 Tutorial
Creating a stylized CC character
This tutorial will focus on the creation of a semi-stylized CC avatar using Character Creator and Sculptris. The tutorial is for beginners and intermediate user.

The following Tutorial will focus on the creation of a semi-stylized CC avatar in Character Creator. We will mainly work in CC, but it will be necessary to have the Essential Morphs and Skin package installed. Additionally, we will use the free modeling tool Sculptris (http://pixologic.com/sculptris/) to refine some elements of the mesh. You don’t have to be an expert in modeling with Sculptris as we will only do basic modeling with it. This Tutorial is for beginners and intermediate users and I will try to present each step as detailed as possible. I recommend to watch the accompanied video to get a better understanding of the individual steps and workflow. Even if I share all the CC slider values with you during each step, please keep in mind that the creation process is always a creative trial-and-error and testing of different sliders. Feel free to experiment and let your imagination run wild. Character Creator offers nearly unlimited possibilities to create the avatars you need. Have fun and Happy Creating!
Step 01: PREPARE CC AND YOURSELF
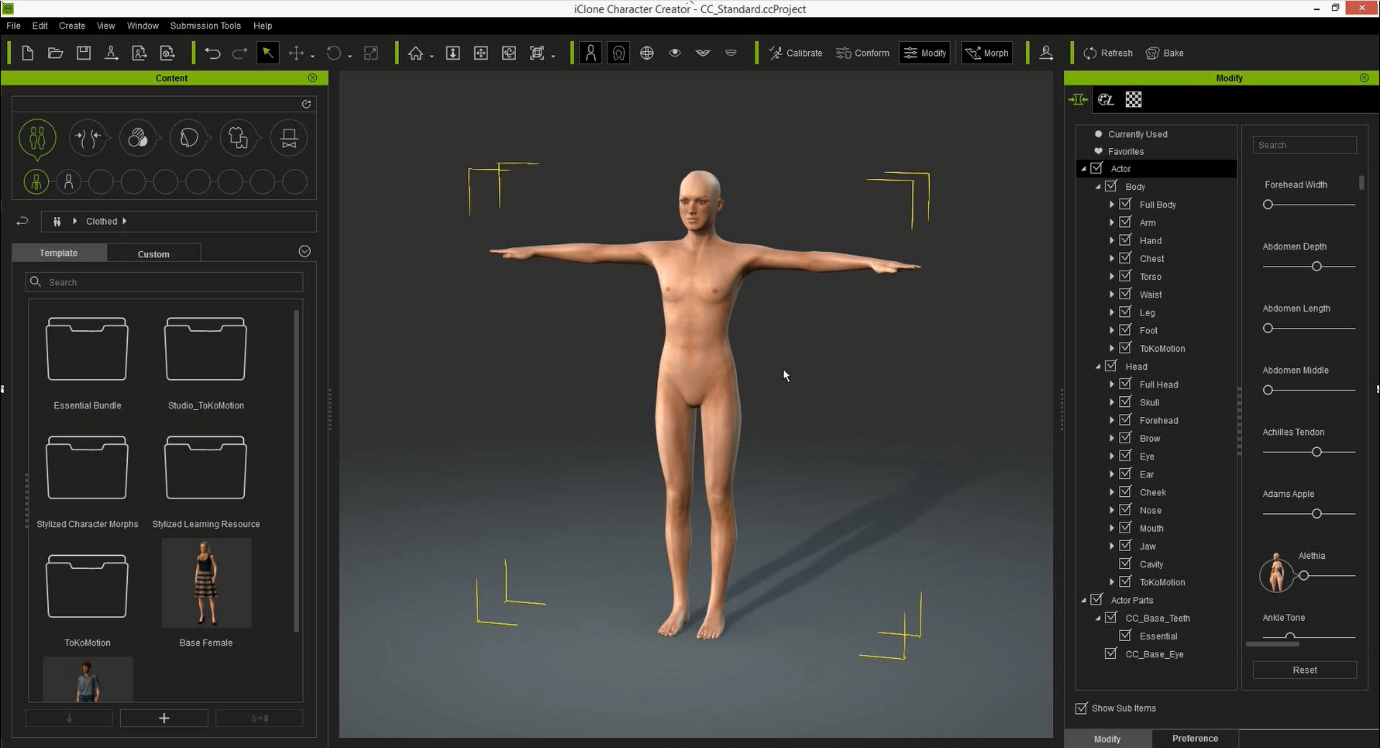
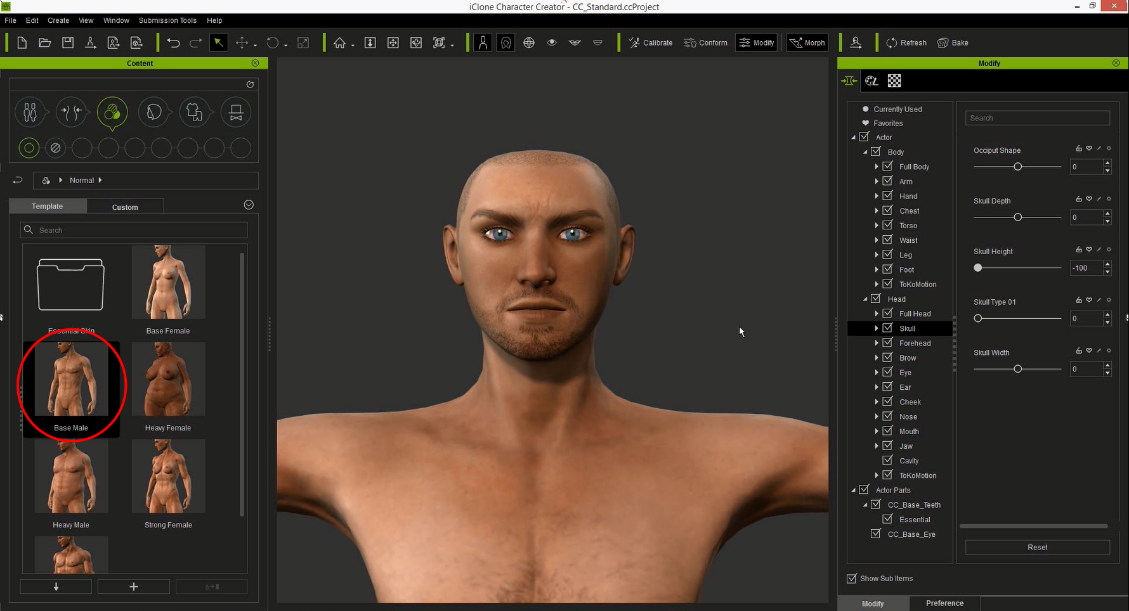
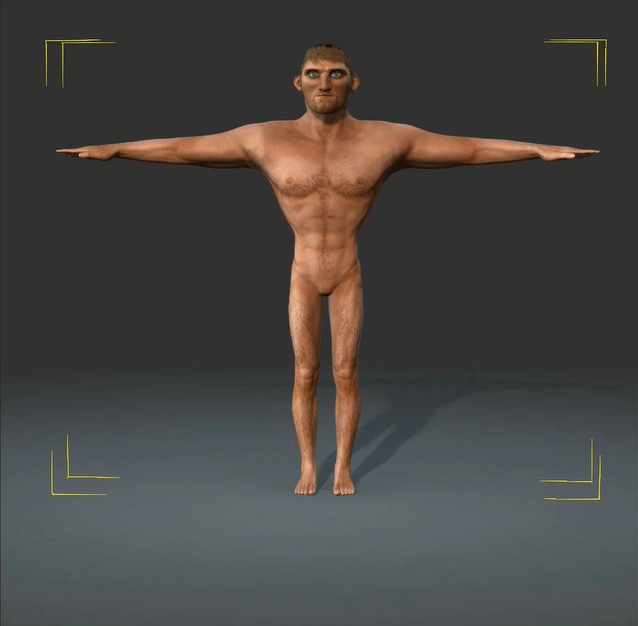
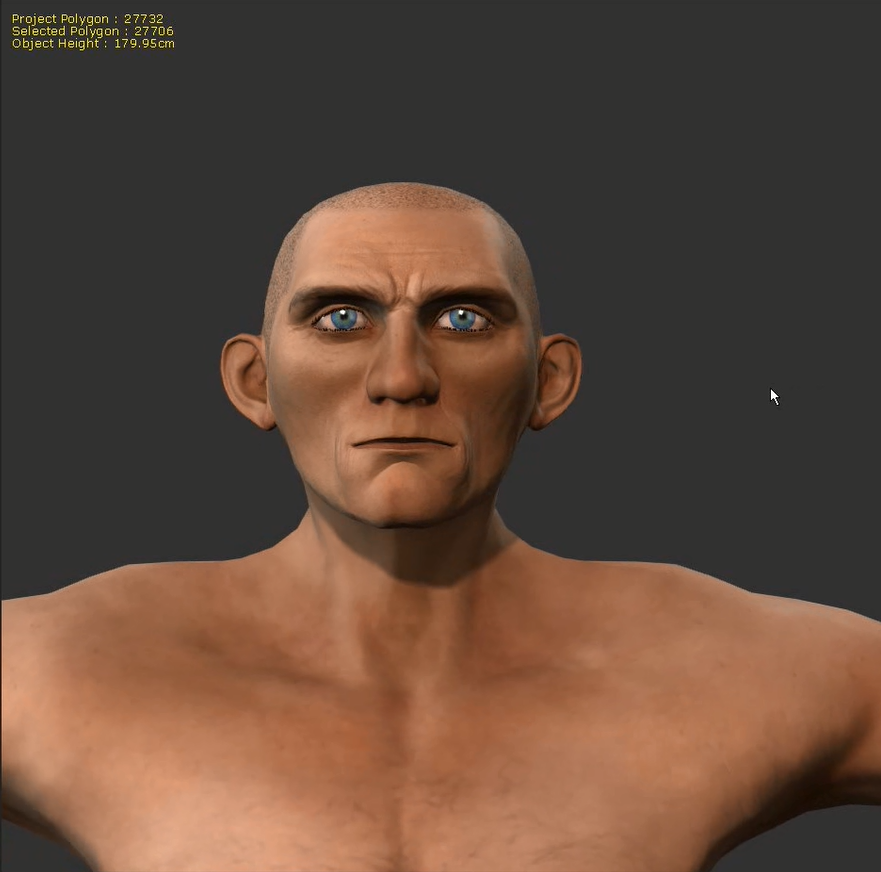
Before starting the creation of the character make sure you have setup CC correctly. After launching iClone Character Creator please press the “Reset” button first. The “Default” avatar should change its shape from female to male (as shown in Pic: 02).
Pic 01
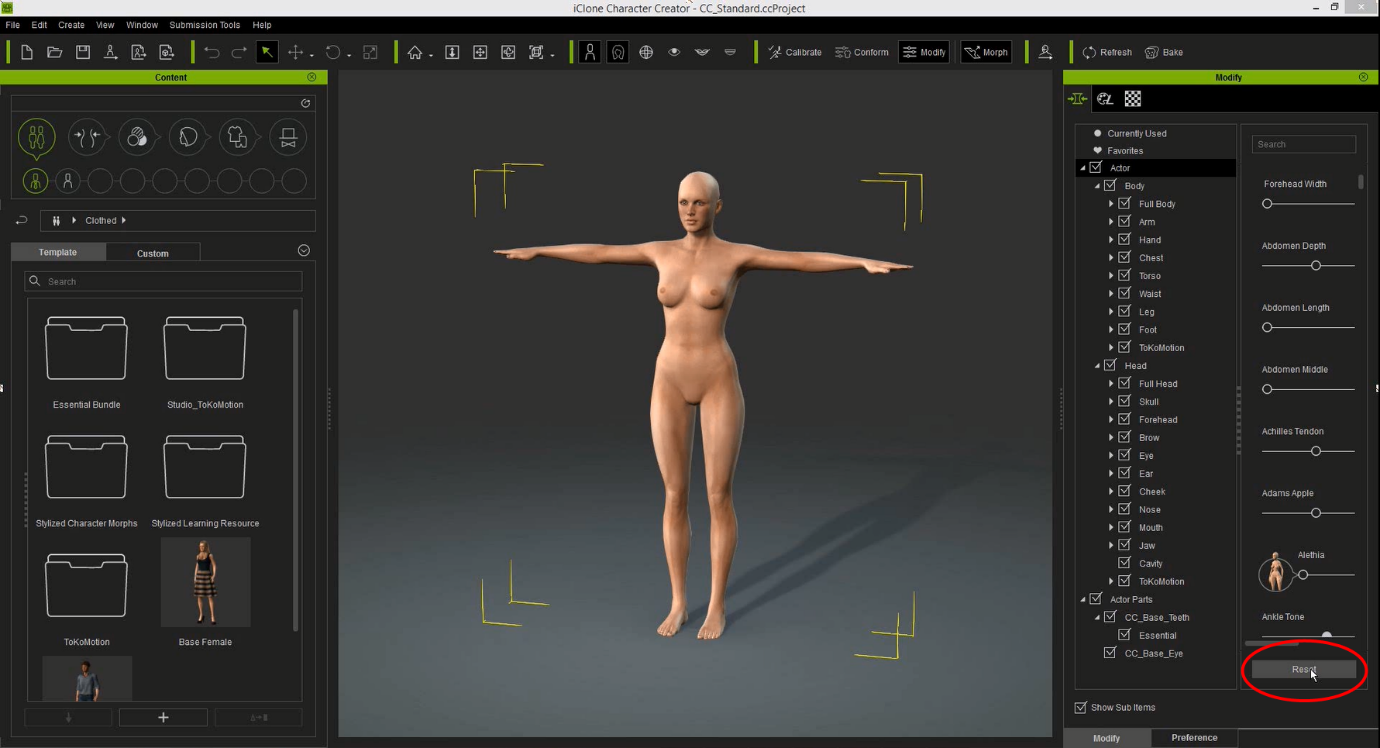
Pic 02
It’s always important to find some references that illustrate the direction how your character should look in the end. You can create a sketch on your own or search the internet for concept art or other stuff. Art books, movies, games and so on are also great inspirational sources. Feel free to create your own reference library with a huge variety of different styles and artists.
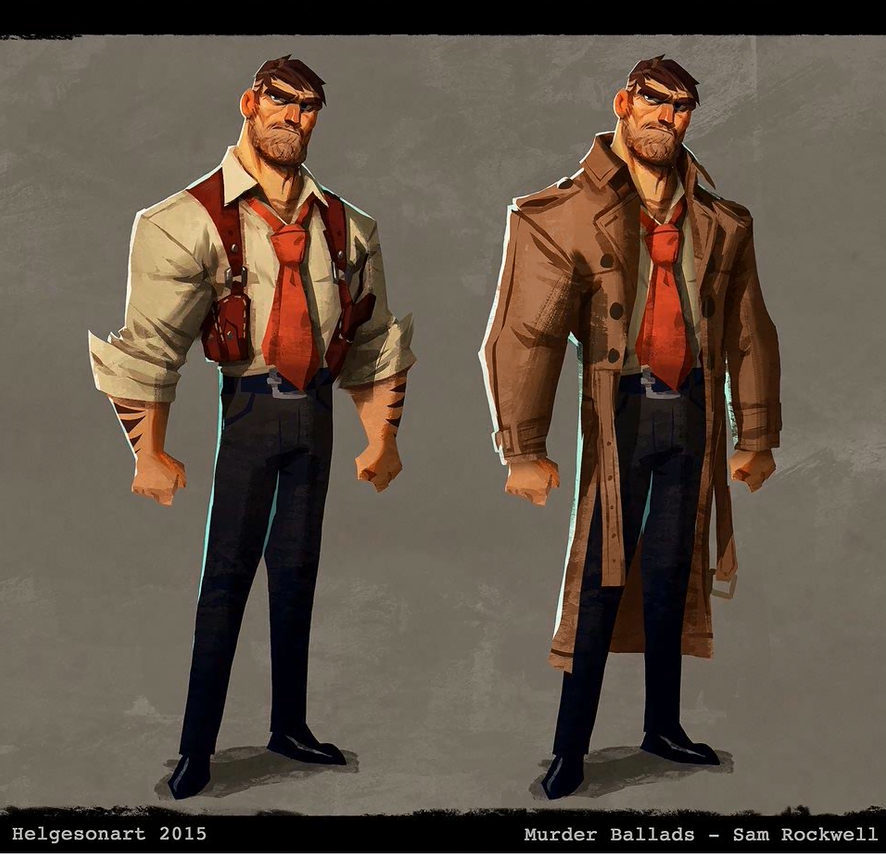
I will use a concept art created by artist HELGESONART that illustrates the overall style I want to achieve (Pic: 03). I mainly focus on the head details and the head-to-upper body-to-lower body size relation. I don’t use an image overlay in CC when modeling as I simply don’t want to copy the character reference, but want to give my character my own style. I’ll usually switch back and forth between the reference and my CC creation from time to time to refresh my mind and focus on important areas.
Pic 03
Feel free to visit Helgeson’s Portfolio on Tumblr (helgesonart.tumblr.com) to know more about him and his creations (Pic: 04). It’s worth it!
Step 02: TIME TO GET STARTED
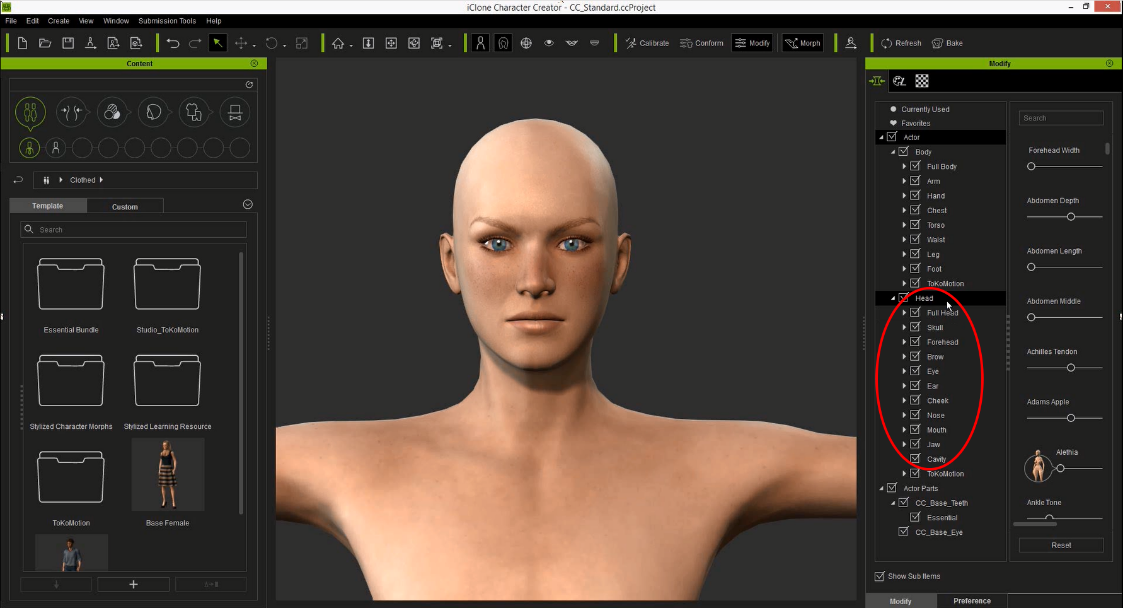
Alright. Time to get things rolling. We will start modeling the head first. I usually start working on the head and adjust the body afterward, but it’s always good to keep an eye on the overall proportions. You will find all available morphs for BODY and HEAD section under the MODIFYàACTOR panel (Pic: 04).
Pic 04
As we will create a male character let’s change the skin texture to “Base Male” to have a better visual guide. Just open the SKIN panel in the CONTENT tab and apply the BASE MALE texture. (Pic 05)
Pic 05
Step:03 MORPHING THE BASE HEAD
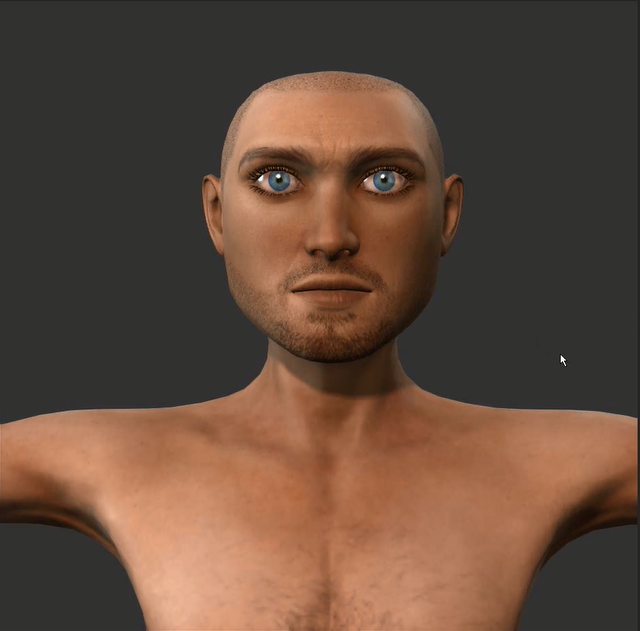
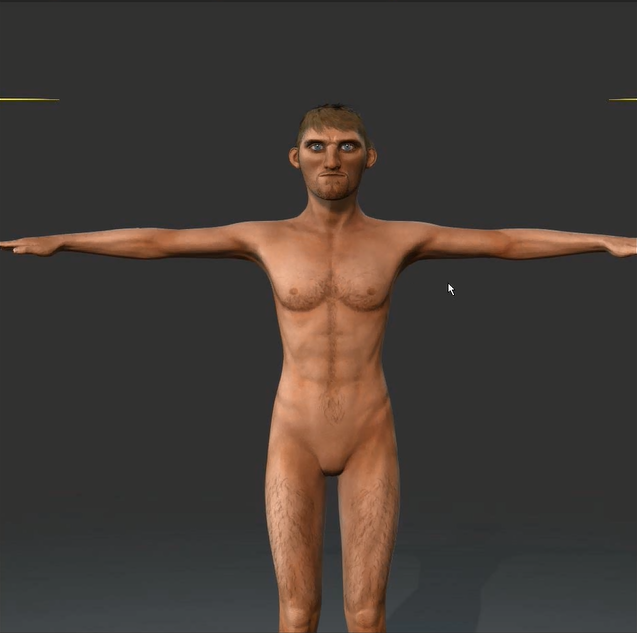
As I said before: Creating a character isn’t a straight forward process. I’m testing different slider values through trial-and-error. It’s important to have a look on your character from different angles, so move your camera around and check your morphs from each side. If something doesn’t work, simply redo and try or combine another morph. Here you can see how I’ve created the base shape for my character. (Pic 06_01 to 06_04)
Pic 06_01 Pic 06_02
Pic 06_03 Pic 06_04

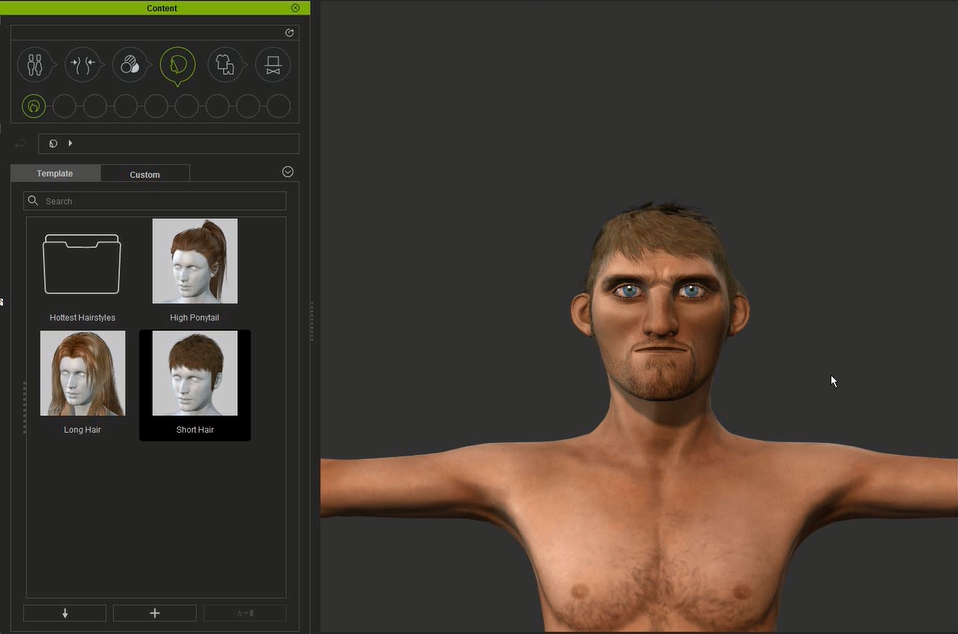
Feel free to add some hair to your character – adding hair sometimes improves the overall look and helps to find the right proportions. You can find the CC Hair assets here (Pic 07): CONTENT -> HAIR
Pic 07
Step 04: MORPHING THE BASE BODY
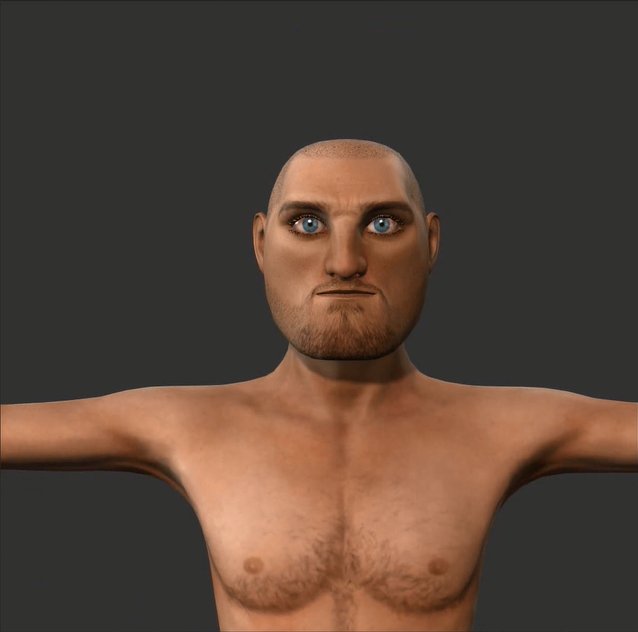
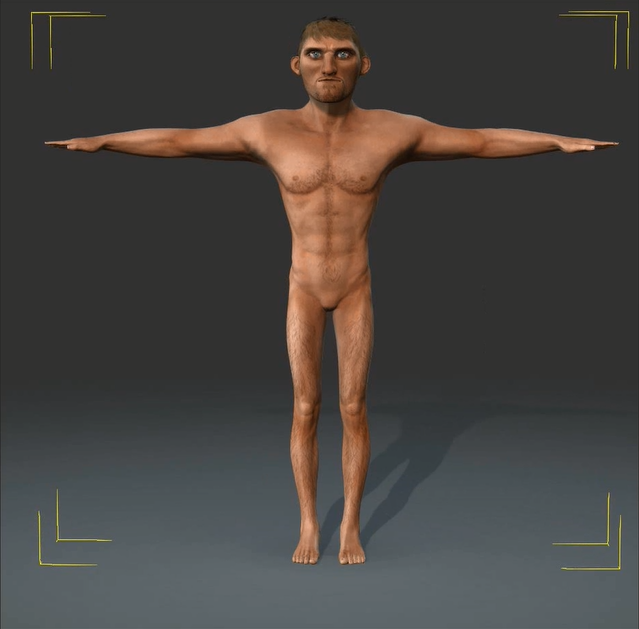
OK, now that we have the base head shape, let’s move on to the body. It’s basically the same process – trying out the different sliders to create your desired shape. KEEP CALM – after you have created a handful characters you will instinctively know which slider will work the best for you – it’s just a matter of practiceJ. See how I exaggerated the upper body compared to the lower body. That’s how I wanted it. (Pic 08_01 – 08_04)
Pic 08_01 Pic 08_02
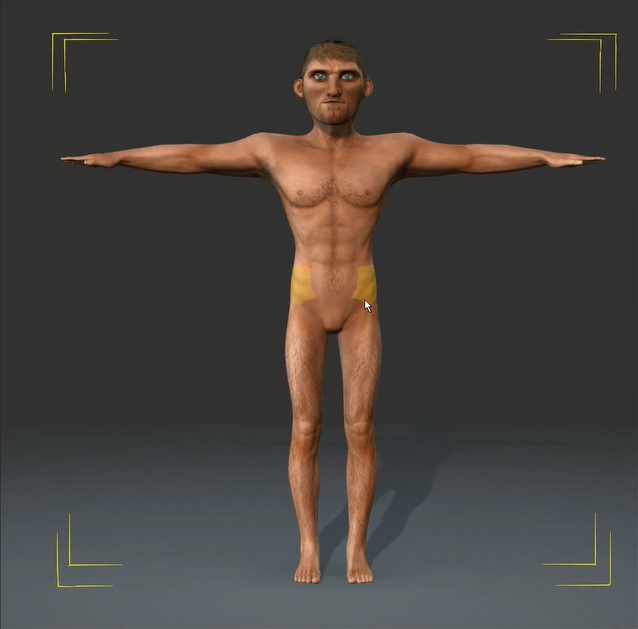
Pic 08_03 Pic 08_04
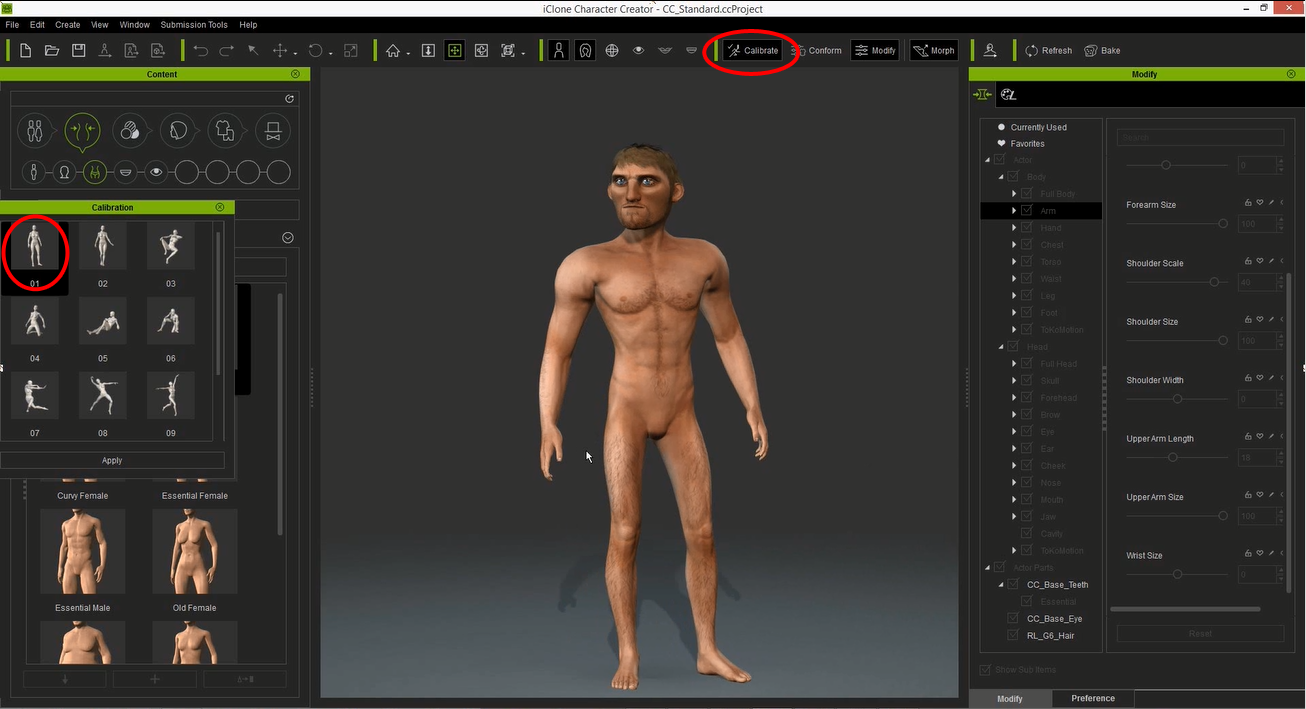
It’s also a good idea to test your character with different poses to get a better feeling for its proportions. Simply use the CALIBRATE tab in the upper Tool Bar to apply a new pose (Pic 09)
Pic 09
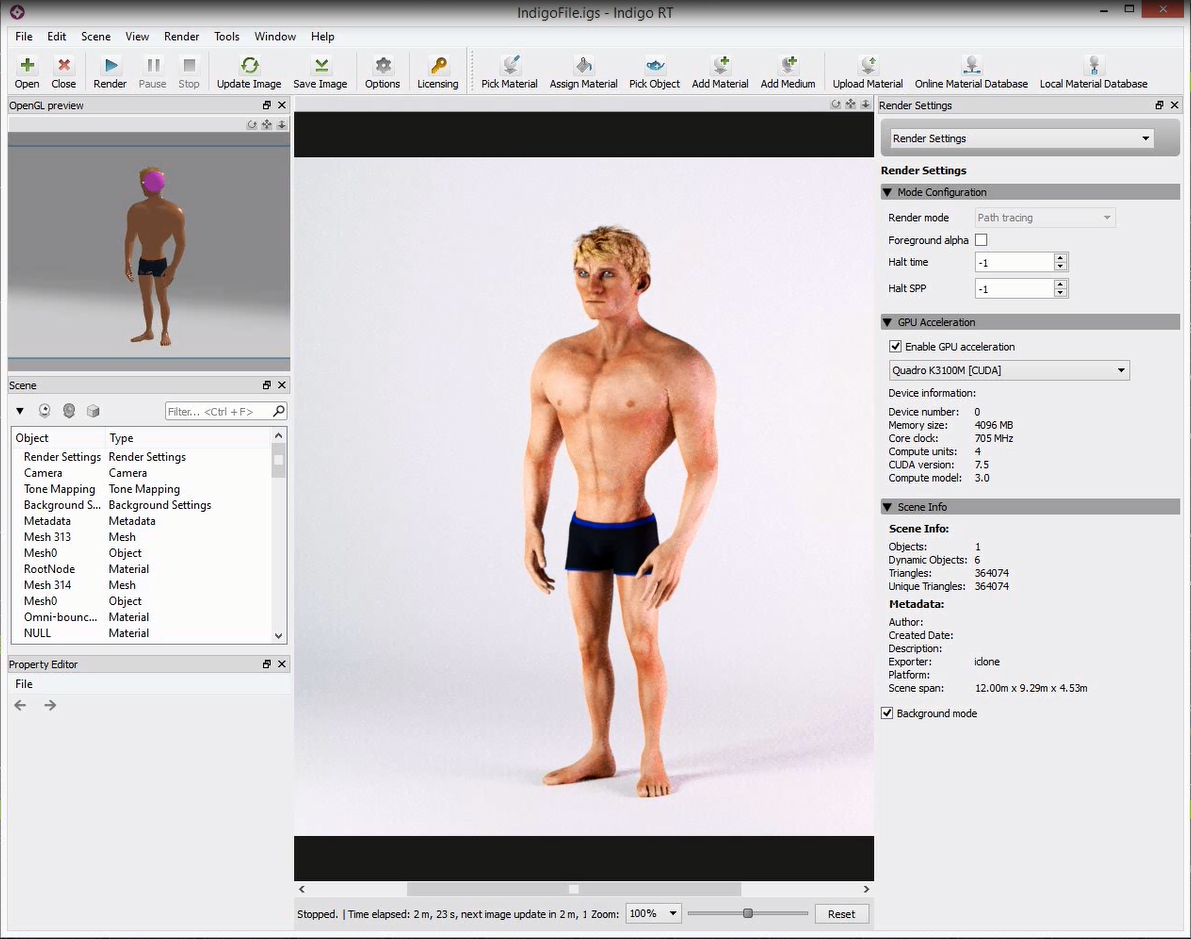
Step 05: TIME FOR A FIRST TEST RENDER
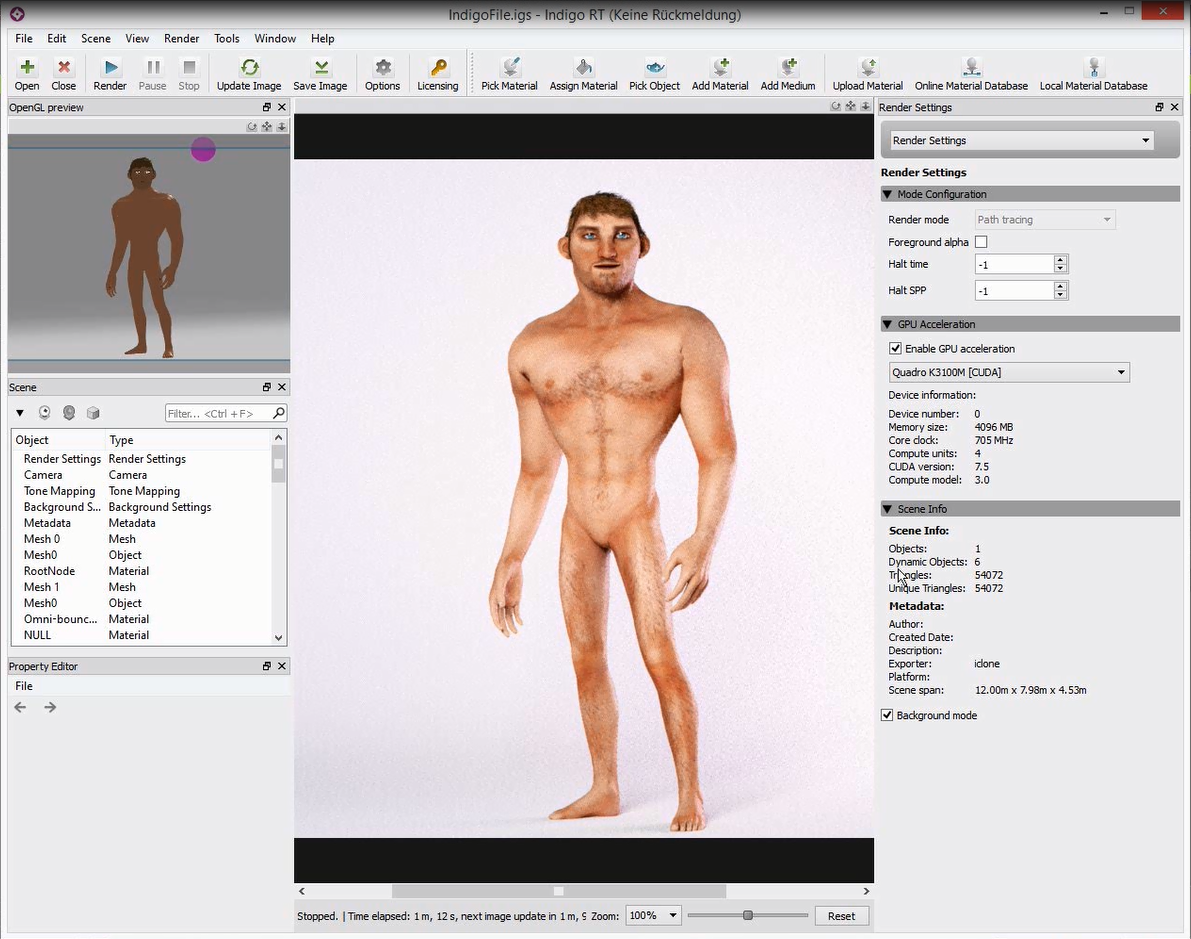
Well, why not give your creation a try in iClone?! I think it’s important to create some test renders from time to time – as it puts a new complexion on it and makes it easier to improve the shape. I really like to use Indigo for it and iClone makes it easy and fast to use. Just load the pre-made Indigo Render Scene from the iClone Scene Temp folder, send you character to iClone , create a nice pose and press the Indigo Render button. That’s it! (Pic 10)
Pic 10
Step 06: REFINING THE SHAPE
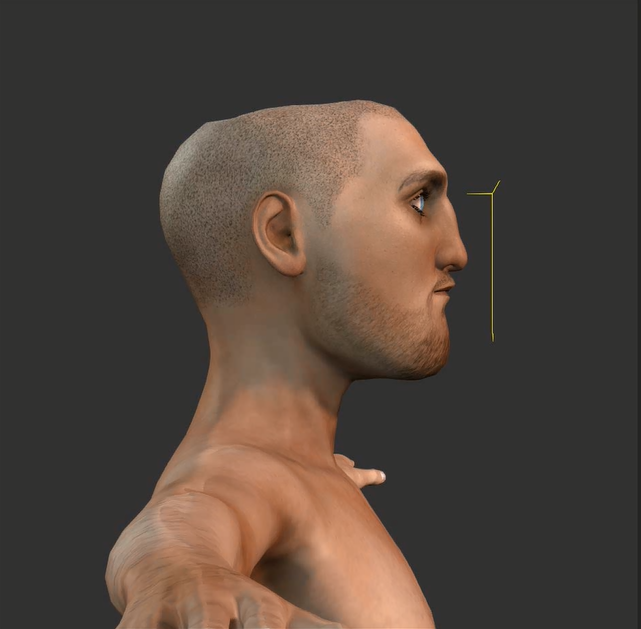
Mmhhh…, the character doesn’t look bad, but some things can be improved – so back to CC. Again I focused on the head first. I mainly did some minor adjustments on the NOSE, MOUTH and CHIN area to sharpen his facial features.
Pic 11_01 Pic 11_02
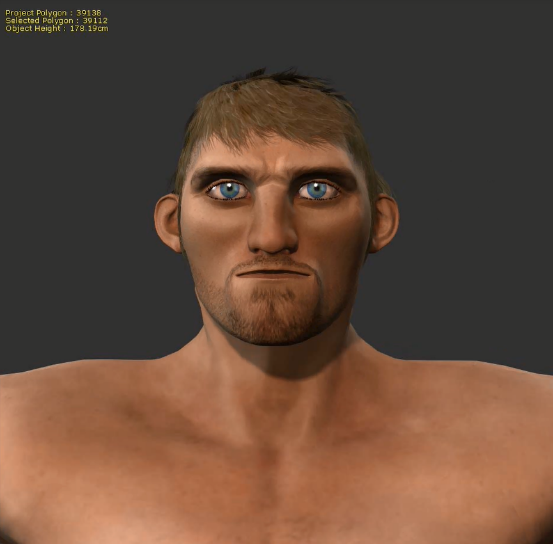
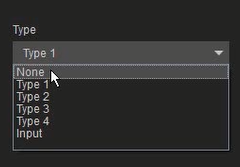
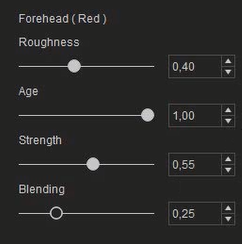
My character should not have a beard, so let’s get rid of it using the APPEARANCE EDITOR. Additionally, I added some wrinkles to his forehead, cheeks and chin area to increase the visual detail. This can easily be done by adjusting the ROUGHNESS, AGE and STRENGTH sliders in the HEAD SURFACE NORMALS section.
Pic 12
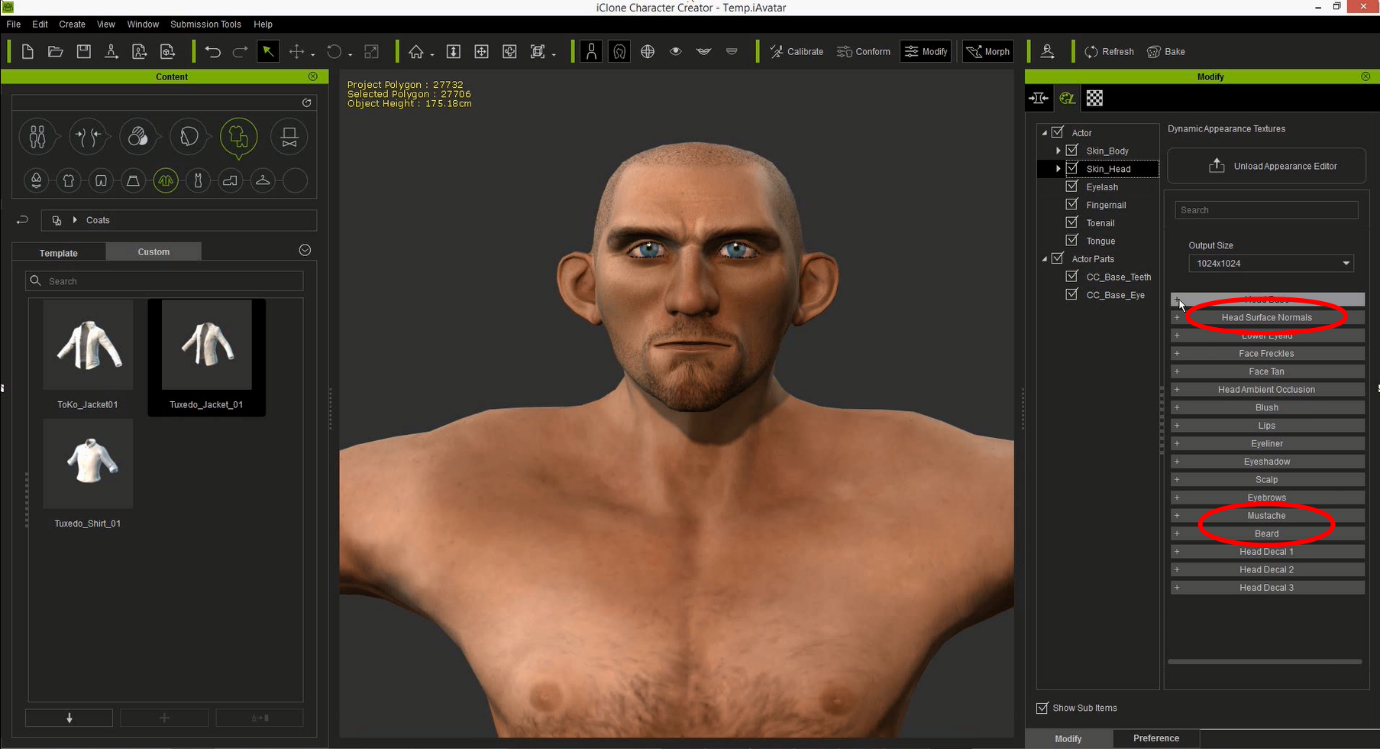
Pic 12_01 Pic 12_02
Pic 13
Step 07: EXPORTING THE CC CHARACTER
OK, I’m satisfied with the character shape in general but some areas need adjustments in an external modeler as the mesh looks strange due to extreme morphs. This is mainly the case with the HEAD and the CHEST/SHOULDERS area – the mesh is pushed in and need to be fixed manually to get a perfect shape.
Pic 14

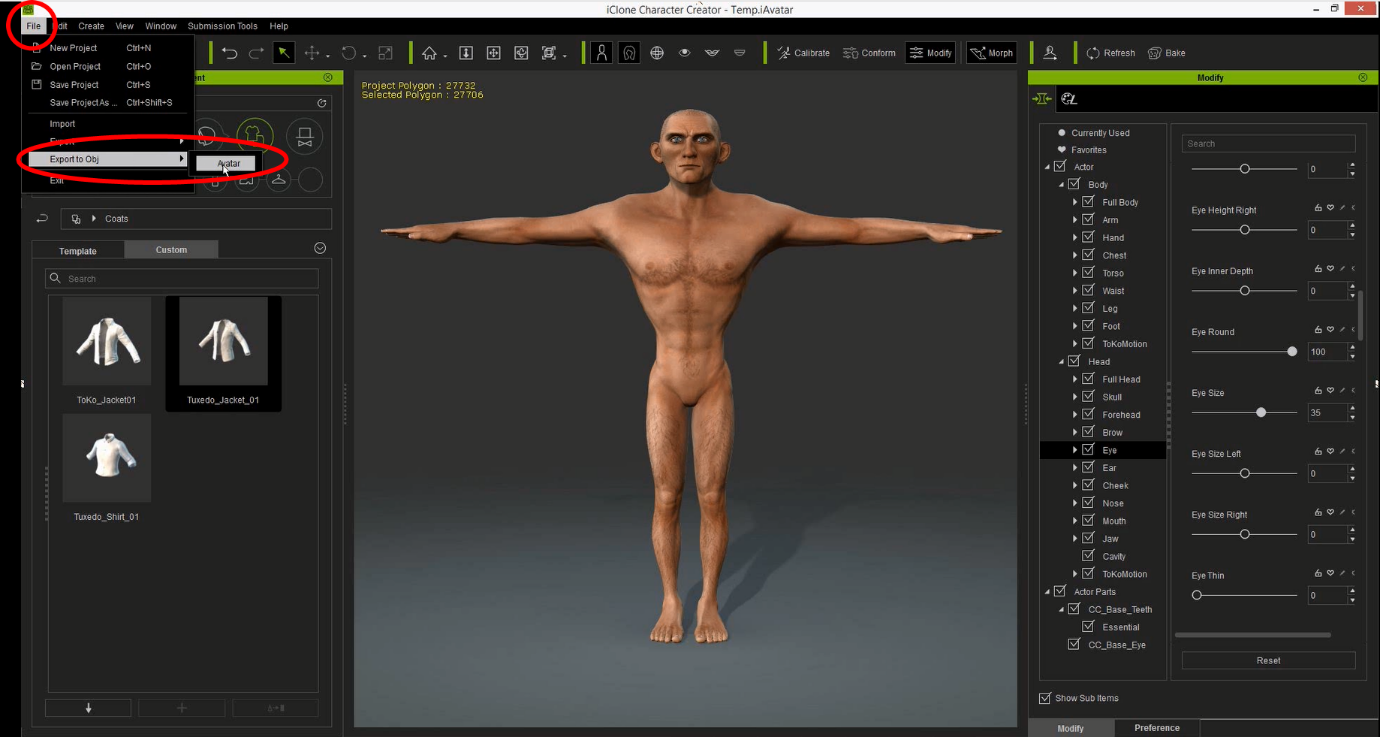
There are 2 ways of exporting the mesh:
1.Exporting directly from CC
Go to:
FILE -> EXPORT TO OBJ -> AVATAR
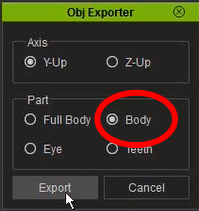
Choose BODY in the OBJ EXPORTER tab and export. Done!
Pic 15
Pic 16
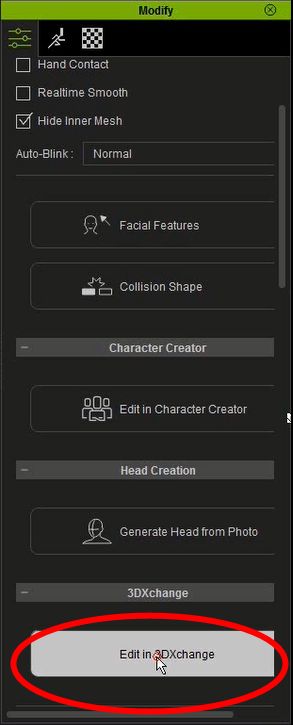
2.Exporting via iClone through 3DXchange
Send the character to iClone and press EDIT IN 3DXCHANGE in the MODIFY tab
Pic 17
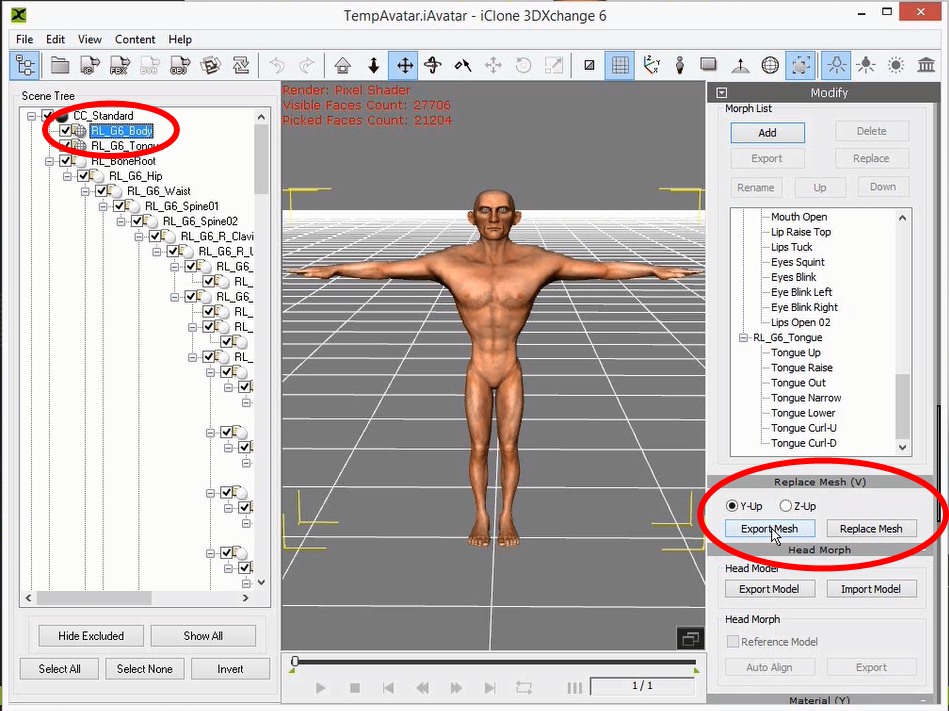
The character will be send to 3DXchange: Now just find the RL_G6_BODY in the scene tree and export via the EXPORT MESH button in the MODIFY/REPLACE MESH tab. Done!
Pic 18
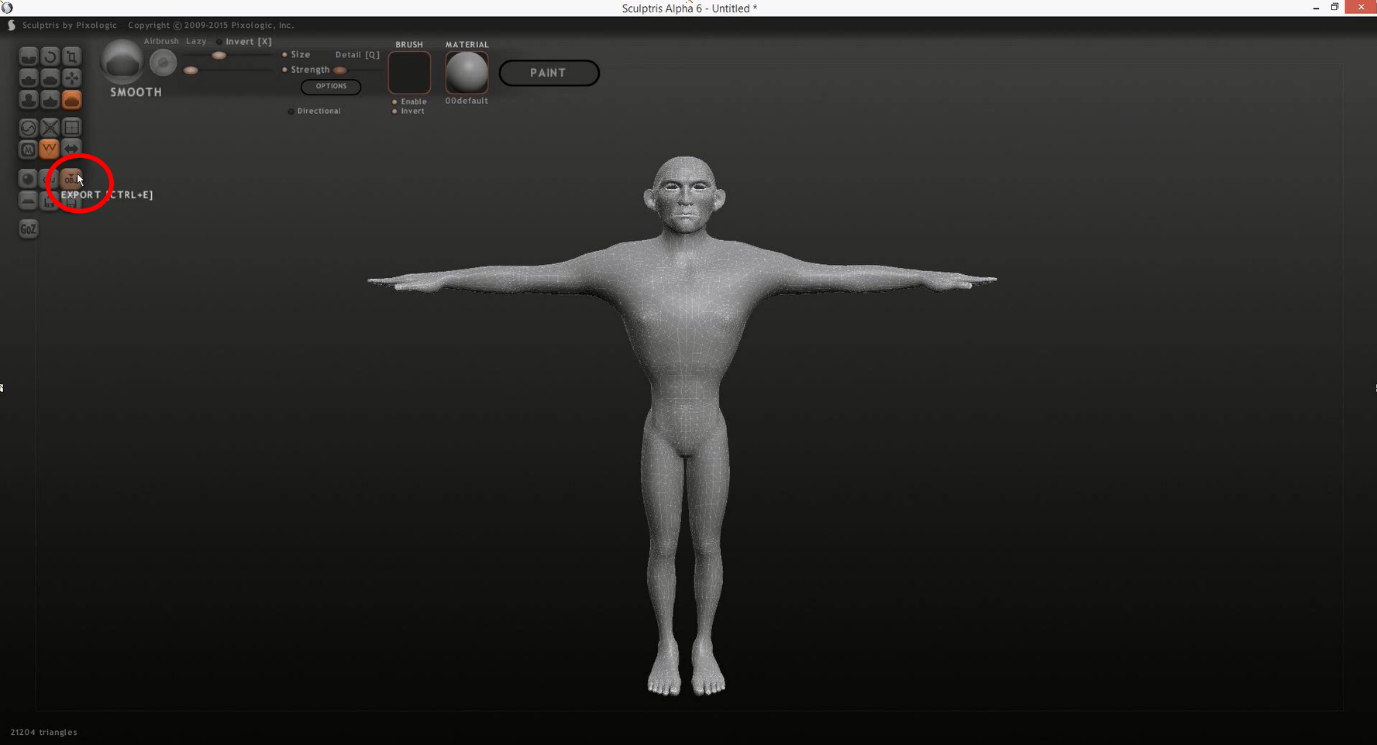
Step 08: EDITING THE SHAPE IN SCULPTRIS
First, you need to import the mesh in Sculptris. Use the IMPORT OBJ button and find the exported character mesh file on your computer. Create a NEW SCENE and press NO when asked if you want to go to Paint Mode. The character mesh should now be imported right in front of you.
Pic 19
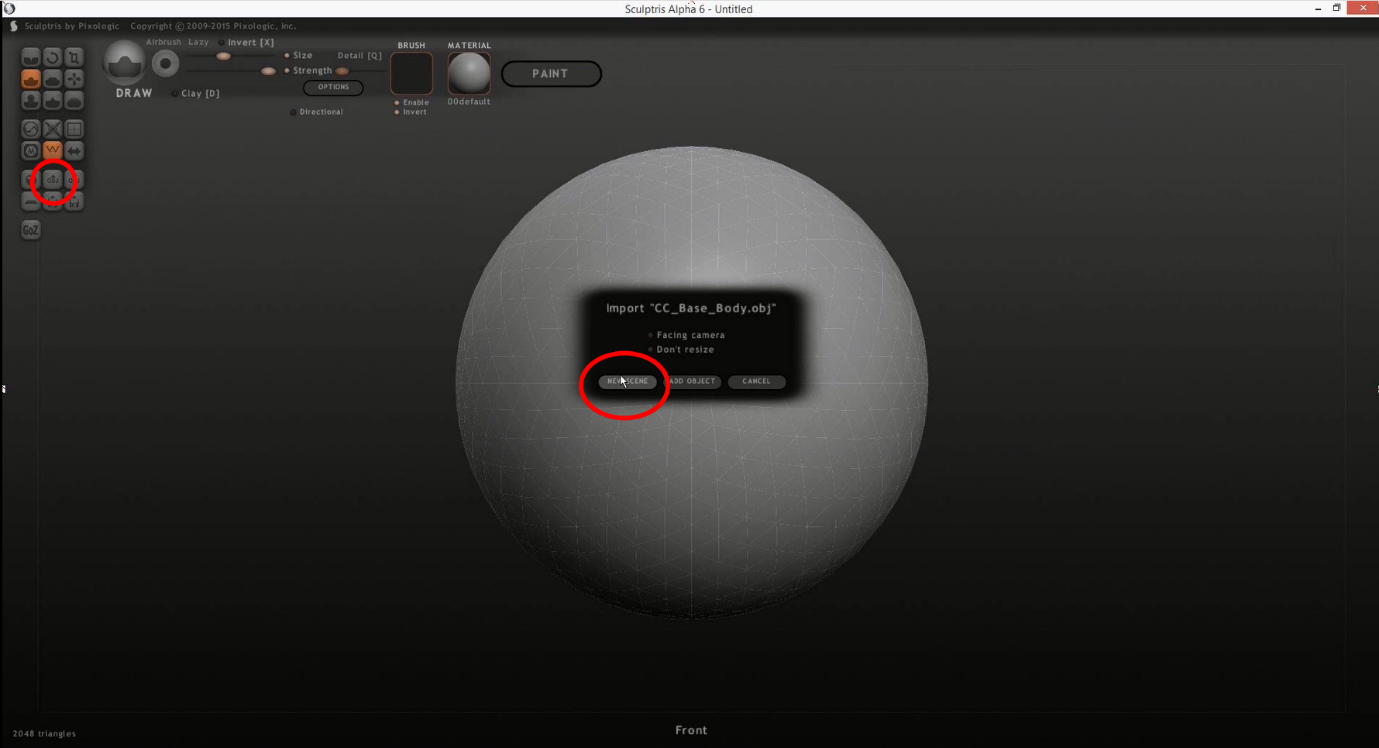
Pic 20

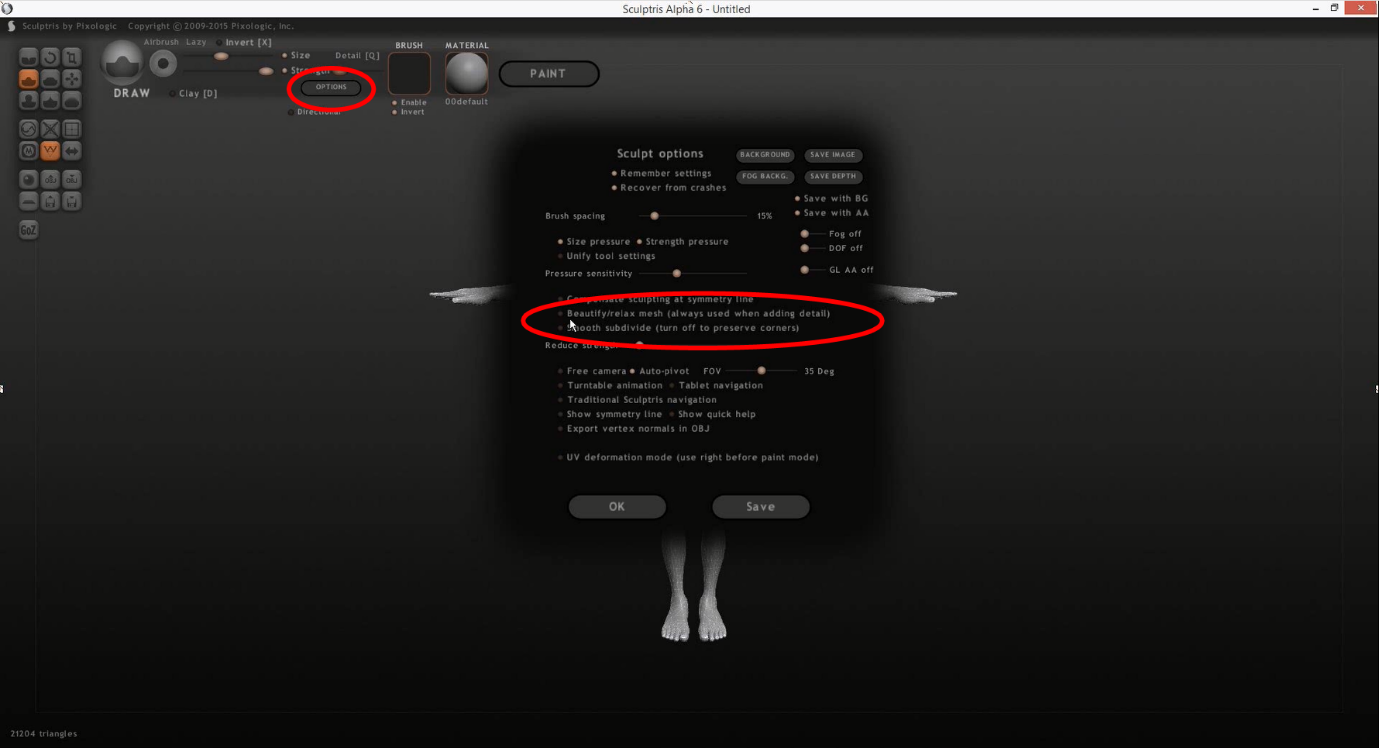
When working with Sculptris for the first time, make sure to check if the following OPTIONS are disabled:
- Beautify/relax mesh
- Smooth subdivide
If these options are not turned off, changes you will make in Sculptris will add additional triangles to the mesh and you will not be able to re-import the mesh into 3DXchange/CC.
Furthermore, you should not use SYMMETRIC SCULPT as this will also make re-import impossible.
Pic 21
Alright!
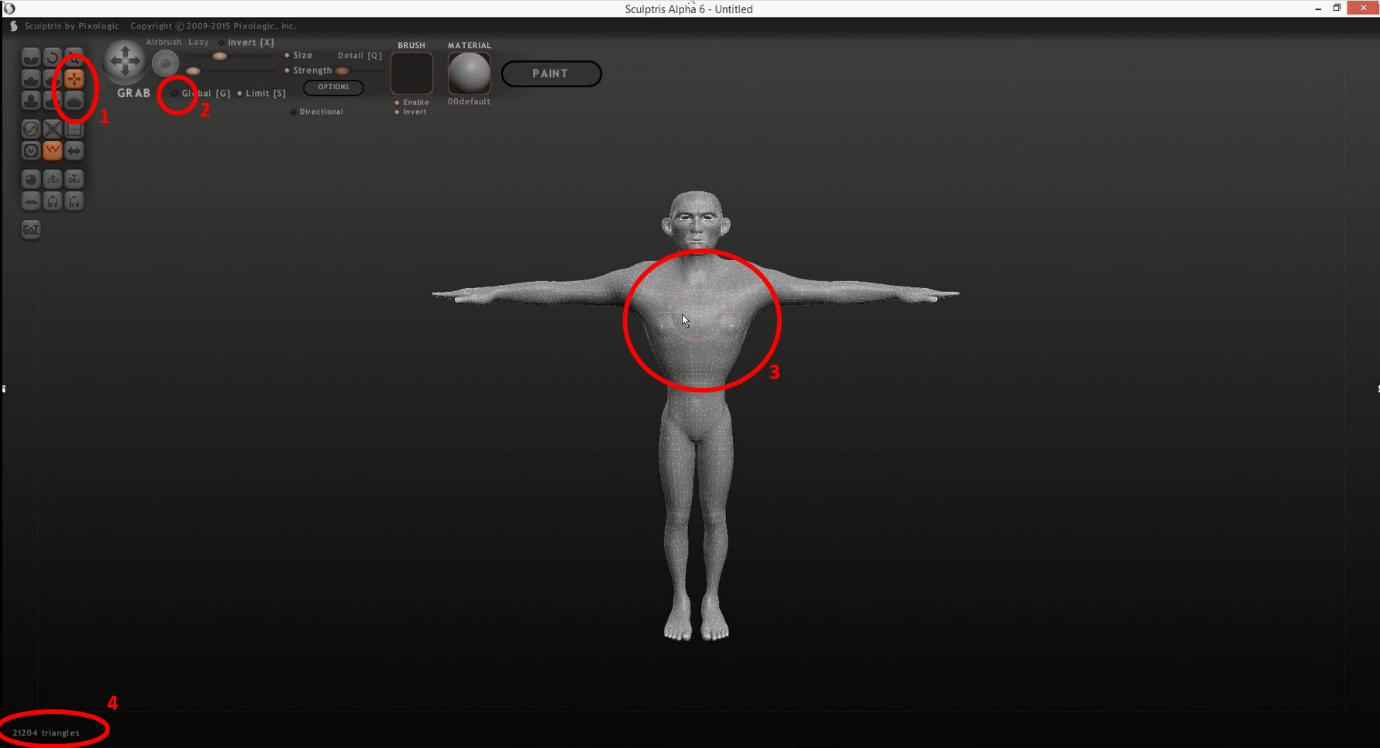
Time for sculpting. I mainly use 2 handy tools in Sculptris to refine my mesh:
- GRAB
- SMOOTH
Make sure that the tool you’re using is not in GLOBAL mode as this will only move the mesh around in the scene. You should see an orange circle when hovering over your character mesh.
Pic 22
TOOL TIP:
Pressing SPACE BAR will enable some tool option. Moving the mouse up and down while holding the left mouse button will increase or decrease the SIZE of the current tool. Moving the mouse left and right will increase or decrease the STRENGTH.
Pic 23
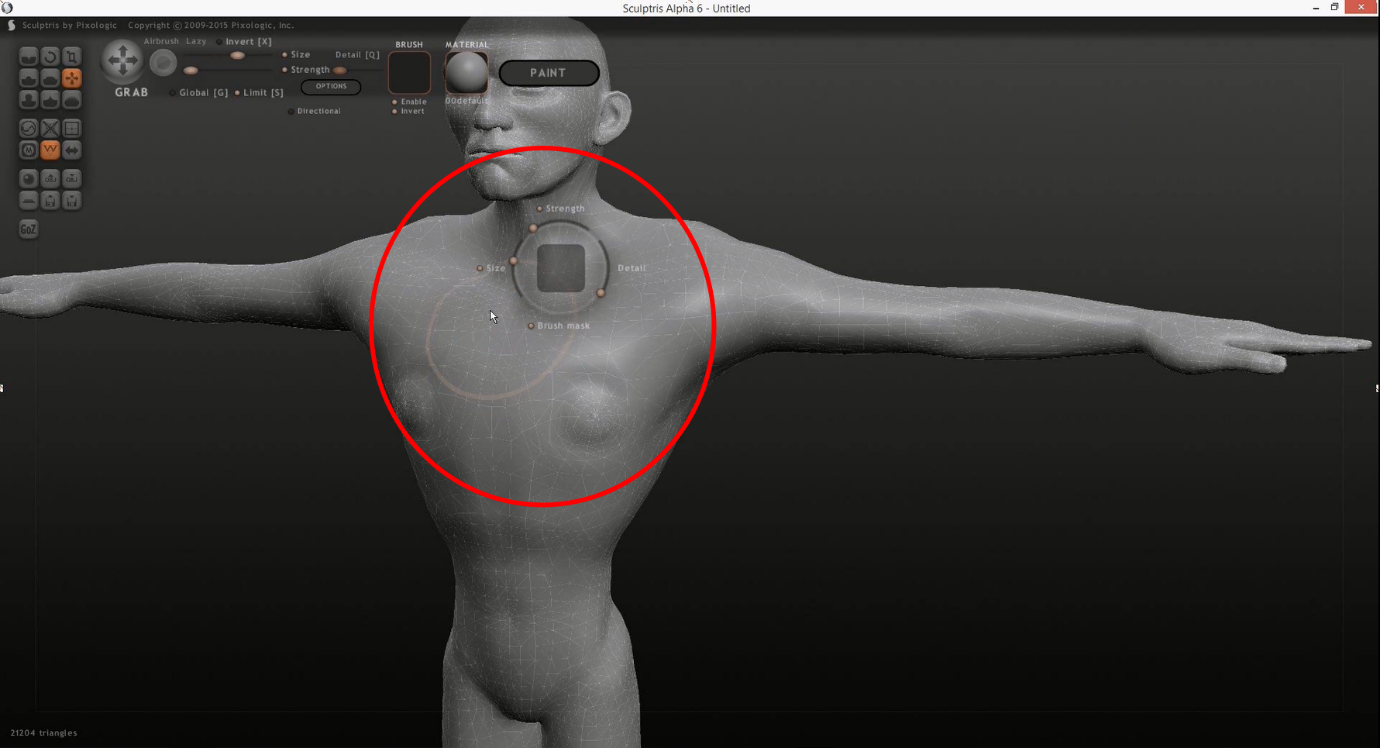
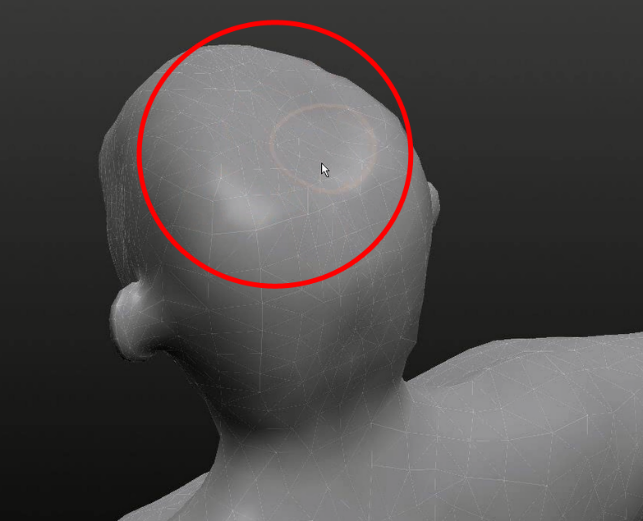
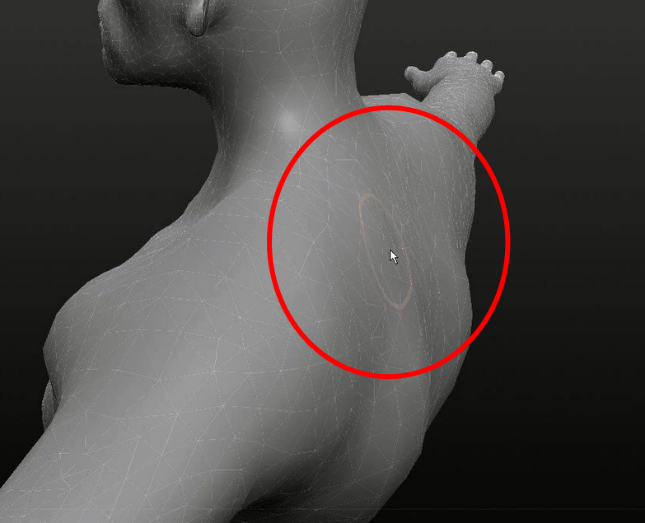
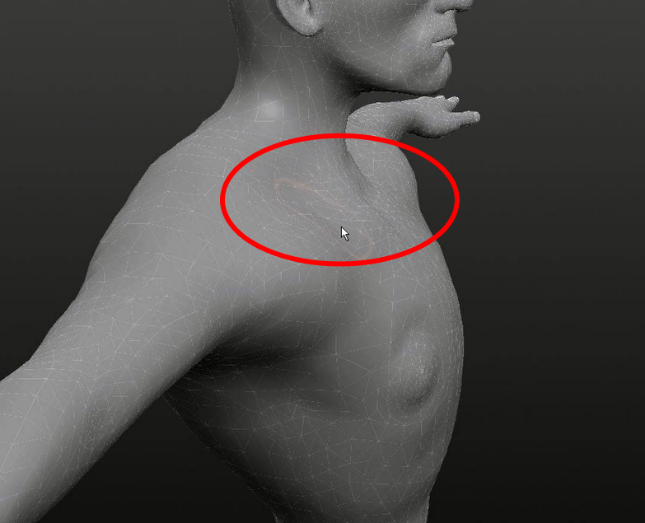
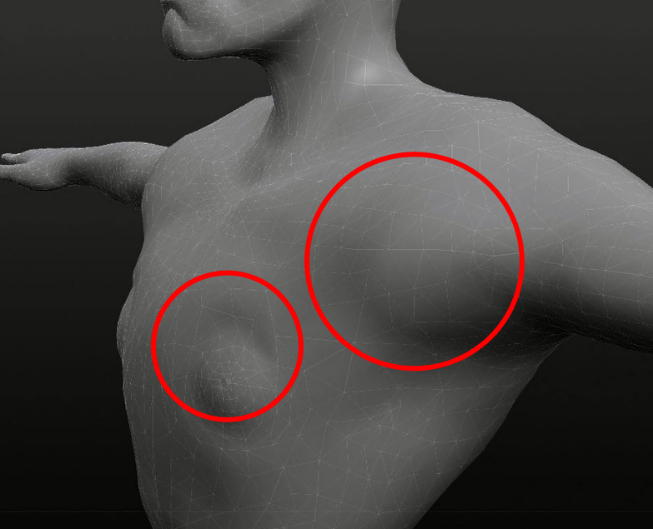
Move around your mesh and try to find all areas that need some additional work. In my case it’s the HEAD and the CHEST/SHOULDER/BACK area. I can clearly see that the mesh needs to be pulled out in these areas to get a smooth and perfect looking shape. I will use the GRAB tool to pull parts of the mesh out and the SMOOTH tool to relax the mesh afterwards. Try to familiarize with each tool and learn how they behave and operate on the mesh. If something went wrong, simply use CTRL + Z to redo.
Pic 24 Pic 25
Pic 26 Pic 27
As soon as you have finished your refinements just use the EXPORT OBJ button to save your mesh. You can overwrite the existing file or create a new one. Then jump back to 3DXchange!
Pic 28
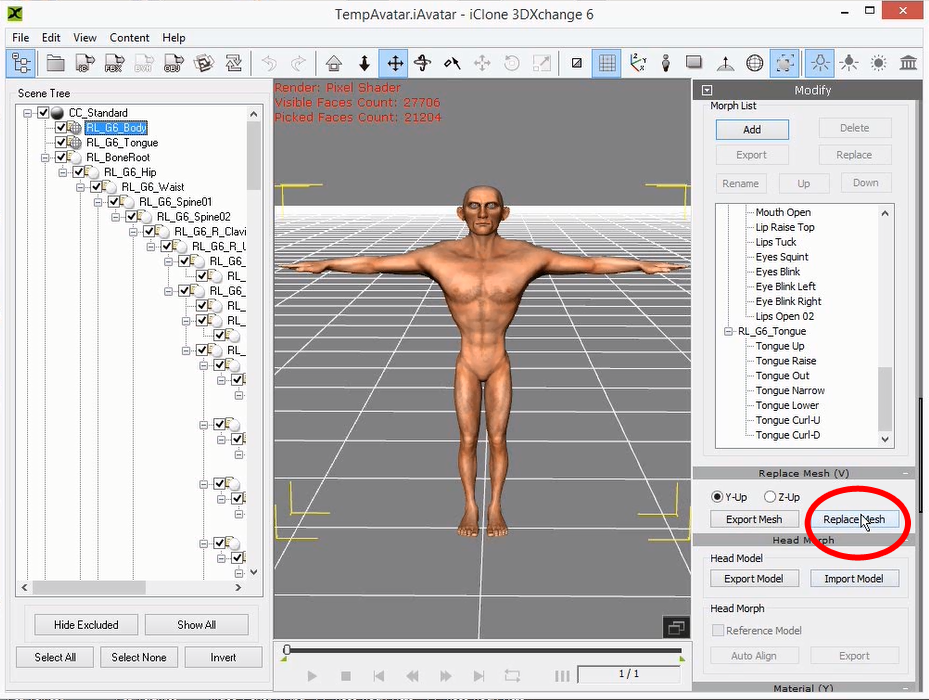
Step 09: FINALIZING YOUR CHARACTER
You can re-import your character mesh using the REPLACE MESH button in the MODIFY tab in 3DXchange. Just follow the instructions and your adjusted mesh will be imported. Now press APPLY TO ICLONE to send the refined character back to iClone.
Pic 29
The character looks almost perfect now. I just want to make some slight adjustments in CC again. Select your character and press EDIT IN CHARACTER CREATOR to send it back to CC.
Please note:
As I exported the mesh, all morph sliders that I used before will now be baked and set to “0” again. Also all textures have been flattened and they need to be reapplied if I want to further adjust them via the Appearance Editor.
Pic 30

Here are the final morph slider adjustments that I applied to my character. I also added a BOXER SHORT and HAIR for the final rendering.
Pic 31
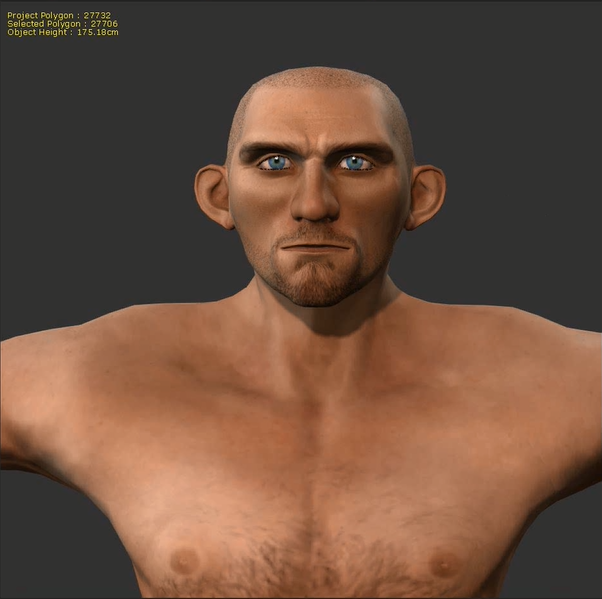
The final character came out really nice. The proportions look good and the character has this nice semi-stylized look. All in all a really cool dude. I like him.

Feel free to add clothes and accessories as you like to further customize your character. I tried to re-create a famous spy character and I guess you know his name now.
Hope you liked this little Tutorial.
Enjoy and Happy Creating!
Watch the video walkthrough of the process-
Part 1: https://youtu.be/8FEZImg0JrY
Part 2: https://youtu.be/L21OdtWMSeg
ABOUT THE AUTHOR
Tobias Kolodziey

Tobias has worked as a production manager in the animation and CGI industry for several years. He launched Studio ToKomotion in 2011 and since then has worked on several projects.


1 comment