![]() Tutorial
Tutorial

My name is Garry Pye and since 2014 I’ve been a content developer for Reallusion. In that time my main focus has been on the creation of 2D assets for CrazyTalk Animator 2, including hand drawn cartoon characters, props, and scenes. Then I started to wonder if my 2D cartoons would work in Reallusion’s 3D software like CrazyTalk 8(CT8) and iClone 6. And so began the idea behind “Garry Pye’s Comic Face Pack”. Ten original hands sketched cartoon faces , fully rigged as 3D head models for use in CrazyTalk 8.
The limitless possibilities for these faces really become apparent when you apply them to the base models in Character Creator, where you can use the morph sliders to create an infinite number of characters from each face. Your custom characters can then be exported to iClone 6 for lighting, posing and rendering and are also ready for animation. In this tutorial, however, I’ll take you through the process and show you how I use the comic faces to create 3D characters for finished artwork stills.
This article is not so much a technical guide as a behind the scenes look at the way I create my art. As this is a creative process, there are certainly other ways to do this, this is just my way. It works for me. Take the tips and advice you can from this tutorial and apply your own ideas and ways of doing things.
Step 1: Coloring the Pencil Sketch
The original pencil sketch is scanned into Photoshop and then I start to build the color. It is important to build the color in separate layers so that you can always work backward or make adjustments to individual layers without affecting the overall image.
Take the original pencil sketch (layer 1) and duplicate it (layer 11). Set the duplicate layer at 40% color burn, and then add all other layers in between these two, so that the pencil lines always stay on top of the color and don’t get lost.
Starting with the lightest colors, begin to build up the color on the face. I apply most layers as ‘multiply’, ‘overlay’ and ‘colour’ layers to get the best results. Use multiply to darken colors and use overlay and color to lighten colors.
Draw the eyeball separate and keep the eye socket blank, so that you can later choose to either use the pencil sketched eyeball or one of the most realistic eyes that come standard with Character Creator. I find the Character Creator eyes give more realism to the character.


Step 2: Rigging the face in CrazyTalk 8
This step is only necessary if you want to use your own sketched faces as 3D models. It is not required if you use the pre-rigged faces from the Garry Pye Comic Face Pack.
The first thing to do is to rig the face as a 3D head in CrazyTalk 8. While the process itself is simple enough, thanks to the contour and texture alignment guides in CT8, the level of detail you can apply at this early stage is very impressive. You can even fit the mouth for lip synching for a full 3D performance. For this tutorial, however, I have used the completed Ogre face from my Comic Face pack, which includes 10 faces in total.
For a complete step-by-step guide on how to rig your own sketched faces in CrazyTalk 8, check out this YouTube video by Reallusion at https://www.youtube.com/watch?v=G6E-BZfYLrU
Once you have your rigged 3D head in CrazyTalk 8, then you can export the RL Head. Open iClone 6, and simply drag and drop the head on to an iClone 6 Character Creator (CC) base model character. Note that these CT8 generated heads will only work with CC base model characters, and not with G6 characters, or previous generation characters. Next, launch the face texture from the Modify window.
In Photoshop you can edit the face texture so that the outer edges blend smoothly with the skin textures of the CT8 head model. Export your finished face texture as a .PNG file and then in iClone 6, select the head mesh of your character and open the edited .PNG texture file as your new Diffuse texture setting.

Step 3: Morphing the face in Character Creator
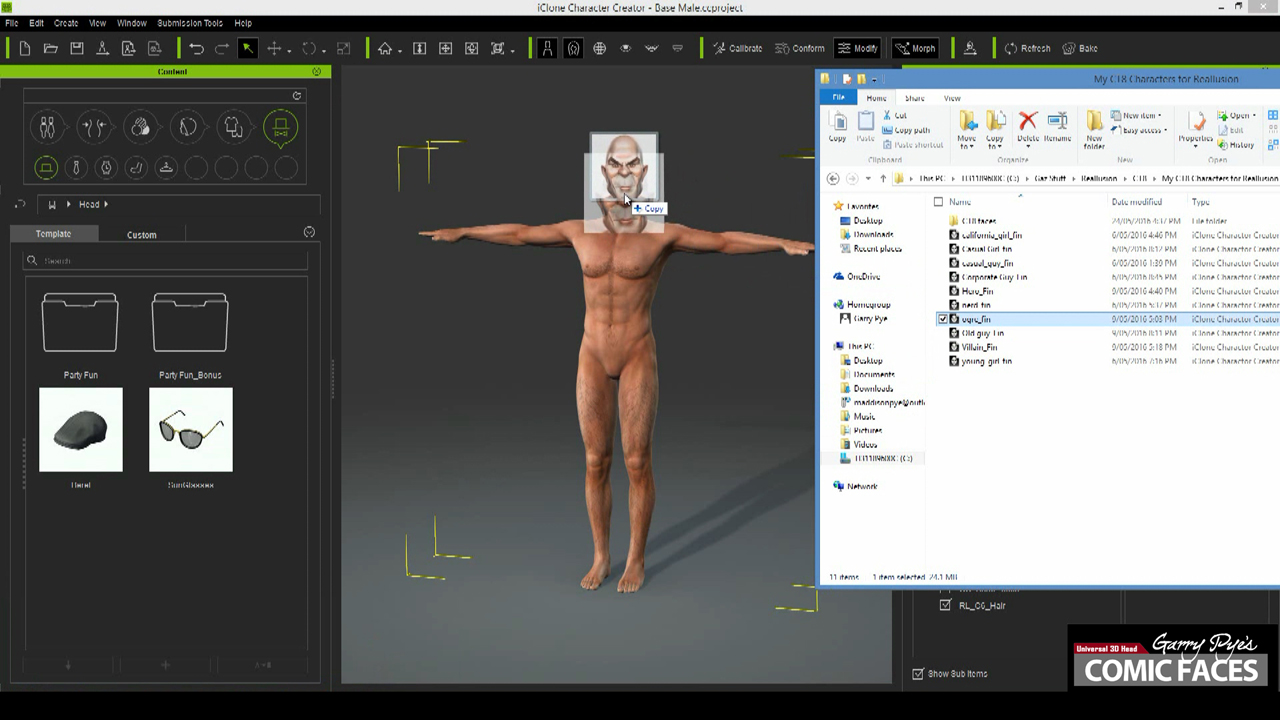
Now that you have your face rigged as a 3D head model, you can drag and drop the RL head file directly on to the CC base male or female model in Character Creator. For this tutorial I have applied the face to the base male model , which we will make adjustments to, to create the body shape we need for the biker.
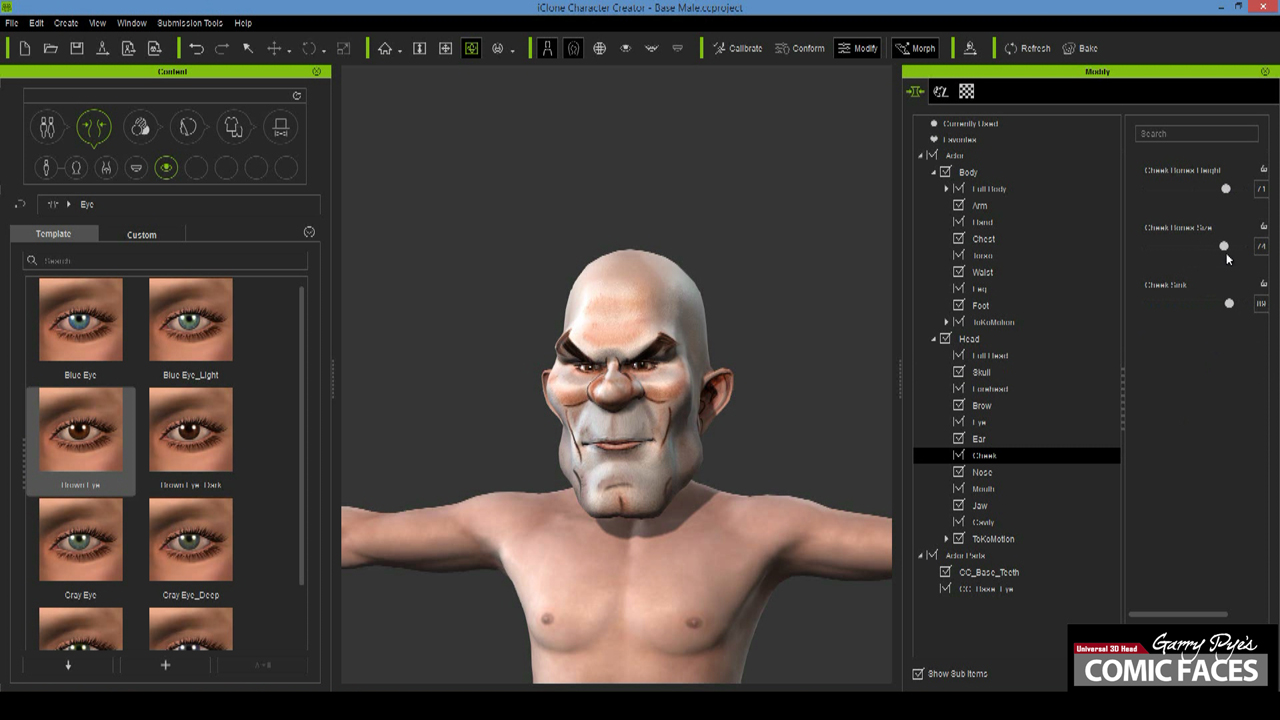
Since we are going to work on modifying the facial features first, hit the ‘J’ hotkey to bring the face up full screen. The first thing I do when the comic face is applied is to remove the hair from the model (we can add that later) and replace the pencil sketched eyes with eyes provided within Character creator, which have a lot more detail and give your figure more realism. For this tutorial, I have used the ‘brown’ eyes.
Now you can begin to use the Character Creator morph sliders to customize the look of your character, down to the most intricate detail. For the purpose of this tutorial, I have used the Ogre comic face and will morph it to create a tough looking biker.
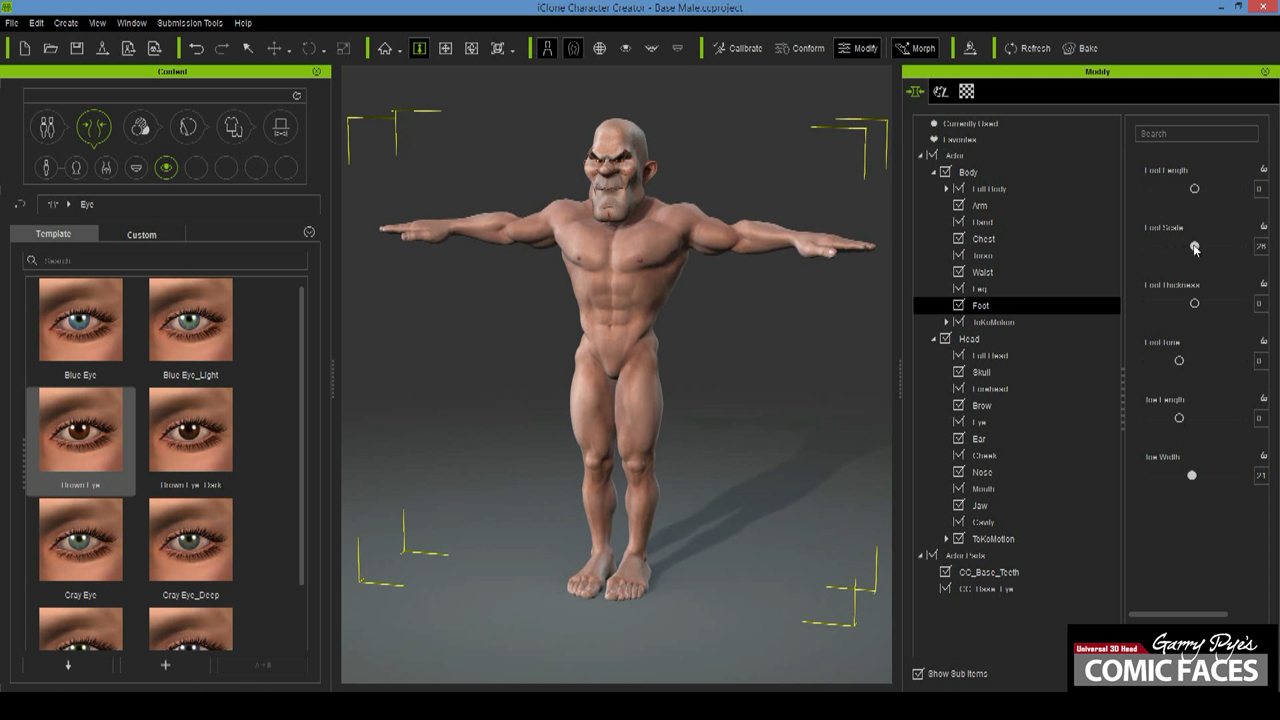
Even though the finished biker artwork will have a high level of realism, we still want the character himself to have a cartoon feel. Therefore I always scale up the size of the head for emphasis. Because the biker is a large, intimidating character, I also increased the scale of the hands and feet. I also tend to lower the ears for cartoon characters.
It’s now time to start morphing and changing the facial features of your character to customize him and make him your own. For cartoon characters like the biker, I highly recommend using the stylized body morphs by Studio TokoMotion, which have a great cartoon quality while still retaining realistic proportions. And when exported to iClone6, they pose and animate perfectly.

Stylized Starter Pack by Studio TokoMotion:
http://www.reallusion.com/ContentStore/iClone/pack/Stylized-Character-Morphs/default.aspx
As you progress with your modifications, be sure to ‘bake’ your character regularly to permanently apply your changes. Baking also allows you to create more exaggerated features. You can morph a feature, bake it, then morph the same feature again, bake it again and so on.
Although it may seem obvious, it is worth highlighting the importance of saving your progress. Each time I save, I save a new version of my work, rather than saving over the top of the same file. This allows me to work backward to an earlier version if I need to, saving a lot of headaches.
Step 4: Aging and Resolution
I recommend increasing the resolution of the face, to make sure you get the most detail from it as possible. To do this, click ‘Modify’ – ‘Appearance’ and then ‘Activate appearance editor’. Now change the ‘Output size’ of the head from 1024×1024 to 2048×2048.
While you’re in the Appearance Editor you can also modify the surface details of your characters face and body, from skin tone and skin aging to the number and size of the freckles on his face.
For the rough and tough look of the biker, I increased the aging across all his facial features using the morph sliders in the ‘Head surface Normals’ sub-folder. And I darkened his skin tone slightly so he has a more weathered appearance.
You can also increase the resolution of the body textures, however, unless your character is in extreme close-up, I don’t feel it’s necessary.

Step 5: Morphing the Body in Character Creator
For this tutorial I needed the biker to be a large, imposing figure. I wanted him to look hardened and tough, and have a cartoon quality, but still maintain a high level of realism. To achieve this I used the morph sliders from the TokoMotion Stylized Characters pack. These morph sliders give exaggerated, cartoony proportions to the human figure in TokoMotions original style, while still appearing realistic in their form.
Again, for all my cartoon style characters I increase the scale of the head, hands and feet. In the case of the biker, this gave him an oversized, heavy look. By increasing his torso and leg length and adding more muscle to his frame, I was able to bulk up his body.
I prefer to add the body morphs AFTER I have finished styling the face. When you do this, the TokoMotion character morphs will also affect the look of the face, which can create new and interesting facial adjustments. If you don’t want the body morphs to affect your face, then morph the body BEFORE you work on the face.
Step 6: Clothing and Accessories
Now that your new characters face and body are morphed, it’s time to dress them for the scene. I prefer work on the face and body morphs before adding clothing so I get a clear impression of who the character is.
If you scale the head up, as I do, and you want to add accessories like hats and sunglasses to the face, be sure to zoom in (J hotkey) so that you can rescale and reposition the accessory and make sure they properly fit the character.
For the biker, I used the bandanna from the Party Fun clothing pack, and then rescaled and repositioned it to fit the enlarged biker head. I applied the weathered JeansC and the checkered ShirtD. Then from the Professional outfit pack I added Short Cowboy Boots C, and also from the Professional Outfits Safety Vest sub-menu, I added Safety Vest D, just to break up the coloring of the checkered shirt, and bulk him up with an extra layer of clothing.
Finally, I added the fingerless gloves and the beard to the character to add the finishing touches, and my tough looking weathered and worn biker was complete.


Step 7: Posing, Lighting, and Rendering
With your background open on your screen for reference, open the ‘3-point lighting’ project file which is free from Reallusion. In Character Creator, click ‘File’ – ‘Export’ – ‘Send to iClone’ and your character automatically transfers over to iClone ready to work on.
1) Posing
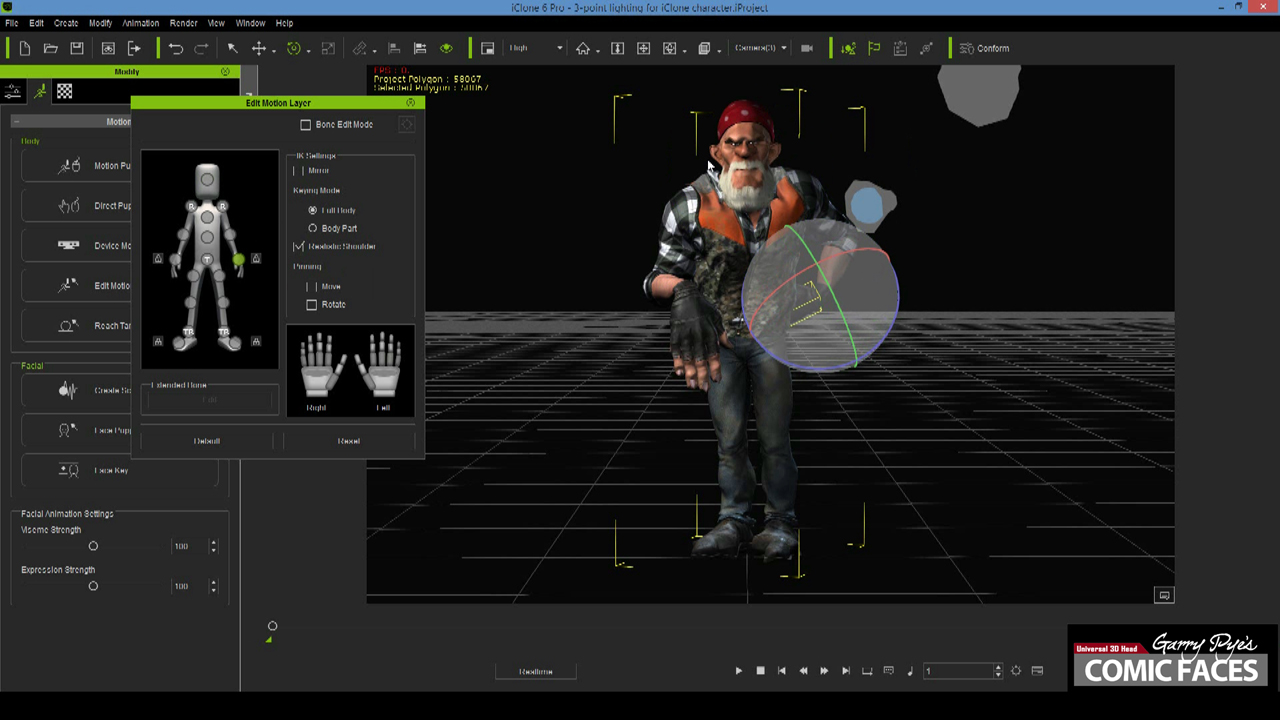
Your customized character will now appear in iClone in the T-position, ready to pose. First, click ‘create’ – ‘camera’. This is the camera angle from which you will do your final render. But for now, in the Top Menu bar, select ‘Preview’ so that you can zoom in and move around your character freely to pose him in the correct position. Just remember to go back to the Camera mode when you want to see if the characters angle matches the photo he will be inserted in later.
Now manipulate the character’s body parts until you get the desired pose.
2)Lighting
Once your character is posed correctly, switch back to the camera you created when you started in iClone. Adjust the camera’s view of your character until both the angle of the character matches the scene it is to be placed in.
For animation, it is important that all your lighting is set up perfectly to light the shot since all the final rendering will be done in iClone. However, this is not at all the case with a still shot to be finished in Photoshop, where you have two options – (1) set up all the lighting in iClone and render, or (2) create the lighting manually in Photoshop. I prefer to create my own lighting effects in Photoshop, where I already have my character and background together, and I can manual adjustments and see the immediate effect on the finished artwork.
So, for now, you only want to approximate the lighting in iClone. If you are adding your character into a background that has heavy shadowing, then it’s best to add extra lighting in iClone to get a realistic shadow. Additionally, if your adding your character into a scene with very specific lighting (e.g. If he were standing next to the glow of an open fire), then you may want to add that in with iClone as well by adding colored light sources.
In my experience, the nice even lighting provided by the 3-point lighting project set up will work fine for most projects. In fact, regardless of the background, I plan to use, I almost always just use the 3-point lighting setup as my final lighting.
So with your character posed, your camera angle setup and your lighting adjusted, it’s time to export your character as a .PNG file, ready to add to the background you have selected. At this point I recommend you save your project. That way, if you need to make minor adjustments to your character’s pose so that it fits the background better, you can.
3) Rendering
Make sure you are in the view of the Camera mode you first set up and select ‘Render’ – ‘Render image’. Make sure that the format is set to .PNG. I always output at the highest resolution of 3840×2160 to get the most detail. Check that ‘Final Render’, ‘Super Sampling’, ‘Sample Size 3×3’ and ‘High-Quality Shadows’ are all selected.
When you export your final character, it is beneficial to apply a variety of lighting and shadow options and save each render. These can be layered on top of each other in Photoshop and you can choose the layer (or parts of layers) that give the best results. To begin with, I turn all the lights off, then turn them on one at a time and render the character with this light only on. Do this for each light, and then do a final render with all lights on.
Then, in the “Modify’ window of iClone, select your character and then scroll down the ‘Edit’ menu to bring up the ‘Display’ options. There are four options for shadow – ‘All shadows’, ‘Cast only’, ‘Receive only’ and ‘No shadows’. I render the character using ‘All shadows’ and then again using ‘Cast shadows’, which highlights different areas of the character. You can end up with 4 or more final renders of your character, each with different lighting results.
Step 8: Finishing in Photoshop
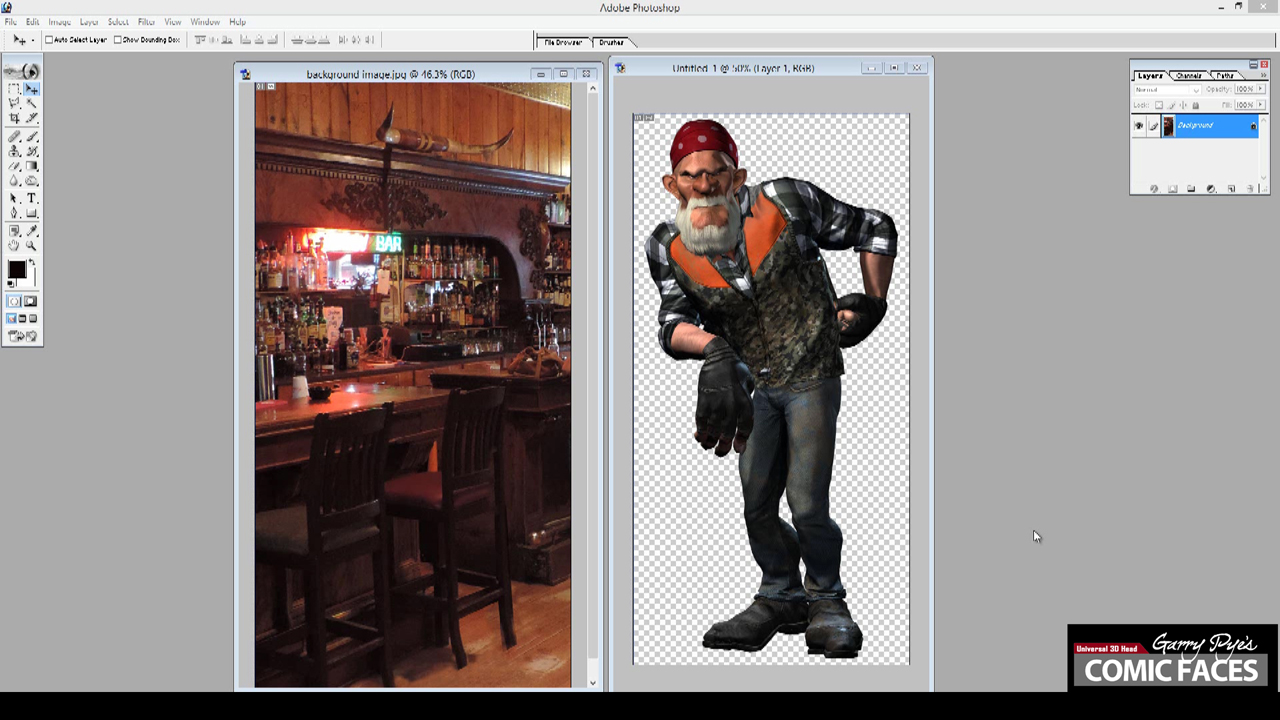
With your background image loaded in Photoshop, open all your rendered .PNG character files and then align them all so that they are directly on top of each other on separate layers over your background image.
Roughly position your character in the background. To really sell the finished image to the viewer, try and have your character interact with some part of the background. Having them partially behind a background prop or leaning against something in the photo helps to sell the idea that they were a part of the background from the beginning.
For the biker, I focused on having him leaning on the tall bar stool to emphasize his large scale, and placed his foot behind the bar stool leg to sell the perspective of the shot. Also, I positioned his head in front of the neon bar light, giving me the opportunity to add the light glow across his face.
From this point it is a matter of using the parts of the different rendered characters that best match the background lighting and erasing those parts that don’t. Eventually, you will be left with a character that matches the background lighting. Once you’re happy with the character, merge all your character layers. Now you should only have two layers to work with – the character and the background.
Next, edit all the elements in your image so that they are layered correctly and the correct items are in front or behind other items. In this image, I really only needed to make sure that the biker’s boot was behind the bar stool leg, by erasing part of the boot. Again, this is to sell the image to the viewer, so that it appears that the character was part of the original image.
Start to play around with shadows and lighting. For each shadow I create a new layer, colour pick a dark area of the background and airbrush in the shadow manually on a layer set to ‘multiply’. Then apply a blur effect to the shadow to soften the edge and experiment with the opacity.
For the illumination around the bikers head near the neon bar sign, I created a new ‘screen’ layer. Colour pick a light area from the background in the neon light and using the magic wand tool (set with a tolerance greater than 5-5) selected the area outside the biker to mask him off and then ‘invert’ to select only the biker. Using the airbrush tool, I painted a highlight down the side of the bikers face and then softened the opacity so that his original textures would show through.
Using these methods of creating shadows and highlights, continue to go over your character and match the light and shadow sources from your background.
At this point your artwork is finished, with your original pencil sketched face now a 3D head, combined with your custom morphed body, embedded convincingly into your background.

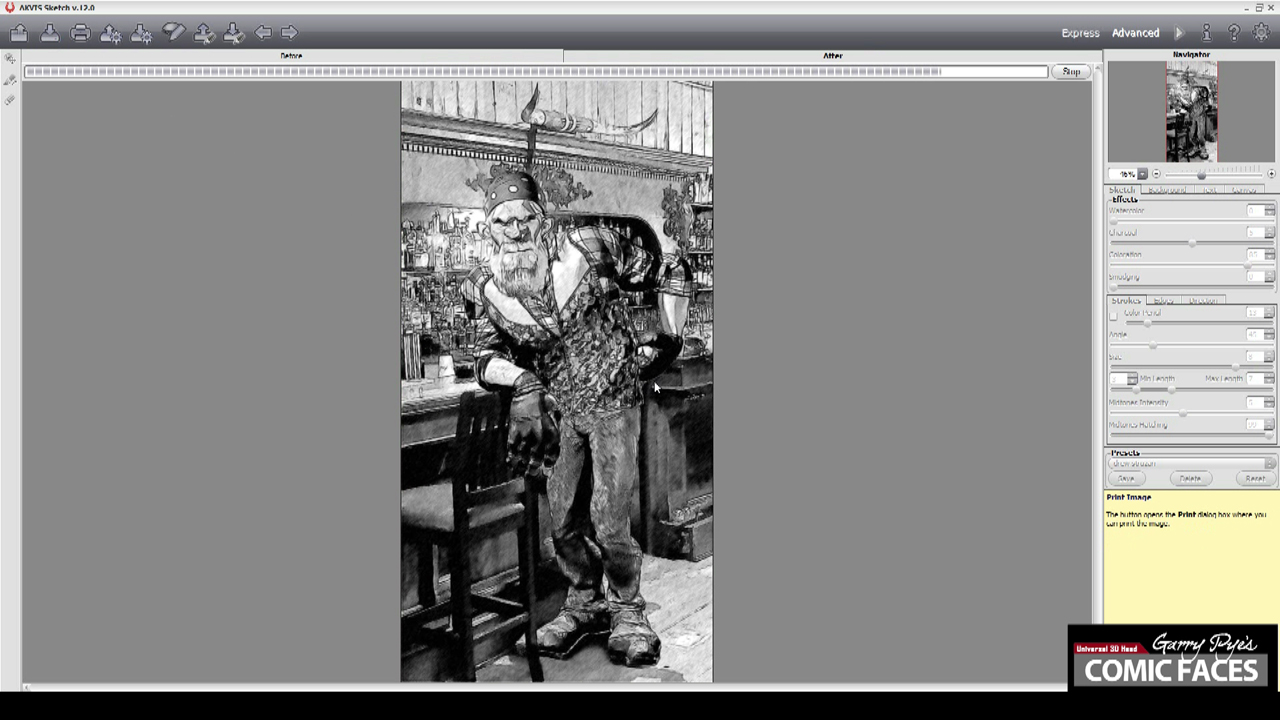
Step 9: Akvis Sketch
There is one final step I like to apply to most of my artworks, which gives the finished artwork a hand drawn ‘sketchy’ feel, complete with pencil lines and rough shading, using a program called Akvis Sketch.
I save my final Photoshopped image as a .JPG and open it in Sketch. Then with one button click, Sketch will take any photograph and give it the look of being a hand drawn colored pencil sketch, and in my opinion, Akvis does this better than any software I’ve found offering to do this. Sketch has a wide range of effects and finishes.
Once Sketch has ‘sketched’ my image, I save it and paste it as the new layer on top of my original artwork, which I have desaturated to match the look of the Sketch file. Then I set my eraser tool in Photoshop to 30-50 opacity and erase the skin tone areas because sometimes Akvis Sketch can make skin tones and eyes a little too rough.

Top Tip-
Save all the time. And each time you save, create a new save. Don’t save over the top of the same file all the time. That way you can work backward as well.
Conclusion
As I said at the beginning of this article, this is not so much a technical tutorial as a look behind the scenes at the way I create my artwork. Take the tips I have written and apply them in your own way to your work. I hope the guide has been informative and if you have any questions, do not hesitate to email me at garrypye@bigpond.net.au . Be sure to visit my Facebook page for more behind the scenes looks at my work, and great free content.
Here are the links to the software and their companies I used in this tutorial-
Reallusion: www.reallusion.com
Garry Pye Comic Face Pack http://www.reallusion.com/ContentStore/iClone/pack/GarryPyeComicFaces/default.aspx
Cloth Bases Professional Outfits http://www.reallusion.com/ContentStore/iClone/pack/ClothBaseForCharacterCreator_ProfessionalOutfits/default.aspx
TokoMotion Stylized Starter Pack http://www.reallusion.com/ContentStore/promo/Stylized-Character-Creation-Starter-Pack/default.aspx
iClone 6 – 3-point Lighting Setup http://city.reallusion.com/ContentPreview.aspx?i=JIC6b16b64856ff5b225&g=
Akvis Sketch http://akvis.com/en/sketch/index.php
About the Author
Garry Pye
https://www.facebook.com/garrypyeanimations/
I have over 30 years experience as a cartoonist, illustrator, and animator and have been a content developer for Reallusion since 2014.


1 comment
Really great article. Thanks for taking the time to explain things in such great detail in a way that is easy to understand.