Character Creator 3 (CC3) is centered to complete the 3D game character pipeline for the game dev industry. Indie game devs can now add highly optimized game character base for mobile, AR and VR developers; while also integrating InstaLOD’s model and material optimization technologies to generate game-ready characters that are animatable on-the-fly with multiple LOD outputs.
But how do we export CC3 characters to game engines like Unity? Especially when some characters have many material textures.
Watch Video
This tutorial will take you through all the steps you will need to export and utilize your CC3 character inside the Unity game engine. You will learn about easiest way to import your character as an FBX file, into Unity’s game engine, by using a script that we’ve prepared in order to save you time with all the material adjustments.

Prior to exporting your CC3 character, you can glance over the material channels to confirm that the PBR shader is being used by this specific character. Inside you will see the telltale signs of PBR thanks to the Metallic, Roughness, AO and other channels. Take note that sometimes these materials might be shared among other Mesh items, which might cause some confusion when importing into Unity.

To fix this, just quickly rename the Materials for each Mesh item in order to differentiate them when importing into the Unity game engine.
You also need to ensure that your character is in a T-Pose and that the pose is on the top of the list of all the motions you wish to export with your FBX file. Just choose the T-Pose from the Content Manager’s motions folder, and rename it with a (0_T-Pose.rlMotion) to place it is first in line.

Then we export the character by choosing the UNITY 3D Preset inside Character Creator 3, and ensure that the T-Pose is at the top of the include motion list.

Let’s go into Unity now, and make sure that we are using version 2018.2.14f1 for now, as the Reallusion team is currently working on updating CC3 compatibility with later Unity versions. (TBA)

Once inside Unity, make sure you download a handy little script, that we prepared, that automates the materials import so that you do not need to spend time in optimizing all the many textures that were exported from Character Creator 3.
You can download this free script here>> http://bit.ly/2Ejq70u
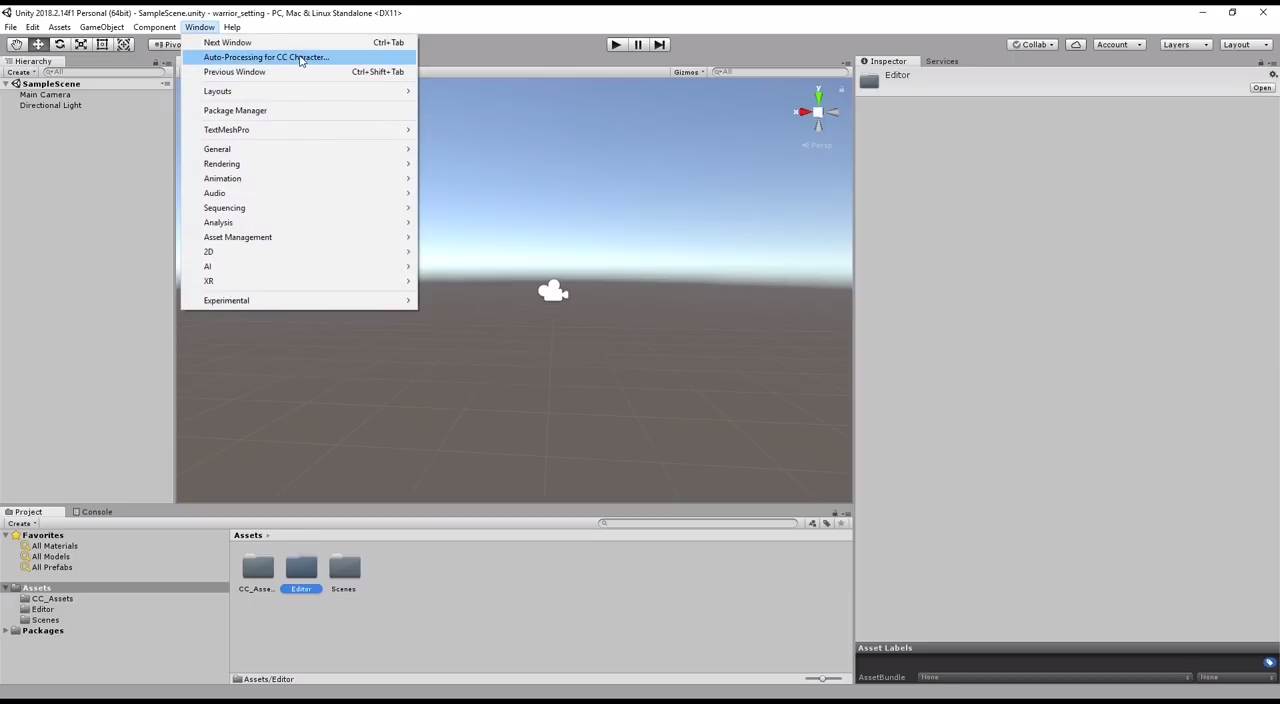
Simply click and drag the script into your Unity assets. You will notice that two folders have appeared; a CC Assets andan Editor Folder. You will also notice that a command has now been added under Window/Auto-Processing for CC Character that will streamline future CC Character importation.

What you want to do later is to manually drag in your entire FBX character folder, complete with textures and all, into the Unity CC_Assets Folder in your Unity library.

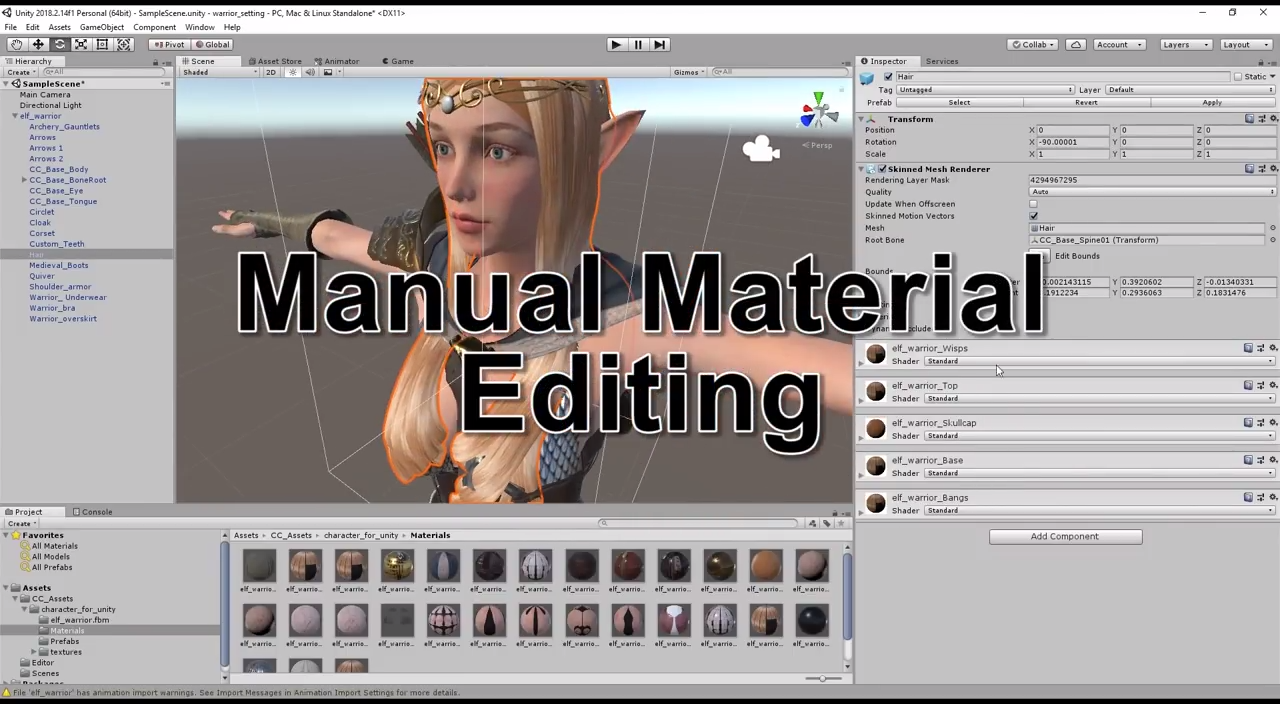
After that it is just a matter of assigning which Shader Type maps from CC3 correspond to which maps inside Unity. You can have a look at the comparison chart inside the tutorial video to see this.
For example, if you are using the PBR shader type from Character Creator 3, then here is also a rough guide:

- Base Color/Opacity > Albedo (Unity)
- Bump > Normal Map (Unity)
- Metallic/Roughness > Metallic (Unity)
- AO > Occlusion (Unity)
- Glow > Emission Map (Unity)
One thing you would want to pay attention to is to ensure that the shading mode is correct for each individual element.Like the shader type for a character’s hair, which you can adjust from OPAQUE, to FADE inside the Rendering Mode. Can also play around with the other shader types for the rest of the character elements to see which transparency values suit best inside Unity. Including any specular highlights the elements may have.

Another workaround for some elements that might be one-sided (like a cape) is to download a free Double Sided Shader ,like the one from Ciconia Studios found in the Unity Asset store.


Simply import it into your project, and then select that shader from the Shader Menu in order to solve anyone-sided item issues.

You can also apply the same Double Sided shader to adjust the mesh of a character’s skirt object further. This will give some elements a much more realistic appearance when it comes to material transparencies.

So that is the basics of importing your FBX characters into Unity from Character Creator 3, that has been made super easy thanks to the script freely available in the Reallusion forums: https://forum.reallusion.com/396261/CC3-to-Unity-Importing-CC3-Base-Characters-to-Unity-Using-a-Script-for-Auto-Setup

To learn more about Character Creator 3, visit: http://bit.ly/2xWiVTu


2 comments
Extremely helpful, thanks!
Does this process work for exporting in FBX Unreal Engine settings? Thanks