


John Yim
John is a Chartered Architect and CGI Artist based in London, specializing in architectural visualization. He is always looking and trying different softwares/plug-ins and different workflows to up his quality and efficiency. Due to COVID lock-down from 2020, he challenged himself to post weekly/bi-weekly CG art online by using new tools. This was how he discovered the Character Creator.
“Character Creator is very user-friendly, as I was able to pick it up just from simply examining the user interface without watching any tutorials. Being part of a small team/ indie artist, time is always of the essence – and being able to create, pose and texture all in one package has been a huge time-saver and therefore extremely valuable.”
John Yim – Chartered Architect / CGI Artist

Q. Hello John, we noticed that you are proficient with many 3D tools, is it because of the needs in architectural projects? Can you give us a little background about yourself?
I am a Chartered Architect and CGI Artist based in London, specializing in architectural visualization.

Growing up in Hong Kong, I always have an extreme admiration for people working in the film and game industries, for all the surreal photographic and photo-realistic CG contents they produce.
I first got to CG rendering back when I was studying architecture in University, where everyone had to present architectural concepts with abstract or Photoshopped renderings in addition to conventional 2D drawings. Softwares like Rhino, AutoCAD and Revit were essential tools of trade within the architectural industry, tools that I have been using for over 6,7 years until I struggled with the limitations of rendering packages available (for CAD/construction-oriented softwares). That was when I started to look into DCCs like Cinema4D and Houdini, which led to a whole new world of possibilities and options in CG rendering and modeling.

Working in a small team at my workplace, I have the luxury of constantly testing and switching among different softwares and plug-ins, as there is no fixed CG pipeline. I picked Cinema4D & Redshift as my primary rendering/modeling tool initially for their stability and ease of use, but I never stopped looking and trying different softwares/plug-ins and different workflows to up my quality and efficiency.

Having to spend more time at home due to the COVID lock-down in 2020, I challenge myself to learn new softwares and post weekly/bi-weekly CG art online, treating this as an opportunity to expand my portfolio and to find an audience that resonates with my style and interests.

Q. As an Architect Artist, what are the most interesting and challenging parts of your work?
The most challenging part is crafting a CG render that is aesthetically pleasing, informative and photorealistic, while the most interesting part is seeing a concept turned into reality.
In the architectural industry, projects could be briefly categorized into 3 main stages – concept design, technical design & construction. A lot of people (my younger self included) perceive Architect as one who designs a building from scratch – from the form of the building to the shape of the windows, from lighting to furniture – whereas in reality the role of an Architect is more about coordinating than conjuring designs out of thin air. For instance, in the majority of architectural projects, almost all building components are off-the-shelf products (with a handful of exceptions that involve bespoke furniture etc.), all planned and coordinated to fit together harmoniously in fulfilling the client’s brief.
I work at the forefront of concept design – specifically coordinating client briefs, survey drawings and sketches from Senior Architects, and translating them into CG still renders or animations. These CG renders would be then used for marketing, design development discussions and eventually construction. This is much like solving a jigsaw puzzle with all edge pieces – a challenging and iterative process that could last from a week to as long as 2-3 years.
It is extremely interesting to follow through a project from concept to construction, and it is the most rewarding moment to see the completed project in real-life that looks almost identical to my CG renders.
Q. How did you find out about the Character Creator?
I found out about Character Creator while in search of an optimal workflow to create custom 3D people.
It is common practice to Photoshop or populate scenes with stock 3D people within the “archviz realm”, but I have avoided either method for a very long time. I personally find the former too time-consuming as it is non-procedural, and the latter lacking in customization (posing & clothing etc).
I first stumbled upon “PIFUHD” earlier last year, an AI tool that generates rough digital human from photo. When used in combination with ZBrush, it is one of the most efficient and flexible ways to quickly create and populate CG scenes with a decent-looking 3D crowd from a distance. However it is still technically a non-procedural workflow, and the AI-generated mesh could be hit-or-miss.


When I eventually needed a digital human with higher fidelity, I was split among Character Creator, Poser and Daz Studio – all of which allow me to quickly create and pose a 3D character with a realistic silhouette. I ultimately picked Character Creator as I prefered the more user-friendly and modern interface.
“Although I initially only intended to use Character Creator as an archviz tool, Character Creator’s plugin “SkinGen” & “Headshot” piqued my interest, later leading me onto a “side quest” in creating photorealistic CG characters that could hold up to very close-up headshots.”
John Yim – Chartered Architect / CGI Artist

Q. Do you use Character Creator in your work, personal projects or both?
I use Character Creator in both my work and personal projects, but for different purposes.
For work, I use Character Creator Characters (CC Characters) whenever I need to add closeup people in my CG renders. The CC Character(s) serves as the antagonist in an architectural scene, to add a sense of scale and to convey the function of a particular space. I use CC Character(s) in combination with Marvelous Designer and my library of baked hair meshes to create realistic silhouettes that complement the architecture.
“The CC Character(s) essentially “animates” a scene that would otherwise look stale and dull, but does not distract the audience from the main focus (space/architecture).”
John Yim – Chartered Architect / CGI Artist
For instance, a public park would look unlively without people, in which case adding CC Characters would be time well spent. But on the contrary, a random CC Character “walking” inside a private residence would be distracting, not to mention the time and effort it takes to create a client CG double otherwise. In this case I would rather spend more time on refining the architecture than worrying about populating the scene.
For my personal projects, CC Character(s) serves as the protagonist – though not necessarily the main visual focus – that adds stories and narratives to a CG environment.
“The CC Character(s) help to make the final CG render more relatable and believable to the audience.”
John Yim – Chartered Architect / CGI Artist
I mostly use CC Character(s) in combination with Marvelous Designer & Ornatrix/Houdini for creating garment & hair-grooming respectively.
Q. Can you share with us your experience in using Character Creator?
I have used Character Creator for about 6 months since September 2020, on approximately 8-9 projects. I personally found it to be very user-friendly, as I was able to pick it up just from simply examining the user interface without watching any tutorials.
Being able to interactively modify and pose a character are the two most valuable features to me; SkinGen is a close second.
As a CG artist who does not know much about anatomy, having the ability to interactively create a character is a game-changer. This has opened up an infinite number of possibilities, as I am no longer reliant on photos (PIFUHD workflow) or stock 3D models to compose my CG art narrative.
Similarly, having the ability to character pose without worrying about the actual technicalities of rigging allows me to focus completely on the artistic aspect. I have not utilized any of the pose presets, but I have built up and saved a custom library of poses that I could reuse on different characters down the line.
“Since my goal has always been creating the most photorealistic character as I possibly could from the get-go, SkinGen has saved me a lot of time by allowing me to procedurally texture the character within Character Creator, rather than utilizing 3rd party softwares (Substance Painter, R3DS Wrap etc.).”
John Yim – Chartered Architect / CGI Artist
Being part of a small team/ indie artist, time is always of the essence – and being able to create, character pose and texture all in one package has been a huge time-saver and therefore extremely valuable.

Q. What’s your workflow?
For most of my personal projects, my workflow consists of the following:
- Researching and finding as much reference as possible;
- Modeling: I use Rhino & ZBrush for the majority of my architectural modeling, Speedtree for modeling trees and Houdini for procedurally modeling environment assets like rocks, generating variation of buildings etc.;
- Scene assembly & set dressing in Cinema4D;
- Character modeling with Character Creator, Marvelous Designer & Ornatrix;
- Rendering with Redshift.
Elaborating on my character creating process, I would first pose and model in Character Creator (CC) in reference to real faces & poses, then I would export the T-pose CC model to Marvelous Designer (MD) for fitting/designing the garment. After that I would export the posed CC model to MD as a morph target, finally exporting the posed garment & CC model to Cinema4D.


I usually do the hair-grooming in Cinema4D with the Ornatrix plug-in, but I have been exploring hair-grooming in Houdini as well for a more procedural & efficient workflow.

Ultimately all the CC textures are exported to Cinema4D and shaded/rendered with Redshift.


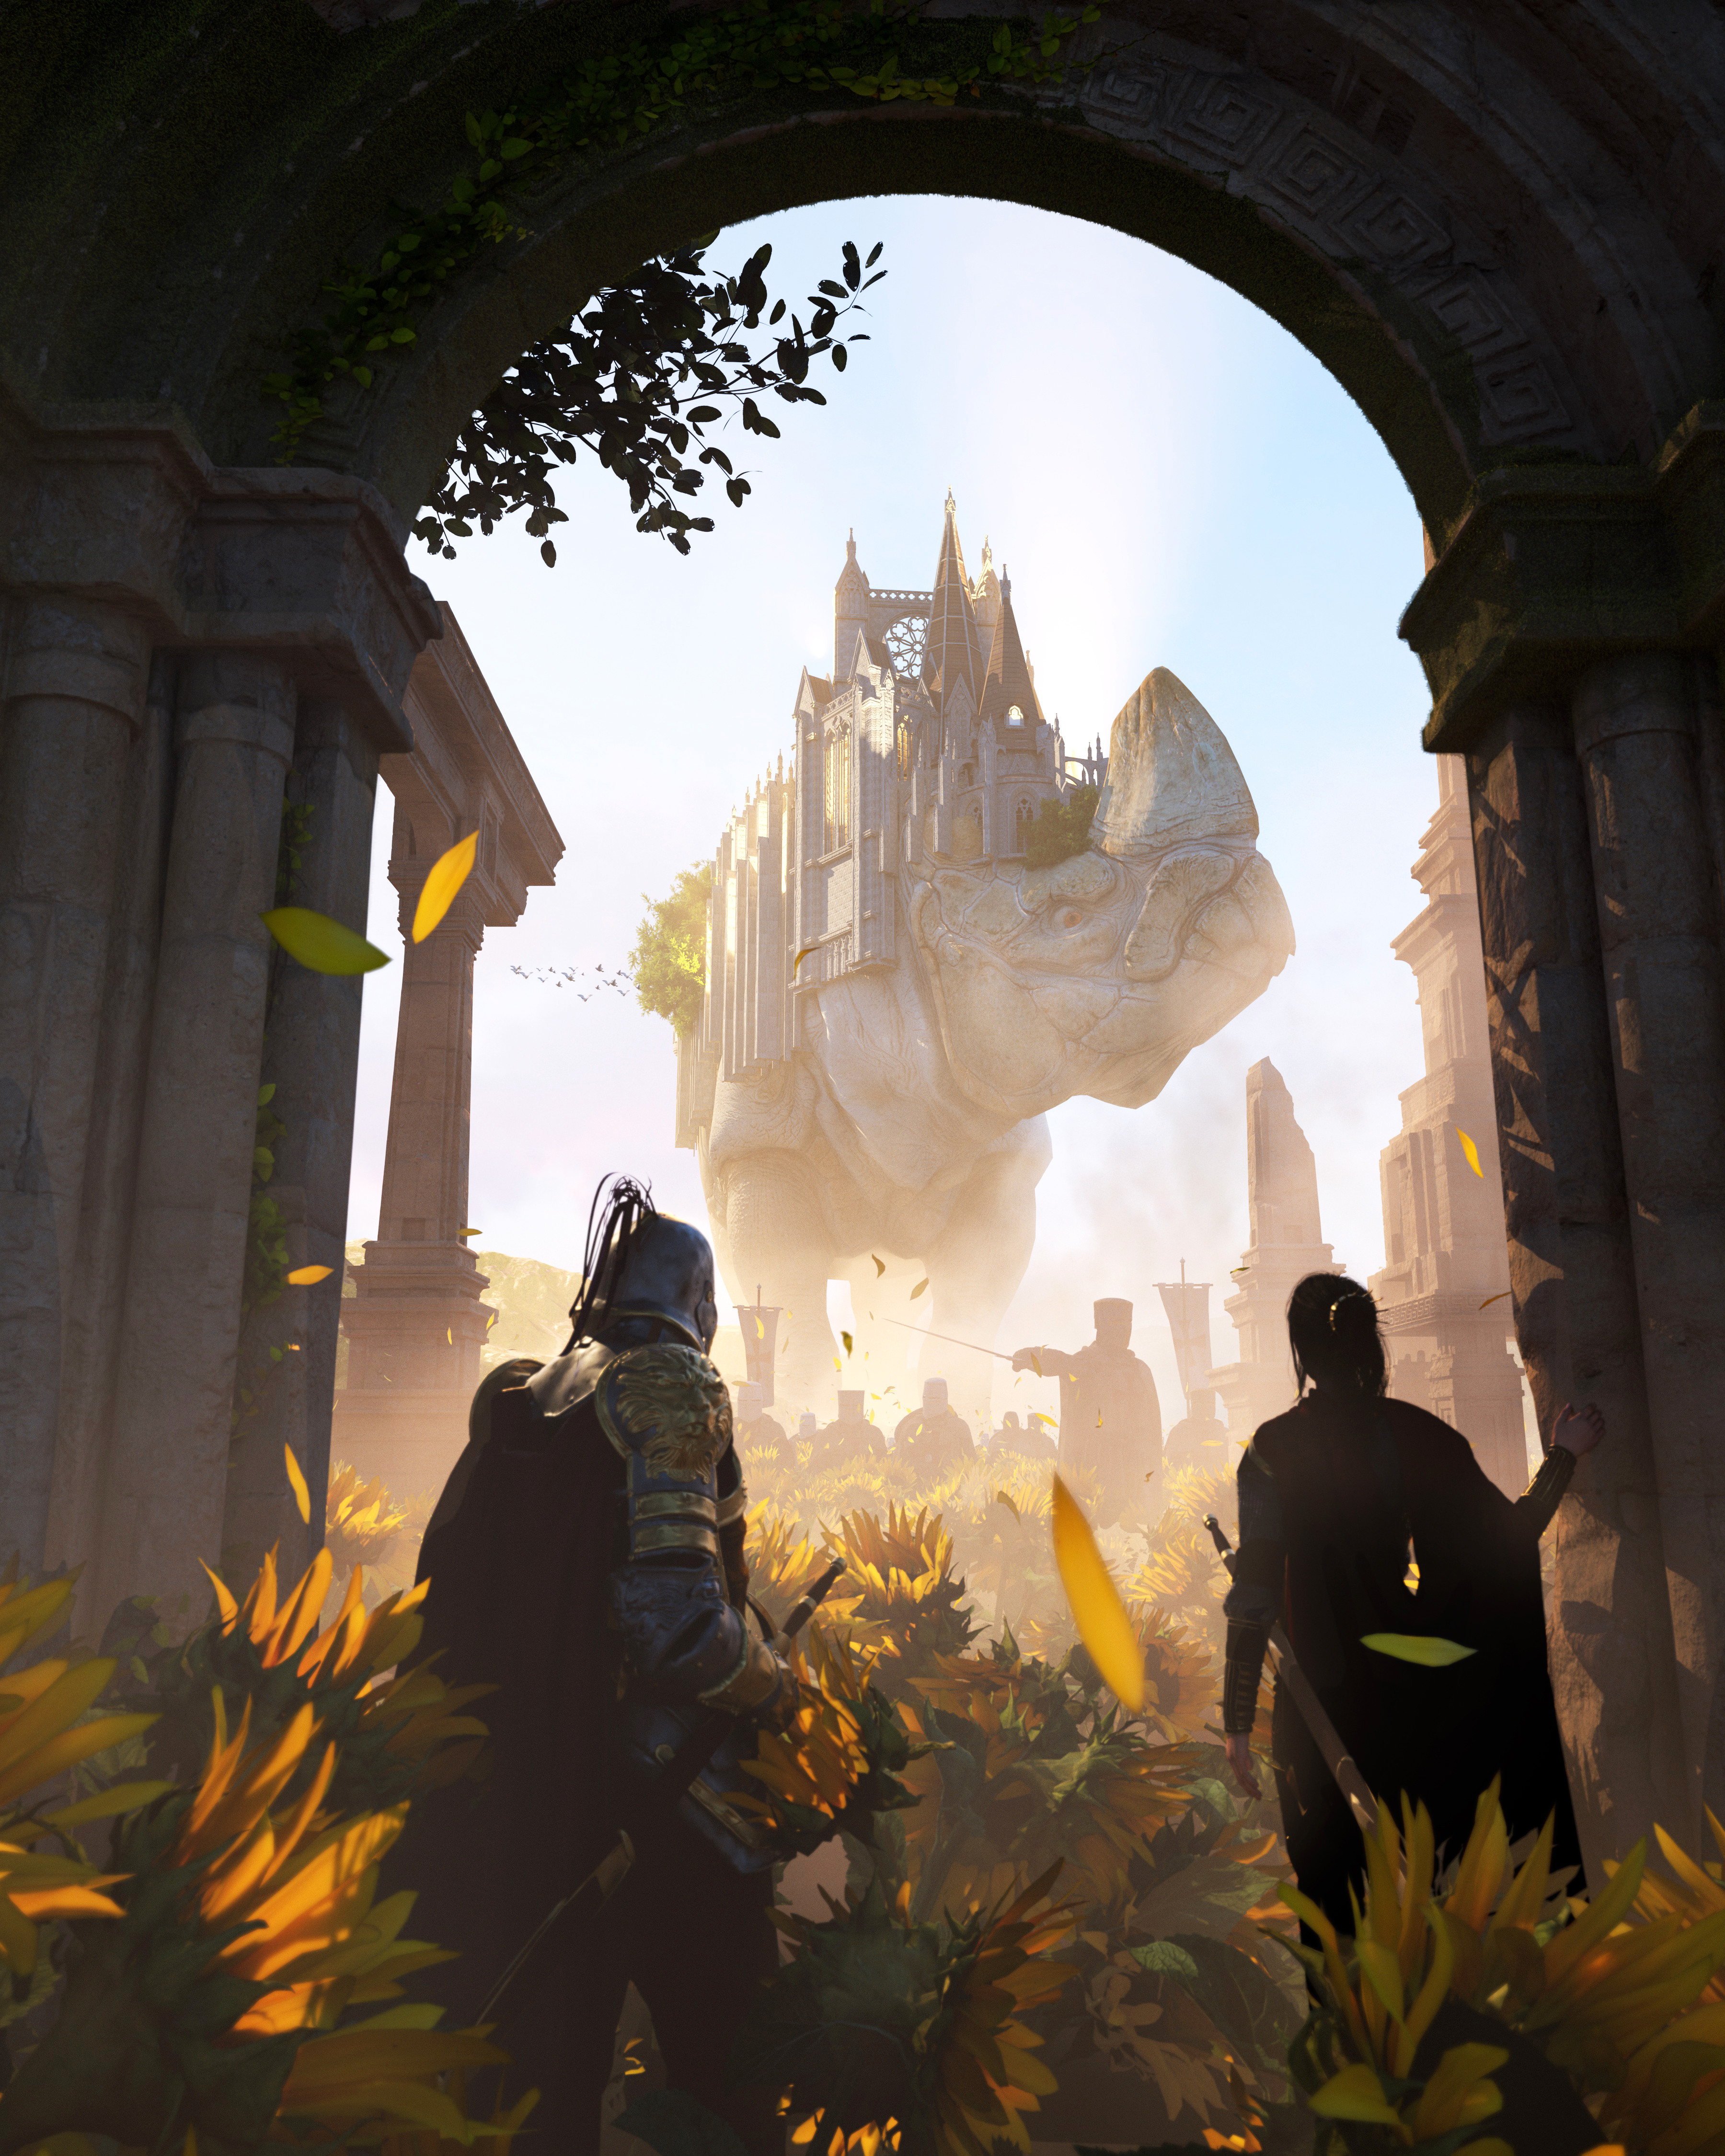
*John won the first prize in CG Boost Challenge with this artwork.
Q. In your opinion, what are the benefits / advantages of using Character Creator?
I think the main benefit of using Character Creator is that it empowers CG Artists with very little anatomy knowledge like myself to create believable CG Characters.
As an Architect by training, I had a fair amount of experience in composing CG environments, but I have zero knowledge in anatomy, nor do I think it is optimal to spend my time sculpting a CG character from scratch in ZBrush. As such most of my earlier works are pure architecture or pure landscape. Character Creator allows me to add realistic CG people into my CG environments, hence adding stories/narratives.
The other benefit is the procedural/non-destructive workflow that Character Creator embraces. Having the option to create and reuse a library of custom characters, custom poses and facial expressions etc. is a huge time-saver. It allows me to quickly iterate and make decisions on the best fitting character for a particular CG render.
Last but not the least, the SkinGen Premium Plug-in is also extremely efficient and therefore gives an advantage for individual CG artists to generate skin textures without the need of Substance Painter or Mari. I have been exploring a combination of R3DS Wrap and Texturing.xyz to add an extra level of face fidelity to my CC Characters as well, but unless I need a very closeup shot, I would stick to SkinGen most of the time.
Q. What can we expect to see from you?
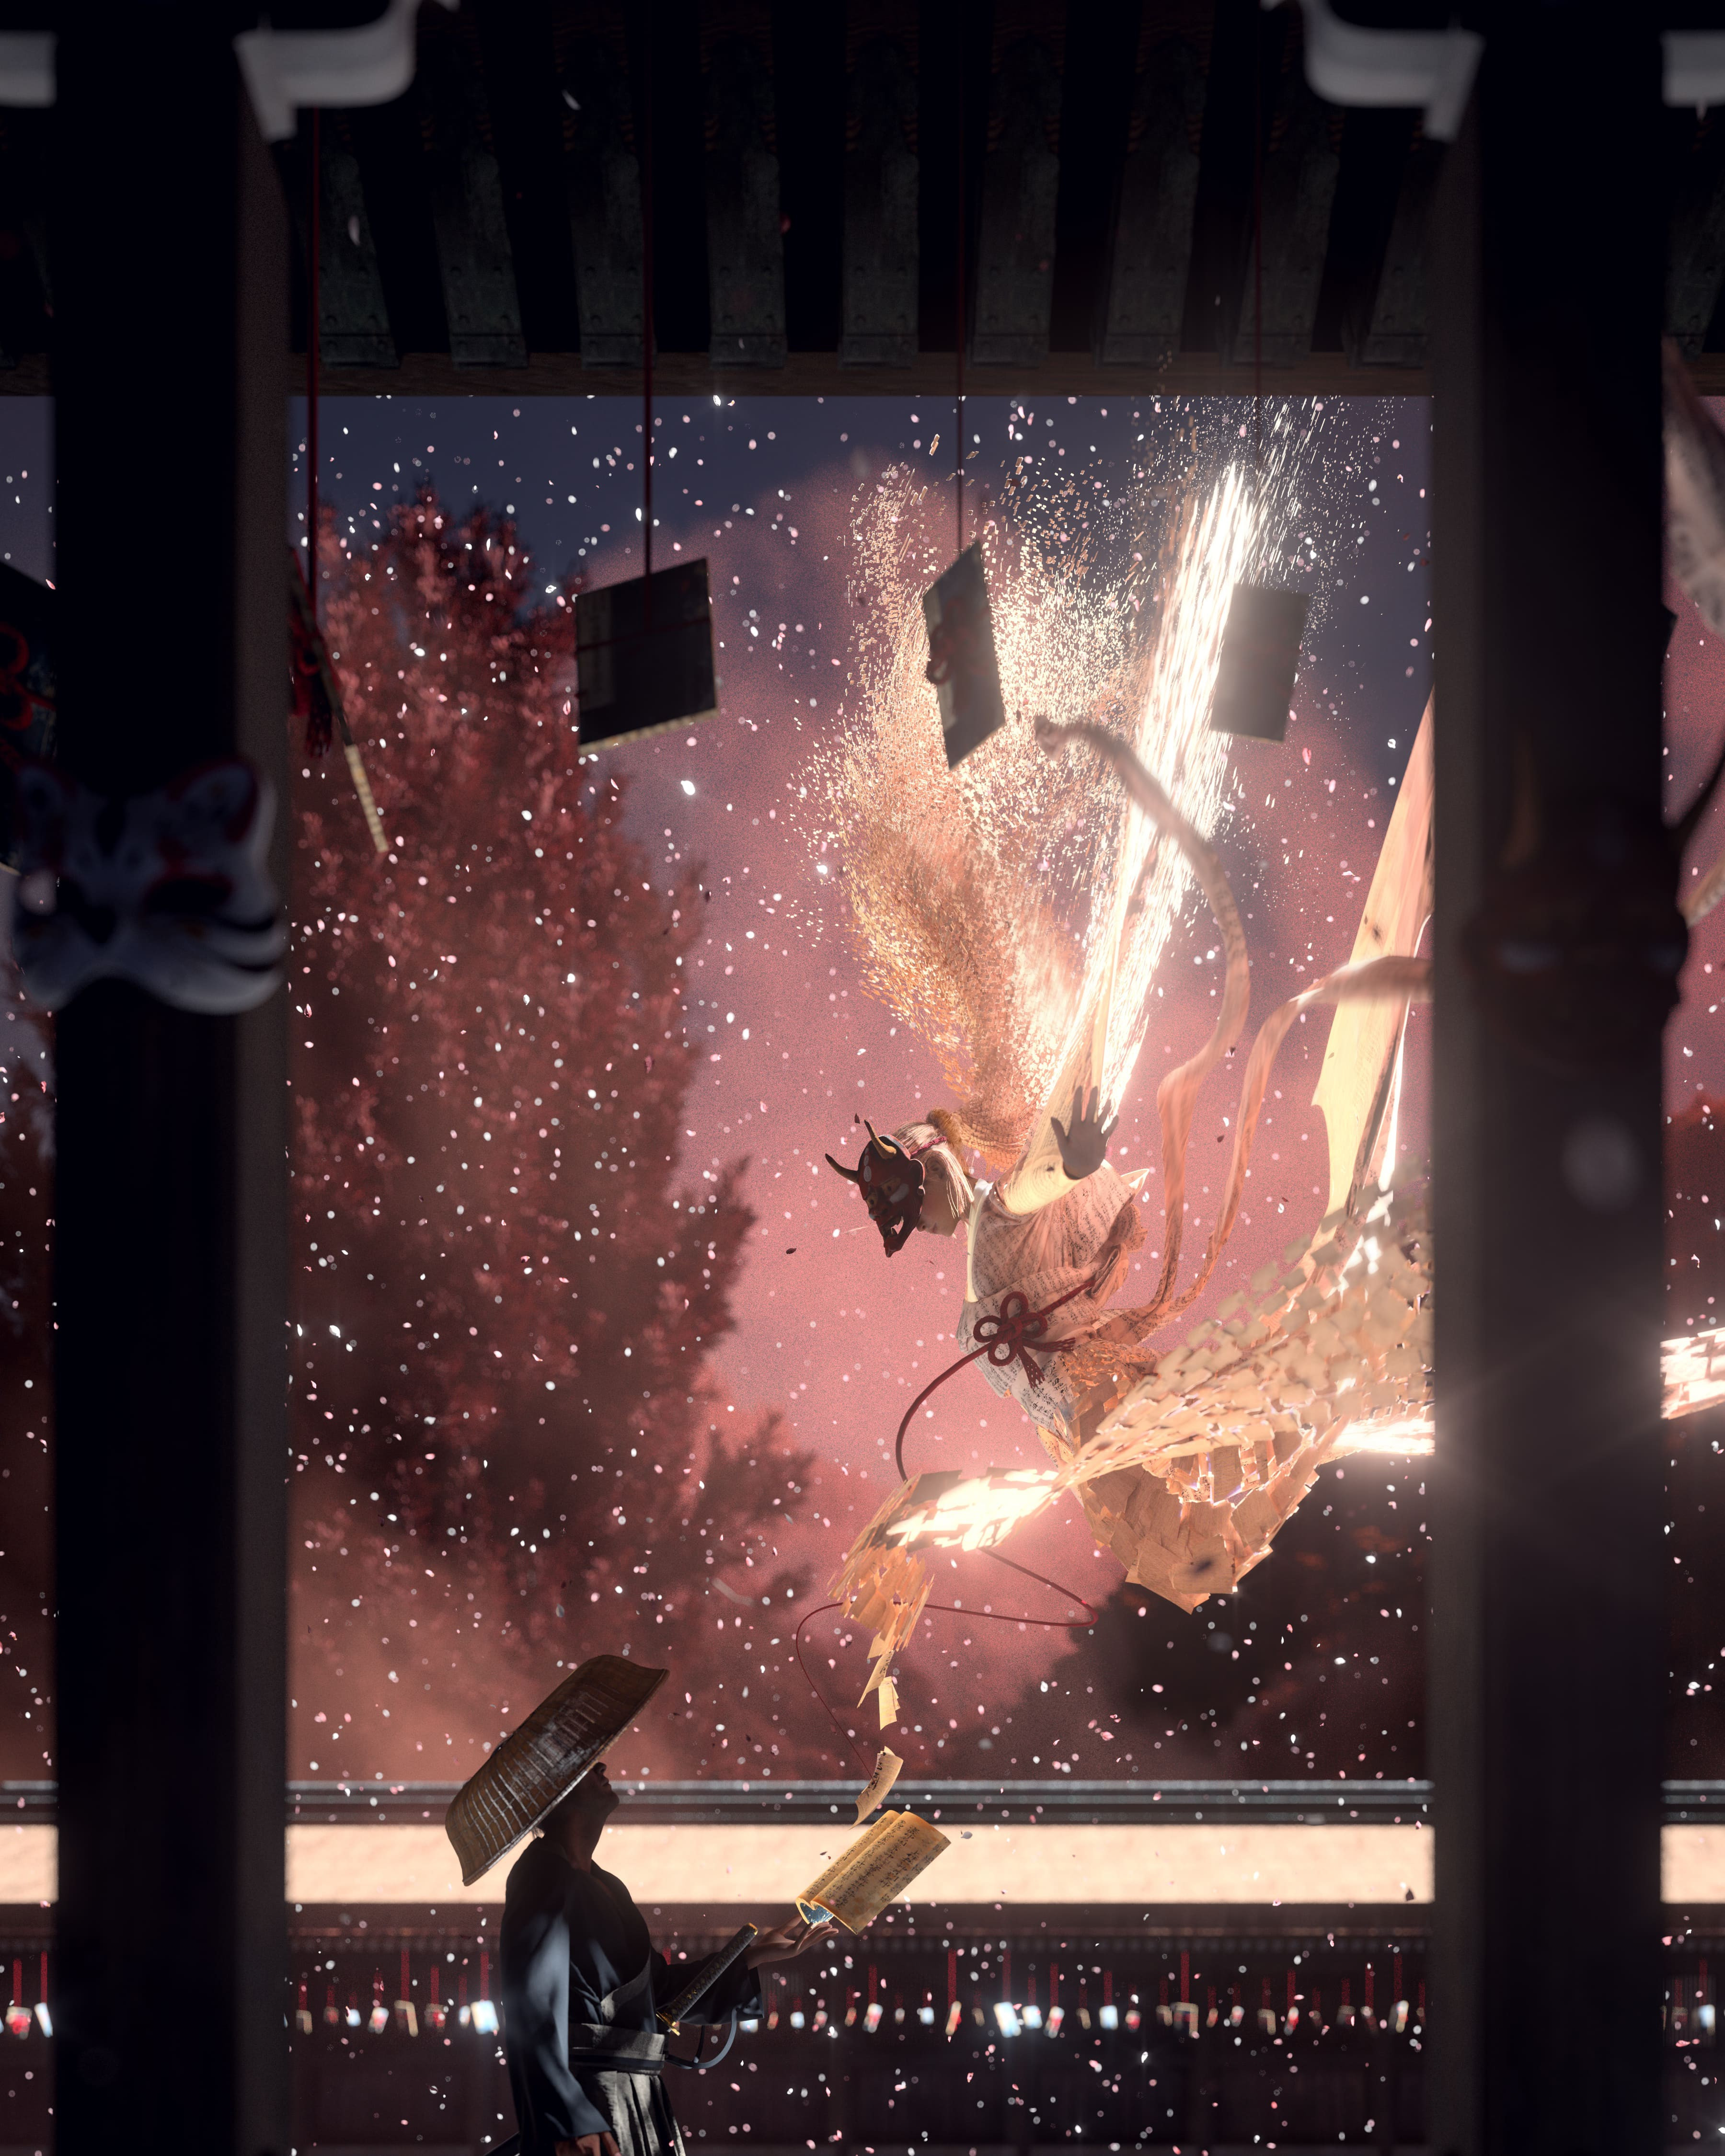
I enjoy creating CG art with fantasy narratives the most – of which a large number of them are Japanese-themed – as I am heavily influenced by Japanese culture through anime and manga.
I also aim to create and post CG renders with more detailed and grandeur architecture in the coming months, since I have been learning and embracing a more procedural workflow. This could all be traced back to when I crossed paths with Houdini last year – it is by far the most challenging software I have ever used. Its user interface and workflow is so unique that it easily threw my initial perception of “3D” out of the window.
Houdini stands out among other DCCs in that it allows me to reuse and recycle a modeling procedure/history, so any work done in Houdini essentially functions like a “plug-in” or a bespoke software that could save myself time in the future.
Having used Houdini regularly for the past 6 month, I have since got a better grasp on proceduralism, and have carried the same concept through my use in other softwares as well (primarily Cinema4D & Rhino). My workflow is always a work-in-progress, but transitioning to a mostly procedural workflow has allowed me to create and iterate CG art more efficiently.
In the long run I am also planning to create and post more CG animations, just as I have recently plunged into learning CG compositing in Nuke.


Know more about John and his artworks:
Website: https://johnyim.com/
ArtStation: https://www.artstation.com/johnyim
Instagram: https://www.instagram.com/k_johnyim/
Facebook: https://www.facebook.com/jy.yimkay
LinkedIn: https://www.linkedin.com/in/johnyim/


