

Hi, I’m Benjamin Sokomba Dazhi and I want to welcome you to this iClone 8 (iC8) tutorial. As you all know I am an animator and my major 3D tool is iClone . I’m so excited to bring you this next tutorial.
This time around, we will still be talking about how to enhance the visuals in our projects on iClone 8 for a captivating and alluring finish.
We are going to talk about lens flare. How to optimize your scene and make your scene look aesthetically appealing using lens flare.
Let’s get started.
Here I have a scene I already prepared where I placed a SWAT van or a police car, in a parking lot. (Fig 1.0)

The next thing I need to do is apply the first lens flare on the lights of the car. That is the blue/red police lights on the car, the headlamps of the car, as well as the rear lights.
Before , I’ve already animated the car since we are not talking about animation today . So we will skip the animation process for the car. I will go ahead and show you how to apply the lens flare.
Firstly, you will go to Content. (Fig 2.0)

Under Content go to Stage. (Fig 3.0)

Under stage you can see lens flare 200 plus. (Fig 4.0)

You can buy this Lens Flare 200+ pack from the Reallusion content store. There are different type of lens flares there.
Now we are going to apply this lens flare at different parts of the car accordingly. That is the headlamp and other lights glowing on the car. (Fig 5.0)

So for the headlamp here, I’m going to apply this light called headlight soft flare.
Just drag and drop it into the scene as shown in Fig 6.0 below.

You can also see the applied lens flare on the headlight here. (Fig 7.0)

Properly place the light where it’s supposed to be, depending on the angle of your camera. (Fig 8.0)
The lens flare will shine brighter or lesser in different angles. The closer it is, the less bright it becomes and if you go farther, the brighter it will be.

Next, I’m going to duplicate this lens flare. (Fig 9.0)

We duplicated the lens flare to use for the second headlamp. Make sure it’s placed correctly.
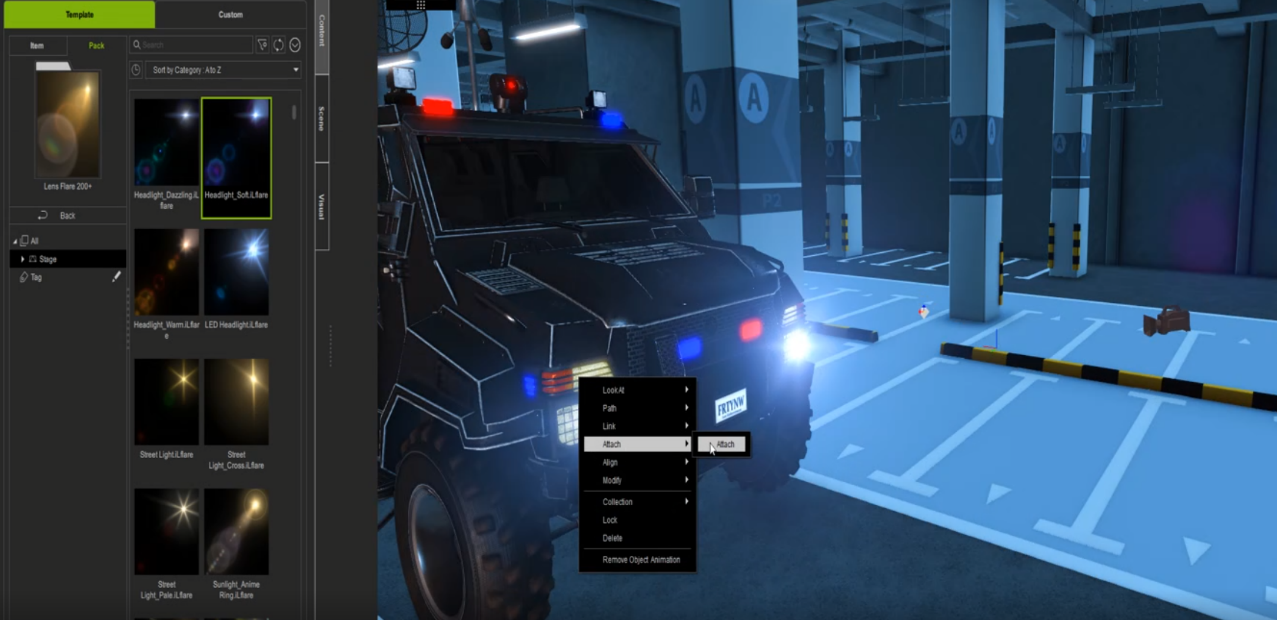
Attach the soft lens flare (Fig 10.0) to the car. Its right for you to attach it to the car since the car is moving. That will be all for the two front headlamps.
Next, let’s go to the back of the car and work on the rear lights. That is the red lights as highlighted in Fig 11.0 below. We are going to apply another type of lens flare. Let’s use the warning light lens flare. (Fig 11.0)

Drag and drop into the scene. (Fig 12.0)

Place it accordingly close to the rear light. Let’s just say here as shown in Fig 13.0 .

When we’re done with the placement, we can hide the sphere. (Fig 14.0) This sphere is there just so that you can see what you’re doing. It doesn’t affect the scene once it’s hidden.

Note: this is not how the actual scene looks. I’m on auxiliary light just so that we can see the whole scene properly. If you switch it off, you see that the rendering and everything in the scene looks better. The auxiliary light is on just for editing purposes so we can see the whole environment well in real time.
Now, we are going to duplicate the lens flare on the rear light to place on the second rear light. (Fig 15.0) Place it depending on the angle of your camera. From this angle it doesn’t look like it’s placed there but it is. You just have to be creative about your choices.

So let’s turn off the auxiliary light and see how the scene is coming. You can see the lens flare looking nice. Let’s continue. I switch back on the auxiliary light.
Remember, since it’s a moving car, make sure you attach the lens flare to the car. (Fig 16.0)

Next, we are going to do the same thing and put different types of lights on the other lights here in the scene, and make them glow. For the blue light on the car, search through for a light called LEDflashlight as shown below in Fig 17.

Drag it to the scene and place it carefully on the blue LED lamps. (Fig 18.0)

Remember that this sphere can be hidden, as it’s just there for placement sake. Also remember that if it is in auxiliary light then you’ll not see the effects yet, but once you switch it off you will then see the effect you have applied.
You must not make use of the particular lens flare I have used here. As you can see, there are different types of lens flare as shown below (Fig 19.0) that could fit the scene perfectly. If you go to the Reallusion content store then you’ll see them. I’m just using a few here, like 3 out of hundreds. This is my preference for the purpose of this tutorial.

Let’s duplicate this particular LED lens flare as indicated by the arrow pointer in the image below and place it at every point where there’s a blue glowing lamp. (Fig 20.0)

Like I said earlier , your light placement depends on the angle of your camera. That’s how lens flare works and that is why it’s called lens flare as it acts on the lens of your camera.
Now let’s apply the light here too. (Fig 21.0) Duplicate the blue flare again as many times as needed, and then add it anywhere there’s a blue lamp.

Again, you can be very flexible with your choices of lens flare. Also, once you’re placing it in the scene, you shouldn’t be worried on how it looks during placement. It majorly depends on your camera angle.
Next, let’s place the blue lens flare in front of the car on places where there’s a blue headlamp as shown below. (Fig 22.0) Repeat the process until all lights have been properly placed.

For the red lamps, we are just going to duplicate the red warning lens flare and put it on the red spots on the car. (Fig 23.0) Duplicate again and carefully place the lens flare on their appropriate positions.

You can still edit or modify the lens flare here. (Fig 24.0)

Once you go to the Modify panel, (Fig 25.0) you can work on the Scale, Brightness, Centre Offset X/Y, ‘view trigger zone’ etc. These are there for you to further modify your lens flare.

And there you have it. See how captivating it looks. You can see the lens flare effect. The scene looks very appealing. Understand I didn’t put any actual light on the car. These are all just lens flare. (Fig 26.0)

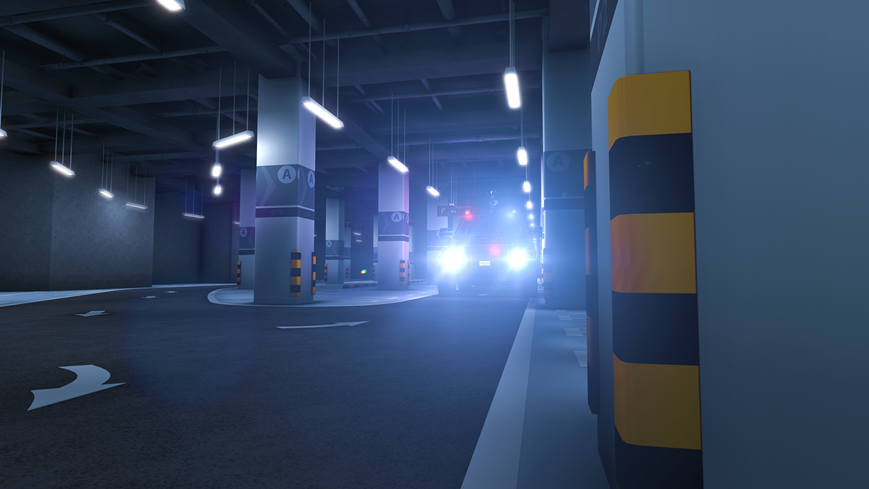
This is a back shot view of the vehicle. (Fig 27.0) You can see where the lens flare is shining from here. Notice how the lens flare is working to enhance the visuals in the scene and on the vehicle.

So this is how you work with lens flare to add life to your scene. It elevates the scene, gives the car a better visual appeal and makes it more believable. (Fig 28.0)
OK, that’s it! I hope you enjoyed this tutorial. I also encourage you to visit the Reallusion Content Store to search and download the Lens flare pack and use it for your projects. I am sure that adding them to your scenes will make everything more alluring and aesthetically pleasing thanks to the visual advancements of iClone 8.
Good luck, and thank you for having me.
Follow Benny Dee:
Instagram:
https://www.instagram.com/therealbennydee/
YouTube:
https://www.youtube.com/channel/UCJ8aa9y8s52q90DvV3yI1OA


1 comment
Excellent