



Tamás Zsolt Nagy
I am Tamás Zsolt Nagy, 2D animator and Reallusion Certified Content Developer. I started using Cartoon Animator six years ago, which turned out to be a perfect decision. It’s an easy-to-use application, and Reallusion’s developers continuously come up with fantastic innovations, enabling us to create higher-quality animations with less effort and in shorter time frames.
Tamás’ Content Store Collection|Tamás’ Marketplace Collection
The latest release, Cartoon Animator 5.3, brought us new dimensions in terms of use of the software. It has become more professional than ever before. While we can continue to work in the application using the well-established methods, new innovations have been introduced that allow us to approach certain tasks in an entirely new way, completing them in a fraction of the time compared to the usual workflow.

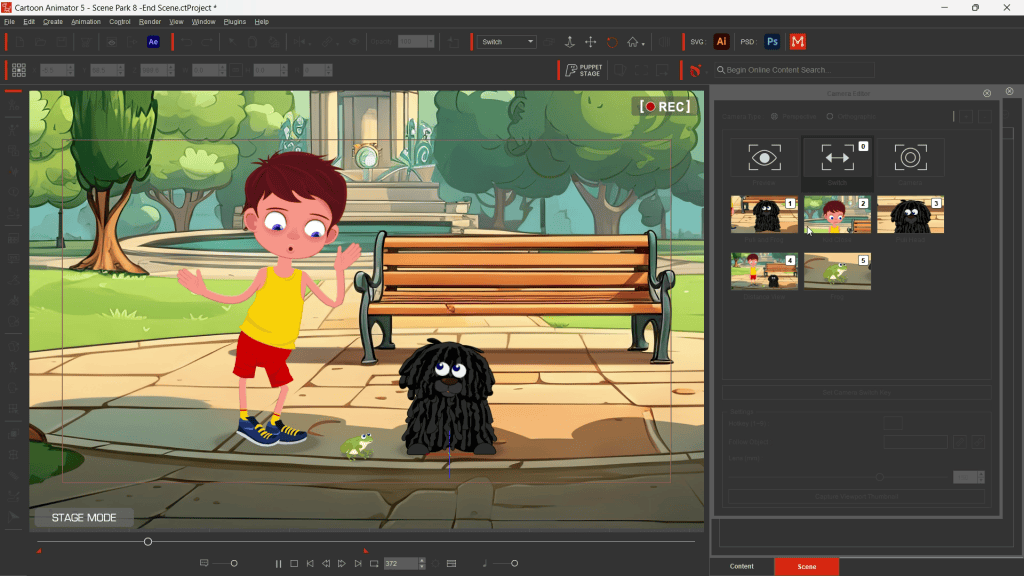
I’d like to give you a glimpse of the new solutions that I find most useful in my daily work. For the demonstration I bring you an animation recently made for children: Kenny and Teddy – The Frog. I will show you how Puppet Stage supports the animation at the scenes where Kenny is talking to the audience, and how the Camera Cinematographic tools make our work easier.
Why puppet animation
Puppet Stage is a real game-changing innovation that radically simplifies the animation process. It removes the need to set every keyframe, significantly saving time and streamlining the workflow during performance synchronization. In contrast to the traditional time-consuming work methods, I can animate the scene in real time, just by mouse and keyboard controls. This gives me the possibility to focus on the creative side of the animation process.
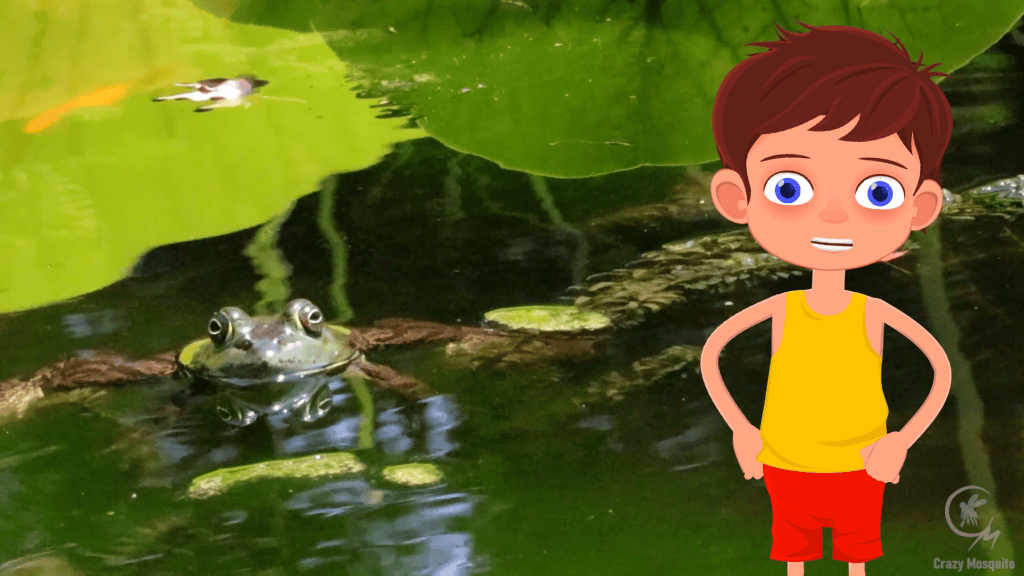
Most of the time in this animation, Kenny, the little guy, stands in front of the camera while explaining the life of frogs to the viewers. I am using voice recordings, and I want it to be harmonized with his body movement and with his facial expressions. It can be animated like any other rig, but the Puppet Stage makes it significantly easier and quicker. This way, I can quickly blend these effects simultaneously in real time by adding the necessary facial expressions and body motions from the Puppet Stage panel. To use this panel, I must configure it first, in the following way.
Body motion and facial expression cards
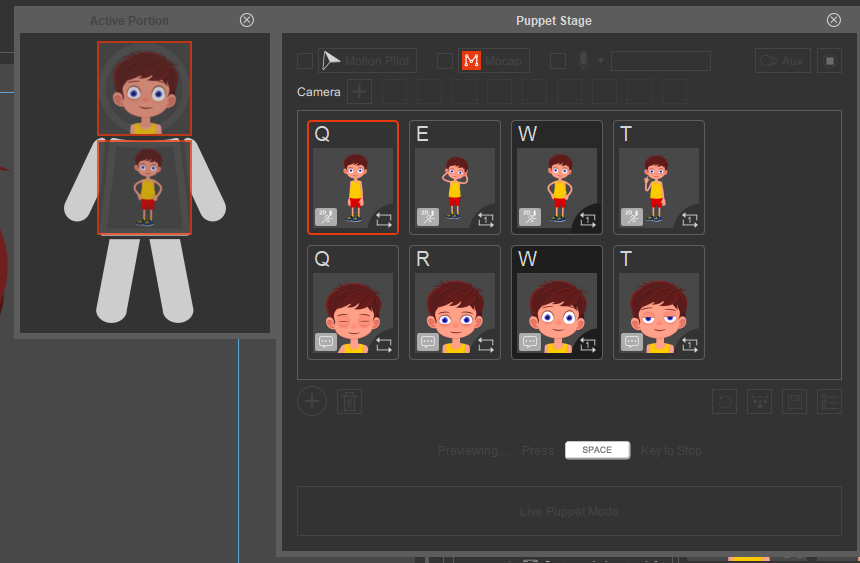
1. The first step is to set up the panel according to my goals. I select the actor I want to control, then I open the Puppet Stage panel from the toolbar.


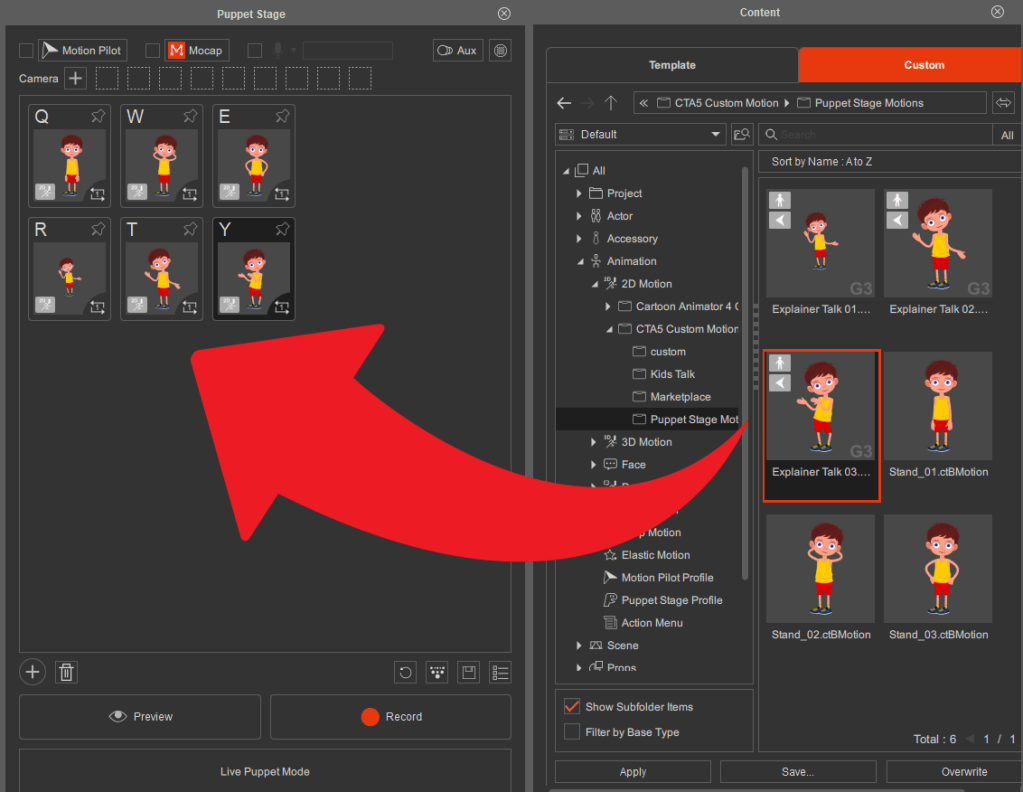
2. I collect those ctBMotion animations in the Content Manager, I want to work with. We can do it in seconds by dragging them into the Motion Card Pool area of the Puppet Stage window.

3. In addition to body motions, I gather facial expression cards from the Content Manager.

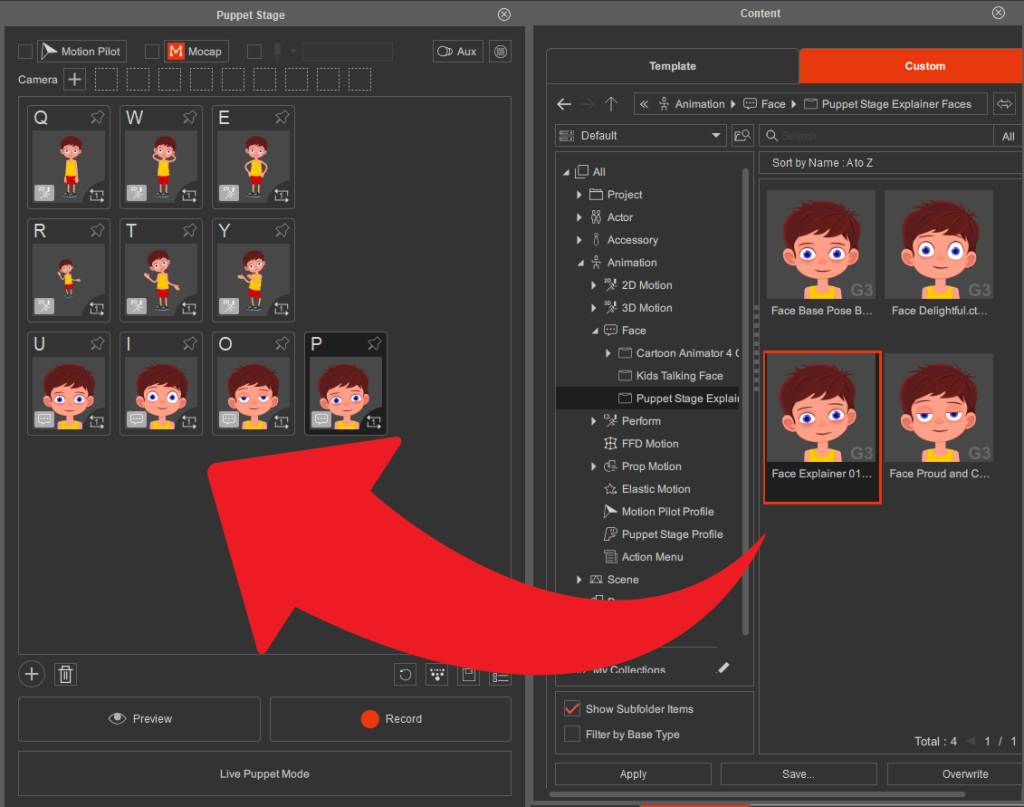
4. Setting shortcut keys for animation cards is highly useful, especially when working in Live Puppet mode. Although I don’t typically use Live Puppet, I still find this feature valuable.
For example, as shown in the following screenshot, I assigned the same hotkey, “W,” to both a body motion card and a facial expression card. During recording, pressing “W” activates and records both cards simultaneously. If I want to apply for only one card, I can simply click on it instead.

Other templates for puppet animation
If you want to enrich the animation of your characters or props, there are other templates to add as cards into the Puppet Stage. It is a good idea to blend FFD, Prop Motion and Elastic Motion effects to characters and props while they are performing other motions or animations.
There are plenty of embedded Puppet Stage contents and we can visit the Reallusion website to purchase additional ones. We can find ready-to-use templates in the Content Store and in the Marketplace for most purposes. However, since I like creating my own set of motions, I buy from these items time after time, or when there is a need for something special, or when I am running out of my time.
Tricks for voice recording
If you added facial animation while recording your puppet stage clip and later want to include character voice from an audio file, some adjustments are needed. Due to Cartoon Animator’s priority rules, it’s recommended to delete the “Mouth_S” entries generated by the facial expression cards during the puppet animation.
1. Sample Motion Clip on Puppet Clip: Open the Timeline, right click on the “Puppet Clip” on the “Face Motion” track and select Sample Motion Clip.


2. Sample Sprite Swapping keys: Make sure that the Sprite Swapping checkbox is enabled.

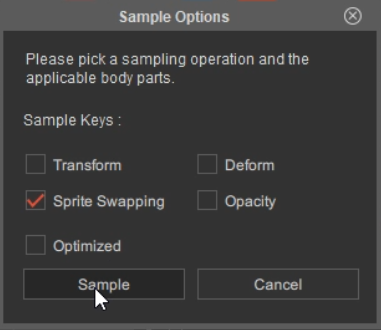
3. Delete all keyframes from the “Mouth_S” track: Right click on the track, choose Select All Keyframes, this way you can clear all the keyframes at once.


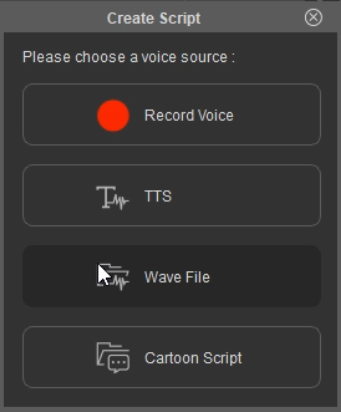
4. Import the Wave File: After completing these preparation steps, importing the wave file ensures proper lip synchronization. Open the Create Script window and select the audio file from the file explorer as usual.

How camerawork enhances storytelling

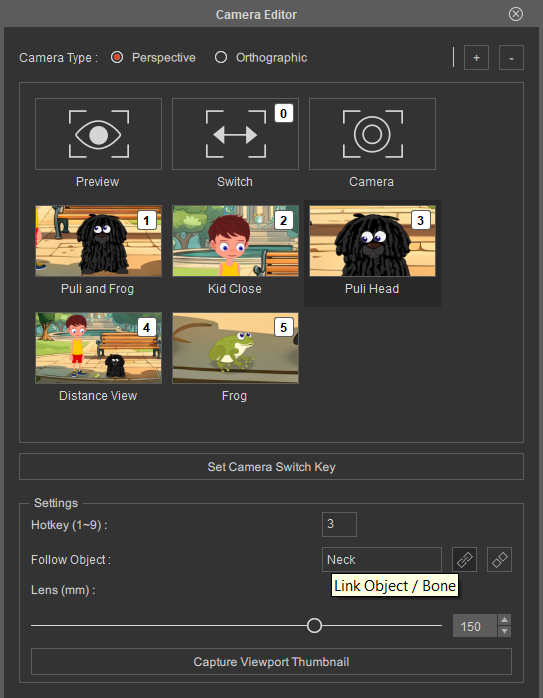
The introduction of Cinematic Camerawork has unlocked numerous opportunities to enhance animations. Strategies can vary depending on the type of animation being created. For example, the approach differs for setting up a live stream versus producing a short children’s story animation. In my video, I assigned camera shots to each actor and added extra shots for wide-angle views.
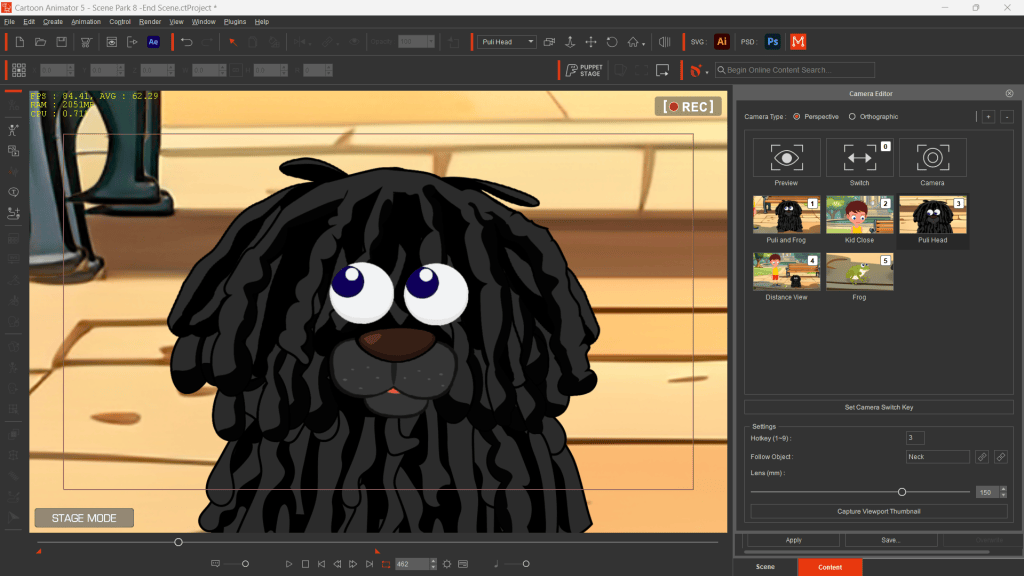
Previously, with only one stage camera available, managing camerawork was less convenient and time-consuming to configure for an entire scene. Now, with a professional toolset, the process is much simpler. Once the Camera Stage is set up, the rest is straightforward. During animation, I open the Camera Editor and use the Set Camera Switch Key to choose the desired camera. For instance, during a conversation, the camera can easily switch to the speaking character, or I can switch to a wide-angle view when needed.

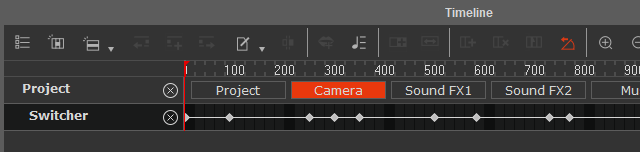
The camera switch key is always auto-added on the track, and I can work with it as I do with any other timeline track keys.

Follow object for dynamism
I would like to mention the Follow Object setting of the Camera Editor, because it is very important to me as it helps me to add more dynamism to my movies. With the link button I can pick a target object or bone that the camera will follow. In this animation I set it up for all the actors. The result is most spectacular at the beginning of the story when Teddy, the dog, is starting to jump. The camera moves together with his hip bone. Before CTA5.3, I had to manually animate the whole pathway of the camera.


Cartoon Animator 5.3 is the perfect choice
I hope you have found my article interesting and have been inspired to try the animation with Cartoon Animator 5.3. I am sure you will not be disappointed if you try it, and you will enjoy working with it, at least as much as I do every day.
Follow Tamás
You can view my animations and “how to” videos on YouTube:
You can also browse through the gallery where I develop characters, animals, and props:
Related Posts
- How to Create Kid-Friendly Educational Animation Step-by-Step
- Vector Graphic Animations For Cartoon Animals

