Spruce Up Game Characters with ZBrush Pose Tools & Character Creator

After winning the first prize in the student division of the Korea 3D Character Creator (CC) contest, Go Eun Kim has been diligently honing her 3D modeling skills. She is now exploring unconventional tools to enhance her real-time animation pipeline. In this interview, Kim discusses her innovative use of ZBrush Pose Tools & Pose Link in conjunction with Character Creator 4 (CC4) to enhance the poses of her cherished game characters, specifically Dragon Sorceress Zyra.
She also delves into leveraging the rich assortment of shaders offered by Auto Setup for Unreal Engine and offers valuable insights on seamlessly integrating various 3D tools, including 3ds Max and CC AccuRIG (an auto-rigging tool). Her expertise enables her to transform static ZBrush sculptures into dynamic, lifelike game characters.

Go Eun Kim
Hello, my name is Go Eun Kim, a college student majoring in computer engineering, and I am from South Korea. In 2021, I started studying character modeling through a graphics academy. At first, I studied using 3ds Max and gradually studied how to model characters using programs such as ZBrush, Substance painter, and Unreal Engine. And by participating in a contest held in Korea, I could learn how to easily implement high-quality characters using Character Creator.
Learning various programs was not an easy process, but visible results are satisfying and fun to me. Also, I was able to concentrate on studying 3D modeling with passion because I always get excited when I imagine people playing future game characters that I have made.
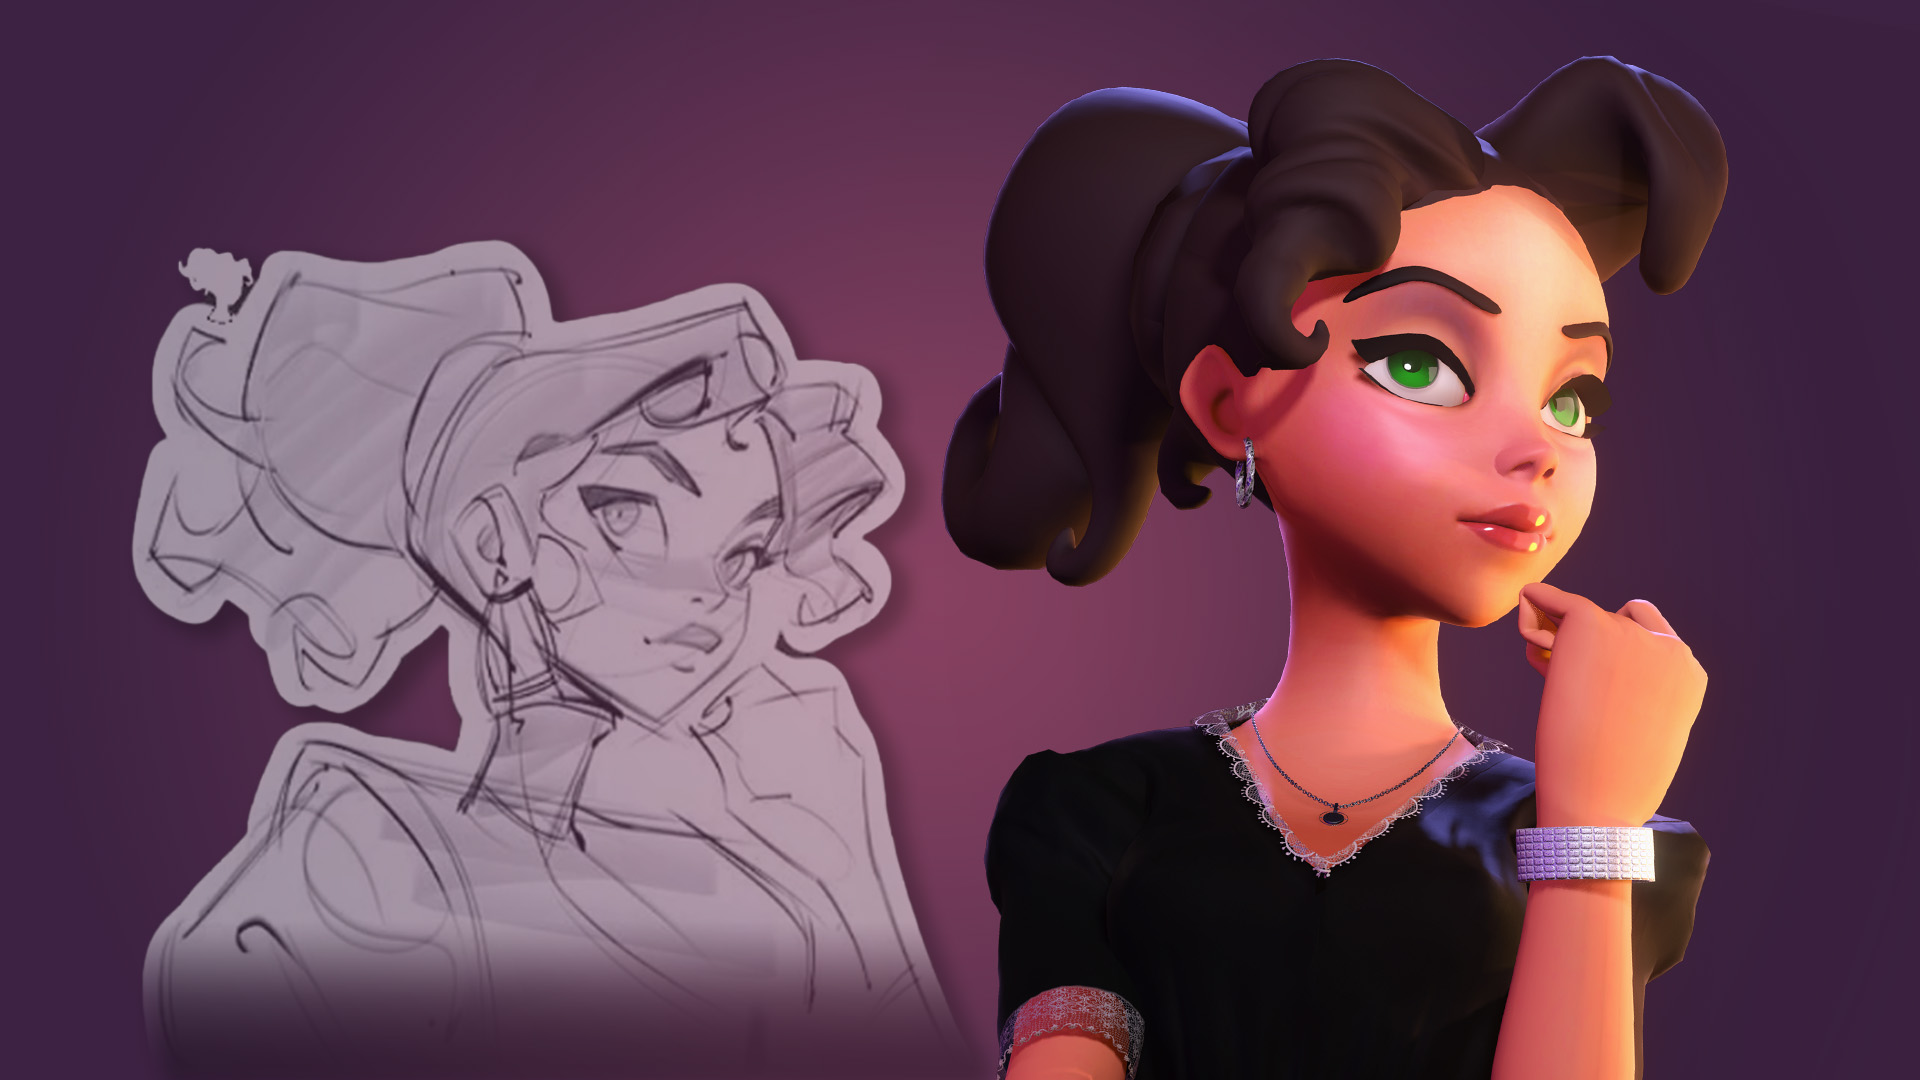
For this project, I decided to deviate from creating a typical human character and instead explore a different character archetype, such as an elf or monster. During my reference search, I came across the concept art of Dragon Sorceress Zyra from League of Legends. I found it particularly fitting for this project’s character concept, envisioning a formidable humanoid boss monster in an RPG game. You can follow my tutorial below to achieve similar results:
Part I. CHARACTER CREATION
Step 1) Character Concept
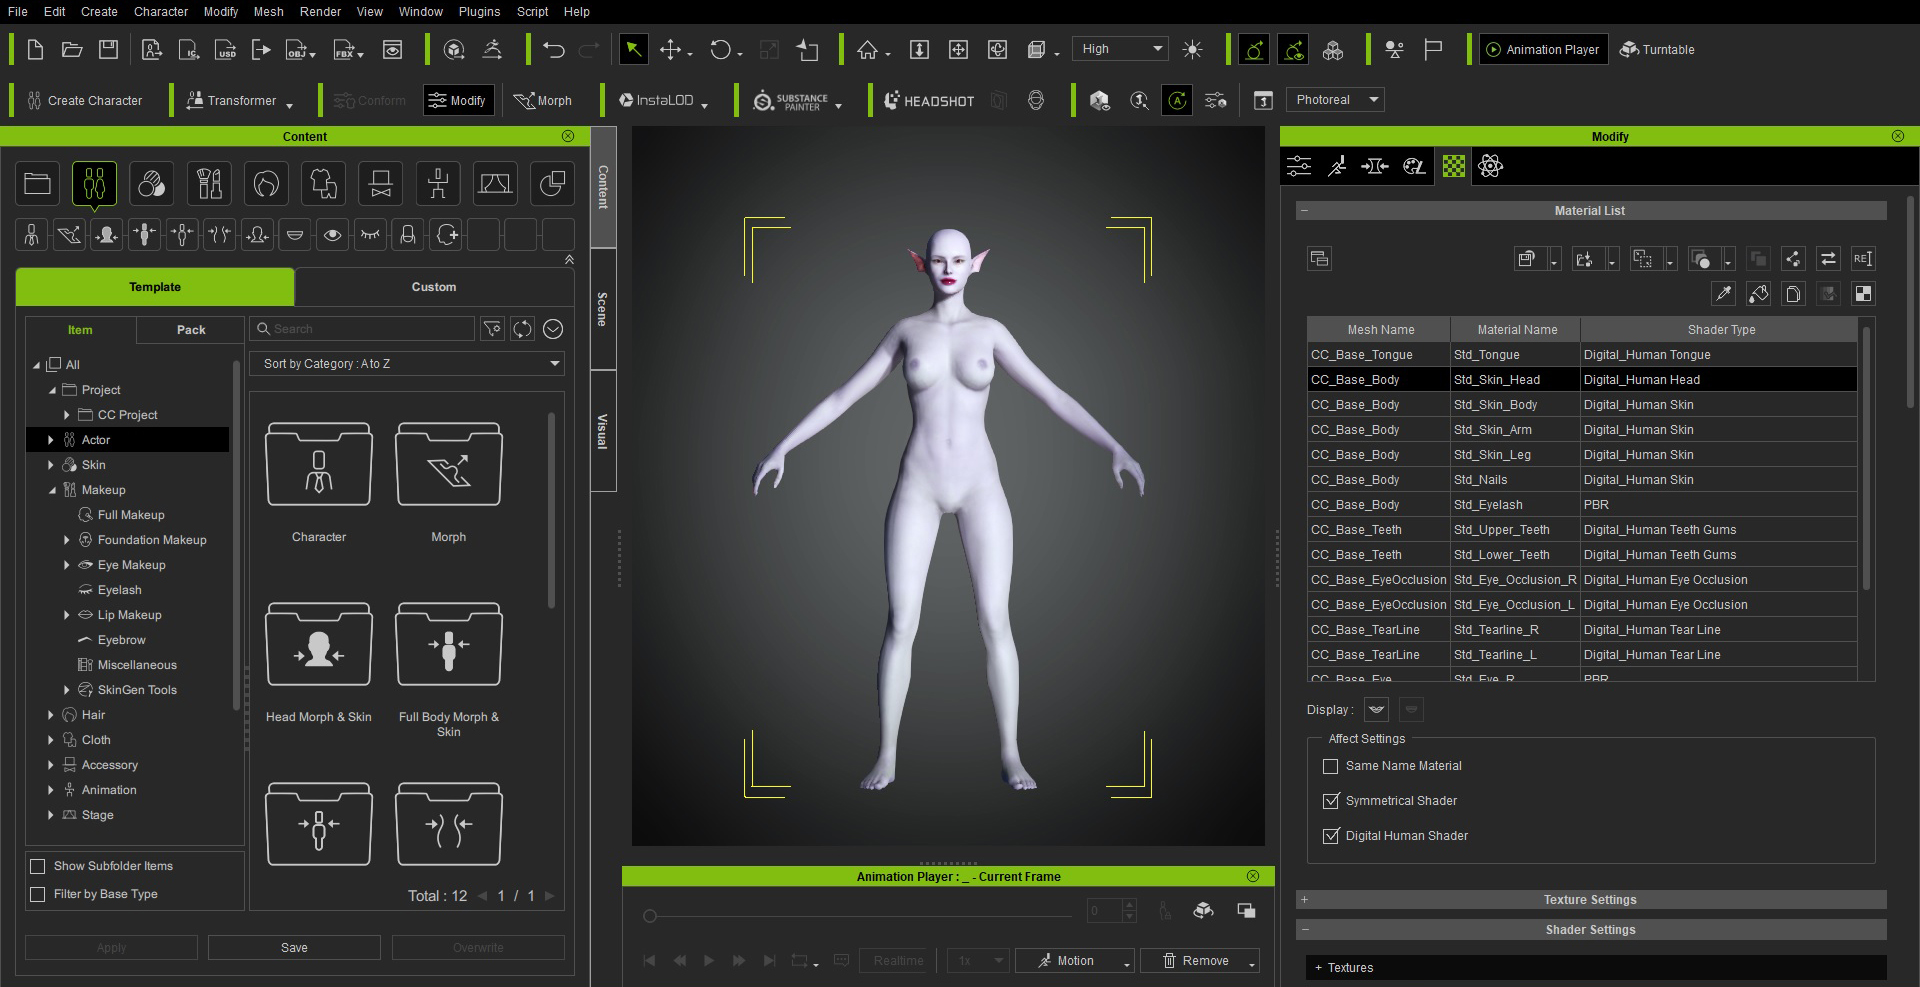
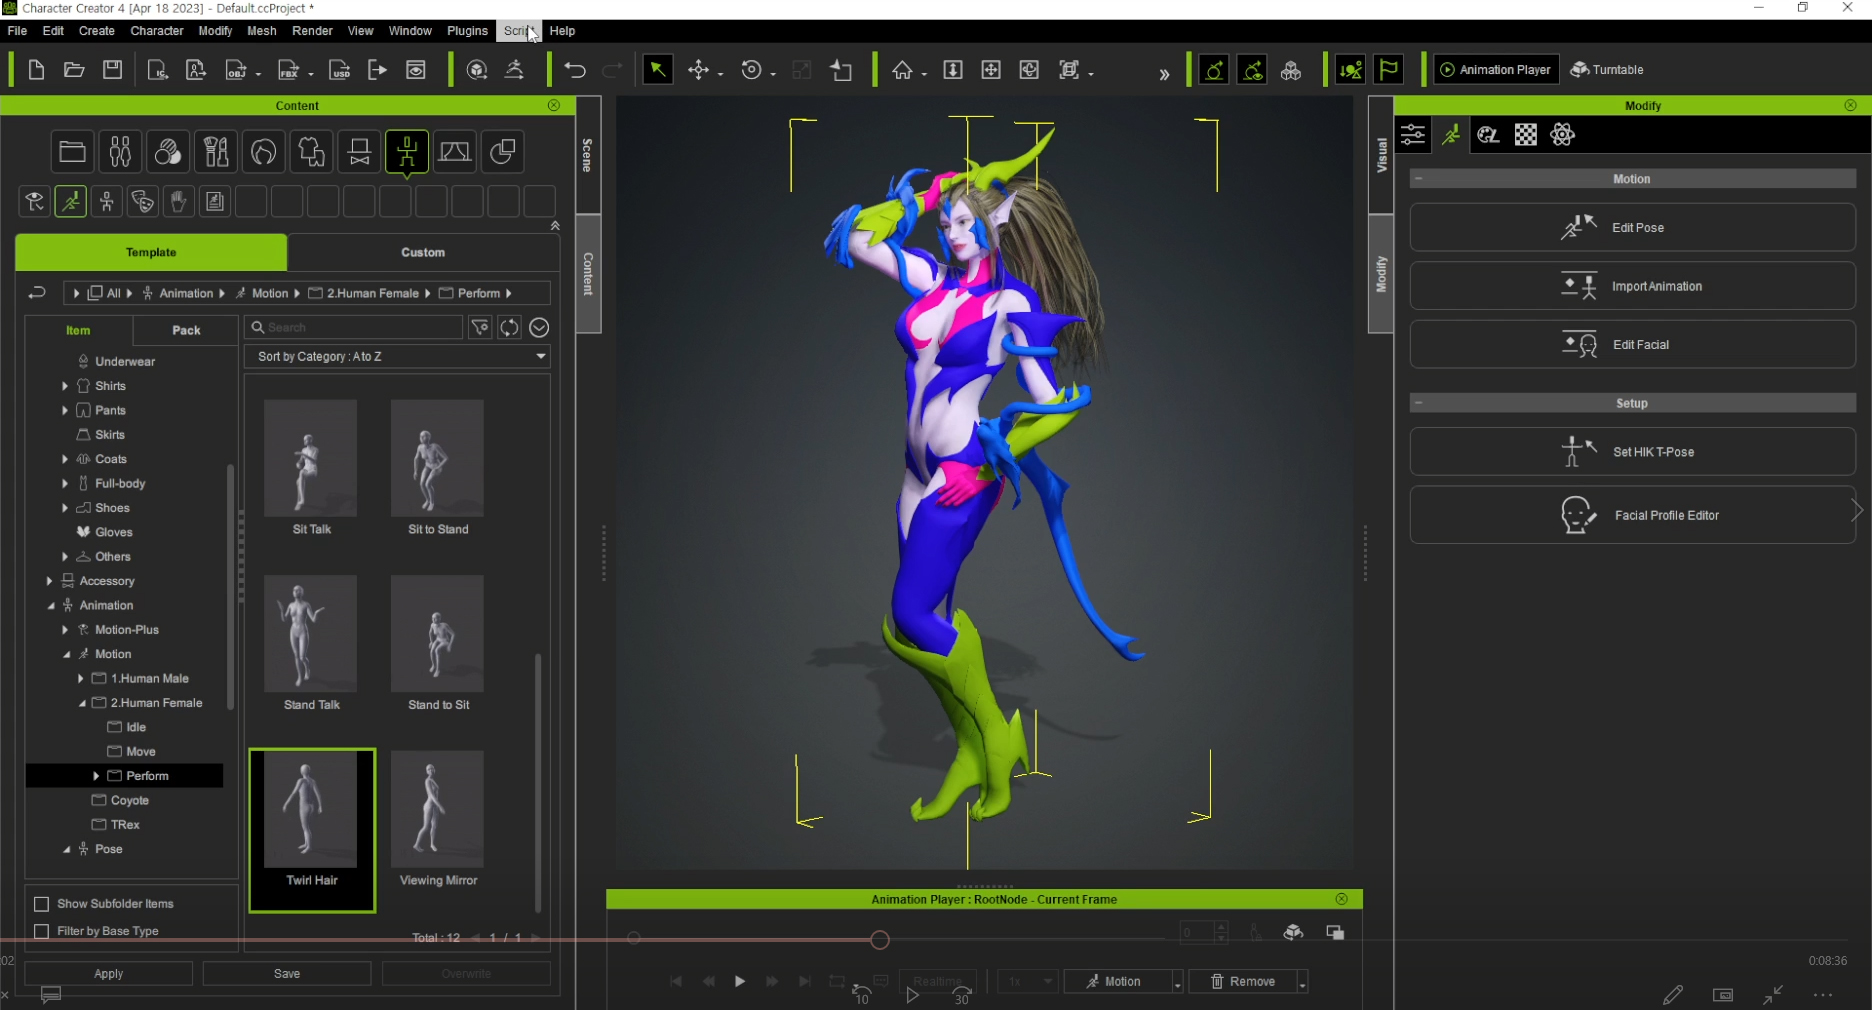
Use Character Creator 4 to change the appearance of basic characters and create purple-colored skin and pointed ears to match the character concept.
To bring this concept to life, utilized the capabilities of Character Creator 4 to modify the appearance of the base characters, by introducing distinctive features like purple-colored skin and pointed ears to align with the envisioned character concept.

Step 2) Sculpting Characters, 3D Assets, Textures with 3ds Max, Substance Painter and ZBrush
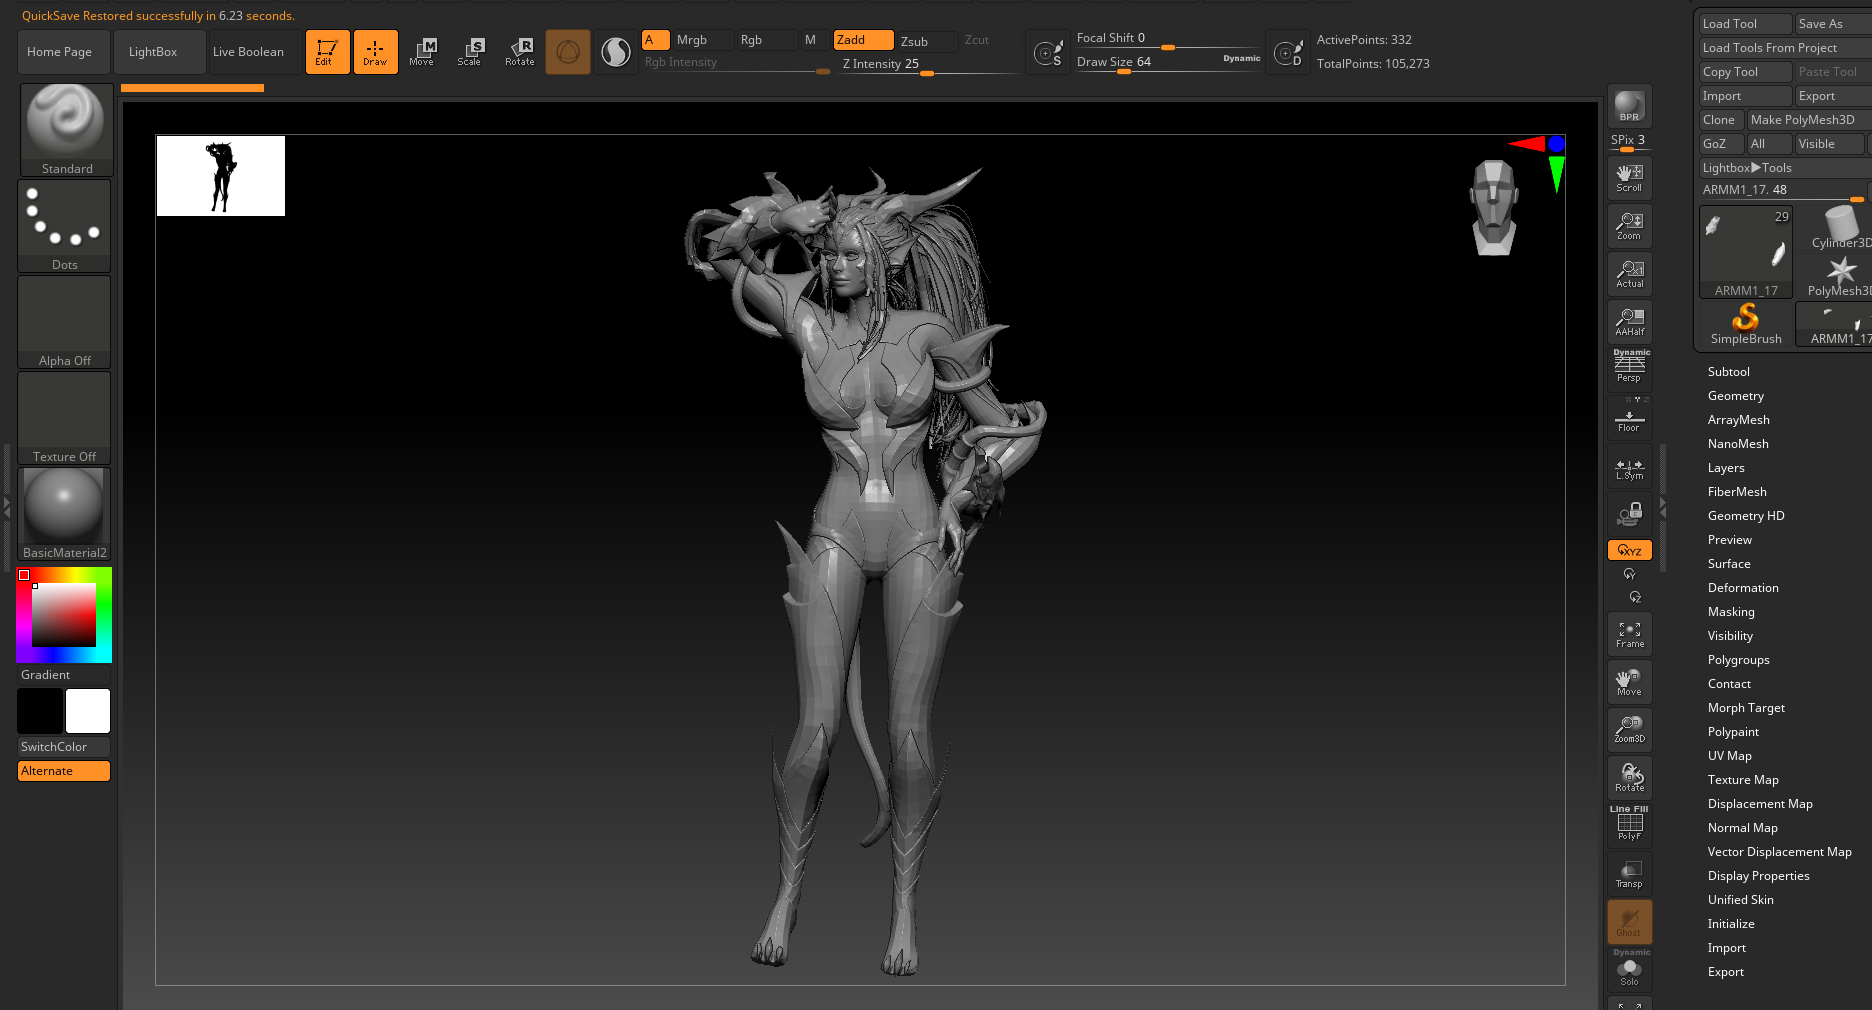
After exporting the model from Character Creator, proceed to work on it in ZBrush. For example, to infuse a dragon-like essence, I meticulously sculpt scales onto the character’s skin.


Following that, I created a dragon ornament in ZBrush to embellish Zyra’s design.


Employ 3ds Max and ZBrush to design and create the accessories and clothing for yourcharacter. Generate both low-polygon and high-polygon versions of these elements and proceed to bake the normal map.


With the freshly baked normal map, proceed to work in Substance Painter. Here, you’ll need to apply the map to the model and meticulously craft a texture map, bringing the clothes and whatever prop, like my dragon, to their final completion.


You can also utilize the face and body texture maps provided by Character Creator 4 to further customize the character’s appearance. By making adjustments to the skin details and applying dragon-like textures and makeup in Photoshop and Substance Painter, I was able to achieve a distinct dragon skin aesthetic.


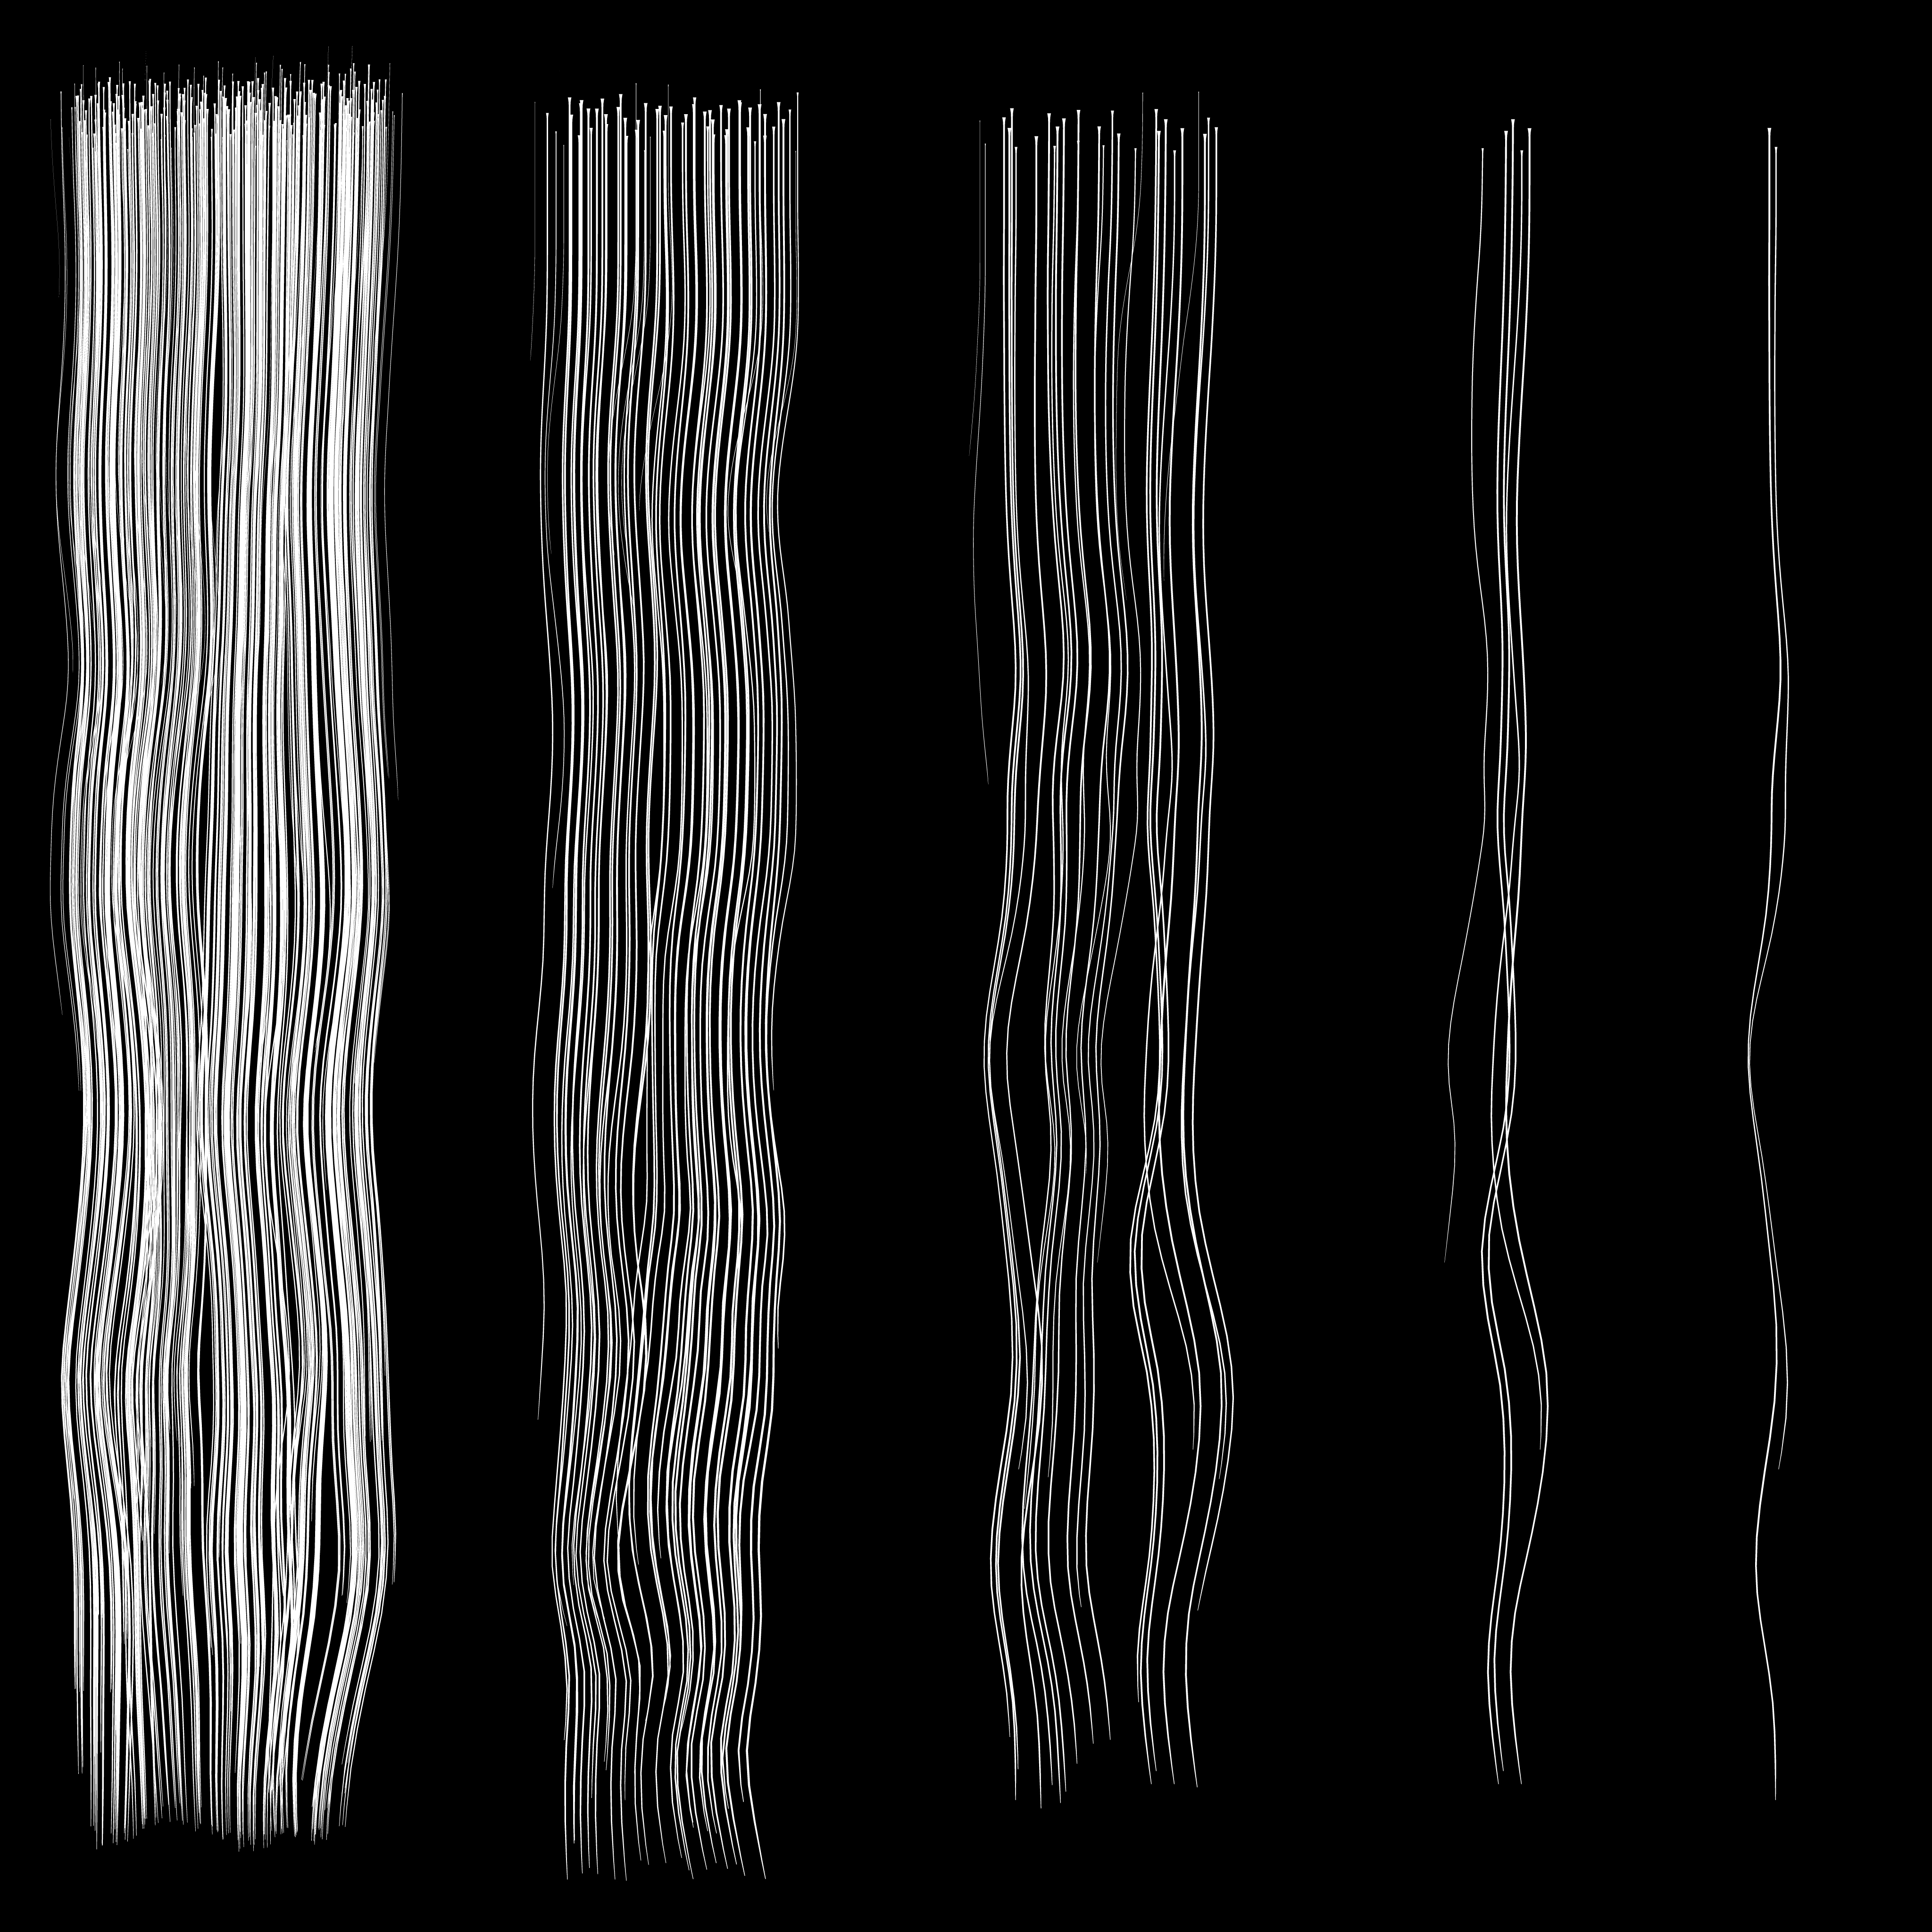
To achieve a suitable hairstyle for the character, employ hair cards in 3ds Max. These hair cards enable you to meticulously craft a hairstyle that complements the overall character design.


Additionally, you can utilize ZBrush’s FiberMesh to generate a hair texture, which is then applied to the hair cards, resulting in a realistic and visually appealing hairdo.


Part II. ZBRUSH POSE TOOLS
Q: Hi Go Eun, first of all, thank you for sharing your amazing idea of creating Zyra with her Dragon. Posing characters in ZBrush can be quite challenging. Could you please elaborate on how you utilized CC AccuRIG and ZBrush Pose Tools plugins to create multiple poses for your character?
Here’s how I created multiple poses using the “ZBrush Pose Tools” plug-in:
To begin, you need to send the character in either a T-pose or an A-pose state from Character Creator to ZBrush using the “ZBrush Pose Link” feature. Once in ZBrush, you can record the character’s pose by selecting “Record New Pose” in the “ZBrush Pose Tools” plug-in and saving the pose.


Creating additional poses follows a similar process. First, generate a new pose for the character in Character Creator. You can use an existing pose provided by Character Creator or create a new one by directly manipulating the bones through the “Edit Pose” function.


After creating the new pose in Character Creator, select “Record New Pose” in ZBrush and then click “Send Current Pose to ZBrush Pose Tools” in Character Creator to transfer the new pose. Remember to save the pose by selecting “Save New Record”. By repeating this process, you can switch between the T-pose and multiple poses as needed, storing them as “pose1”, “pose2”, and so on.

This method allows for the creation of various poses, providing flexibility and versatility to bring the character to life in different positions.

Q: In comparison to your previous method of posing characters in ZBrush or other 3D tools, what are the advantages of utilizing the AccuRIG+Posing workflow with Character Creator?
The benefits are manifold. With this workflow, you can effortlessly change poses within a single project, eliminating the need to create a new project for each pose. The “Edit Posture” feature in Character Creator enables swift pose adjustments that can be seamlessly sent back to ZBrush. Moreover, by utilizing layers, you have the ability to modify the mesh for each pose independently, without altering the mesh in the original T-pose. This grants greater control, allowing for the expression of distinct clothing folds and details.

Q: What are your thoughts on the overall experience of using the ZBrush Pose Tool plugin in terms of time and results?
Initially, setting and using a pose required exporting and importing it into other programs. Any modifications also involved going through the same process. However, ZBrush Pose Tools has simplified the workflow by establishing a seamless connection between CC and ZBrush with just one click. This not only saves time but also allows for quick adjustments. Additionally, leveraging the layer on/off feature enables the addition of intricate details by sculpting each mesh differently when capturing a screenshot.

Part III. ANIMATE WITH UNREAL AUTO SETUP
Step 3) Animation Process
To enhance the natural and lively feel of the dragon animation, incorporate the spring effect function in Character Creator 4 after integrating the bone structure in 3ds Max.

To transfer facial expressions and eye movements from 3ds Max, export them as an OBJ file. Then, utilize the iClone morph creator to update and refine the morphs. This allows for seamless integration of the facial expressions and eye movements into iClone, enhancing the realism and expressiveness of the characters.
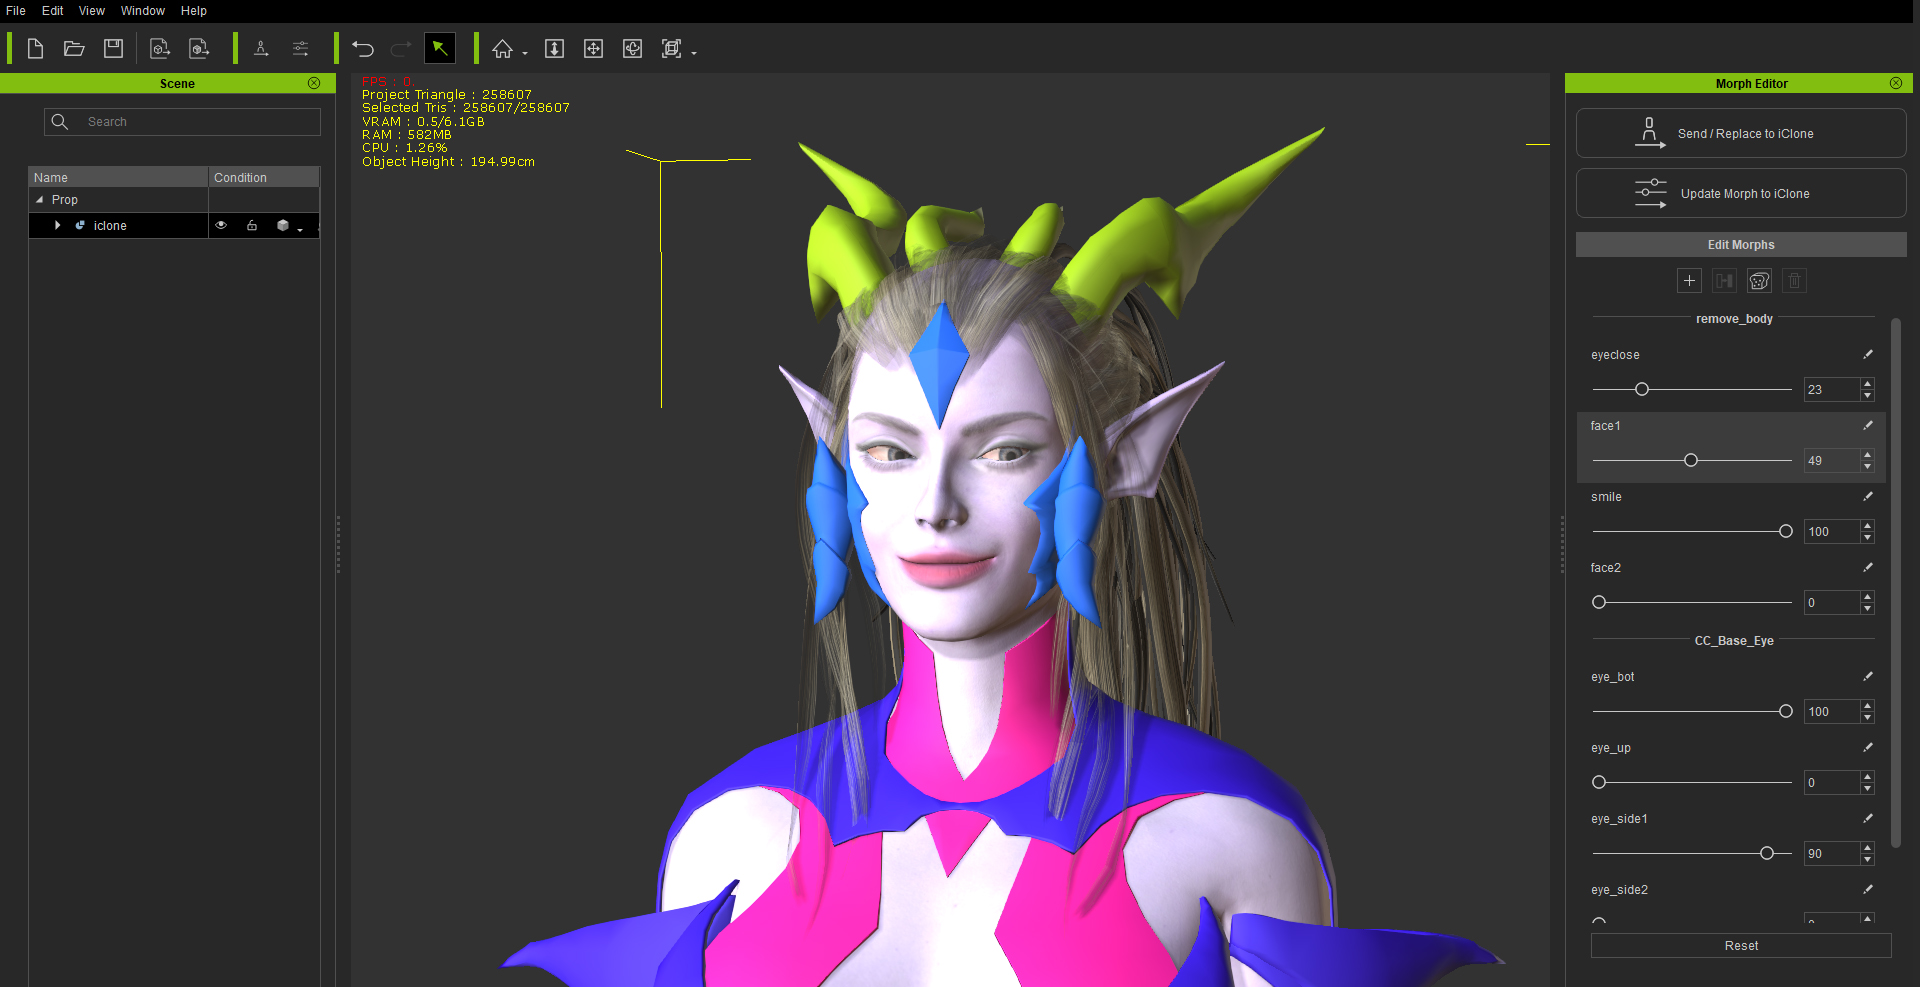
Once you have updated the morphs using the iClone morph creator, employ the morph animator to seamlessly incorporate a range of facial expressions and eye movements into the specific sections of your desired animation.

Afterwards, export the animation and bring it into Unreal Engine 5 (UE5). Apply all the texture maps generated in step 2 to the material node in UE5.
Step 4) Lighting Setup
The CC4-to-UE5 AutoSetup provides a variety of shaders. By applying the skin shader, you can adjust the details of the skin using micro normals. The Eye Shader allows you to freely modify the color, reflective light, and more. The Eye Occlusion shader creates a realistic appearance for the eyes.

Once you have applied the materials to the character as described, proceed to select a background in the Unreal Engine that complements the character’s mood.

Enhance animation with lighting effects and camera movements for dynamic visuals. Capture a screenshot and record the video to complete the process.


Part IV. Conclusion
With the aforementioned steps completed, my “Dragon Sorceress Zyra” character is finished. I thoroughly enjoyed designing and adorning characters according to my desired concept. Undoubtedly, Character Creator 4 greatly facilitates this process, making it both easy and efficient. Thank you for following my workflow and tutorial.


Free Download :
• Auto Setup for Unreal Engine
Learn more :
• Go Eun Kim: ArtStation
• Posing ZBrush Character Effortlessly: CC & ZBrush workflow. ZBrush-only workflow
• CC AccuRIG: Auto Rig Tool (embedded in Character Creator 4)