

Onur Erdurak
I’m Onur Erdurak, a director, writer, and 3D artist from Turkey and I love telling stories.
I earned my bachelor’s degree in Cinema from Izmir University of Economics. While studying in Izmir, I applied and got accepted to the Erasmus Student Exchange Program and studied Cinema in Slovenia for a year.
While studying I made my first short film with no budget, one location, and one actor – which was with my uncle. Luckily my uncle Kemal Erdurak was already a professional actor so I put my skills in VFX, writing, and everything in between to the test, and with the help of a great team we made; my debut short film “STRANDED”. The film premiered at the Cannes Film Festival Short Film Corner in 2018. You can watch it for free on YouTube.
Currently, I am a Fulbright grantee, and I am pursuing an MFA degree at Loyola Marymount University in Los Angeles. After a few failed attempts over the years trying to learn Blender. I finally got started after watching Ian Hubert’s “World Building in Blender” video. This was when the COVID-19 pandemic struck, I viewed this as a chance to enhance my skills and knowledge.
After a couple of months of learning, I started @blendreams to share my creations.
“Blendreams” got started as and still is my passion project. I share my renders and animations over there and share what I’ve learned during my journey on my YouTube channel as tutorials. I am incredibly grateful that this passion project now has over 100,000 followers on Instagram.
About a month ago I was testing Character Creator (CC4) for my short animation The Apple Thief, which caught Reallusion’s eye and contacted me to see what I could do with their AI Headshot plugin for Character Creator. So I used Headshot with a scan of my head I did with Polycam to recreate myself as a medieval warrior in Blender. The results were amazing as they allowed me to live my childhood cream of staring in my own action movie!
“Character Creator and iClone have truly streamlined the character creation and animation process for me. With these remarkable tools, I can craft and animate characters within mere minutes, a fact that continues to amaze me. What’s equally impressive is the level of customization and quality they offer for character creation. Now, I can feature lead actors in my renders, a level of versatility that’s immensely valuable to me.”
Onur Erdurak – Director / 3D Generalist
Character Creator Headshot 2.0 plugin
I always wanted to star in my own film as a medieval warrior, back in 2019, I made a film called “The Tale of The Great Warrior” teaser for the film:
For that film, I hand-built a sword out of cardboard and newspapers. I recreated the sword in the Blender to wield it myself this time.


I could finally wield it myself using the new Character Creator 4 plug-in Headshot 2.0 , which is an AI enhanced plugin that lets me create advanced 3D real-time digital humans from photos and 3D models.
Character Creator provides creators with precise model fitting, texture baking, and full body animation capabilities, which can be used in any other 3rd party rendering software like Blender, Unity, Unreal or Maya.
Here is the process of creating it in 3 steps:
Step 1: Getting a 3D Head Scan
There are a lot of ways to get a scan, but I used my iPhone and an awesome scanning app called Polycam, which is an excellent choice for capturing high-quality scans, and I highly recommend it. Although an app on the phone you can also utilize your professional camera or drone and upload your images via their website and get your 3D scans that way.
To ensure the best results taking a head scan, follow these simple tips:
- Find a place to lean your head against. This eliminates movement and creates a better scan. A pole or tree works wonders.
- Opt for a shaded area or choose an overcast day to avoid harsh sunlight and shadow interference during the scan.
- Keep your eyes open during the scan to ensure compatibility with HEADSHOT 2. You can blink on command, as the scanning operator may pause and signal a blink to eliminate any unwanted motion.

If you have a messy hair like mine, I recommend wearing a headband to keep your hair out of the way. When downloading the head scan, use the GLTF format for the best outcome with embedded textures.

Import the mesh into Blender. Right-click and shade smooth and clean up the mesh.
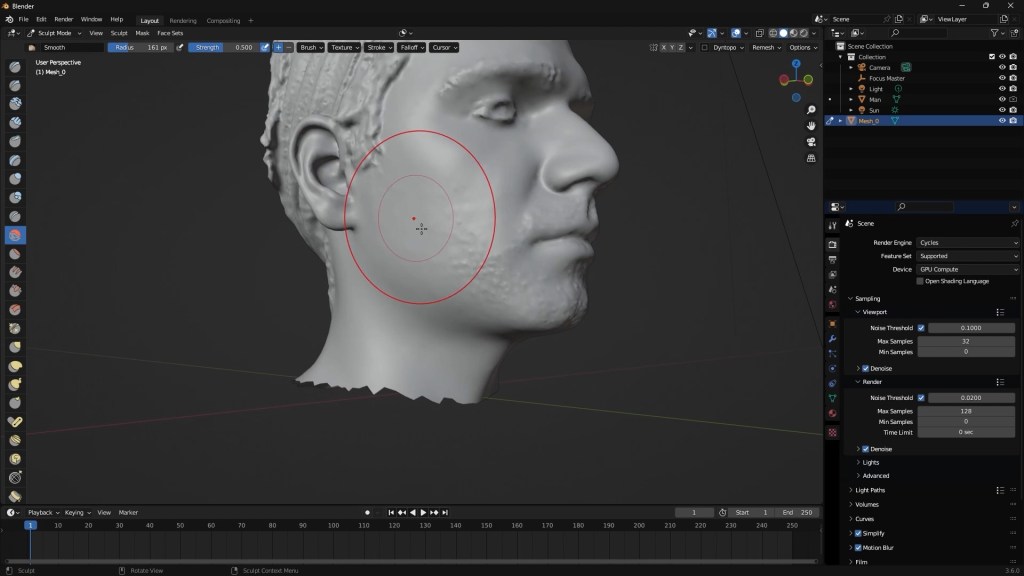
Go into Edit Mode, select all vertices press F3 and search for “by” choose “merge by distance” to get rid of unnecessary vertices.
After this, sculpt problematic areas using the smooth brush.

Before you export your head scan make sure it faces directly forward. I use a human model to arrange the direction of my face-scan. After all the adjustments are done save out the textures into a folder, then export the head scan as a .OBJ. The quickest way to export is to press F3 and search for “Wavefront” which is .OBJ format.
You can also of course just go to “file”, and “export” and choose .OBJ there.

Step 2: Character Creator’s new Plug-In: HEADSHOT 2.0
Bring the mesh inside CC4. File -> Import and import you head scan. If you don’t see the model, press “F” on your keyboard to go to the model. Go to the Headshot 2.0 panel. Now with the head selected, click “Start Head Generation.” Start aligning your points based on the reference.

You can also use the “Auto Detection” feature to line up all the points. However, this feature detects the points using your viewport, so make sure the head scan is in full view. You will still have to adjust the points, but this feature gets us to the end much faster. Also, I suggest spending some time and doing the full process a couple times to get the best results. My first result wasn’t the best. Like all tools, the more I practiced and played around with it, the better my results got.

Once everything is aligned in the first step of the “Head Generation” go into the second step inside Headshot 2.0
Head Generation through AI
Here you can choose the affected area by masks. The AI enhanced features in Headshot will help you identify and automatically assign many of the correct points. If there is a problem, you can always go back and adjust your points better. If everything seems great, then move onto the third step inside Headshot 2.0.

Refining the Character Mesh
In this step, sculpt the reference model on top your own model. Lining up the key areas like, lips, eyes, hairline. Using the move and the smooth brushes.
I uncheck KEEP NECK SHAPE and then click “Attach To Body.”


Here you can choose the texture size. 8K gives incredible results but it makes everything slow. 4K works just as well and it is a lot faster.
Choose your body type between the given options: “Neutral, Male, Female or Baby.” You can also mask using 4 different Types here.

Then click Generate.
Once it loads, press “F” once again to snap to your model and start fine tuning it like you can any other CC4 character. You can also fix up any parts about the textures that seem off by using the given tools inside Headshot 2.0 or export your images out and fixing them in a dedicated photo editing app and importing the textures back in.


We can do further adjustment, adjusting anything and everything about it, changing the eye color, adding makeup, hair, beard, scars, dress them up, give them animations or facial expressions using the Digital Soul pack. You can also import them to iClone 8 and animate them there.


When it is time to export them out, go to “File, Export, FBX, Clothed Character.” Export FBX dialogue box will pop up, here I choose Blender, because that’s where I am exporting it to. Max texture size, change it to 4K and convert images to JPEG.
For the frame rate, my project file is 24 so I changed it to 24. Then click Export, create a new file for our character and export!
Step 3: Bringing Your Creation into Blender
Finally, we reach the last step in our journey. Using the CC4/iClone Blender pipeline add-on we import the character in.
With this add-on I feel the skin textures comes in a bit too Specular, so I go into the Shader Editor and adjust them.

Step 4: Body Motion Capture and Facial Expressions
For the final animation I used a lot of other tools. The animations were made with the Rokoko Smart Suit Pro II. This high quality motion capture suit is ideal for indie filmmakers as it captures body’s motion and streams the data over Wi-Fi in real-time to your digital characters. It brings really good results and a reasonable price, with lots of great support.


And the best thing is that iClone 8 even has a profile plugin to connect your Rokoko Smart Suit directly into iClone where you can later clean, merge, blend and edit any motion clip to whatever you need. Talk about having everything in one pipeline!
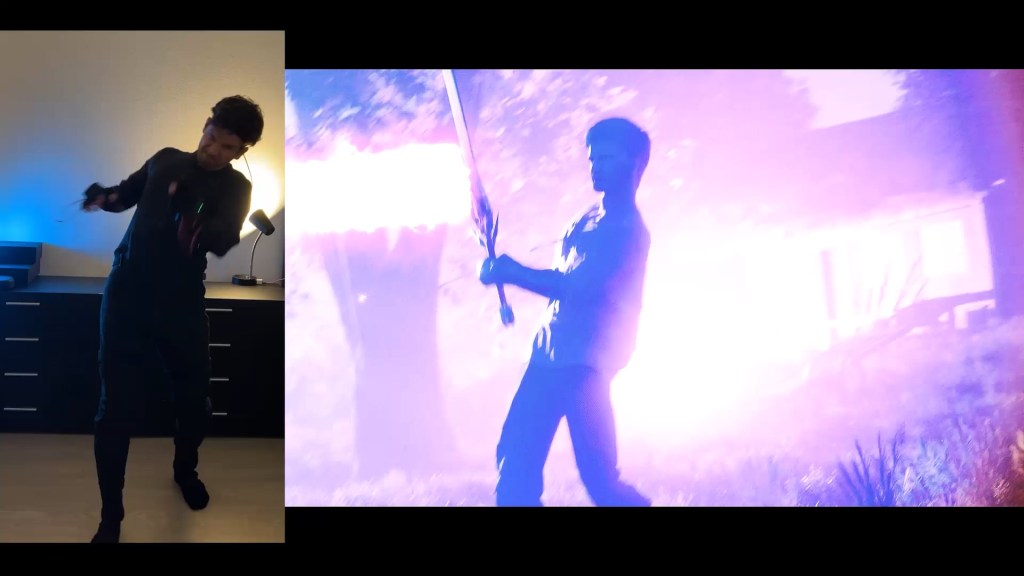


Character’s facial expression were made with the iClone 8 LIVE FACE app for iPhone X or above, which also connects directly into iClone. The iPhone tracks faces with a depth map and analyzes subtle muscle movements for live character animation.

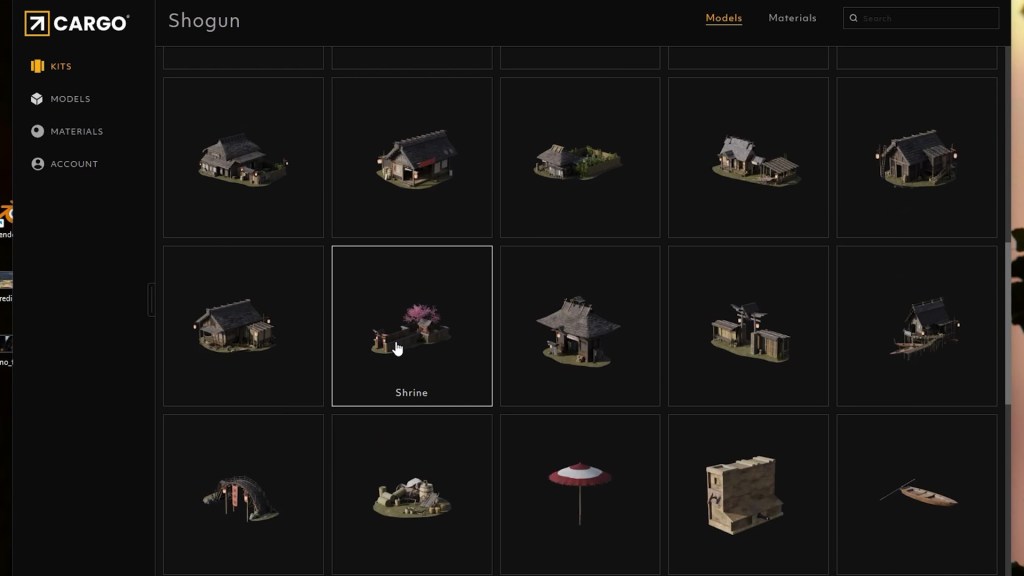
Some of the assets such as Warrior’s shed and the Portal were imported from KitBash3D’s Cargo Pro, from the Shogun and Ancient kits.


Characters clothing was created and simulated in Marvelous Designer by Melis Caner (@melniverse) – https://www.instagram.com/melniverse/
Botaniq and Geo Scatter add-ons were used to create the nature scenes and forests.
Conclusion
Now, thanks to real-time software like Character Creator and iClone, in a few steps you can turn yourself into a fully-rigged character that is 100% compatible with 3rd party tools like Polycam, Rokoko and Blender. And all of this can be done by achieved by any solo, or indie developers simply by capturing a 3D Head Scan with Polycam, then turn it into a rigged character with Character Creator’s HEADSHOT 2 plug-in, and finally, bringing it in to Blender.
Finally for those of you who may be asking about the hardware, for this project I was able to accomplish all of this while using Razer’s Blade 16 Laptop which includes RTX GPUs which are optimized for rendering in Blender ! You can learn more about all the new Blade capabilities in this other video I made about Razer.
Don’t hesitate to explore the possibilities and unleash your creativity with these amazing tools.

Follow Onur Erdurak:
Website:
http://blendreams.com/
YouTube:
https://www.youtube.com/@onurerdurak
Instagram:
https://www.instagram.com/blendreams/
Twitter:
https://twitter.com/blendreams


