
DIGITAL PUPPETS UK
In the world of animation and virtual avatars, creating realistic and stylized characters is an essential skill. I am Antony Evans, the co-founder of Digital Puppets, an animation studio in the UK specializing in character design, animation, and virtual avatars. I have worked as character designer for many years for studios such as Disney, Warner Bros, and the BBC.
Today we will take you through the process of creating “Lil Lewis Capaldi“ for TikTok social media content. In Part 1, we’ll demonstrate how to build the character using Character Creator 4, and in Part 2, we’ll delve into the animation workflow we employed in iClone 8.
Part 1 – Creating the rigged Lewis Capaldi 3D model
In this video, we will guide you through the stages of transforming the character into a more cartoony style by adjusting proportions and features. Using the tools available in Character Creator 4 (CC4) , we can easily transform the base mesh into a custom design, and still retain the facial expression and animation rig.
Headshot AI plugin for Character Creator 4
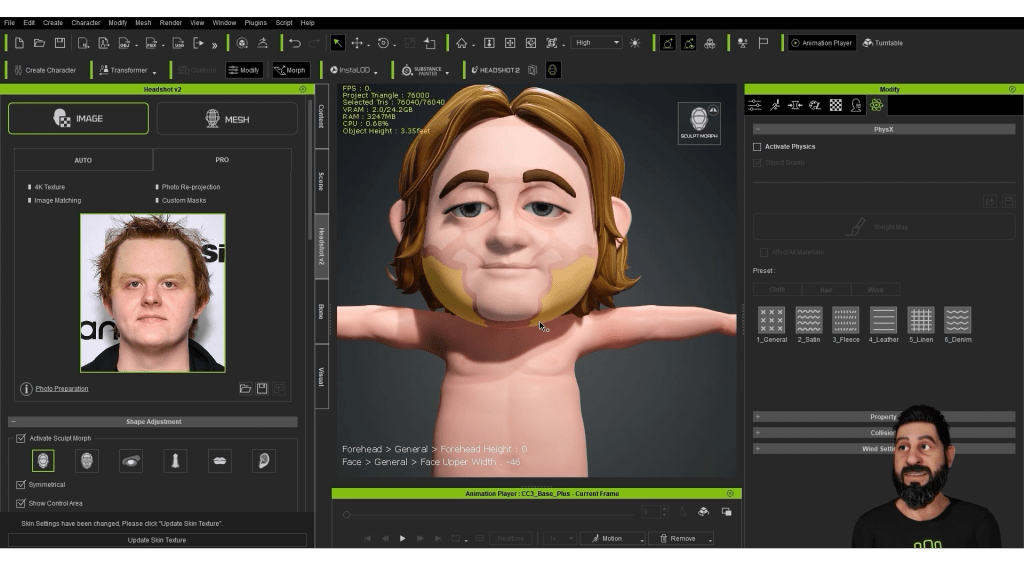
To begin, we utilized an online image of Lewis Capaldi and imported it into Headshot, the ai face creation plugin for Character Creator 4. When working with Headshot, it’s essential to use a high-resolution image with even lighting. Occasionally, adjustments may be necessary for the image, and you can use Photoshop to address issues, as we did in this case (involving the removal of the fringe).
Headshot is a great way to create a likeness from a photo, it does a good job of matching the proportions and gives a great base for creating your character. We are looking forward to working with Headshot in our upcoming projects and having the ability to work with scanned 3D heads, especially now that there are some great apps you can use on your phone to get impressive scans.
ZBrush and GoZ
We’ve found that the Character Creator GoZ feature is particularly helpful for rapidly making mesh changes and sending the model back and forth. This allows us to test out the overall look of the character before getting into the finer details. The same result can be achieved using the edit mesh and morph tools in Character Creator 4, so it does come down to personally preference. We have been working with ZBrush for many years now, so this workflow works best for us, but that’s one of the things we love about Character Creator is that it can fit into a workflow that works best for you.


Hair and Clothing
We wanted to keep this video short so we didn’t go into SkinGen and adding clothing as there are already detailed videos out there on how this works and is also very easy to use. But SkinGen is another powerful skin texture plugin for Character Creator 4, it is a great tool we use all the time to add those final subtle details, adding elements like pores and blemishes to the skin really help to give your character more life. Also, with the hair and clothing we worked with the default items from the Reallusion content library to add a simple t-shirt and jeans to the model. For the hair and eyebrows we used Luis Duarte’s La Familia Content pack.

Final Design
In this 1st tutorial, we will conclude by loading the original model we created. The model in the video will eventually match the previous one but requires repeating the steps previously shown in the video, tweaking proportions in ZBrush, and using the Edit Expressions sliders until it precisely resembles the original. We didn’t want to go through all the steps in getting to that original design as it is just a case of repeating the back and forth to ZBrush.

Part 2 – Animating Face and Body of Lewis Capaldi 3D Model with iClone
In Part 2, we will break down how we animated the original video. We’ve set up the scene as a template, allowing us to create new videos swiftly. Once the character is rigged and configured, we can effortlessly insert a new song and matching animation—ideal for generating content for platforms like TikTok and YouTube Shorts.
Facial Capture
For facial expressions and lip sync, we choose to utilize the iPhone and LIVE FACE plugin for iClone. While AccuLIPs can be used with an audio track with only vocals, we’ve found it quicker to sync the lip movements in real time with the song. If you’re familiar with the entire song, it makes the process even easier. However, we work line by line, recording each line separately and then merging them together. This method works exceptionally well for syncing with rap music.


Body Animation
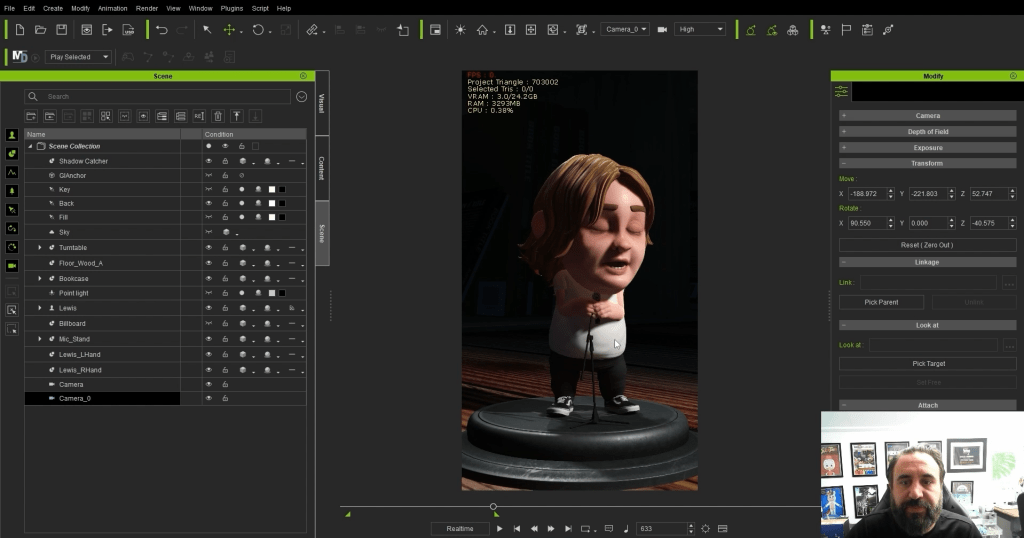
The animation’s motion is relatively simple, as it primarily involves the character singing in one spot. We work a lot with the preset animations and motions we find on the ActorCore website. In this video we just wanted to add an idle animation to bring some life to the character, so he was just stood still on the spot, so we used the breath animation that comes included in iClone. We then show how we added reach targets to attach the hands to the microphone, which allowed us to animate the hands and arms moving by moving the microphone around. The reach tool is a very powerful tool when working with characters interacting with objects.

Lighting
When setting up lighting in iClone we always start out by trying all the preset lights, once we have one that looks good or close to what we are after we can then teak by adding or removing the lights until we get what we are after. We also like to add in some volumetric lighting, as this really adds to the atmosphere of the scene.


Cameras
In this video we have kept the camera work pretty simple, you can get some great results with just a couple of cameras and well timed camera cuts. When working with a music track we try and time the camera cuts to the changes in the song. You can add lots or cameras and interesting shots, but with this particular video we wanted to keep the focus on the character and keep a slower pace.

Final Thoughts
The video hopefully shows a workflow that demonstrates how quickly you can create a custom character and animated content. With platforms like TikTok and YouTube Shorts demanding rapid content creation, this method has proven effective for us.
Once the template is set up, you can allocate time each day to create a new video or spend a day crafting multiple videos for scheduled releases. Character Creator and iClone features, such as Goz, LIVE FACE and preset animation content can really speed up your production, which allows you more time to make more content.


Learn more about Digital Puppets at https://digitalpuppets.co.uk and check out our YouTube channel https://www.youtube.com/@DigitalPuppets.
Join our Discord channel at https://discord.gg/28DNM9A94P if you’re an iClone, Unreal Engine, Character Animator, LIVE2D user, seeking advice, or wanting to share your work. We hope to build an active community and welcome animators of all kinds to join us, share your preferred programs, and foster a learning environment for everyone.


