A Step-by-Step Guide from ZBrush Master Pablo Munoz Gomez

Adjusting Expressions with Face Editor in CC
Alright! Time to get into the custom expressions; this is what all the fuss is about!
Up to this point, we’ve refined the base mesh, incorporated basic high-frequency details, and adjusted the textures, resulting in a visually appealing ‘static’ character. However, our goal extends beyond mere aesthetics; we aim to create a character capable of dynamic animation and conveying natural expressions. Hence, the forthcoming stage is dedicated to achieving precisely that.
In CC4, I used the Face Editor to create a quick smiling expression. I just added a bit of squinting, raised the eyebrows a tiny bit and push the corners of the mouth app and here is my smiling character:

Not a bad smile right? but it could definitely be improved… Currently, even though I’m using the default morphs and the sliders I think are involved in the smile, I’m getting more of a ‘nervous smile’ so it doesn’t feel very genuine.
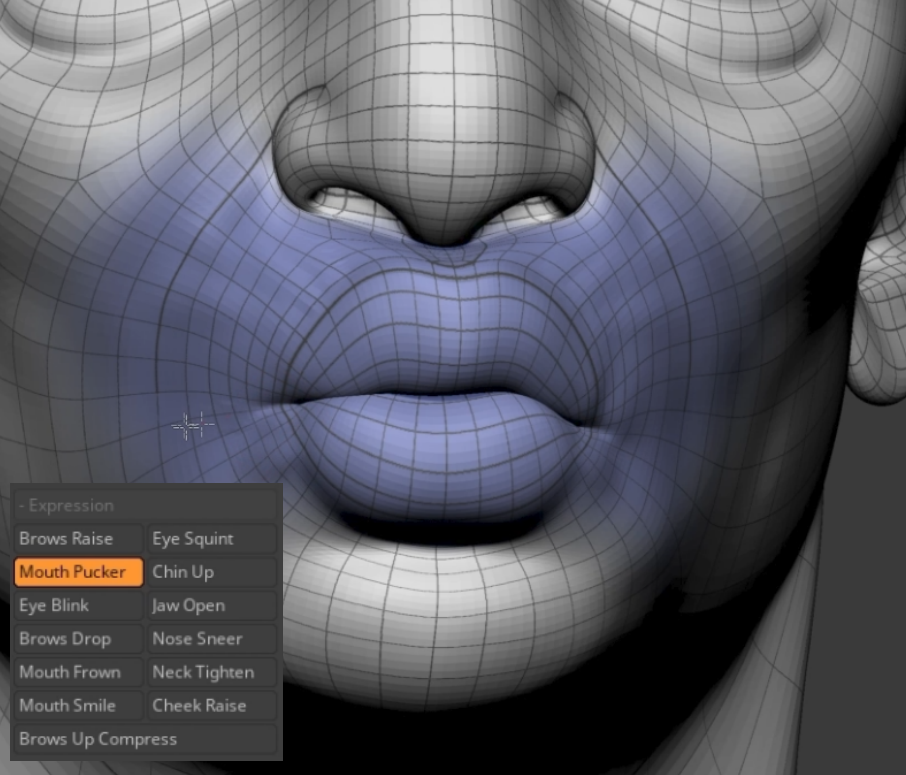
This is where the real power of the ZBrush Face Tools comes into play — the plugin allows us to customise and work on just 13 areas of the face (expression morphs). Based on those, CC4 can create a whole range of expressions for our character.
13 Core Expressions in ZBrush Face Tools
The way the editing expression works in ZBrush is also very simple… form the plugin all you need to do is click on one of the switches containing an expression and edit the range

For instance, let’s begin with ‘Mouth Smile’. This expression typically presents a ‘fake’ or ‘nervous’ smile, which could be attributed to the adjustments made to the head base.
By clicking on the Mouth Smile switch, a distinct sculpting layer is activated within the head subtool in ZBrush. This allows you to focus solely on editing the changes related to the activated areas of the smile.

In fact, there is a pretty cool tool in the plugin called ‘Range’. So after you enable your expression to edit, you can also click on the switch called Range next to Diffuse and this will enable a temporary texture map applied to the head that will show you exactly the areas you can tweak for this specific expression:

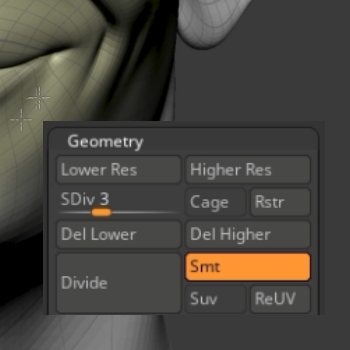
Now, when it comes to adjusting expressions, I’d suggest you follow the same workflow we used to edit the base mesh of the character. Basically the rule of thumbs is: to make large proportional changes use the lowest subdivision levels and to sculpt or adjust small things, use the highest subdivision level.

Another useful feature of the plugin is that it sends the character from CC4 with polygroups intact. This enables you to isolate specific areas by holding Ctrl + Shift and clicking on a polygroup. This functionality proves particularly handy, especially when working on intricate areas such as the mouth.

Using the ‘Move Topological’ brush with AccuCurve enabled at subdivision level 1, I refined the corners of the mouth, pushing them upward to craft a more natural smile. Subsequently, I progressed to higher subdivision levels to sculpt the volume around the mouth area.
I also refined the volume around the nasolabial fold and accentuated the fold a bit more since this is an area that will be more prominent with this expression.

Once you are happy with one of the expressions that you tweaked, you can simply click on a new switch and continue with the refinement. If you leave the Range switch on while changing to a new expression, the texture range will be updated and applied automatically.
Modifying the Rest of the Core Expressions in ZBrush Face Tools
Here is a quick reference of what I updated for my Brows Drop morph:

Here is what I adjusted for the Mouth Frown:

And a bit of the Mouth Pucker:
Just like this, you can adjust all 13 expression morphs. Once you are happy with the edits, you can click on the Update to Character Creator button — but this time the selection from the pop-up window is going to be different.
We won’t be altering the texture, base mesh, or details covered in the Base Update section (as those have already been addressed). Our focus now is on updating the expression. Therefore, ensure that you enable the Update Expression / Wrinkle section and disable the Base Update section.

Then, from the expression sections we want to enable only the Expression Morphs switch and select all the expressions that you have updated. you can actually edit and update expressions and wrinkles in a single pass but to keep things organised, we’ll focus only on expressions first.

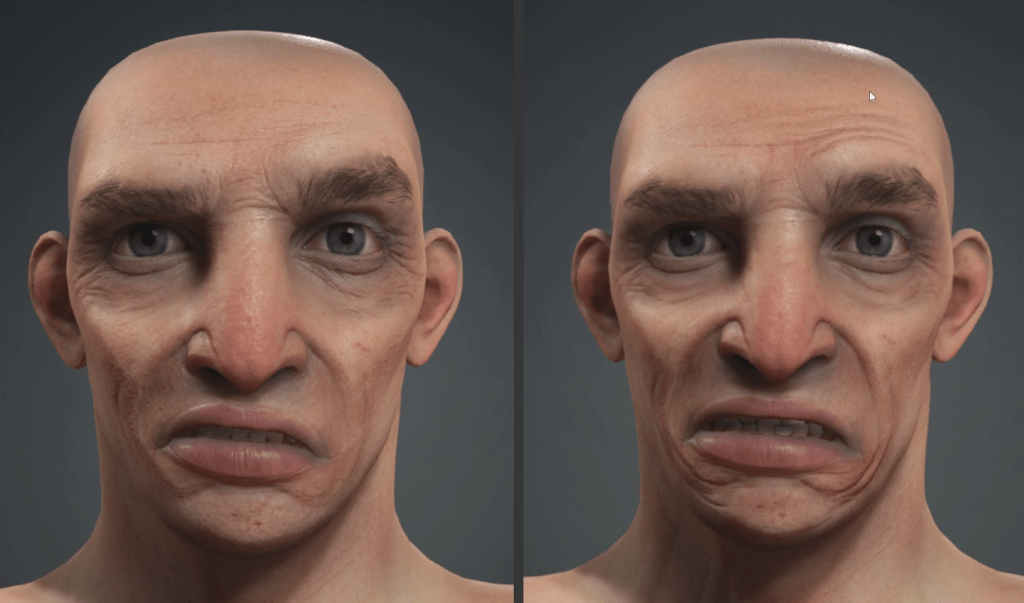
Back in CC4, I tested the smile expression with the Facial Editor and straightaway the difference between the default expression and the custom one for the smile is significant.

Here are quick expression test involving some of the morphs I changed in ZBrush:

To underscore the significance and effectiveness of this process, here’s a comparison between the default smile expression obtained from CC4 upon designing your base mesh, and the considerably more natural and genuine smile achievable through a straightforward adjustment in your custom expressions:

Sculpting the Dynamic Wrinkles
After completing the core 13 expression morphs, we can move on into adding some details to the expressions with the Dynamic Wrinkles. This feature from CC4 is a very clever way to apply specific details to a section of the face based on the area or ‘muscle’ that is moved.
The idea behind this feature is that there are a bunch of normal maps with detail information for different parts of the face, and when you use the morphs to create an expression, CC4 will blend and display the relevant details or normal maps for that expression.
Here is an example of the same expression before and after adding the dynamic wrinkles:
Creating these wrinkles is as straightforward as the workflow we’ve been using to edit the head shape, texture, and expression morphs. There’s just one small thing I’d like to address, and that is the level of subdivision.
From CC4, when we send the character to ZBrush to create the expression wrinkles, I personally like to send the subdivision level 7 which will produce 4K resolution normal maps when CC4 converts the details. This means that in ZBrush we’ll have lots more polygons to play around with but it will also be heavier than if you send it at subdivision level 6… not a big deal, just something to keep in mind for your project.

Once in ZBrush, the workflow is exactly the same as the previous one to tweak the expression morphs. The main difference is that we’ll spend more time in the heights subdivision level so that we can add those nice wrinkles and details.
So, just as a quick recap, all you need to do is make sure you are at subdiv level 7 and then click on the switch of a specific expression like Mouth Smile. This will obviously show the updates we made to the larger shapes of the ‘smile’ with the expression morphs, so you can start sculpting the crevices that are created naturally as the character smiles.
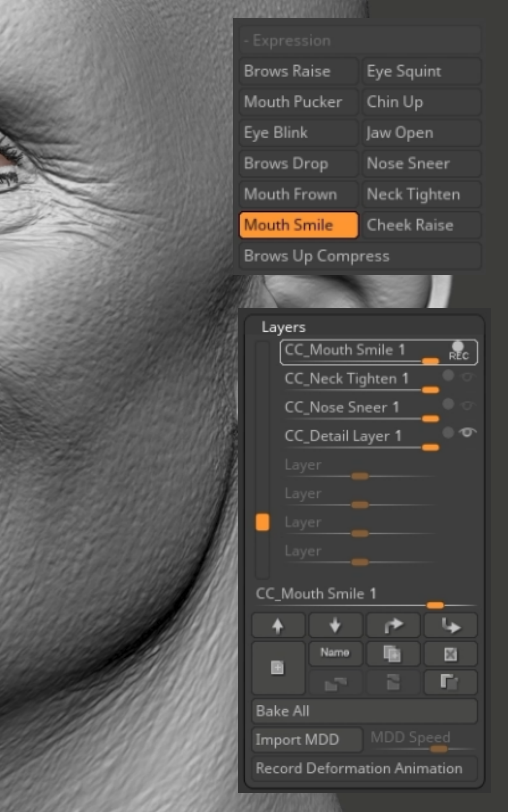
Another cool tip you can use to see how much the dynamic wrinkles are actually affecting your expression, is to turn off the last layer of the sculpting layers (the Details Layer that has the base details we created a few steps ago). This will show you a very clean base mesh with only the dynamic wrinkles you are adding on the selected expression:

Create Custom Wrinkles for the 13 Core Expressions in ZBrush Face Tools
Once you do one set of wrinkles, the process is pretty much the same for the rest. You can also take advantage of the Range feature from the Face Tools plugin to see how much area will be affected in the selected expression and make your detailing process a bit more accurate.

Make sure you go through all the 13 expression morphs to add your details so that CC4 can then create a full set of expressions with the wrinkles.

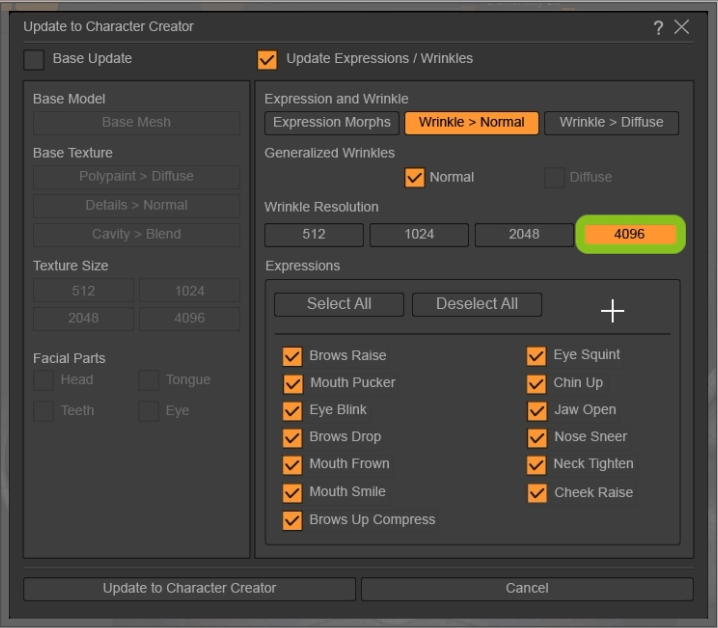
Once you’re done with your details, converting those wrinkles into normal maps in CC4 is also straightforward. After clicking on the Update to Character Creator button, ensure that in the pop-up window, the Wrinkle > Normal switch is enabled, the Normal checkbox is ticked, and the resolution is set to the desired size of maps you want to generate (assuming you’ve edited all the expression checkboxes, they should all be selected).

As I mentioned earlier, I wanted to have sharper details and more resolution so I produced 4K maps by selecting the 4096 switch in the Wrinkle Resolution section before updating to CC4:
Once you are back in CC4, if you don’t have the dynamic wrinkles activated you’ll get a pop-up window where you can simply activate Expression Wrinkles:

That’s it! you should have a fully-rigged character with expressions and wrinkles that are displayed as you change your expressions.
I used the Edit Facial window to select some controls, and with the middle mouse button, pushed them around to test the effect of the wrinkles in my expressions. Below you can see how the folds around the bridge of the nose appear with the ‘sneering’ expression:

Here is another one that is pretty obvious with the smile expressions and the wrinkles generated around the corner of the mouth:

About The Author

Pablo Munoz Gomez is a renowned 3D concept and character artist, with a passion for education. 3D sculpting, visual development, and other mixed-media form the pillars of his artistic passion which he channels through the various platforms that he owns, including ZBrush Guides, 3D Concept Artist Academy, and 3D Snippets Project. Thanks to his vast online following, he is able to reach artists from around the world and help them advance in a variety of 3D-related disciplines.

Read More
Easy Facial Rig in ZBrush with Face Tools (1/4): Concept & Setup
Easy Facial Rig in ZBrush with Face Tools (2/4): Detailing & Polypaint
Easy Facial Rig in ZBrush with Face Tools (4/4): Animated Demo


