首頁 » Page 62

Character Creator to Unreal Engine 5 Best Practice

Why use Reallusion Auto Setup?

Character Creator (CC), iClone, and ActorCore provide quality rigged characters, animations, and assets for game developers. However, importing characters to Unreal Engine requires heavy and complex rigged character setups, which include creating and assigning shader blueprints for each part of the character. With the help of the Reallusion Auto Setup tool, you can save an enormous amount of the time invested in your project, making the process of Digital Human shader assignment and characterization for Unreal Engine fully automated.

UE5 Lighting System: Lumen

Reallusion Auto Setup 1.23 and later versions guarantee compatibility with Unreal Engine 5 (UE5), allowing your character to be transferred from CC (with optional motion export) to UE5. One of the major updates from UE4 to UE5 is its new lighting system: Lumen. In this article, we will cover how to get the best shader results under a Lumen lighting setup. Epic provides a huge improvement in performance with the new Lumen lighting system compared to the UE4 Standalone Ray Tracing system.

*Using hardware Ray Tracing is down to personal preference, as long as one can balance between performance and visual quality.

UE5 Physics System: Chaos

Another major UE5 update is its physics system: Chaos Physics. Compared to UE4 PhysX, Chaos provides new configurations and settings for more physics possibilities. Hair and clothes can now move more convincingly, given their material nature. At the end of this article, we will cover how to adjust collision shapes, vertex weight painting, and Chaos physics configuration to best optimize the physics simulations.

Reallusion Auto Setup Download and Installation

It is recommended to download and install the newest version of the Auto Setup tool through the RL website – Auto Setup free download page. Best practices are integrated into Auto Setup 1.24, which has fixed most of the shader and physics issues you might have encountered with Auto Setup 1.23 (Please see the installation guide on how to set up your Unreal project with the Auto Setup plugin).

Character Export and Import Options

To get started, you need a character from CC or iClone ready for export. Upon export, please make sure to switch the Target Tool Preset to “Unreal”, and enable Delete Hidden Mesh to prevent mesh clipping between the skin and clothes. Motion export options are also provided for animated characters (Make sure to enable First Frame in Bind-Pose). Upon import, make sure to bring in your CC3+ characters with HQ Shader for the highest quality shading. If you want to include motion in your import, please enable these options: Use T0 As Ref Pose, Import Morph Targets (for facial morph), and Import Animation.

Auto Setup Automatic Shader Assignment

Auto Setup supports automatic shader assignment (automatically create and assign material instances with constructed blueprints). It is recommended to get familiar with the material properties and parameters of each shader, so you can instinctively know which shader and parameters to modify to get the result you are looking for. It can be most useful if your character is under different lighting scenarios and you want a specific shader outcome.

Overall shader comparison between Auto Setup 1.23 and Auto Setup 1.24 with minor adjustments.

Hair Shader

Auto Setup one-to-one transfers Hair Shader parameters from CC and iClone to Unreal. The shader is set up to easily adjust hair color, highlights, specularity, roughness, thickness, and more. The Hair shader is assigned to the hair, brow, and beard.

Hair Shader comparison between Auto Setup 1.23 and Auto Setup 1.24 with minor adjustments.

Follow the steps below for Auto Setup 1.24 results.

(1) Hair Shader > Roughness and Specular – Adjust hair reflectiveness and glossiness :

(2) Hair Shader > Alpha Settings – Adjust the thickness of the hair (This is important if you want to achieve smooth and silky hair) :

(3) Hair Shader > Color – Adjust the root and tip color of the hair :
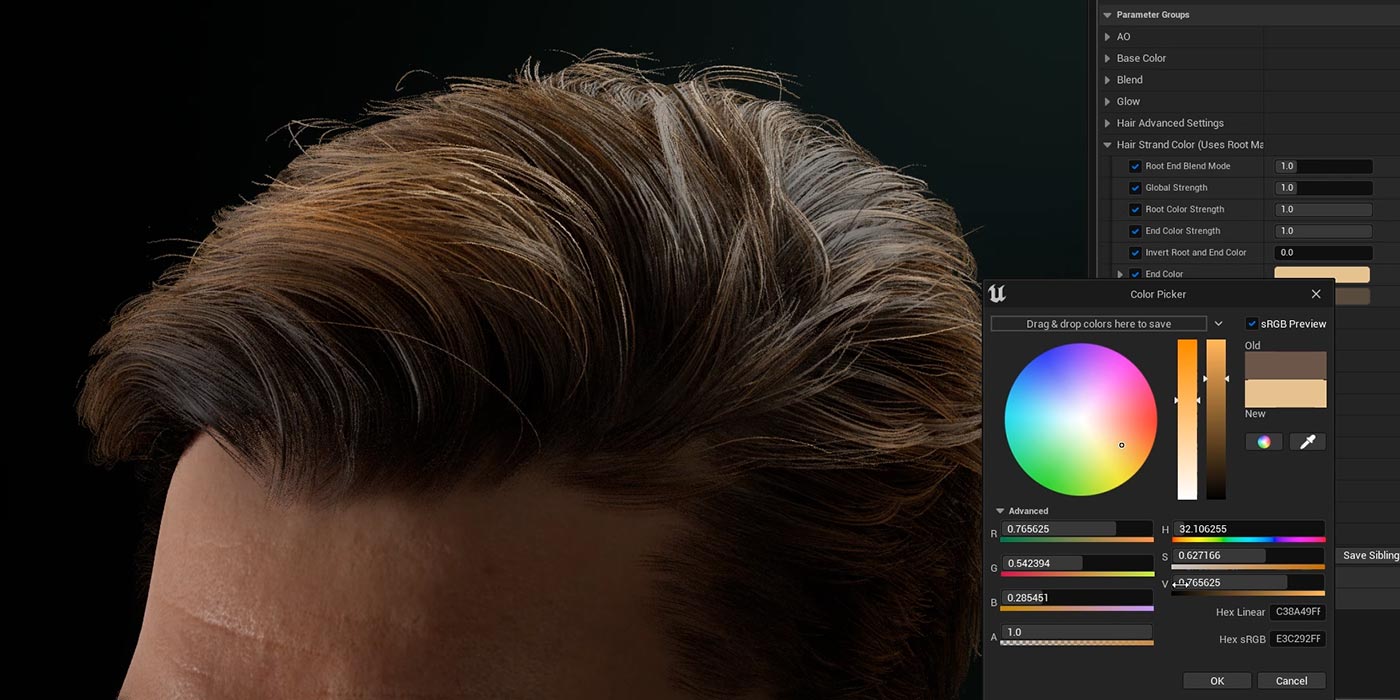
(4) Hair Shader > Highlight A and B – Additional highlights on the hair can be added :

(5) Repeat the same process on the eyebrows and beard (they share the same material properties) :

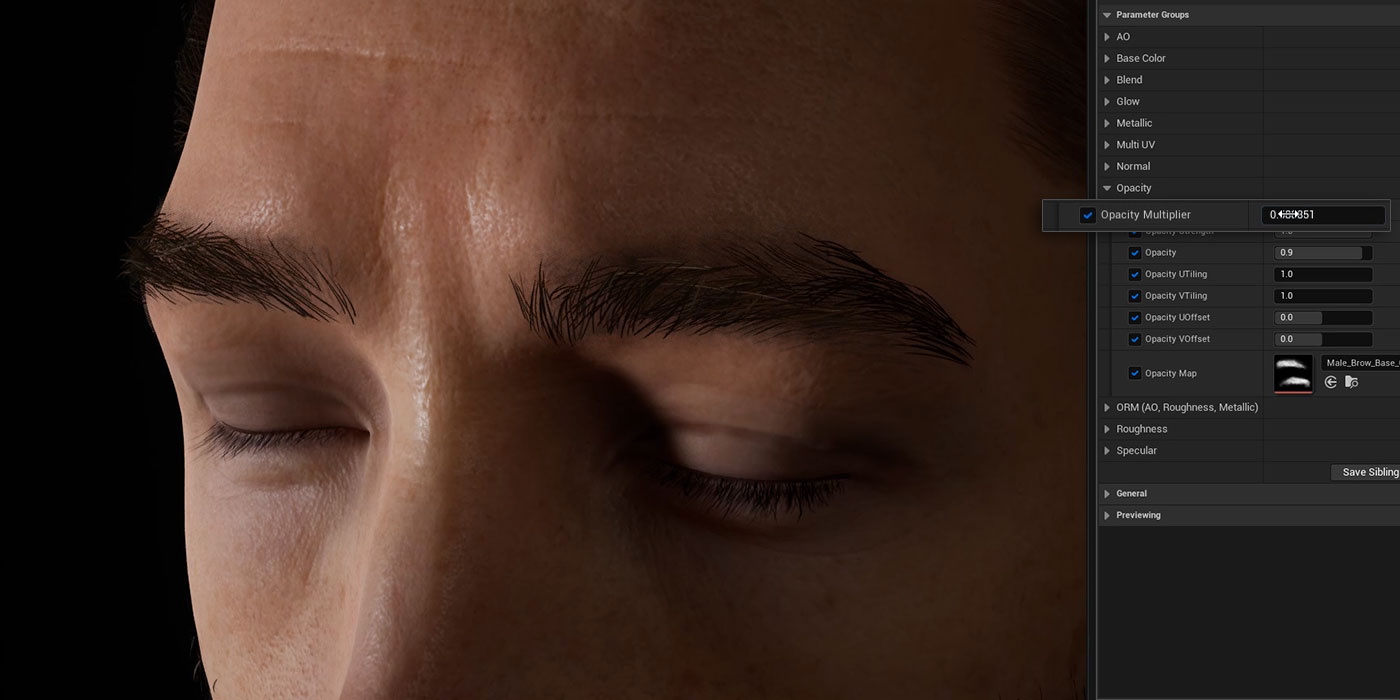
Brow Shader comparison between Auto Setup 1.23 and Auto Setup 1.24 with minor adjustments.
Additional opacity adjustment on brow base (PBR) is advised to tone down the heavy shading on the brows.
Beard Shader comparison between Auto Setup 1.23 and Auto Setup 1.24 with minor adjustments.

Teeth Shader

Teeth color and brightness can vary based on age, race, gender, and ethnicity. Whether you want your rigged character to have a radiant smile with neat and glistening teeth or a ferocious creature with intimidating and gritty teeth, anything is achievable with the help of the Teeth and Tongue shader. Ambient Occlusion properties are also provided to control shading inside the mouth cavity. Combine these parameters with the use of Character Creator morph sliders to generate variations with the best results.

Teeth shader comparison between Auto Setup 1.23 and Auto Setup 1.24 with minor adjustments.

Follow the steps below for Auto Setup 1.24 results.

(1) Teeth Shader > Normal Strength – It’s advised to tone down the normal strength if it’s too heavy :

(2) Teeth Shader > Teeth Desaturation and Teeth Diffuse Brightness – Adjust the saturation and brightness of teeth :

(3) Teeth Shader > Teeth Front Roughness and Teeth Front Specular – Adjust the reflectiveness and glossiness of teeth :

(4) Teeth Shader > Teeth scatter: Increase the subsurface scattering (SSS) of the teeth.

Eye and  Eye Occlusion Shader

Eye Shader consists of different anatomical parts of the eye including the iris, sclera, limbus, and pupil, (each with adjustable features and parameters). You can flexibly change color, brightness, roughness, specular, depth, refraction level, etc. In the Auto Setup 1.24 update, Eye Shader & Eye Occlusion shader blueprints were enhanced to achieve a more realistic look on the eyes. Adjustments were made towards sclera brightness, iris brightness, and eye occlusion shadow.

Eye and Eye Occlusion Shader comparison between Auto Setup 1.23 and Auto Setup 1.24 with minor adjustments.

Follow the steps below for Auto Setup 1.24 results.

(1) Eye Occlusion Shader > Depth Offset – You might have noticed a small mesh that is protruding out from the corner of Kevin’s eyes, use Depth Offset to push it back in:

(2) Eye Occlusion Shader > Shadow 1 and 2 Strength – Decrease shadow strength on Eye Occlusion (both Shadow 1 Strength and Shadow 2 Strength):

(3) Eye Shader > Iris Color and Iris Brightness – Increase the brightness and saturation of the iris:

(4) Eye Shader > Sclera Brightness – Increase brightness on the sclera, and as a bonus adjustment, change Sclera UV Radius to enlarge the eyes:

(5) Eye Occlusion Shader > Bottom Blur Range / Blur Strength / Expand – Adjust Blur Strength to get rid of unwanted gaps:

(6) Eye Shader > Iris UV Radius – Notice there’s an unnatural ring around the iris; adjust Iris UV Radius to fix it:

(7) Eye Shader > Iris Depth Scale – Adjust iris depth:

(8) Eye Shader > Iris Inner Scale – Adjust iris inner color range:

(9) Eye Shader > Lumbus: Adjust the properties of the ring around the iris.

(10) Limbus Dark Scale: Adjust iris outline thickness.

(11) Limbus UV Width Color: Adjust limbus boundary expand and contract.

(12) Limbus UV Width Shading: Adjust light shading to increase and decrease refractiveness.

(13) Eye Shader > Eye Shadow Radius – Adjust from a range of flesh colors for the eye corner:

(14) Eye Shader > Sclera Brightness – Revisit this parameter to tone down the brightness of the sclera:

(15) Eye Shader > Iris Color – Return to tone down the brightness of the iris:

(16) TearLine Shader > Specular and Metallic – Adjust to your liking:

(17) TearLine Shader > Detail Adjustment – Add normals on the tear line to increase detail:

Skin Shader

Get stunning renders for Digital Human skin in UE5 with the Reallusion Auto Setup tool. Digital Human Skin shader is set up to easily adjust subsurface scattering, roughness, specular, and micro-normals for character skin. Parameters on different facial parts can be adjusted separately with the help of RGBA masking.

Skin Shader – optional adjustments: How to get the results you’re looking for.

• Skin Shader > MicroNormal Tiling and MicroNormal Strength – Optional patterned skin micro-normal adjustment:

• Skin Shader > Mirco Roughness – Adjust roughness in different facial areas with the help of RGBA masking:

• Skin Shader > Specular – Adjust skin specular level:

• Skin Shader – Make subsurface scattering and transmission adjustments:

• To get the light transmission to work properly, make sure to switch your light mobility to “movable” and enable transmission:

Ray Traced Shadows

How to turn off Ray Traced shadows – You might come across a weird shadow artifact when using ray tracing, which normally appears on meshes with transparent properties:

Simply follow these steps to turn it off:

  1. Go to the material instance and browse to its parent shader blueprint.
  2. Duplicate the blueprint if it is directed to the RL_Standard shader (PBR shader). You do not want to overwrite the original PBR shader otherwise you will turn off Ray Tracing shadows on all the PBR assigned meshes.
  3. Assign the duplicated material blueprint to the material instance.
  4. Open up the blueprint and search for “Cast Ray Traced Shadows”.
  5. Disable “Cast Ray Traced Shadows”.
  6. Save and let it compile.

Check out the result of Kevin in different lighting scenarios:

Hair Physics

In the Auto Setup 1.24 update, prior physics issues were fixed. Few enhancements were made towards Chaos physics configuration and vertex weight-mapping, which includes a more accurate conversion from CC/IC texture weight map to UE vertex weight map (max distance scale value is set to 15 instead of 100 so the physics calculation is more subdued). Chaos physics configuration is optimized with a set of default values to create the best possible physics calculation. With these improvements, hair now moves more naturally without destroying its intended style.

CC texture weight map converted to UE vertex weight map.
Collision shape one-to-one transfer from CC to UE.
Hair physics comparison.

If you have Auto Setup 1.23, simply repeat the following steps for Auto Setup 1.24 results.

(1) Adjust the size of the colliders on your character’s head and shoulders:

(2) Remove weight paint on unwanted areas and smooth out the weights with the smooth tool:

(3) Make Chaos physics configuration adjustments (Please watch the video to see corresponding results for each configuration):

  • Subdivision Count (3 or above): calculate physics with subdivision to avoid low-poly edges.
  • Anim Drive Stiffness (0.5): Put more stiffness in the calculation, which helps retain its intended style.
  • Anim Drive Damping (0.5): More damping and less shaky movement.
  • Gravity Scale (0.3): Amount of gravity pull.
  • Collision Thickness (0): Thickness of collision shape, larger the number the more distance away from the colliders.

How to add a mask and assign it to a specific configuration (in this case, Anim Drive Stiffness):

  1. Create a new mask and set the target to Anim Drive Stiffness.
  2. Enable cloth painting mode.
  3. Paint the tip of the hair to paint value 100 (vertex color white) and keep the remaining as paint value 0 (vertex color pink).
  4. Do a simple smooth with the smooth tool.
  5. Exit cloth painting mode.
  6. Go to Chaos physics configuration and under Animation Properties, you can find Anim Drive Stiffness. Paint values range from 0 to 100 with 0 for the root of the hair and 100 for the tip of the hair. You should keep the hair root stiffer and the hair tip softer.

Cloth Physics

In the Auto Setup 1.24 update, prior physics issues were fixed. Few enhancements were made towards Chaos physics configuration and vertex weight-mapping, which includes a more accurate conversion from CC/IC texture weight map to UE vertex weight map (Chaos physics configuration is optimized with a set of default values to arrive at the best possible physics calculation). It is suggested to delete unused collision shapes and fine-tune collision size and position to fit mesh boundary. Enable the “Delete hidden mesh” option while exporting to prevent mesh clipping between skin and clothes.

Cloth physics comparison.

If you have Auto Setup 1.23, simply repeat the following steps for Auto Setup 1.24 results.

Adjust collision shapes:

  1. Delete unused collision shapes to prevent unwanted collision interceptions.
  2. Scale and move collision shapes to fit more precisely with mesh boundaries (create new collision shapes if necessary). Please avoid oversized collision shapes. It might cause the mesh to bulge.

3. Adjust weight paint – Add weight up to waistband and smooth weight with the smooth tool:

4. Chaos Config > Subdivision – Set to 3 or above and Collision Thickness to 0:

5. Go back and forth to tune the weight paint and collision shapes until you get the best result:

Another case to conclude the Physics section.

For dynamic demonstration (GIF) of each step, please see Character Creator to UE5 Best Practice (dynamic demo).

Webpage : Auto Setup For Unreal Engine

Forum : Unreal Engine 5 Auto Setup v1.24 Release Note

Reallusion and 3Dconnexion leverage synergies to accelerate 3D animation production

Reallusion, a platform for digital human character creativity and animation, joined forces with 3Dconnexion, a German manufacturer of human interface devices, to accelerate 3D real-time workflows on camera directing, character animation, and sequence editing. All iClone features can be accessed using the 3Dconnexion SpaceMouse®. 

iClone is a fast real-time 3D character animation software for professional use in films, previz, animation, apps, and games; as its user-friendly environment blends facial performance, humanoid body animation, mocap production, scene design, and cinematic storytelling.

Voted as the top device request in iClone users’ wishlist, iClone’s latest version 8 has refreshed its software architecture, opening it up to freedom of customization with SpaceMouse through hotkey and device mapping to more than 700 iClone features. 

“3Dconnexion’s SpaceMouse brings joy and sensitivity to 3D creation with iClone 8, allowing for unprecedented agility for animating, directing, timeline editing and live recording.”

Charles Chen, Founder & CEO of Reallusion

“It has been a great pleasure for us to collaborate with the Reallusion team on this integration. We believe this will let our joint users experience 3D like never before, while adding more speed and enjoyment to their workflow.”

Antonio Pascucci, CEO of 3Dconnexion

Powerful Real-time Production Workflows 

Three specially designed SpaceMouse presets have been optimized for Animation Editing, Object Transformation, and Light Arrangement.

In addition to camera navigation, SpaceMouse has been highly optimized for Animation Editing that requires quick collaboration between view angles, joint traversal, posing, and lots of manipulation through left-hand control.

The handy timeline scrubbing function simulates jog dialing by using the 6DoF sensor so that users can easily search target frames by manipulating scroll, zoom speed, break clips, and copy/paste keyframes. The context-sensitive design will control cameras and objects while in the 3D viewport, but will also work as an animation sequencer when focused on the Timeline.

Freely Download Presets

To make the most of the SpaceMouse with iClone’s real-time production, users can freely download three SpaceMouse hotkey presets to work with different design purposes. iClone 8 users just need to easily switch to the desired profile via 3Dconnexion’s driver, 3DxWare 10. 

The latest iClone 8 Profiles can be downloaded here.

Creating a Cinematic Teaser for Dream Harvest Games using iClone 8 and Character Creator 4

Presentation

Hi, I’m Loïc Bramoullé, an art & film director from France. When Dream Harvest asked me to produce a cinematic teaser in March 2022 for the visual development of a new project, I knew there would be many different technical challenges to tackle on my own, mostly under a tight two-month schedule.

Luckily enough, I have learned how to use iClone and Character Creator through the lip-sync animation contest. With Reallusion’s special help on the beta programs of iClone 8 and Character Creator 4, I could overcome these challenges and speed things up, thanks to the multitude of features these programs offer. So here I will break down how I approached the Nightmare Hunter short film production.

Pre-production:

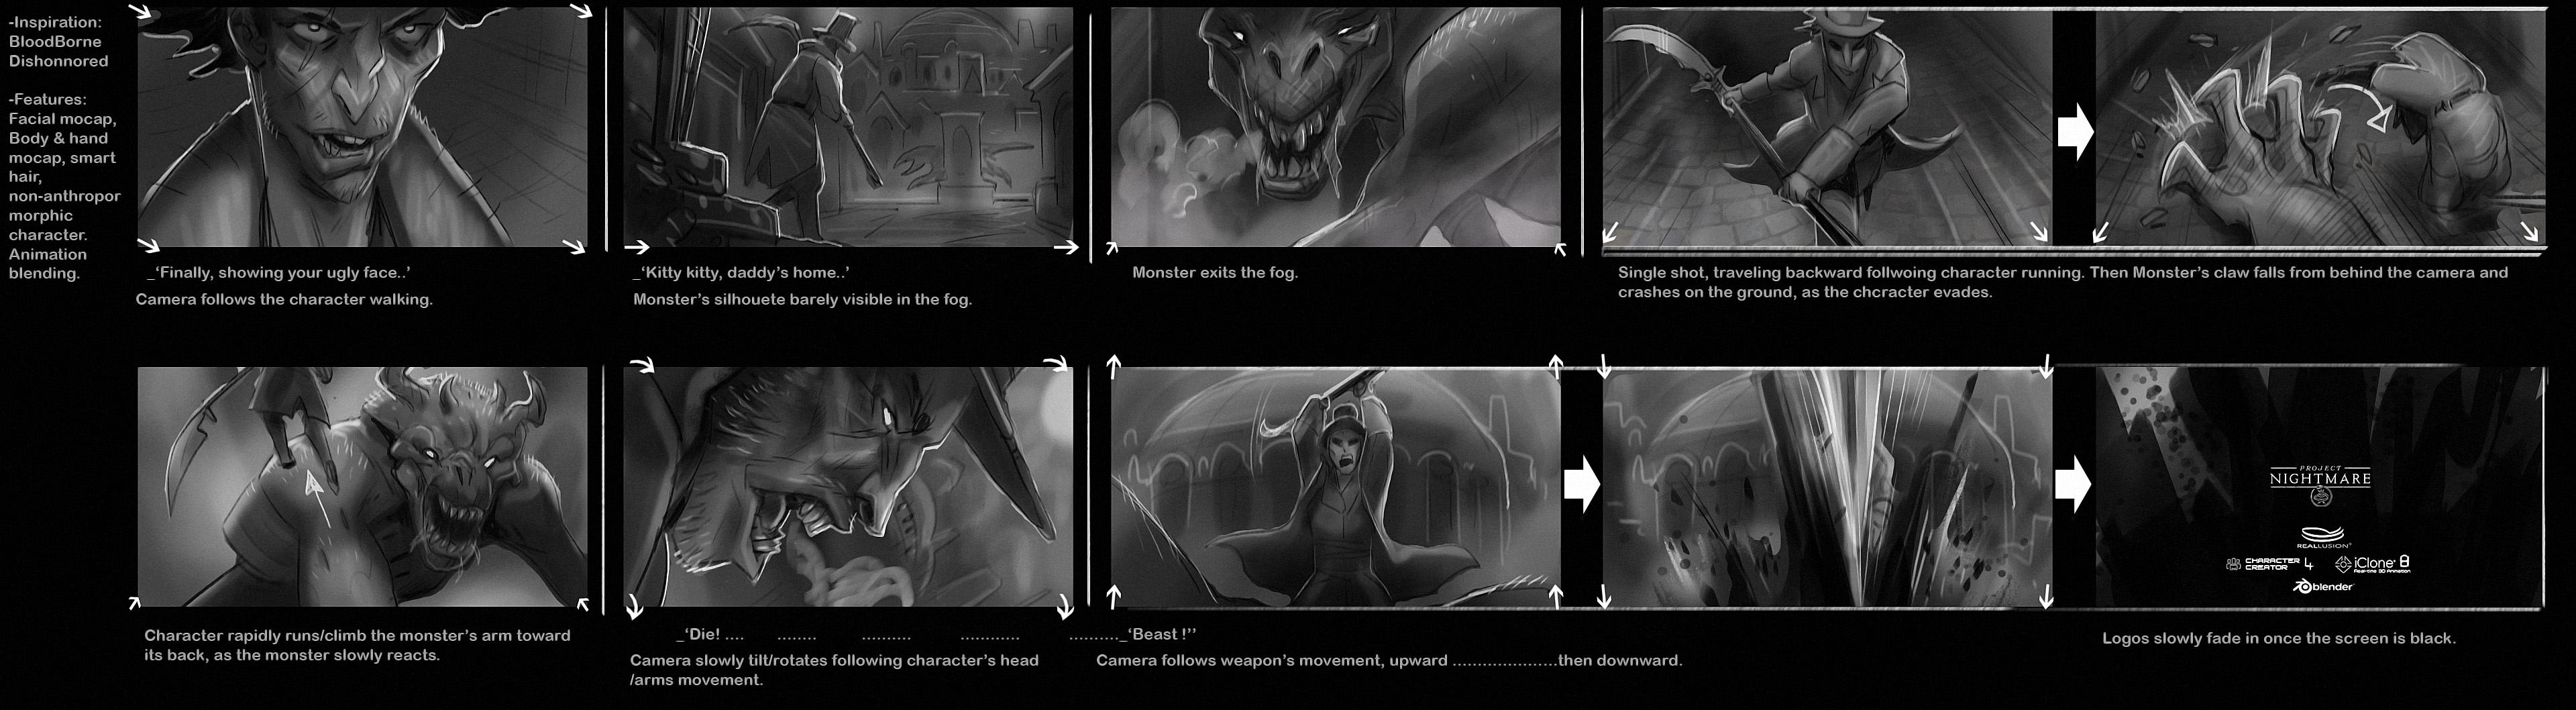
The first step was to quickly explore a few different options directly with storyboards, as it’s a simple way to define nearly all aspects of a film at once, the narration, setting, characters, action, lighting, mood, etc. This is the most critical part as these little sketches made in a few minutes will determine the whole film produced over the course of a couple of months.

So after testing a few different settings and combining them, we locked on a Victorian setting with a hunter and its monstrous prey. My idea was to challenge myself and see how far a character from CC4 could be pushed, toward a nearly non-anthropomorphic one with a long face, and still be able to receive facial motion capture from iClone 8.

The second step for pre-production was getting a more precise idea of the final look and style of characters and environment. I did these two characters to have some elements to play with and ended up mixing them to keep the most interesting parts.

Background Settings

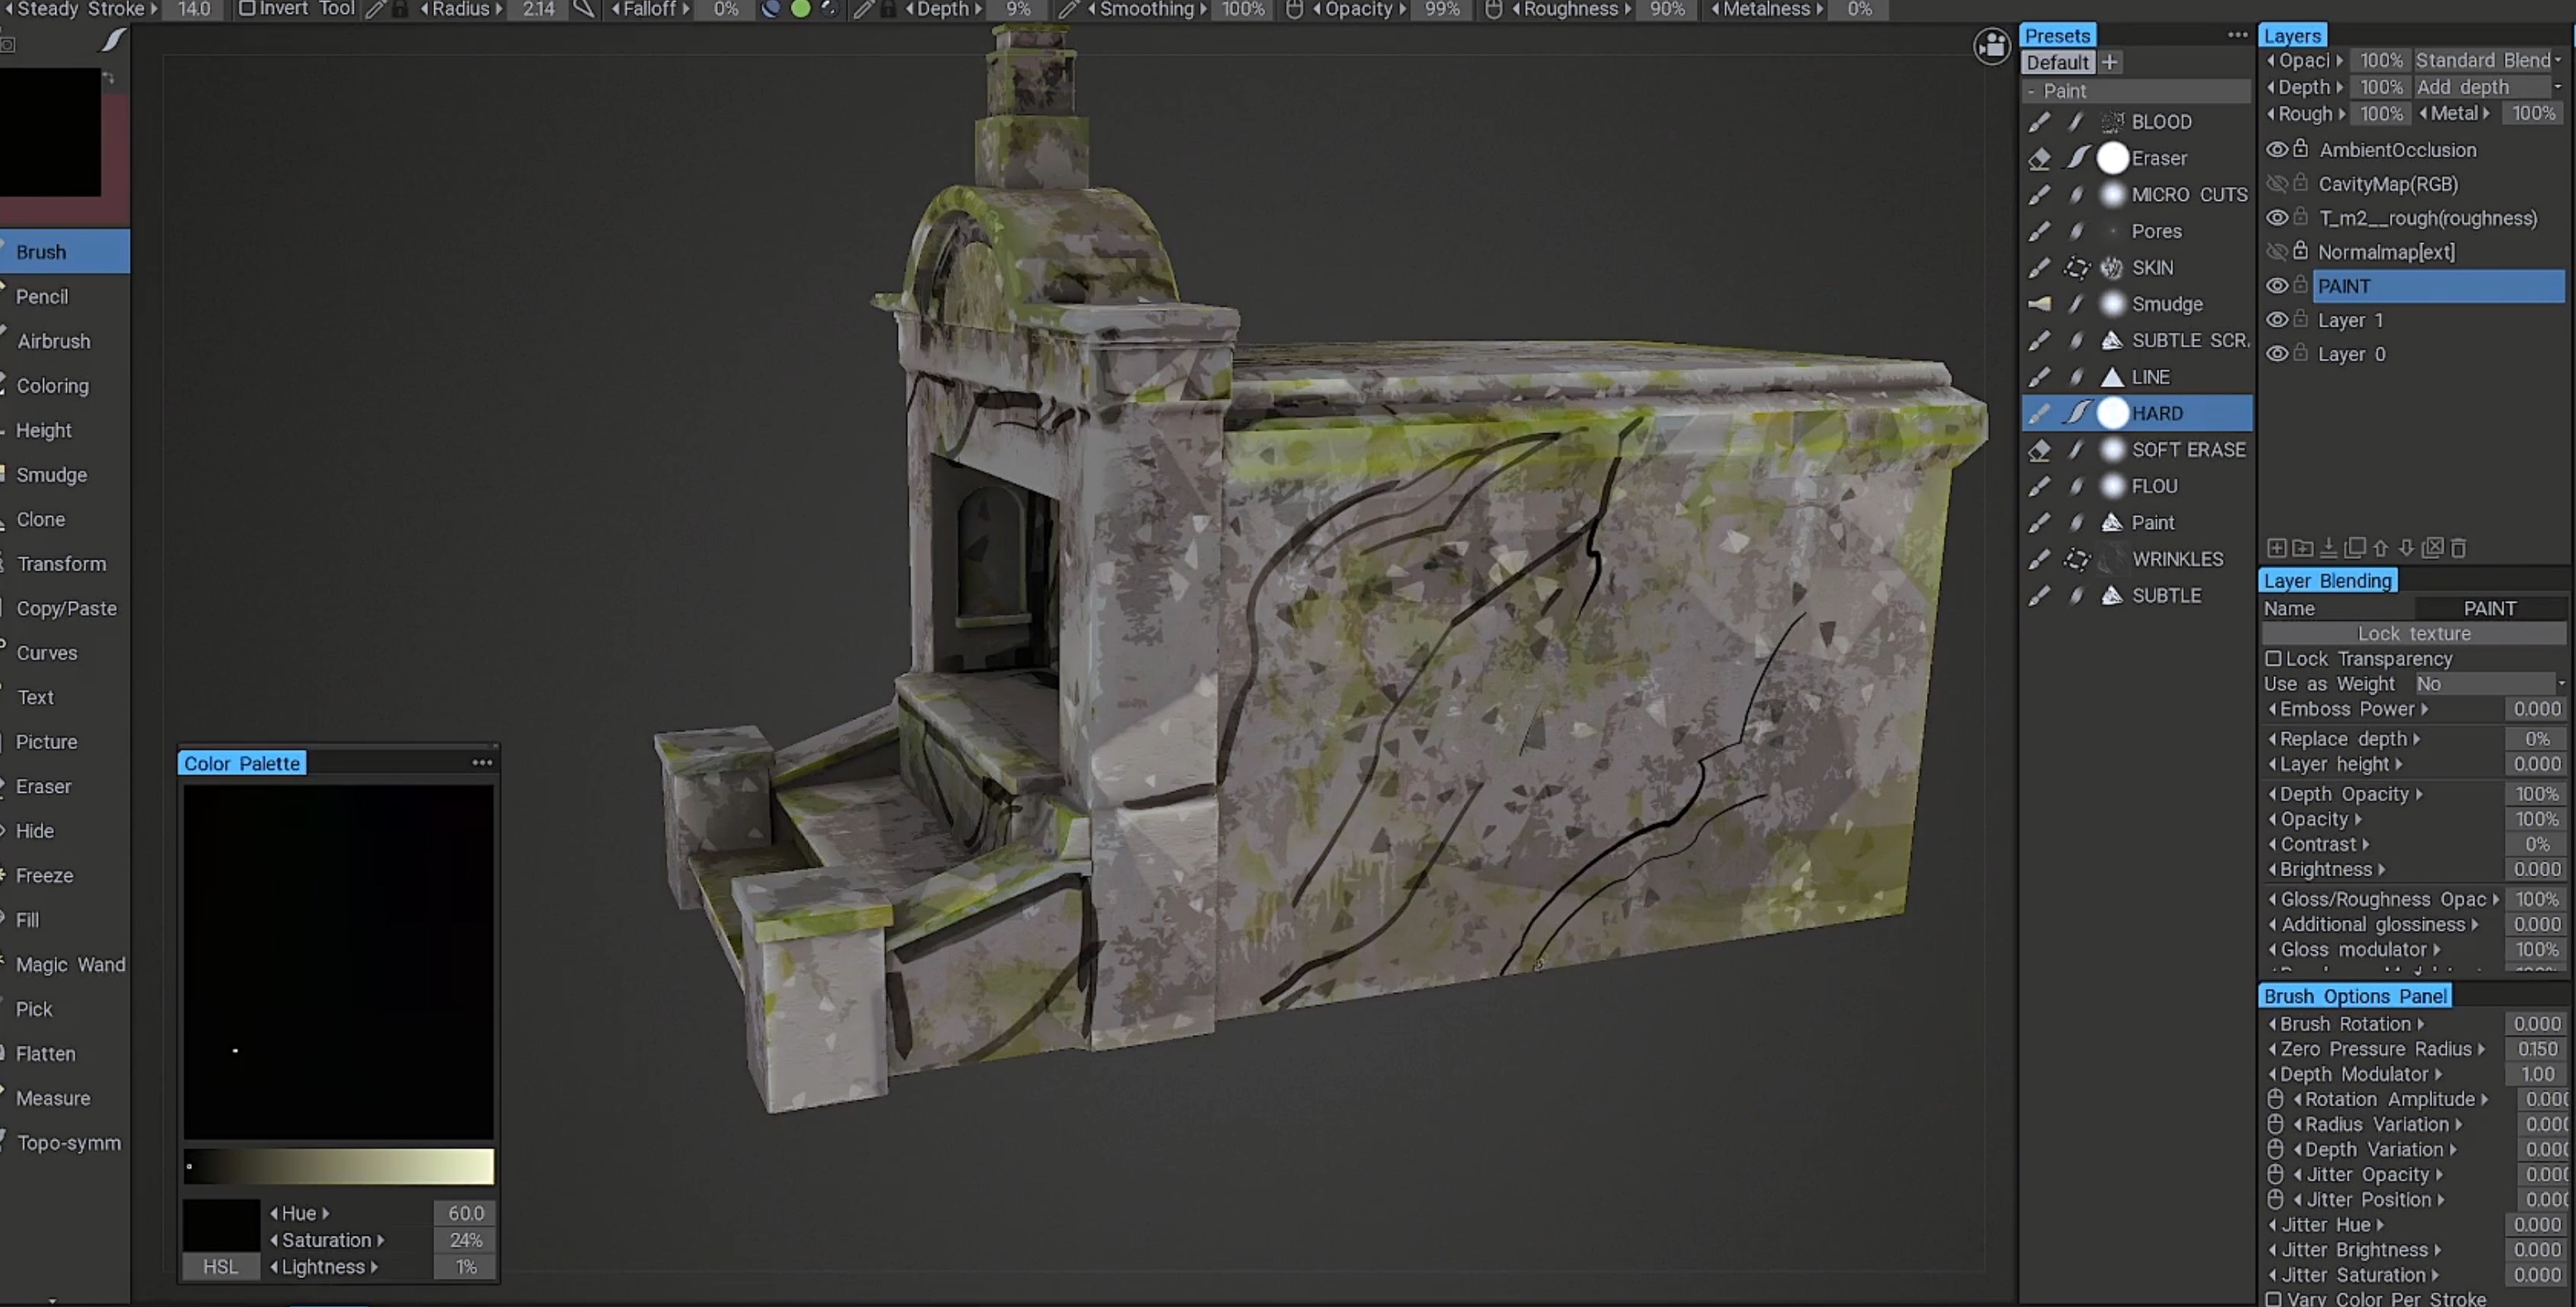
At that stage, I had already done some tests directly in 3D for the environment, because I needed to find a technical solution to produce it fast, so I couldn’t rely on designing everything from scratch in 2d. I bought some assets online that I painted over directly in 3D, and modified some free PBR textures in photoshop and Blender, to merge everything in a similar graphic novel style.

To create the characters I started from basic ones in the Character Creator, tweaking the base anatomy thanks to the morph bank, and adding some basic reference clothes.

Building the Character in Character Creator

I used the headshot plugin and more precise concept art to create the first version of the face, I then exported it to Blender thanks to the Character Creator addon. I also used 3DCoat to model and texture the clothes and weapons. To export back your character, check that all custom objects that you created are correctly skinned onto your armature. You can then select the armature and click Export in the Blender addon.

In Character Creator, instead of the usual import, you can go to plugins, Blender Auto Setup, and import from the Blender. You will be able to check if each object is recognized correctly, and change its type if it’s not. If some custom materials you added are missing some textures, you can simply select the mesh, go into the material tab, and fix any issue quickly.

Animation Production

In iClone, I used the Motion LIVE plugin to connect to Noitom’s Perception Neuron 3 mocap suit and recorded the motion capture directly on the characters.

Implementing 3D Mouse, Motion editing, and Motion Control

The first thing you might want to do is create a follow camera. I’m using a SpaceMouse so I’m able to animate the camera directly in 3D, without touching the keyboard or mouse.

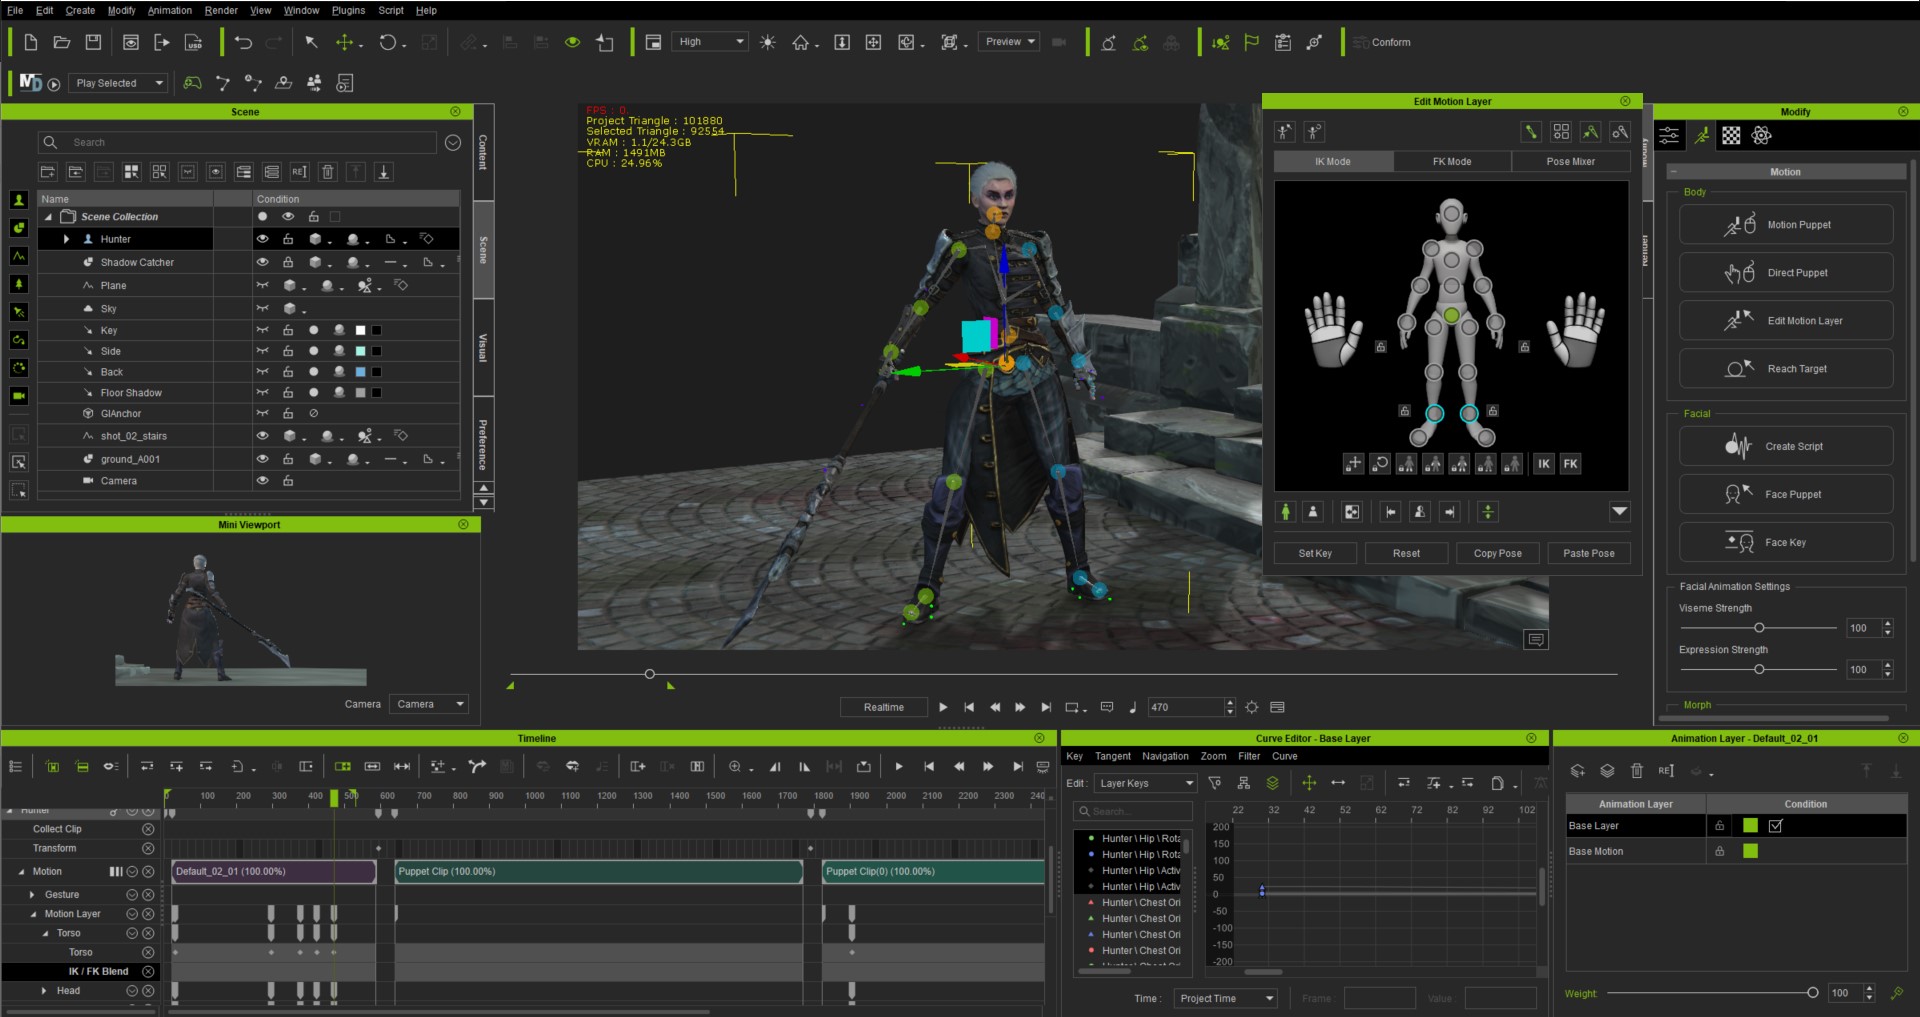
The majority of the work is then to edit and polish this capture with the iClone toolset to make it match exactly our needs. A good example of that is the second shot of the film, where I could not match the 3D stairs during motion capture in my living room, so I edited them in thanks to the “Motion Direction Control”, and “animation layers”, and “motion correction.”

“Motion Direction Control” can be accessed by right-clicking on a clip, or via the toolbar on the timeline. You can then place your animation in the 3D space, and break your clip to assign a different direction on each part. iClone 8 features a new bidirectional fade between clips, allowing for a smooth and natural transition between them.

Motion correction on the character

Another handy new feature of iClone 8 is the “Motion Correction” that allows you to select some limbs, and “print” their contact points in the 3D space, so you can then transform, move and rotate, these footprints, to adjust the exact location where the contact happens with the ground. Pay attention to the threshold setting, higher values will detect more contacts, and lock the contacts for longer. But you can always access the timing of these contacts in the reach target section of your character animation in the timeline. Clicking on each tip allows activating a fade in or out, for the snapping to be smoother.

The “Motion Modifier” function just below the two others in right-clicking the menu, allows to shift the overall posture of the clip.

For shot 04, I was able to quickly mock up the action using pre-made motion-capture clips from ActorCore that features a wide range of commonly useful and high-quality motions from ActorCore.

The ability in iClone 8 with “Motion Direction Control” to transform a whole character animation clip in relation to other ones is also really handy to quickly assemble a custom sequence of actions. You can automatically assign a limb that will be snapped onto its position in the previous clip so they blend perfectly, or adjust its orientation to suit your environment, etc…

Creating believable facial expressions

This process also allowed me to work on the body and facial animations independently. Once the body animations were complete, I used an Ipad and MotionLive to motion capture a facial performance with lip-sync while listening to the voice to be synchronized.

Editing the keyframes

I polished this mocap with the same method as the body, sampling the captured clip to access all the keyframes in the curve editor, smoothing some parts that were jittering. I then Flatten the clip again to be solid, which allows me to add keyframes non-destructively on a layer on top of the motion capture.

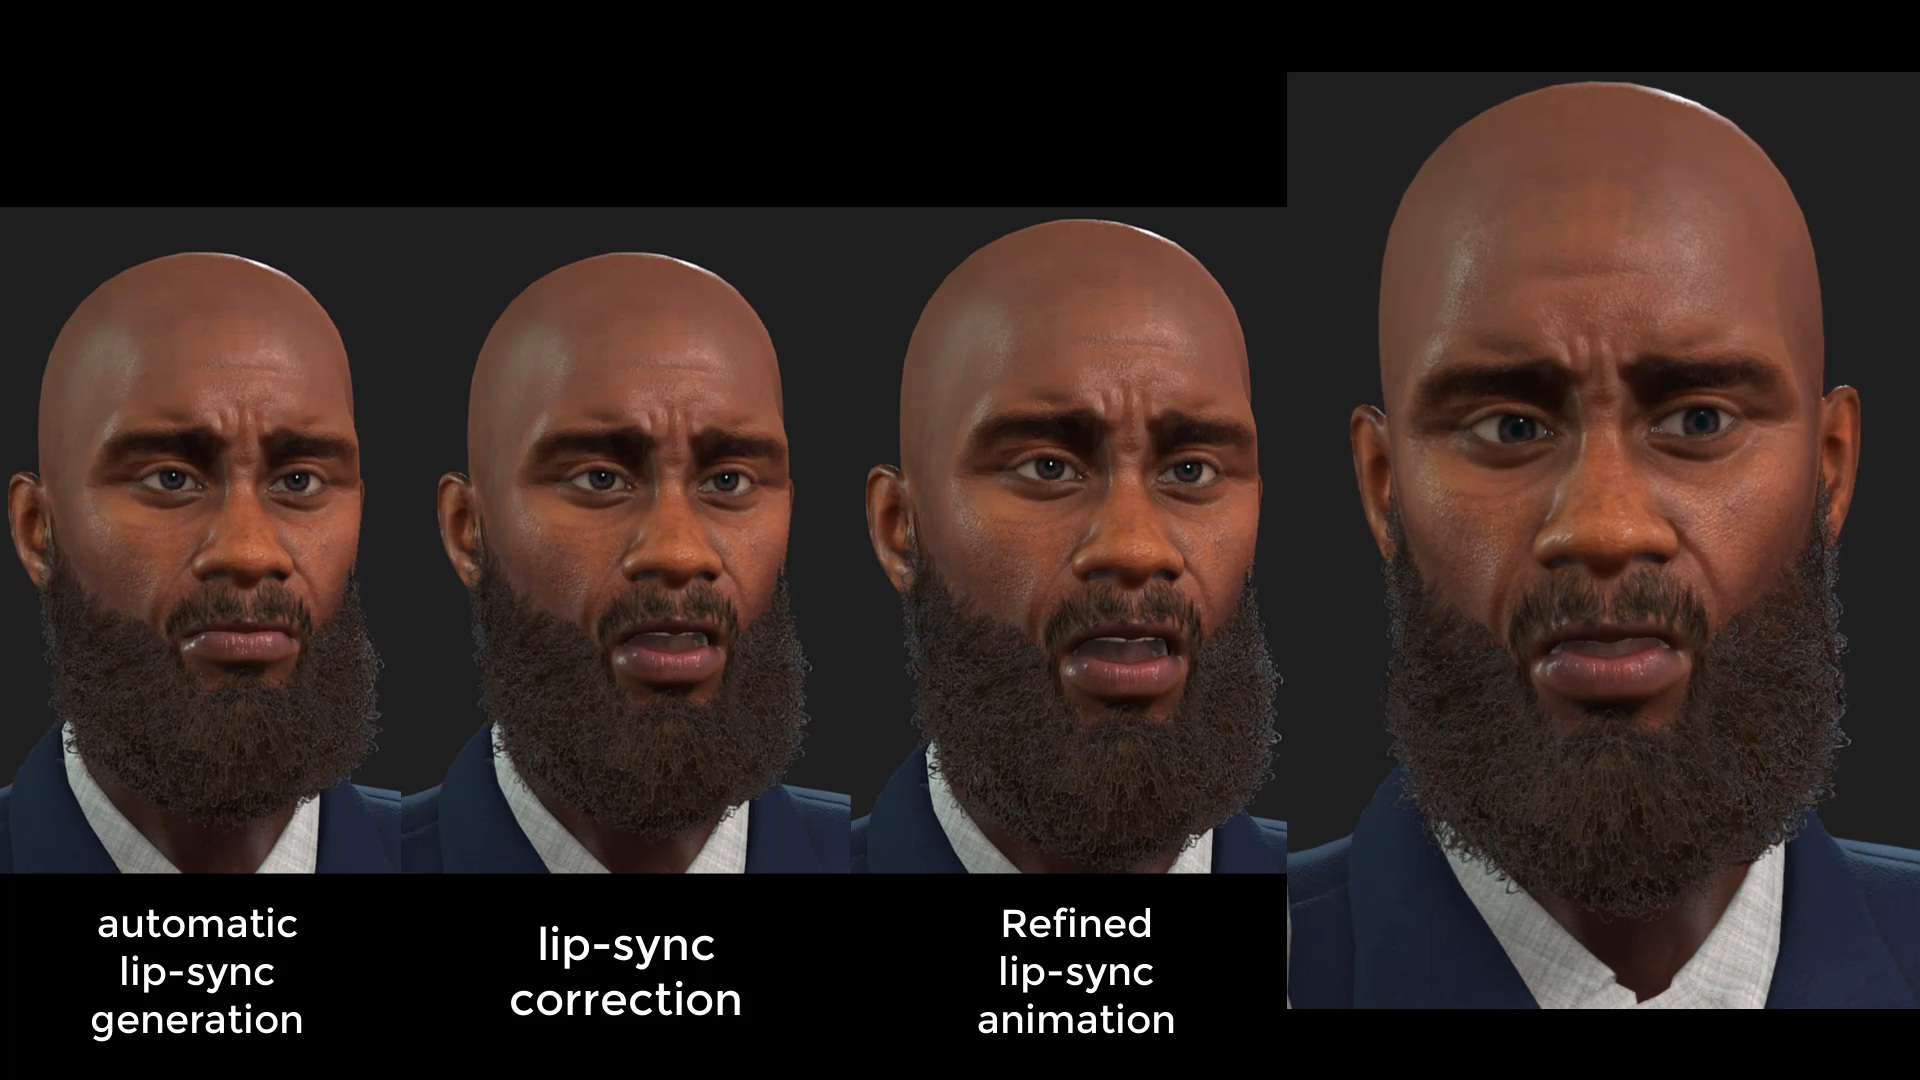
To edit the facial animation, you can open the Face Key menu here. Controls are separated into different categories: Face, where you can edit the head rotation, and have overall control over the expression. Then you have eyes, mouth, and tongue, where you can have much finer control over precise morphs. For example, changing the eye’s direction. But the most important thing here is to polish the lip synch from the motion capture, with the jaw control here, and the mouth open and close just below. The objective here is to accentuate and add character to the performance, so we can listen to the recorded voice, and detect the moments where the lips should be closed, where specific mouth shapes should be more accentuated like on the O and M sounds, that we can produce by selecting the corresponding mouth type here, and then moving the lips into that shape. Breaking the symmetry with the split lips option can go a long way to break the uncanny valley and add something more imperfect and human to the character’s expression.

Setting the lights and VFX

Once the animation was mostly there, I started to light the scenes to see how the final film would look. The main light source is a powerful moonlight, with cloud shadows that I painted as vertex colors on a plane in the sky, so I was able to very precisely paint where the light would hit the character or not, to improve the readability and add depth to the mood. The secondary lights are the fire burning in the environment, which allowed me to add a strong warm spotlight to contrast with the cold moonlight and strongly isolate the character from the background.

Post-production:

Once the first shots were lit, I started to prepare the scenes for rendering, adding a duplicated linked scene for each shot to render volumetrics with EEVEE, while the main scene was rendering in Cycles, all passes including cryptomatte & denoise data into two EXR sequence, that I then denoised in another scene. This reduces render times dramatically as the GPU does not have to wait for the CPU to denoise, and the denoise is not done on the final image as this adds a lot of blurs, but on each render pass that’s used to re-composite the beauty render. So I can start the compositing in After Effects from the same image that I see in Blender, except it was rendered much faster as even with low sample counts the passes denoising manages to get a crisp final composite. Some shots were only 14 seconds per frame. I also rendered everything only in 1920×1080, as I would be upscaling with AI to 4k thanks to Topaz Video at the very end after the compositing.

One thing adding a lot to the overall impression in compositing is exporting the 3D camera and some empty/null objects from Blender with the export .jsx addon, and importing that with file>run script in AE, to then be able to add the 3D plane of a painted cloud of fog, masked with the Z-Depth. This allows to improve readability to control where the eye should look, and adds a lot of mood and style as there is not only 3D volumetric fog but then also a hand-painted one, that can be animated to simulate wind. Finally, I did another scene for each shot in my Blender files, where I linked the characters and a few objects around them, so I could simulate rain drops in particles, setting the collection with all the scene objects in a holdout, so only the raindrops were visible.

Final thoughts:

Character Creator 4 and iClone 8 revealed themselves as great additions to my pipeline for their flexibility and ease of use. From helping with previsualization by being able to create a wide variety of body shapes, and bashing animation and motion capture clips together, without the usual hassle of retargeting different animation sources that are at different positions in the 3D world. To speed up greatly final character creation by skipping a lot of repetitive technical tasks, like topology, UVs, armature, skinning, and facial blendshape sculpting, while still being able to fully customize all this with traditional, industry-standard tools, to keep full control over the design and art direction of your project.

The new features of the Character Creator will be a big help in streamlining facial expression customization for anthropomorphic characters. The increased number of morphs compatible with facial motion capture is definitely adding a level of fidelity and control to character expression. For the body animation, the new features of iClone 8 allow you to more comfortably reach what you need by blending clips and animating over the result non-destructively thanks to animation layers.

Finally, the added support for the space mouse is great news for anyone wanting to speed up their workflow, as moving around in 3D can be really important during animation, so the 6 degrees of freedom of the space mouse gives you the feeling of being physically present inside the 3D scene as you move around effortlessly.

That’s about it, Thanks!

Follow Loïc

https://www.artstation.com/liok

https://www.instagram.com/_liok_/

Motion Director Makes Moves with New Animation Approach

Why Motion Director?

Motion Director is a powerful feature inside iClone 8, that exemplifies the Play2Animate philosophy of Reallusion. Locomotion game animations are commonly tasking and complex, even when animating simple walks and turns. Animators need to know how to align motions, smoothly blend them together, and make proper directional control. Even animating movement from idle to walking and running requires tedious work or the same-style mocap animation at different speeds, and needs to properly transition between motion speeds, for example from walk to jog, you need to have speed-up action to make the transition smooth.

However, in the gaming world, players are naturally skilled with the capability to steer the character’s motion, trigger different fighting skills, or interact with the environment. This logic is now built-in, with intuitive simplicity, to iClone for the best of both worlds from game and game animation. 

In 2019, Reallusion started researching how game companies create smooth and natural interactive character experiences. Through years of development, iClone 8 introduces an innovative solution for character motions using game-like controls. Features cover speed changes, natural turns, smooth transitions, and blended trigger motions; it works both for piloting protagonists and automating NPC actions.  

Who can benefit from Motion Director?

Digital content creators are not always well-trained animators, the goal of iC8 Motion Director is to enable anyone to create character animation with greater speed. MD is ideal for first-time animators, gamer filmmakers (Machinima), and AEC (Architectural, Engineering, and Construction) simulators. It also helps previsualization directors, and filmmakers to easily set up an acting plan for later animation refinement, or whoever requires autonomous character behaviors in a 3D space. 

What is Motion Director?

Accomplishing simple human movement normally requires many steps, and Motion Director is an intuitive way to make motion control interactive, highly natural, intuitive, and expandable with behaviors and triggers. These new motion creation features are helpful for ultimate player control, AI compatibility, and the ability to simulate multiple characters at the same time. 

Simply put, Motion Director is a unique tool for animators to create motions, layout scenes, and control single or multiple characters in a hybrid gameplay experience. In addition, this system is fully expandable, so users can keep adding character abilities.

The MD features in the iClone 8 first release include game piloting, mouse waypoints, zone animation, follow capabilities, perform triggers, and random idle behaviors. With iClone’s powerful motion blending, layering, and reach-constraint editing, users can derive unlimited motion possibilities and let characters easily interact with their surroundings. 

Macro Record and Playback

This type of motion control offers some new editing capabilities, since the motion is interactively generated, they record the events as editable macros for replay and review while the animated result is also able to be recorded to the timeline for motion editing.  The unique macro editing provides an easier way to resequence any set of commands given to the character when controlling and using triggers. 

MD Motion Expansions

Two MD expansion packs were released along with iClone 8.0 to increase the character’s abilities, seamlessly in tandem with the included male and female casual MD motions.  

How was it Built?

Motion Director offers a simple method to interactively create motions more efficiently than the extensively combined efforts of iClone standard tools.

Motion Director is well beyond just hotkeys and motions, there is a real science to building an intelligent motion-matching system, and Reallusion has expanded it into a fully scalable system”, said John Martin, Reallusion Vice President.

Here’s a quick breakdown of this amazing technology:

A. Sampling real performer’s behavior in all moving patterns and speed 

Inspired by Ubisoft motion matching technology introduced in GDC 2016, the team first starts with a comprehensive set of dance cards, which are motion maps that outline a path a performer needs to follow during mocap.  The dance cards are marked on the floor, and a large enough area is required to capture the motion artist performing each dance card at various rates of speed. Each corner or angle in a path designates where the motion artist should turn or pivot and a direction to continue.  

All dance cards are performed at different speeds for walking, jogging, jumping, and running. The motion performances capture much more than just movement—it’s also important to get a sense of weight shift with speed turns. This extends beyond motion loops, as the capture even records crucial complicated feet crossing when turning or pivoting.  All of this data makes for a believable motion system that feels like a game but is an entirely new approach to character animation with iClone 8. 

B. Motion AI Calculation

The team gets all the information needed from capturing these dance card motions to incorporate into their motion AI. This dataset is used to generate real-time character movement, turn on any angle, stop, or shift speed velocity with any character in iClone 8.  

C. Event Triggers and Realtime Motion Matching (AI or Device Trigger)  

Acceleration and direction in the gamepad control stick or keystrokes originate from the precalculated capture data and real-time motion matching. 

All characters and even large gatherings can be navigated through the scene with a range of motion speeds and behaviors. 

Event triggers can originate from users’ device input or sent by AI request. Idle, stroll, walk, and jog ratio settings determine the navigation speed along the path. 

D. Perform Trigger During Different Movement Speed

Augmenting motions with blended motion triggers adds even more nuance to the performances. Combining other motions triggered by keystrokes or the gamepad while the character is moving lets the character add action while walking or running.  For instance, a character could be walking down a street and then trigger a phone conversation that will blend with the upper torso of the character.  Another example would be the jump trigger that is set by default so that a character can jump while walking or running, just like in a video game.  The MD Behaviors panel has complete control to set up the additional behaviors and trigger motions. 

E. Motion Expansion and Behavior Management

Motion Director has character motion behaviors for strolling, walking, jogging, and an extension for Athletic Runs, including dashes and even running styles for agile runs or loose running movements. It’s easy to apply the motion behaviors to characters with a simple drag-and-drop. The Casual moves that are included for everyone provide you with the walks and jogs that will be most commonly used.  

Drag in new MD motion from Galley, or turn on selected behaviors in MD Behavior Manager

Deep Collaboration with Motion Capture at the CMII

Production of the iC8 Motion Director moves and dance cards began by collaborating with the mocap professionals at the Creative Media Industries Institute (CMII), Georgia State University in Atlanta.  

To facilitate the shoot, they also worked with Natural Point OptiTrack, and many staff members and students from the CMII.  The challenge was that they needed a huge space that would enable their talent to reach top speed for the runs and dash captures.  The solution transformed the GSU basketball arena into a massive capture volume with 72 optical cameras providing coverage of the space.

A cover was stretched over the basketball court to alleviate any reflections that could challenge the cameras. Once that was complete, they added the taped lines for the dance cards to the floor, so the motion talent could easily understand the performances they would be capturing.  

James Martin, GSU professor, and motion capture expert directed the shoot day and gave the talent a thorough walkthrough of the day’s capture plan.  A full day of motion capture commenced and over 100 motions were captured by the athletic motion artist.  It’s a big job for the planning, setup, and performance capture to meet the requirements of Motion Director. 

After the shoot, all the motions were cleaned and readied for engineering into Motion Director by the team at Reallusion. The final result of this collaboration is iC8 Motion Director, a big leap forward for every user made possible by an elite team at the CMII and the partnership with Reallusion.

Future Roadmap 

The newly revealed Motion Director is just the tip of the iceberg—the surge of auto-animation has just begun. Here are more exciting features developing now for the upcoming iClone 8 releases:

  • Response to terrain height
    • Auto-detect the ground height to ensure the foot is on the ground.
    • Characters react according to changes in ground elevation.

  • Avoidance and Goal Seeking 
    • Prevent collisions between characters.
    • Auto-search path to the target location.
    • Move away from an undesired target.

  • NavMesh for autonomous 3D space crowd navigation
    • Auto-project and define a walkable area from a given 3D space.
    • Mark borders and bounding areas to prevent collisions and crisscrossing.

  • Scalability for Crowd Sim 
    • Support autonomous crowd scenes with hundreds of characters in LOD, with optimized MD data size and performance.

  • Motion Planning and Object Interaction
    • Sit on chairs, interact with target objects, and pick up and drop items.
    • Characters are aware of special interest spots, or other 3D people.

  • User MD Creation
    • Reallusion will open the MD motion creation tool to users for adding custom perform, idle, and interactive movements.
    • Reallusion’s Actorcore keeps thousands of themed animations

  • Future MD Packs
    • Talking, singing, body languages, etc. help to speedily fulfill all sorts of production demands.

  • Recruiting Professional Motion Partners
    • Reallusion will choose experienced professional mocap studios for more movement styles, fighting or dancing movements, parkour, etc.
    • Build the MD world together and become a partner with Reallusion.

——————————

Learn more about Motion Director: https://www.reallusion.com/iclone/motion-director.html

Learn more on the forum: https://forum.reallusion.com/515930/

Related video tutorials: https://courses.reallusion.com/home/iclone/motion-director/

Libertas Review : Five Pro Tips of iClone 8

Erik Larson (Libertas)

Born in Chicago, Libertas started out with a passion for filmmaking at an early age, and since he’s had a desire to tell grand and fantastical stories featuring brave heroes on epic quests in lush and vibrant worlds, much like his Assassin’s Creed-inspired micro-short film “Modern Assassin Training Session”.

Libertas admits to always dreaming bigger than his shoestring budget could afford. Even still, he loves creating characters and their costumes to see them come alive, especially in his Youtube short films. Outside of his day job as the Manager of Videography and sole 3D generalist at his company, he spends his free time, once again, dreaming big and crafting new characters, costumes, and props for his digital actors who are instrumental in bringing his epic stories to life for the audience community and not just himself.

iClone is one of those programs that just makes your life easier. iClone 7 has been the backbone of my micro-short 3D animations for the past few years, and it is where I exclusively do all of my character animations. With the release of iClone 8, things have only gotten better; so let’s take a look at my five favorite features that I believe will help you bring your characters and projects to life faster than ever.

1. Drag-and-Drop

To begin, we can now drag and drop character animations and props directly into the viewport. Gone are the days of having to set up everything in 3DXchange. This is especially great if you’re like me and typically want to use a lot of Mixamo body animations in your projects. On the fly, you can quickly drag and drop your files directly into iClone 8’s viewport and see them updated on the timeline.

2. Motion Correction and Alignment Tools

In this latest release, we also have improved motion correction and alignment tools. If you have ever attempted to string multiple 3D animation clips together, whether from Mixamo or ActorCore unless those clips were specifically designed to flow together, you will know just how difficult it can be to seamlessly transition from one clip to the next. 

This is especially frustrating when each clip has its origin point offset or its rotation is not consistent. In the past, you would need to add simple geometry as reference points, and then do your best to align the clips. But now we have tools like Motion Correction and the Motion Direction Controller, which help us quickly align and rotate each clip. Furthermore, we now have bi-directional blending, which allows us to customize how much the first and second clips blend together. The results are smoother transitions than we had in the past.

Using these new tools means less time fighting the 3D animations to achieve the desired outcome. You can get your base animation finished much more quickly, thereby allowing you to devote all of that saved time and energy to refining and polishing your animation. 

3. Mirroring

Although it seems simple, a new feature that opens up a lot of possibilities is the ability to mirror your animations.

If you’re like me, you’ve probably found yourself searching longer than you’d like to admit and testing different search terms to find that perfect animation for your project. For the sake of example, let’s say we are looking for someone throwing a ball. Now, it can’t be just any throwing animation; it has to have right foot movement, posture, and timing. After an extensive search, you finally find it. The only problem is that the animation has the character throwing with their right hand, but you want to see your character throw with their left hand. If only you could just flip the animation…

In the past, you would have been out of luck. But now, thanks to the mirroring option, you are just a few clicks away from being able to mirror any animation. While it seems simple, it opens up a wealth of opportunities limited only by your imagination.

4. Animation Layers

Another feature introduced that I absolutely love is the Animation Layering System. Once you have found your ideal animation, odds are you likely need to make some adjustments. In the past, if you wanted to modify an existing animation you would have to sample its keyframes and essentially overwrite them with your changes. However, thanks to the new layering system, you can stack multiple layers of adjustments. This means you can devote a layer to fixing the head, while another adjusts the hands—all the while leaving the root body animation untouched. 

The benefit of making modifications in this non-destructive manner is if you make a mistake, or change your mind about how you want the animation to look, these layers can be deactivated or deleted individually, meaning you no longer have to start from scratch. For anyone building off of pre-existing animations, this is huge. 

5. Reach Targets

Reallusion has also spent a good amount of time and effort beefing up their reach target system. This is extremely helpful for cleaning up potential foot sliding issues, but it also provides accurate locking of hands and feet when interacting with props or other characters.

Having two characters interact can be pretty tricky, as you can easily run into clipping issues. But now you can use the reach targets to quickly lock onto the other character’s armature. Once initiated, you can adjust when the reach target is active and inactive, and even adjust the smoothness of the transition. Though you might need to make a few minor adjustments here and there, it is exponentially faster than hand animating each frame individually. 

Final Thoughts

Of course, I have only covered five of the many new features introduced in iClone 8. There are plenty more to explore and get excited about. But in the end, the ones I have selected to highlight boil down to this : That you can animate faster and with higher fidelity. 

iClone 8 has dramatically improved my own workflow, and I look forward to leveraging each of these new features to help me produce my next short animated film. Likewise, I’m excited to see what the community does with these tools. I truly believe we are on the cusp of seeing the next content revolution as creators utilize these amazing and powerful programs to tell bigger and better stories. Stories that a short time ago would have only been seen in our dreams.  

Learn more :

• Erik Larson (Libertas) http://www.libertasvideo.com/

• Libertas Armory https://www.reallusion.com/contentstore/featureddeveloper/profile/#!/Libertas-Armory/

• iClone https://www.reallusion.com/iclone/default.html

• Character Creator https://www.reallusion.com/character-creator/

• Reallusion https://www.reallusion.com/

How iClone 8 & Character Creator 4 boosted a Musician’s Animation Workflow

Richie Castellano- Producer, Musician

Richie Castellano

My name is Richie Castellano. I’m a New York based producer and musician. I’m a YouTuber with over 30 million views and I’m a member of the classic rock band, Blue Öyster Cult. I’ve been using iClone and Character Creator for several years.

I’m in the middle of producing an animated sci-fi musical that has pretty much been built around what Reallusion’s tools have allowed me to do. I’m a musician, not a 3D artist. Before I learned about iClone and Character Creator, I had totally dismissed the idea of trying to produce this musical as an animated feature. The 3D animation learning curve was far too steep. When I saw that iClone and Character Creator could give a non 3D artist like me the opportunity to tell stories without the daunting barrier to entry, I saw the path to completing this massive project.

While getting familiar with these tools, I had a few opportunities to use what I’d been learning on some other projects. In 2020, Blue Öyster Cult released a new album, The Symbol Remains. As part of the music video for the song Box In My Head, I used iClone to create a trippy sequence in which the band performs inside one of the album covers from the 70’s. I also used iClone to create a few Blue Öyster Cult live DVD menu animations.

With production on my sci-fi musical underway, I was really getting a handle on iClone 7 and Character Creator 3. Things were slow going, but I was making progress. The main sticking points for me were linking together motion capture clips, walking in general, having characters touch things, reflective surfaces, stiff looking character expressions and having to constantly revert to earlier saves after butchering my motion layers. I was getting things done, but I was frequently tripping over these stumbling blocks and it was costing me a lot of time.

Then, Reallusion answered my prayers. iClone 8 and Character Creator 4 were released and literally addressed all of the issues I was having. Let’s break it down.

“Then, Reallusion answered my prayers. iClone 8 and Character Creator 4 were released and literally addressed all of the issues I was having.”

Richie Castellano- Producer, Musician

Non-Destructive Layered Animation

This is easily my favorite new feature. It might not be as sexy as some of the other new features, but we’ll get to those. Let’s face it, no matter how great your motion captures are, you always gotta tweak something. Maybe your character’s elbows are going through his body, or maybe your character is supposed to be holding something while he’s performing the motion. So you open up the motion layer editor and start rotating and re-positioning joints and bones. 

You get about 20 minutes into it and you realize that something you did negatively impacted another part of the character animation, so while your character’s elbows no longer intersect his torso, his hips are somehow twisted and he’s developed a severe limp. You try to correct the limp, but it has a ripple effect, ruining everything you’ve just done. What do you do now?

Richie Castellano in his music studio.

Well, if this were still iClone 7, you’d have to start from scratch again. Luckily, iClone 8 has firmly squashed this major problem forever. In iClone 8, you can now add layers to your motion clips. Layers that can be activated, deactivated, deleted and even faded in and out (thanks to the ingenious animatable weight control that I never knew I desperately needed!) You can make a total mess of your new motion layer and never affect the starting 3D animation. You can add as many layers as you need and always be able to backtrack to quickly identify problems. You can have separate layers for different body parts, or different actions. I use this constantly. Especially now that I’ve been creating my own mocap files using a VR gaming setup. These homemade mocap files are rife with glitches. With the motion layers, I can quickly and non-destructively correct all of these glitches and make my cheapo mocap files look much more professional.

Non-destructive layered 3D animation editing inside iClone 8.

Motion Direction Control

The new iClone 8 Motion Direction Control feature does what used to take me hours to do, in less than a second. I think I might’ve cried the first time I put 2 walking animations next to each other on the timeline and they seamlessly looped in the correct direction! The old method of combining different mocap files to create a single performance almost seems cruel now.

” The new iClone 8 Motion Direction Control feature does what used to take me hours to do, in less than a second. I think I might’ve cried the first time I put 2 walking animations next to each other on the timeline and they seamlessly looped in the correct direction! “

Richie Castellano- Producer, Musician

The fact that I can even grab totally unrelated mocap files from different sources and make them work together is mind-blowing. When I was able to seamlessly blend a Mixamo running sequence with a homemade fighting sequence, my brain exploded. I have no idea how they’ve achieved this. The new alignment tools are doing some kind of sorcery to get these different files to work together.

The other absolutely earth-shattering feature here is the simple arrow that pops up when you go into Motion Direction Control mode. It clearly shows you the path of your character animation represented by an arrow on the ground. You can quickly see all the directional paths associated with your motion clips and just nudge them where they need to go. It’s fantastic!

iClone 8’s new Motion Direction controls with motion clip timeline.

The Motion Director

Before this feature was included, I actually used to avoid writing scenes with background actors. Getting my main characters to walk was hard enough. I couldn’t even imagine having to animate walks for a dozen background actors too! iClone 8 introduced an entire suite of tools specifically for this. Now, I can drop a bunch of extras in my scene, load them up with their own walking styles (by using iMD files) and get them moving in a matter of minutes.

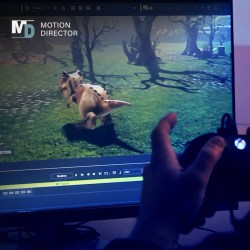
Game controller connected to iClone’s Motion Director feature.

The amount of control options here goes beyond what I even imagined. I would have been more than happy with WASD walking, but I can already think of a bunch of ways that I’m going to use the path control options, zone mode and follow mode. And if that weren’t enough, I can even control characters using my XBox controller!

Controlling and animating various 3D characters with iClone’8s new Motion Director.

Improved Reach Target

Another thing I used to avoid in my scripts was having a character touch things. Sure, the reach target option was a fine way to have your character interact with other characters or objects, but using it almost always negatively affected your character animation. Joints would move strangely or your character would contort in an unnatural way.

The improved reach target controls in iClone 8 are a game changer.  Now you have much greater targeting control. The best improvement here is that you can target without affecting the rest of your 3D animation. It works in a much more fluid and pleasing way. I’ve actually gone back through my script and added more interaction because of this feature.

Improved reach target controls in iClone 8.

Mirror Props

There are several moments in my script where characters look at reflections of themselves or at other characters. I had completely given up on trying to get reflective surfaces to work inside iClone 7. For whatever reason, the reflections were always distorted and I couldn’t manipulate them to reflect what the script called for. I’d basically resigned myself to making every shot involving a reflection a VFX shot that I’d have to figure out in a 2D compositing app like After Effects.

The new iC8 mirror props completely eliminate this problem and have saved me the headache of trying to do this in compositing. The mirrors work perfectly and can easily be manipulated to work as other types of reflective surfaces. Lower the opacity on a mirror and you’ve got a window.

Reflective surfaces in iClone 8 easily allow for the creation of real-time mirror props.

Volumetric Lighting

This solved a problem I didn’t even know I had. In my movie, there are a few scenes where characters use flashlights. Something looked off about them. I wasn’t totally selling the effect. Since volumetric lighting was added to iClone, my flashlights and other dramatic light ray effects look totally convincing. Adding it to my shots has really stepped up the visual quality I’m able to achieve.

iClone 8’s volumetric lighting enhances scenes and atmosphere.

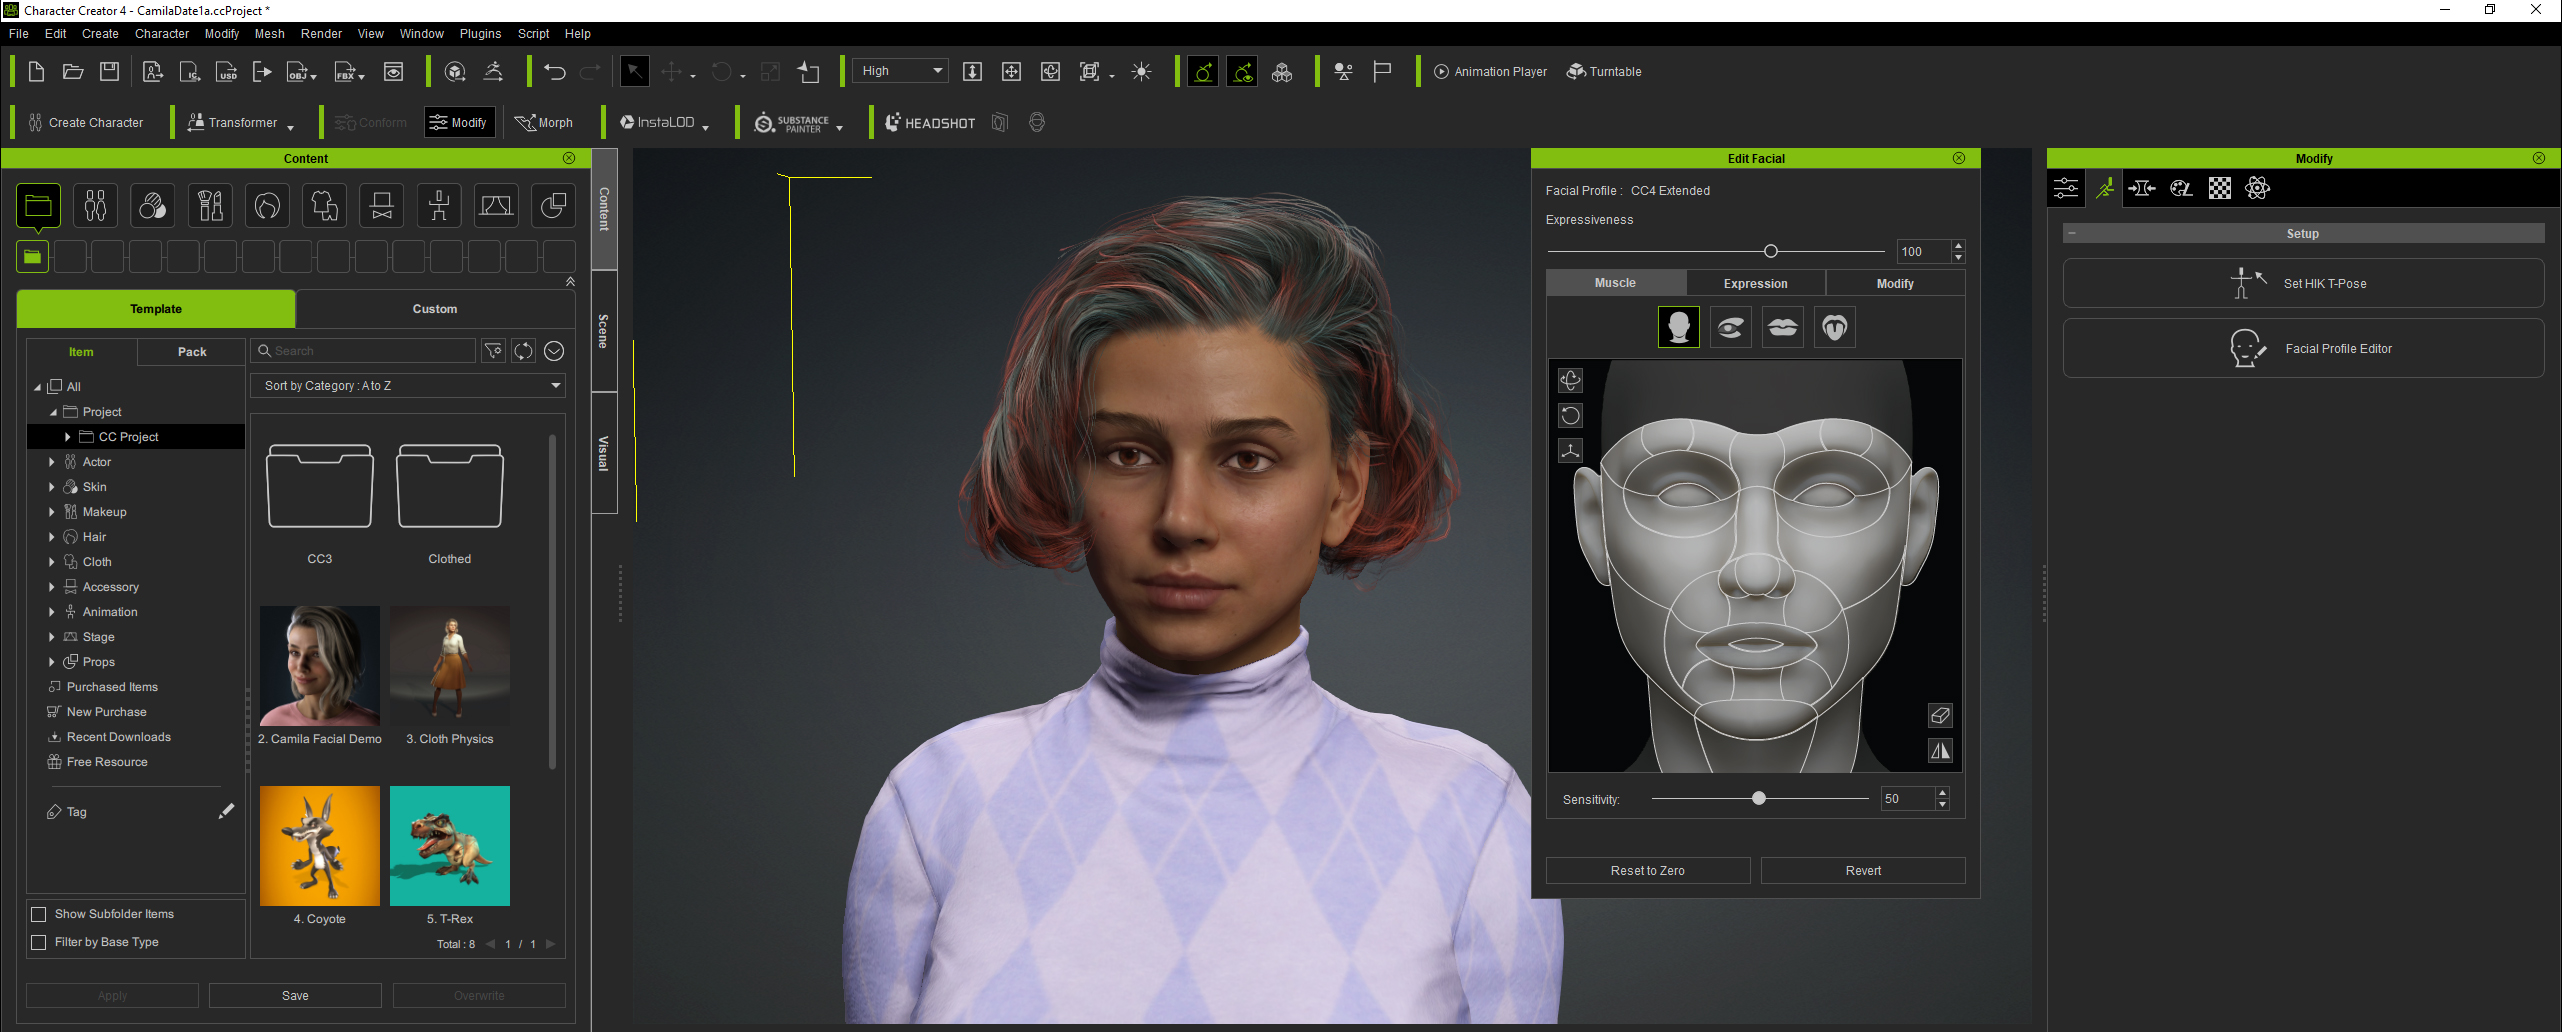
Extended Facial Animation Profiles

I know it seems like I’m giving iClone all the love here, but Character Creator 4 has some equally cool new features… my favorite being the extended facial animation profiles. I have a few scenes where characters are singing. Singing can be a much more expressive and emotional way of communicating an idea. While I was getting good results with the Character Creator 3 avatars I made, the Character Creator 4 facial animation profiles have helped me make the singing expressions much more convincing.

The release of iClone 8 and Character Creator 4 has just brought me a lot closer to my goal of completing a full length animated feature. Where it used to take me several weeks to complete a scene, I’m now getting the same amount of work done in a couple days. I’ve also raised the bar on acceptable quality. The limitations of the previous versions of these apps caused me to settle in certain areas. I would rewrite shots that were too complex or too ambitious given my limited 3D art skills. With iClone 8 and Character Creator 4 I’m able to aim higher and create a much more cinematic product.

” The limitations of the previous versions of these apps caused me to settle in certain areas. I would rewrite shots that were too complex or too ambitious given my limited 3D art skills. With iClone 8 and Character Creator 4 I’m able to aim higher and create a much more cinematic product. “

Richie Castellano- Producer, Musician

I’m thoroughly impressed by these recent updates. Most software companies give you small, incremental improvements in their new versions. Reallusion just moved lightyears forward.

Follow Richie Castellano:

Website:
https://richiecastellano.com/

YouTube:
https://www.youtube.com/richiecastellano

Facebook:
https://www.facebook.com/richiecastellano.bandgeek

Twitter:
https://twitter.com/rich_castellano

Instagram:
https://www.instagram.com/richiecastellano/

Twitch:
https://www.twitch.tv/bandgeekmusic

Studio Ghibletz brings original stories to life for 2D animated series

Nathan and Cody from Studio Ghibletz are a small independent animation studio who chose Cartoon Animator (CTA) to produce their animated series Spellslingerz, a story with a moral message about friendship and kindness set in a post apocalyptic universe.

In his interview with Reallusion, Nathan outlines why Cartoon Animator was the perfect software choice to bring their story to life and he speaks about his favourite CTA features and what the future holds for Spellslingerz.

“When we started, Cody and I knew nothing about animation. But when we watched that Cartoon Animator tutorial, I was excited when I saw the potential of rigged characters. Within a few hours I created my first animation! From there, we doubled down and purchased Cartoon Animator.”

Nathan – Studio Ghibletz

Q: Hi Nathan. Thank you for your time. We were excited to see what Studio Ghibletz has been up to. Can you tell us more about the studio?

My partner Cody and I, plus our awesome crew at Studio Ghibletz, are currently producing our first animated show using Cartoon Animator. In 2022 we released our first show, Spellslingerz—a post apocalyptic, gun slinging, wild west / fantasy adventure. It’s a 2D cartoon about two girls exploring a post apocalyptic desert and trying to make the world a better place. We’ve planned a story arc and dream of a six episode series. At the moment, however, we’re still in the writing stage for episode two. 

Q: Spellslingerz is such a great series concept. Where did the idea originally come from?

I stumbled across Hellua Boss—the animated YouTube series by Vizziepop. The idea of character driven comedy struck me—that the humor could both drive the plot and develop characters. Also, seeing an indie studio showed me that my dream of making my own animated cartoon was within reach. (As mentioned before, we learned everything from scratch.)

As for the characters, we wanted to create a show centered around friendship. As Alice (the voice of Gumdrops says) “Gumdrops and Sidewinder are friends and family all in one and their relationship goes super deep.” However, the response to their post-apocalyptic world differs. Sidewinder adopts a realist’s approach to their world. In her mind, she lives in a hard world so she must also be hard. This is the only way to keep Gumdrops safe, which is her main goal in the show. Gumdrops, on the other hand, sees the world as repairable, and dreams of seeing rainbows and butterflies. This conflict between these two friends moves the show forward. 

Q: What is your goal for telling the story of Spellslingerz? Is there a moral to the story?

Toward the end of the episode, Sidewinder and Gumdrops argue over the possibility of making it rain in the desert. Gumdrops holds up a fossil and asks “how did this get here?” inferring there used to be water in the desert. This fossil triggers a flashback for Sidewinder.

In the flashback, we see a young Sidewinder hungry, sad, and alone. Gumdrops—still a stranger—notices her. She offers Sidewinder a fossil she can sell to buy some food. This one act of kindness changes Sidewinder’s entire life and she becomes Gumdrop’s best friend. 

When the flashback ends, she sees Gumdrops holding a fossil. In her hard, realist heart, Sidewinder knows all the butterflies are gone and the rainbows are dead. However, she decides, for Gumdrops, “let’s make it rain.” The fossil symbolizes what we do for people we love, and that a small act of kindness can change someone’s life. 

Q: When you decided to make a full animated pilot episode, what made you choose Cartoon Animator as the platform to create your series?

When we started, Cody and I knew nothing about animation. Like JFK, we promised the moon without knowing how to get there. We learned everything from scratch. Along this quest for knowledge, YouTube took note of our plight and their algorithm suggested a video of Cartoon Animator by Reallusion.

Previously, Cody and I had decided 2D animation wasn’t feasible because of our lack of technical ability and resources. A one point we had even planned to use Lego stop motion. But when we watched that Cartoon Animator tutorial, I was excited when I saw the potential of rigged characters. In my mind, it fell between the 2D style we loved and the accessibility of stop motion. So I downloaded the trial version.

Within a few hours I created my first animation (Sidewinder v.1) Ugly as it was, Cody realized what it could become. From there, we doubled down and purchased Cartoon Animator. With Reallusion’s tutorials, we animated the first scene of Spellslingerz. Then we basked in its glory. To us, this scene was indescribably beautiful. Two months ago, we’d been playing with Legos. Now, we felt like Walt Disney. 

What sold me was the software’s intuitiveness. After watching half a dozen tutorial videos, I got the gist of the program. Once I had the basics, the show quickly came together.

” With Reallusion’s tutorials, we animated the first scene of Spellslingerz. Then we basked in its glory. To us, this scene was indescribably beautiful. Two months ago, we’d been playing with Legos. Now, we felt like Walt Disney. ”

Nathan – Studio Ghibletz

Q: What is your favorite genre or theme to work with?

Spellslingerz is a wild west / fantasy mashup—a solid intersection of our two favorite genres. Cody and I thought: how cool would a pistol shooting wizard be? We built our world around this concept. Spellslingers, like Sidewinder and Gumdrops, use guns to channel their magic— like wands. 

Q: Having worked with Cartoon Animator to create a full animated episode, how did you find the process of creating characters? Was it easy and enjoyable?

Yes! We designed our characters in pieces. Each piece corresponded to parts of the dummy template in Cartoon Animator. In the beginning, we manually clicked each piece into place. Later, we used the pipeline feature to import our art directly from Photoshop which makes things fast very easy.

The rigging character bone system in Cartoon Animator made our show possible. A “rigged character” or “free bone actor” is an animated cartoon character you can manipulate like a puppet. With hand drawn animation, you have to redraw the character thousands of times, taking countless hours, skill and resources. With a free bone actor, you simply morph and reposition the character’s body in each frame.

These free bone actors make 2D animation accessible to small studios like ours.

Q: Now that you have used Cartoon Animator, what are some of your favorite features and tools?

Without doubt, the most clever feature in Cartoon Animator are the 3D heads. Your characters can express emotion without changing the sprites (face pieces). This also allows your characters to turn their head. This is a little hard to imagine so I’ve included a video.

Ultimately, giving your toons a 3D head gives them a wider range of expression and motion. Without this feature, Sidewinder and Gumdrops would’ve looked like talking stick figures. The 3D heads gave the illusion of traditional animation without all the hard work of hand drawing thousands of required individual frames. A 3D head takes what would otherwise be stick people and make them into living, breathing 2D cartoons. It adds a layer of polish and detail that gives the characters a level of lifelikeness and warmth. 

As for the bone hands—these give you an unprecedented level of expression. People talk with their hands, characters should too. If you watch the first few seconds, you’ll see Sidewinder talking about squeezing water out of cactus toads. As she talks, she makes a squeeze gesture with her hands. This is perhaps one of my favorite animations in the show because it feels so lifelike.  The hands can be a little tricky to design. Each hand has fifteen parts and it takes time to rig each piece into place. However, the results are worth the effort. 

Q: So what’s next for Studio Ghibletz? Do you have plans for future content in the works? Will you be expanding on the Spellslingerz series?

My goal for future Cartoon Animator projects is the use of the pipeline feature to pipe the animations into After Effects and use Shadow Studio to shade and bevel the characters and scenes. I love the way 2D character designs look after you add shadows and intend to do this going forward.

We’ve kicked around ideas for Spellslingerz episode two. However, we’re leaning towards starting a new project. Because Cartoon Animator now has the ability to export layered scenes as MOV files for post production, we want to apply lighting and shadows using Adobe After Effects.

Originally, we planned to add lighting and shadows to Spellslingerz. Unfortunately, our backgrounds and 2D character designs were too complex. Now we’re leaning towards a simpler animation style with higher production quality.

Follow Studio Ghibletz:

YouTube:
https://m.youtube.com/c/StudioGhibletz

Facebook:
https://www.facebook.com/studioghibletz/

Instagram:
https://www.instagram.com/kosainecm/

The Making of Ancestories XR Cinematic Game Trailer

Giving life to characters with Digital Soul

José Antonio Tijerín

José Tijerín is a digital illustrator, 3D sculptor, and creator of video games such as “Dear Althea”  available on Steam. His content pack “We’re Besties” is currently for sale in the Reallusion content store.

In this tutorial, Tijerín explains how Character Creator (CC) and iClone helped to make a fund-seeking cinematic trailer for the Ancestories XR video game. Read on to discover the possibilities of Reallusion software to attain professional and industry-standard results sans expensive equipment and enormous financial support.

The Ancestories XR Project

José Tijerín: This promotional trailer was made to bring awareness to AncestoriesXR.com. We are telling stories about American history and stories of individual families. We are building a company that uses narrative video game techniques to create connections between younger and ‘digital-first’ generations to their family history and their combined legacy to American history. Millions of Americans can trace their family history back to the time of the Civil War, and this promotional video makes that history come alive. We don’t stop at animation; we also add interactivity so people can learn and explore via modern game techniques.  

Planning the Project

The first thing to do, in a really big project like this, was to spend weeks visualizing the result. Then we developed a plan that would allow us to get there in the most efficient way possible, to not waste time and resources.

The most important aspect was to define a storyboard and main character according to the narrative and audio files provided to us. In order to emphasize the aim of the project, it was decided that an old family photograph was to come to life to tell a story—specifically, an old African-American Union soldier in army uniform.

Creating the Character

To create the central character, I used Character Creator 4 together with Reallusion’s Human Anatomy pack, and after modifying the base character to resemble the references that I have gathered, I took it to Zbrush for retouching until I achieved the desired look. When sculpting, I usually do so without perspective in order to keep all polygons in sight, as lens distortions can augment the actual shape of the character. Modeling should not be approached in the same fashion as drawing: It’s important to constantly check all angles of the character and the shadows that form on its 3D face.

After that, I got to work on the character’s add-ons, most importantly, his beard. This element will be responsible for giving shape to his face and personality, so it was crucial that it was exactly the beard I had in mind.

For this, I chose one of the beards that comes with a mustache which was also offered as a base in Character Creator, and took it into Zbrush for reshaping. Even then I added more hair cards with transparent textures of thick and kinky hair for a more fluffy and realistic look. 

You can see the beard layers that were progressively applied in the image below. And thanks to Character Creator’s efficient system, the beard automatically adopts the weight maps of the 3D face (when the program is kept open). If we close Character Creator during this procedure, then we’ll have to manually synchronize the morphs of the face and beard when it comes time to animate facial expressions and perform lip-sync. It’s also important to test out 3D character animations, and in this case, we had to make sure the beard didn’t deform, due to its length, while the animated character turns his head. 

To make the clothes and objects of the scene, I had to do a lot of research and ask for help from historian Retha Hill of the AncestoriesXR group. I usually use, as was this case, Maya and Zbrush for modeling and Substance Painter for texturing. While Character Creator makes clothing setup fast and adaptable, we still had to make sure the clothes were error-free while the animated character moves about. 

CC 4 lets us apply an animation test to check for possible errors with clothing and accessories, and allows us to correct them and prevent further complications later down the road. In the same way, it is now also possible to test, modify, and add facial expressions.

Animating the Character

After having done all of the necessary checks, including correcting the position of the teeth and tongue—which is often overlooked—it’s time to export the character for animation in iClone, and after having set up the scene with props, I then applied lip-syncing. Adding audio to the character as the base for the rest of the 3D character animation made the most sense, as it gave us a clear guide to match the voice actor’s performance with the character’s movements and, ultimately, a much more realistic animation.

iClone also offers manual and easy ways to correct the lip-sync and match them to the words pronounced by the character, as well as intensity and emphasis of the syllables, which helped to get the animation just right.

After having completed this process, it was time to use the revolutionary Digital Soul content pack available in the latest version of iClone. With this tool, we were able to apply subtle facial animations that contributed to the ‘presence’ of the character and enhanced his performance with the lip-sync already applied. 

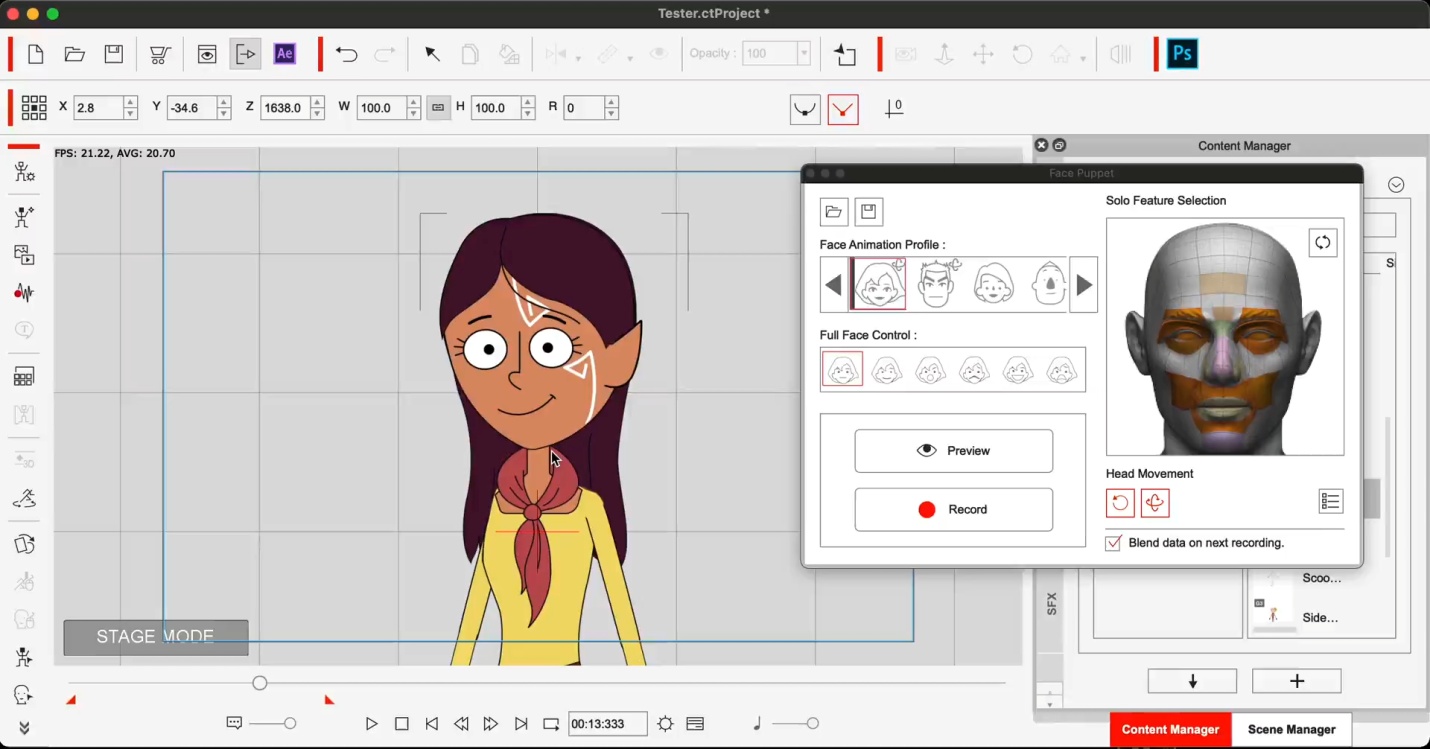
Simply by adding one of the many animations available in the package, the character came to life in a solidly realistic way with subtle and natural movements that made the character feel more human. This became a great base animation, on top of which, we applied additional motion keys with tools such as the real-time Face Key and Face Puppet tools, to perfect and customize the performance until we had what we were looking for. We were also able to layer on additional animations from Digital Soul without a loss in animation quality. It’s important to keep trying out several options and retouching the final animation, to give the performance a ‘genuine’ touch, fitted for the specific scenario.

After having defined the facial expressions, it was necessary to add an animation to the body to enhance the performance of the character. This should be done even if the camera shots do not capture the character completely, for example, even if the character’s hips are not shown, their movement will  inevitably affect the head and make their movement less stiff and more natural.

Fortunately one of iClone’s default animations worked perfectly for this task and only a couple of adjustments had to be made with the Edit Motion Layer window to make the character fit the chair. While applying this animation, I noticed that there was a moment when the character changed his posture and raised his hand. Combining these movements with a change in the voice acting gave intention to the character and made more sense and gave more power to the performance.

Exporting work to Omniverse

After having made sure the whole cinematic sequence looked exactly as planned with camera animation which were mostly still-shots, we finished the project in iClone and exported it to Omniverse for final rendering.

It’s a good idea to leave the scene lighting to Omniverse and check the result in RTX Path-Traced mode. Otherwise, the lighting can give unpredictable results in the final render, if we don’t preview the light bounces.

As shown in the image above, there was a general light thanks to the HDR image that encompassed the entire scene (not visible in the shot). Another two sets of lights were placed to illuminate the 3D face. I then added a cube as a back-wall that created soft-shadows on the entire character and darker shadows for the lower parts of the character. In my opinion, this created a more intimate effect for the scene. Finally, I placed a yellowish cloth to bounce lighting onto the opposite side of the character’s face. 

Now that everything was complete, the only remaining step was to configure the Movie Capture window and render for as many hours as necessary. In this case, rendering at 4K in RTX Path-Traced mode with 60 frames per second on my computer took more than 40 hours. After assembling the video together with the music and audio, I was able to deliver the Ancestories XR cinematic advert to the team, which was then used to promote the project. Remember to visit ancestoriesxr.com to support the project and I recommend you to watch more related videos of this article on the official Reallusion Youtube channel.

Learn more :

——————————————————————————————————————————————————————————————————

This article is also featured on Creative Bloq.

Fastest Turnaround from Static Mesh to Fully Animated Character

Blender to Character Creator 4 – Humanoid Pipeline

This article is featured on BlenderNation and BlenderArtist.

Greetings,
My name is Peter Alexander, I’m a 3D Generalist and Character Artist who specializes in Reallusion-related workflows. In this video, I’m going to demonstrate how to take a ready-made 3D character model, rig it in Blender, and import it into Character Creator 4 (CC4) to make it compatible with Reallusion’s 3D facial animation standards. 

INTRO: Select a 3D character model of your choice

For this demonstration I’m going to be using a model purchased from the 3D artist, Makar Malicki, whose assets can be seen on Artstation.

I’m going to start by opening a Blender file that I previously set up by separating the mesh into sections. This may not be necessary for you, but it helps me in the weight mapping process. Also, keeping the body separate from the hair, eyes, teeth, and accessories also helps to apply a degree of symmetry when doing facial expression editing.

STEP 1: Blender Character Rigging

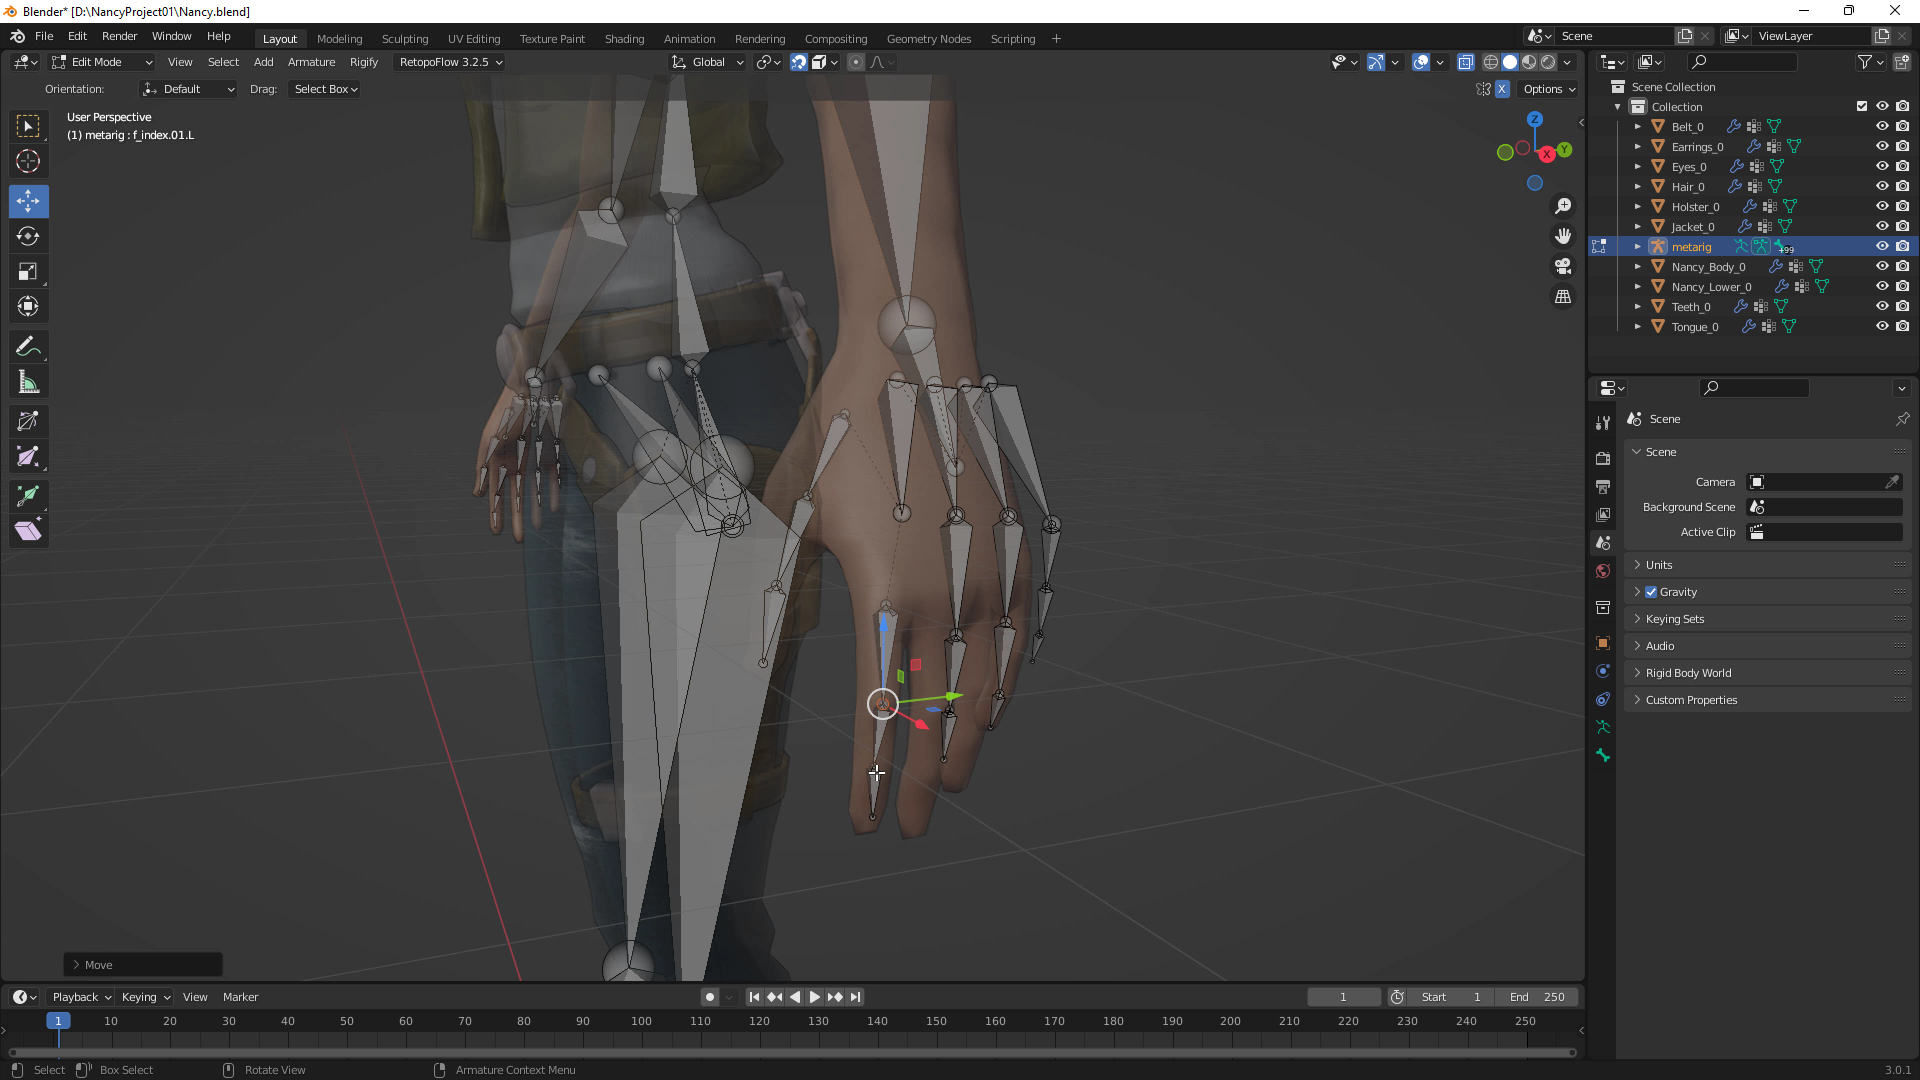
For rigging, I use the Human Meta-Rig located in the Armature section under Add. After adding the Meta-Rig, I scale it down and align the bones to the model as best I can. It can be difficult to align bones in three-dimensional space, so I turn on the Snap > Volume > Center option for some bones, especially the fingers. 

I deleted most of the facial bones, as morphs will control much of the expression system. Technically you can leave them, or apply weight maps to assist in the facial setup process in Character Creator 4, but my preferred method is to leverage morphs.

I add a bone for the jaw, three bones for the tongue, and I give the top and bottom teeth a bone each. Your setup doesn’t have to follow this precisely, although you’ll probably want at least a jaw bone, as well as bones for the eyes. While your face setup can be different, try to keep the rest of the bones consistent with the Human Meta-Rig. These names will be used in a script within Character Creator that will automatically identify the Meta-Rig setup.

Once the bones are aligned, select all the meshes and bind them to the armature. Weight mapping will almost always require adjusting. The trickiest parts tend to be the jaw for me—although getting bulkier clothing to deform properly can be problematic as well.

You’ll want to thoroughly test your weight maps before the next stage. Character Creator does have a system that allows you to edit weight maps, though it’s not as robust as Blender’s. Using Blender’s pose functions can allow you to see which aspects of your character need to be touched up.

STEP 2: Auto Import Meta-Rigged Character to Character Creator 4

With the rig finished, export to FBX (uncheck Add Leaf Bones), then import into Character Creator 4. You can do this by dragging the FBX into CC4, or opening up the Import dialog and selecting the file.

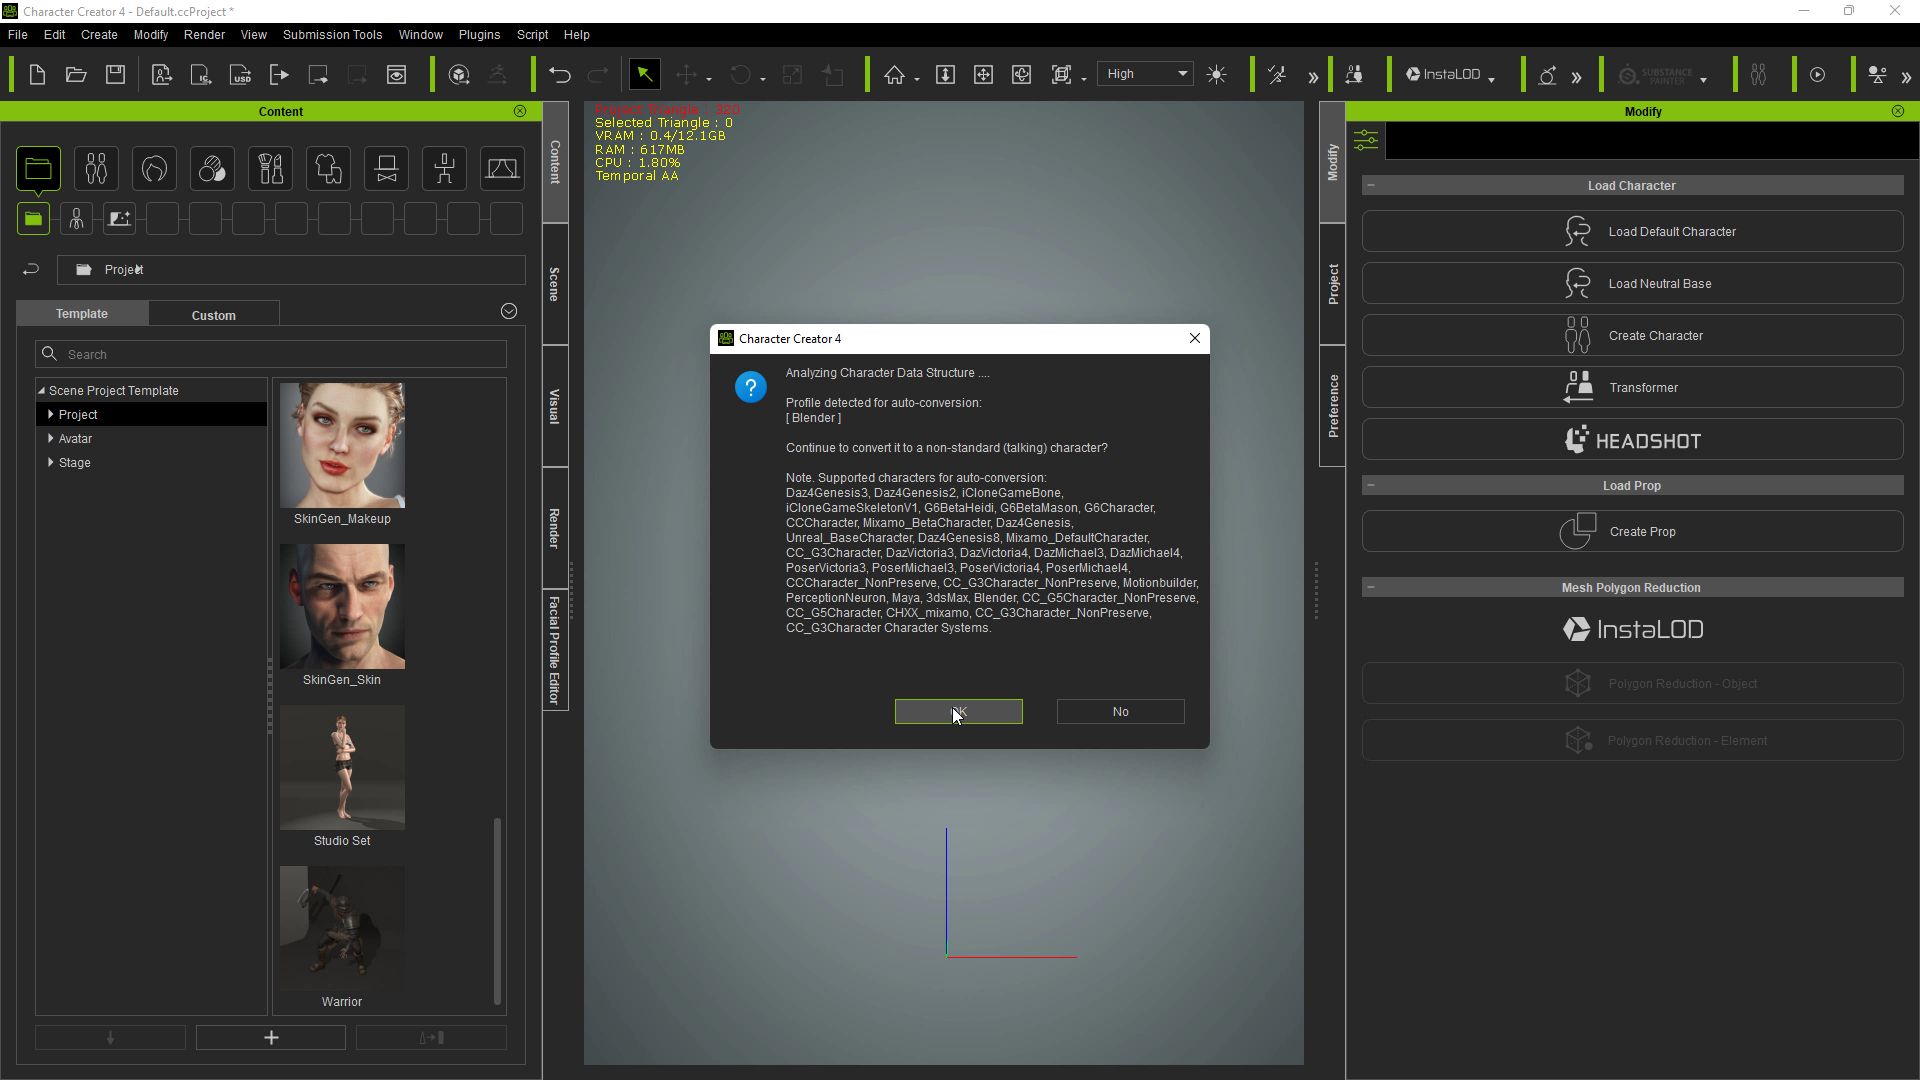
Unless you’ve changed the bone names, the script should detect Blender’s Meta-Rig, if you use that rigging for your character. If not you’ll have to manually assign the bones using the bone assignment menu.

Reallusion’s motion library will be largely compatible with your imported character; although due to the proportion difference of stylized characters, you’ll notice some of the poses and animations need to be adjusted.

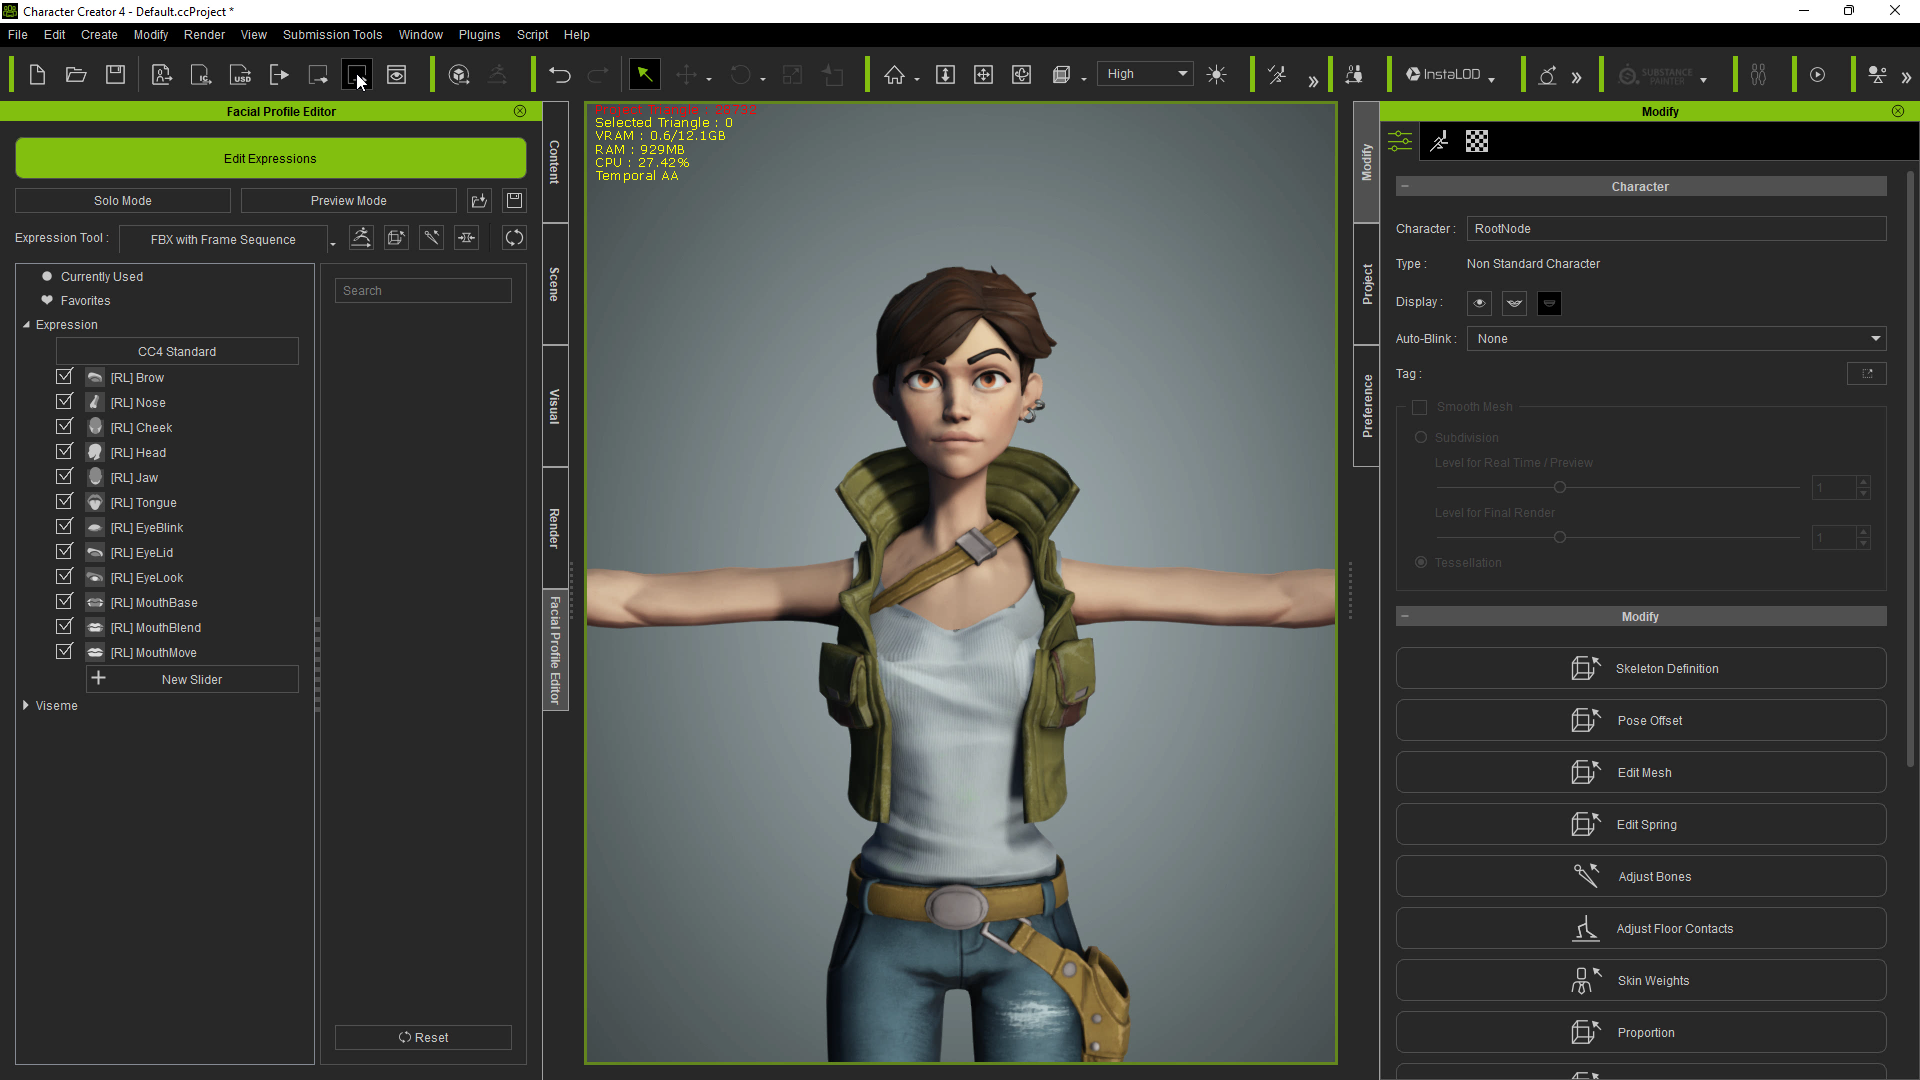
The Facial Profile Editor allows you to insert morph data into named slots that will be used to give the character facial animation and lip-sync compatibility. For a custom character outside of Character Creator, these slots will be empty by default. Depending on how you’ve rigged your character, you’ll need to export the model to a 3D application that allows for manipulating OBJ and/or  FBX files to efficiently create morphs. Zbrush’s GoZ is built into the pipeline, but an FBX can be exported into Blender, or similar software, just as easily.

STEP 3: Adding Facial Rigs in Character Creator 4

Each expression has a thumbnail that visually conveys the intended morph for that slot, often with little red arrows for additional assistance. This eliminates a lot of the guesswork involved and makes the process attainable for many skill levels.

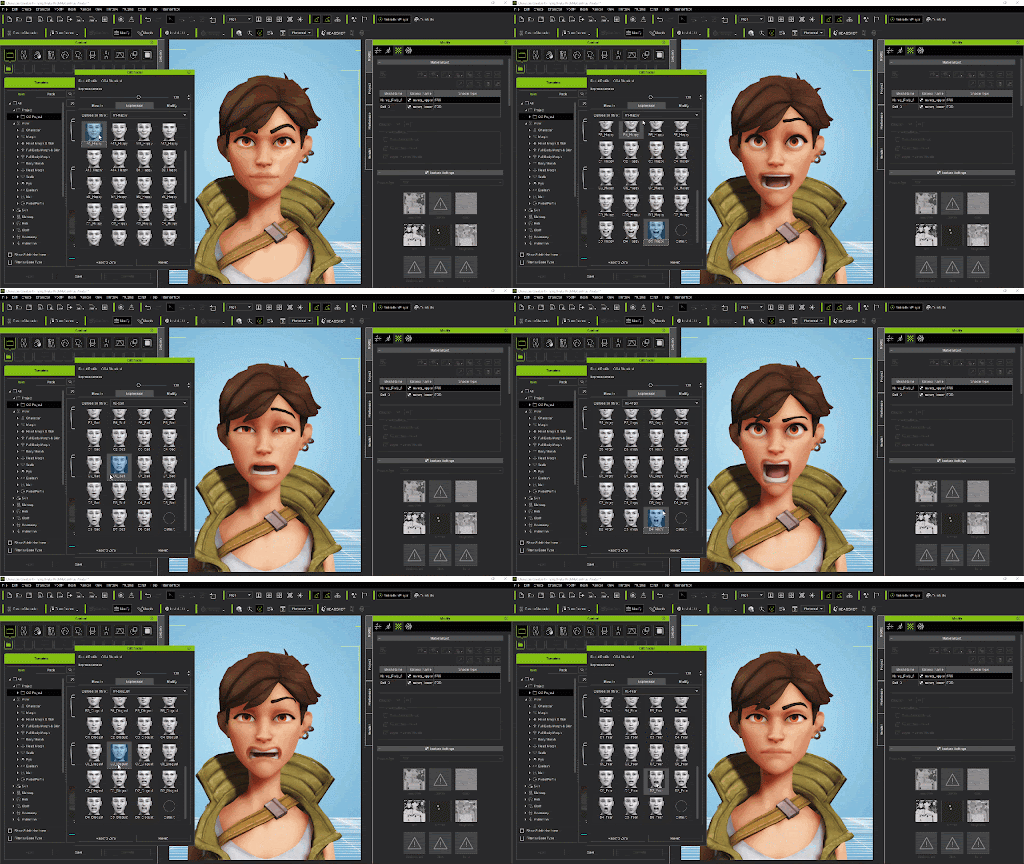
STEP 4: Batch Import Facial Morphs from Blender FBX

Character Creator 4 has an additional FBX export option, which is optimized for exporting FBX data for the Facial Profile pipeline, with presets for most industry-standard software. Blender is my software of choice, so I select that option and choose ‘FBX and Expression Sequence’.

Pro Tip:

From the FBX export panel, please make sure to check “Mesh and Expression Sequence” options so the FBX file will include empty morph entries for Blender designers to easily fill in additional morph data.

Morphs for Blender are located in the Shape Keys section. Character Creator 4 has populated the slots with empty names, making this process much easier than if you had to manually insert the names.

Blender character creation has many tools for sculpting expressions efficiently. I use a combination of the sculpting tools and the Edit Mesh tools. Also, Blender has a feature called Blend from Shape Key, which allows you to select aspects of your model and add or subtract other shape key data. It’s very useful for this process and in general.

When you’re finished editing, export as an FBX back to CC4. Uncheck Add Leaf Bones before you finish the export.

STEP 5: Check Animation in Character Creator and iClone

In CC4, go back to the Facial Profile Editor and import ‘FBX with Frame Sequence’, choosing the file you just saved from Blender.

The morph data should now be populated with the data you exported from Blender. This pipeline allows you to efficiently switch between Character Creator 4 and your 3D software of choice, allowing for easy adjustments for each morph data slot.

In addition to the morph preset slots and categories, you can add your unique expressions and categories, allowing for nearly limitless expressions full of personality. From an artist’s perspective, this adds a new dimension to 3D art that was previously limited to professional animators.

Another benefit to CC4’s facial expression pipeline is that it is extremely well organized. If you want to dial in a specific feature, you don’t have to stumble around looking for it. Everything is categorized, there’s a search menu, and you can see which morphs you’ve dialed in by going to the Currently Used section at the top of the categories.

You can check your expression work by going through all presets in the facial editing menu. If your expression looks mostly like the ones visualized in the icons, you’re in good shape in terms of expression compatibility.

With the character mostly set up, I’ve imported her into iClone 8 for a quick animation demonstration. The iClone Face Puppet and LiveFace features are fully compatible with every aspect of your custom character, just as they would be with a Character Creator avatar.

The Face Puppet menu allows you to manipulate aspects of your character’s expression using a wide array of programmed presets, with the ability to implement your own presets if needed.

Certainly, you can use iClone’s timeline to fully animate Nancy by blending motion clips, changing curves, or setting motion layer keys.

In Conclusion

To sum up, my experience with using CC4 to add a personality to this character is a very positive one. Traditionally, adding this level of complexity to a character is beyond the scope of artists who specialize in areas of 3D outside of rigging and animation. Character Creator 4 opens up a new avenue for artists to bring life to their creations, giving smaller studios access to tools and pipelines that are extremely easy and efficient to use.

I am not a professional rigging artist, and my experience in this area is limited at best. However, with modest familiarity with Blender character creation tools, I was able to successfully take this static character, rig it in Blender, and endow it with full personality using the new features in Character Creator 4 and using Blender for the morph target pipeline.

In brief, my main takeaways are:

  • Due to its speed and ease of use, Character Creator 4 is the ultimate tool for bringing life to rigged characters.
  • Blender (my software of choice) is an excellent choice for getting a character prepared for the Character Creator 4 pipeline. In addition, the facial morph pipeline is very Blender-friendly.
  • While I am not a trained animator, iClone 8 is easier to use than ever. Applying, cutting, and blending motion clips makes the process of animation quite enjoyable.

Learn more :

• Peter Alexander (Mythcons) https://www.artstation.com/mythcons 

• Blender-Character Animation Pipeline https://www.reallusion.com/character-creator/blender.html

• Character Creator https://www.reallusion.com/character-creator/

• iClone https://www.reallusion.com/iclone/default.html

• Reallusion https://www.reallusion.com/