首頁 » Page 51

Multiple Poses for League of Legends Character: The Making of Dragon Sorceress Zyra

Spruce Up Game Characters with ZBrush Pose Tools & Character Creator

After winning the first prize in the student division of the Korea 3D Character Creator (CC) contest, Go Eun Kim has been diligently honing her 3D modeling skills. She is now exploring unconventional tools to enhance her real-time animation pipeline. In this interview, Kim discusses her innovative use of ZBrush Pose Tools & Pose Link in conjunction with Character Creator 4 (CC4) to enhance the poses of her cherished game characters, specifically Dragon Sorceress Zyra.

She also delves into leveraging the rich assortment of shaders offered by Auto Setup for Unreal Engine and offers valuable insights on seamlessly integrating various 3D tools, including 3ds Max and CC AccuRIG (an auto-rigging tool). Her expertise enables her to transform static ZBrush sculptures into dynamic, lifelike game characters.
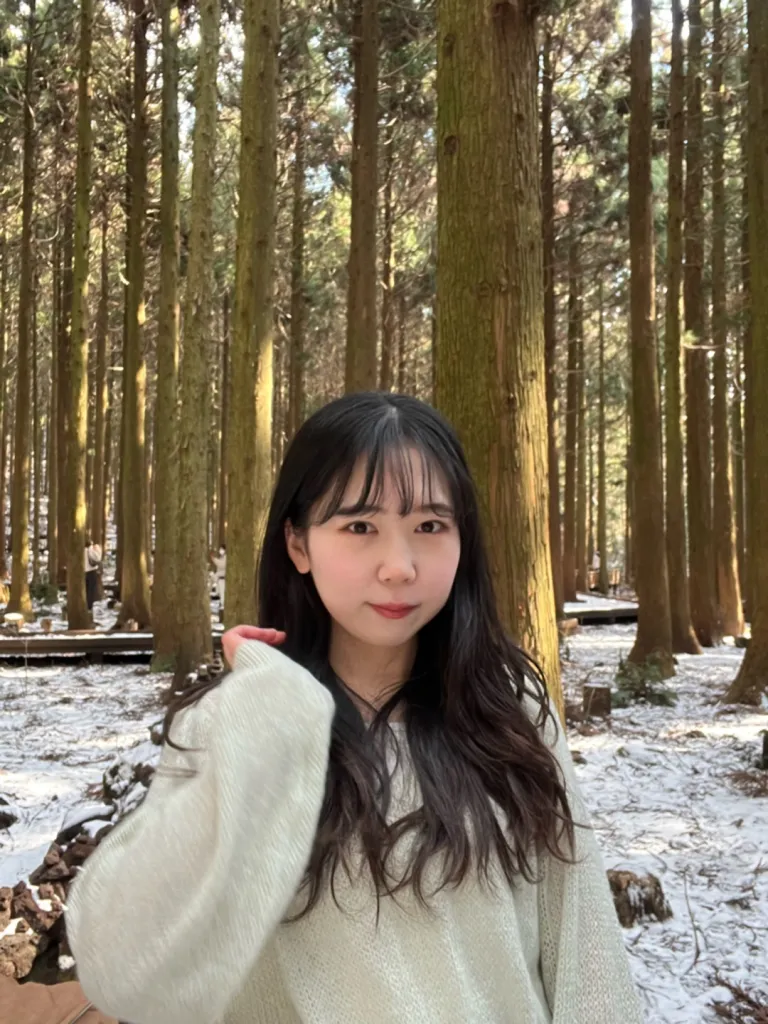
Go Eun Kim

Hello, my name is Go Eun Kim, a college student majoring in computer engineering, and I am from South Korea. In 2021, I started studying character modeling through a graphics academy. At first, I studied using 3ds Max and gradually studied how to model characters using programs such as ZBrush, Substance painter, and Unreal Engine. And by participating in a contest held in Korea, I could learn how to easily implement high-quality characters using Character Creator.

Learning various programs was not an easy process, but visible results are satisfying and fun to me. Also, I was able to concentrate on studying 3D modeling with passion because I always get excited when I imagine people playing future game characters that I have made.

Go Eun Kim’s ArtStation

For this project, I decided to deviate from creating a typical human character and instead explore a different character archetype, such as an elf or monster. During my reference search, I came across the concept art of Dragon Sorceress Zyra from League of Legends. I found it particularly fitting for this project’s character concept, envisioning a formidable humanoid boss monster in an RPG game. You can follow my tutorial below to achieve similar results: 

Part I. CHARACTER CREATION

Step 1) Character Concept

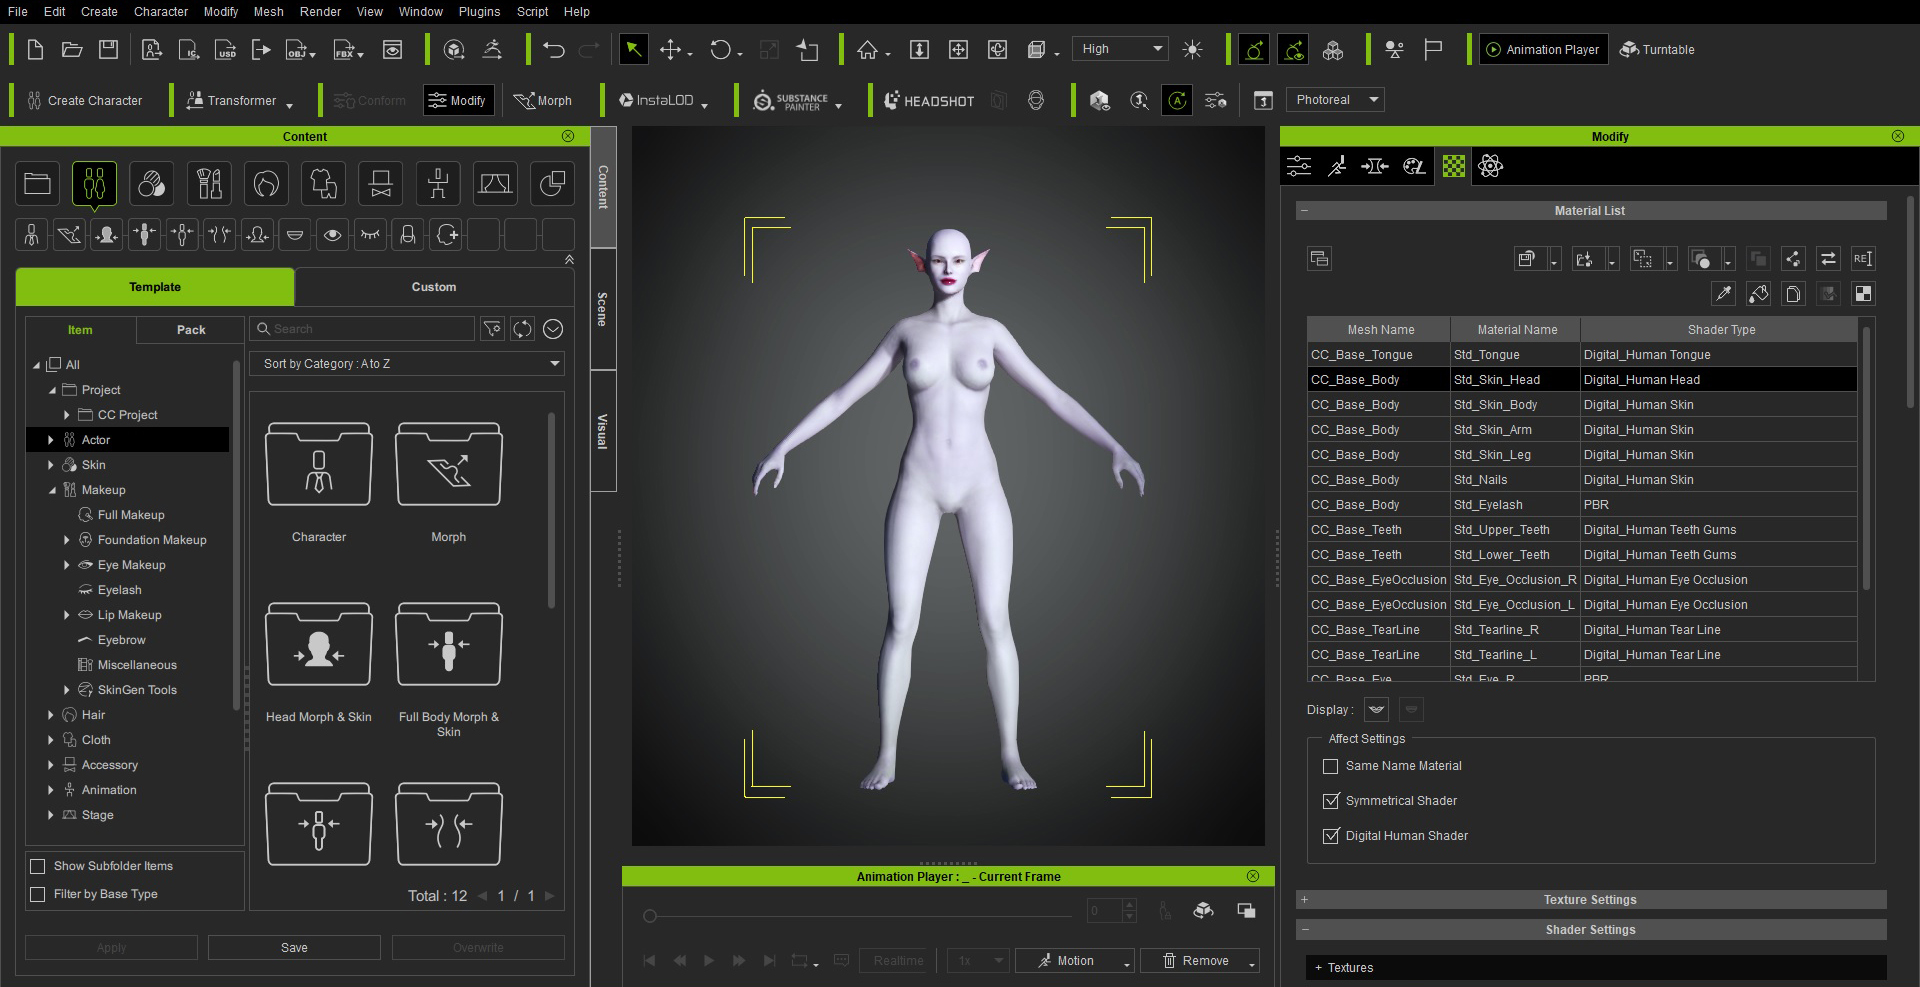
Use Character Creator 4 to change the appearance of basic characters and create purple-colored skin and pointed ears to match the character concept.

To bring this concept to life, utilized the capabilities of Character Creator 4 to modify the appearance of the base characters, by introducing distinctive features like purple-colored skin and pointed ears to align with the envisioned character concept.
Step 2) Sculpting Characters, 3D Assets, Textures with 3ds Max, Substance Painter and ZBrush

After exporting the model from Character Creator, proceed to work on it in ZBrush. For example, to infuse a dragon-like essence, I meticulously sculpt scales onto the character’s skin.

Following that, I created a dragon ornament in ZBrush to embellish Zyra’s design.

Employ 3ds Max and ZBrush to design and create the accessories and clothing for yourcharacter. Generate both low-polygon and high-polygon versions of these elements and proceed to bake the normal map.

With the freshly baked normal map, proceed to work in Substance Painter. Here, you’ll need to apply the map to the model and meticulously craft a texture map, bringing the clothes and whatever prop, like my dragon, to their final completion.

You can also utilize the face and body texture maps provided by Character Creator 4 to further customize the character’s appearance. By making adjustments to the skin details and applying dragon-like textures and makeup in Photoshop and Substance Painter, I was able to achieve a distinct dragon skin aesthetic.

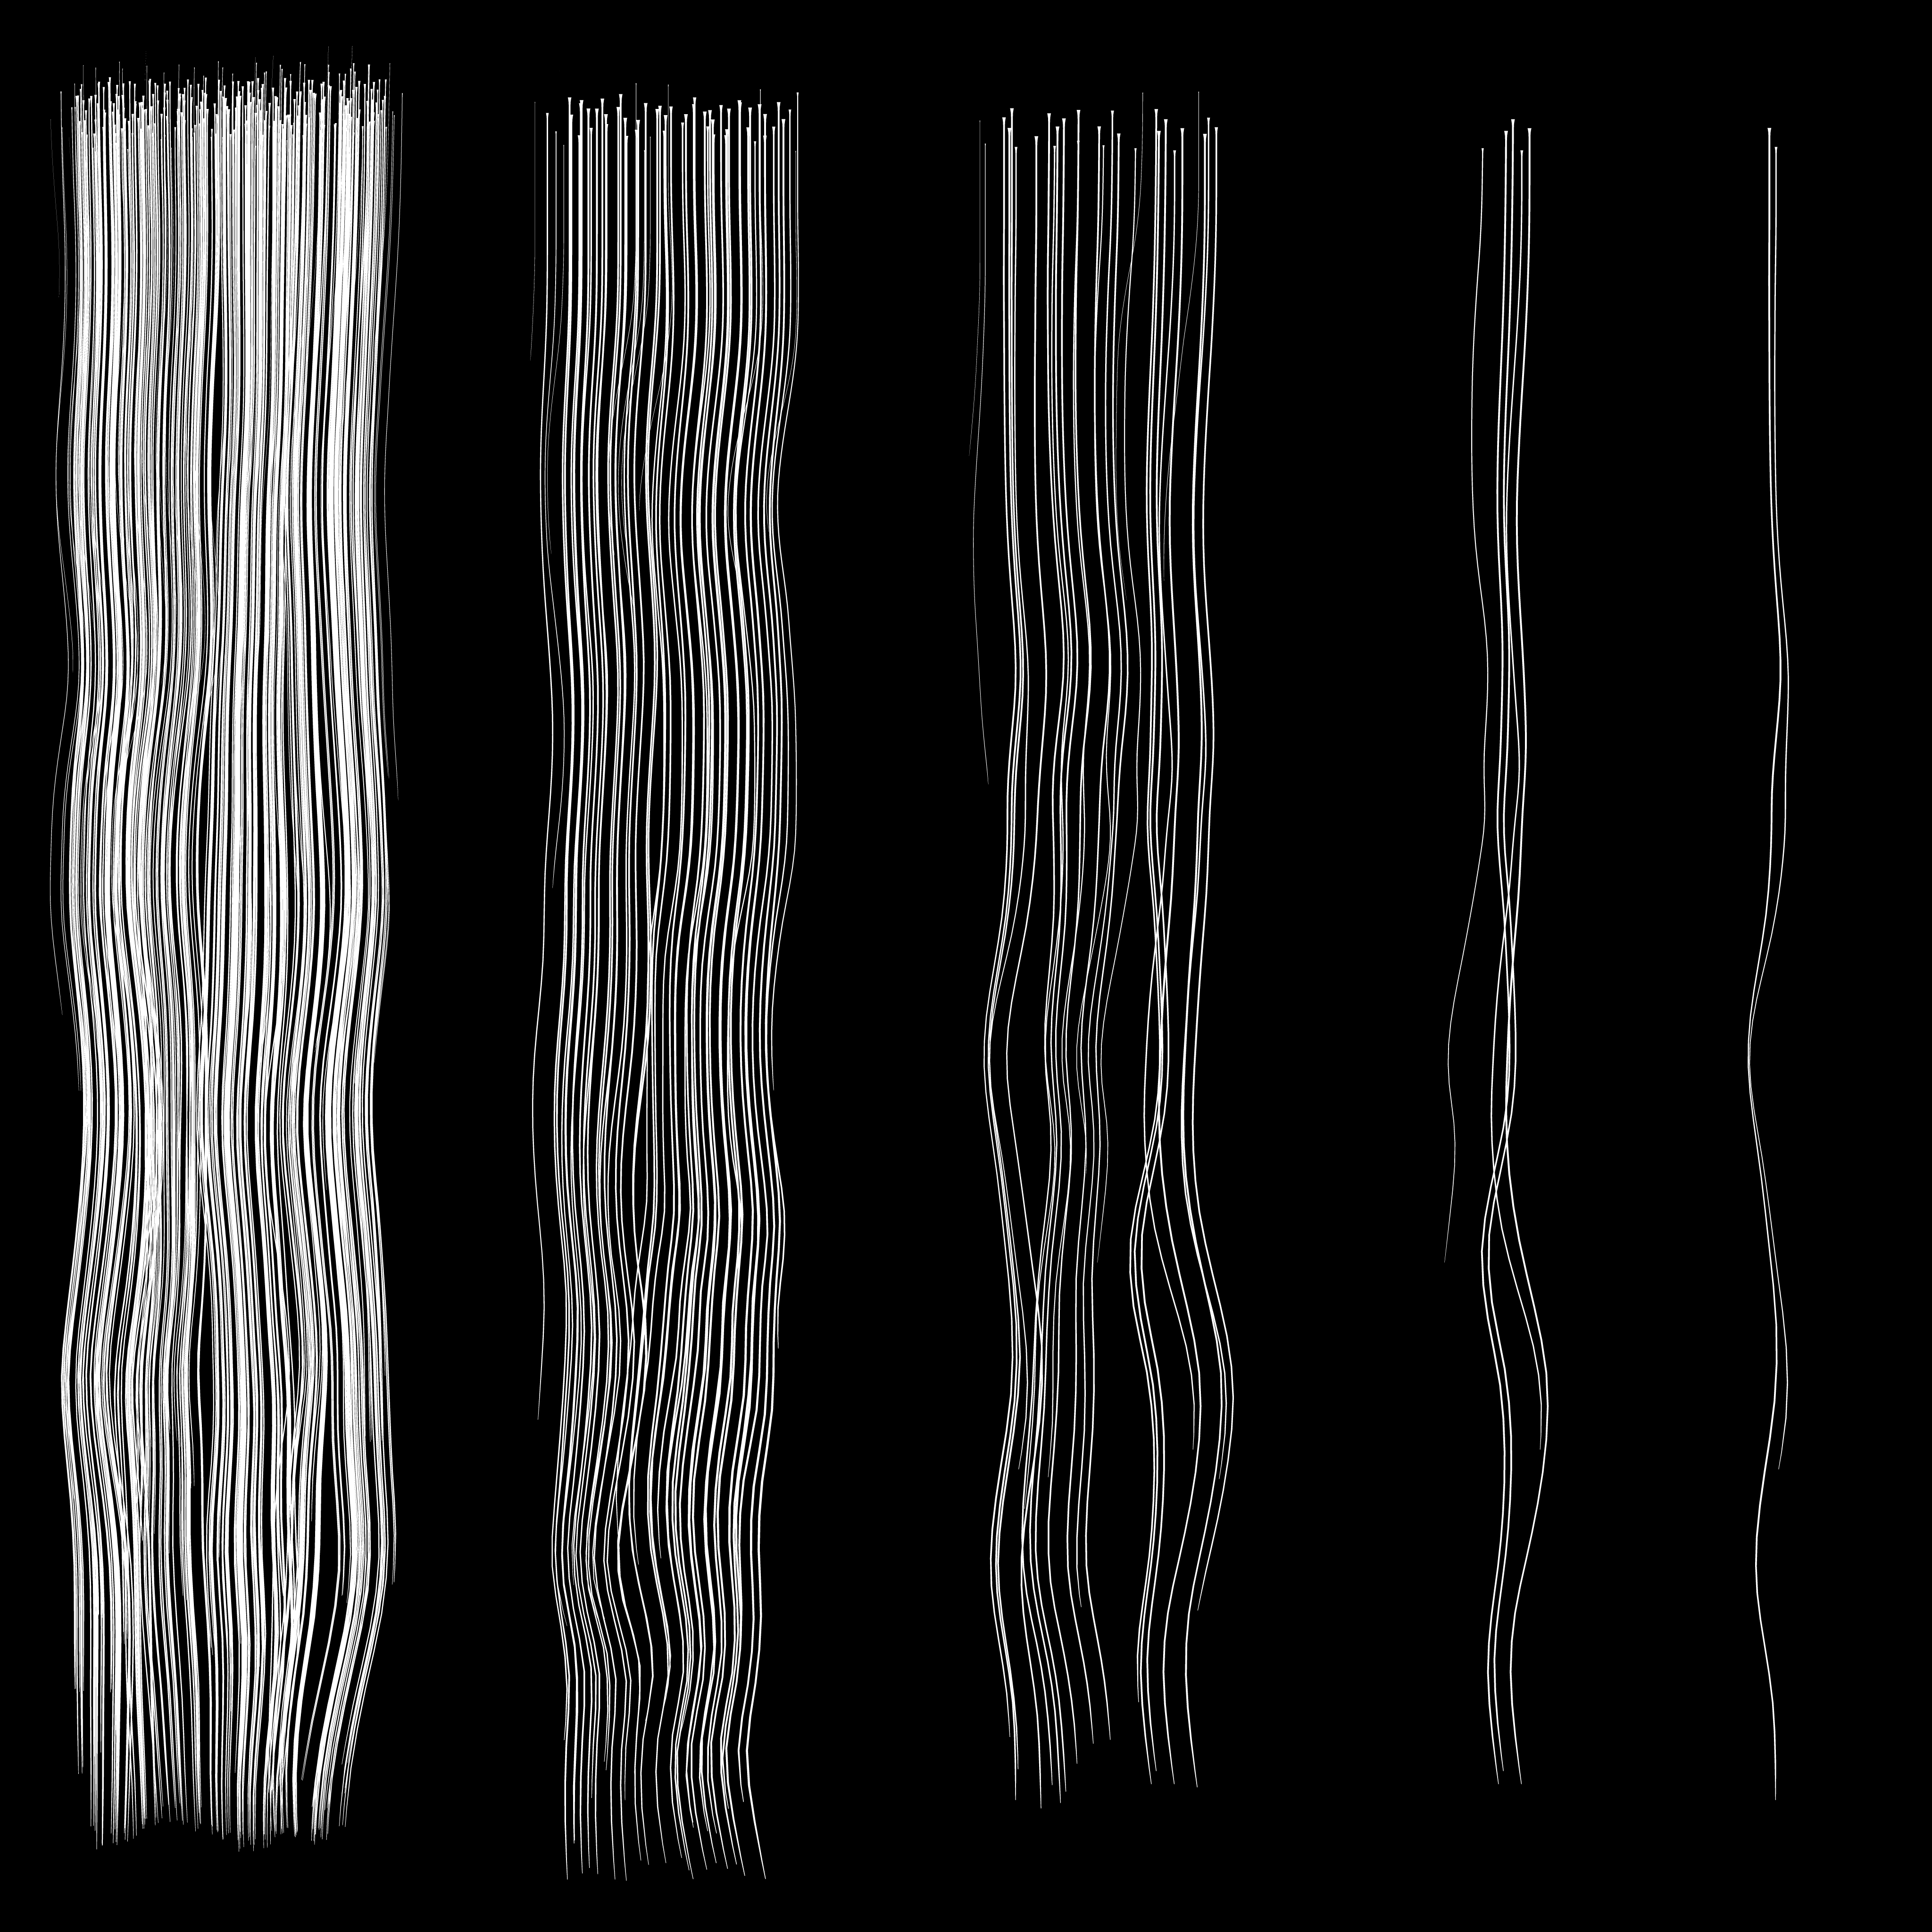
To achieve a suitable hairstyle for the character, employ hair cards in 3ds Max. These hair cards enable you to meticulously craft a hairstyle that complements the overall character design.

Additionally, you can utilize ZBrush’s FiberMesh to generate a hair texture, which is then applied to the hair cards, resulting in a realistic and visually appealing hairdo.

Part II. ZBRUSH POSE TOOLS

Q: Hi Go Eun, first of all, thank you for sharing your amazing idea of creating Zyra with her Dragon. Posing characters in ZBrush can be quite challenging. Could you please elaborate on how you utilized CC AccuRIG and ZBrush Pose Tools plugins to create multiple poses for your character?

Here’s how I created multiple poses using the “ZBrush Pose Tools” plug-in:

To begin, you need to send the character in either a T-pose or an A-pose state from Character Creator to ZBrush using the “ZBrush Pose Link” feature. Once in ZBrush, you can record the character’s pose by selecting “Record New Pose” in the “ZBrush Pose Tools” plug-in and saving the pose.

Creating additional poses follows a similar process. First, generate a new pose for the character in Character Creator. You can use an existing pose provided by Character Creator or create a new one by directly manipulating the bones through the “Edit Pose” function.

After creating the new pose in Character Creator, select “Record New Pose” in ZBrush and then click “Send Current Pose to ZBrush Pose Tools” in Character Creator to transfer the new pose. Remember to save the pose by selecting “Save New Record”. By repeating this process, you can switch between the T-pose and multiple poses as needed, storing them as “pose1”, “pose2”, and so on.
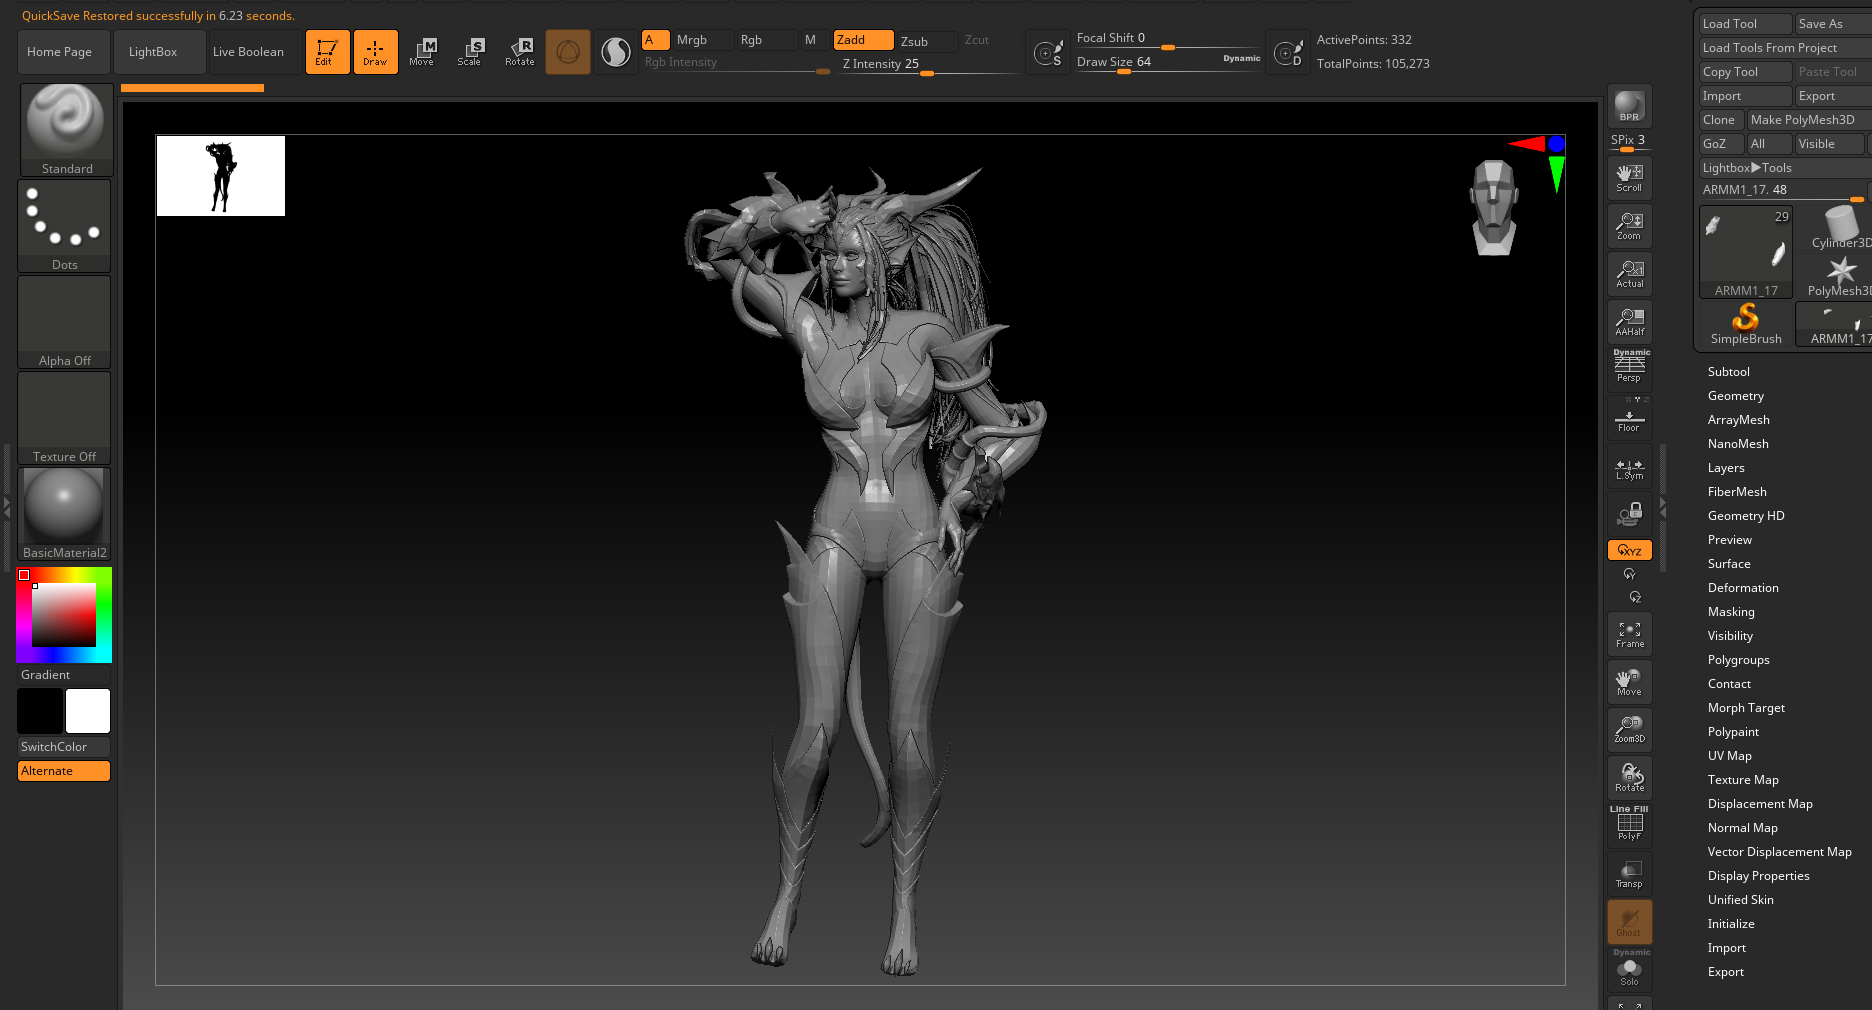
This method allows for the creation of various poses, providing flexibility and versatility to bring the character to life in different positions.

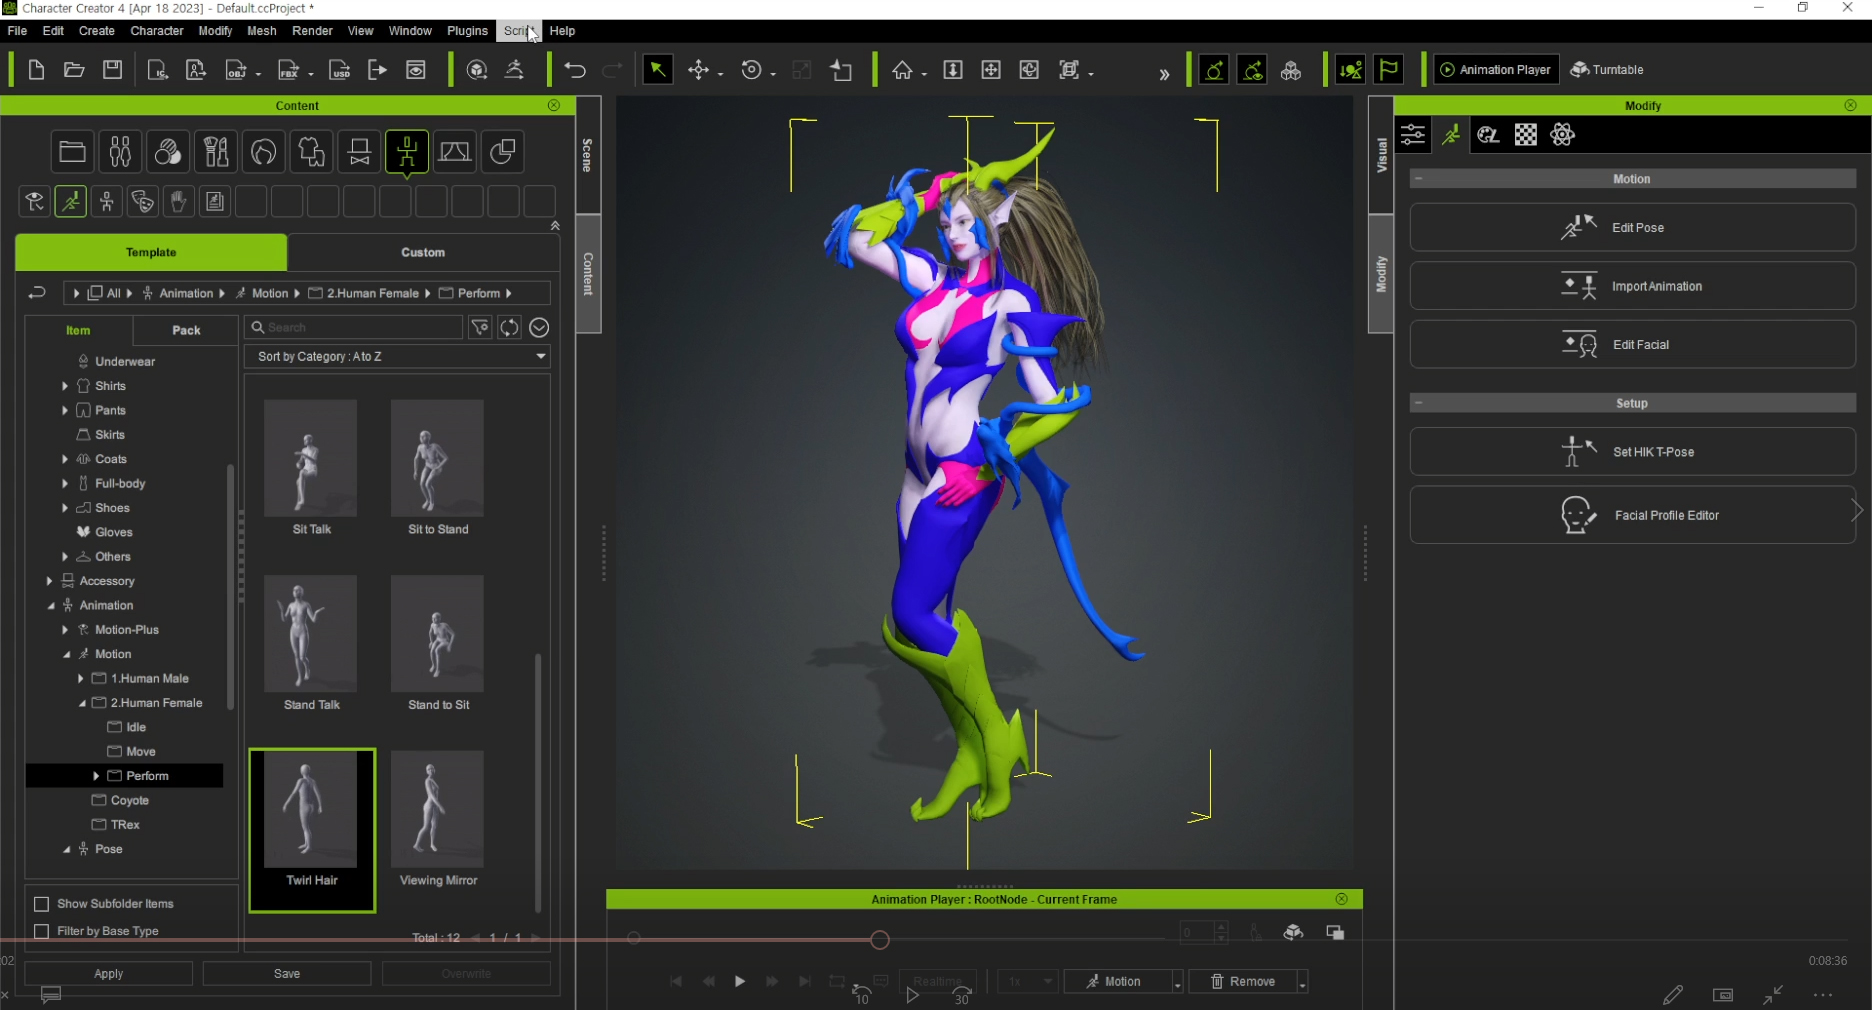
Q: In comparison to your previous method of posing characters in ZBrush or other 3D tools, what are the advantages of utilizing the AccuRIG+Posing workflow with Character Creator?

The benefits are manifold. With this workflow, you can effortlessly change poses within a single project, eliminating the need to create a new project for each pose. The “Edit Posture” feature in Character Creator enables swift pose adjustments that can be seamlessly sent back to ZBrush. Moreover, by utilizing layers, you have the ability to modify the mesh for each pose independently, without altering the mesh in the original T-pose. This grants greater control, allowing for the expression of distinct clothing folds and details.

Q: What are your thoughts on the overall experience of using the ZBrush Pose Tool plugin in terms of time and results?

Initially, setting and using a pose required exporting and importing it into other programs. Any modifications also involved going through the same process. However, ZBrush Pose Tools has simplified the workflow by establishing a seamless connection between CC and ZBrush with just one click. This not only saves time but also allows for quick adjustments. Additionally, leveraging the layer on/off feature enables the addition of intricate details by sculpting each mesh differently when capturing a screenshot.

Part III. ANIMATE WITH UNREAL AUTO SETUP

Step 3) Animation Process

To enhance the natural and lively feel of the dragon animation, incorporate the spring effect function in Character Creator 4 after integrating the bone structure in 3ds Max.

To transfer facial expressions and eye movements from 3ds Max, export them as an OBJ file. Then, utilize the iClone morph creator to update and refine the morphs. This allows for seamless integration of the facial expressions and eye movements into iClone, enhancing the realism and expressiveness of the characters.
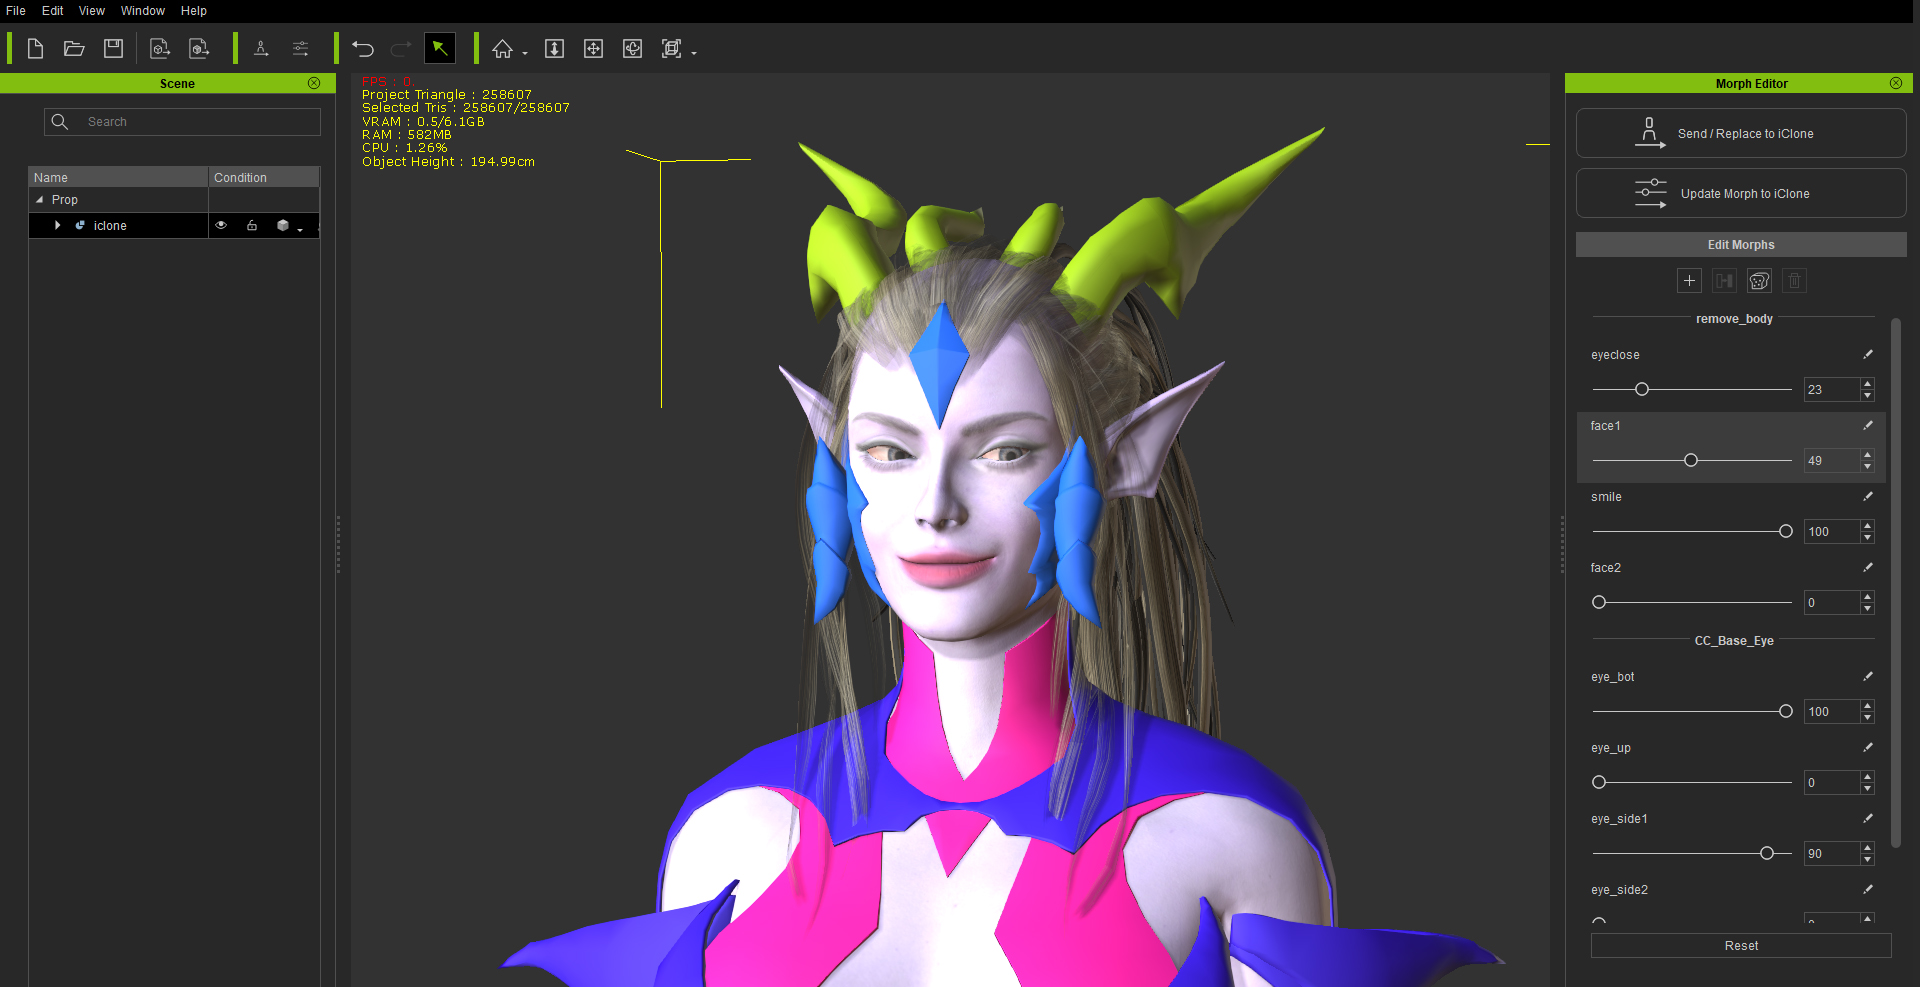
Once you have updated the morphs using the iClone morph creator, employ the morph animator to seamlessly incorporate a range of facial expressions and eye movements into the specific sections of your desired animation.

Afterwards, export the animation and bring it into Unreal Engine 5 (UE5). Apply all the texture maps generated in step 2 to the material node in UE5.

Step 4) Lighting Setup

The CC4-to-UE5 AutoSetup provides a variety of shaders. By applying the skin shader, you can adjust the details of the skin using micro normals. The Eye Shader allows you to freely modify the color, reflective light, and more. The Eye Occlusion shader creates a realistic appearance for the eyes.

Once you have applied the materials to the character as described, proceed to select a background in the Unreal Engine that complements the character’s mood.

Enhance animation with lighting effects and camera movements for dynamic visuals. Capture a screenshot and record the video to complete the process.

Part IV. Conclusion

With the aforementioned steps completed, my “Dragon Sorceress Zyra” character is finished. I thoroughly enjoyed designing and adorning characters according to my desired concept. Undoubtedly, Character Creator 4 greatly facilitates this process, making it both easy and efficient. Thank you for following my workflow and tutorial.

Free Download

Learn more

Generating Distinctive and Dynamic Wrinkles for Toon Characters

Introduction

Greetings, this is Peter Alexander. In this video I’m going to demonstrate how to use the wrinkle system for a stylized character.

Overview

There will be two main sections to this tutorial: one for basic users, and one for advanced. The advanced section will delve into areas of normal map modification.

Software Used

I will be using Character Creator and an image editor known as Krita. I chose Krita because it has a height-to-normal map filter, which is very useful for non-3D generation of normal map details.

Part One: Basics

Understanding Wrinkle Maps

The wrinkle system uses three sets of maps, with 5 main maps in total for each set.

Loading a Wrinkle Map

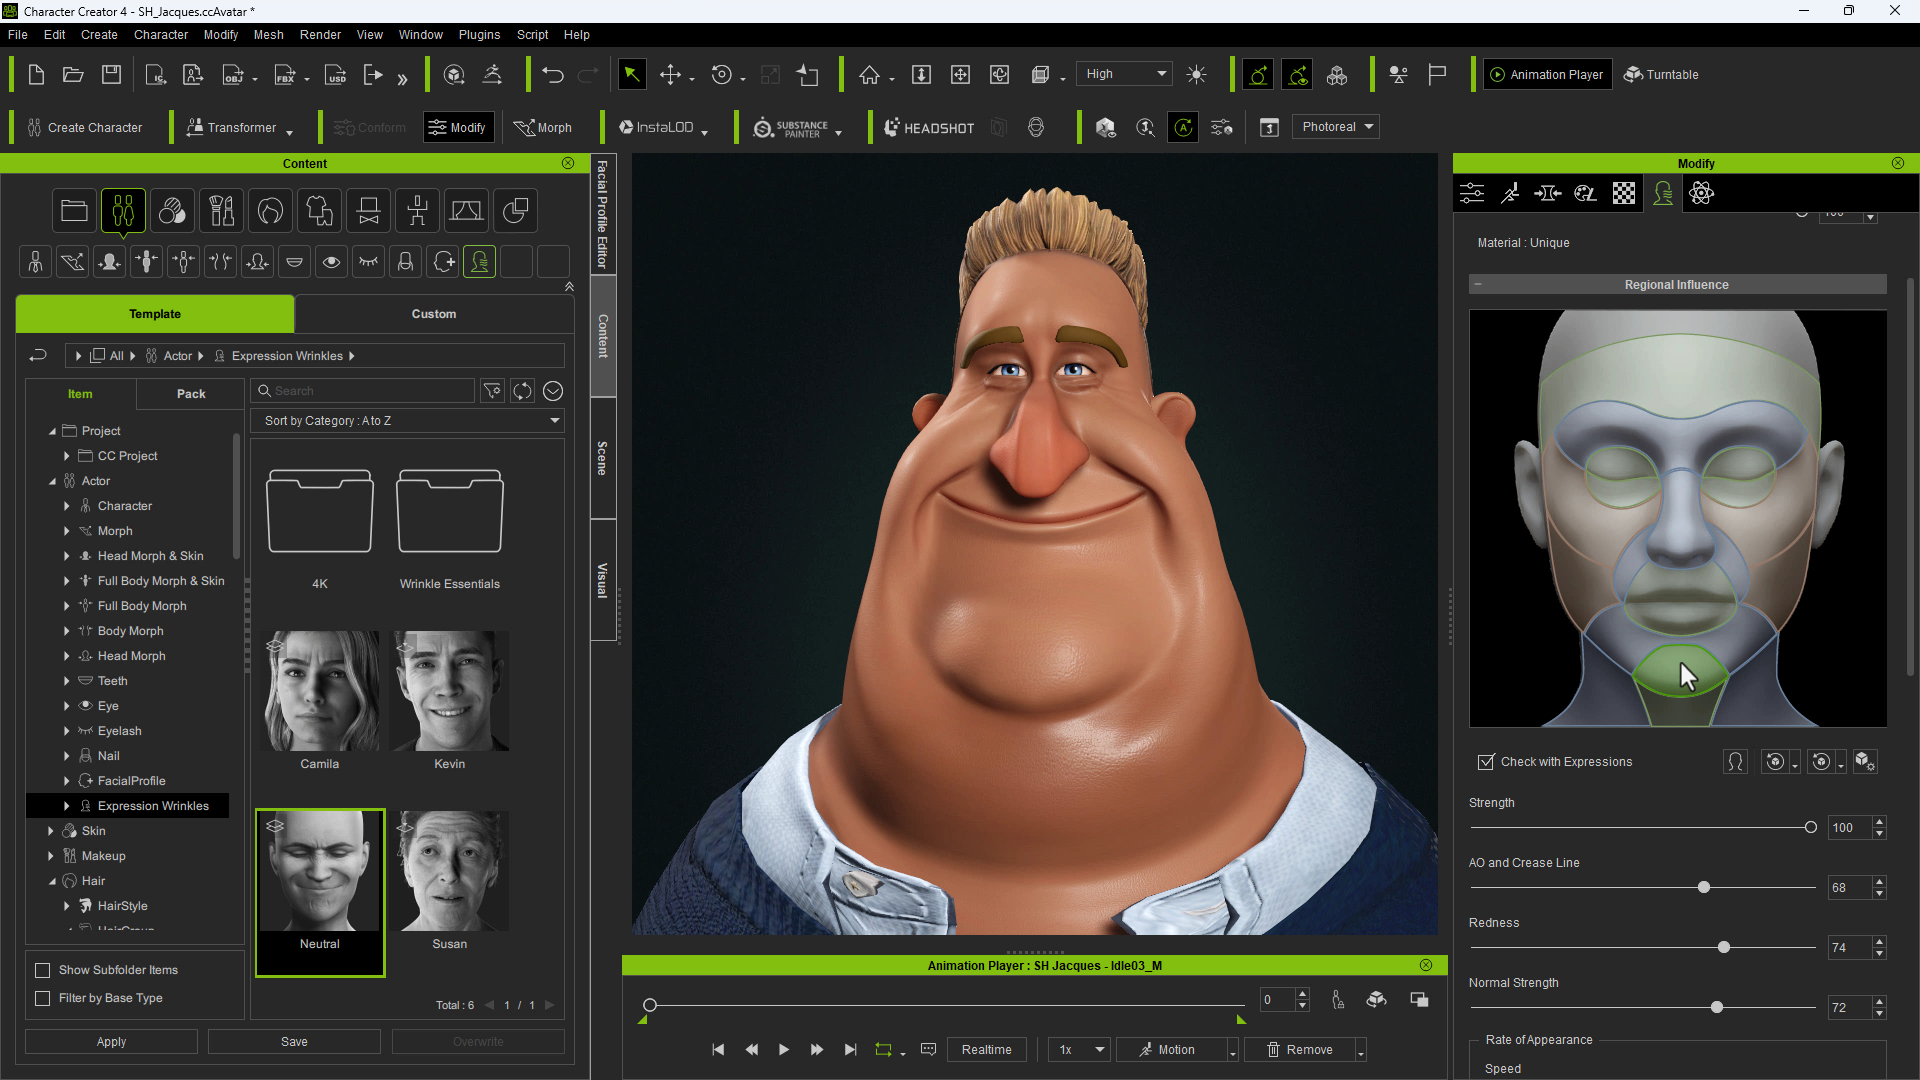
The process of adding wrinkles to a character is very simple. Just find a preset in the Wrinkle tab of the Content window, which is a subsection of the actor properties.

Character Creator has some facial animations preloaded to the animation player, to allow you to check your wrinkles and other animation properties.

Choosing the Right Set

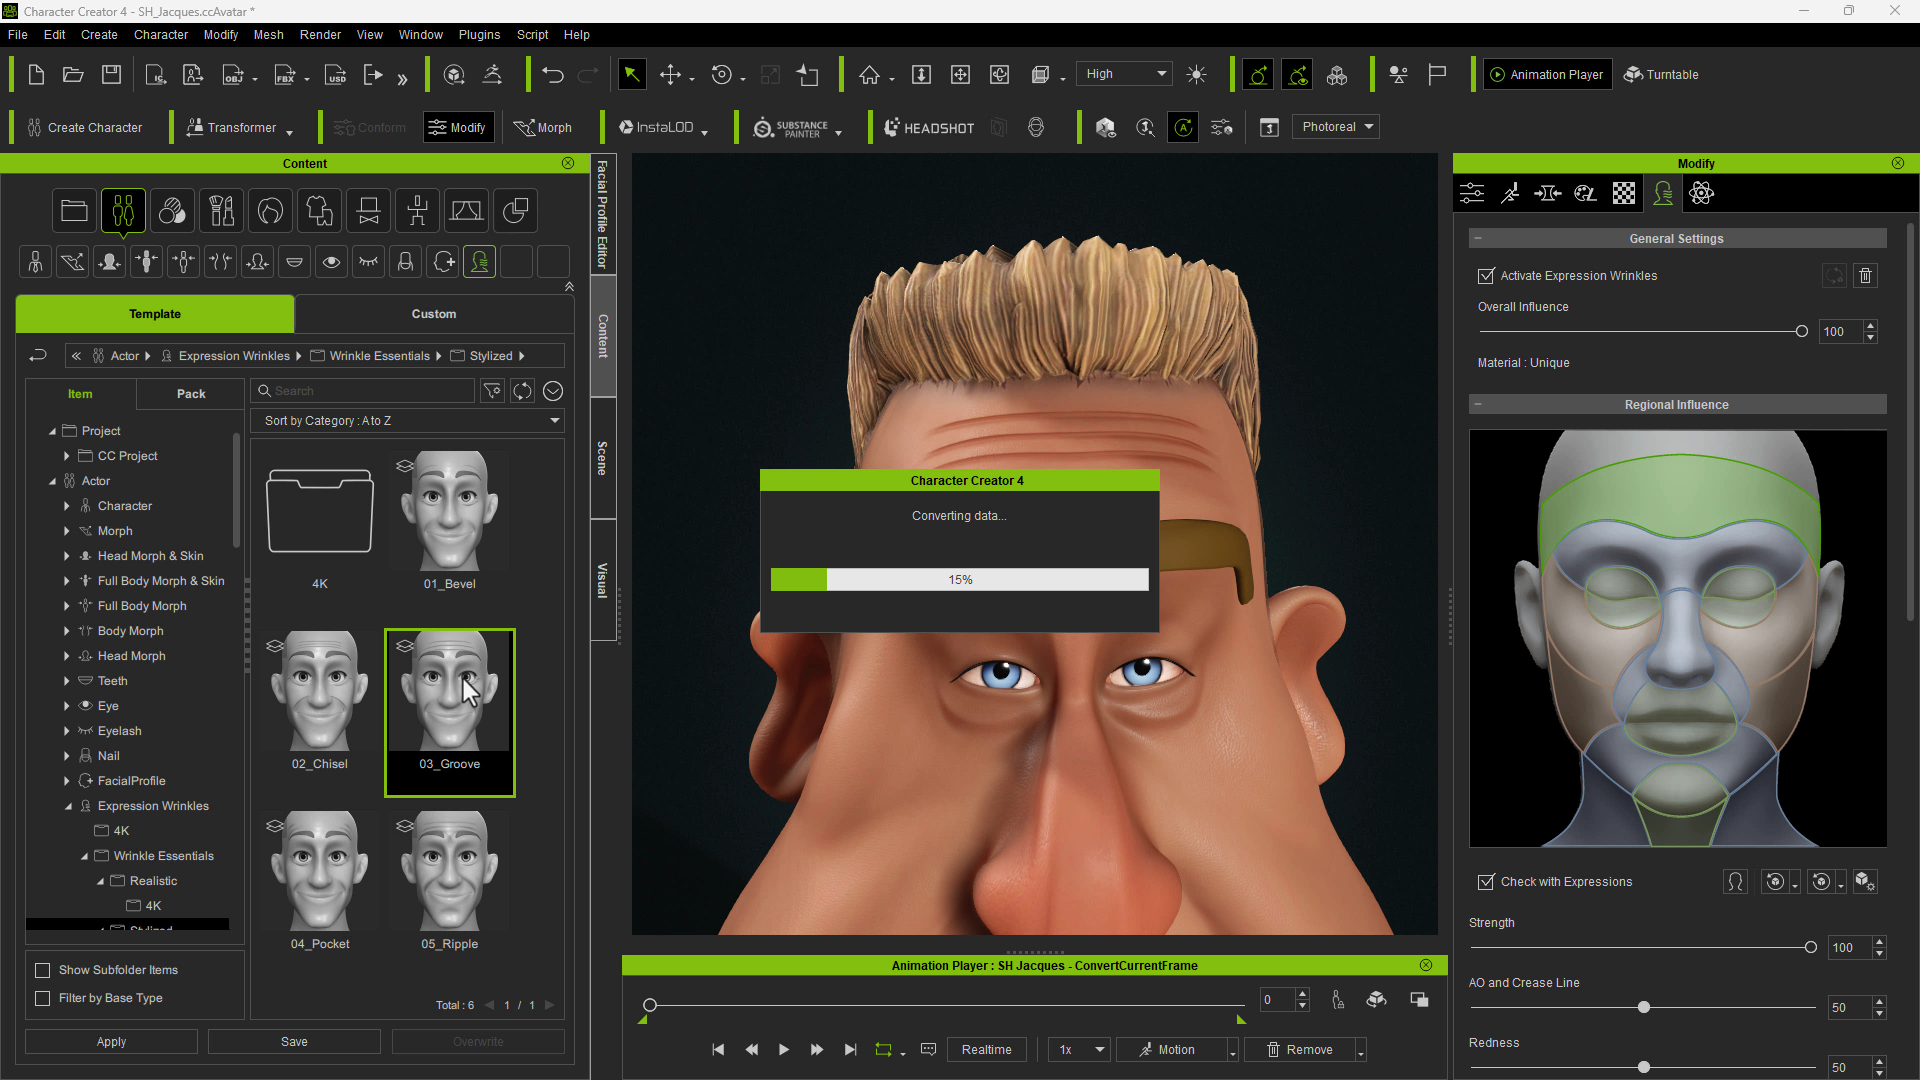
After experimenting with the realistic sets, I’ve decided to apply the stylized wrinkle presets included in the “Wrinkle Essentials” package.

Keep in mind that you can only apply one wrinkle preset at a time, meaning one preset will overwrite the other; but you can manipulate and combine maps from multiple sets.

Using Wrinkle Settings

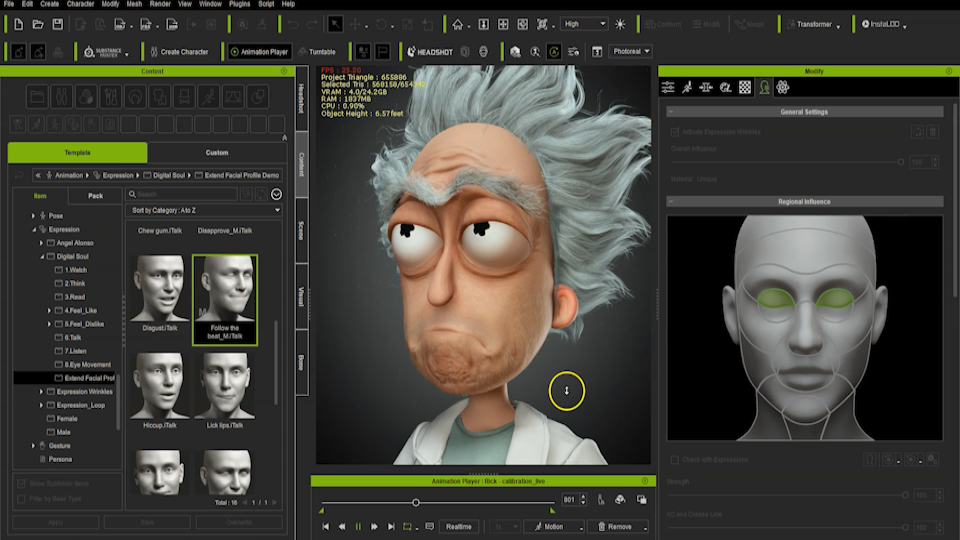
Once your wrinkle preset is loaded, you can play around with various settings in the wrinkle panel under Modify.

You can adjust the overall influence of the set, and below that you can select parts of the face and apply strength settings to the active part. The strength settings are divided up by map effect. Normal maps provide much of the detail, while ambient occlusion and redness are significant components, especially for more realistic characters. There’s also the speed of the wrinkle effect, which I do not have much experience in using.

Adjusting the strength for part of the character’s face can be important for a character with, say, a large forehead but a small mouth, or other combinations of exaggeration.

Part Two: Advanced

In this part of the Demo, I’ll show you a method for combining wrinkle map effects with a custom expression.

Where to Find More Info

Without getting into the exact mechanics of this system, which I’d not be fully accurate in describing, I will say that the expression sliders are linked to the data, which triggers the wrinkle effects.

If you want a more in-depth overview of the relationship between the sliders, wrinkle data and textures, I highly recommend going to the Reallusion webpage linked here. There it kind of goes under the hood of the technology and its features. I’d especially point to this breakdown.

These texture maps are the final textures, which generate the wrinkle effects. Below this is the tier of textures I previously mentioned.

Which Map Normal to Edit

It can be a tad confusing, especially if you don’t know what all these textures do. That said, the final texture map is a combination of maps. For example, the character’s normal map, and the normal map, would blend together, like this.

However, you don’t want to edit the result, but the wrinkle part of this equation — which would be this map here:

Using Wrinkles with Custom Expressions

By default, custom expressions are not linked to the data which triggers wrinkles. Even if you were to use sliders with wrinkles and combine them into a new custom slider, the wrinkle data would be lost. There are ways to use wrinkle data with a custom slider, however. I will go over one such method.

Step 1)

Dial in your expression components or utilize one of the presets in the facial editor. These presets are linked to the expression components which trigger wrinkles. Once your expression is dialed in, save it as an expression asset.

Step 2)

Open the facial profile editor. Your expressions will be reset while in this editor for better editing. However, you can apply the expression preset you just created. This will dial in the various sliders which comprise your expression. Send your character to a sculpting application, preferably ZBrush. 

Alternatively, you can use the mesh editor, which can perform basic mesh sculpting functions.

Step 3)

As you edit your expression, note that the final expression should be a fix, enhancement or exaggeration of the original expression , as it will use the same wrinkle data.

Step 4)
While still in the facial profile editor, your character should now have the combined expression dials and the sculpted data. Now reset the expression sliders, leaving only the sculpted data. 

Step 5)

Bake the remaining changes, the sculpting data, as a custom expression.

Bringing it Altogether

You can apply both your expression preset and the custom slider you just created. This combined data can now be saved as another expression preset, which will trigger the wrinkle data.

This final expression is now a combination of many partial expression sliders, and one custom slider. Each of these can be adjusted independently.

Limitations

Keep in mind that unless another character has a custom expression of the same name, only part of this data will apply to other characters.

Choosing the Right Wrinkles

Now to apply a wrinkle set. I will start by experimenting with some of the realistic sets. While the realistic sets are great, it is not the style I am looking for. The stylized sets have some chiseled wrinkle effects, which suit this character better.

The “Groove” set is almost perfect, so I will export the maps and tweak them slightly in Krita, a free painting application.

Editing Wrinkles in Krita

What I am going to do is add a bit more emphasis to certain areas. I will do this by painting in displacement detail, then converting it to normal map detail with a filter Layer.

Why Krita

Krita is a great tool for 3D artists as it has been developed with texture artists in mind. There is a filter layer called “Height to Normal Map”. Add this layer below the original normal map, and then set the original normal map’s blending mode to “Overlay”. This will combine the two normal maps. A third paint layer will allow you to add height. However, to add negative height, you will need a gray layer below the paint layer. So, I will add a fill layer with gray selected.

The gray layer allows the “Height to Normal Map” filter to read black as a negative value.

I’m now painting on the paint layer with white, and occasionally some black. Black basically allows you to add deep cuts to your normal maps.

The original normal maps in this case are mostly cuts into depth, rather than elevation. As this expression is a boxer being struck in the face, I figured some height would add more emphasis. You can use tools and brushes like smudge and erase to soften and remove detail. The Layer above it calculates the changes, so you don’t have to worry about the technical aspects of painting a normal map. Since there are three normal maps to edit, you get to practice this procedure three times:

  1. Create a gray fill layer.
  2. Add a paint layer for displacements.
  3. Add a filter layer with “Height Map to Normal Map” selected.
  4. And drag your original normal map to the top, with blend mode set to overlay.

Other Methods

I’d also like to point out that you can use ZBrush, 3D-Coat, Blender or other applications to create and edit wrinkle maps. This is probably the best 2D method, but 3D sculpting and texture painting applications have significant advantages. Just remember that you do not have to start from scratch. Use the presets as both a guide and foundation for any changes you make.

Similarly, when crafting a custom expression, you can use the facial presets as a starting point, especially the components of those presets are linked to wrinkle data. Back in Character Creator, you can load the wrinkle maps from the folder containing the changes you were just working on.

Depending on your changes, the effects may be subtle or extreme. It takes a while to get the right look. The changes I implemented are not too extreme, but there is a noticeable difference compared to the originals.

Before and After

I hope these tools and tips will provide you with a foundation for altering or even creating your own wrinkle map set. Thanks for reading!

Free Download :

• Character Creator

Learn more :

• Peter Alexander (Mythcons): ArtStation. Facebook

• Wrinkle Essential: Expansion of Dynamic Wrinkle Patterns

• Reallusion

3D Sculptor Brings Ancient Deities to Life as Animated Performers with AccuRIG

Marcel Brynard

My name is Marcel Brynard. I am a digital artist with a background in architecture, inspired by working some years at a bronze sculpture studio in Cape Town, South Africa  and by my travels to various archaeological sites.

My love for beautiful forms intertwines with a fascination for the chimeric and arcane, resulting in art that exudes story-telling and mysticism.

Embracing digital tools, I explore new possibilities intersecting architecture and sculpture. Fueled by a love for these things, I am working on an animation project titled “Transcendental Rebirth,” narrating the transformative journey of two shamans on a pilgrimage.

Image credit: Marcel Brynard

In this video I will be taking users through the process of auto-rigging my original models in AccuRIG and uploading to ActorCore for motion previewing and retargeting, as an easy workflow to achieve animation and concept art.

From a Static Sculpture to a Fully Rigged Actor

All my creations are inspired by ancient religions and lore from different places.  The Deer character that I have used in this project is inspired by an ancient Peruvian relic.   

In order to bring my model to the 3D production, I have chosen AccuRIG to do the magic.  There are other rigging tools.  But AccuRIG, new in the market, is not only free of charge but provides really accurate results. 

With only five simple steps and some very useful functions such as symmetry, I have completed the body rig and hand rig of my model in no time.  With minor adjustments, the end results are above my expectations.

Automatic rigging with AccuRIG.  Image credit: Marcel Brynard

Situate the Best Poses for My 3D Model

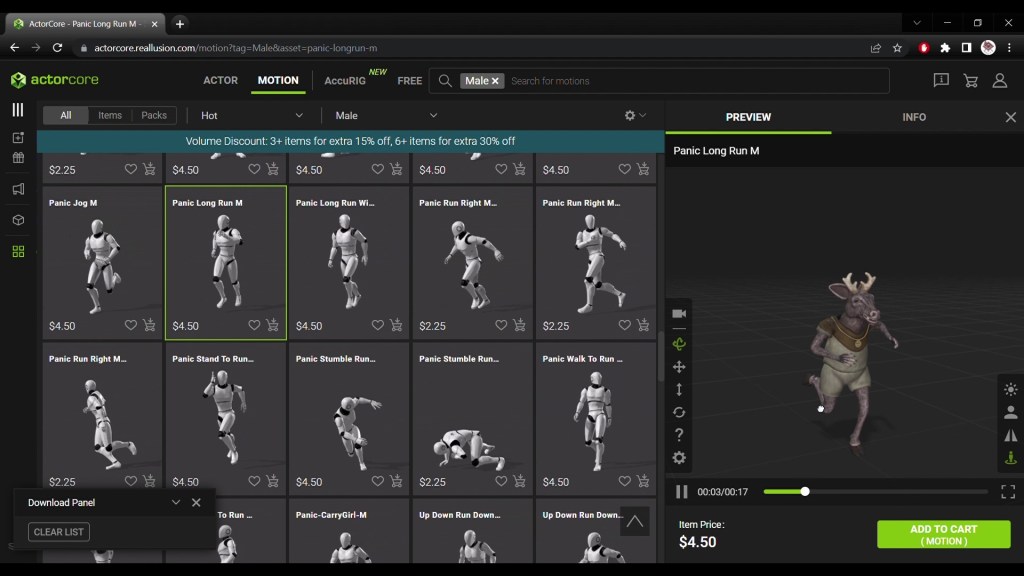
Next I uploaded my rigged Deer character to ActorCore on the cloud and tried out animations. In my account, I can see all my uploaded actors, and I can go ahead and test different motions in the 3D preview window.  There is a whole range to choose from, including 32 free motions; totalling over 2,000 animations on ActorCore — way more than I need!  

I can select and download any motion on the model that I have uploaded. Classic “Sneak”, “Wondering Walk”, “Normal Walk” — it’s all very straightforward.

Preview animations on ActorCore 3D asset store.  Image credit: Marcel Brynard

Flawless Export to Blender

I want to export everything included, not only motions.  I like to choose 24 frames per second, original size, and embed the texture. And it downloads in a zip folder containing the FBX, and I can easily import that FBX straight into Blender.

Now I have got the 3D character in Blender.  If I were to scrub through the timeline at the bottom, I can see that the animation is included in the FBX, as per the motion that I have downloaded. I can set it up with cameras and lights, and it is ready to render out.

Easy export to Blender for further production.  Image credit: Marcel Brynard

Conclusion

Overall it is really very simple, from rigging with AccuRIG, motion previewing on ActorCore and sending to Blender.  The AccuRIG to ActorCore workflow has given me an impressive result to continue my production in Blender.  I recommend other 3D character artists to give this pipeline a try and see for yourself how the workflow can be largely enhanced.

Free download AccuRIG auto-rigging tool: https://actorcore.reallusion.com/auto-rig

Visit ActorCore 3D animation store:  https://actorcore.reallusion.com/motion

Learn More

Marcel Brynard’s Artstation: https://www.artstation.com/marcelbrynard

Lyle, Lyle Crocodile’s Real-time VFX brings life to the dancing and singing crocodile

This article is featured on befores and afters

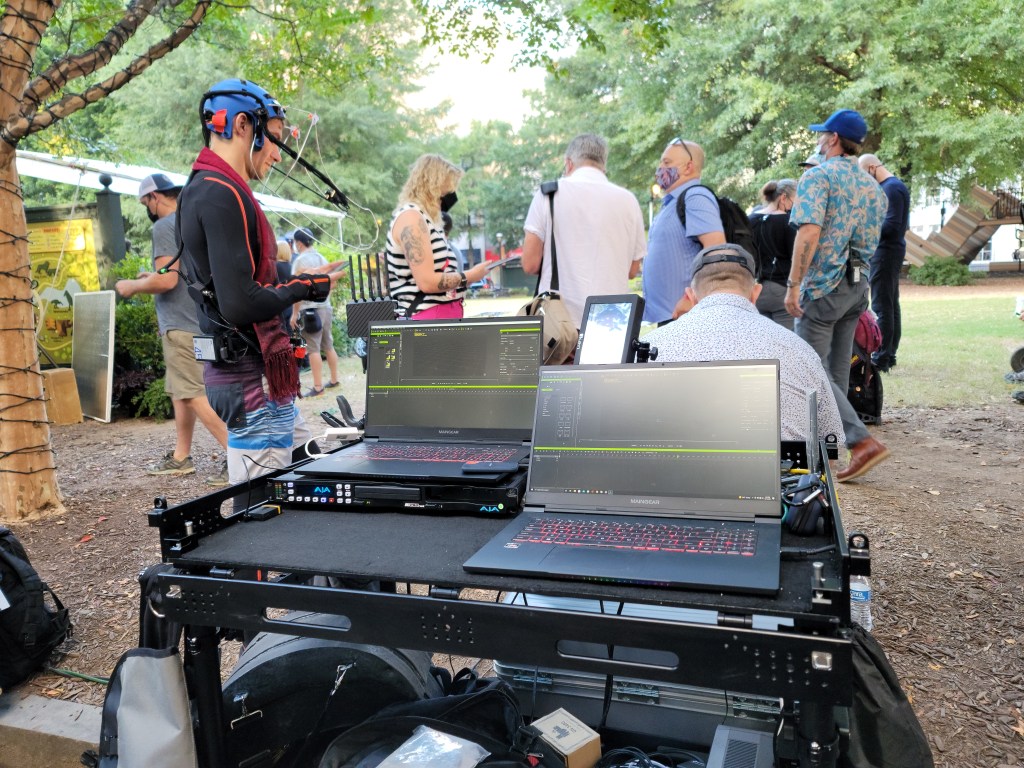
The Sony Pictures movie Lyle, Lyle Crocodile brought the lovable childhood story to life by the crew at Actor Capture, responsible for the motion capture over the 16 week film production. The team worked with the VFX department and VFX producer, Kerry Joseph and VFX Supervisor Joe Bauer on Mocap and virtual production on location in New York City, at Shadowbox Studios, and locations in Atlanta. Actor Capture provided motion capture with Movella Entertainment – Xsens for the on-set stage performances, over 40 locations, and while even hanging out of taxi cabs in Manhattan.

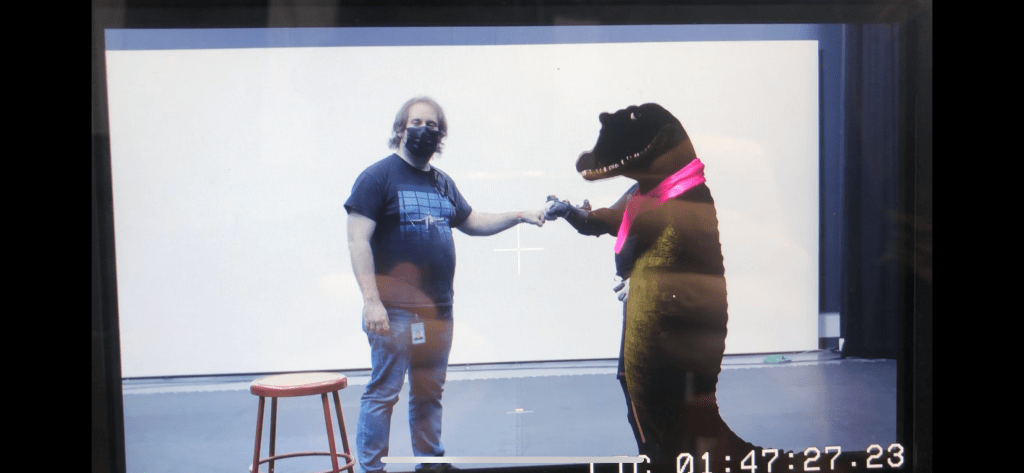
Virtual Production with in-camera VFX visualized the dancing crocodile in real-time allowing the directors and VFX crew to see the Lyle, Lyle’s, performance as it happened through the simulcam.

The actors trained in real-time to personify and get familiar with Lyle using Reallusion iClone for visualization.

To bring the character of Lyle Lyle Crocodile to life, Actor Capture relied on Xsens motion capture suits, Reallusion iClone and Unreal Engine. These powerful tools enabled the team to visualize Lyle in real-time with mocap animation, and quickly meet the needs of the VFX crew for Sony Pictures’ blockbuster musical.

One of the most significant advantages of iClone for the Actor Capture team was the ability to give performers like Rudie Bolton, who played the young Lyle, the opportunity to see themselves as Lyle in real-time. Reallusion iClone helped them get into character more easily during their performances.

James Martin, Technical Director at Actor Capture, highlighted the importance of Xsens as their preferred body motion capture tool and Reallusion iClone for visualization . “The combination of Xsens’ Link Suit, Gloves, and Faceware enabled the team to capture full-body data with best-in-class quality. Enabling our dancers to see Lyle in real-time with iClone Motion Live was valuable to preparing for the dance sequence mocap.  From stunt Lyle actors to the main Lyle actor, Ben Palacios, Actor Capture captured every take for Lyle Lyle Crocodile”

Actor Capture’s success in bringing Lyle Lyle Crocodile to life was a testament to the power of Xsens motion capture, Reallusion iClone, Vanishing Point and Unreal Engine. As digital technology continues to advance into AI motion and other machine learning solutions, these tools still remain a vital solution for capturing and delivering authentic and endearing character performances on set or in the studio.

————————————————————————————————————————————————————————————

The original article is also featured on befores and afters.

Pitch & Produce | History YouTube Channel Selects iClone and Character Creator for Speedy Production

This article is featured on Creative Bloq

War history YouTube channel Yarnhub has half a million subscribers who tune in weekly to watch heroic and captivating stories from famous wars retold as dramatic animated movies. Creating high-quality animated stories weekly isn’t easy. Not only do Yarnhub’s cinematics need to be engaging and high-quality, they must be historically accurate, which is why Yarnhub turned to Reallusion’s best tools – Character Creator for character design and generation; iClone for animation.

Yarnhub Animation Studios

Yarnhub is an entertainment company founded by industry veterans and employs talented young animators to produce history-related animated films. Led by CEO David Webb and Manager Sergey Peresleni, the team consistently produces incredible, awe-inspiring true stories that give you goosebumps and make you feel something for the amazing people who lived them. We try to do these incredible yarn justice by animating them in an amusing and informative way and bringing them to a broad international audience.

Since its inception in 2019, Yarnhub has grown in experience and wrinkles, moving from 2D cartoons to excellent 3D graphics, with more than 30 animators, comparable to some modern video games. The team heavily adopts Reallusion’s software into their daily production.

Why do we select Reallusion tools

The team at Yarnhub develops around 30 characters a week, and using Character Creator 4 they can create a huge number of characters in a short space of time.

Accuracy with Character Creator 4

The flexibility of Character Creator 4 ensures the team’s historian can create historically accurate costumes and characters in a quick time and with accuracy. The artists are able to use other apps, including Substance Painter, to create accurate and lifelike textures. The team takes their time to research a historical period and make use of photos of historical figures to create their meticulous characters.

The historians and artists Yarnhub use historical references in Character Creator 4 for accuracy

Those 30 characters we mentioned earlier can also be easily adjusted and edited to create further variations. Character Creator 4 has a material creation workflow that fits seamlessly with Substance Painter to ensure Yarnhub’s artists can iterate versions of the same character with pre- and post-battle looks, as well as civilian/military clothes and varying ages.

Character customization with the Modify Tab 

Character Creator 4 has new features that enable the animators to check lip-synching, body rig, and facial animation, says Webb, revealing this means the animators can “help us spot and fix any issues early on”.

CC4 enables animators to easily check facial animation, rigs, and lip-synching early in the workflow

“We try to release at least one movie a week and that puts huge pressure on our team to meet the deadlines. In order to succeed we have to use the latest technology and tools like iClone and Character Creator, to produce the best quality we can in the time we have available.”

David Webb, CEO of Yarnhub Animation Studios

iClone 8 makes cinematics easy

When the team needs to create more complex animations they take their characters into iClone 8, Reallusion’s real-time 3D animation software that delivers excellent animation for films, pre-vis, and video games. For the Yarnhub animators, it means they can make use of Reallusion’s ActorCore mocap libraries – a set of readily-rigged characters, including mocap motions and animated 3D humans – to build large-scale battle scenes with variety.

The studio found iClone 8 has a number of new features that perfectly suited a professional studio looking to make animations under tight deadlines. These include the new Control Rig, Advanced Hand/Foot Controller, and Pin Controls that have become go-to tools to provide the flexibility Yarnhub needs when creating and editing its animations. Particularly, the animators are able to save time and speed up their pipeline. Pin Control, for example, prevents joints from breaking.

Adjust hand or footprint position made easy

A key new feature, the improved Reach Target and new Offset function, is one Yarnhub has found incredibly useful. This tool means animators can attach the hands, including both hands together, to an object with ease. This means a character can be set up to interact with other characters, the scenery and objects in a natural way and avoids characters’ hands going through other models or their own bodies. For Yarnhub, which focuses on military animations, where its digital actors need to hold swords and guns it solves many attachment problems.

Crucial new features in iClone 8

Ease and speed of workflow are fundamentals to iClone 8 and Character Creator 4, and it’s been a major reason why Yarnhub has adopted Reallusion’s pipeline. For the team making its weekly content the Animation Layer Editing feature in iClone 8 has been a mainstay. 

iClone 8 offers new and improved tools, such as Reach Target and the new Offset function to make interaction easier

“Animation Layer Editing can help adjust the animation without needing to alter every key, or having to flatten the keys,” says Webb, adding: “It’s a useful tool that can save time when animation requires any adjustment.”

Everything created in Character Creator 4 and iClone 8 is taken into Unreal Engine

Making the most of mocap and Unreal Engine

Likewise, Motion Direction Control makes it much easier to combine animations to create more natural movement and transitions between movements with a couple of clicks – iClone 8’s UI is simple and natural, with clear icons dictating animation. “It makes a turn an organic part of a movement,” explains Webb.

iClone 8 is compatible with Rokoko Smartsuit Pro, too. This mocap setup has bee designed for small teams and indies, and is ideal for capturing specific, natural movements that can then be corrected and refined in iClone 8. 

Finally, all of Yarnhub’s work in Character Creator 4 and iClone 8 is taken into Unreal Engine where the cinematic comes together. Reallusion’s 3D animation pipeline works smoothly with Unreal Engine, ensuring professional results – 600k Yarnhub subscribers can’t be wrong.

Read the full article on Creativebloq.

Learn More

Visit Yarnhub Channel
https://www.youtube.com/@Yarnhub/videos

Get 36 FREE iClone tutorials for optimized animation editing
https://www.reallusion.com/iclone/maya-motionbuilder-alternative/mocap-animation-courses.html

Reallusion Character Creator
https://www.reallusion.com/character-creator/

Reallusion Pitch & Produce program

Pitch & Produce | Reviving Historic Soldiers with iClone 8 and its Dynamic Wrinkle System

Yarnhub, a popular historic YouTube channel, has been steadily gaining awareness and a growing fan base. Known for its meticulously crafted narratives and captivating animated stories, the channel garners an impressive 4 million monthly video views. To further expand its reach and maintain high visual standards, Yarnhub has once again chosen Reallusion’s top-notch tools, namely Character Creator and iClone, for their daily video production needs.

Yarnhub Animation Studios

Yarnhub is an entertainment company founded by industry veterans and employs talented young animators to produce history-related animated films. Led by David Webb and Manager Sergey Peresleni, the team consistently produces incredible, awe-inspiring true stories that give you goosebumps and make you feel something for the amazing people who lived them. They try to do these incredible yarn justice by animating them in an amusing and informative way and bringing them to a broad international audience.

Since its inception in 2019, Yarnhub has grown in experience and wrinkles, moving from 2D cartoons to excellent 3D graphics, with more than 30 animators, comparable to some modern video games. The team heavily adopts Reallusion’s software into their daily production.

Why choose Reallusion tools?

Yarnhub faced difficulties in creating captivating 3D animations featuring diverse characters from various historical periods and nations. However, the team has now upgraded their pipeline by incorporating the advanced features of iClone, Character Creator, and the Unreal Live Link Plugin. This enhancement allows them to efficiently produce high-quality historical animations with speed and precision.

Animating an authentic tank scene

Creating a realistic tank scene animation has been a thrilling collaboration between Yarnhub and Reallusion. In their recent video, titled “M26 Pershing vs T34-85“, Yarnhub found immense value in utilizing specific features from the latest iClone Unreal Live Link plugin update. This partnership has allowed them to bring their story to life and enhance the overall quality of the production.

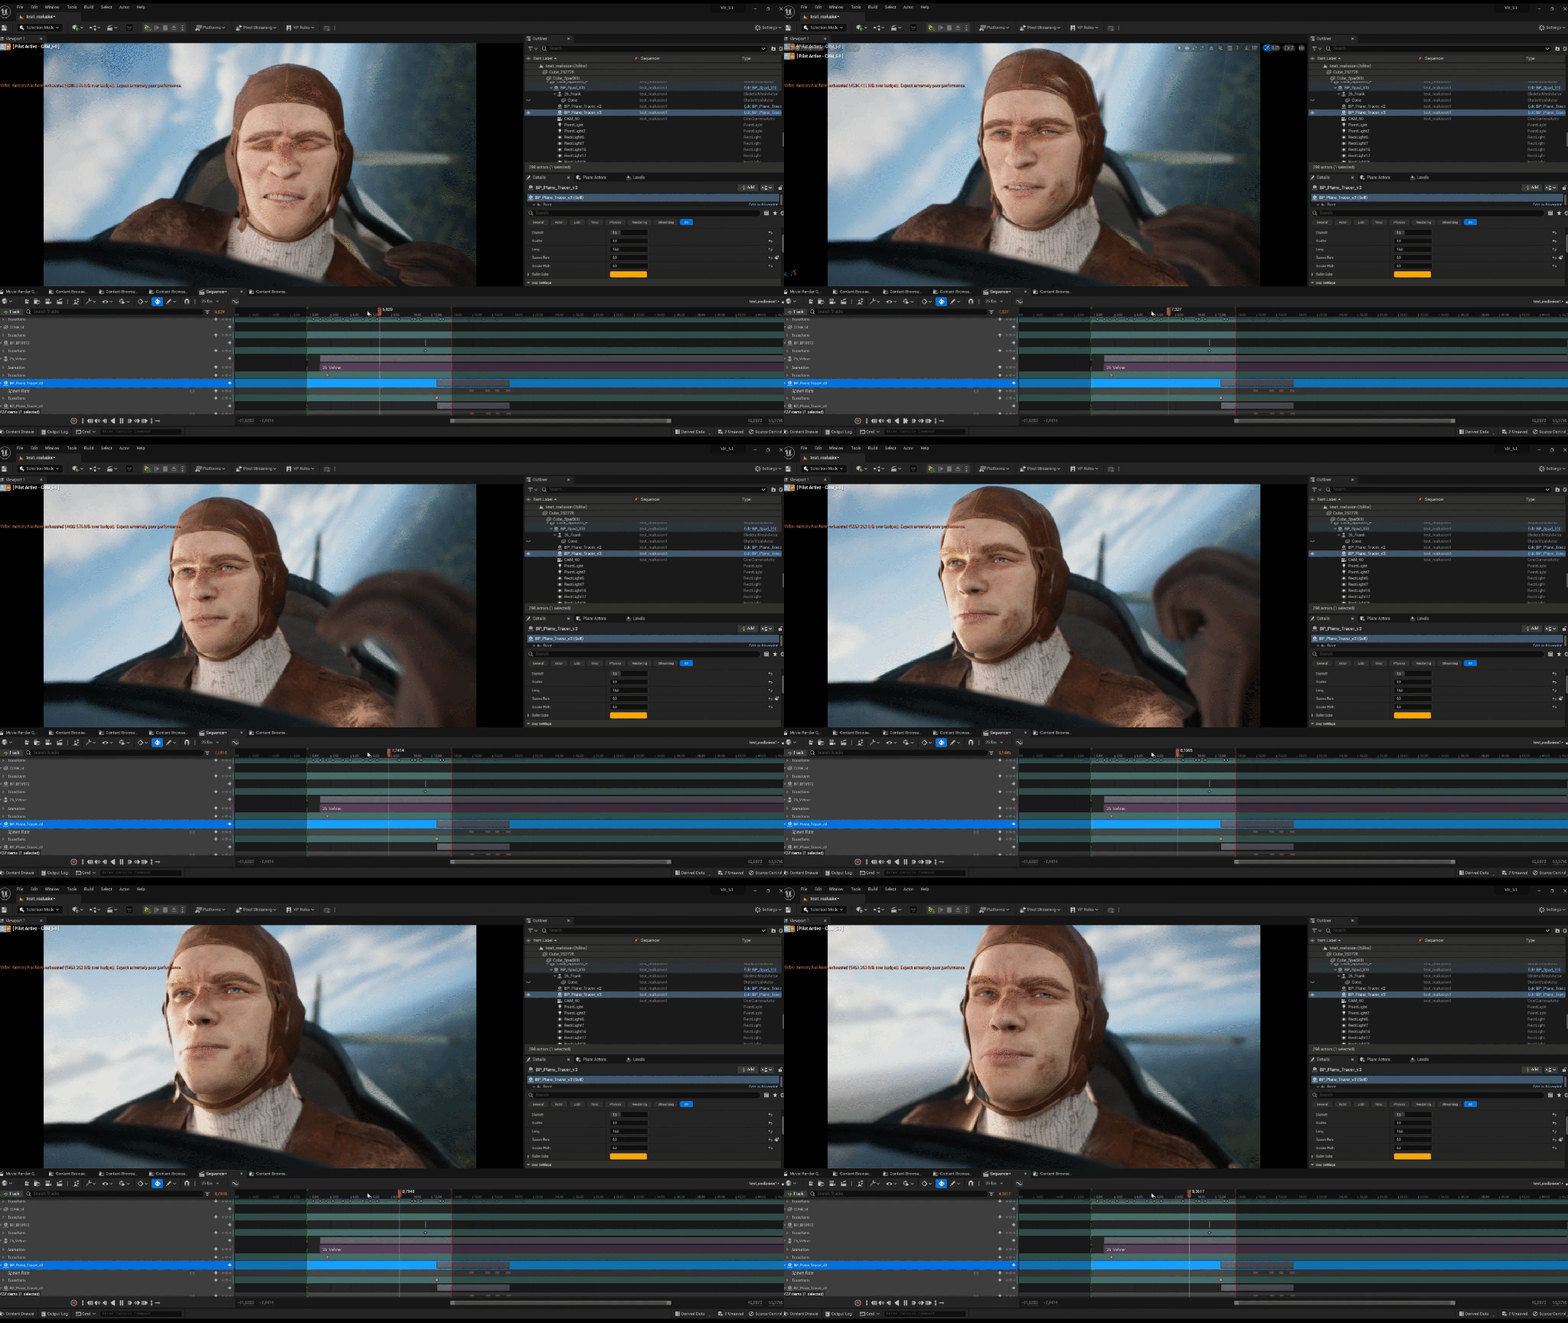
Yarnhub began by implementing the two-way data link, which facilitated the transfer of mesh data from Unreal to iClone 8. Through this link, they were able to synchronize keyframe animations, aligning character positions with the surrounding environment. The following video demonstration showcases the seamless and accurate integration of their characters within the tank hull.

In their routine production, they frequently rely on the Curve Editor as a valuable tool. Within iClone 8, this integrated plugin proved instrumental in accomplishing fluid and lifelike animation.

They have integrated an additional Motion LIVE and Rokoko Mocap profile into their workflow, enabling them to directly capture motion data from a Rokoko suit into iClone 8. By utilizing a transferred static motion correction mesh as reference points, they can fine-tune character movements accordingly. Once the animation is completed and the character’s actions appropriately respond to the environment, they employ the bi-directional link to transfer all necessary elements from iClone to Unreal. The inclusion of the Timecode Sync feature addressed a long-standing request since iClone 7, allowing for seamless animation recording in the Unreal sequencer without frame drops. Lastly, they configured the lighting and camera setup to achieve the desired final shot.

Applying realistic wrinkles to aging soldiers

Known for its meticulous and comprehensive portrayal of historic military battles, Yarnhub caters to a vast audience of millions who appreciate the company’s commitment to objectivity and accuracy. However, they understand that war encompasses more than just the physical elements of planes, ships, guns, and bombs. Above all, YarnHub recognizes that war is fundamentally intertwined with human emotions.

“We are very happy to be the first to try a revolutionary new Dynamic Wrinkle System from our friends at Reallusion. It’s a fresh and powerful wrinkle-blending system for our character expression workflow.”

David Webb, YarnHub CEO

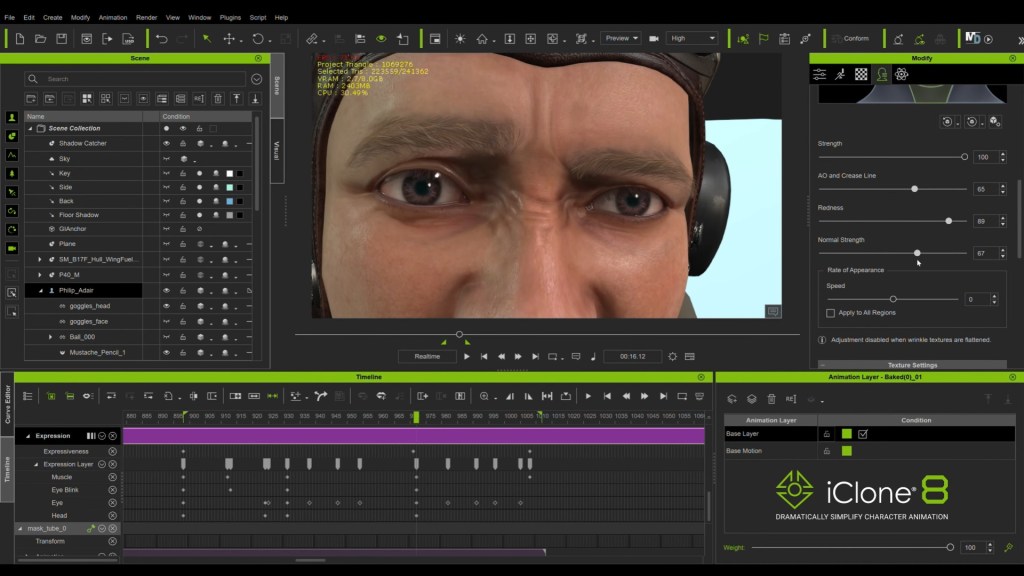
The Dynamic Wrinkle System proved to be remarkably advantageous and efficient when it comes to characters with both high and low polygon counts. Several shots featuring Yarnhub’s own characters were created and tested, showcasing the tool’s capabilities. Not only did it enable the addition of wrinkles and the creation of realistic emotions, but it also facilitated real-time triggering of subtle facial changes. Furthermore, they successfully applied the “Wrinkle Essential Pack” to optimize the appearance of certain soldiers.

And what was important for the pipeline was that with just a quick FBX export, the most complex wrinkles and facial expressions seen in Character Creator could be mirrored in the Unreal Engine, Unity, and Blender.

Learn More

Visit Yarnhub Channel
https://www.youtube.com/@Yarnhub/videos

iClone: Unreal Live Link Plugin Update
https://www.reallusion.com/iclone/live-link/unreal-engine/default.html

iClone: Get 36 FREE iClone tutorials for optimized animation editing
https://www.reallusion.com/iclone/maya-motionbuilder-alternative/mocap-animation-courses.html

Character Creator: Dynamic Wrinkle System
https://www.reallusion.com/character-creator/dynamic-wrinkle.html

Reallusion Pitch & Produce Program

Prompt Muse – Unleash the Power of AI to Create Next-Level Animations

The rise of AI-powered animation has given rise to fresh aesthetics, yet due to the limitations of the current AI technology, the shapes of objects and characters from one frame to another tend to shift about in a sort of amorphous fashion. Some individuals view the instability of the generated images as an aesthetic side-effect of nascent technology — a je ne sais quoi, while others opt for incorporating additional tools into their pipelines to smooth over the animation, regarding the visual artifacts as unsightly glitches.

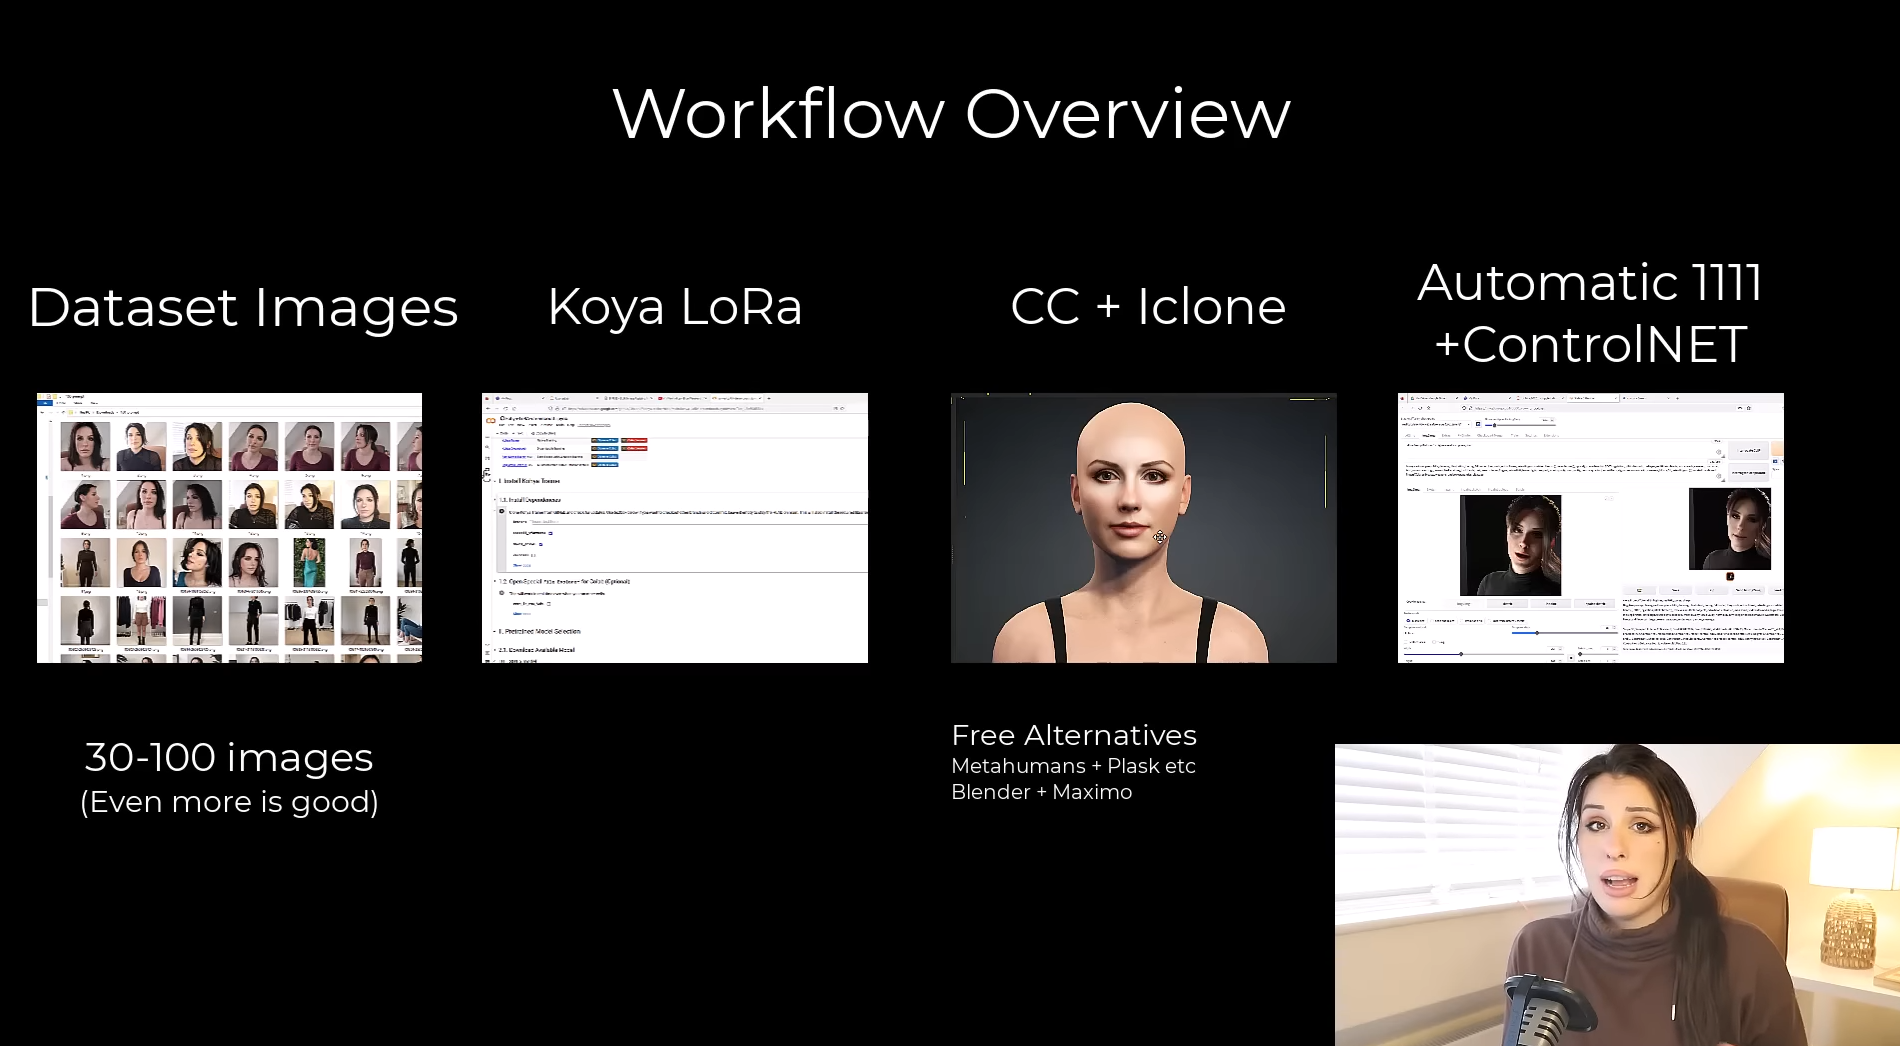
Amelia Player, co-founder of Prompt Muse, seamlessly incorporated Headshot, Character Creator, and iClone into her AI-generated animation workflow. By utilizing CC Character and iClone Animation, Amelia effectively addresses the instability that commonly occurs in video-driven AI animations. Reallusion’s tools were chosen for their user-friendly approach to 3D character creation, what she referred to as a “zero-learning curve” solution. These tools integrated with the animation pipeline, alongside MetaHuman and Blender, enhancing the overall user experience.

I use Character creator to create a puppet. You do not need to know any 3D. There is no learning curve to this software. You’re basically using sliders and dragging and dropping assets onto your 3D character. It is super simple to use.

Amelia Player, co-founder of Prompt Muse

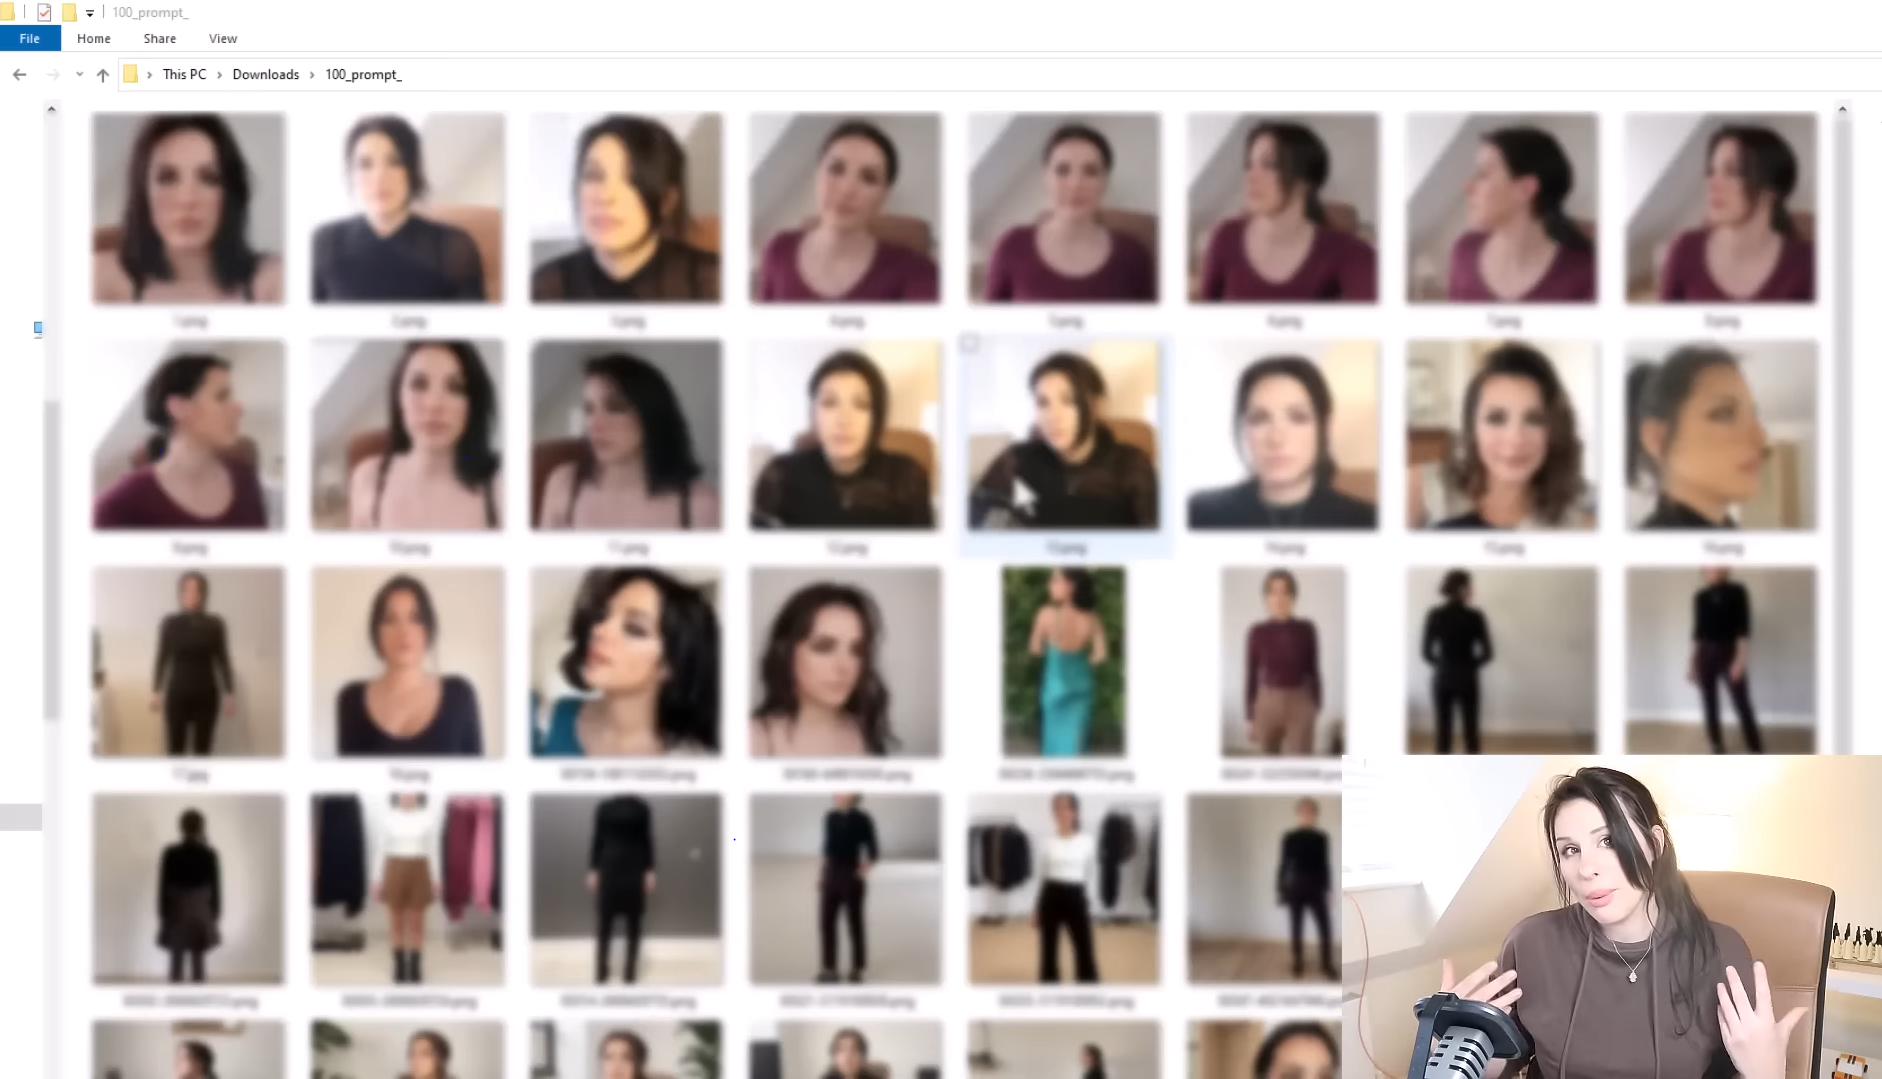
After preparing the data and getting the AI model trained using Google Colab, Amelia simply uploaded her images into Headshot and AI-generated a 3D character of remarkable resemblance.

I’m going to be taking this bald image of myself and dragging and dropping that into the Headshot plugin, which then generates a 3D model of my face. I can go in and sculpt this further if I want to, but I’m just using this as a puppet or a guide for the AI.

Amelia Player, co-founder of Prompt Muse

Next, she explored Reallusion‘s content ecosystem, carefully selecting and incorporating her preferred hair and clothing options onto her 3D character.

Once I’m happy with the face and the body shape, I then add some hair. Again, it’s super easy. I’m just dragging and dropping from a library.

Amelia Player, co-founder of Prompt Muse

The extensive asset library included in Character Creator 4 and iClone 8 provides fully-rigged characters, over two thousand 3D outfits, hairstyles, dynamic wrinkles, expression morphs, light presets, and more. >> Learn more

Upon finalizing the design of her 3D character, Amelia proceeded to export it to iClone. Additionally, she downloaded the free facial motion capture application, LIVE FACE, with the intention of capturing her expressive performance data. The data was then used in iClone Motion Live to enhance the realism of the facial animation.

iClone is more of an animation programme. So this is where I’m going to be adding the facial animation as well as the body idle.[…] It’s super easy to use. All you’re doing is recording your facial movement and that’s being applied to your 3D model in real time.

Amelia Player, co-founder of Prompt Muse

After speaking with Amelia, her motivations for selecting Reallusion tools became evident:

  • Headshot and Character Creator conditioned the source videos, leading to more stable AI-generated animations.

  • Character Creator provided the flexibility to have complete control over the appearance of a character. It eliminated the need to hire a dress-up model for AI rendering.

  • With the extensive ecosystem of content available in Character Creator, including options for hair, clothing, shoes, and more, the desired look can be achieved effortlessly.

  • iClone provided the freedom to create top-notch animations, with adjustable camera distances and angles to capture the best visuals.

  • Different lighting setups were readily available to establish the desired atmosphere for each shot.

It has been truly delightful to witness how Amelia utilized Reallusion’s tools and resources to streamline her workflow and produce professional-level, AI-generated animations with such efficiency. To see the complete process, watch the detailed steps below, and for additional professional tips, be sure to visit Prompt Muse’s website.

How to create your own AI-generated animation with state-of-the-art techniques :

  • Step 1. Preparing Your Data for Training

  • Step 2. Training Your AI Model with Google Colab

  • Step 3. Creating and Animating Your 3D Character with Headshot, Character Creator and iClone

  • Step 4. Rendering and Finalizing Your AI-Generated Animation

  • Step 5. Batch Rendering Frames with Automatic 111

Free Download :

• Headshot

• Character Creator

• iClone

Learn more :

• Prompt Muse : YouTube, Website

• Fully Controllable MetaHuman Creation (CC to MetaHuman)

New Image Sequence & GIF Animation Import for Cartoon Animator 5.1

This article is featured on AWN
Nathan Smith – 2D animator, a member of Studio Ghibletz

Nathan Smith

Greetings, my fellow animators! I’m Nathan—an esteemed member of Studio Ghibletz. Today, I’ll be your guide as we explore Cartoon Animator 5’s latest features. We’ll learn how to use the vector character launcher, how to create props in Photoshop and Illustrator, and how to add GIF animations to your next cartoon. 

Follow Nathan’s YouTube Channel

Using Adobe Illustrator to Edit Vector Characters

Cartoon Animator 5 ushered in a new generation of vector characters. Vector assets enable you to produce characters and props which can be enlarged without a loss of quality. In the past, however, CTA5 lacked the ability to launch vector characters to an external image editor, but Cartoon Animator 5.1 remedies this issue. 

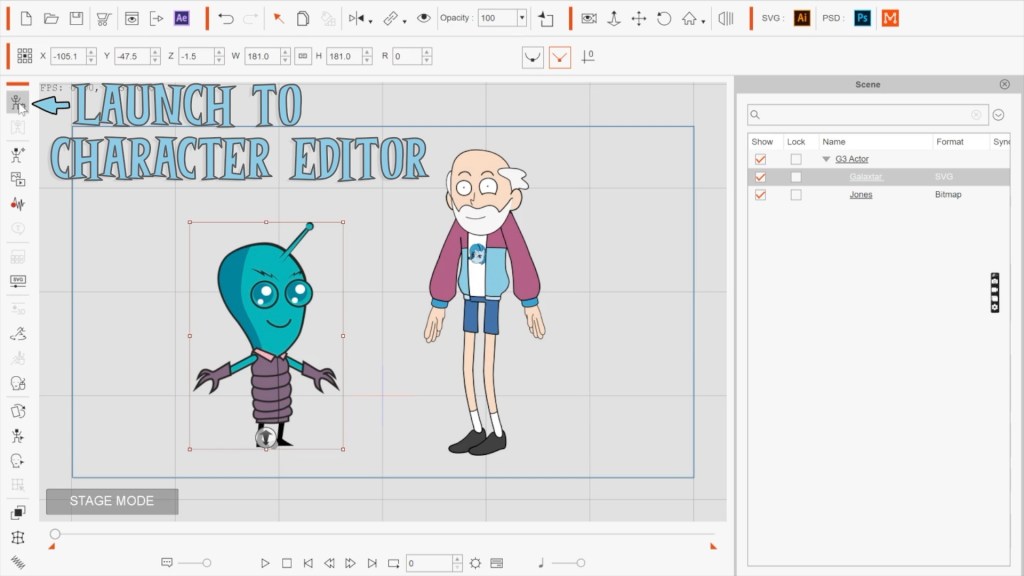
You can now launch vector characters to Adobe Illustrator. To make edits to an SVG asset, bring it into the character composer. From here, select the SVG launcher, which is conveniently located beneath the PSD option. Seasoned CTA5 users will notice this follows the same pipeline as the Photoshop launcher.

CTA5 will then export your prop or character to Adobe Illustrator. For now, Illustrator is the only supported vector editing software, but this could change in the future. After bringing your character into Illustrator, make your desired changes, save, and then exit. Your character will automatically update in CTA5.1.

Sequence Images – PSD Prop Pipeline

Certain types of 2D animation, like water, fire, and smoke, can’t be rigged with a bone structure like characters. They require a hand-drawn, frame-by-frame sequence. To make use of these assets, you must create a prop. In the past, you had to import your prop’s sprites one by one. This was time-consuming, especially if you had a ten-frame sequence for something like this flame. CTA5.1 now offers an alternative. 

With CTA5.1, you can import multiple sprites at once. The pipeline begins in Photoshop. To import a prop with multiple sprites, you must correctly format it in Photoshop. If the file is not correctly formatted, your prop will fail to generate. You can format your prop in Photoshop by following these four steps:

Step 1: Create a folder named sequence. This tells CTA5.1 that you want to play the following sprites in a loop. 

Step 2: Create a second folder with the name of your action sequence, then place it inside the folder named sequence. For example, the folder in the screenshot below is called flame.

Step 3: Load all of your sprites into the action folder. Here, you can also create multiple actions by using additional subfolders. For example, I added a second action sequence image called blue flame. 

Please note: In Photoshop, the sprites will play from the top down. In Illustrator, however, the sprites will play from the bottom up. 

Step 4: save your document as a .psd file, then drag it into CTA5.1. Your prop will automatically generate. From there, you will then find the sprite sequences under the action menu.

Sequence Images – SVG Prop Pipeline

If you want to make an SVG prop, Adobe Illustrator employs a similar pipeline. Again, it all comes down to correctly formatting the file. To make your first vector prop, follow these five steps:

Step 1: The first layer should bear the name of your prop. In the picture below, the prop’s name is “bread”.

Step 2: Add another layer. Name this one “sequence:” Don’t forget to add the colon. This is very important because without the colon the prop will not generate correctly when you import your file into CTA 5.1.

Step 3: Create another layer and name your action sequence. In the example below, the layer is named “bread_falling.”

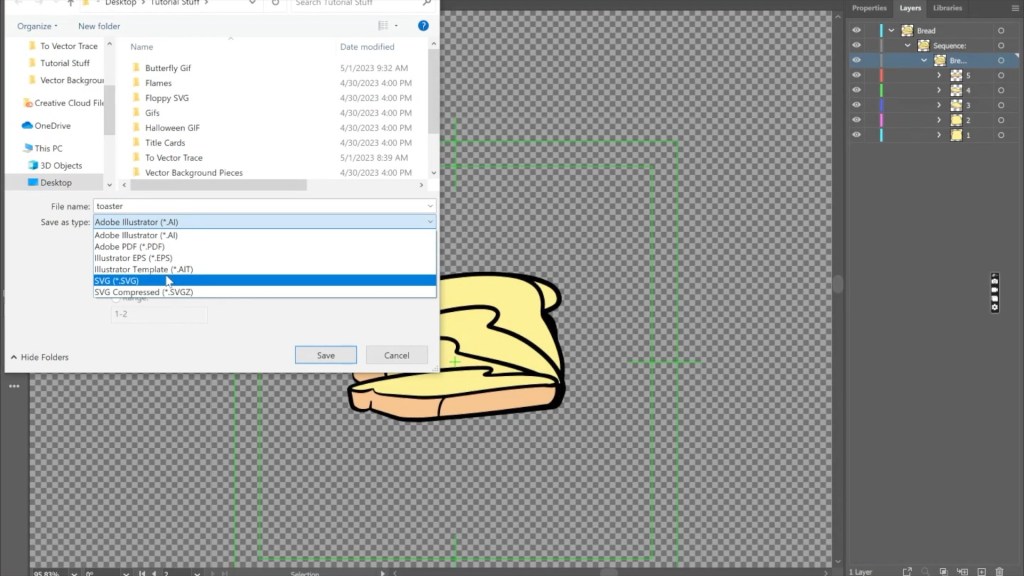
Step 4: Place your sprites in the next layer. Remember, in Adobe Illustrator the sprites will play from bottom to top, which is why these five sprites are ordered in reverse. You can also create multiple sequences in the same prop, just like in Photoshop by creating another layer under “sequence:” 

Step 5: Save your prop as a .svg file. Other formats, like .ai, won’t work. Finally, drag this .svg file into CTA5.1 to generate your new animated prop. As with traditional props, you’ll find the sequence image you created under the action menu.

A Quick Q&A about GIF and APNG Compatibility 

The next exciting feature to grace CTA5.1 is GIF and APNG compatibility. You can now import animated GIFs directly into Cartoon Animator 5 with ease. This feature requires no elaborate set of instructions. Simply drag your GIF or APNG directly into CTA5.1. You’ll then be prompted to set the number of times you’d like the gif to play, then presto — you have a fancy new prop.

To make the most of GIFs, use them for props that require a constant loop — things like water, fire, and smoke. Additionally, you could consider using them for blinking lights or static computer screens. For Floppy’s Obstacle Course, I imported several butterfly GIFs to add flourish.

What is the difference between GIF and APNG?

GIFs and APNGs perform the same role. They create short, looped animation sequences. The primary difference, as Cody explains, is: “ GIFs and APNGs are both types of animated image files, but the main difference is that APNGs can have more colors and be better quality than GIFs.”

Where can I get free GIFs?

You can find animated GIFs all across the internet. The gifs used in Floppy’s Obstacle Course came from Envato. These butterflies were originally video files which I converted into GIFs to add into CTA5. Another great place to find GIFs is giphy.com. Here, you’ll find all the GIFs your heart desires, any of which are sure to boost the production value of your cartoon.

How can I create a GIF?

Funny you should ask! The butterflies used in Floppy’s Obstacle Course were originally video files. You can convert .mp4 files to GIFs using software like Premiere Pro, or a free GIF converter online.  

Raise Production Value with CTA 5.1

I hope these new features help you produce excellent cartoons. If you have any questions, I’ll be hanging out in the comments section and in the Cartoon Animator Users group on Facebook. The CTA community is large and supportive. Never hesitate to reach out if you’re curious about 2D animation. Farewell brethren!

Know more

2D Animation Software for Cartoon Maker | Cartoon Animator

FREE for 30 days plus over 1,700 ready-made assets:

2D Animation Software Download | Cartoon Animator

———————————————————————————————————————————————————————————————————

The original article is written by Nathan Smith and also featured on AWN.

Recreating Snoop Dogg: Character Creator and MetaHuman Creator

Antony Evans – Co-owner and Animator at Digital Puppets UK

DIGITAL PUPPETS UK

In the world of animation and virtual avatars, creating realistic and stylized characters is an essential skill. My name is Antony Evans, I am the co-founder of Digital Puppets, an animation studio in the UK. I have worked as character designer for many years and recently worked with Vtuber company Taiyaki Studios as well as studios such as Disney, Warner Bros, and the BBC.

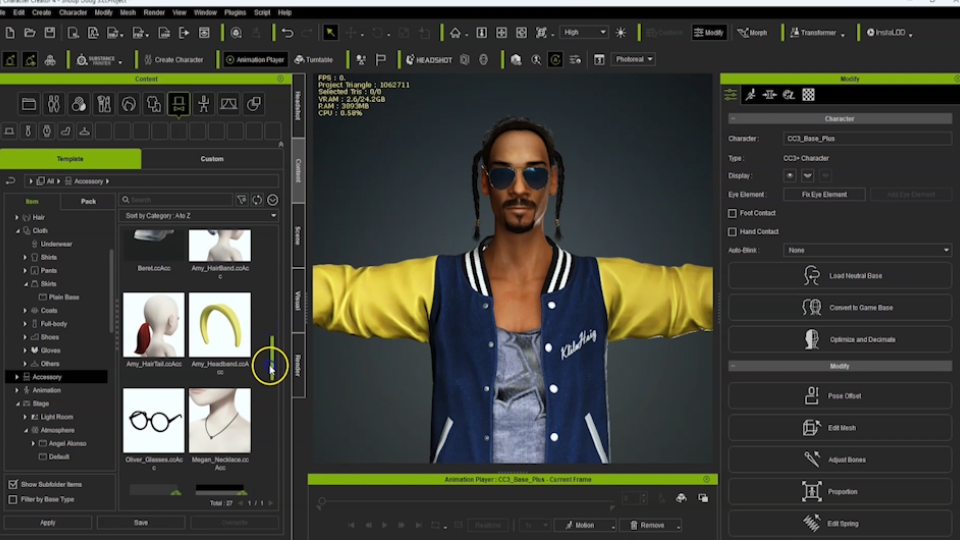
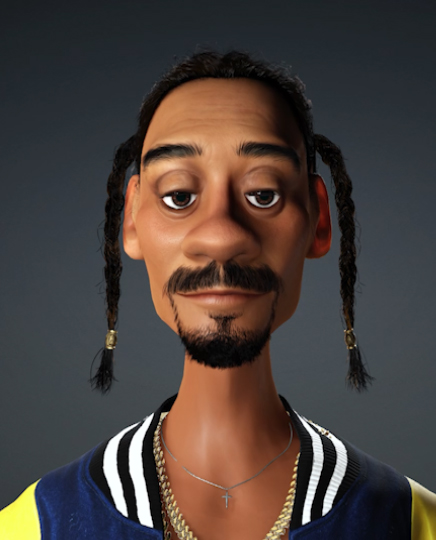
In this video I will share my insights and workflow for developing a stylized Snoop Dogg avatar. Leveraging tools like Character Creator 4 and ZBrush, I will run through the process of transforming a realistic base into a captivating cartoon version.

“One of the key advantages of Character Creator 4 is its ability to sculpt detail directly into the mesh. The software provides powerful sculpting tools that allowed me to add specific features and refine the character’s face to match the unique characteristics of Snoop Dogg. I could sculpt the shape of the nose, eyes, lips, and other facial elements with greater precision, resulting in a more accurate representation.”

Antony Evans – Co-owner and Animator at Digital Puppets UK

Establishing a Realistic Base

To begin the character creation process, I started by acquiring a reference image and using this with the Headshot plugin for Character Creator 4.  The image I used was from ArtStation and was actually a 3D render but was perfect for a front-on-image of his face. When working with Headshot a good image with even lighting is important to get the best results. With some tweaking using morphs and the Edit Mesh tool in iClone 8, I fine-tuned the character’s features, trying to achieve a close resemblance to Snoop Dogg.

I started the process by creating a realistic version, as this gives me a great base to create the cartoon version from. I can then test out exaggerating different features and trying different styles until I get the look I am after.

Creating a realistic base with unreal Mesh to Meta Human

In the video the next step was to try the same process of creating a realistic Snoop Dogg but using the Mesh-to-MetaHuman tool. I found that this did work really well, and the process of turning my mesh created in Character Creator 4 into a MetaHuman was easy to do.

It was only when It came to adjusting the mesh that I found that the MetaHuman editing tools were limited. I would have liked to have more control over the areas I could manipulate and be able to push them further than its limits. The final animation results in the Unreal Engine and with the MetaHuman were however impressive, but for my goal of turning the model into a stylized cartoon version – Character Creator allowed more options for me to achieve this.

Why I used Character creator instead of MetaHuman?

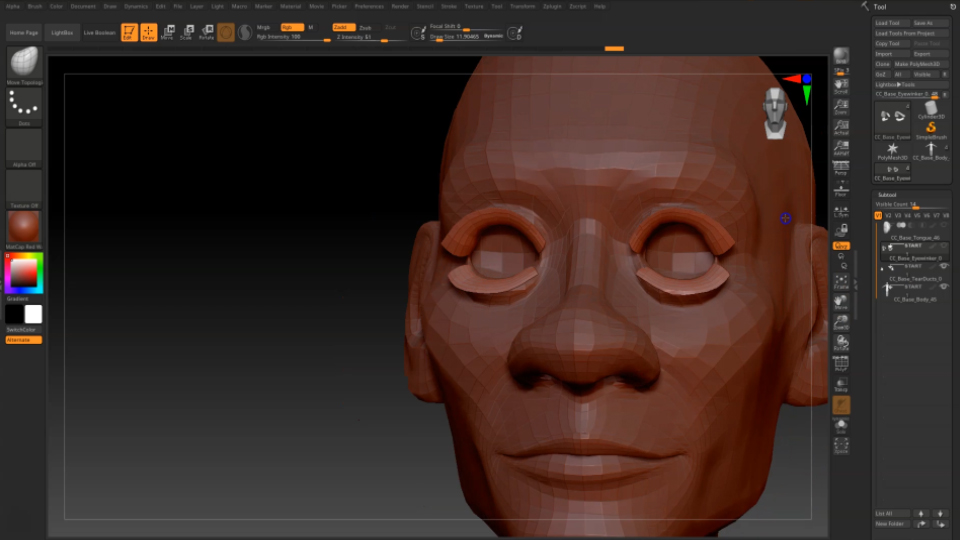
In the video I go back to the CC4 base, this is because using tools like the Edit Mesh and the Sliders I had more control over editing the mesh. One of the other big advantages is the GoZ plugin which opens up all the sculpting tool available in ZBrush. Its in ZBrush I can really push and pull the mesh around and test out different looks for the stylised character.

Creating a Stylized character from CC4 realistic base

With our realistic base established in Character Creator 4, we embark on an exciting journey of stylization. Drawing inspiration from beloved Disney characters and other stylized designs, we explored how pushing and pulling mesh elements in ZBrush can transform our realistic base into a captivating and unique stylized character. We embrace the trial-and-error process, leveraging the flexibility of ZBrush to achieve diverse looks and evoke a specific style.

Final Thoughts

One of the key advantages of Character Creator 4 is its ability to sculpt detail directly into the mesh. The software provides powerful sculpting tools that allowed me to add specific features and refine the character’s face to match the unique characteristics of Snoop Dogg. I could sculpt the shape of the nose, eyes, lips, and other facial elements with greater precision, resulting in a more accurate representation.

Additionally, by using the GoZ integration, I could switch between Character Creator 4 and my preferred sculpting software with ease. This streamlined workflow enabled me to sculpt intricate details onto the mesh and achieve a higher level of realism, ensuring that the Snoop Dogg character closely resembled the real-life counterpart.

While the Mesh to Metahuman feature in Unreal Engine provided a solid starting point, Character Creator 4, along with the GoZ integration, offered a better way to sculpt fine detail into the mesh. The ability to directly manipulate the mesh and seamlessly transfer sculpted details between software packages significantly enhanced the level of customization and realism achievable in the character creation process.

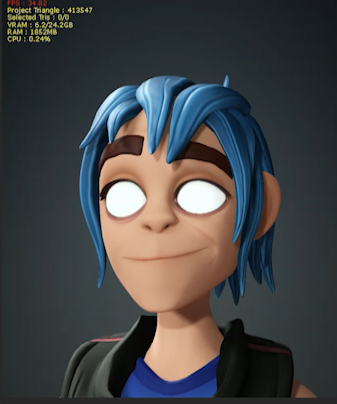
Also, a great addition to CC4 is the new wrinkle map feature. Whether you are creating a realistic or stylized character, the additional wrinkle detail brings an extra level of life you your character designs. At the end of the video you can see these examples of different characters and you can use the different wrinkle map options to get the right look for your character.

Follow Digital Puppets

Check out our Discord channel at https://discord.gg/28DNM9A94P So if you are a iClone, Unreal, Character Animator, LIVE2D user and you want advice or to share your work, come join us. We’re hoping it’s going to be an active community. Also, if you are an animator in general, join us too, tell us what programs you are using, we are always keen to learn about what others are doing and using 🙂

Website :
https://digitalpuppets.co.uk  

YouTube:
https://www.youtube.com/@DigitalPuppets

Taiyaki Studios :
https://taiyakistudios.com   

Taiyaki YouTube:
https://www.youtube.com/@TaiyakiStudios