Dom Fred – Director / Producer / Editor / 3D Animator
Dom Fred
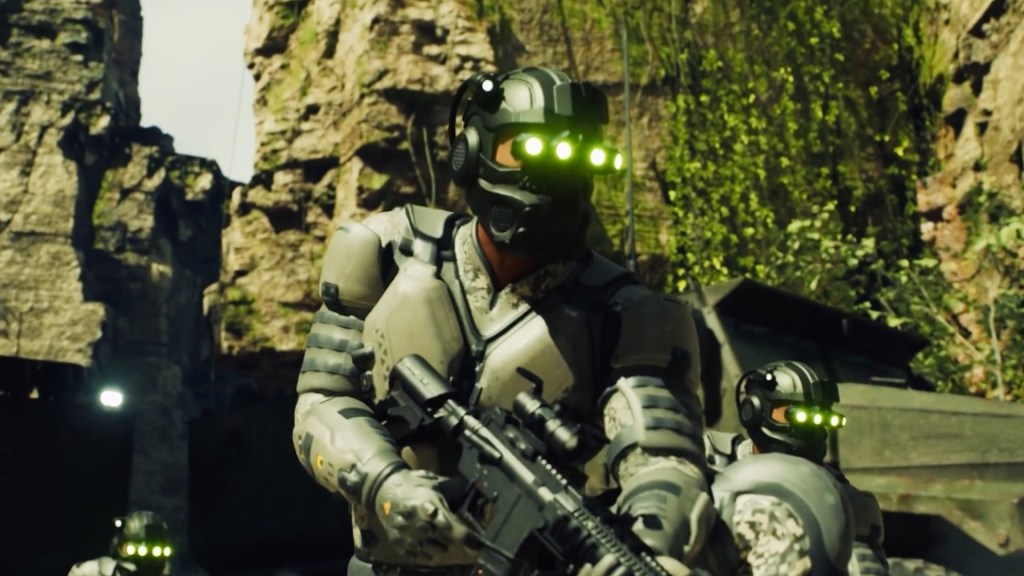
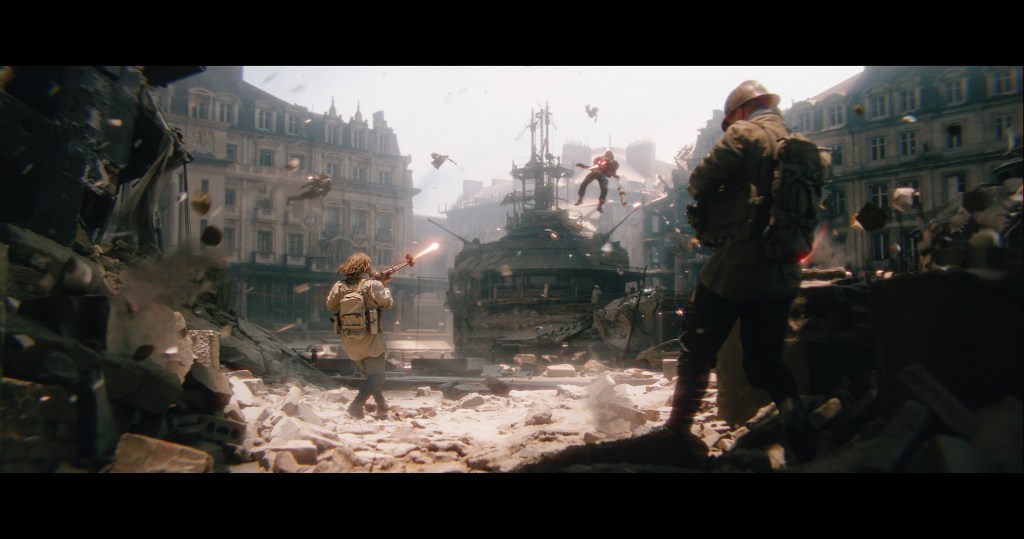
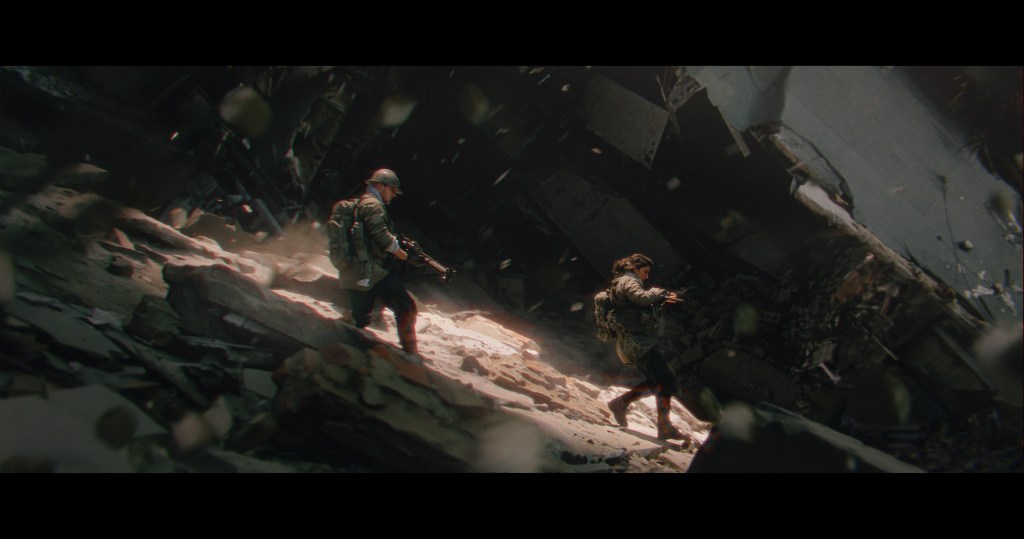
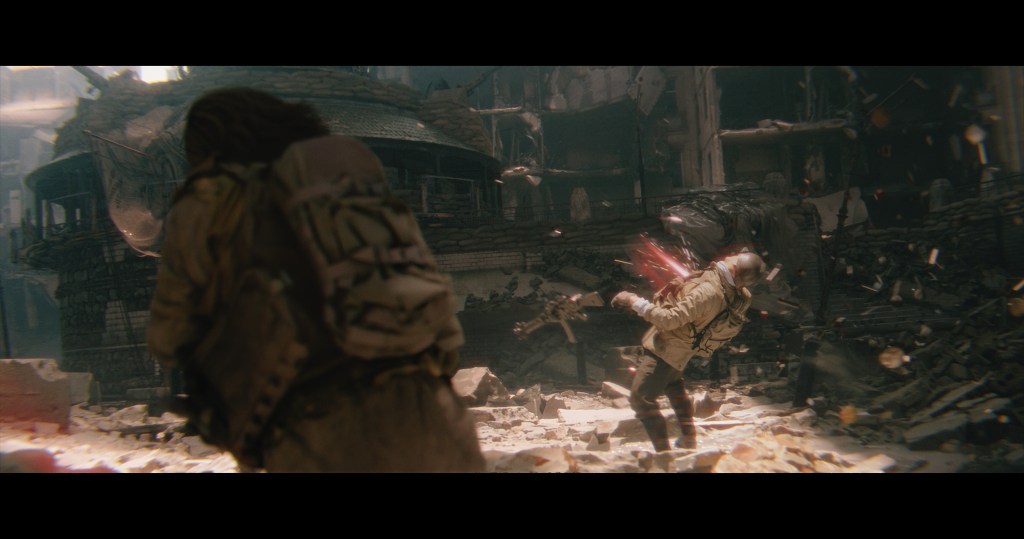
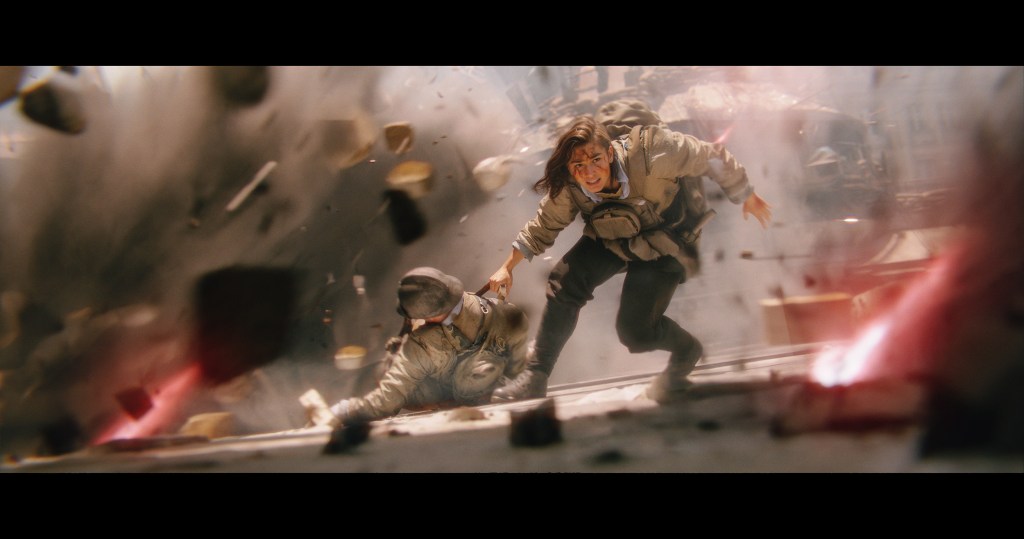
“The Stone” is a 3D animated short film, by Maya animator and director Dom Fred, showcasing action cinema techniques, featuring a formidable stone monster under attack by a military team.
Leveraging ActorCore’s motion capture library, Dom and team achieves exceptionally realistic body movements, enhancing the authenticity of live combat sequences.
With a focus on realism, the project seamlessly integrated iClone, ActorCore, and Unreal Engine to produce a cinematic short, boasting detailed rendering of colors and an ultra-realistic environments.
Crafting an entire 3D cityscape bustling with animated characters engaging in daily activities was a formidable undertaking that consumed months of effort to accomplish. New technological advancements paired with the right tools paint a new and better picture —Today, such a feat can be achieved with spare minutes to the hour.
What is also a boon to the movie and gaming industry represents a paradigm shift in how individual artists express themselves: By harnessing software such as iClone 8 and its newly introduced Crowd Simulator, any enthusiast — regardless of their skill level — can swiftly prototype and execute massive animated crowd scenes.
iClone 8 Crowd Simulator was designed with the removal of restraints in mind, both in terms of reducing technical complexity and refining user experience. The freedom to bring vibrant worlds to fruition for an individual artist, as opposed to a large production team with extensive time and budget, marks a new era of self-expression that Reallusion is actively encouraging.
Shaking Up the Movie and Video Game Industry
In both the movie and video game industries, the creation of dynamic and populated environments plays a vital role in storytelling and building immersive experiences. Traditionally, this task required extensive work from large teams of highly skilled artists and significant time investments. However, with iClone 8 Crowd Simulator, this laborious process is reduced to mere minutes, empowering a single visionary armed with nothing more than enthusiasm.
The accelerated production times made possible by iClone 8 also open new possibilities for indie game developers and small studios, enabling them to craft rich and vibrant worlds that can rival those created by larger entities. By increasing efficiency, artists can focus on what matters most: bringing their unique visions to life and captivating their fanbase with awe and excitement.
Empowering Indie Creators – like Yourself
But all these pie-in-the-sky concepts mean nothing if individual artists aren’t positioned at the forefront. After all, it’s about basics and practical steps that give results. It is the same practicality that enabled Indie Developer Zeng Xiancheng to create all assets for his video game in just two months — and that was before iClone 8 Crowd Simulation even existed. Just imagine what you can do now.
So, how can creators like you practically utilize iClone 8 Crowd Generation? What better way to learn than through a tailored tutorial by none other than our featured recurring artist and instructor, Mark Diaz.
Crash Tutorial on iClone 8 Crowd Generation
Hey there! I’m Mark Diaz, but let’s fast forward the formalities and dive right in. My mission? To show you the fastest route from zero to hero with iClone 8 Crowd Generation features.
Step 1: Instant City Creation
Alright, so we’re kicking things off with building your very own 3D city in iClone 8, and guess what? You’ve got options! Whether you’re all about getting straight to the fun part or you’re the hands-on, do-it-from-scratch type, there’s a path for you.
Quick and Easy: Grab a City Off the Shelf
So, you’re excited to jump right into animating and not so keen on spending months on modeling and texturing, right? Well, iClone 8’s got your back with a super shortcut. Pop over to the Reallusion Content Store by going to Help menu > Reallusion Content Store.
Go to search, make sure you have iClone selected, and type “Modern City” in the search bar, and boom, you’ll see a bunch of ready-made cities just waiting for you.
There’s this cool one called “Modern City New” that’s just perfect for what we need. It’s $30, but think about it — it’s like skipping ahead two or three months of hardcore city-building work. Just click, drag, and drop, and you’ve got yourself a slick cityscape ready to roll. How awesome is that?
On a Budget? No Worries, We’ve Got You.
Now, if you’re watching those pennies or you’re all about that DIY life, there’s a totally free way to get your city started too. Dive into the Content panel, and follow the breadcrumb trail: Template > Item > Stage > 3D Scenes > Mesh_Medium. Look for “iPlaza_noneCG” — it’s a solid base for practicing crowd simulation and getting the feel of urban design.
Click and drag it to the scene, and you have got a plaza to practice with.
This route might take a bit more time and elbow grease, but hey, it’s all about the journey, right? Plus, it’s a great way to learn the ins and outs of city crafting without spending a dime.
No matter which path you pick, iClone 8 is here to make sure your city-building adventure is a blast. Ready to get started? Let’s dive in.
Step 2: Path Creation for Characters
Before we dive into path creation, a quick pro tip: make sure your cursor is parked on frame zero. Trust me, it’s a small step that makes a big difference.
Now, ready to roll out some paths for our animated friends? Just head over to the Create menu > Path, and click away in the scene to map out your route.
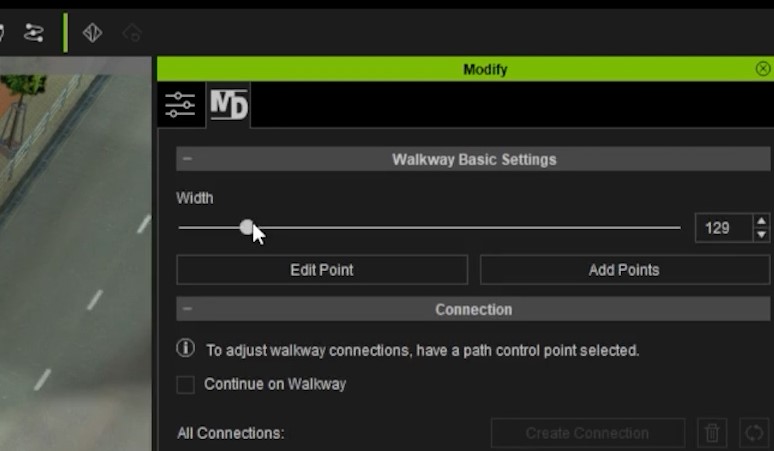
Need to adjust the width? The Modify panel has got you covered with the ‘MD’ option for that perfect fit.
And don’t forget to generate that NavMesh — it’s crucial for keeping our characters on track. Just go to Create menu > Generate NavMesh.
You can adjust some settings if you want, and once you are ready, click Generate.
Step 3: Populating the City with Walkers
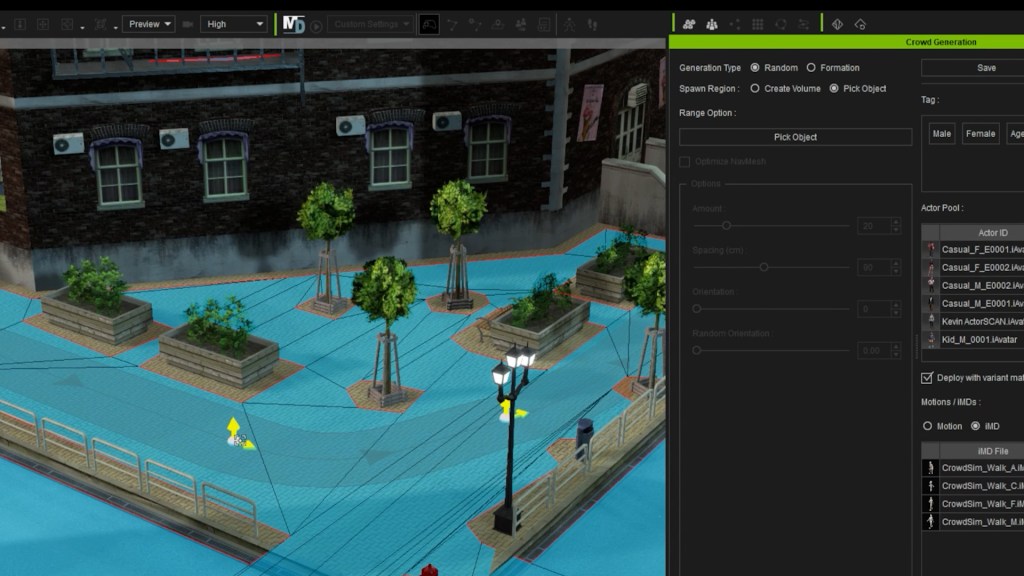
With the paths set, we populate them using the Crowd Generator tool. Just go to Create menu > Scatter > Generate Crowd.
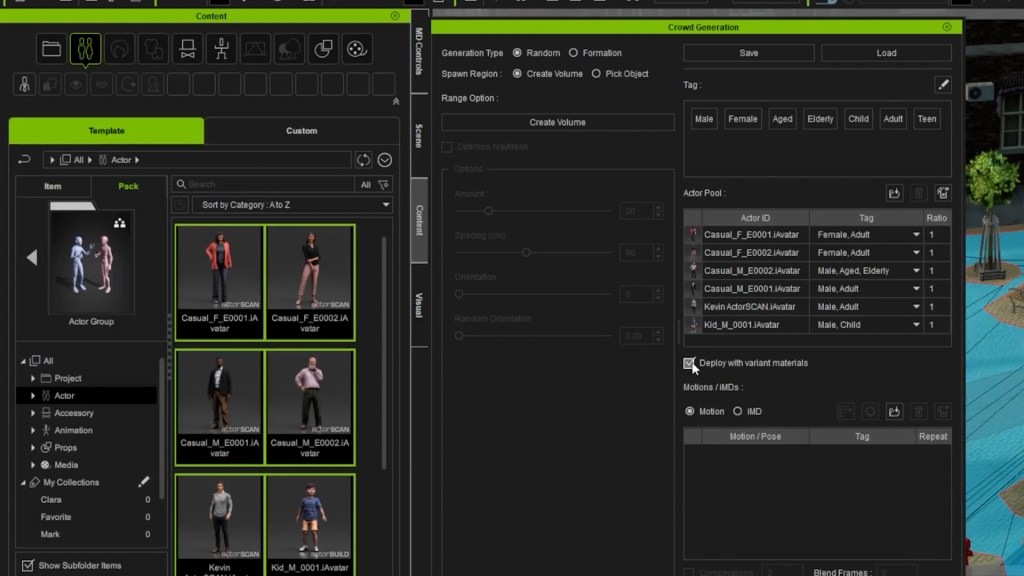
Then in the crowd generation box, we can click and drag characters that you want to set as the crowd from the Content panel. And if you want to repeat some characters but have them with different colors for the clothes, make sure you check the option “Deploy with variant materials”.
The actors selected for this tutorial are all the characters from the pack “Actor Group”.
Then for the animation, I use the Motion Director feature, by going to the “Motions / iMDs” section, and selecting “iMD.” Then click and drag some Motion Director clips from the Content panel that you would like your characters to be animated with when they walk.
The ones I used for this tutorial are:
CrowdSim_Walk_A.iMD
CrowdSim_Walk_C.iMD
CrowdSim_Walk_F.iMD
CrowdSim_Walk_M.iMD
Then, for these characters to walk on the path we created in the last step, we just have Generation Type as Random, Spawn Region as Pick Object, and then we click on Pick Object, and select the path in the scene.
You can tweak some options. I like to have Optimize NavMesh activated, have 14 actors, and have the Direction Ratio set in the middle.
Then you just click Deploy Actors, wait for iClone to process the characters, and there, you have characters ready to be animated.
Step 4: Adding Idle Characters
Animating the inhabitants of our digital city comes with options, each offering a different balance of time investment, cost, and variety. Let’s explore the three ways to bring those idle moments to life, making your city not just a backdrop but a living, breathing world.
DIY Animation: The first route is the most hands-on, animating each character one by one. While this method offers the most control over individual movements, it’s a real time sink. Perfect for those who love to dive deep into every detail, but be warned, it’s a lengthy process that can extend to weeks or months.
Utilizing Motion Clips: A quicker alternative involves using pre-existing motion clips designed for idle characters. This method speeds things up and keeps things simple. However, the downside is a potential lack of variety, with characters possibly repeating the same few animations.
Investing in City Life: For those looking to combine speed with diversity, the “City Life” pack is a game-changer. Priced at $99, it’s particularly suited for game creators or anyone aiming to animate a city with a dynamic, natural feel quickly. The pack offers a wide range of idle animations, from folks chatting on their phones to others enjoying a quiet moment on a bench, bringing an authentic vibe to your urban scene.
For our tutorial, we opted for the “City Life” pack to ensure our city felt as real and vibrant as possible. The diverse animations provided by the pack allowed us to populate our streets with characters engaged in various idle activities, effortlessly adding depth and realism to the urban landscape.
With that in mind, we are ready to use the Crowd Simulator tool again, but here we change from IMD to Motion, then for this tutorial, we pick clips from “City Life” to add a natural variety of personalities.
Now with the settings on random, and spawn region on volume, I click create volume, then click and drag on the scene to create an area with these characters.
Then I set the random orientation all the way to 1. I keep pressing generate placement until I’m satisfied with the positions. And then deploy actors.
Done! If you want, you can reposition some of those actors easily in the scene, by moving and rotating them.
Step 5: Camera Animation
The hardest part is OVER. Now we finish with the last 3 quick steps.
First I position the Preview camera in place, then go to Create menu, Camera>Orbit Camera.
Then I move forward in the timeline and then set the second position of the camera.
Done. The camera animation is ready. You will notice the 2 keyframes of the camera in the Timeline.
You can do some quick adjustments and then we’re on the next step.
Step 6: Add Sky and Sunlight
For the sky, I go to Content panel >Template > Set > Sky, change to Item, And select the “SunsetSky”.
Then just click and drag to the scene.
Then I add a lens flare by going to the Create menu, lens flare. And just position it behind that building near the back.
And just like that, you now have a sky and a beautiful sunset.
Step 7: Add HDR Effects
Finally, you can get some finishing touches by going to the Visual panel, which if you don’t have it you can go to Window menu > Visual Settings. Then go to the first setting, the Atmosphere, scroll down and activate the HDR effect.
Then quickly play with the settings, and you are done!
The HDR effects add a bloom effect to your scene. Here is a comparison (see if you can spot the difference in the bloom effect):
Conclusion
Through this tutorial, we’ve demonstrated how iClone 8 and the Crowd Simulator feature can revolutionize content creation, making it accessible, fast, and efficient. This process opens up new horizons for creators across industries, enabling them to bring their visions to life with speed and ease previously unimaginable.
Every 3D animation contest presents its own set of unique challenges. In addition to pushing the boundaries of artistry, participants have to adhere to strict deadlines for submitting their final renders. Let’s explore notable entries from three prominent competitions:
“ROKOKO TV” Intergalactic Animation Challenge
Pwnisher Endless Engines Challenge
Pwnisher Eternal Ascent Challenge
The following entries highlight the emergence of exceptional artists and their personal techniques. Their high-quality craftsmanship and ingenuity in character animation are clear roadmaps to transcending the limits of conventional methods.
Advanced Facial Animation Capture with AccuFace
Florian Salvesberger’s “Kiss The Cook” 👨🍳”
Florian Salvesberger’s submission to the “ROKOKO TV” Intergalactic Animation Challenge stood out for its innovative approach. In his cooking show entry, Florian introduced a captivating twist by showcasing a flying chef bot alongside a meticulously crafted mechanical cook, replete with intricate details. Notably, Florian utilized Character Creator for the creation of the cook character, leveraging its versatile capabilities that seamlessly integrate into his character workflow, whether for conceptualizing art or directly generating 3D models.
To infuse the character with even more vitality, Florian ventured into the realm ofAccuFACE Mocap for the first time, and the outcome exceeded all expectations. The ability to receive live feedback in real-time, directly onto the character mesh within iClone, was akin to every CG artist’s dream — a flawless 10/10 experience. After experimenting with various equipment, Florian settled on recording the final performance using the front camera of an iPhone 12 Pro, as it provided superior performance capture data compared to his slightly older webcam.
Following the recording, the character mesh seamlessly transitioned into Blender using the CC Blender Auto Setup plugin, effortlessly integrating with the rest of the scene. Rendering everything in Blender Cycles, Florian meticulously crafted the final composition, incorporating a medley of sound effects recorded within his own kitchen. The culmination of these efforts resulted in a delectable video submission, inviting viewers to indulge in a culinary journey. To that, we say “Bon appétit!”.
Trained and studied in Austria, Florian is a freelance 3d artist with a focus on Environmental Design, Worldbuilding, Matte Painting, and 3D Modeling. For more artwork of Florian, follow his Instagram @salve.vision.
ZBrush sculpting combined with iClone animation
Varuna Darensbourg’s “Void Detectives”
Varuna Darensbourg participated in the “ROKOKO TV” Intergalactic Animation Challenge, submitting the entry titled “Void Detectives”. This entry features a black female detective in the lead role, supported by several robots. Leveraging extensive experience withZBrushCharacter Sculpt, Varuna utilized the tool to seamlessly incorporate customized sculpting onto the main character.
As the deadline loomed, COVID-19 unexpectedly impacted Varuna, causing him to be sidelined for the final weeks of the competition. However, he persevered and accomplished a significant amount of work in the last two days of the challenge. This attributed his success to the seamless real-time character workflow. Varuna expressed satisfaction in seeing his efforts through to completion despite the challenges he faced. The native render in iClone8 (using the native engine) stood out. And it also showed how Varuna excelled in crafting the character’s appearance and expressions.
Varuna Darensbourg, based in Toronto, Canada, boasts an impressive portfolio with contributions to several Hollywood blockbusters. His credit can be seen in “Shang-Chi and the Legend of the Ten Rings” and “Alita: Battle Angel.” For those interested in connecting with Varuna, they can follow his work on ArtStation under the handle @aria_redux.
Seamless workflow with Unreal Engine
Mohammad Khalikh’s “Auto Rickshaw’s Action”
This entry, created by Mohammad Khalikh, was submitted to the Pwnisher Endless Engines Challenge in 2023. Adorned with motion blur effects, the video has the audience immersed in a high-intensity car chase and gunfight sequence. Despite the challenge’s requirement for animating using the provided sequence image, the artist retained the freedom to customize it. And that includes characters, textures, lighting, and applying VFX to enhance the scene. Utilizing seamless integration with Unreal Engine, iClone, and the Character Creator, Mohammad opted to incorporate the car chase characters in this entry, showcasing a seamless blend of creativity and technical skill.
Mohammad Khalikh, trained and educated in India, is a skilled previz artist renowned for his contributions to both live-action and animation projects. His clientele boasts prestigious names such as Lenovo India and Xolair, with one of his previz works notably featured in a war movie available on Amazon Prime Video India. For those interested in exploring more of Mohammad’s artwork, they can follow his portfolio on ArtStation under the username @grizzlyartist.
Ro-Bob Ross teaches AI-generated Art
Nick Shaheen’s “Ro-Bob Ross Teaches AI Generated Art”
Artist Nick Shaheen submitted this entry to the “ROKOKO TV” Intergalactic Animation Challenge. Reflecting on his upbringing when cable or satellite television was not widely available, Nick had a memory of one scene. He recalls the simplicity of Saturday afternoon programming, which often featured bowling or the painting show hosted by Bob Ross. Inspired by Bob Ross teaching text to AI-generated images, Nick whimsically decided to depict him as a cyborg. Embracing the philosophy that in his world, there are no mistakes, only happy accidents. Nick transformed this concept into a 7-second video for the competition.
Using Rokoko suit for Bob’s body animation
Beginning with Character Creator in conjunction with ZBrush andSubstance Painter, Nick successfully achieved the desired sci-fi appearance for the character. Following the completion of the body mocap session using Rokoko, he further refined the body animation utilizingiClone motion layer editing tools. The execution of the concept was commendable, resulting in a final outcome that is both impressive and gratifying.
Ro-Bob in action!Courtesy of Bob Ross Inc.
Nick is a versatile professional, serving as a writer, director, freelance motion designer, and VFX artist. His portfolio includes the award-winning short film “Honey Romance” and the sci-fi-comedy M.A.R.C. For those wishing to connect with Nick, they can reach out to him via his Instagram account @nickhshaheen.
Best character pipeline for Blender
Jasper Hesseling’s “Ascending from the ashes”
Artist Jasper Hesseling interpreted the theme of “Eternal Ascent” for the Pwnisher contest by portraying a phoenix-inspired transformation. In his submission, the princess ascends from a shattered castle, her dress burnt, symbolizing her rebirth with newfound strength. Jasper utilized his trusted tools from Reallusion – Character Creator and iClone – along with ZBrush and Substance Painter, to sculpt and texture the character. Furthermore, he employed Marvelous Designer for dress simulation and integrated Megascans assets to enhance the depth and visual appeal of the project. Due to the article layout, watch the full version of the entry here.
Jasper’s primary goal was to expand his skill set in Blender, and he is thrilled with the outcomes achieved. The CC Blender Auto Setup plugin played a crucial role in seamlessly transferring CC shader and PBR data to Blender, streamlining his character workflow within the software. Jasper takes particular pride in the lighting and eerie atmosphere of his piece, along with the meticulous attention to detail throughout. The depiction of clouds and fire, generated using imported OpenVDB volume data files, put significant strain on his computer, resulting in frequent crashes during rendering with Blender. However, Jasper found the render manager B-Renderon to be an invaluable tool for managing these challenges and ultimately achieving the desired final outcome.
Jasper Hesseling, based in Utrecht, Netherlands, is a freelance 3D artist specializing in character art and various other 3D creations. For those interested in contacting Jasper, they can send him a private message via his ArtStation profile under the username @mastajappa.
Try the tools that these artists have used
If you’re interested in exploring the software and tools mentioned, you can visit the following product links to learn more about these solutions. All Reallusion products offer a 30-day free trial upon registration, with no credit card required. Feel free to test them out before making a purchase. Happy animating!
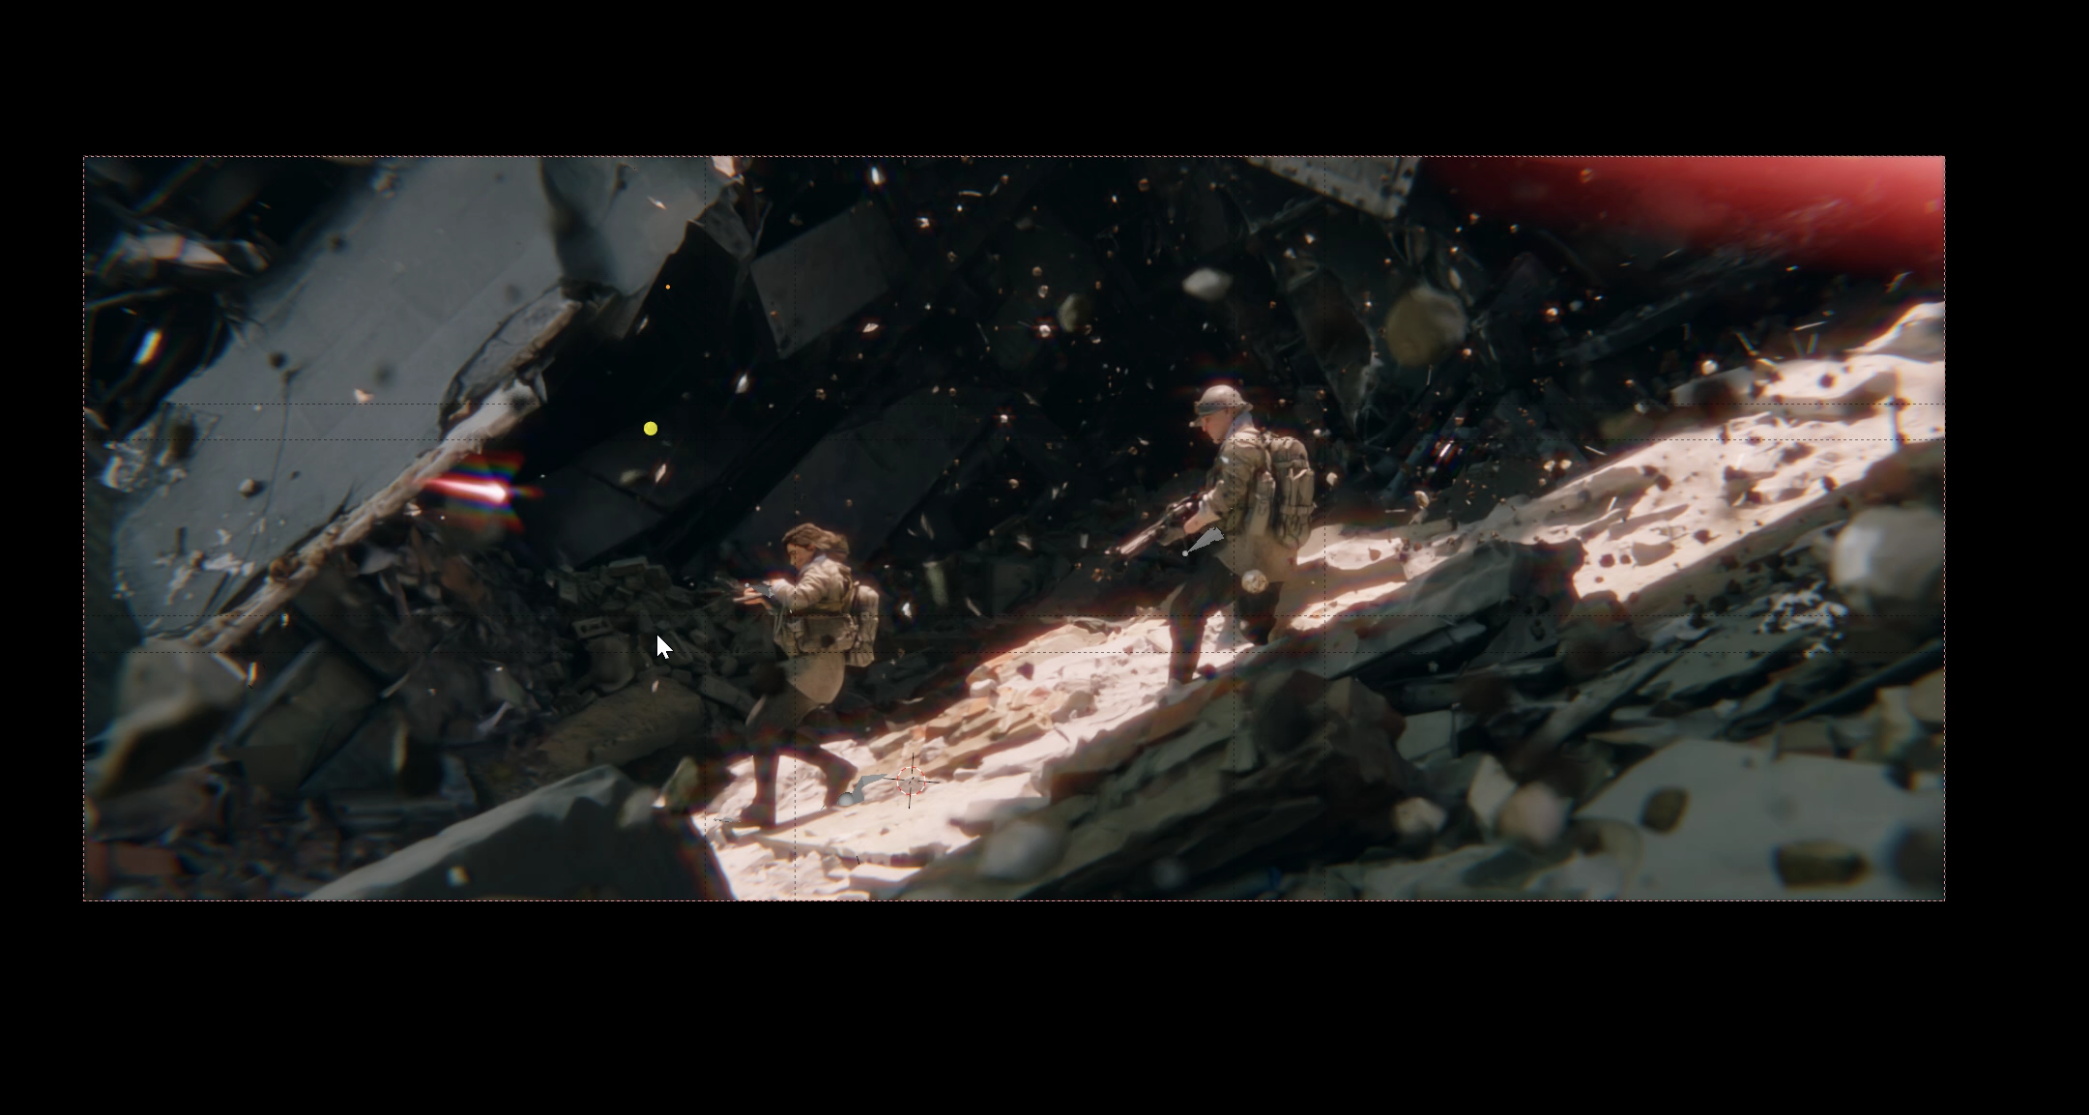
Concept artist Jakub Kaźmierczak harnesses synergistic workflow in the creation of his “Battlefield” concept series
Jakub Kaźmierczak
Hello, I’m Jakub Kaźmierczak, a concept artist specializing in environments concept art and key frames. Today, I’m excited to share my workflow that enables you to swiftly create high-quality characters for your concepts. With the combination of Character Creator and KeenTools for Blender, crafting realistic characters has never been easier. This streamlined process not only ensures realism but also simplifies character posing.
Prior to concept design: gathering ideas & references
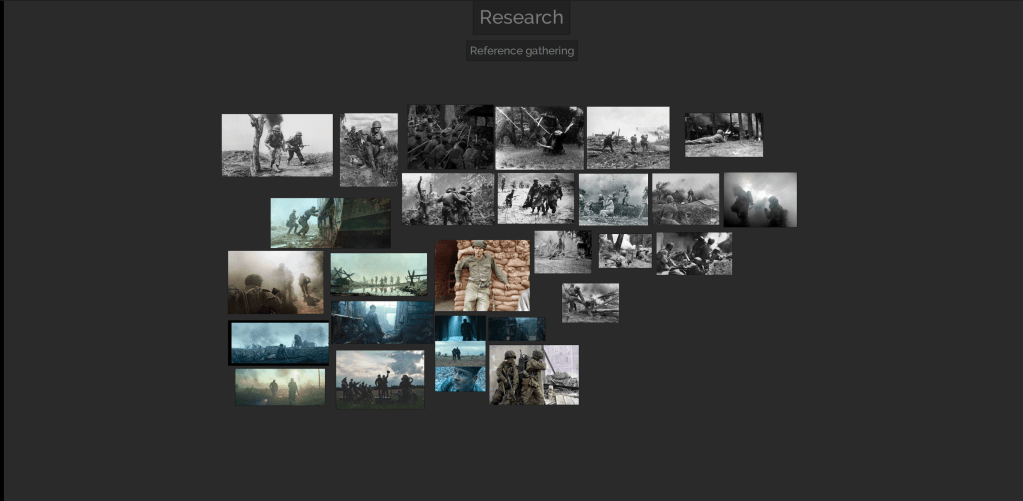
In selecting the theme, I opted for a warzone scene, drawn to its potential for dynamic and action-packed compositions, which I thoroughly enjoy crafting. My process invariably begins with gathering references.
For this project, I scoured archival photos for pose inspiration and film stills for insights into color palettes and mood. I typically utilize search engines like Bing and platforms like ShotDeck to curate a diverse array of images. These references serve as invaluable resources, providing answers to questions regarding materials, lighting, and design that may arise during the creative process.
Crafting a character for your concept art using KeenTools Face Builder
I will now demonstrate my process for creating a character for my concept art from scratch.
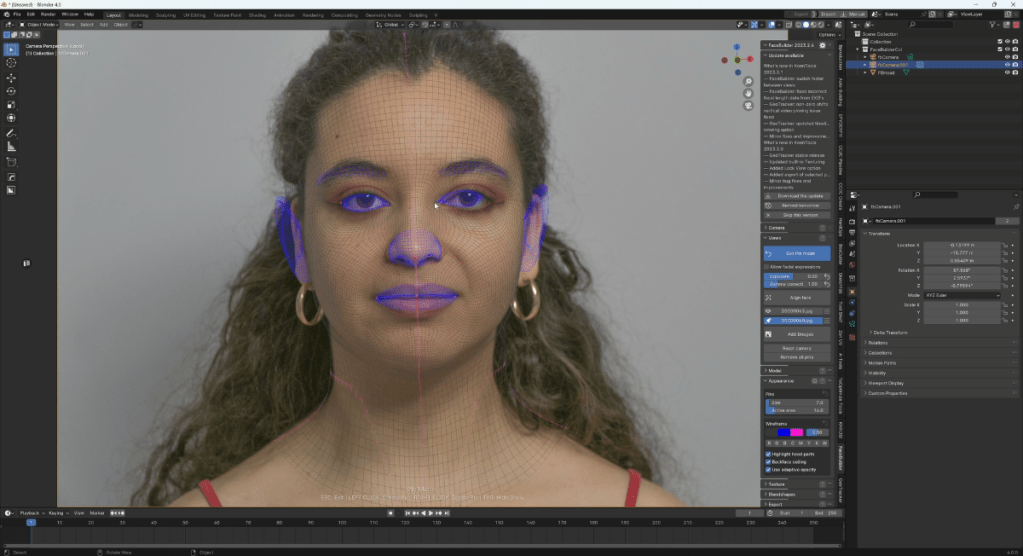
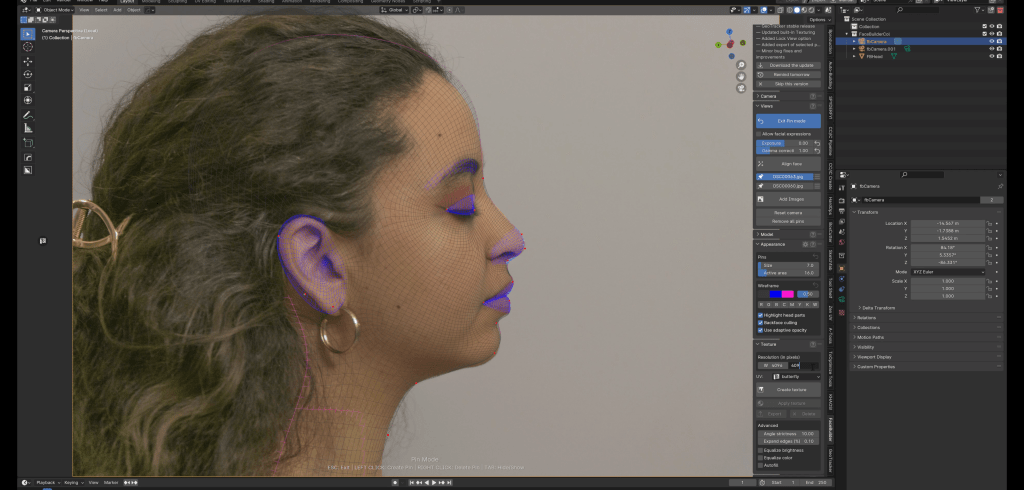
We’ll begin in Blender, where I’ll demonstrate how to utilize KeenTools to align the mesh with reference photos and sculpt a face for our character. This intuitive process involves seamlessly integrating parts of the mesh with the reference images, ensuring accuracy and detail.
Once the sculpting is complete, we’ll generate the texture and export it to Character Creator to finalize our character.
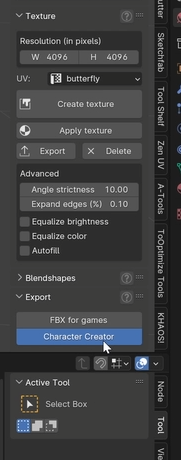
When we have it all done, we can create the texture. I just have to set the desired resolution and pick how many photos we want to use in the process.
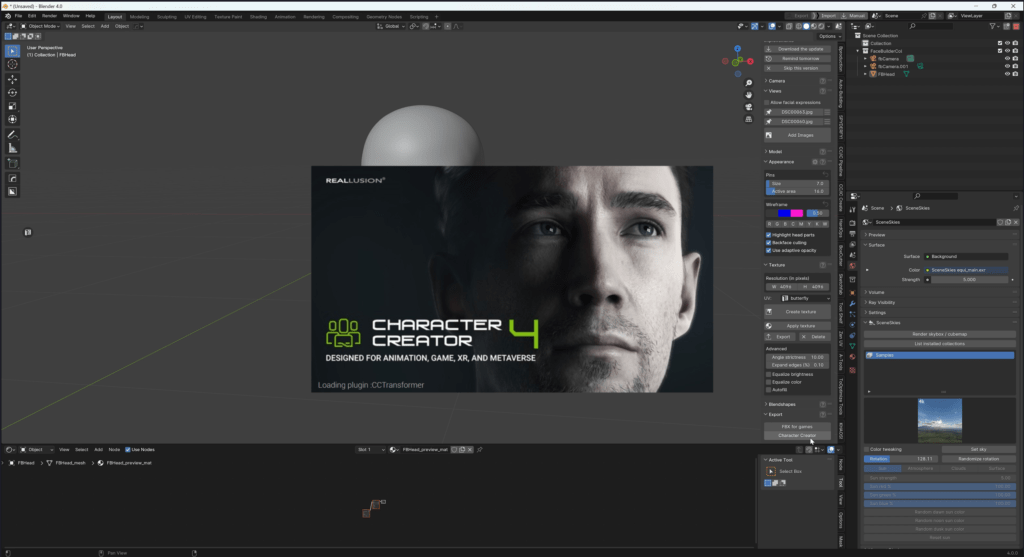
KeenTools offers a dedicated option to seamlessly transfer your head model directly into Character Creator, which is really convenient.
Exporting it to Character Creator and making the model for the concept art
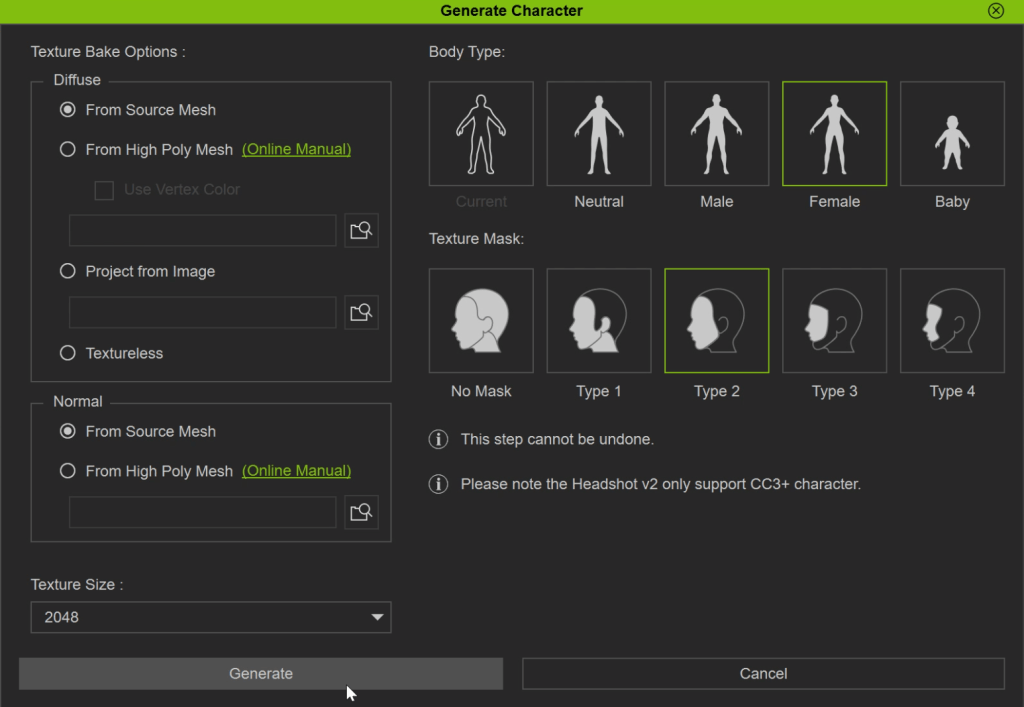
After a quick import I clean the mesh if some things are still not aligned and attach the head to the body. In my case, I use the “Female” Body Type and “Type 2” Texture Mask.
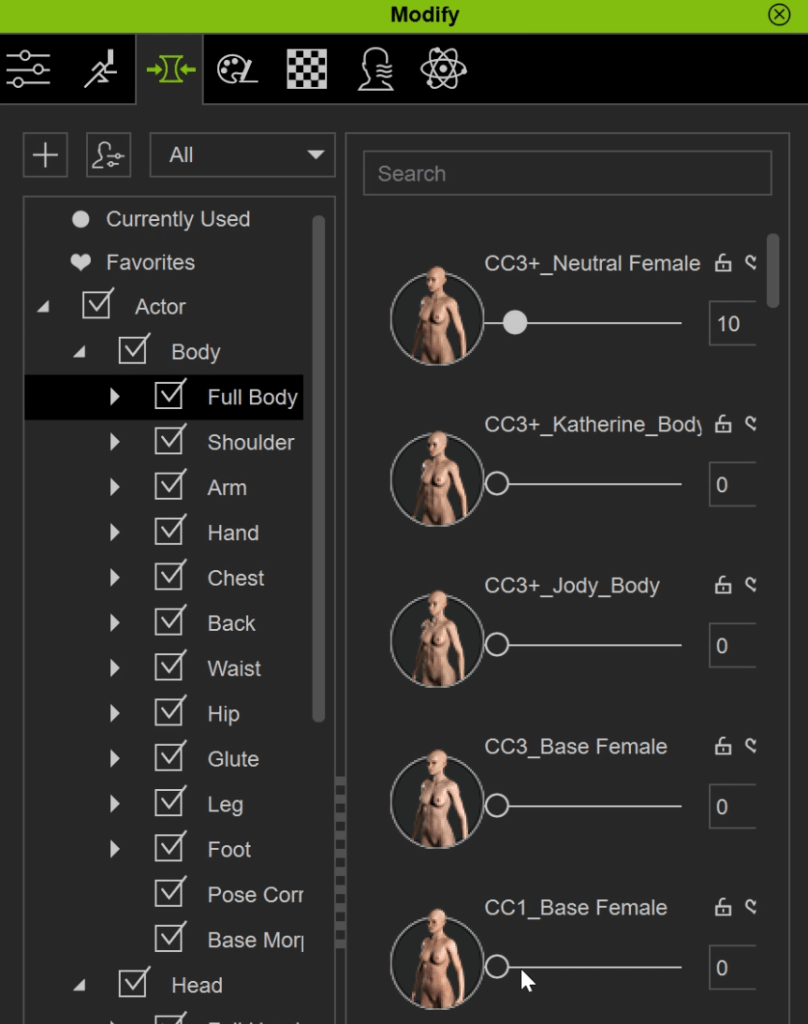
To further refine the character’s appearance, I employ the morph function to fine-tune each facial feature and add additional details to the head.
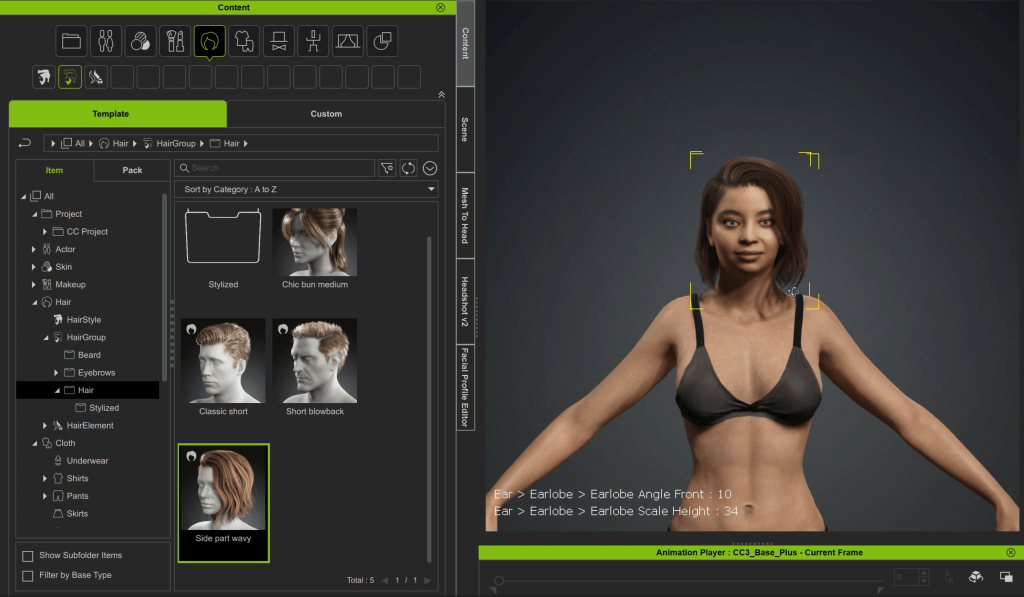
Thankfully, Character Creator offers a wide range of elements such as hair, eyebrows, wrinkles, and normal maps to enhance facial detailing. This is where I experiment with various options to achieve the desired look in the concept art.
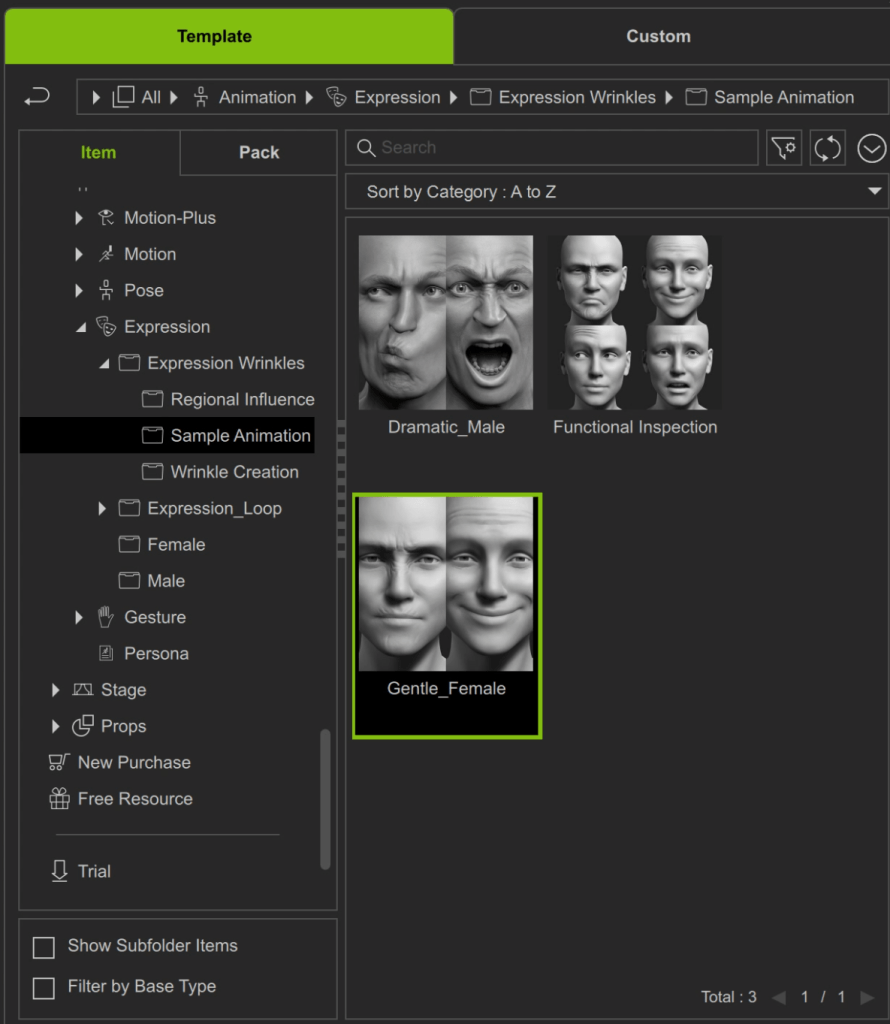
Furthermore, I take advantage of the expression wrinkles feature of the latest release, which proves invaluable in conveying emotions and laying the groundwork for photobashing if needed.
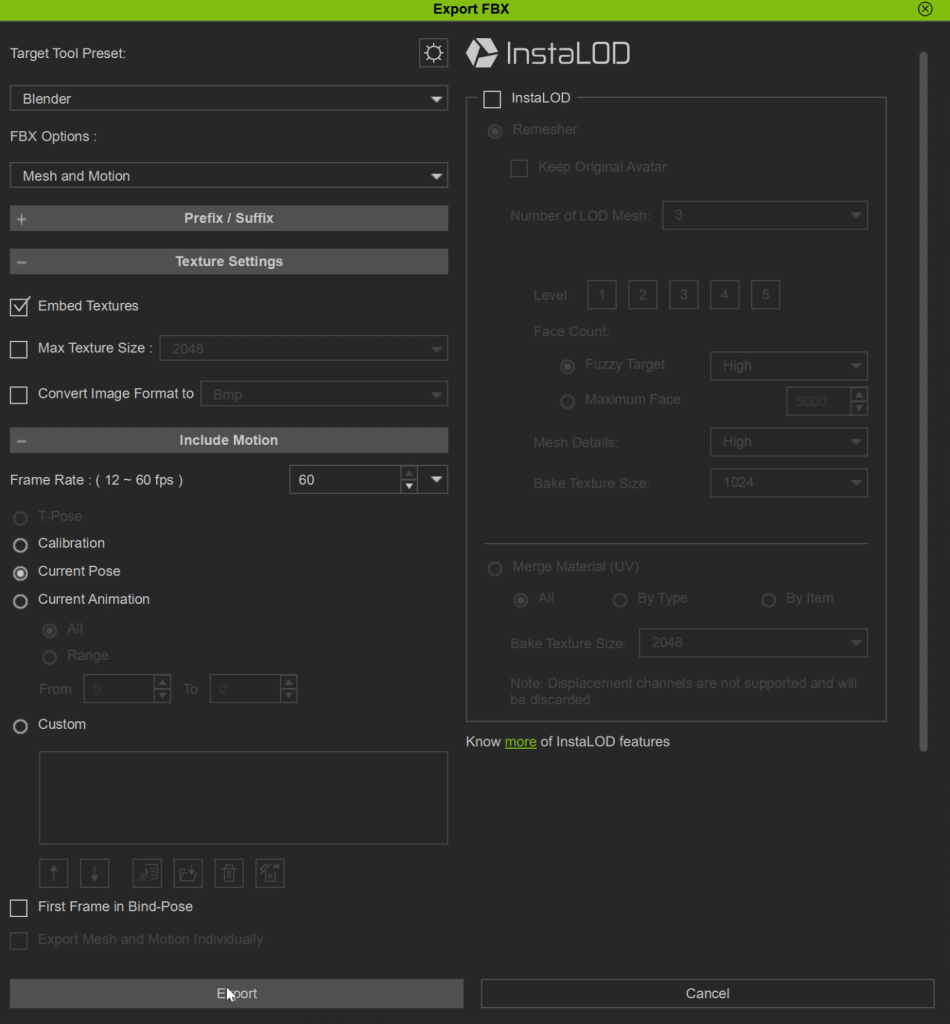
Once satisfied with the model, I export it back to Blender via the menu command: File > Export > FBX > Cloth Character.
Reallusion Addon: Blender Auto Setup
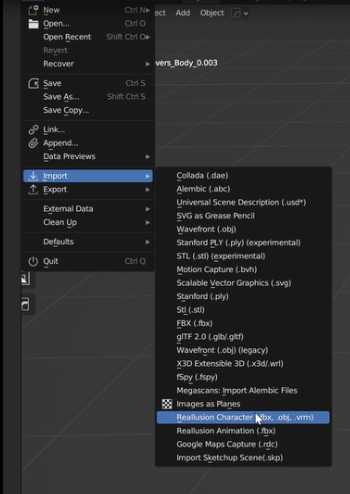
For seamless character transfer, an official auto-setup add-on is provided for Blender, accessible via the Reallusion forums. Within Blender, we simply navigate to the Import menu and select Reallusion Character. Once imported, we have the flexibility to fine-tune various parameters directly from the addon tab. This includes adjustments for roughness, subsurface scattering, color, and an array of other options to achieve the desired appearance.
Creating Clothing in Blender
With the character now in Blender, it’s time to give her an outfit. Previously, I relied on exporting outfits from Marvelous Designer. However, for efficiency’s sake, I’ve transitioned to dressing the character directly in Blender. It’s akin to dressing up an action figure. Whether modeling custom outfits in Marvelous Designer, sourcing models from online platforms, or even utilizing 3D-scanned clothing items, the objective remains the same: achieving the desired effect promptly.
With this approach, I dress the character, ensuring proper fit with adjustments when needed. When I’m done, I export the entire ensemble as an FBX file.
Importing Clothes into Character Creator
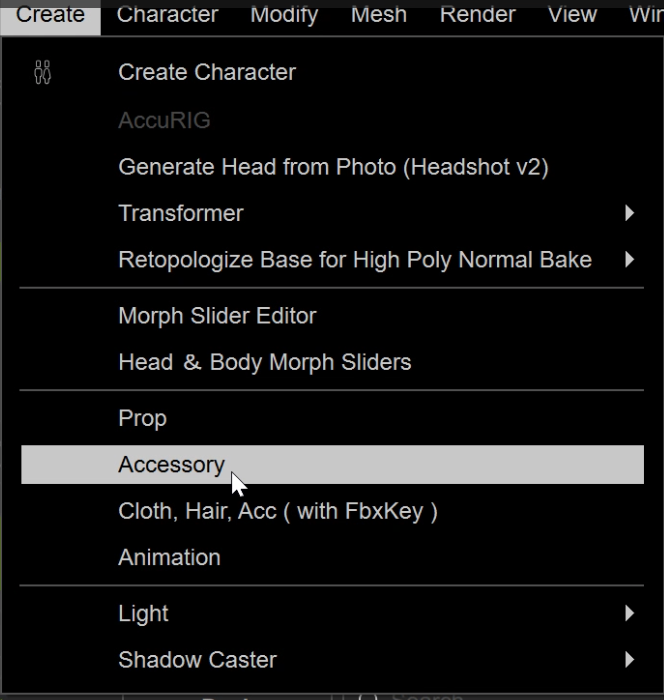
Once that’s completed, I return to Character Creator. To import clothes and attach them to our character, I navigate to Create > Accessory > FBX.
After a quick pose adjustment to ensure the outfit aligns the character properly, we proceed to make the clothes adhere to the character.
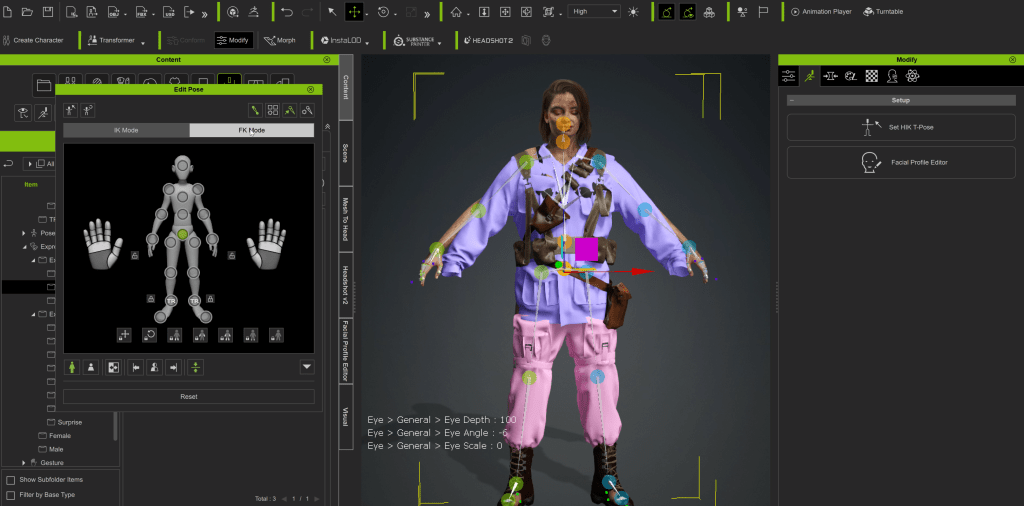
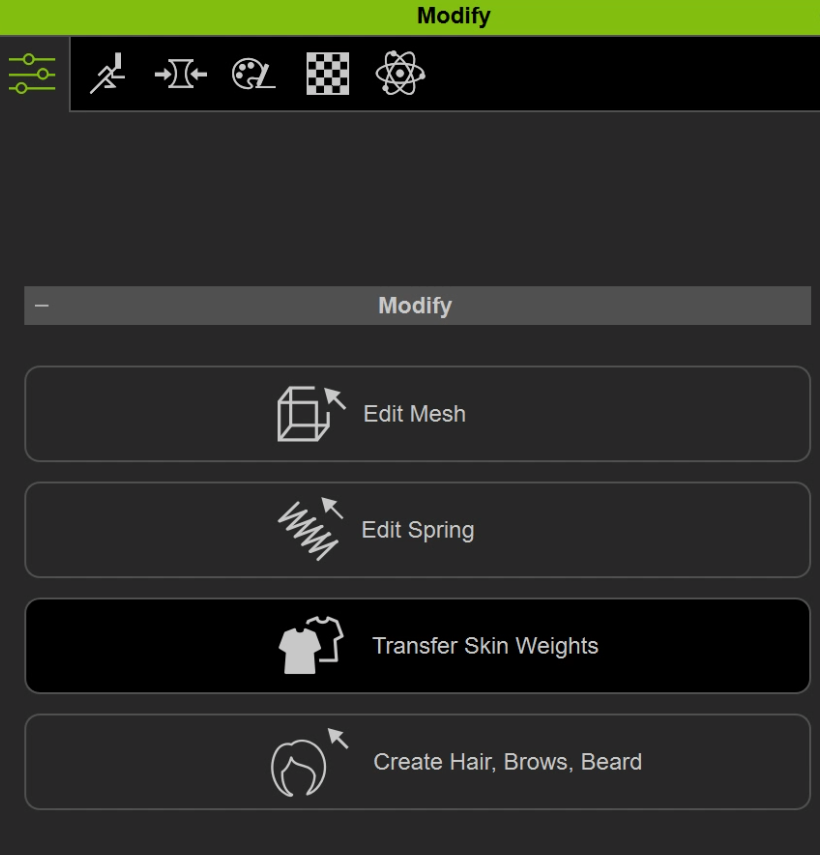
To achieve this, we select the clothing element, such as shoes, navigate to the Modify tab, and transfer skin weights. We repeat this process for each piece of clothing.
For those seeking a comprehensive guide, Michael Pavlovich has an excellent tutorial detailing the entire process in depth.
Bringing ActorCore Motion & Poses into Blender
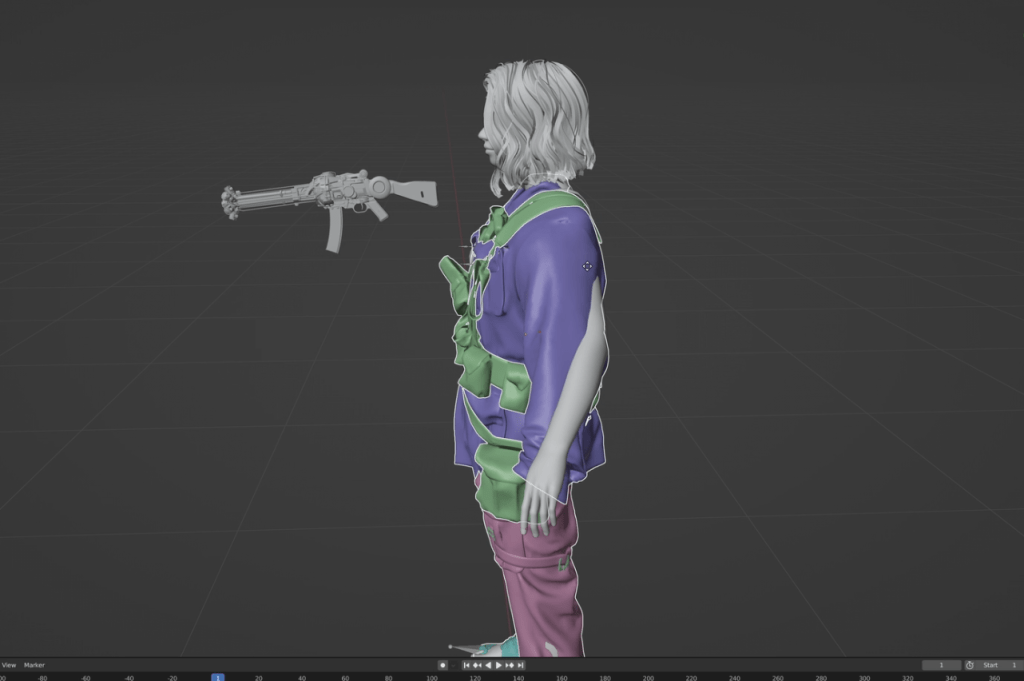
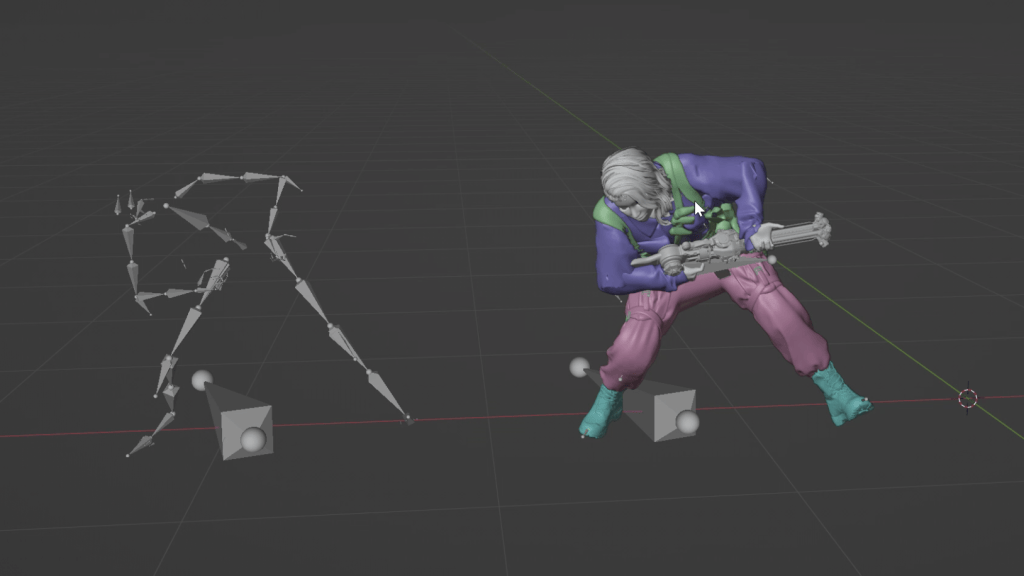
Now, it’s time to reintroduce the fully clothed character back into Blender. If you wish to attach additional elements, such as a backpack or gun, simply navigate to edit mode on the skeleton. Duplicate the bone you wish to use, select the desired element, and with Ctrl+P, set the parent to the bone. To ensure the clothes adhere properly to the mesh, I utilize the sculpt tool in Blender.
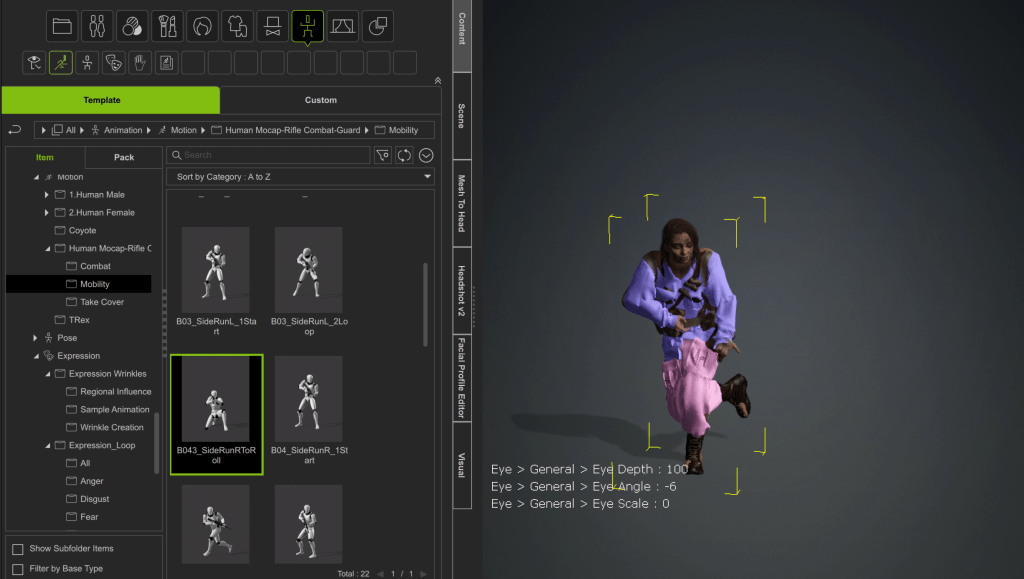
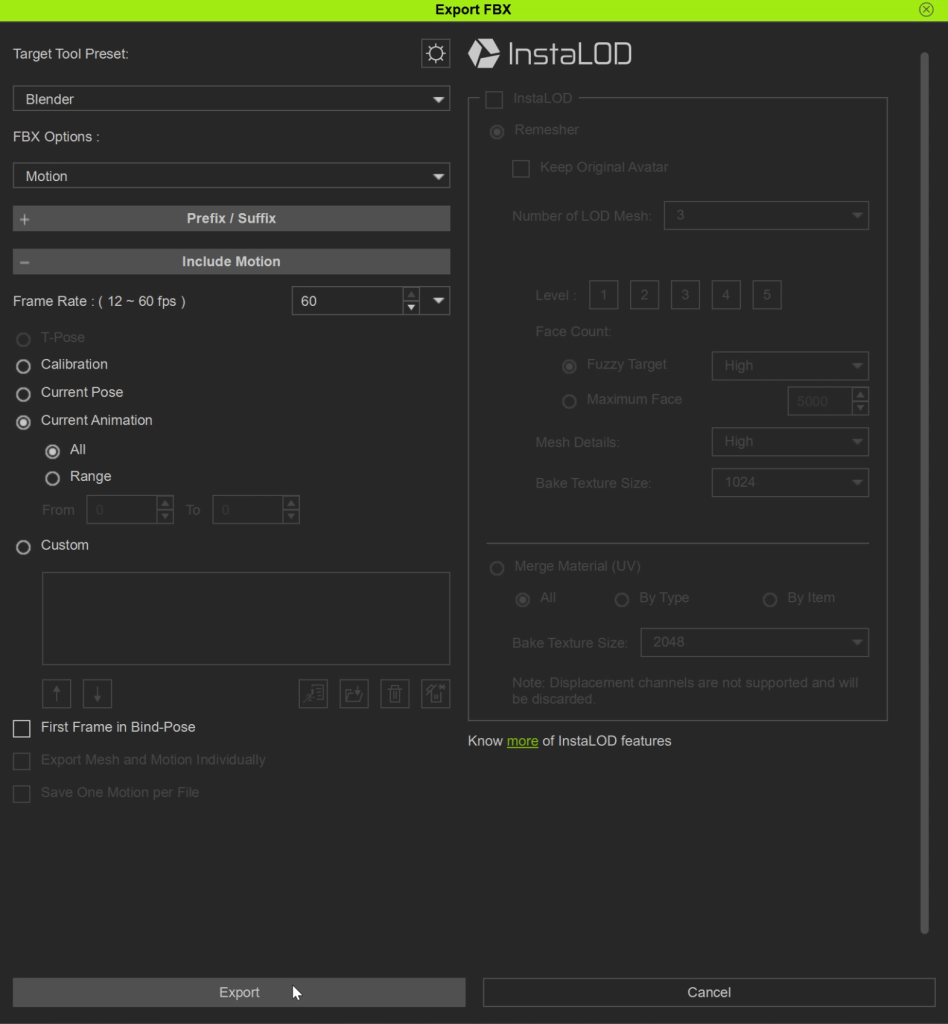
Importing animations into Blender is straightforward. In Character Creator, within the Motion tab, select the desired animation. Then, navigate to export and choose Motion and Current Animation.
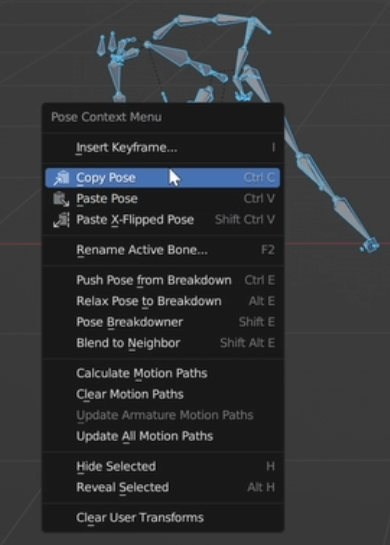
In Blender, choose Import Animation. To transfer the desired pose, select the skeleton with animation, move the cursor over the timeline, and press G. This allows you to play the animation by moving the mouse. Once you’ve found the pose you like, switch to pose mode and copy the pose. Next, enter pose mode on our character, right-click, and paste the pose.
Blockout Phase
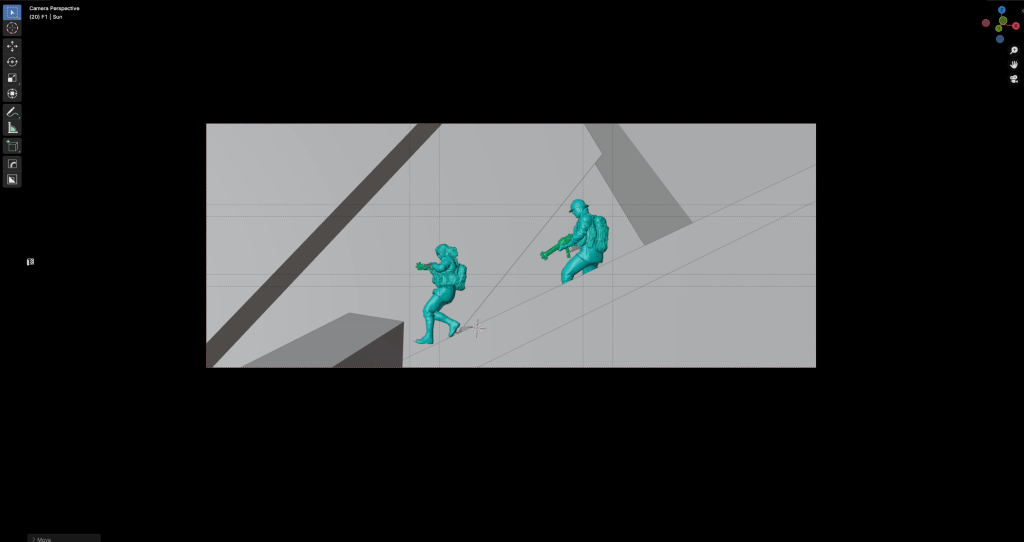
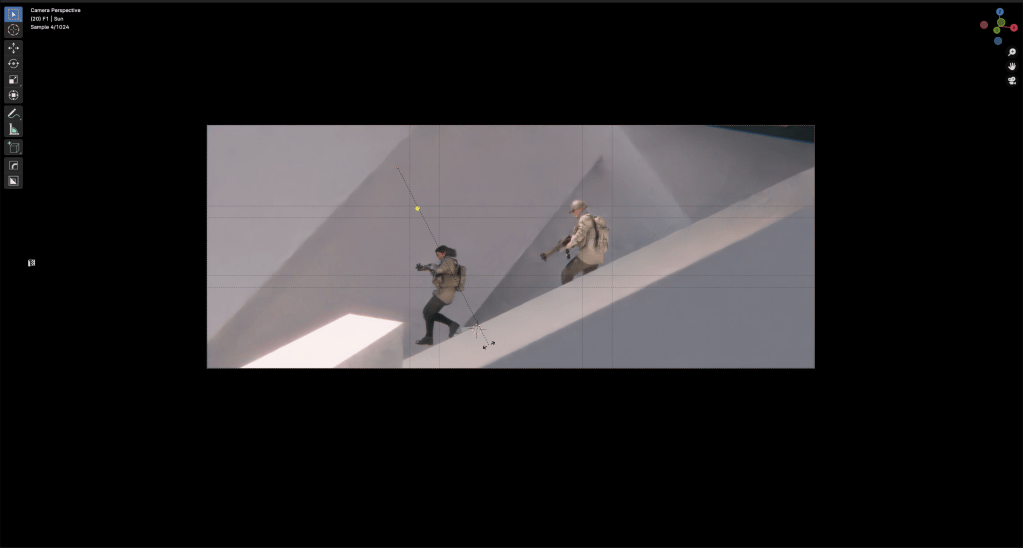
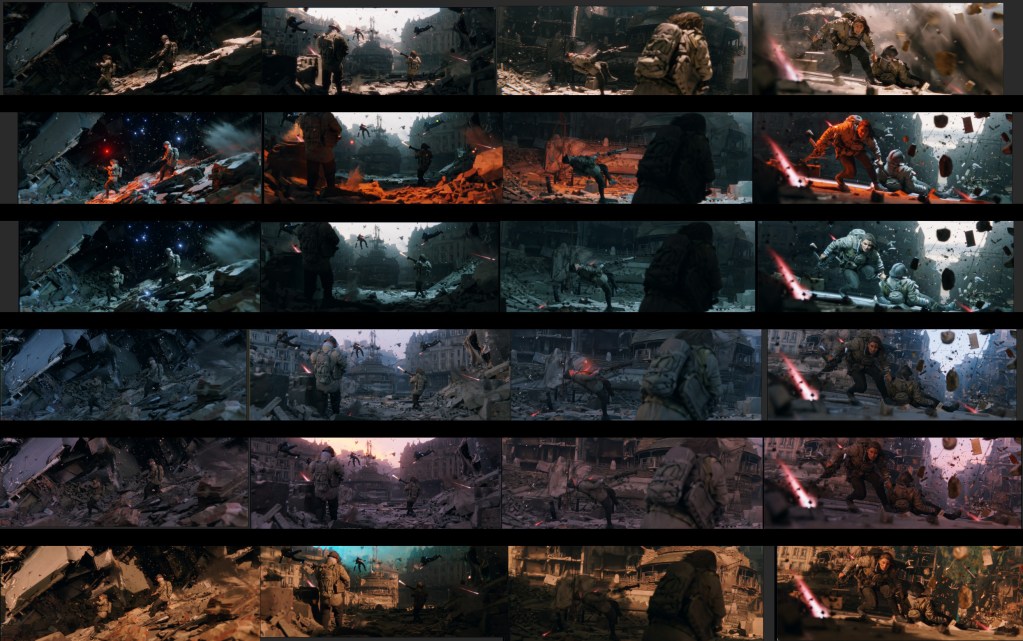
Upon reviewing the references, I commence with a rough blockout of my scene. My aim is to establish the composition and initial lighting. During this stage, I alternate between Blender and Photoshop to overlay and quickly iterate on the initial concept.
Once I’ve completed the blockouts for all the shots I intend to create, I populate the scene with assets and incorporate particles and atmospheric elements.
Expression
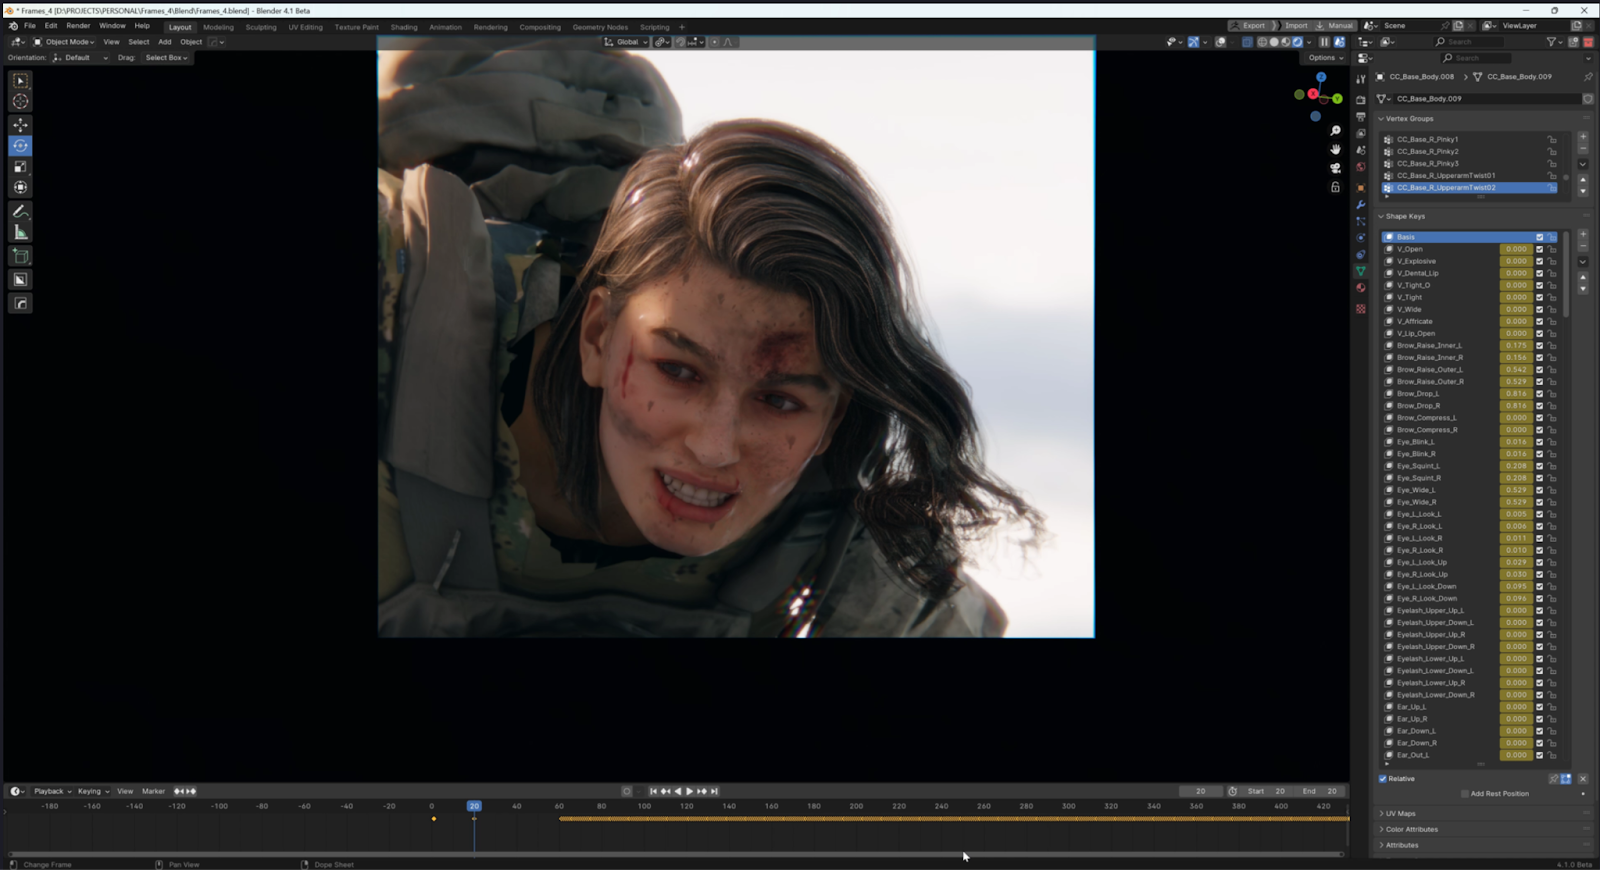
One of the most useful features for me are expression wrinkles that I exported from Character Creator.
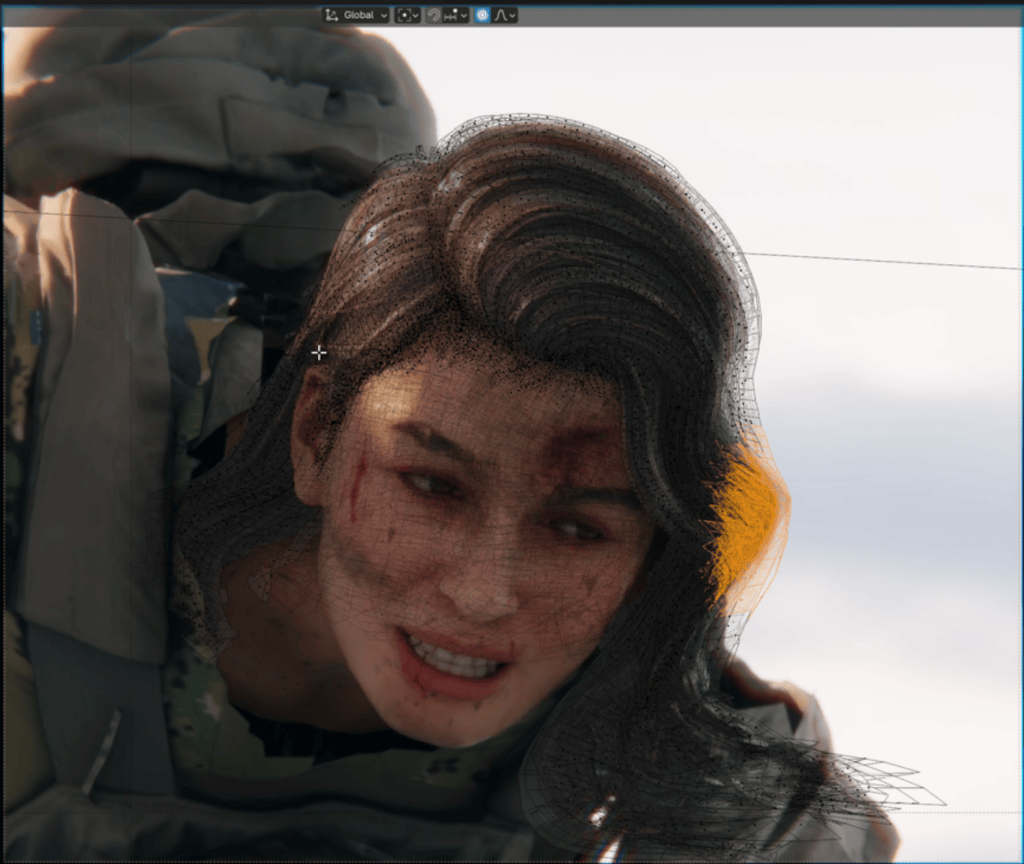
In Blender, I can choose from the expression that is the closest to the one i want by moving my cursor over the timeline and planting animation. When I find something that I like I use shape keys to get precisely what I want.
As for hair, I just simply modify them in Edit mode.
After finalizing the scene, I transitioned to Photoshop for the final photobashing and color grading process.
In Conclusion
The workflow outlined here provides a comprehensive and efficient approach to crafting high-quality characters for concept art. Through the utilization of tools such as Character Creator and KeenTools for Blender, the process is significantly streamlined, enabling rapid and realistic character creation with effortless posing.
Throughout the process, a delicate balance between speed and quality should be upheld, with continuous iterations and refinements to attain the desired outcomes. This workflow seamlessly integrates 3D modeling, texturing, and posing, delivering both flexibility and efficiency in character creation for concept art design.
Stylized motions that add zest to 3D cartoon productions
Anyone familiar with keyframe animation understands the immense skills involved, even for seemingly basic tasks like animating a walk cycle. While keyframe animation grants artists full control to meticulously craft animations to realize their original vision, the process of creating pose-to-pose animations and then refining the in-between poses with precise timing and pacing is undeniably laborious.
To circumvent this challenge, some animators opt for motion capture animation for stylized characters. While effective mocap animations can seamlessly animate a human model into a dynamic actor within the scene, this approach falls short with stylized characters. Translating human movements onto cartoonish characters dilutes their unique personalities, as their exaggerated actions and reactions lack authenticity, resulting in awkward visuals.
Image: Hundreds of cartoon motions available on ActorCore.
While desirable, toon motions can still be challenging to create. ActorCore, the asset store for 3D productions, offers hundreds of ready-made handkey animations. These animations save artists a significant amount of time and effort while ensuring high-quality, realistic cartoon movements.
ActorCore also provides dedicated categories, allowing users to easily find ideal moves for their stylized actors for a wide range of scenarios. All motions are crafted with seamless transitions between poses, enabling effortless switching of different sequences.
Image: ActorCore handkey motions are catered to match different toon personas.
Handkey animations on ActorCore are crafted to accommodate a diverse range of stylized characters, providing unique animation styles suited to various body scales and personalities. Whether it’s a male, female, child, or a character with a robust or slender physique, ActorCore offers specialized motions for all cartoonish performances.
Currently there are over 500 handkey motions available in the ActorCore motion store, from general movements such as walk, talk, run, to paired motions and interactions. Any motion that showcases unique cartoon personalities can be found, including playful, hefty, clumsy, cowardly, and more.
One example is “Clumsy Moves”, is a handkey motion pack designed to infuse uproarious fun and slapstick humor. When applied, the characters come alive and engage in a variety of negligent behaviors resulting in slips, falls, and tumbles.
The “Chubby Moves” packs offer a range of lively performance animations tailored specifically for plus-sized characters. By incorporating compatible animations (like “Sit Chair” and “Sit Sofa”) across both the “Chubby Moves – Playful” and “Chubby Moves – Bulky” packs, motions can transition from one theme to another, to transcend the performance. By extending this integration to include “Playful Stand” and “Bulky Stand”, different performances can be connected into one dynamically cohesive scene.
Easily find and export the best content to your favorite platforms
3D motions on ActorCore can be conveniently accessed via web browsers and mobile devices. Enhanced interactive 3D viewing experiences are available, accompanied by swift search functionalities and categorical exploration based on keywords and phrases.
All ActorCore 3D motions seamlessly integrate with leading 3D software such as Unreal Engine, Unity, Blender, Omniverse, iClone, 3ds Max, Maya, MotionBuilder, and Cinema 4D. Comprehensive step-by-step guides and tutorials tailored to each program are provided, alongside optimized Auto Setup plugins and import presets to streamline workflow processes. The use of ActorCore assets can benefit both newcomers to the 3D field and industry veterans with their established pipelines and arsenal of tools.
Image: Select “Handkey” to see cartoon motions designed for stylized characters.
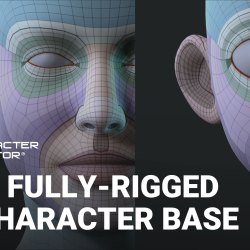
Reallusion, a trailblazer in simplifying character creation processes and breaking down animation barriers for 2D & 3D artists, is excited to announce the release of its highly praised Character Creator (CC) character bases, now accessible for free download. Recognized for their well-balanced and fully rigged topology, these animatable character bases facilitate effortless customization for a wide range of scenarios.
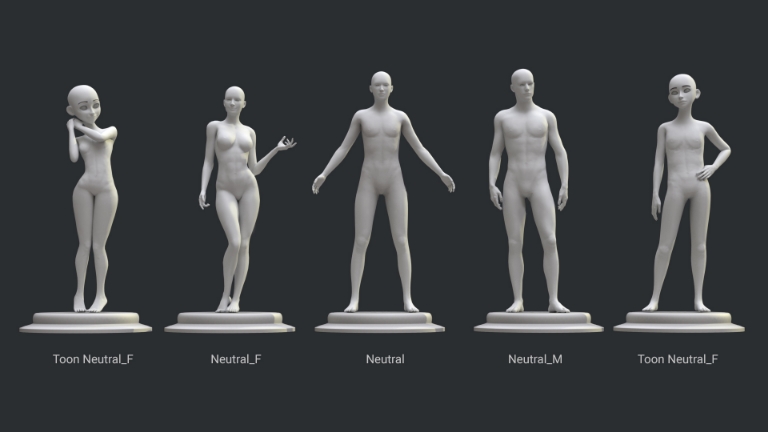
Five Character Bases for Free Download
Figure 1. Five bases including both cartoony and realistic male and female characters
To familiarize more individuals to the benefits of CC bases, Reallusion is generously offering five sets of CC characters for free. Interested parties can easily register on the official Reallusion website to access these valuable resources. The five bases encompass both cartoony and realistic male and female characters, as well as a neutral character. Each base is provided in three file formats — OBJ, FBX, and ZTL — accompanied by high-resolution textures. These bases can smoothly integrate into any 3D software, like Blender and ZBrush, thereby streamlining workflows.
The free CC character base is accessible for both personal and commercial purposes, encompassing applications like filmmaking, animation, gaming, 3D printing, and education.
Five Character Bases with high-res textures
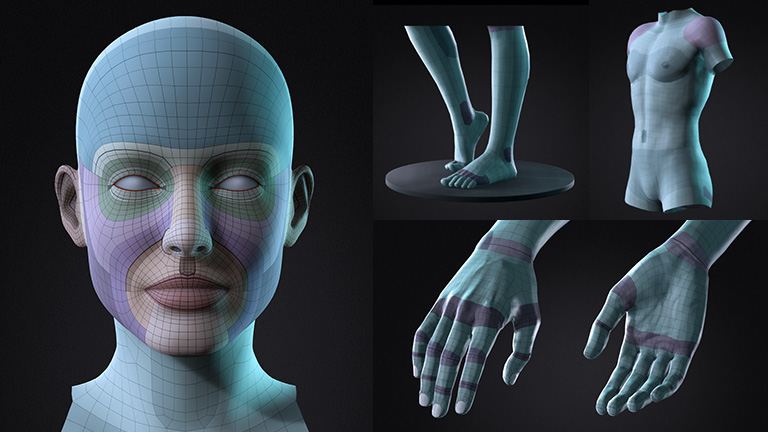
Well-balanced Topology for Morphing and Animation
Distinguishing itself from other bases on the market, CC character bases feature exceptionally balanced topology, making them not only ideal for animation but also for morph design and sub-divisional sculpting. Additionally, they come pre-loaded with 150 facial morphs meticulously crafted for expressive and accurate lip-sync animation.
Figure 3. Well balanced topology
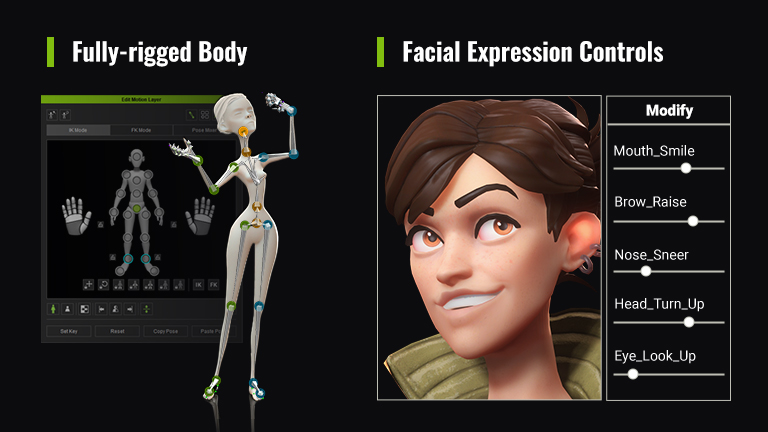
Full-facial and body Rigs for Posing and Motion Control
Furthermore, owing to their fully rigged nature, users can effortlessly transition from sculpting in other software to animating in Character Creator, utilizing its built-in skeleton for seamless motion creation.
Figure 4. Fully- rigged face and body
Custom Character Design for Game, Film and 3D Print
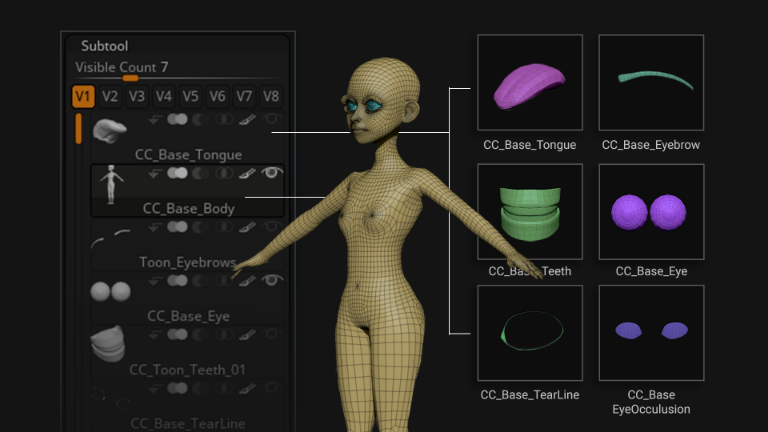
The download package includes a ZBrush ZTL file that includes subtools for eyes, brows, teeth, and tongue. This segmentation facilitates easier manipulation, adjustment, or hiding of individual elements within the ZBrush subtool list. The updated character can seamlessly GoZ to and from Character Creator while retaining its bone rig for animation and game production.
Reallusion has also dedicated significant effort to enable ZBrush designers to pose and animate their models effectively. Whether sculpting for animation, posing for 3D printing, or detailing expressions, a comprehensive character pipeline between ZBrush and Character Creator is provided.
Figure 5. Sub tool in ZBrush
For those eager to delve into an enhanced character creation experience, Reallusion warmly invites users to download Character Creator for free. Enthusiasts of all skill levels can unlock advanced functionalities and a wealth of content for a deeper engagement in the creative process.
To access further details and download Character Creator, please visit Reallusion’s website.
For more information regarding usage regulations and limitations, please refer to the end-user license agreement (Section 5: Character Creator Base Model License).
Reallusion’s Unreal Engine Live Link plugin has been a real boon to animators seeking to utilize the great rendering capabilities of the game engine. While iClone concentrates on providing animation tools, Unreal Engine is known for its cinematic rendering and life-like characters when combined with the proper lighting.
One-click transfer of assets from iClone to Unreal Engine saves time eliminating any rebuilding of the scene in Unreal. Combine this with the ability to easily send a prop or set piece from Unreal to iClone for reference and you have a more efficient means of going back and forth with assets.
Transversely you can build the scene in Unreal Engine, send over some landmark props, and use iClone for the character animation with only a bare-bones scene in iClone. It depends on your needs.
There is a new, streamlined process for transferring assets from iClone to Unreal Engine that eliminates the need for the popup Command window. Unreal Engine will provide popups showing the process along the way.
While a command window isn’t something we all use or even think about it had become a part of the process and I don’t miss it, but it did seem strange the first time I tested the new transfer method and didn’t see the command line interface popup. The new method just seems “cleaner” for lack of a better term.
UPDATE LIVE LINK & AUTO SETUP
Recently Reallusion released an update to this valuable plugin along with the equally important Auto Setup for Unreal Engine. It can be a little confusing because there is a difference between installing Live Link and Auto Setup for the first time versus updating an existing installation. The new updates are Live Link 1.3, Live Link Plugin 1.6 for Unreal Engine, and Auto Setup 1.33.
FIRST TIME INSTALLATION
If you have never installed Live Link, then the process is straightforward.
For first-time installation:
Download and Install Unreal Live Link Plug-in for iClone version 1.3 from the Reallusion HUB.
Download and Install the iClone Live Link Plug-in for Unreal Engine to version 1.6 from the Unreal Marketplace.
Download and Install Auto Setup to version 1.33. More on this later in the article under the Copy and Pasting Auto Setup Files section.
▌Reallusion HUB – from here you can install the Unreal Live Link controls in iClone, you can access it from the iClone PlugIn menu.
▌Unreal Marketplace – from here you can install the iClone Live Link plugin into Unreal engine, once the installation process is complete, the addon icon appears on Unreal engine’s top menu.
▌Auto Setup – download Auto Setup in a zip file from this page, and manually copy the “Plugins” and “Content” folders to your Unreal project folder. Once you reopen the project, the Auto Setup addon icon appears on Unreal engine’s top menu.
Icons of iClone Live Link & CC Auto Setup on the Unreal Engine’s toolbar.
UPDATING AN EXISTING INSTALLATION
THE OUTDATED PLUGINS
It is easy to identify the outdated plugins by going into Plugins from the EDIT menu in Unreal Engine. Select Reallusion on the left side panel or search for “iClone” in the search box. As you can see there are two plugins listed and any plugin with this date or earlier is outdated and will not work with the new features.
THE NEW PLUGINS
The new plugins are version 1.33 for Auto Setup and 1.60 for Live Link. As of this writing, this is the only version that works with the new features. Follow the information below on how to properly update your existing installation.
OPEN THE REALLUSION HUB: Update the Live Link plugin. Press the refresh symbol if you do not see an update to the plugin.
NOTE: The new Auto Setup 1.33 “ensures maximum compatibility with the Unreal Engine, and also takes into consideration the most efficient use of R&D resources; The Auto Setup plugin will only work with the latest 3 official release versions of the Unreal Engine.” More information at the website.
COPY AND PASTING AUTO SETUP FILES
This is the most difficult part of the process but by the time most of us reach this point we understand copy and paste, which is all this is. There is no installer-based installation of the Auto Setup files as they are project-dependent and must be copied to each project. This is not a big deal though.
Below is a quick look at transferring the files which is also covered, in more detail, in the Reallusion tutorial at the link towards the bottom of this section.
CLICK HERE to go directly to this section of the Reallusion tutorial.
ENABLE LIVE LINK PLUGIN & AUTO SETUP IN UNREAL
Now we need to go into the Unreal Engine editor and enable the Live Link and Auto Setup plugins. This requires checking the box on each plugin and restarting the Unreal Engine editor. Make sure to save any progress before restarting.
CLICK HERE to go directly to this section of the Reallusion tutorial.
OPEN THE LIVE LINK PANEL IN UNREAL ENGINE
The Live Link panel will not be open by default so you will need to open it to interact with the plugin.
CLICK HERE to go directly to this section of the Reallusion tutorial.
CONNECT & TRANSFER CONTENT
Connecting is a two-step process requiring Live Link to be activated in both iClone and Unreal Engine. After connecting you can then seamlessly transfer iClone content to Unreal Engine while Auto Setup takes care of the shaders and other aspects of the transfer.
Below is a quick look at the new transfer process:
Note that any accessory that is Hidden in iClone will be visible in Unreal Engine such as the earpiece/headset on the above character.
CLICK HERE to see the same installation process in the previous update. The tutorial below is still relevant even though the method of transfer has changed in Live Link 1.3v.
With the various plugin versions and depending on if you have a previous installation of Live Link, it can get a bit confusing for even the most advanced users. Just follow the info in this article and the Reallusion tutorials then you’ll be up and running with your first Live Link session.
Digital Artist MD “Mike” McCallum, aka WarLord, is a longtime iClone user. Having authored free tutorials for iClone in its early years and selected to write the iClone Beginners Guide from Packt Publishing in 2011, he was fortunate enough to meet and exchange tricks and tips with users from all over the world and loves to share this information with other users. He has authored hundreds of articles on iClone and digital art in general while reviewing some of the most popular software and hardware in the world. He has been published in many of the leading 3D online and print magazines while staying true to his biggest passion, 3D animation. For more information click here.
Jonathan Winbush details his workflow with Character Creator and iClone to create a custom character for Unreal Engine Fortnite
The Beginning of a Digital Transformation
The journey into the digital realm is both thrilling and intricate, especially when you’re crafting a character that will inhabit the vibrant world of Fortnite. Jonathan Winbush, a maestro in 3D creation with Reallusion iClone and Character Creator, has embarked on an extraordinary venture to transform himself into a fully-fledged game character. The fascinating process, from the initial scanning of Jonathan’s head to the final steps of integrating his character into Fortnite, is detailed in the video released on Jonathan’s YouTube Channel, where he shares his insights and tips into working with 3D tools.
Capturing the Essence with Creality Ferret Pro
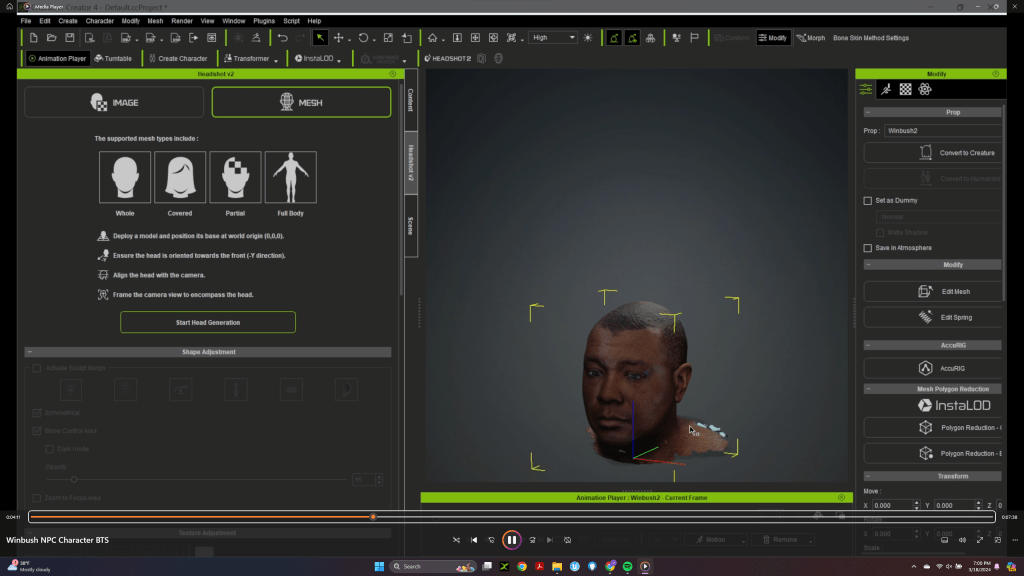
Jonathan’s adventure began with the Creality Ferret Pro 3D scanner, a tool known for its precision in capturing high-resolution images. This initial phase was crucial as it laid the groundwork for creating a digital avatar that truly resembled him. The scanner meticulously recorded every contour and feature of his head, ensuring that the digital representation was as close as possible to Jonathan.
Crafting the Persona in Character Creator 4
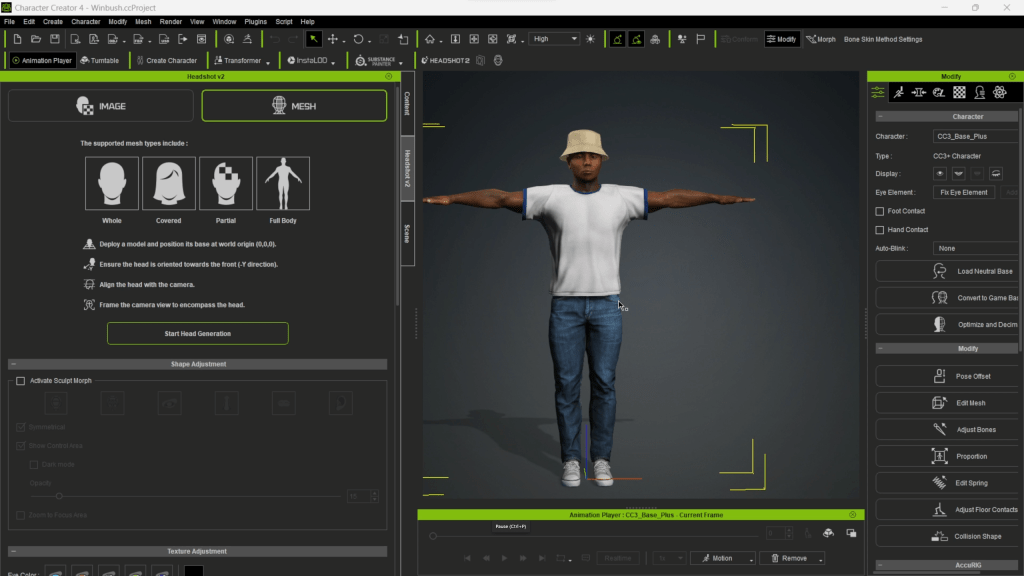
With the head scan complete, Jonathan turned to Character Creator 4 to sculpt his avatar. In this phase, he designed every aspect of the character, from the facial expressions to the attire, making sure that each element was a reflection of his personal style and flair. The goal was clear: to create a unique character that would stand out in the Fortnite universe.
Bringing Emotions to Life with Rokoko HeadRig
To animate his character with facial expressions, Jonathan utilized the Rokoko Head Ring for facial motion capture. This technology allowed him to record his facial movements and expressions in real-time, ensuring that his digital counterpart would emote just like him. This step was vital in breathing life into the avatar, making it more than just a static figure.
Animating the Character in iClone
iClone was the next tool in Jonathan’s arsenal, where he finalized the motion capture process. Here, he animated his character, infusing it with dynamic movements that would translate well into the fast-paced action of Fortnite. The software’s robust capabilities allowed for seamless integration of the previously captured motions, resulting in a fluid and realistic animation.
Integrating into Fortnite with Unreal Engine (UEFN)
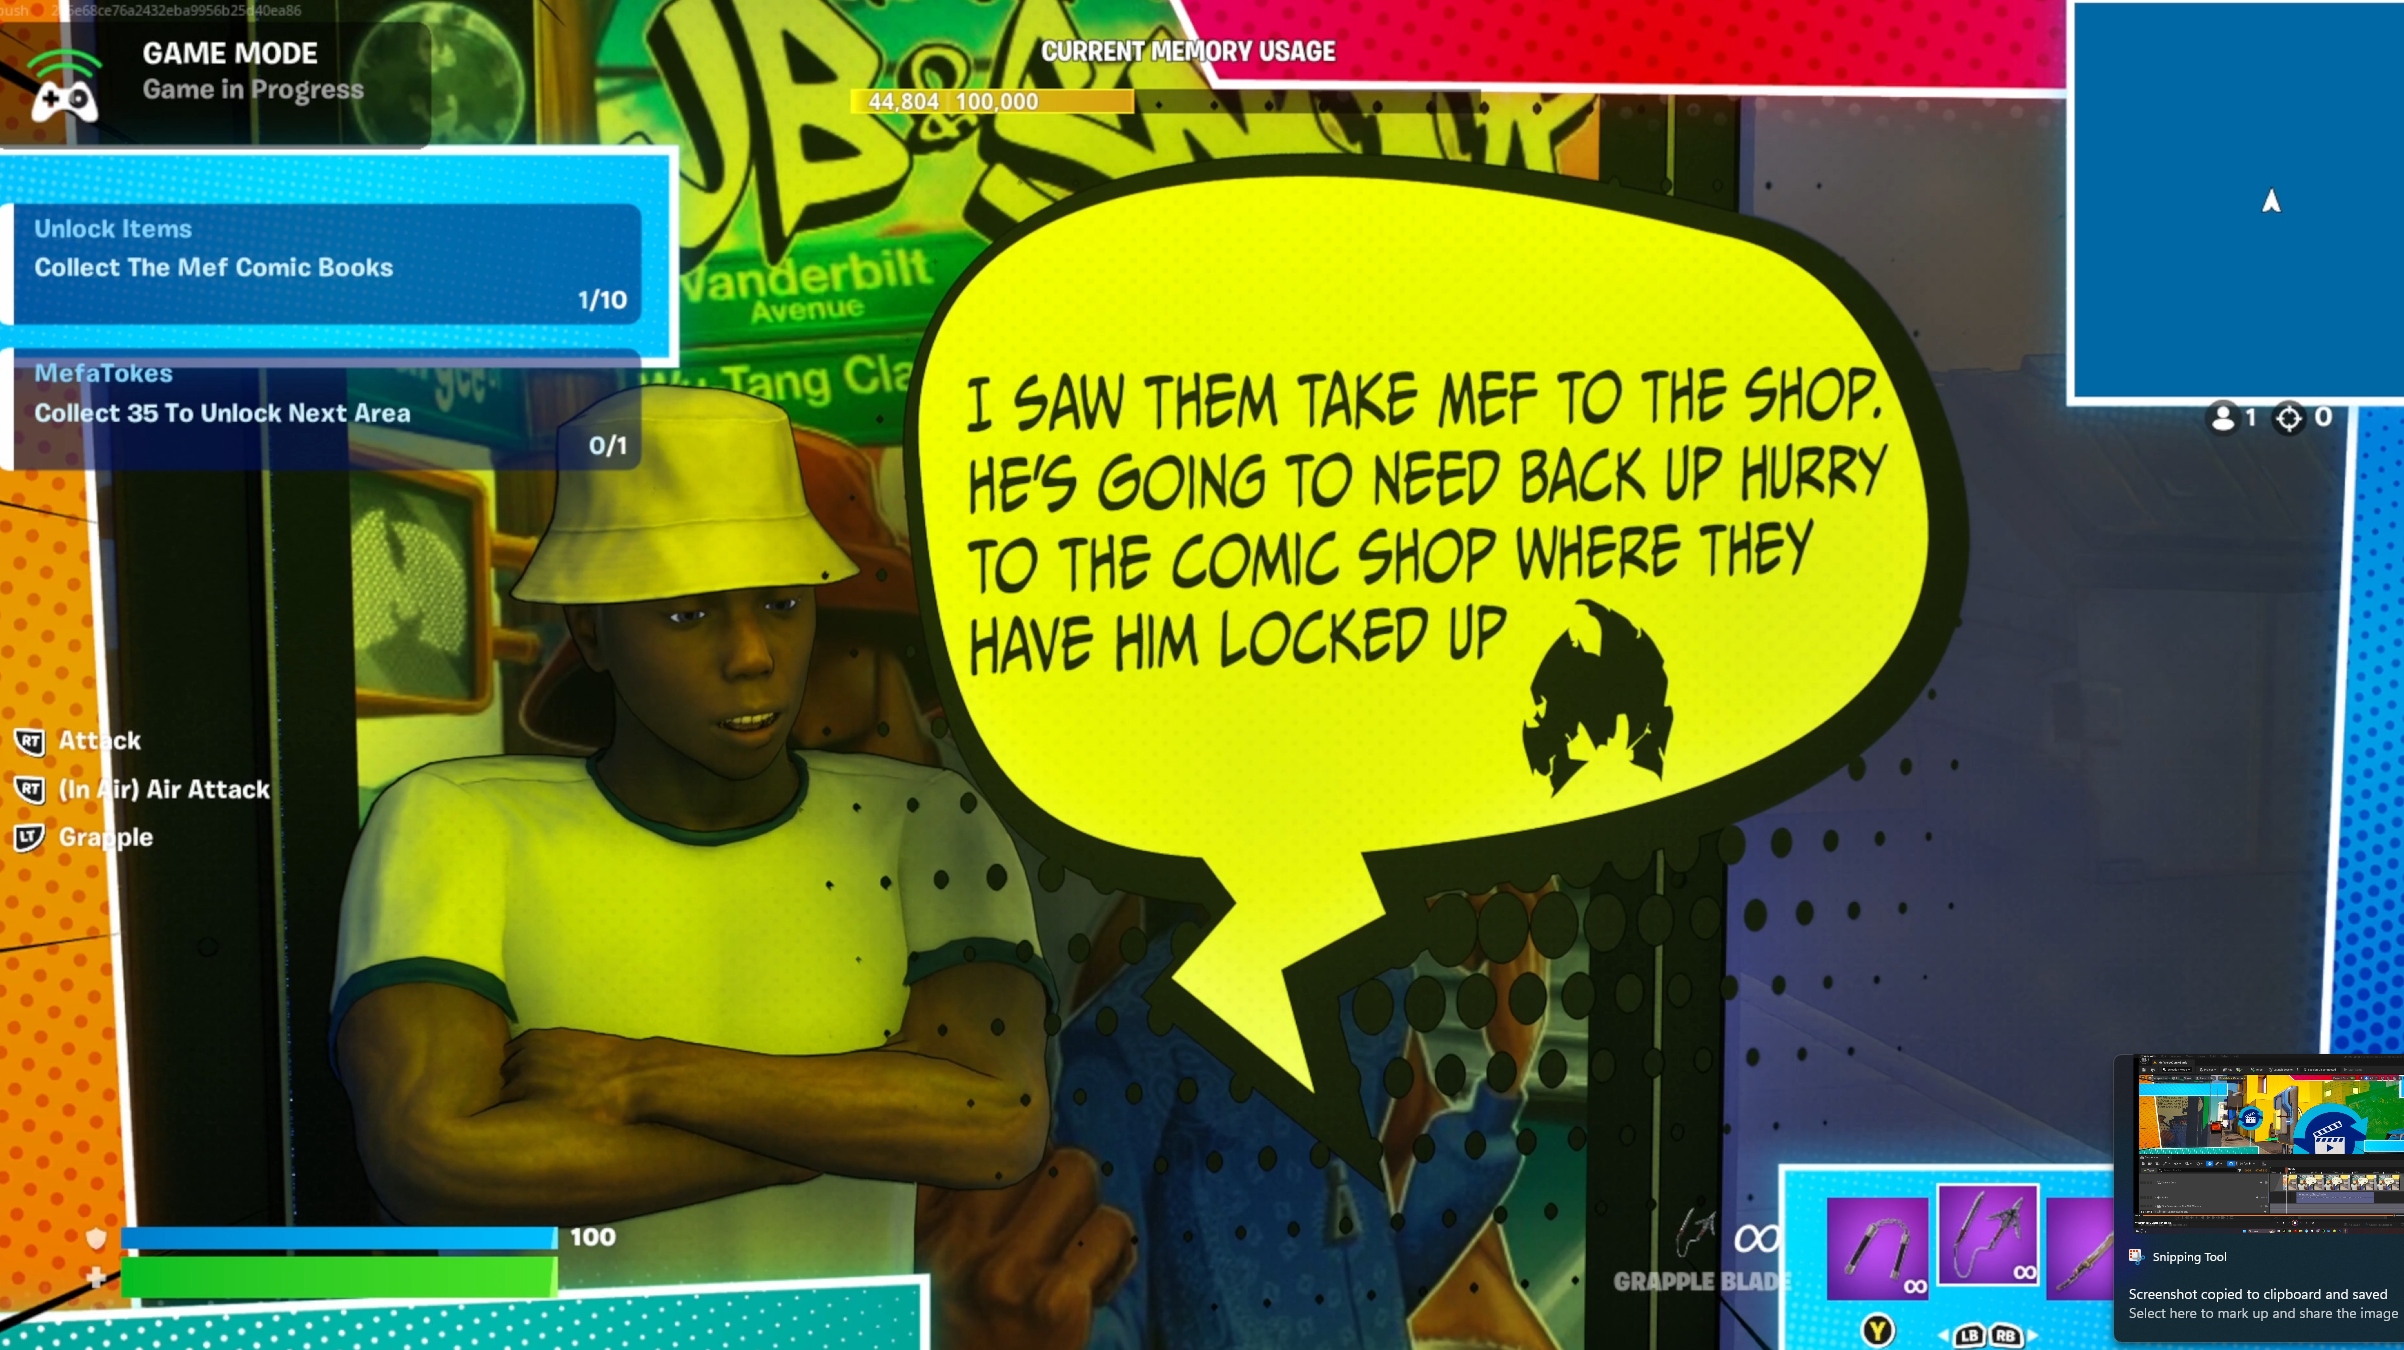
The culmination of Jonathan’s efforts was the integration of his character into Fortnite through Unreal Engine (UEFN). This powerful engine enabled him to blend his avatar seamlessly with the game’s environment. The character was now ready to partake in the epic “Battle for Wu-York City,” an original Fortnite experience crafted alongside Method Man from the legendary Wu-Tang Clan.
The Epic Battle for Wu-York City
“Battle for Wu-York City” is not just a game level; it’s a fusion of hip-hop culture and gaming, set in the heart of a fictional city. Players can expect intense battles, hidden easter eggs, and an immersive experience that Jonathan helped bring to life through his digital creation.
Conclusion: A Journey of Digital Creation
Jonathan Winbush’s journey from a real-world individual to a character in Fortnite exemplifies the power of modern technology and creative vision. Through his use of advanced tools like the Creality Ferret Pro, Character Creator 4, Rokoko HeadRig, and iClone, coupled with the capabilities of Unreal Engine, he has not only transformed himself into a digital avatar but also contributed to the rich tapestry of Fortnite’s universe. Stay tuned to witness the full process, discover tips and tricks, and see the birth of Jonathan’s digital alter ego. Join him in this creative odyssey and explore the boundaries of digital artistry and gaming.
The face is the first thing your audience looks at when watching or interacting with your character, so it is of the utmost importance that you make that experience a memorable one! And not just how your character looks standing there expressionless — your character’s face will move while it tells its story, and if all it can pull from is mediocre, default shapes, its performance will fall flat, and its story won’t be very interesting to your viewers. YOUR face and its movements are unique and interesting, so why wouldn’t your character’s face be as well. Beyond how your character’s face moves, there’s also supporting details that interact with facial movements that lend nuance and uniqueness to your character as well, adding a richness and believability that will make your characters stand out among a sea of boring characters, as well as being more effective telling their visual story. That’s why we are going to explore the powerful plugin – ZBrush Face Tools.
In this article we’re going to learn how Face Tools allow to you create all of these rich, unique shapes, wrinkles, and supporting detail, all while keeping the process fun. Creating expressive characters historically was a tedious and time consuming process, where you spent most of your time managing files and tweaking verts. With the Face Tools plugin, you’ll spend your time sculpting, painting, and exploring what makes your character unique, and letting Character Creator do the heavy lifting on the technical implementation!
Part 1. Face Tools Installation and The Concept of Expression Wrinkles in Character Creator (CC)
Installation
Before we get too far, we need to discuss what expression wrinkles are, and how they’re used and implemented in Character Creator. We’ll also go ahead and get Face Tools installed, so it’s ready to go when we need it. Installation is easy: go to the Reallusion Hub, click on Character Creator, and press the Install button for ZBrush Face Tools.
Installing Face Tools
Character Base Head
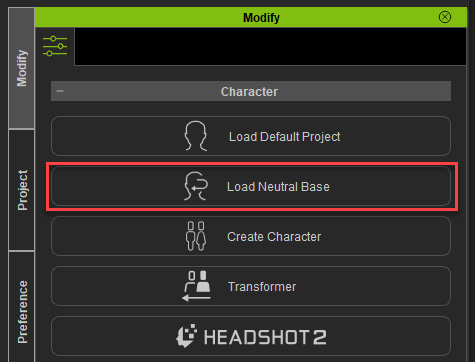
To illustrate some concepts, go to the Modify panel in Character Creator and press the Load Neutral Base button. Hit J on your keyboard to zoom in on the head, then go to the Morph tab > Head section to change the look of your character using the various sliders
Load Neutral Base
Morphs tab to change base head features
Base Head & Face Shapes
Yourbase geometry is the low-res topology of your neutral face and body. You can go into the Scene tab and change the shading mode to wireframe to see your low-res geometry.
Wireframe on Shaded mode to see the topology
As you’re using morph sliders, this low-res geometry is moving, updating the look of your character. Next, go to the Motion tab and click the Edit Facial button; this will load up a dummy head where you can click and drag on the various muscles of your character to generate expressions.
Motion > Edit Facial to change face shapes
Expression Wrinkles
So we know our character’s face can emote with shapes, but you’ll notice when the face moves, it’s a little underwhelming. Look in a mirror and raise your brows; notice how your forehead wrinkles as your eyebrows go up, and in fact get deeper and more pronounced the higher your eyebrows go.Expression Wrinklesare driven by the facial shapes that help enhance the realism of our expressions, by behaving exactly how your face does in real life. When your character’s eyebrows go up, wrinkles will start to appear on the forehead.
Base head, base head creating an expression, and finally, those expressions being supported by expression wrinkle textures to add realism!
Adding Neutral Expression Wrinkles
Let’s add some quick expression wrinkles to our morphed, neutral test character. Select the top group of your “CC3_Base_Plus” neutral character in the Scene tab, and you’ll see an Expression Wrinkles tab is available in the Modify panel — click on this tab. If you check on Activate Expression Wrinkles, Character Creator will apply default expression wrinkles to our character (these can actually be found in Actor > Expression Wrinkles > Neutral in the Content tab). Turn on Check with Expressions as well, and as you click on the different areas of the face in the dummy panel, the expression wrinkle system will activate a face shape, and blend in the appropriate wrinkles on your character where those shapes require it.
You can change the Strength, AO, Redness, and Rate of Appearance in the sliders below the dummy window. As your characters face animates, slight movements will cause less intense wrinkles to show up, but extreme or exaggerated facial expressions will bring in a texture map that will add wrinkle bumps (normal strength), shadows for those wrinkles (AO), and blood pooling between the wrinkles (Redness). All of these together create a much more nuanced, believable result as your character’s face moves.
Expression Wrinkles tab
Expression Wrinkles for Stylized Characters
These default wrinkles are fairly realistic — but, what if you had a stylized character, with chiseled, cartoony shapes? Realistic wrinkles would look out of place on these types of characters — but, don’t worry, with Face Tools we’ll be able to make custom shapes and expression wrinkles for both realistic characters as well as cartoony stylized ones! In fact, if you have the “Wrinkle Essentials” pack from the Reallusion Marketplace, you can apply different types of preset stylized wrinkles to your stylized characters.
Stylized character Eddy with Chisel type expression wrinkles appliedNew Stylized base mesh with Groove type expression wrinkles applied
Part 2. Fast Prototyping Head & Body for ZBrush Sculpting
Kevin Base Head Setup
Let’s start a new character that we can take into ZBrush and make our own. To provide us with a good starting point, let’s load up the “CC4 Kevin” character from the Actor > Character folder.
Loading up the Kevin Character
Right now, Kevin isn’t symmetrical, and that’s ok — you don’t really want a perfectly symmetrical character. However, just starting out my new character, I want a symmetrical mesh to sculpt on in ZBrush to make things go a little faster, and later right before we call it done, we can dial in asymmetry using morphs. To fix this, select the “Kevin” group in the scene tab, and in the attributes tab, choose Edit Mesh, then choose a Mirror Copy option (left to right or right to left).
Attributes tab > Edit MeshEdit Mesh > Mirror Copy
Using Morphs in CC
Now that your eyelids are symmetrical, your eyeball placement is probably off a little. Luckily, all you have to do is go to the Morph tab and use the Morphs > Head > Eye > Eyeball > Eyeball Height sliders to fix eyeball placement in our newly symmetrical mesh. Also, while we’re in the morphs tab, go ahead and make overall adjustments to your character’s physique/head to get closer to the character you want to make (in our case, a gaunt, vampiric creature).
Eyeball Morphs to fine- tune placement
Remember you can use the Morph button in your toolbar to quickly and easily grab sections of your character’s face to move them around, and you can get more morph slider options by using the “Ultimate Morphs” pack from the Reallusion Marketplace.
Dialing in our character forms
Face Tools Locations in Character Creator
With a character loaded in Character Creator, you’ll find the button to send your character to ZBrush using Face Tools in these locations:
Plugins > Face Tools
Top menu bar
Modify tab > Face Tools (with a character selected)
Installing the Face Tools Plugin for ZBrush
Use any of the above methods to send your character to ZBrush. If you haven’t installed the plugin to ZBrush, it will prompt you to install. Select the version of ZBrush you want to install it for, and click OK.
Installing Face Tools ZBrush Plugin
Face Tools Output Settings
Before Character Creator sends over your character, it’s going to need a little more information about what we want to send over. In the ZBrush Face Tools dialog box, choose Create New for Action, since we’re not relinking an existing project. For Subdivision, we’ll do Level 6 – 2k Texture Resolution. This means when it sends our current head over to ZBrush, it will be subdivided up to level 6 (SDiv 6), and if we transfer the base color texture currently applied to our Character Creator head to our ZBrush polypaint, the millions of polygons that make up our SDiv 6 head will be enough to support a 2048 (2k) texture resolution on the transfer. Which is exactly what we’re going to do later.
Go ahead and check on Normal Details; this will put the skin pores and fine wrinkle detail currently applied to our character into an adjustable, sculptable layer in ZBrush. Then click All to turn on all the normals for every expression. All of our expressions in ZBrush will have Kevin’s own expression wrinkle detail baked into a sculptable layer for that expression.
Before we click GoZ, we’re going to uncheck Include normals in polypaint; This can be useful in some situations, but because we’ll be changing our base head polypaint, it’s not something we’ll need to do with our workflow. Finally, click the GoZ button to send all this over to ZBrush.
Part 3. Sculpting High-res Base Head with ZBrush Face Tools
ZBrush Sculpting
Now that we’re in ZBrush, open the Face Tools plugin by going to the ZPlugin menu, and clicking on the Face Tools submenu. While in ZBrush, we can modify the characters base Head, Eyes, Teeth, and Tongue geometry and polypaint, and any changes we make will be baked and sent back to CC.
Detail Layer, Diffuse, and Range
The Detail Layer button in the Face Tools plugin turns the “CC_DetailLayer” in your Layer pallet on and off. The Detail Layer contains pore detail and basic face detail wrinkles. We’ll toggle this off while sculpting our base. We want to ensure our base sculpting is done on the base model, NOT on a layer. However, if you want to add more pore or wrinkle detail to this layer, toggle it on, and press the record button on the layer. The Diffuse button loads up the head texture from CC, which we can transfer to polypaint later on. The Range button (with no expressions selected) will apply theFace Topology and UV Guide to your head.
Head Base Sculpt
Let’s start finetuning our character. Again, turn off your Detail Layer so we’re only sculpting on the base geometry that gets propagated to all of our other shapes. Drop down to subdivision level 1 under Tool > Geometry, and use your favorite ZBrush brushes to change your major volumes, increasing subdivisions as needed to dial in your custom primary and secondary forms.
SDiv 1 with Detail Layer off
Sculpting with guides in mind
Turn on your Range map so you get a better idea of what edgeloop the systems will be looking for when deforming into shapes later. When creating primary forms, make sure you move the geometry appropriately to keep the face guidelines where they need to be, instead of just sculpting through them.
You can also Ctrl+Shift click areas of your face to get easy visibility access while sculpting (press Shift+F on your keyboard to toggle polyframe mode on and off in ZBrush).
Hide and show major areas with polygroup visibility
Detail Sculpting
Once you get your primary and secondary forms done for your custom ZBrush character, you can turn on the Detail Layer in the Face Tools plugin to continue sculpting high frequency pore and fine wrinkle detail.
Original morph mesh vs final detailed ZBrush sculpt
Polypaint
Stop recording on your detail layer if you are. Go ahead and turn the detail layer off completely in the Face Tools plugin menu. Turn on Diffuse in the Face Tools plugin menu to load Kevin’s base color into our subtools texture, go to highest subdivision on your mesh, and in the Tool > Polypaint menu, click Polypaint from Texture to transfer Kevin’s diffuse texture to your head subtools polypaint. Once you’ve done that, go ahead and turn Diffuse OFF in FaceTools; that’ll turn the texture off, but your head should still be colored by the transferred polypaint. At this point, make any changes that you want in ZBrush to both the base head sculpt and its corresponding polypaint. Remember you can use the Polypaint > Adjust Colors menu, and utilize any ZBrush brush with RGB turned on in the toolbar to paint on your model, as well as sculpt.
Diff use on to turn your Kevin Texture Map on, then Polypaint > Polypaint From Texture to transfer your diff use texture to your polypaint
Eyes, Teeth & Tongue
Select a teeth or tongue subtool, subdivide the model up, and just like the head, turn the Diffuse texture on using the Face Tools plugin. Press Polypaint from Texture to transfer Kevin’s base color texture to your polypaint, unless you want to paint this subtool from scratch, which is fine too. Change the model and polypaint as you see fit for your character, it’ll all get sent back over to CC in the next step.
Original base teeth vs modifi ed teeth
Sending Base Head Changes Back to CC
Turn on your detail layer to make sure it’s still working well with your changes up to this point, and modify as needed. In the ZBrush Face Tools plugin menu, press the Update to Character Creator button. On the left side of the resulting dialog box, check on the Base Mesh, Polypaint > Diffuse, Details > Normal, and Cavity > Blend options, so all of our detailed sculpt and polypaint changes are baked back to the CC character. Keep the Texture Size at 2048, and under Facial Parts, check on anything that you updated in ZBrush – Head, Eyes, Tongue, and Teeth can all be updated. The options on the right side of this dialog box can be unchecked for now. Press the Update to Character Creator button.
Left side checked to send back only base head changes
CC GoZ options from the ZBrush Base Head
The ZBrush data is sent over to CC, so tab over to Character Creator, and in the resulting dialog box, keep the defaults checked, along with Apply Head Color to Body, so Character Creator will automatically adjust the body tone to match the head. We’ve successfully transferred the base details and polypaint from ZBrush back to Character Creator.
Results of the transferred texture polypaint and fi nal modifi ed polypaint in ZBrush, and sculptural detail and polypaint baked back into Character Creator using Face Tools
Part 4. Create Unique Expressions & Wrinkles with ZBrush Face Tools
Sculpting Expressions in ZBrush Using Face Tools
So we’ve got our base head, eyes, tongue, and teeth changes in ZBrush and in Character Creator, so now let’s work on those custom expressions. Tab back over to ZBrush and click on an expression in Face Tools to begin tweaking the wrinkles for that expression. Remember, the face tools button is turning on the corresponding expression layer in your layer pallet, and pressing the REC button so you can sculpt and polypaint on that expression. Any changes you make to your geometry or polypaint while the expression is in REC mode will eventually be sent back to Character Creator.
Before you sculpt on an expression, you can press the Apply Mask button in the Face Tools plugin menu; this will show the area that will bake out sculpted detail and polypaint information back to CC for the selected expression (in this example, “Brows Drop”). Go through each expression and sculpt/polypaint to create the perfect shapes and details for every expression for your unique character.
Mask region for Brows Drop expression wrinkles
Sending Expression Updates from ZBrush back to Character Creator
After you’ve fine-tuned your expressions in ZBrush, press the Update to Character Creator button in the Face Tools plugin menu again. This time we’ll use the right side menu.
If you updated shapes of the face (SDiv 1), check on Expression Morphs.
If you updated expression wrinkles (SDiv 2-6), check on Wrinkle > Normal to bake those details back to CC.
If you updated your polypaint for the expressions (redness, etc…) check on Wrinkle > Diffuse to ensure those changes get baked back to CC.
Back in CC, keep the defaults checked in the GoZ menu, then go to the animation player and choose Motion > Wrinkle Check for “Dramatic_Male”. As your face animates, your custom expression wrinkle changes will show up on the character.
Selecting expressions
Custom expressions and wrinkles
Part 5. Transfer Character’s Head and Complete the body in ZBrush
Full Body Head Data Transfer
Our head still looks a bit out of place on our CC body; let’s sculpt a custom body to match our head. First, select your character assets in CC, then hit the GoZ button in the toolbar, to send our body over to ZBrush this time. Keep all the defaults in the resulting dialog box, and make sure you have a-pose selected in the Pose section. Back in ZBrush, switch from the body tool we just sent over back to Face Tools that we were sculpting expressions on. Select the “CC_Base_SkinHead” subtool, then Ctrl+LMB the latest point in the history slider to store those vertex positions and colors into history.
Next, switch back to the body tool, select the “CC_Base_Body” subtool, and press the Tool > Geometry > Divide button until it reaches SDiv 6 to match the head resolution from the other Face Tools subtool.
Turn on Polyframe visibility with Shift+F, then Ctrl+Shift click the “red” polygroups on the body subtool to isolate their visibility (body and eyelash geometry). Then Ctrl+Shift+Drag in your document to invert visibility, so only the head geometry is showing (minus the body and eyelashes).
Storing history for the Face Tools head subtool
Isolating just the head geometry to match the Face Tools geometry visibility
Now that the vertex order matches between the Face Tools head geometry stored in history and the body geometry, select the Morph brush (you can hit the B, M, then G keys on your keyboard to select it), and “brush in” the details stored in history onto your body geometry! This will get our sculpted detail onto our “body” head, but not the polypaint. For that, go to the Tool > Subtool > Project menu, turn off “Geometry” so just Color is selected, and press the “Project History” button to transfer the color data from your Face Tools head to your body tool head!
Project History to transfer Color
Link and Sculpt
Ctrl+Shift click in your document to make all the geometry visible for your body subtool, then press the GoZ All button in the ZBrush Tool menu to send your updated body back to CC.
While you’re in CC, switch the pose from the standard a-pose to the relaxed a-pose using the Motion menu in the Animation Player, press the GoZ button in the Character Creator menu bar to send our relaxed a-pose to ZBrush.
Make sure you choose Current Pose in the dialog box.
Changing our pose to a relaxed A- Pose to sculpt on
Body Sculpt
Sculpt and polypaint the rest of the body, and follow the body Substance Painter workflow from the previous “Goblin” series to bake mesh maps and populate CC with your character textures.
Tip – the CC Body tool will have 7 subtools, the Face Tools tool will have 9 subtools
Sculpting the body to match the head
Conclusion
You now have a unique character with a custom body, custom facial expressions, and custom expression wrinkles, all tuned exactly how you want for your particular character. Feel free to apply accessories, clothing, animations, and poses to this character like we did in our previous “Goblin” article.
About The Author
Michael Pavlovich earned a Bachelor’s degree in Computer Animation from RSAD in 2005. Initially, he contributed to the development of environment and character art for popular video games such as Madden and NCAA Football. Later, he relocated to Austin to join Daybreak Games, where he worked on the creation of art assets for DC Universe Online.
Presently, Michael holds the position of Director of Character, Weapon, and Vehicle Art at Certain Affinity. His expertise lies in implementing iterative pipelines for Certain Affinity artists helping develop renowned video game franchises, including Halo, Call of Duty, and DOOM. To stay updated on his latest tutorial projects, you can visit Michael’s YouTube or ArtStation page.