The Smart Way to Auto Rig Soft, Rigid, & Mixed Armor Pieces
José Antonio Tijerín
José Tijerín is a digital illustrator, 3D sculptor, and creator of video games such as “Dear Althea” available on Steam. His content pack “We’re Besties” and “We’re Homies” are currently for sale in the Reallusion content store.
CC4 with AccuRIG: a gateway to new possibilities
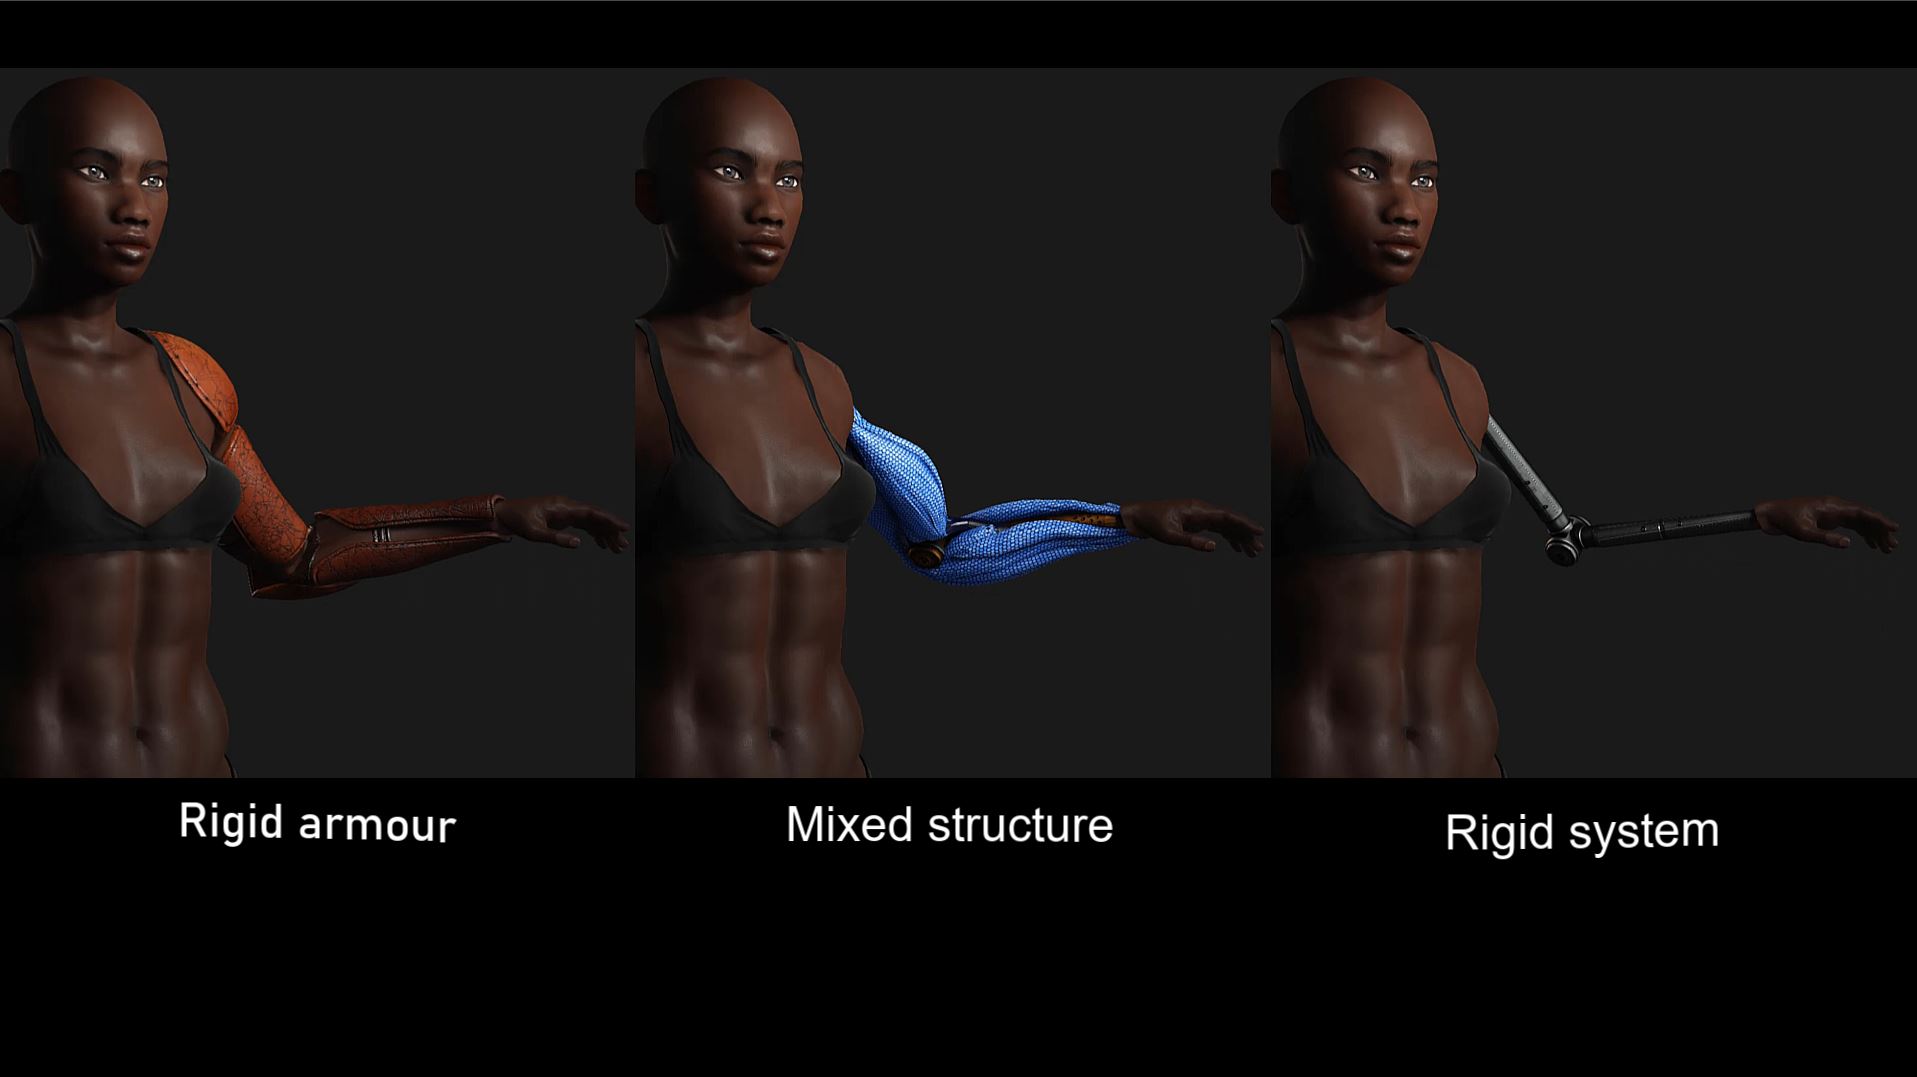
AccuRIG in Character Creator 4 is the most important tool we’ll be using for this tutorial. This tool is designed to rig characters quickly and easily and lets us skip a lot of manual processing in 3D programs like Maya. To create this tutorial, I have divided the character into three categories: rigid armor, mixed structure, and rigid system. This makes it easy to understand and analyze the common mistakes for each category.
Type I: The rigid armor
Let’s explore several ways to correctly integrate different parts to make a suit of armor. For this tutorial, I’ll be working with the “Polish Hussar Armor” that can be found on the Tijerin Art Studio Sketchfab page. Let’s start with the simple minor parts of the armor, such as the tassets and vambraces.
First go to the Create to access the Accessories menu and import these armor parts. Since the armor is divided into parts, we will have to select them one by one to convert them into accessories using the namesake button. Now, we have to go to the lower part of the Modify window to find the Attach section and link the armor parts with their corresponding bones.
This method is the most optimal for attaching rigid parts to the character, but it is not always recommended. I suggest individually importing the armor parts so that each part can be given the necessary attention and independent problems can be corrected as they arise.
Thanks to the improvements in Character Creator, we can check for problems while the character moves without having to leave the program. There will be times when the armor pieces intersect with other models and in those instances you will need to edit the geometries right away so it doesn’t continue to happen.
Rigid elements, like the ones applied here, are widely used to complement cloth and leather clothing and give a striking touch of variety to our character. Let’s talk about the armor elements that are more complicated, so much so that they require hard surface rigging such as the helmet for this particular character.
1. Helmet armor
Helmets are usually composed of one or two pieces, but this particular helmet has several pieces at the back. This is an opportunity to take advantage of because the lower part collides with the armor that we have not yet placed. We can handle this problem by hard-surface rigging this part in a third party 3D application. This time, we are going to import it not as an accessory but as a 3D prop so that we can introduce the bone system without a hitch.
The rest of the process is the same as those used for previous armor parts. As you can see, we now have full control over the helmet and can prevent it from intercepting other armor pieces. We are going to further develop this solution for the animation phase so that it goes beyond just fixing problems and takes us a step further in the animation of the character.
2. Chest armor
Now is the time to place the chest armor, which presents a delicate challenge. In this case, we have a one-piece breastplate that will be placed in the same fashion as the first amor parts. This type of armor is very constrictive on the body, so we must refrain from animating the bones of the upper spine and raise the arms more than 180 degrees. The most popular method, due to its versatility, is to separate an upper part to protect the thorax and a lower part for the stomach.
3. Shoulder armor
For the shoulder pads, I attached the lower part of the arm in the same way I did the first parts of the armor. For the upper part, I added a couple of bones like I did for the helmet. The mobile parts of a traditional armor are usually joined together with leather straps, and normally, they are covered by metal. This armor, however, features straps that are visible and I’ll need to be careful to confine the flexible areas to the shoulders.
It’s worth mentioning that futuristic armor found in video games often contain rigid parts that are sewn onto flexible parts. This type of design can save on polygons and eliminate many of the problems mentioned before, but we will explore this later.
By attaching the bones to the armor, we get several possibilities for animation. We can correct the position of the shoulder pads as was done for the helmet. In addition, we can have those pieces jump while he is riding on his mount. It should be obvious by now that adding bones to the armor requires some forethought, especially about the character’s range of motions and how the armor will react in kind.
4. Scabbard of the sword and accessories
Let’s now examine the scabbard, which is usually a prop for decoration, but we can do more with it by rigging it to make it functional. To accomplish this, I add bones along the length of the leather scabbard to have it curve with the sword. Once set up, the sword, despite its curvature, can smoothly slide in and out of the sheath.
In the act of sheathing a sword, one hand holds the scabbard and the other hand inserts the sword. So we should consider adding a bone to attach with the hand. If we want to get fancy, we can export the props in FBX format along with its animation into Character Creator. On top of this, we can also add a spring effect so that the soldier can sway while he walks and have that momentum transfer to the sword while it is sheathed. Once completed, I continue to make some corrections and add the rest of the armor, accessories, and textures to make it ready for animation in iClone.
Now that we have seen what this system can do for us, I’ll explore two more techniques that mix rigid with soft elements in the second part of this tutorial series. Do visit the YouTube channel to continue watching and please subscribe for more great tutorials.
The Smart Way to Auto Rig Soft, Rigid, & Mixed Armor Pieces
José Antonio Tijerín
José Tijerín is a digital illustrator, 3D sculptor, and creator of video games such as “Dear Althea” and ” The Evil Furry” available on Steam. His content pack “We’re Besties” and “We’re Homies” are currently for sale in the Reallusion content store.
Type II: Mixed structure
In this tutorial, I’ll explore what I call a mixed structure for making a suit of armor with Reallusion‘s toolset. This type of structure is very suitable for making robots and cyborgs because it has a more modern or even futuristic aesthetic. We’ll be using the “Neo Robot” character which comes with this exact system of mixing rigid and flexible structures. You can download this character from Sketchfab.
How to use AcuRIG in Character Creator 4.1
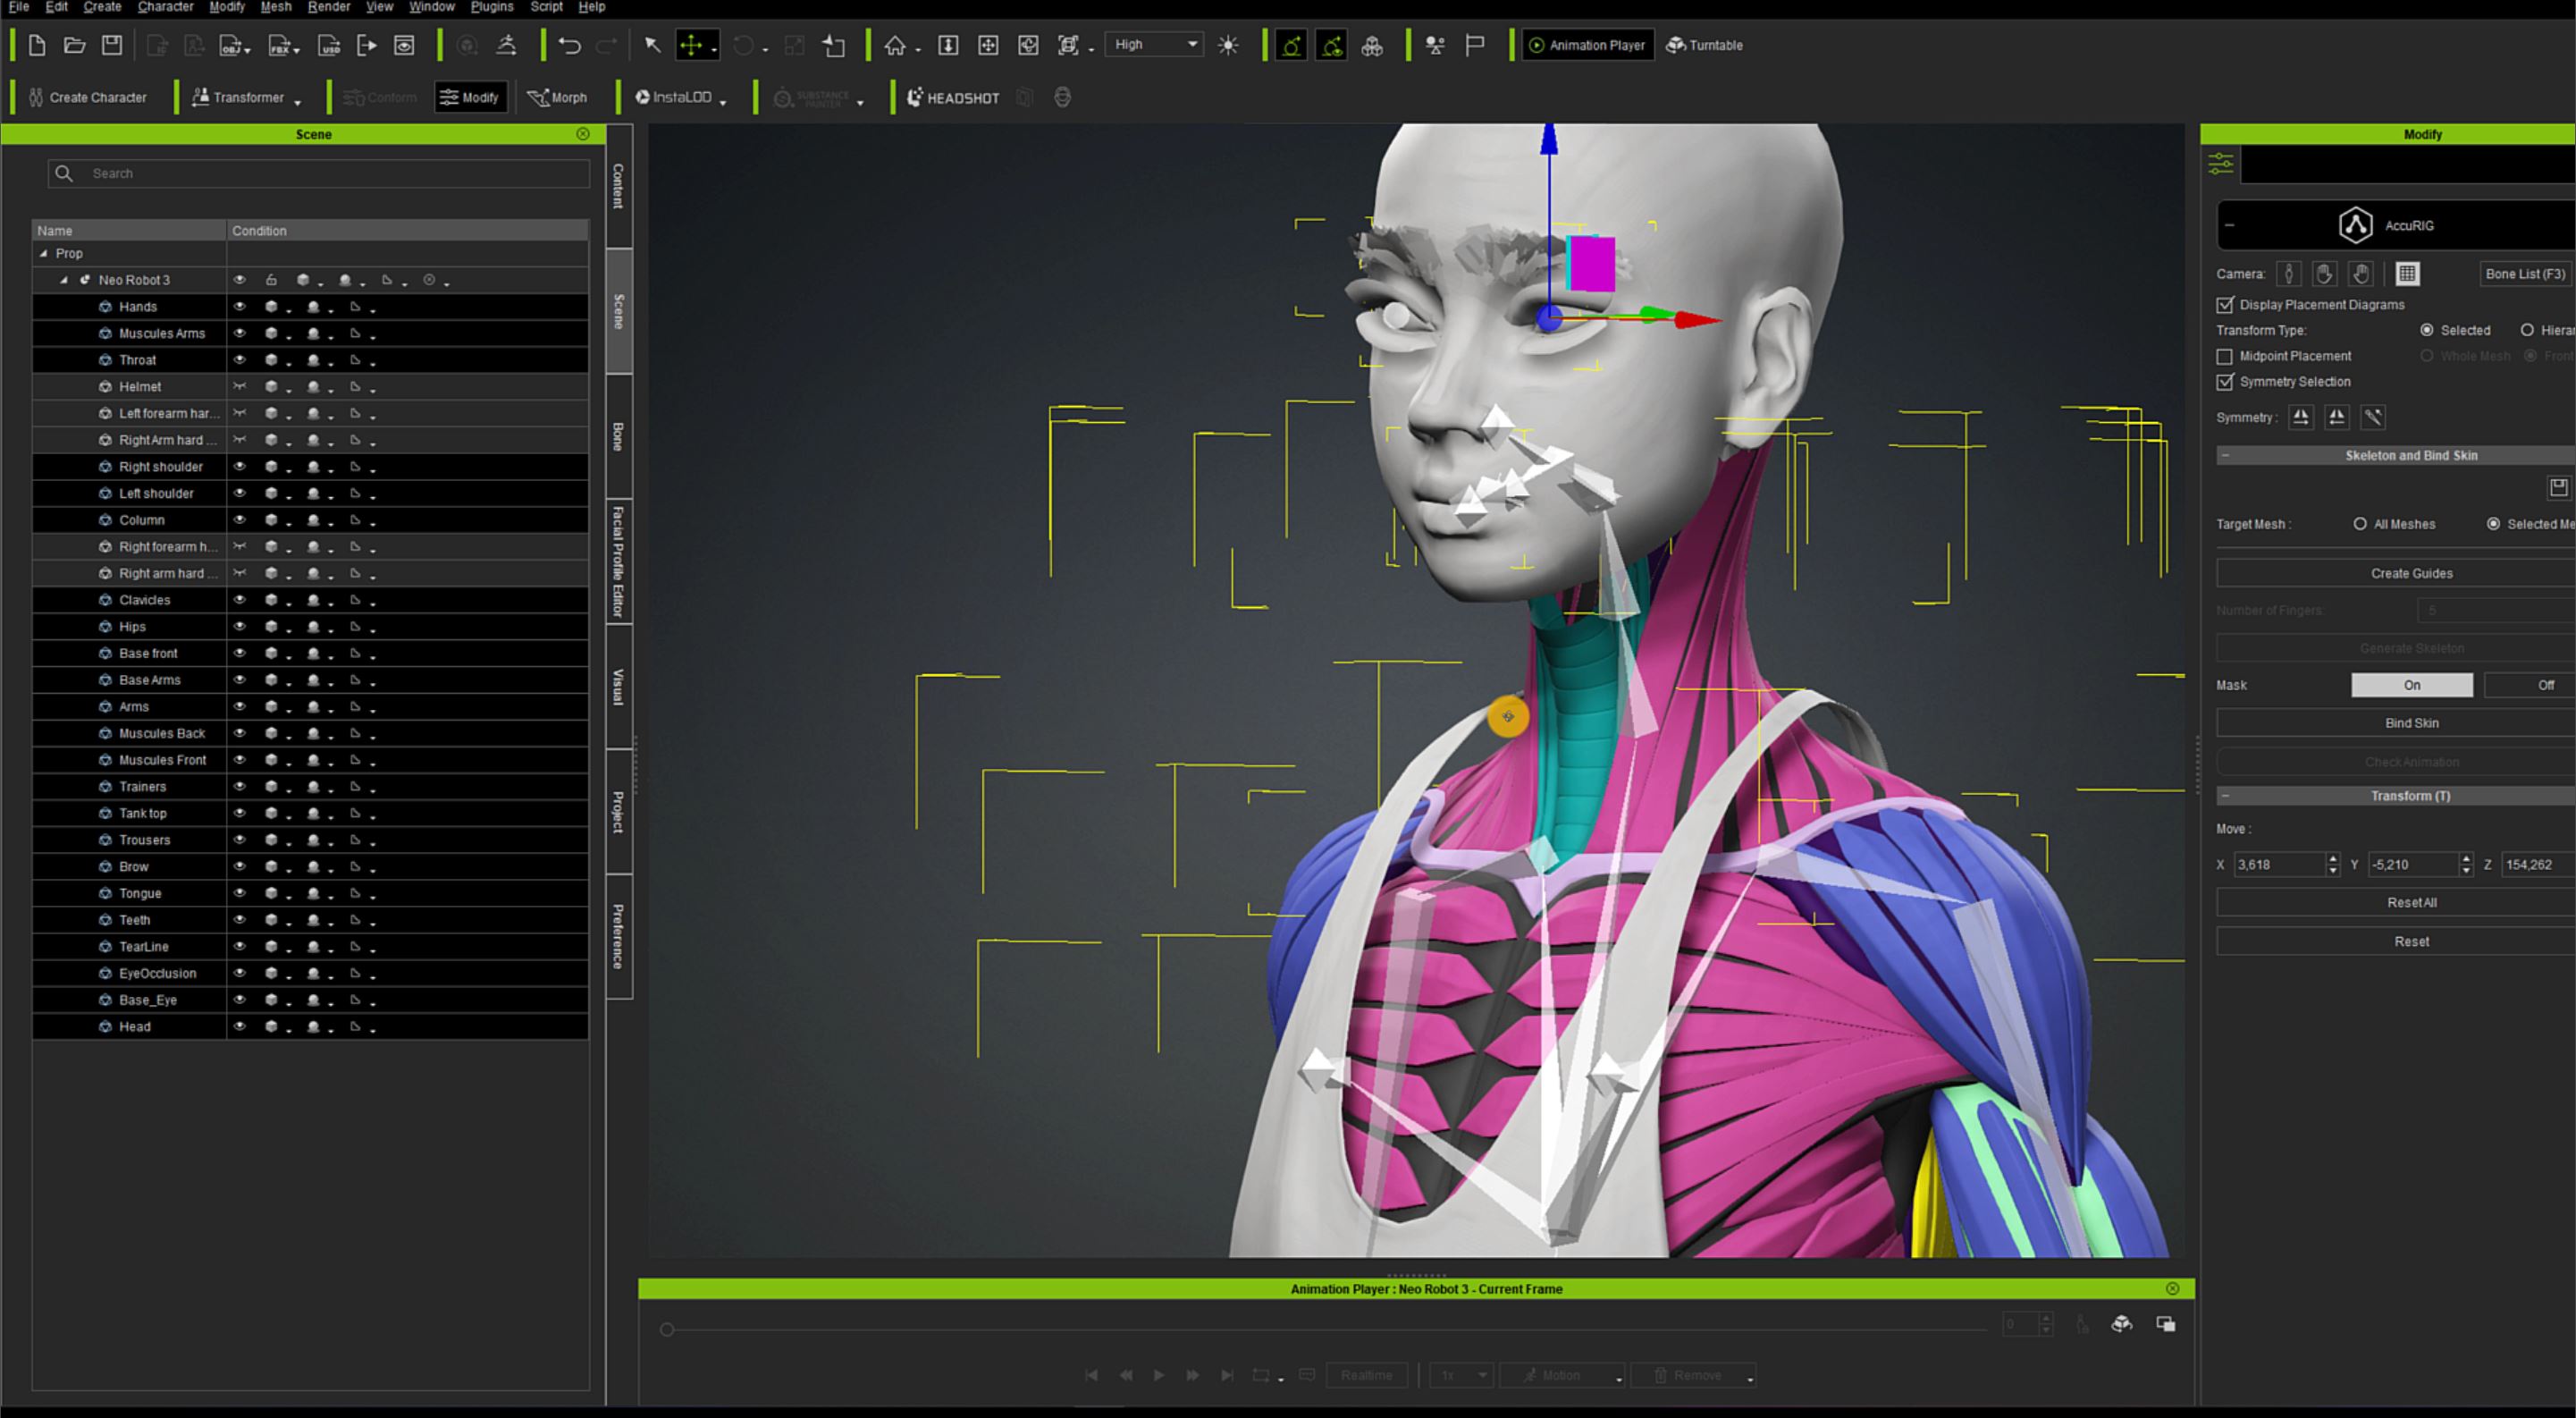
First, import the character directly into an empty project in Character Creator. If you haven’t done so already, proceed to rename all the parts of the robot to make it easier to work with later. After that, we can ready to use a new tool that Reallusion has added into Character Creator.
AccuRIG is a tool that has opened new horizons for Reallusion products. Now, Character Creator is no longer a program entirely focused on realistic or stylized characters, it can actually load all types of characters. With this improvement, Character Creator is no longer limited to certain types of projects and has become an essential tool for any project that involves 3D models.
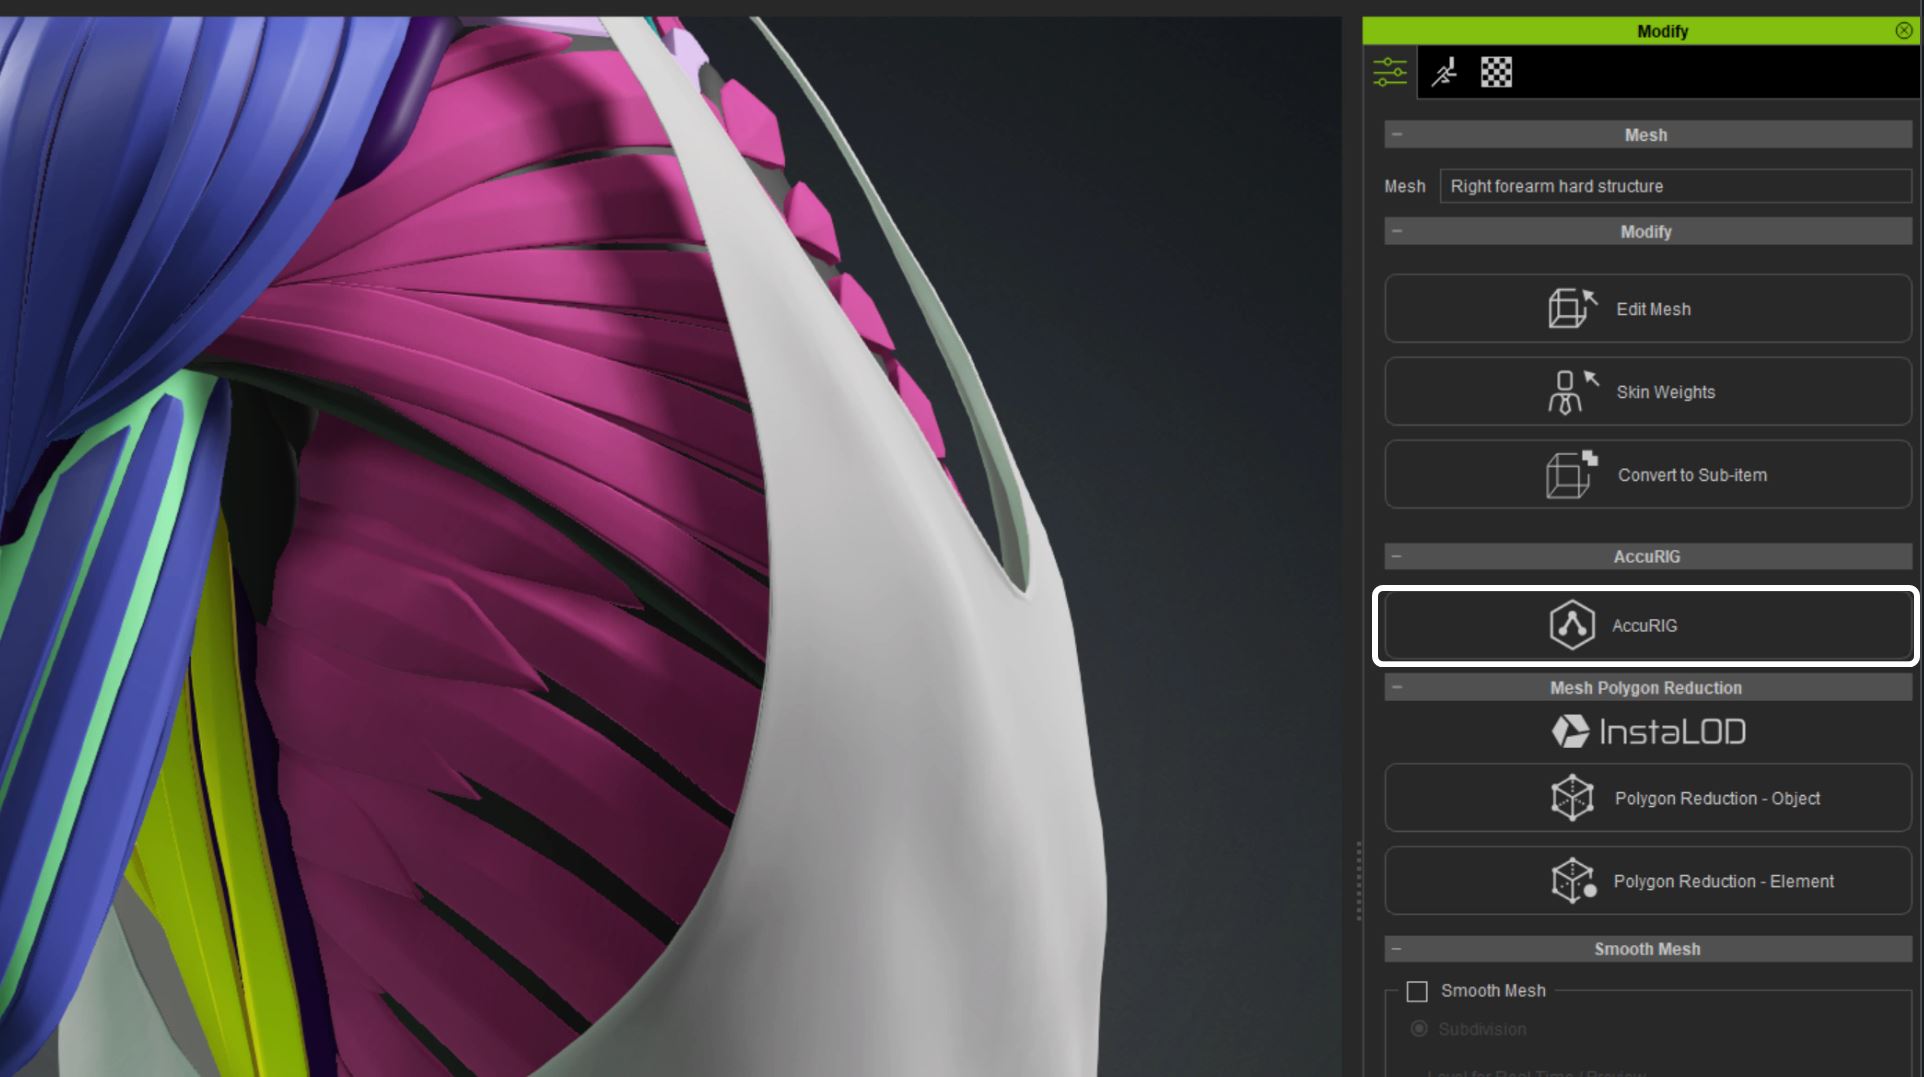
I’m going to select some of the rigid components and click on the AccuRIG button on the right. In the AccuRIG menu click on the Create Guides button. The system will proceed to place the joints in an arrangement that it deems best based on its algorithm.
Can we confirm if these are the best positions for the joints and modify it to better fit our model. Character Creator makes this easy by displaying a small help window every time a joint is selected. The system is usually pretty good at placing the joints into correct positions.
When we have verified the joint positions, click on the Generate Skeleton button. This is where the magic happens. In other programs, creating and adjusting a skeleton would undoubtedly take hours of your time.
The skeleton that the Character Creator generates is perfectly adjusted to fit the character’s anatomy. Yet, we can still adjust some parts that we are not satisfied with and use the Bind Skin button. As you can see in this example, the results are fantastic. It is even perfect for the fingers which are usually prone to errors due to their close proximity with one another.
Even the rigid parts of the model deform so slightly that it is almost imperceptible. That’s why for cases like these, it’s better to leave the rigid pieces as parts of the model rather than separating them into individual pieces.
Models with a lot of overlapping parts will likely encounter mesh penetration, but you can use the Skin Weights tool to quickly check the skinning. Another thing you have to take into account is that you can’t use the Transfer Skin Weights button to fix mistakes in your rigged characters, instead you will need to go back to the AccuRIG menu and use the Bind Skin button.
Animated add-ons in iClone 8
When dealing with robots in iClone, there is one factor that you should take into account, that is animated components. Electronic components are often tacked onto futuristic characters and they may even have their own motions.
Adding these elements is really easy in iClone. We simply need to import the pre-rigged components and position them in the right places. When they are all positioned, we have to use the Link option on the nearest bone of our character and we can animate this element independently without separating it from the body.
Furthermore, we can explore the use of robotic extensions as part of the character’s body.
The classic example is the articulated arm that is fully animated. Creating this setup is much easier than you might think, thanks to AccuRIG. We can simply import the mechanical arms into Character Creator and press the AccuRIG button to start the hard surface rigging process, just like before.
In this case, not all bones will be needed for this model, such as the leg bones. AccuRIG provides a practical solution to mask out these bones so that they don’t interfere with the hard surface rigging process. As mentioned a moment ago, we can just import the model into iClone and use the Link option to attach it to our character.
Type III: The rigid system
The rigid system is one traditionally used for classic robots. It is the most complicated system because we cannot use elastic elements and deformations, forcing us to think very carefully about the structure that makes up the character.
Use of spheres in the joints
As you can see, the whole system is based on using spheres as joints, but we also have some hydraulic parts that will need to be integrated into the rig.
Now check how well the sphere system works in Character Creator and let’s see just how useful it can be to incorporate the hydraulic tubes. These tubes have polygons at the top and bottom. In this way, the lower polygons can bind to the hips and the upper polygons can bind to the chest. When the character moves it gives the impression of the hydraulic tubes sliding to smoothly expand and contract. This method was used in practical production for my upcoming video game “The Evil Furry” on Steam.
In this version, I wanted the robot to be more friendly, so I added light bulbs on the sides of the spheres that can move independently. I also added two antennae with spring effects to make the head more dynamic.
Facial expressions on a deadpan robot
I also wanted this robot to possess facial expressions and the ability to talk, despite it being a rigid robot. It occurred to me that the way to do this is to use a base character in Character Creator with all the expressions and lip-sync systems already set up with what the program has to offer.
To have all these features, I needed to work off of the base character and add the rest of the armor as clothes. It is a slower process, but it’s worth it for all the animations and expressions that the face has to offer.
That is all! I hope you like the final result and that the tutorial has helped you.
iClone 8 Becomes a Tour de Force for Mocap Animation Editing
Featuring Trailblazing Mocap Animation Workflow
Mocap animation editing is an essential skill in digital entertainment, regardless of how the motion data is sourced. Although natural performances can be obtained via optical tracking, mocap suits, AI generation, or pre-made motion files, studios still struggle to refine animation data for their precise requirements.
iClone has been used in major mocap productions for decades, proving itself as a top-tier solution for mocap animation editing. With the release of iClone 8, this cutting-edge software offers professional-grade animations at a fraction of the cost, time, and effort required by other applications. Know More >
Overview of the iClone Mocap Animation Workflow
Thanks to iClone 8’s new features, most of the previous tedious processes are now fun and streamlined.
– Nildo Essá, Founder of FX Animation Studios.
Direct Support for Industry-Leading Motion Formats
iClone 8 is compatible with all industry-leading mocap formats. With a simple drag-and-drop application, anyone can import mocap data and retarget motions to different body shapes and sizes. It’s finally time to leave tedious bone mapping and characterization in the rear-view mirror.
Round-Trip Pipeline for Connecting with MotionBuilder and Maya
Thanks to iClone 8’s powerful round-trip FBX workflow, MotionBuilder and Maya productions can seamlessly integrate iClone and take advantage of its powerful native features. This translates to precise poses and finger gestures with motion transfer, making collaboration across different software solutions effortless and even enjoyable.
View the iClone-to-MotionBuilder and iClone-to-Maya workflow videos below:
See the benefits of iClone compared to MotionBuilder and Maya: Feature Comparison >
Unlock the Untold Secrets of Mocap Animation with Over 35 Battle-Tested Courses – All for Free!
Until now, there has never been a comprehensive and well-planned mocap animation course available. Reallusion takes up the challenge, offering 35 courses that cover every aspect of mocap production, from cleanup and editing to accurate interactions. These courses draw from decades of work on mocap projects with world-class studios featured in the ActorCore motion library, which is filled with difficult-to-capture motion sequences that range from paired interactions, parkour, and combat moves, to prop and accessory manipulation.
iClone does everything MOST people are using MotionBuilder to do, with a fast workflow and even a faster learning curve.
– Jeff Scheetz, Motion Capture Orlando
Conclusion
For iClone users, exploring the courses can help reinforce existing knowledge while also offering new tricks to enhance your animation skills. If you are new to iClone but have experience with Maya and MotionBuilder, give iClone a try to discover how the same quality results can be achieved with unmatched speed and convenience. And there’s more! Users of Maya and MotionBuilder can take advantage of our exclusive Welcome Offer to jump in and explore the possibilities.
Whether you’re an experienced pro or a newcomer to mocap animation, get ready to take your skills to the next level with iClone. Reallusion is dedicated to creating the next generation of animation solutions, making mocap work easier and more effective than ever before. We value your input and would love to hear your feedback as we continue to innovate and improve.
Industry Veteran’s Professional Making of 3D Motions with Vicon mocap for Action Films and Games
Hollywood disaster movies have always topped the box office, from Independence Day in the ’90s to The Wandering Earth II this year. These blockbusters center on ordinary people dealing with catastrophic events, giving avid moviegoers like us the adrenaline rush we crave. Time after time, we are thrilled by apocalyptic scenes of airplane crashes, massive explosions, rampaging monsters, and, of course, people running amok on the big screen.
Creating chaotic scenes for disaster movies with real people and props on actual sites is extremely complicated and costly to produce, and many studios across the globe are turning to CGI for this very reason. Unfortunately, CGI isn’t a magic bullet as it presents its own set of challenges, especially when it comes to generating a large crowd of realistic digital actors in varying shapes and sizes. Animators must ensure that each character has a distinct personality while in action so that they don’t end up with repetitive animations that are a telltale sign of computer-generated rendering.
ActorCore was created specifically to address these issues in production. In fact, animating 3D characters in disaster scenes has never been easier, thanks to the latest 3D motion content pack, “Run for Your Life“. This pack consists of 68 motion-captured animation clips, including surprised encounters, panicked responses, dynamic runs, jumps, climbs, falls, and even heated interactions during moments of chaos. Combined with ActorCore’s collection of fully-rigged 3D characters, this pack can expand the cinematic scope of any project in Maya, Max, iClone, and Blender. It is even fully compatible with game engines like Unity and Unreal.
Behind the Scenes: Run for Your Life
Monkey Chow Animation Studios, a company based in Orlando with extensive experience in 3D motion capture and a wealth of creative ideas, developed the “Run for Your Life” 3D motion pack. The content pack underwent a rigorous design process to ensure the highest quality of motion editing and accessibility, making it suitable for any project theme while exceeding all expectations.
Take a look at the process behind creating these incredible 3D motions.
AAA Studio Production
Monkey Chow Animation Studios, with its sister company, Motion Capture Orlando, was founded by Jeff Scheetz, a veteran in 3D animations and the co-founder of The Digital Animation & Visual Effects (DAVE) School at Universal Studios Orlando in Florida. Monkey Chow offers a full service for animation and VFX production. Over the years the company has been involved with many projects for Universal Studios, Walt Disney World, and theme parks around the world. They recently wrapped work on a new movie for Netflix and Season 2 of HBO’s The Righteous Gemstones.
Copyright: Jesus Film Project 2021
Action-Oriented Content Inspired by Hollywood
As a fan of big-budget disaster movies, Jeff came up with an idea for an “action movie” series to sell on the ActorCore 3D asset store. The pack’s goal is to help users create chaotic scenes that match the style and production value of Hollywood’s most thrilling disaster flicks. These scenes typically feature hordes of people scrambling to escape malevolent robots, monsters, or catastrophic asteroids. The pack is also very versatile because it complements ActorCore’s diverse selection of 3D characters from all walks of life.
ActorCore 3D Motions “Run for Your Life”
Eye-Catching Killer Stunts
To enhance the realism of mocap animations for crowded and chaotic scenes, Monkey Chow enlisted the expertise of veteran stunt choreographer Joop Kanata from The Stunt Collective. With a track record of collaborating with top companies in the film, TV, and live broadcast industries, including Aascar Films, Renaissance Entertainment, Innovative Entertainment Services (IES), Resorts World, and CRU, The Stunt Collective is a highly renowned team. Joop works closely with his crew of professional stunt performers to capture runs, tumbles, falls, and near-misses, which are sure to keep audiences engaged and on the edge of their seats.
Motion captured with stunt choreographer Joop Kanata
Creating this ‘Run for Your Life’ motion pack was a great opportunity to test out our newest Vicon motion capture system while paying homage to Hollywood’s disaster movies. It is such a pleasure to partner with Reallusion on themed content creation.
Jeff Scheetz, CEO of Monkey Chow Animation Studios
Motion Data Optimization with iClone
Having become familiar with its powerful features, Monkey Chow chose iClone as their primary tool for refining raw mocap animation data due to its impressive capabilities in real-time 3D animation. The studio’s motion data optimization team was particularly impressed by the software’s user-friendly interface, which streamlined the process of applying motions to characters without the need for complex, multi-step procedures common in other programs. And, unlike these other programs, which often involve convoluted processes like importing data, matching poses, linking joints, characterizing target characters, and making intricate adjustments, iClone simplifies the process by providing high-speed real-time animations with fast motion correction, motion editing, smooth blending, and accurate interactions between the actor’s body and objects in the scene.
Achieve natural character interactions with the environment using iClone Enhance the drama and excitement of your animations with iClone’s Time Warp
iClone won’t do everything Motion Builder does, but it does everything MOST people are using Motion Builder to do, with a fast workflow and even a faster learning curve.
Jeff Scheetz
More Action Motions to Come for Quick Previz and Game
ActorCore offers a variety of motion packs for different scenarios, including daily life, common conversations, combat, historical reenactments, and fun-filled cartoons. And now with the “Run for Your Life” content pack, you can also create Hollywood-inspired blockbuster action scenes. There are more content packs in the works by Monkey Chow Animation Studios which are perfectly suited to other popular themes like “Bank Heist” and “Street Riot”, and for users to create projects for game trailers, previsualization, or even big-budget movies.
Katherine, known as KD or KDSKETCH online, is a 2D digital animator from the UK making animated videos and tutorials on YouTube. With a focus on creating 2D animations, she talks about the production process including character design, storyboards, and various tips for making animation.
This is not the first time that Katherine has made a 2D animation with Cartoon Animator (CTA), after having experimented with CTA4 in 2019. She published two tutorial videos on YouTube, one introducing Cartoon Animator’s new features – with lip-sync being one of her favorites – and the other demonstrating motion capture animation with mocap plugins.
Vector Graphic Animation
In KD’s video, she introduces the benefits of vector animation as one of the most attractive features of Cartoon Animator 5, which supports the infinite resolution of artwork. Users can also choose their preferred vector tools for animation background creation or 2D character design, exporting SVG files into CTA for making animated videos; KD chose Affinity Designer as the vector tool for the scene design, which was inspired by platform games with a Pixel Art Style.
(Color adjustment tool for vector character design)
(Drag and drop motions on character)
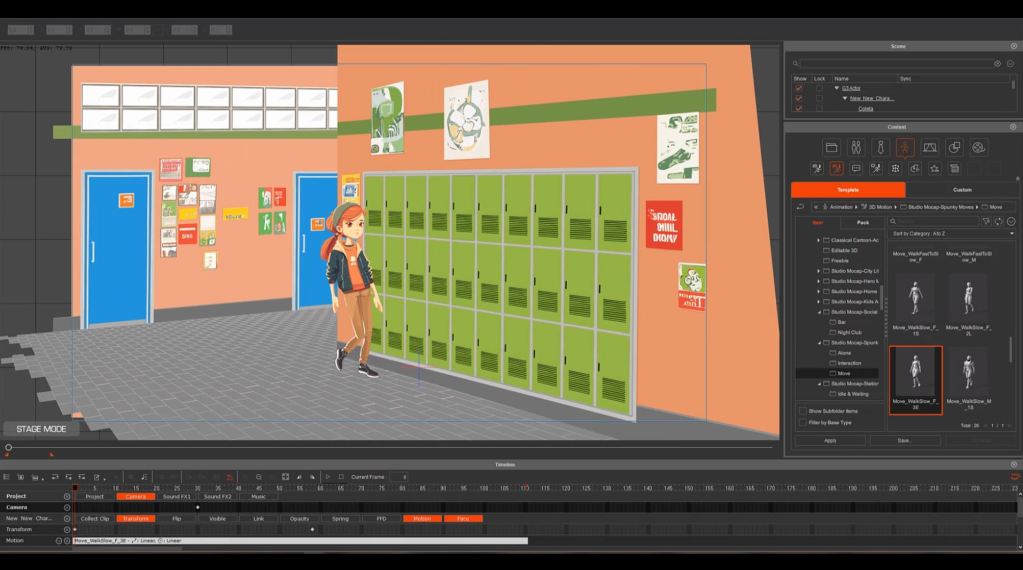
Moreover, the video shows that Cartoon Animator provides pre-made 2D characters and 2D assets that enable users to change the colors of skin tones, hair, clothes, and others. The Free Form Deformation effects and embedded motions are very useful for users who like to make an efficient and high-quality 2D animation in minutes.
(Easily create 3D layering of the scene)
In order to present the layering of the animated scene, the 3D Camera System is the most accurate function to experience realistic 3D camera movements. The tutorial demonstrates detailed workflows when making a high-quality animated video with more CTA features and tips.
Share Animated 3D Characters on PC and Mobile with the Best Viewing Experience
Reallusion announces brand-new features for ActorCore AccuRIG following its popular inauguration as a premium tool that is completely free of charge. In addition to uploading rigged characters to ActorCore, users can now share them on various social media platforms. The newly introduced Share feature, which is currently in its Beta phase, lets users share their rigged 3D models in a quick and effortless manner for personal and professional purposes.
What’s New with AccuRIG Share (Beta)
ActorCore AccuRIG is quickly gaining traction in the 3D community due to its user-friendly interface and ability to provide precise character rigging for 3D models at no cost. Rigged characters can be exported to all major 3D platforms and uploaded to the ActorCore 3D store. The asset store contains a vast library of professionally produced mocap animations that guarantee excellent quality for practical purchases.
In the latest version, users can upload and share their 3D characters via social media and email. Those who receive the models can explore them in ActorCore’s interactive 3D viewport, experiment with over 2,000 mocap animations, and directly download or re-share the model assets. AccuRIG Share is the perfect way to showcase creative work to family and friends, collaborate on projects, or review and deliver products.
Best Virtual Presentation with AccuRIG Share
Whether you’re part of a production or scan studio, content creator or marketing professional, AccuRIG Share allows you to effortlessly share your rigged models with others in remote locations. With an interactive 3D viewport and matching 3D motions, you can showcase your complete portfolio on ActorCore, enabling others to view and appreciate your work. For marketing professionals, this tool is ideal for spreading product and brand awareness by sharing 3D avatars on various websites and mobile devices, ultimately boosting potential sales.
We Want Your Feedback!
ActorCore AccuRIG Share is now in beta and comes with an array of new features. We invite all users to try out the program and give their valuable feedback through our beta survey. Your comments are crucial in helping Reallusion improve AccuRIG to meet your expectations. Additionally, if you use the software in a professional capacity, we urge you to fill in your professional information to qualify for project collaboration with Reallusion. This will give you access to additional free character upload slots and promotional opportunities. Don’t wait, take the survey now and let us know what you think. AccuRIG Share Beta Survey
Hi, I am José Tijerín, a digital illustrator, 3D sculptor, and videogame developer. My “Dear Althea” is a visual novel game that is available on Steam. Another game I am currently working on, called “From the Streets to the Script: A Carabanchel Story”, can also be added to your favorites list on Steam.
The information in this article is lifted from the AI with Cartoon Animator (CTA) tutorial video, which you are encouraged to watch for a comprehensive insight into my creative process. You can see an example of the final animation described in this article by watching the tutorial video.
The Use of Artificial Intelligence
AI is a revolutionary technology that gives artists like me the time to focus more of our efforts on creativity. Still, to get the most out of AI, we need to harness our imagination and hone the technical skills necessary to operate AI in the first place. It is equally important to be aware of the ethical and legal implications of relying on AI to generate artwork, especially regarding transparency around the way these tools are used in the creative process.
Tips on Creating AI-Generated Images
Getting the AI to generate the right images that we want can be difficult. The smart way to go about it is to give it consistently good prompts. But, what exactly is a prompt? Simply put, it is a set of words describing the image that we want to generate, and it is usually fed to the AI from a chatbox interface. By pulling data from what it has learned from its countless sessions with training models, the AI can analyze the given information to come up with an appropriate response.
When writing prompts, I suggest only allowing the AI to derive results from images that are in the public domain. There is a high probability in the future that all AI will base their creations solely on publicly available images; But for now, we must manually direct it to do so. One way to do this is to include the name of an original creator whose works are already in the public domain. High-quality digitized images of their works are likely readily available in the AI’s database—take, for instance, the great works of John William Waterhouse. However, there is a method that gives us more control, and thereby, better results.
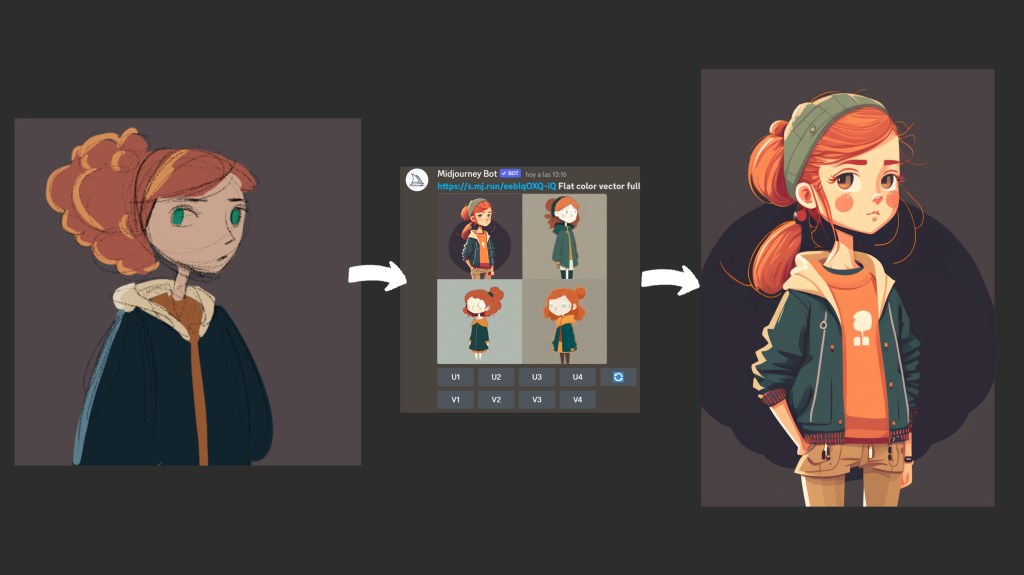
The technique I’m about to mention can be used with almost any image-generating AI. That is the use of images to generate other images using a machine-learning model. To elaborate, if the AI is fed a sketch with the concepts we want our illustration to have, we can have it generate alternative images based on our original concept. In this way, AI can help with 2D character creation.
Personally, I prefer to put a few character sketches into the Artbreeder AI and let it quickly derive a few more character concepts. Out of the ideas that it gives me, I continue to refine my ideas based on what resonates. Admittedly, it’s a very fun way of working that I highly recommend you try.
Whatever procedure you choose, a good rule of thumb is to master the tool rather than have it master you—that includes not losing sight of the goal. In this particular case, we are looking for a result that lends itself to painless animation in CTA, and that would require us to retouch the character—like furnishing the rest of my example image with the missing legs. For solutions to problems such as these, we can consult the AI community at https://huggingface.co/. On that website, we can explore all sorts of great AIs that can be used for free, right in the browser.
Of particular interest is Stable Diffusion Infinity which is promoted for its ability to zoom into an image with great accuracy. It belongs to a broader family of tools under the Stable Diffusion technology. This AI is completely free and, unlike others, remains open source. It is also my favorite and I use it exclusively for its accuracy. That said, it does require copious amounts of prompts to get it there. The more prompts given, the better the final result will be and the closer the output image will match what you had in mind. Lastly, if you are using the Image-to-Image function, be cognizant of the input image resolution as that will affect the quality of the generated images. For high-quality results, be sure to feed it images with adequate resolution and detail.
Tailoring the Illustration for Cartoon Animator
When our sketch has been turned into the desired illustration with the help of AI, we can start retouching it. Our initial instinct may start us off with refining the hands, but I recommend taking this opportunity to make the illustration more our own. Namely, we should modify the 2D character and decorative elements according to our tastes and bring them closer to the style of character we have in mind. This process is of vital importance if you are working on a project with multiple characters and they all need to complement each other in a cohesive style. Personally, I think it’s best to remove the whole inside of the face and make it individually. This way, all the faces of the characters will have a consistent style and lets us animate with ease in CTA.
Free Vector Templates for 2D Characters
When we have finished with the 2D character creation, it is time to visit the CTA website and download the free templates to animate our character. If we open them, we can see that they work by separating the joints of the body by layers and grouping them into folders. We will need to do the same with our character by separating it into parts. In the process, we must take into account the layers that go on top and those that go beneath. By imagining the poses that the character will assume during animation, we can make sure to not leave gaps in the design that will cause the character to look unsightly in the final animation.
CTA allows us to import vector graphics for limitless resizing while keeping the resolution sharp and quality high for graphic animations. If we use a program to automatically vectorize the illustration, we can easily make use of this advantage.
Animating 2D Characters in the Simplest Way
Never before has it been so easy to create an animated 2D character of such high quality in such a short amount of time. Thanks to CTA, we can bring illustrations to life in a very simple way and without the need to have much knowledge of 2D animation. When the exported character is introduced in CTA, it comes pre-rigged, which saves us a ton of time. When a background scene is generated with AI, we can easily integrate it with our character with the help of the intuitive tools of the program.
Giving life to our character is just a couple of clicks away when we use the large library of motions that CTA has to offer. The ones I like to use the most are the 3D motion effects. With them, I can control the animation on the 2D plane with precision.
All-in-one Guide of ZBrush CC Pose Manager (Early Access of CC to ZBrush Posing Pipeline)
ZBrushGuide founder, Pablo Munoz Gomez gives away a whole course in 3D character creation. From concepting in Krita to sculpting in Character Creator 4 (CC4), he takes us on a ride of turning 2D concepts into articulated 3D characters with the strategic use of ZBrush and AccuRig. Explore ways to set up a humanoid character in ZBrush for easy rigging and posing with the ZBrush CC Pose Manager, a free plugin developed by Reallusion in collaboration with Maxon and ZBrushGuide. Don’t wait — get started now with early access to the plugin here!
*Note to readers: Since the publication of this article, the plugin referred to as “ZBrush CC Pose Manager” has been rebranded as “Pose Tools”. All references to ZBrush CC Pose Manager in this article should be understood to refer to Pose Tools or CC to ZBrush Posing Pipeline.)
Pablo Munoz Gomez is a renowned 3D concept and character artist, with a passion for education. 3D sculpting, visual development, and other mixed-media form the pillars of his artistic passion which he channels through the various platforms that he owns, including ZBrush Guides, 3D Concept Artist Academy, and 3D Snippets Project. Thanks to his vast online following, he is able to reach artists from around the world and help them advance in a variety of 3D-related disciplines.
The workflow I’m going to show you through the video series is a real game changer when it comes to posing and managing poses in ZBrush as it allows you to keep all your subdivision levels while testing and prototyping all sorts of poses!
Pablo Munoz Gomez – Founder of ZBrush Guides
This article is a part of a transcript series based on Pablo’s tutorial videos and the following content is presented in his own words.
Let’s create a full-body character project from scratch using ZBrush and CC4!
To start off, I will be focusing on the ideation process and generate some ideas for the character. The goal is to create a character that can be rigged using the CC4 AccuRig feature and test its integration with ZBrush.
I began the process by sketching lots of rough ideas using Krita. I only spent around thirty seconds on each sketch, just enough to get the gesture and the general shape of the volumes, without any detail. You can use any tool you prefer, but I like using Krita because of its experimental brushes. I also use Procreate when I just want to take a more relaxed approach.
The setup is simple, with a light gray background and using a hard brush to sketch pure black on a new layer.
I then did a second pass to figure out the volumes inside the silhouette. I used some tips, such as using “alpha clip” to restrict my brushstrokes to the silhouettes, customizing the brush to add a bit of “wet mixing“, imagining a single key light from above each character, using a slightly darker gray for the foreground, and even at this stage, defining ideas for the materials.
From all the sketches I created, I settled on one silhouette that I felt had a good balance and some areas for extra details. I then refined the silhouette on a larger resolution to use as a reference for the character design.
For those who might not be as comfortable with 2D sketches, I have some tricks to help get started with 3D sketches. You can use CC4 to morph a base silhouette, take a screenshot or render the image directly, fill the layer with black, and paint over it with additional shapes.
Another option is to put together a ZSphere armature in ZBrush, pose it using the Rotate tool, add primitives, and render a BPR. You can then use the alpha and invert it to black, and start painting on top to refine the silhouette.
Setup the 3D Concept in ZBrush
With a more defined idea of what I wanted to create, I used a base mesh from CC4 just to get a rough idea of the proportions. The goal of the project was to use a different topology anyway, so I ended up Dynameshing and sculpting it in ZBrush.
I split the body into various parts like the hands, legs, head, and body, and then used Dynamesh and sculpting brushes to bring the silhouette closer to the reference sketch. I also added a couple of extra pieces using cylinders for the neck and the wrists of the suit, and defined the cuts and panels with the “cutter brush” from my H.R. Giger tribute pack.
At this stage, it was very sketchy and low-resolution, but I was able to assign polygroups to the body suit based on the cuts I made with the cutter brush. This not only allowed me to test the palette with a quick polypaint color but also guided the ZRemesher process later on.
The next step was to start the polishing process and cleanup of the forms. I increased the Dynamesh resolution of all subtools to add more details and refine the cuts and panels. For example, with the head, I increased the Dynamesh resolution to define the secondary shapes and add folds around the side of the face, neck, and mouth. I then used ZRemesher to generate a cleaner topology for the head and sculpting brushes to add details and polish the head.
The process for the body suit was the same, using the polygroups to guide the loops of the ZRemesher process and then using PanelLoops to generate the cuts inside the panels and polish the surface a bit more. I also used the polygroups to mask some areas and add wrinkles to give a hint of the different types of materials on the suit.
For the final step, I duplicated the entire mesh of the body suit, used selection tools to isolate some polygroups and deleted the rest, and then used Dynamic Subdivision to add thickness to generate the extra hard-surface objects. I used IMM brushes to create the tube connectors, and took advantage of the polygroups to add wrinkles and folds using a custom brush from the Cloth and Drapery pack.
Regarding the design of the space creature, I wanted to push the AccuRig tool inside CC4 and try new things, such as a low center of gravity, three fingers on each hand, and a combination of hard-surface and soft deformation parts. I also wanted to keep the neck piece completely solid when doing the rig.
Polishing & Remeshing the 3D Sculpt
At this point of the process, I’ve completed the setup and sculpting of the character in 3D, it’s now time to move on to the textures. I’ll briefly talk about how I approached planning and baking the high-resolution mesh into the low-resolution mesh and how I used Substance 3D Painter to create the texture sets of the creature.
Let’s start with the planning process. Organizing the assets is an important step to make sure that the baking and texturing stages go smoothly. I started by having a high-resolution mesh with all the details and a low-resolution mesh with UVs. To simplify the process, I tried to keep the number of subtools in both high and low-resolution meshes to a minimum, making sure that they match. I also separated the objects based on the material or texel density to have more control over the details.
An important thing to keep in mind when merging subtools is that in ZBrush, you can only combine objects with the same number of subdivision levels. If you have different levels, you’ll have to make them the same before merging. Another important thing to remember is to make sure that the UVs switch in the Merge section is enabled to keep your UVs. In my case, I had overlapping UV islands, so I used Ryzom UV to pack them and update the UVs of the low-resolution mesh.
Next, I exported the low- and high-resolution versions of the model, keeping the same name on the subtools and only changing the suffix from “_low” to “_high”. In Substance 3D Painter, I used the Match by Name option to bake the details from the high-resolution mesh to the low-resolution mesh.
Once the baking process was completed (just a few minutes of computing time), I generated the base color palette for each piece of the character:
You might have noticed that there are already some details and patterns on this blocking of the color palette. This is because some of the base materials I used are substances that come with certain details like the hexagonal pattern on the green areas or the padded stripes on the abdominal area.
Next, I spent some time adding some wear and tear and adjusting the brightness of the colors. The change might be subtle, but when you add all these subtleties together, you’ll get something pretty cool. I then focused on unifying the base colors and varying the roughness a little bit. My goal was to maintain the bright and saturated colors that I thought would go well with the character’s stylization, but also keep them within the same hue range.
There’s a simple trick that I like to use in Substance 3D Painter, which can override the hue. You can create a fill layer on top of your stack of layers in any texture set you want, and turn off everything but the color channel. Then you can right-click and copy the layer, and go to another texture set, right-click an empty area, and click on the Paste Layer as Instance option. This way, you should have a layer that only affects the color of each texture set, and you can change its settings, and it will update across your texture sets. The other cool thing you can do is change the color and set the blending mode to something like soft light, and then play with the opacity to fine-tune the effect. Just keep an eye on your black and white colors so they don’t get overly tinted with the overlaid color.
For the head and hands textures, I used the Stylised Skin Smart Material resource that I developed for one of my previous 3DSnippets projects (the Viking). I simply tweaked a few settings to adjust the strength of the bumps and the colors. I wanted to keep a very simple and stylized texture for the creature, so I avoided any patterns that could be distracting.
In addition to the smart material, I created three layers (two of which are instanced) to vary the color and add a bit of darkness based on the ambient occlusion. Finally, I added a couple more layers and another smart material to sharpen some of the smaller pores/bumps and make the reds of the base color pop a bit more.
Auto-Rigging ZBrush Character with AccuRIG
So now, I have the character ready with UVs, textures, sculpted details with subdivision levels, and a symmetrical pose. I also have everything that makes up this character in four subtools.
Before we start rigging in CC4, there are a few things to keep in mind. You don’t have to have UVs or textures, but having them beforehand makes the workflow easier.
You need to have CC4 installed and the GoZ connected for sending things back and forth between ZBrush and CC4. And it’s always a good idea to save both the ZBrush files (ZTools) and the CC4 projects as you work, just in case you need to go back to a previous stage.
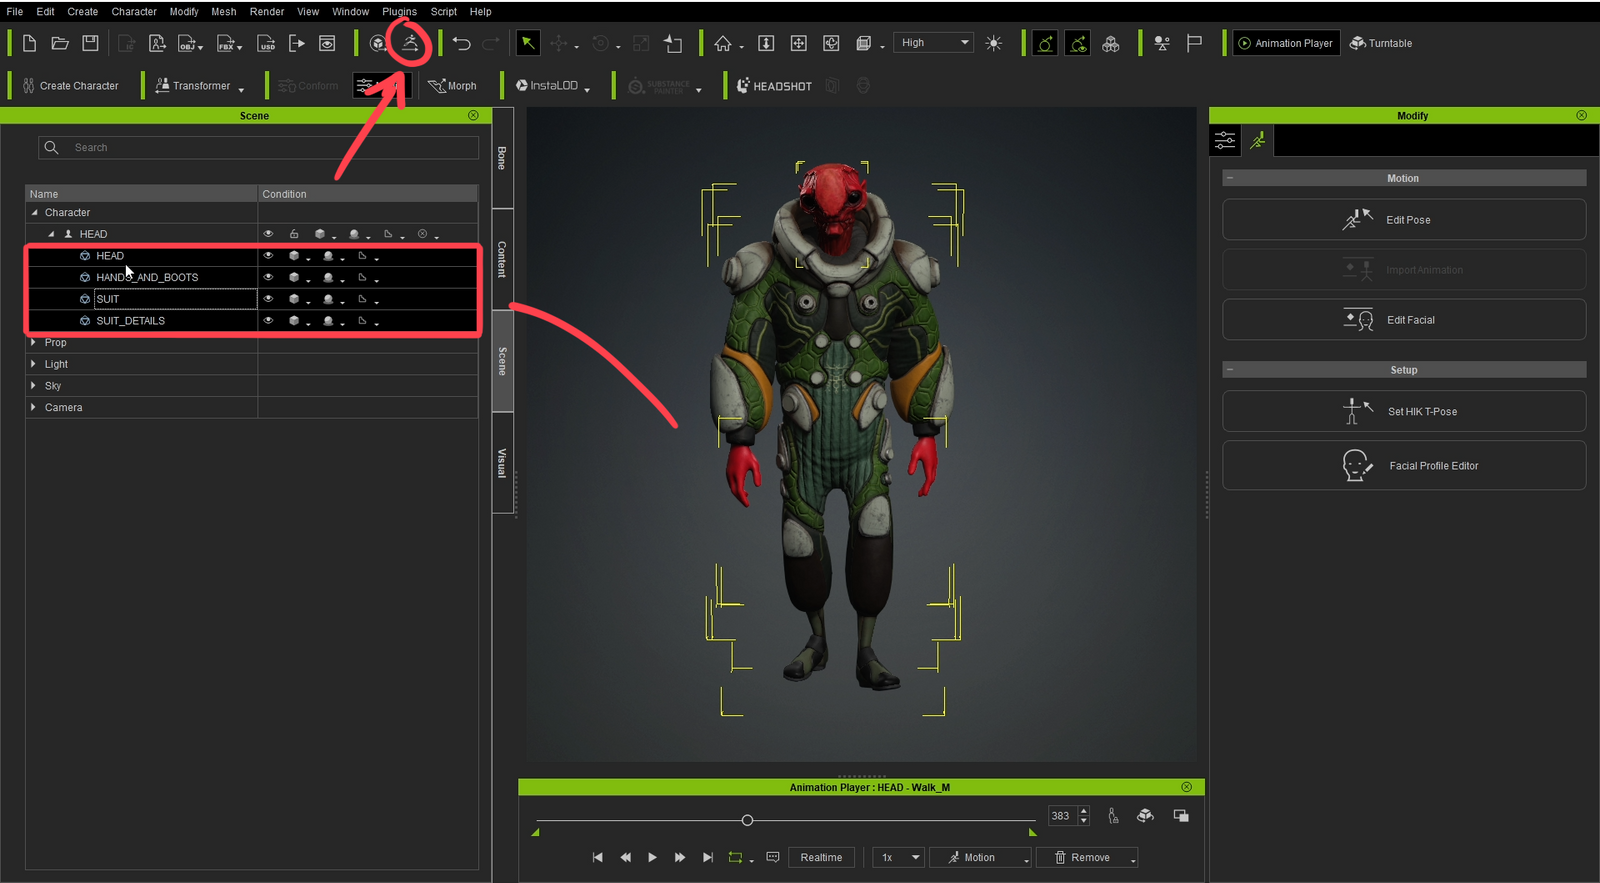
Now, the first and only step is to click the All button next to the GoZ on the Tool palette. This sends all the subtools, not just the selected one (which is what happens with GoZ). You might have to select the external application if you have more than one connection in the GoZ Settings, in which case, select Character Creator 4.
In CC4, you will see a window and the default settings should be okay. You should only have one action template which is Create Prop because we created the entire character and base mesh in ZBrush. Note that depending on your version of Character Creator, this window might look different, so make sure to update to the latest version.
Once you click Update, you’ll see your character in CC4 with the same subtools as separate meshes in the Scene tab on the left-hand side. The connection between ZBrush and CC4 through GoZ will automatically look for the lowest subdivision level available in your subtools and send those into CC4. If you want to visualize more details, you’ll need to create normal maps and send those over. If you have textures in ZBrush, CC4 will automatically recognize them and plug them in. But if you have maps outside of ZBrush, you need to tweak a couple of things.
Now, for the fun part! Select all your meshes from the Scene tab and in the Modify window, you’ll see the AccuRIG button. Click on it and let’s start the process!
Once you enter the AccuRIG, you can choose to rig all the meshes or just a selection of them. In my case, I’ll use the All Meshes option and click the Create Guides button.
The first step of the AccuRIG process is to place the reference of the joints (the green, orange, and blue dots) on the character. As you place the dots, you can toggle symmetry on or off and mirror the placement of individual joints if you want. If you’re struggling to place the dots, you can turn off the Midpoint Placement option.
Probably one of the most important placements is the joint for the wrist. The correct placement of this point will make your life a lot easier when setting up the fingers.
If you move to the next step and the points for the fingers don’t look quite right, make sure you go back and tweak the wrist:
The next step is to choose the amount of fingers you have on your character. I intentionally designed my creature with three fingers and a thumb just to show you the versatility of this process.
From the Number of Fingers drop down I selected “4”
After you make your selection, you can hit the Generate Skeleton button to create points for the hands, allowing you to adjust the placement of the fingers if needed.
The final step is to bind the mesh to the skeleton you’ve created, which is accomplished by clicking the Bind Skin button. Now you have a rigged character ready for posing. You can use the Check Animation button to preview the deformation, and if you’re satisfied with the result, you can exit AccuRIG.
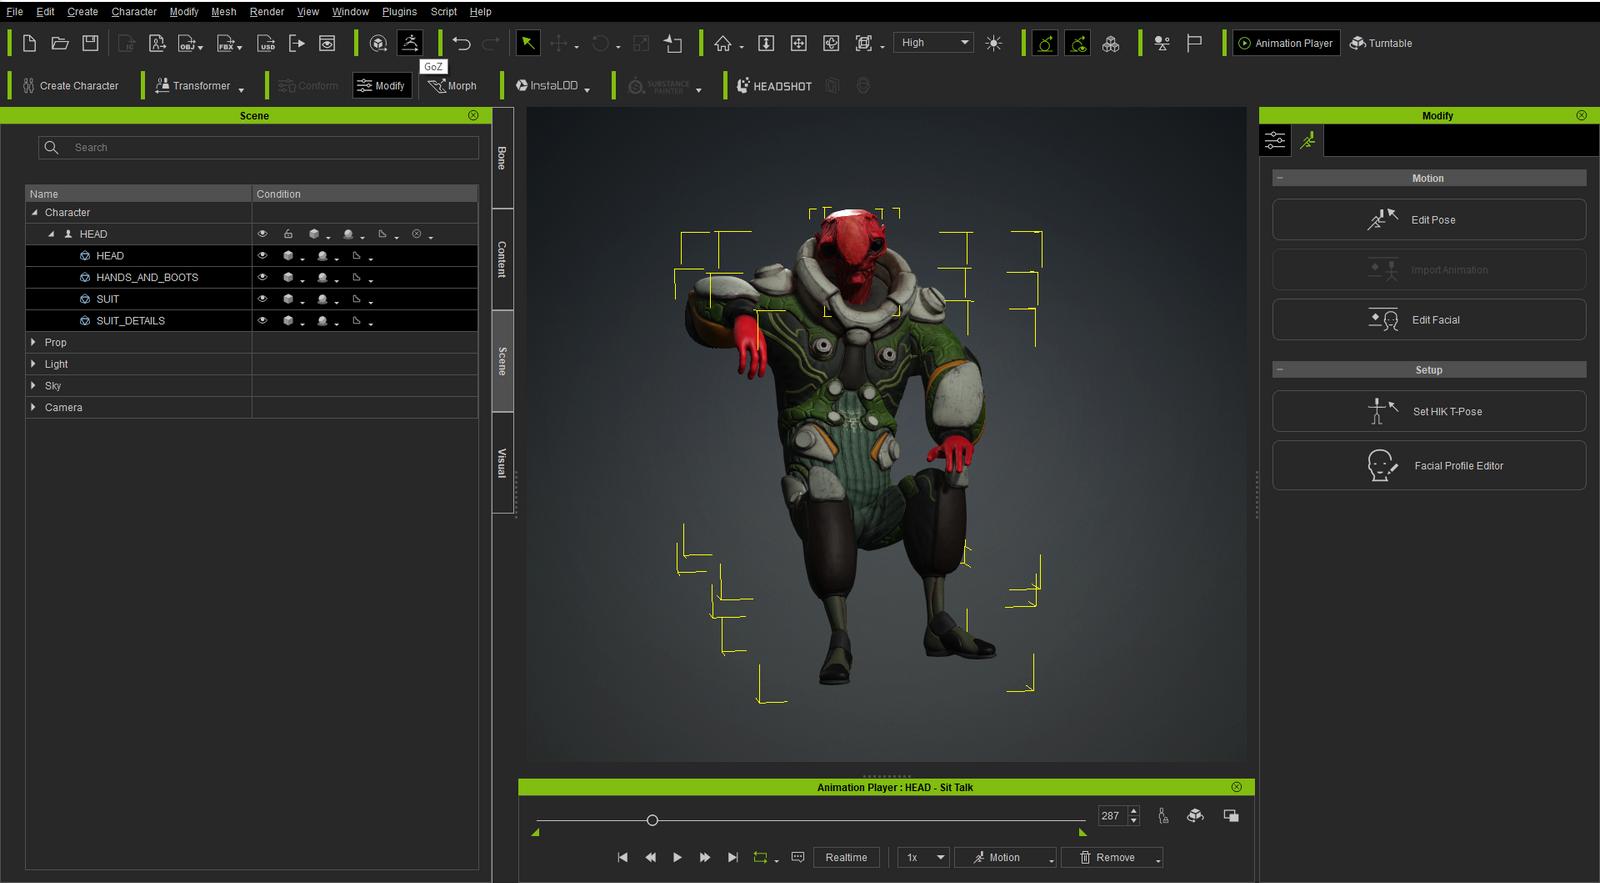
You can also adjust the skin weights if you want to change the influence of certain joints on the mesh, but that’s a topic for another time. For now, let’s move on to the final step which is sending the pose to ZBrush. Simply find a pose you like from the animations, or edit a pose yourself using the Edit Pose button. Then, select all of your meshes and hit the GoZ button at the top of the UI.
A new window will pop up, and it’s important to choose Current Pose from the bottom and select Relink from the drop-down menu so that CC4 can find and relink the pose to the character in ZBrush, including all subdivision levels and details. If you don’t select Relink, the pose will still be sent to ZBrush, but as a new mesh, and you’ll lose all subdivision levels and details.
Once in ZBrush, we have the pose from CC4, and all subdivision levels and details are preserved. And if you need to make changes, you can easily go back to AccuRIG and reset the pose or create a new one.
Rig Tweaks and Managing Poses
To wrap up this project and make sure you have all the information you need, I want to share some additional valuable tricks to enhance your workflow and the quality of your poses.
First, let’s take a look at one of my final poses in ZBrush. And here’s a quick render in Marmoset Toolbag 4, which was exported from ZBrush:
Now, let’s dive into the ZBrush CC Pose Manager, a fantastic little plugin from the folks at Reallusion. It is the perfect companion for the ZBrush-to-CC4 workflow. The plugin is incredibly useful in automating the process of recording layers on each subtool to save new poses.
The best thing about this plugin is that you only need to click one button to switch between poses, even if you have multiple subtools with multiple subdivision levels. Here’s how it works:
Selects the first subtool from the subtool list.
Go to the highest subdivision level of the subtool (if applicable).
Create and record a new sculpting layer from the Layers subpalette.
Go back to the lowest subdivision level (if applicable).
Move down to the next subtool and repeat the process.
Here’s another pose recorded in a separate layer within the same project:
So once you have your character rigged in CC4 and you want to start playing with some poses, you can send them all to ZBrush and keep them in layers using the ZBrush CC Pose Manager.
To get started, you need to have ZBrush and CC4 open and the character rigged. Essentially, everything we’ve done in this project up to the last update post.
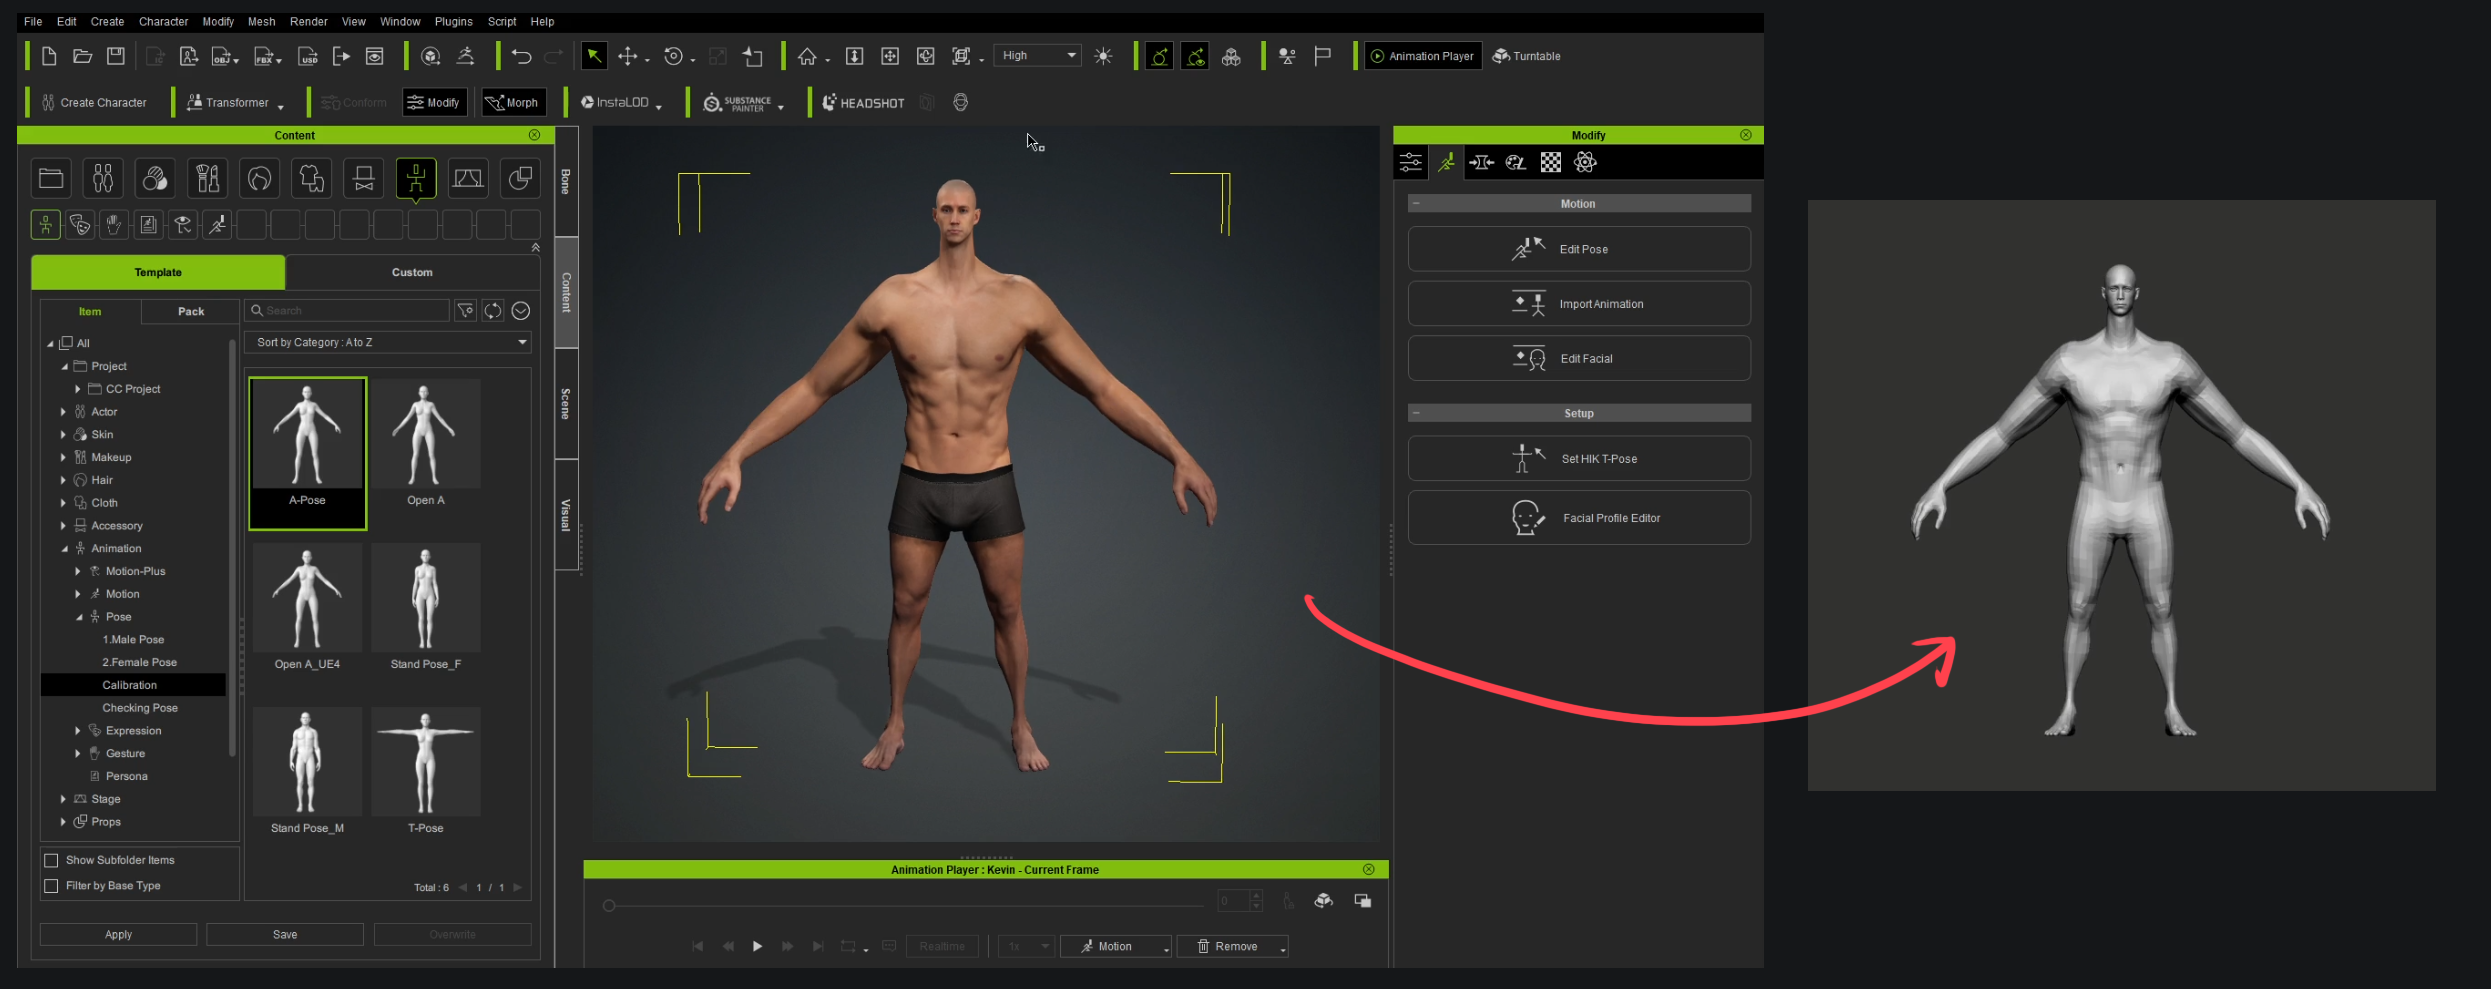
The next step is to create a pose in Character Creator using the posing tools or a pre-made pose from the Content Manager in CC4. You can create any pose you want in CC4. Then, make sure that you have your default A-pose in ZBrush and the ZBrush CC Pose Manager plugin installed. I have the ZPlugin palette docked to the left for easy access.
The plugin is very simple and straightforward. As I mentioned earlier, it just follows a series of steps that can be done manually. In order to bring the pose from CC4, you need to click on the Relink to Add Pose switch at the top of the plugin.
Once this switch is turned on, go back to CC4 and send your character in a pose to ZBrush using the GoZ button. Make sure to select the Relink option from the pop-up window.
Then, click on the switch from the plugin to turn it off and bring the character pose. Let the plugin do its work, and you’ll have a new pose added in your ZBrush CC Pose Manager that you can turn on or off. This allows you to keep your original symmetrical pose and all your subdivision levels!
You now go through the process of adjusting your pose by sculpting in any of your subdivision levels in a new layer so the entire process is non-destructive.
For instance here are some Before And After comparisons of one of the poses I sent from CC4 to ZBrush and how I tweaked to update the compression of fabric and some little nudges to the geometry around the hands and the head:
ZBrush CC Pose Manager for Lightning Fast Posing
The tweaking of the rig is a bit more tedious and somehow more technical, but nothing too crazy. Once you get your head around the idea of how to edit the weights you can spend a couple of hours refining the rig and then it will make a huge difference when you get to pose your character.
For instance, the creature for this project has some hard surface details that should not deform with the rig. Instead, they should be props or accessories to the rig.
Take the neck piece as an example since it is the most obvious one.
The default rig gives you something like this:
So we can simply edit the weights of the rig to affect less — or more — of a specific area. All you need to do is select the object you want to edit, in my case the “SUIT_DETAILS” object, and then click the Skin Weights menu on the right:
In the image below, I’ve entered the edit mode for skin weights and selected the bone that I want to use to control or move the neck piece: “CC_Base_Spine02”.
You’ll see that it looks like a portion of the neck piece is white and the other part towards the back is black or dark gray. This simply means that pure white will be 100% influenced by the selected joint or bone, and anything that is pure black will be 100% left alone (zero influence over the neckpiece by the selected joint).
So, you can use the icons next to “paint operation” to add or remove white or black to tweak the influence of the joint over the piece or object you want.
In other words, I want the neck piece to be 100% white when I select the “CC_Base_Spine02” bone so that when the character moves the upper torso, the neck piece moves with it and when the character moves the head (a different joint) then nothing moves on the neck piece.
I painted it all white:
That is all there is to it. The hard surface bits should be easier since in most cases they are either 100% white or 100% black in weight mapping.
With all the tweaks to the rig, it was a lot easier to pose the character and simplified the process of adjusting the sculpt once the pose was back in ZBrush. Here are a couple of final renders from my favorite poses of this character:
Thank you for taking the time to read this tutorial, I hope this has been helpful and informative!
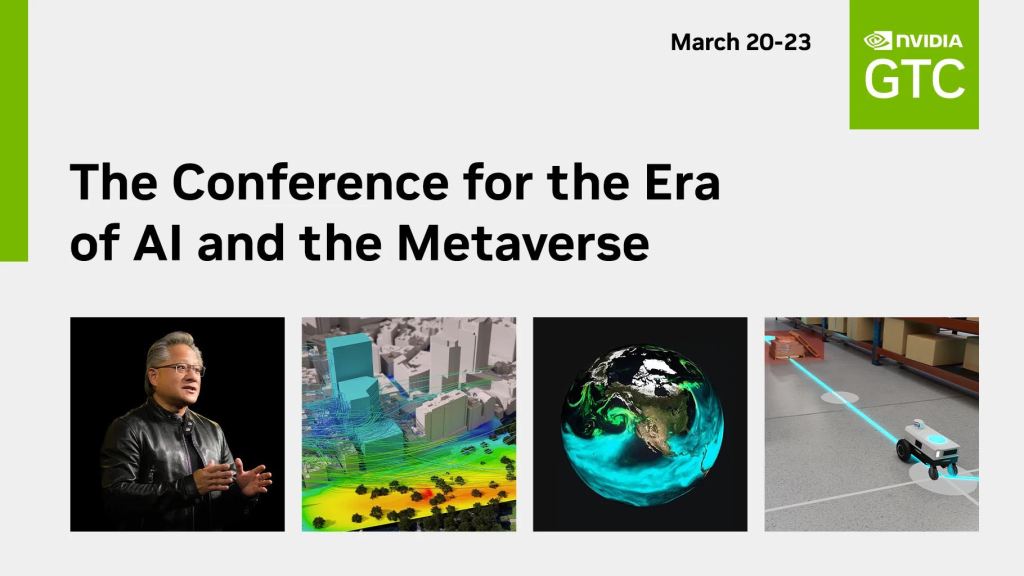
Digital Twins are coming alive with characters and animation to power solutions from Bentley Systems, Mercedes-Benz, and BMW Group. Learn about new features of iClone 8 and Character Creator 4 for Nvidia Omniverse creativity that add digital humans to visualizations and simulations for industrial AEC projects. Register to virtually attend GTC for free and get access to this and many other talks including the keynote. Join John Martin and Reallusion for the #gtc23 Avatar Conference Sessions:
How to Start a Business in Omniverse. Wednesday, March 21, 3:00 PM PDT Developers, artists, and enterprises are moving at the speed of light in their adoption of NVIDIA Omniverse platform. Join this session to see how developers and technical artists have built their businesses.
John Martin II, VP of Product Marketing, Reallusion Edmar Mendizabal, Omniverse Community Engagement Manager, NVIDIA Natalia Mallia, Software Engineer – Machine Learning, Smart Cow Christopher Scott, Evolver Interactive Kevin Hart, CEO, Aireal Michael Wagner, ipolog and SyncTwin
Real-time Industrial Simulation and Digital Humans. Wednesday, March 22, 11:00 AM – 11:25AM PDT Create an industrial visualization with a large crowd of animated 3D people for transportation, building, and emergency management purposes. The project is built inside Omniverse using the simulation technology from Bentley Systems, and 3D animation and avatar creation software by Reallusion.
John Martin II, VP of Product Marketing, Reallusion
Industry: Architecture / Engineering / Construction