

By Gaspar Ferreiro
Gaspar Ferreiro is the Founder of Project GHOST Studios, an Atlanta-based VR/AR and game development firm whose work was recently featured at LeapCon.
————————————————————————-
Being a studio these days means delivering the most challenging content ever created, on-budget, with completely unrealistic deadlines. To help others in our position, we would like to highlight some tools that are affordable, flexible and offer the best return on investment. Please note that like many of you we don’t have the luxury to throw an army of modelers, riggers and texture artists at a project, we work with solutions that empower us to deliver quality work FAST. Among the tools , we will use Reallusion’s Character Creator, ZBrush and Noitom’s Perception Neuron.
Step 1 – Let’s create our base hero using Reallusion’s Character Creator 3 (CC3)
This is the beginning of all things, and luckily one of the easiest parts of the process. In fact, when I describe this process to colleagues, I tell them is like the hero-creation process from an RPG Video Game. We start by selecting our base character (male or female), and then use the CC slider options to customize our hero.

Once we are happy with our base character, it is time to send her to ZBrush to give her some custom gear. To do this, you simply press the GOZ button in CC3 and then press GoZ on the window that pops up.
Step 2 – Let’s outfit our hero using ZBrush
Our hero won’t be very interesting to our players if she is just naked, so let’s build some gear! With our character imported into ZBrush, we will first subdivide the character so that we can sculpt or modify enough detail on our gear. (usually 4 to 5 sub-levels are good enough).


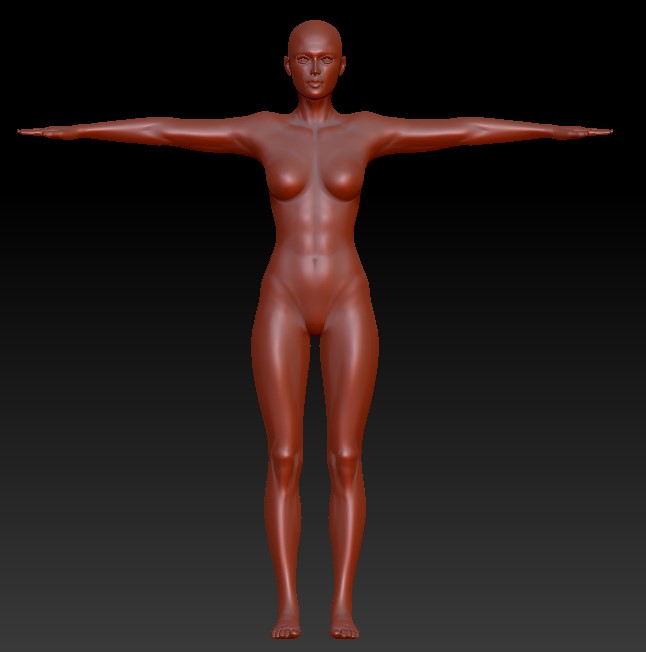
Look at that buttery-smooth character once it’s divided!
We will then use a mask in order to make clothing super-quick. Simply use your mask brush to shade the areas that you want to create clothes for. Also, don’t forget to activate “symmetry” if your clothes are symmetric.
Finally, we use the extracted feature to extract an object that will be used as clothes. I recommend a number around .007 for thickness, but that can vary depending on your desired clothes. Once you like the result, remember to click accept, and the extracted sub-tool will appear. Turning off the visibility on the model will allow you to work faster on the clothes.
At this point, you can sculpt and modify the clothes as much as possible. My advice is to soften the areas that have high contours from the model (usually chest, abs, and rear – but again, your final goal might not require to do this). Also, you can use masks to extrude parts of the body to make armor plating or use the panels function.
One thing to keep in mind as you sculpt (especially for game assets) is that smaller details like cables, cords, etc.. can be done using texturing in other programs without having to add complexity to the geometry (this will be helpful when we optimize the clothing mesh). I personally like to work with the Move, Mask, Smooth, Inflate and Clay Buildup brushes.. but everyone has their own preferences. Another trick I use is just to mask areas I want to extrude armor from, invert the mast, and then scale it using the scale options, and holding the control key. For the purposes of this piece, I will stay with a very simple/raw piece. It is also a good idea to turn visibility on the original human model from time to time, to make sure you have not reduced the gear too much so it won’t fit your model.


Once this is done, you will want to use decimation master so that you reduce the number of ploygons for your gear, and once that is done you will generate UVS for this piece so that we can texture it correctly in other programs.
When you get this done, the next step is to do 2 things. One is to export out of ZBrush so you can texture it in your favorite texture program (I like Substance Painter), and the other part will be to use the GoZ button to send the clothing asset back to Character Creator.
As you make the transfer, make sure to adjust the position as needed, to make sure it’s aligned with the model. Then transfer skin weights, selecting default, so that the clothes conform to your character.

You can verify that this is done successfully by changing the pose of the character.
The next part is to take the clothing model that you exported out of ZBrush, and bring it for texturing in your preferred tool… Again, we will use Substance Painter.
Step 3 – Let’s paint some textures
We won’t get too much into how to use substance painter, and some of the techniques to facilitate your texturing process, like exporting poly-painted textures from ZBrush to facilitate texturing, but we will definitely say that by just using fake UV geometry you can get a very simple piece of gear, and create the illusion of it being highly sculpted. Once done, just export your textures and bring them to Character Creator.


And once the textures are applied, you should end up with something like this. Then feel free to pose add hair to your character, etc.
Here is a final render of the character.

Step 4 – Time to get animated
As we mentioned earlier, we plan on using this character for a game, so it is only fitting that we add some animations. With that in mind, we will use the Character Creator button to send the model to Reallusion’s 3D tool, iClone (a good idea is to already have iClone open.) We will then use the tool’s Motion Live capability to select the capture devices to use to animate.
Once you have your animation recorded and selected, then you simply export the FBX and a folder will be created for everything you need (In this case, we selected unity since that is our target game engine).
Step 5 – Let’s get our game on!
The first thing we will do is drag the folder that iClone created into our Unity asset folder. Import the textures and materials, and then fix the materials with the right textures.
Once you have everything looking to your liking, then use your animator controller to set the animation, and test your scene.
And there you have it, a super-fast and easy way to prototype animated characters for Unity. For anyone who needs a deeper dive into Character Creator 3, Reallusion has a great overview video intended for the gaming community.




1 comment
Such an interesting article. i read this article. thanks for sharing. Custom Leather Jacket