In this 5 part series for – Master Class “Realtime Digital Double with Character Creator and Texturing.xyz”, Sefki Ibrahim shares his tips and tricks on how to take advantage of Character Creator and Texturing.xyz multi-channel face textures to create a real-time character (Ed Harris), and animate Ed’s face and body easily in Unreal Engine.

Sefki Ibrahim is a freelance character artist that specializes in photorealistic digital human works.
He is familiar with employing Texturing.xyz material maps, and has been selected as “2019 Artist of the Year” by Texturing.xyz.
Part #4: Dynamic Texture Editing with Character Creator SkinGen
Before activating the SkinGen editor, I started by attaching the textures for the head material, which should have the Digital Human Head shader type applied. Character Creator allows a maximum texture size of 4K so even if you import an 8K map, it will downsize the resolution.

I proceeded by editing the eye, skin and teeth shaders in the modify section. In this section, I changed the subsurface scale and was able to alter the roughness in different regions of the face, which is incredibly efficient and artist-friendly.
Below Shader Settings, Character Creator also offers the artist flexibility to apply their custom maps and masks for various attributes, such as micro-normal detail (which are also provided by Texturing XYZ), subsurface weight and a bunch more.

I created a custom sclera and iris map and replaced the default diffuse texture to get a closer match to the reference. It’s needless to say how vital eyes are in any portrait. You can also utilise CC’s various eyeball presets to get the look you want without any work.
The high-fidelity detail of the normal map won’t show through until we enter SkinGen mode. So before you activate it, use this time as an opportunity to ensure the roughness of the skin looks correct and that you connect an appropriate micro normal map. But of course, once in skinGen, you can return to make changes to the material if necessary.
SkinGen is an interactive editor: presets from the content gallery can be dragged and dropped into your scene, and its effects displayed in real-time. Presets range from skin detail to skin blemishes to blood spatter and more.

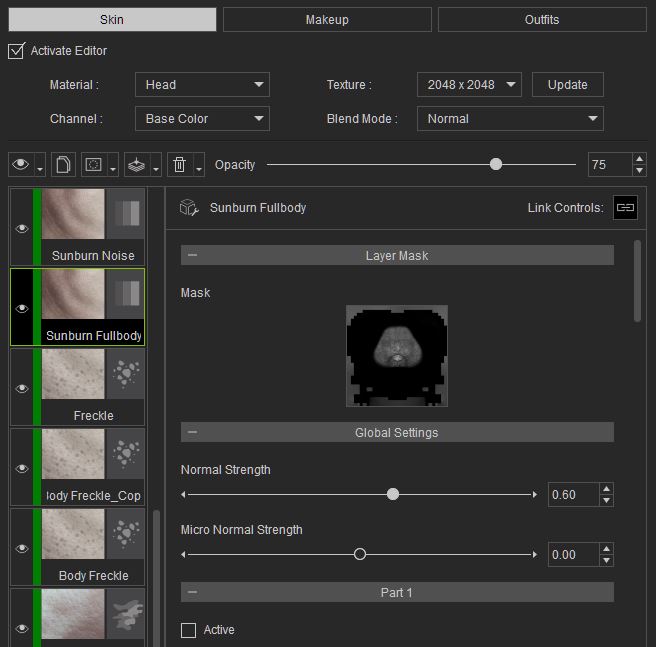
The option to insert masks is what makes this tool so dynamic. You can choose from Character Creator’s vast library of region masks to specifically alter regions of the face and closely match the look you want. Below, you can see that I connected the Utility-R map (from the set of textures created earlier) to the mask slot of a sunburn preset (the Utility-R map is intended to control the melanin of the skin). Within this layer, I can control many attributes. Such as the opacity of the layer itself or the colour of the sunburn.
I think you can see I went a little overboard with the number of layers in my editor. I recommend playing around with the different presets; observing their effects and how they alter the look of the skin.

Under the modify tab, switching from Skin to Makeup can allow us to add a variety of eyebrow, eyelash or make-up presets. In the content editor, under make-up, I chose a bushy male eyebrow and brought it into the scene. From there, I tweaked some of the settings: I reduced the effect of the normal and increased the brightness and hue of the diffuse to give a slight grey/blonde tint to the hairs.
For artists looking for even more flexibility, be sure to check out the SkinGen Tools. You can drag and drop say a Tile layer into the scene; import your alpha and tile it across the character.
And that is it!


I’m relatively new to the real-time space, but this project has allowed me to jump head-first into the development of a real-time character. And with Character Creator’s diverse range of tools, the workflow has eased the jump for me somewhat. SkinGen, in particular, is a powerful feature. I have also tested the implementation of some of the maps baked out from Character Creator in an offline renderer (Arnold), and the results look great.

PART #1 – Project Overview
PART #2 – Sculpting and Utilizing Multi-channel Face Maps
PART #3 – Hair Card Generation
PART #5 – Animating in iClone for Unreal Engine


2 comments