Gnomon Instructor and Senior Concept Artist Kyle Brown shares a groundbreaking workflow

Kyle Brown, a veteran of the CG world, Kyle has worked within the field since 2015 and has had his hand in a number of projects throughout the film and television industry. He also currently is an instructor at the Gnomon School of Visual Effects where he is able to share his expertise with others.
This Master Class comes in 7 parts, each carries its own tutorial video to guide you through the entire process of how Kyle incorporates Character Creator, Photoshop, ZBrush and other tools to create the concept art. You can find links to the other 6 tutorials below.
Part #5: Lighting and Posing a Character in Character Creator 3
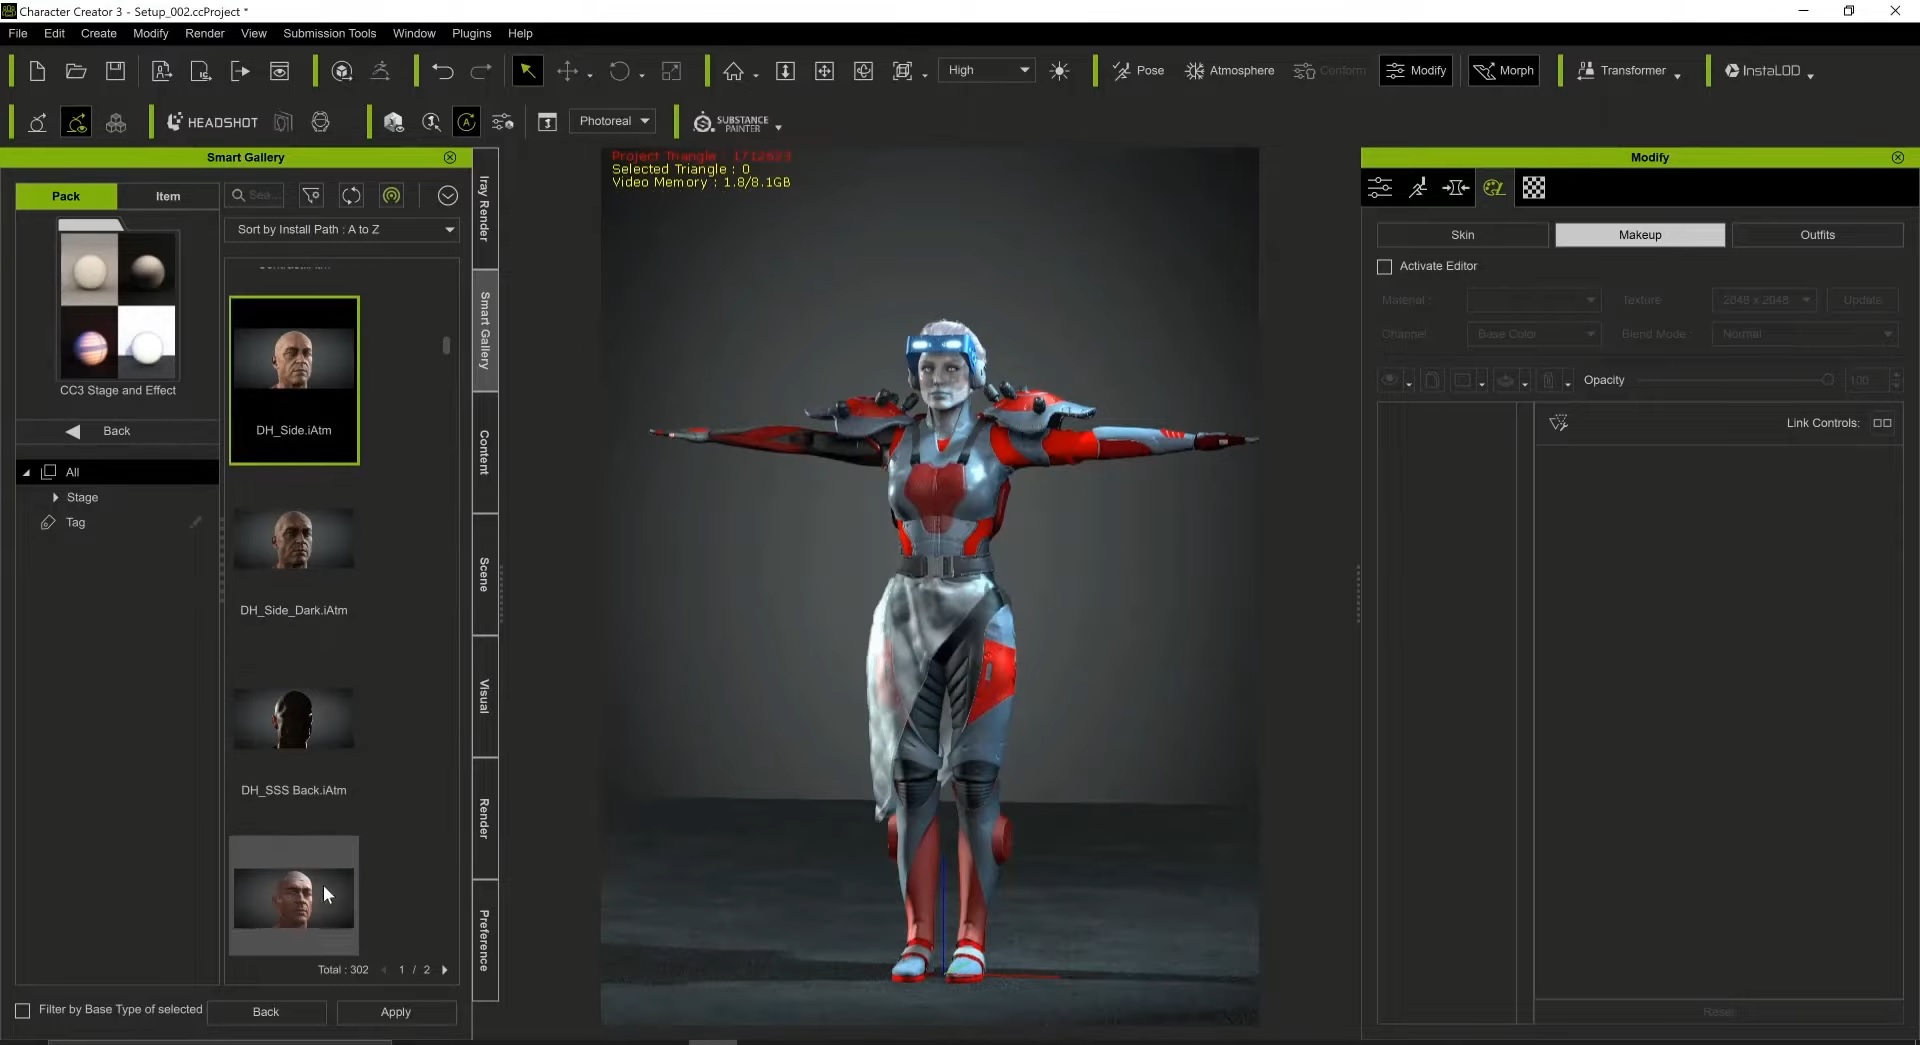
With all of the textures in place and material properties assigned, I start to work with some of the other properties within the content library, including the Stage elements. I enjoy looking through the Smart Gallery as well so see how options are bundled for a more cultivated look.
Not only can you set up the lights but you can also further adjust the image window with a number of post effects including blurs, color adjusts and LUT color grading effects.

This is great for artists who want to streamline the process as much as possible and limit their time in their post processor of choice.
I flipped through a number of studio lighting scenarios that had some really strong dramatic lighting. I wanted a nice blend between studio lighting and something that would feel a little more natural or environmental as though some of the lighting was coming from some neon street signage.
Once you pick a studio lighting preset you will see that it generates lights in your scene tree that you can move and manipulate for further customization.
With lights arranged I went digging through the library of content to see what I could tackle inside of CC3 rather than generating elsewhere or photobashing later. I was thrilled to find the Floor_Asphalt and Floor_Tarmacked available in the Content > Stage Elements > Props > floors.

There is also a really great concrete wall that fit perfectly for the vibe I was trying to achieve in the piece and did a great job of framing the scene.
I experimented with some posing earlier in the process, when checking to make sure all of the costume and prop elements were parented to the right body part and conforming properly. After setting up the lighting with the figure in T-Pose, and locking in a little bit of the environment, I deep dive into getting my character into her final pose.

The final Pose is similar to the initial pose used for the sketch phase, still maintaining the same attitude that the sketch had. I wanted a pose that showed off a bit of character without it being too extreme, blocking parts of the costume. As this is for concepts, it’s important to communicate as much information as possible to the viewer.
I had to tweak a few elements of the costume, including the shoulder pauldron that after moving was interpentrating the upper torso and arm.
Everything is looking the way I want, the pose and position are where I want them, the camera angle is where I want so I start adjusting some of the camera effects.

These adjustments can be made in the Visual tab, where you can make adjustments to your Light, Shadow, Ambient Occlusion and much more. You have the option to edit your post effects that were added from your content library as well.
Here is the piece rounding the final adjustment to get our primary scene set up. I make some adjustments to the Bloom to get a little bit more ‘oomph’ out of the visors and play up that cyberpunk aesthetic.

CC3 can render out a static image from the real time window, It’s is important to know that there is also the option to render with the Iray renderer that can be installed with CC3. To take advantage of the real time benefits of the SkinGen set of tools and their appearance, it would be best to render with the real time render in CC3. This will be one set image when I render out, with no additional passes which means I want to handle as much in one pass as possible and handle the rest in paint within photoshop.

I want to get some depth of field in the shot, so I select the Camera in my scene tree and jump over to the Modify menu where you find some additional options you can tweak.

If you want to see the effect of the depth of field, you can check or uncheck the Activate box in the Modify menu to turn it on and off. I will do this as I apply different costume pieces to the other iterations in the coming steps.
*Tip: To save the Camera by navigating to the Content tab, selecting the Stage Elements > Camera and selecting Custom. Hit the + at the bottom of the menu to add your custom camera in case you accidentally move out of that view while modifying your character.

Follow the other 6 tutorials in this series:
Part #1: Getting Started and Sketches
Part #2: Costume & Asset Creation in ZBrush
Part #3: Refining and Adding Details in ZBrush
Part #4: Generating Textures and Importing into Character Creator 3
Part #6: Costume Variation and Texture Modification
Part #7: Comping Renders, Paint, and Finish


