Fast Way to Update Cloth Design with Free Blender Plugin

Greetings, this is Peter Alexander and the purpose of this article is to demonstrate the Replace Mesh feature in Character Creator and the workflow with Blender. You can watch the timelapse of the robe creation in the following videos and the process for making a fully functional, properly weight-mapped robe will be detailed in a future video as it is a more complicated effort.
To start off this tutorial, you’ll need to download and install the “CC4 Blender Pipeline Tool Plugin” for Character Creator 4. >> Download here.
Then you’ll need to download and install the “ CC/iC Blender Tools” plugin for Blender. >> Download here.
Character Setup and Export
First, I start with a mostly bare character, except for his sandals and hair. I export this character using the Posed option in the CC4 Blender Tool Plugin; I’m doing this so that when I import the clothes I’ll be creating, they’ll fit the character pose as a starting point.

Blocking Out Clothing with CC/iC Blender Tools
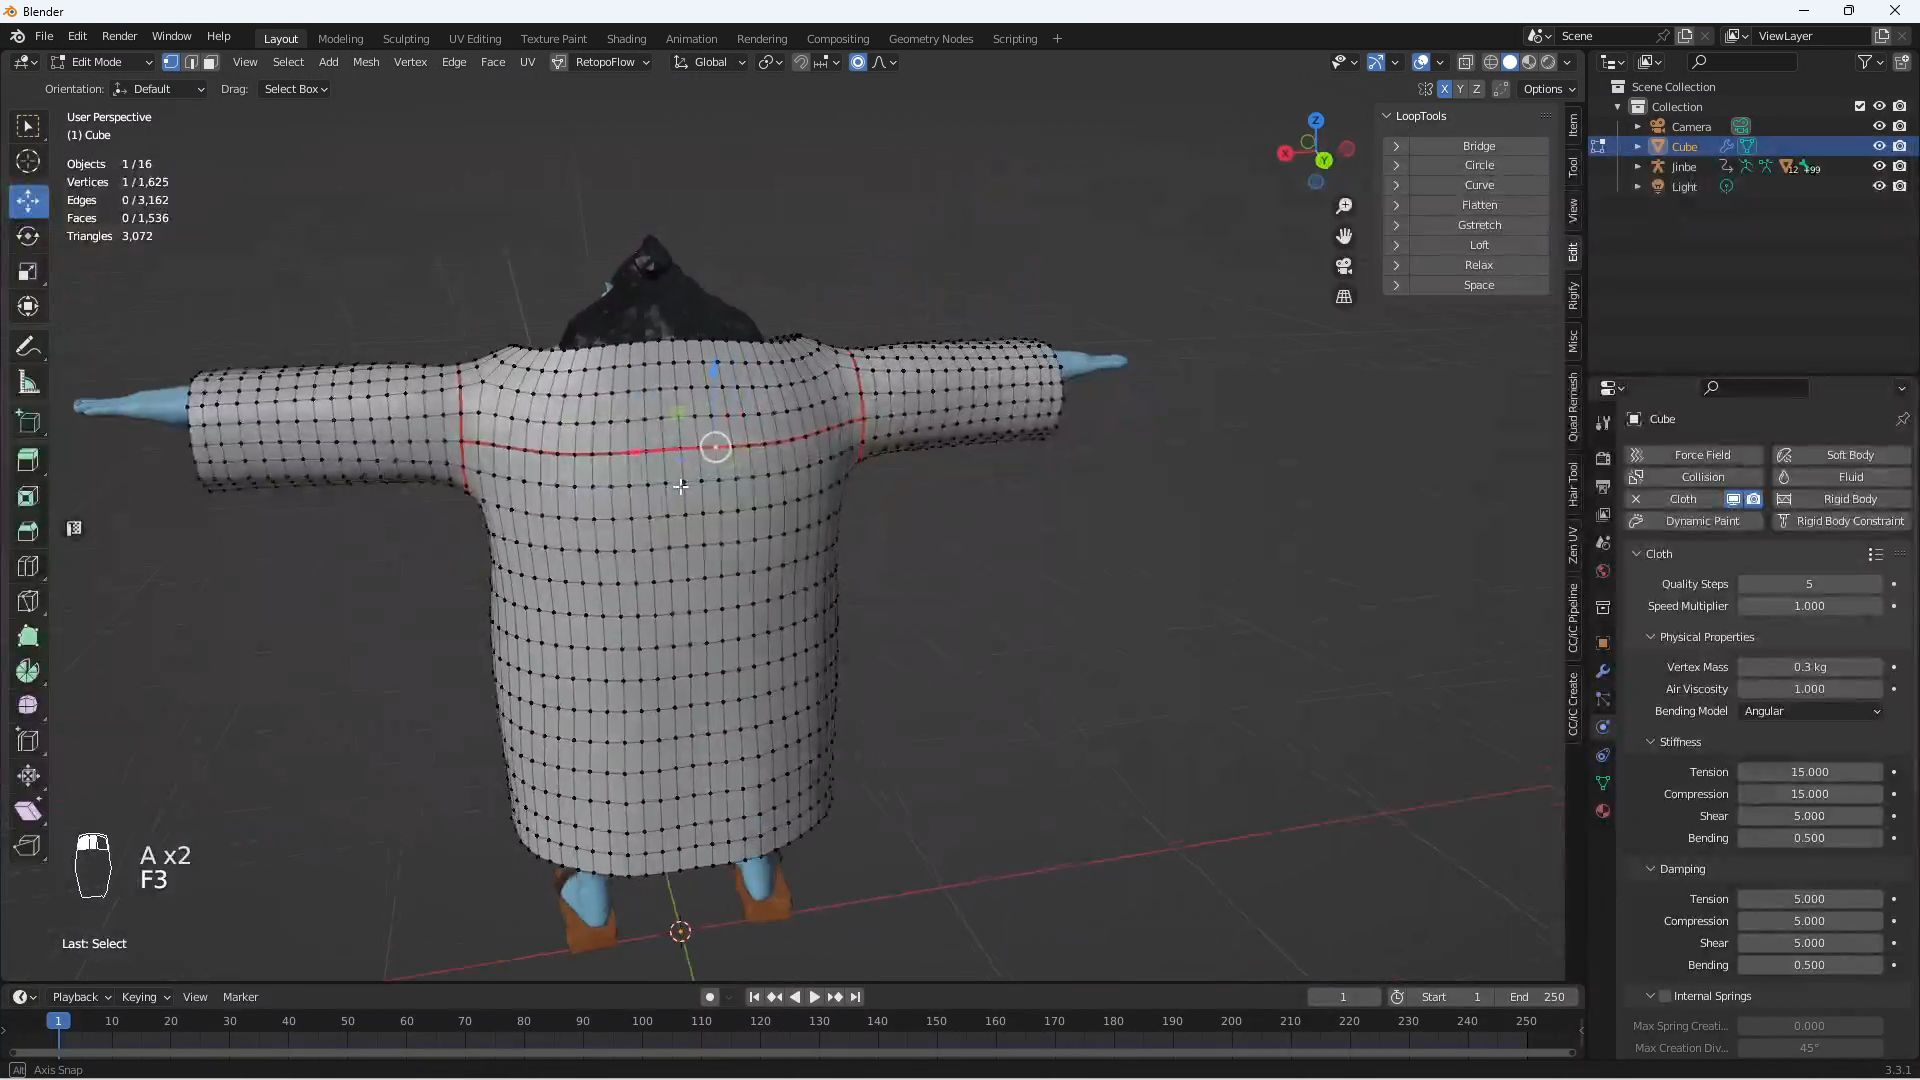
In Blender, I import the character with the Import Character function in CC/iC Blender Tools. Now I start to create the robe by adding a simple cube, then blocking out the shape of the robe. I then add more details with the use of edge loops and subdivisions. Unless you are sculpting on the base mesh or adding fine details to your item or character, you generally want to start modeling with broad shapes and add more resolution and detail as needed.


Creating UVs
After blocking out the shape and adding resolution, I create some seams to generate the necessary UVs, which are essential for most 3D models, especially their utility for this pipeline. Although I’m using a paid addon for some of the UV operations, you won’t need to do this: besides the “Quadrify UV Island” tool, everything else I use is native to Blender.

Using Proportional Editing
Here I break symmetry to close the robe. Closing the robe can be a bit tricky, especially if you’re not used to Blender. I use Proportional Editing with Connected Only turned on to restrict the effect to the mesh and the radius of your selection rather than the entire mesh. Turning up the radius will impact more of the mesh.


Completing Wardrobe
Once the robe is complete, I create a simple belt and cloak. The knot on the belt is the only thing to demonstrate from these items. Instead of tying the belt mesh into a knot, I use three subdivided cubes and polygon strips for the tied portion of the belt. I can sculpt them at a higher resolution and bake out normal maps to make them more authentic in appearance.


Exporting and Importing Accessories in Character Creator 4
This setup is mostly complete, so I export each item as an accessory. Likewise, in Character Creator, I’ll import each item as an accessory.

Transferring Skin Weights
Then I use the Transfer Skin Weights function to convert them into clothing. I usually use the “Dress” preset for items past the knees.

Posing and Second Export with CC4 Blender Pipeline Tool
The clothing is now weight mapped and conforms to character poses, but it’s very rough and needs to be manually adjusted. I export this character with a pose using the CC4 Blender Pipeline Tool plugin, which will also export all the clothing items. Then in Blender, I start a new scene and import the rigged character.


Adjusting Items in Blender
Now, I adjust all the items to prepare them for the Replace Mesh function in Character Creator. I’m only adjusting these for a static scene, still, this process can be used to adjust items for other purposes. It’s possible to make a piece of clothing snuggly fit a highly exaggerated character and it is also possible to swap out the UVs of an item. The only limitation here is the inability to alter the mesh vertex count and vertex order. For example, I must subdivide this cape because the resolution is too low. Once I do this, it will be incompatible with the process and must be imported as a new accessory.

However, if one happens to have access to Marvelous Designer, then the draped version of the existing article of clothing can be imported, even though Marvelous Designer exports triangulated meshes. The vertex count remains the same, so the process is error-free.
Using Multiresolution Modifier to Sculpt
If you plan to sculpt with the Multiresolution modifier then remember to use the Apply Base function in the modifier which will adjust the shape according to the highest resolution. If you are adept at baking texture maps in Blender, you can create a Normal map for the additional sculpted details and import it into Character Creator.

Creating a Brush Texture
Here, I use Affinity Photo, a Photoshop alternative, to create a texture map for my Blender brush. It’s a very basic diamond design, which I will export as a transparent PNG file and use for painting onto the robe mesh.


Once this texturing is done, I save the robe texture as an image for use in Character Creator.

Baking Normal Maps
Now, I switch the render engine to Cycles, as Eevee does not support texture baking. In my opinion, the process of baking maps in Blender is a little confusing and convoluted, but not difficult once you understand it.
The main thing I must do is make sure I’m in Cycles, select my mesh item, go into the assigned shader of that item, and create a new texture map. The texture baking will take place in this image. For normal maps, I go to the multiresolution modifier and make sure the sculpting level is zero, and the render level is on a higher level, such as “3”. Then, I click Bake with Normals and wait for my maps to generate.

Normal maps can be edited like any other image, but with certain rules regarding how the maps work. If you want to remove detail from a normal map, sample the neutral blue in the image and paint over any unwanted distortions.


Exporting Back to Character Creator with CC/iC Blender Tools

With the maps saved and with the sculpting details applied to the base resolution, I export all of these items with the multiresolution modifier disabled. I use the Export for Replace Mesh option in the CC/iC Blender Tools plugin.

Using Replace Mesh to Transfer Vertex Positions
In Character Creator, I apply the changes by selecting the mesh and using the Replace Mesh function, and choosing the exported version of the mesh from Blender. I did some minor work on this rigged character after recording the video, which you can see in the final render.


Conclusion
The Replace Mesh function is a simple, powerful tool, and saves a lot of time — especially for content creators. While I did not demo it here, it can also replace the UVs of an item, which previously could only be done by reimporting the item and setting it up from scratch or using the cumbersome 3DXchange process. It’s a very welcome addition to Character Creator 4, which the CC/iC Blender Tools for Blender is designed to accommodate.

Free Download :
• CC/iC Blender Tools (addon installed in Blender) https://github.com/soupday/cc_blender_tools
• CC4 Blender Pipeline Tool Plugin (addon installed in Character Creator 4) https://github.com/soupday/CC4-Blender-Tools-Plugin
• Character Creator https://www.reallusion.com/character-creator/download.html
Learn more :
• Peter Alexander (Mythcons) https://www.artstation.com/mythcons
• Blender-Character Animation Pipeline https://www.reallusion.com/character-creator/blender.html
• Reallusion https://www.reallusion.com/