
DIGITAL 3D SCULPTOR ÓSCAR FERNÁNDEZ
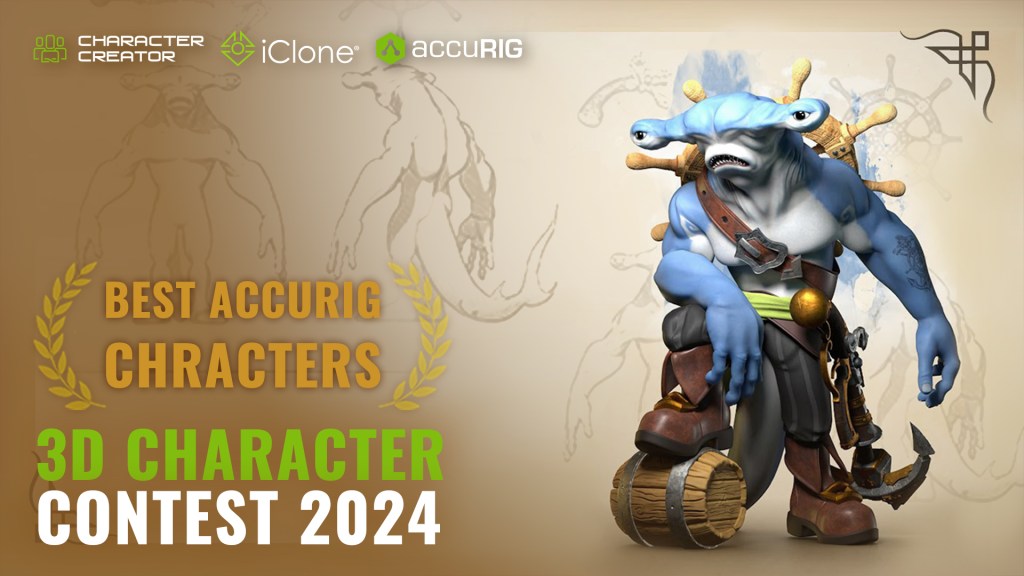
Hi artists! My name is Óscar Fernández, and I am a digital sculptor. My work typically centers on figures for 3D printing and collectibles. It’s an honor to be selected as a winner in the 2024 Reallusion 3D Character Contest, and I’d like to demonstrate my workflow for my winning entry – *The Hammer Jack*. Creating something unique for the contest was a joy, and I’m excited to share that experience with Reallusion readers.
In the 2024 Reallusion 3D Character Contest, I eagerly submitted several entries. Participants had access to free CC3 base characters, fully rigged and ready for animation, letting us focus on crafting unique characters, which was ideal for ZBrush enthusiasts. On the other hand, the arrival of AccuRIG has been a game-changer, allowing me to rig a character created from scratch in ZBrush in just 10 minutes. This category was where I felt the most excitement. I didn’t even sketch out the character beforehand; I simply started with an idea in mind: a pirate hammerhead shark. Let’s see how it turned out!
Block Out Phase
I intended to create a stylized character, so I started with a typical modular blockout to define the character’s proportions and overall look. Using basic shapes with a low polygon count, I defined the character’s volumes. This system allowed me to easily adjust the proportions without getting caught up in the details and losing focus.

Using Dynamesh ZRemesher
During the blockout, I performed a dynamesh to merge all the meshes, begin defining the anatomy, and establish the primary shapes. Once I defined the main shapes, I applied a ZRemesher and added subdivision levels. This system allowed me to switch between lower subdivision levels, which still supported substantial changes to the basic shape, and higher levels that enabled the addition of finer details. After finalizing the character’s shape, I subdivided it once more and continued increasing the level of detail with folds and secondary forms.

ZBrush Polypaint Process
Using the skin shade material, I began manually adding color with Polypaint. I didn’t want the separation between the white and blue parts to be just a gradient, so I blended the transition with an alpha. After applying the base color, I used a system similar to painting the real figures. I simulated zenithal lighting by brightening areas that would be more exposed to light from above and darkening areas more hidden from that light direction. To refine this, I used ambient occlusion or cavity masks to adjust the darkness or brightness of specific areas. For the eyes, I employed radial symmetry and an alpha to achieve a look similar to the real eyes of a hammerhead shark. When the character had eyes, it seemed to start coming to life.


Making Teeth
For the teeth, I simply sculpted a basic shape, turned it into an insert mesh piece, and applied it directly to the surface of the mouth. To check if everything worked well, I proceeded with my first rigging test. Before bringing the character into CC4, I opened Character Creator and exported a base mesh as an OBJ, which I then imported into ZBrush to adjust its size. (Although this can be done using Character Creator Pose Tools, I opted for this method.)
After unwrapping the UVs for each Subtool, I brought the character into CC4 using the new GoZ plugin, which automatically generated the Normal and Diffuse maps, as long as the UVs were set up beforehand. With a simple click, the character was sent to CC4. I imported everything as a prop, and that was it. Then, I performed a quick AccuRIG check with the walking animation, which revealed that the tail was not attached to the body. I defined it as an accessory and attached it to the hips so it moved with them.

Making Hard Surface Accessories
To begin adding storytelling elements to the character, I attached a rudder that the shark always carries on its back. I used ZModeler to define the basic shape, applying ZRemesher as needed, with polygroups to help guide the program in creating a suitable topology. Once the basic shape was complete, I unwrapped the UVs to allow for subdivision and sufficient resolution to apply a wood grain texture.
Since the alpha for the wood grain was horizontally oriented, I aligned the UV islands accordingly to ensure the grain followed the correct direction. After finalizing the sculpt, I moved on to polypaint, following the same process as for the body. I applied base colors, highlights, and shadows, and used cavity and ambient occlusion masks to enhance depth and detail.

Making Clothing
The next step was dressing the character with boots. I chose a simple design to maintain a stylized look, opting for a low polygon count. To keep the mesh structure straightforward, I defined the boots in three parts: the sole, the main boot, and a separate mesh for the folded-over section. For the metal detail, I returned to ZModeler and created a basic shape to use as an insert mesh brush. This approach allowed me to adjust the projection strength so the metal detail aligned seamlessly with the boot’s shape.


After duplicating the mesh for the body, I used “Slice Curve” to make a couple of cuts defining the pants. I smoothed the edges, reduced the polygon count, and completed the basic shape. To create a more natural drape for the garment, I applied physics to let the program handle some of the adjustments automatically. I masked the waist edge and the area around the knees, then fine-tuned the settings and used cloth brushes to add some extra wrinkles for realism.

Making Accessories
For the remaining accessories, such as the waistcloth, belts holding the anchor, and the pistol, I extracted them from the original body mesh, adjusted them, and ran them through ZRemesher. The hard surface elements were created simply with ZModeler. By separating the faces into different polygroups, I quickly achieved the desired shapes, combining ZRemesher and “Polish by Groups” to maintain volume and ensure smooth, clean shapes.

I wanted the accessories accompanying the character to help tell their story, so I decided to design a gun that shoots anchors, with the anchors dragging enemies to the depths. The design of the gun was developed on the fly, drawing inspiration from various sources and refining it repeatedly until I arrived at a shape I was satisfied with.

I wasn’t much of a fan of the Knife Curve tool, as it usually caused the program to crash. However, I started experimenting with it for the metal parts protruding from the weapon’s body, and I really enjoyed the creative freedom that the knife curve tool set offered.
Exploring CC AccuRIG
Next up was the rigging process. When I created a character in an A Pose, I tended to give it a more natural pose. I noticed that AccuRIG worked much better when the arms were fully extended, more or less in the same plane as the back. The hands also performed better when they were in a more rigid position, with a flat palm and fully stretched fingers. So, I modified the character using “Transpose Master to find that more rigid position that AccuRIG seemed more comfortable with.
Once I had all the accessories with the Polypaint done and the UVs extracted, I sent everything directly to CC4. The plug-in extracts both the normal maps and the color information, allowing everything to be displayed in high quality in CC4. By sending all the parts that would move with the character, such as pieces of clothing, I avoided any issues with their behavior, as they adjusted to the rigging of the body. For the rigging, I selected the character and started placing the joint points in the right spots. Thanks to the help of diagrams, it was super easy, even for someone who had never done it before.

Then, I sent the accessories even though there were several Subtools for each one. It wasn’t necessary to merge them, as all those parts could be grouped into a single element. I adjusted the position of the accessories and linked them to the corresponding body parts, like the spine for the helm.

Since the anatomy of this character was a bit unusual, I could define variations in the base posture, such as the separation of the arms and legs or whether the character was more or less hunched over, to improve the behavior of the animations and poses. To add the gun, I followed the same process I used for the helm.
Posing with AccuRIG
Next was the most fun part of the whole process. Anyone who has posed in ZBrush knows it can be a real ordeal. It’s a slow process, and you have to think carefully before moving your character. What I loved about this workflow was that we could do a lot of tests in just minutes. By taking a pose from the Pose Library or selecting a specific frame from a particular animation, we achieved dynamic poses quickly and in a fun way. It wasn’t the real sacrifice that posing in ZBrush can be.

The hand position is another gem within this workflow. The Character Creator Library likely has almost any pose we need. By taking a pose from the library, we can still manually adjust it to make it unique or achieve a better result. This applies to both hand positions and body poses. Next, I grabbed my little figure and started playing around.

The new feature in GoZ Plus allows us to combine it with Character Creator Pose Tools. When we bring our characters back to ZBrush, we activate the “relink mesh changes” in a new layer box, as well as the “current pose” box. The process then executes automatically. In ZBrush, everything stays as it was—Subdivision Levels, Polypaint, etc.—and we also get a new layer with the information of our pose.
With Character Creator Pose Tools, we can store all the positions in the rack simply by pressing the “Convert Layers to Pose” button. This way, we can have all the poses of our character in a single project and access them with the press of a button. Since each pose is just a layer, we only need to activate the “Edit Current Pose” button, which puts the layers of all the Subtools corresponding to that pose into recording mode. From there, we can continue manually adjusting the anatomy or adding wrinkles to the clothing that would only appear in that pose, without affecting the others.
If we wanted to add fabrics to our character that move independently with the character’s movement, we would simply send it to CC4 as a flat plane. They shouldn’t have thickness, and once the weights are defined using a mask, we’re done. However, in this case, I created the fabrics as I normally would—with their thickness, folds, etc.—then added a layer, naming it according to the specific pose, and adjusted it manually.
Final Render in Marmoset Toolbag
On this occasion, I rendered in Marmoset Toolbag 4 and took my laziness to the absolute extreme. I exported the high poly mesh of each pose directly as an FBX file. With the Subtools organized by materials, so I could modify them directly in Marmoset. I created a new material for each group of materials and took advantage of the Polypaint we had already done in ZBrush.
By selecting vertex color in the albedo map, I was able to get all the color information. Then, I adjusted other parameters like roughness, metalness, SSS, etc., for each material manually, or modified some of the existing materials from the library. After setting up the lights and adjusting both the position and the settings of each one, we were ready to render. And here’s our final look!

Related Posts
- Winner Select: Mastering Mysterious Character with ZBrush Face Tools
- Reallusion’s 2024 3D Character Contest – Meet the Winners!