In Part 2, we covered the ZBrush and GoZ Plus workflow for sculpting the body and suit foundations, managing transferred micro-details, and preparing subdivision-ready meshes for Character Creator 5.
For this part 3 article, the focus shifts to hard-surface asset creation. We’ll build sci-fi armor and accessories such as chest plates, layered panels, and boots using masking, extraction, Dynamesh, and manual retopology workflows, then prepare all assets for clean integration back into CC5.
Pablo Munoz Gomez
Hello, my name is Pablo Munoz Gomez, and I’m an enthusiastic 3D concept and character artist who is deeply committed to the spread of knowledge. My expertise lies in 3D sculpting, visual development, and engaging in mixed-media projects. I take immense pride in being the creator of Pablander Academy, serving as an outlet for showcasing my work, sharing my workflows, and assisting fellow artists in honing their skills across a wide range of subjects.

Creating the Chest Plate with Masking and Extraction
When building armor that needs to hug the body, the fastest and cleanest approach is to work directly on the highest subdivision level of the base mesh and use masking as a blueprint. Start by enabling symmetry and using Mask Lasso to block out the overall silhouette of the chest plate. Once the shape feels right, refine the edges with a sharper masking brush to create crisp panel borders.

With the mask finalized, go to SubTool → Extract. Set the preview thickness to zero and accept the extraction. This generates a clean, single-sided mesh that perfectly conforms to the body surface.
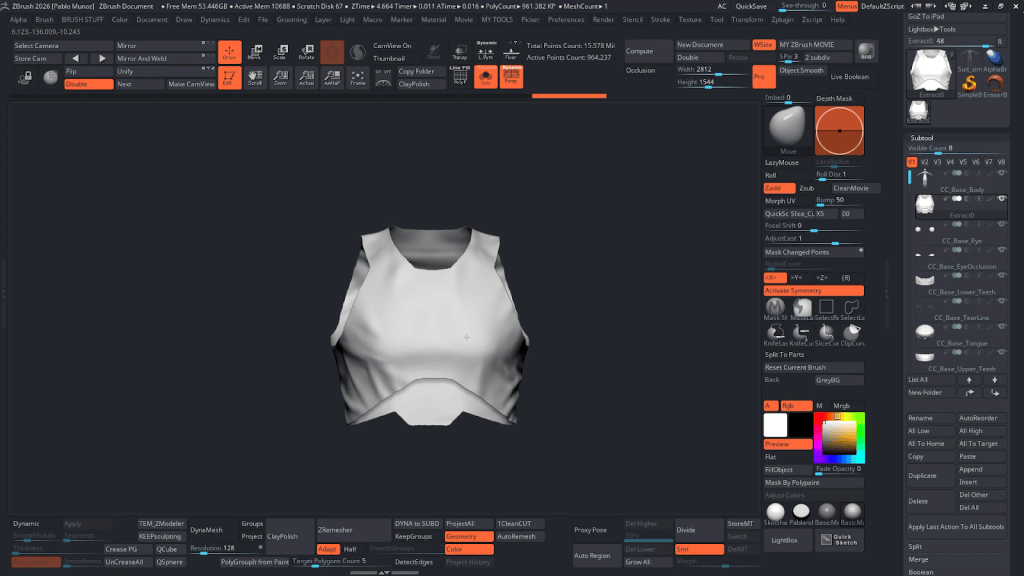
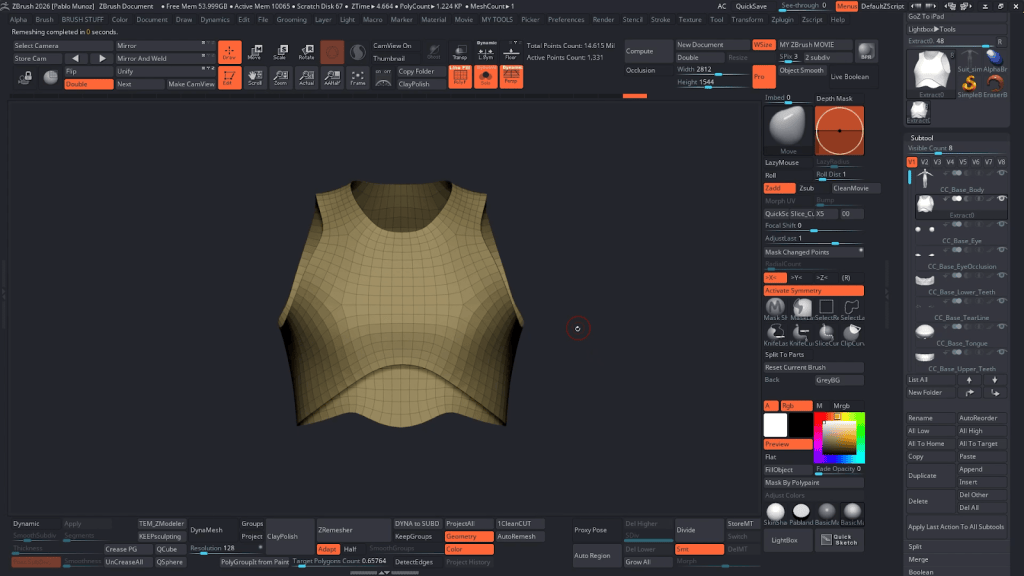
From here, run a quick automatic retopology pass to clean up the geometry. This gives you a solid base for adding thickness, subdivision, and further detailing.
Rapidly Create Additional Panels
For layered armor designs, there’s no need to repeat the entire extraction process every time. A faster method is to duplicate an existing plate, subdivide it, and then cut new panel lines directly into the duplicate. Use selection brushes to isolate the desired polygroup and delete the rest. The result is a new, conforming armor piece with clean topology, which is functionally identical to a fresh extraction.
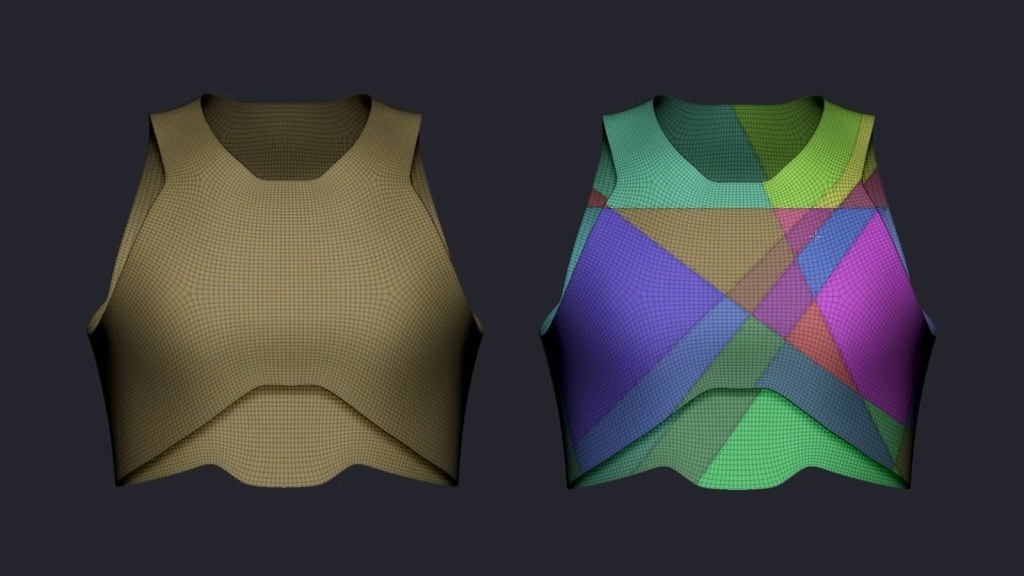
After a second retopology pass, the panel is ready to stack cleanly on top of the underlying plate. Assigning different display colors to each armor layer is a simple but effective way to keep the hierarchy readable when working with multiple overlapping components.
Adding Thickness and Smoothness
At this stage, the armor pieces are still single-sided. To turn them into functional geometry, thickness is required. Enable Dynamic Subdivision under Geometry to preview both smoothness and thickness interactively. For the final result, either apply thickness using an inflate or inner-extrusion workflow, or convert the dynamic preview into real geometry and polish the edges.
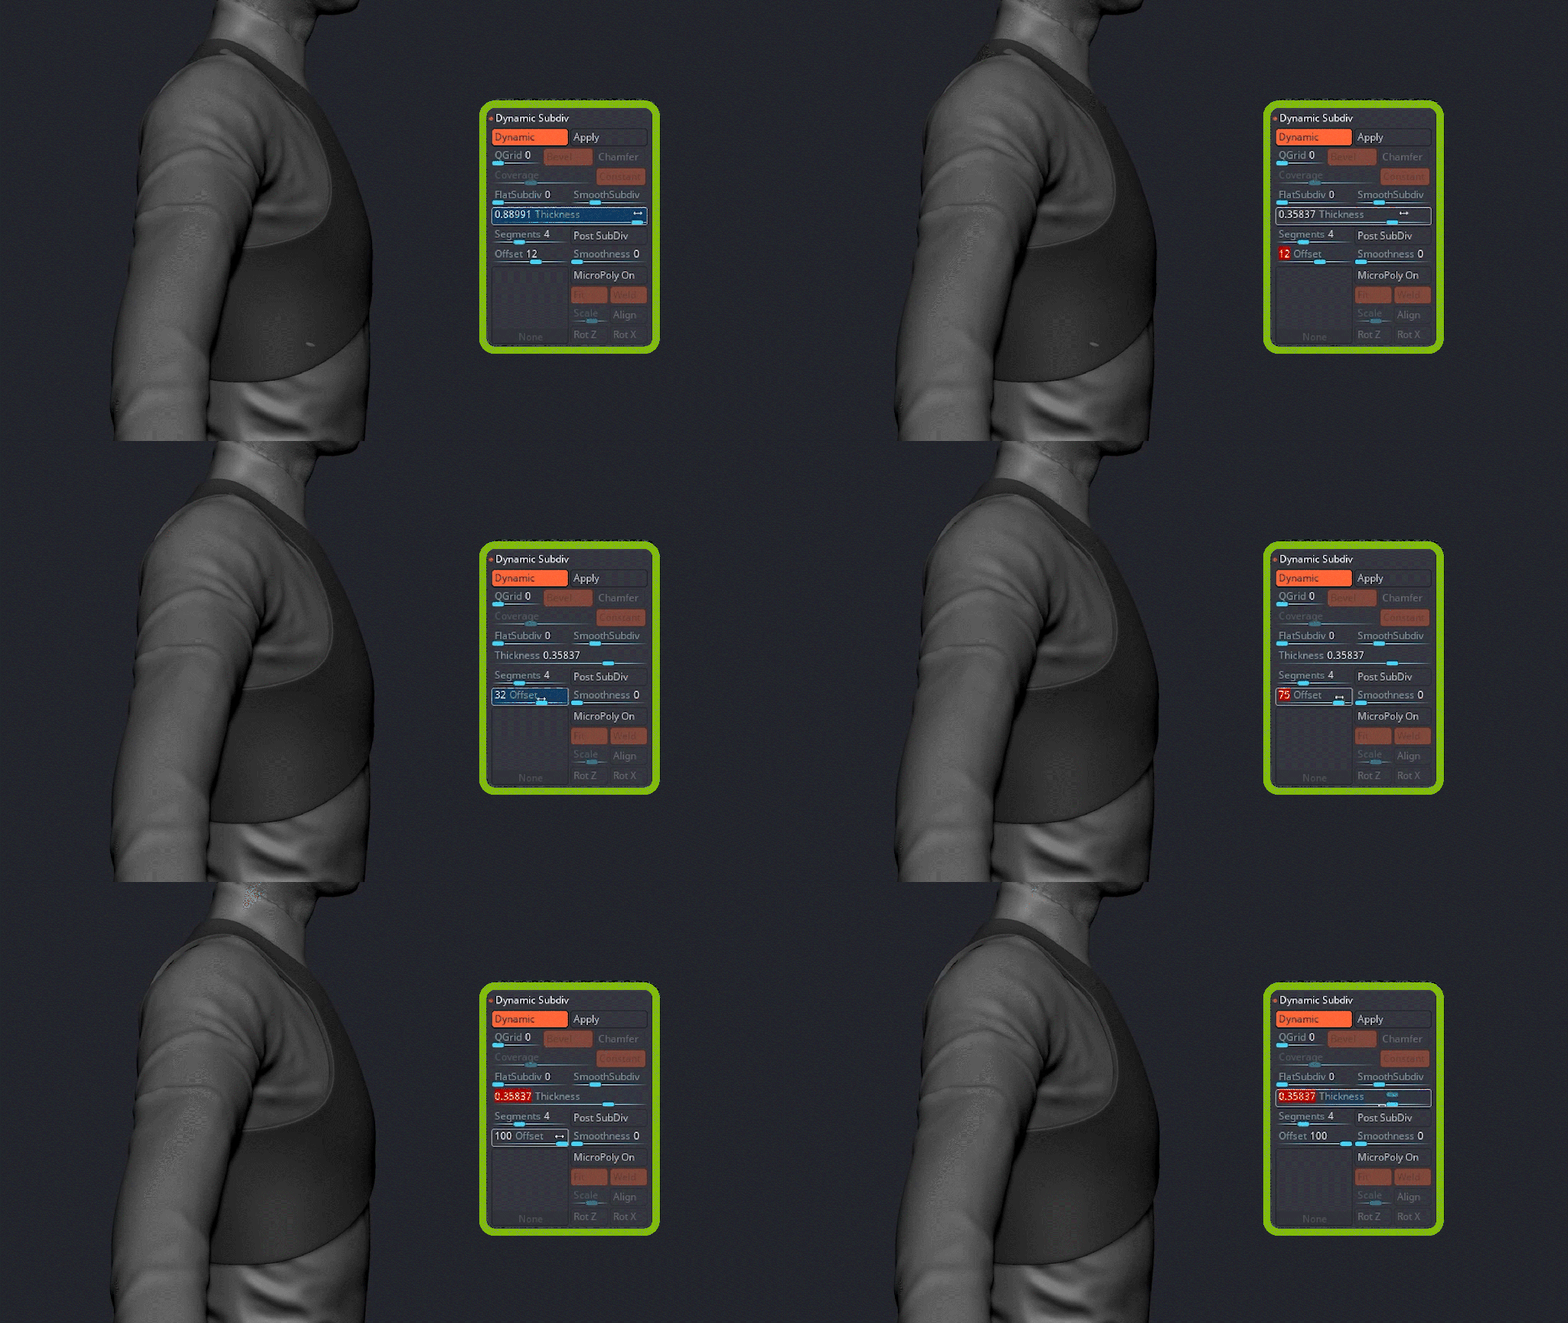
Once one side is complete, mirror and weld the mesh to quickly finalize both halves. These techniques cover the majority of hard-surface armor panels in this project.
Two Design Principles for Believable Armor
When designing sci-fi armor, I follow two guiding principles. First, keep things simple and separate. Even complex designs are best broken down into clear, isolated components, with each part existing as its own subtool. This dramatically simplifies editing, polishing, UV layout, and later texturing. Second, design with function in mind. Even stylized armor should feel believable. Plates should protect the torso while still allowing movement at the ribcage and shoulders. Letting function inform placement, thickness, and articulation helps sell the design far more effectively than surface detail alone.

A Different Approach for Boots: Dynamesh and Freeform Sculpting
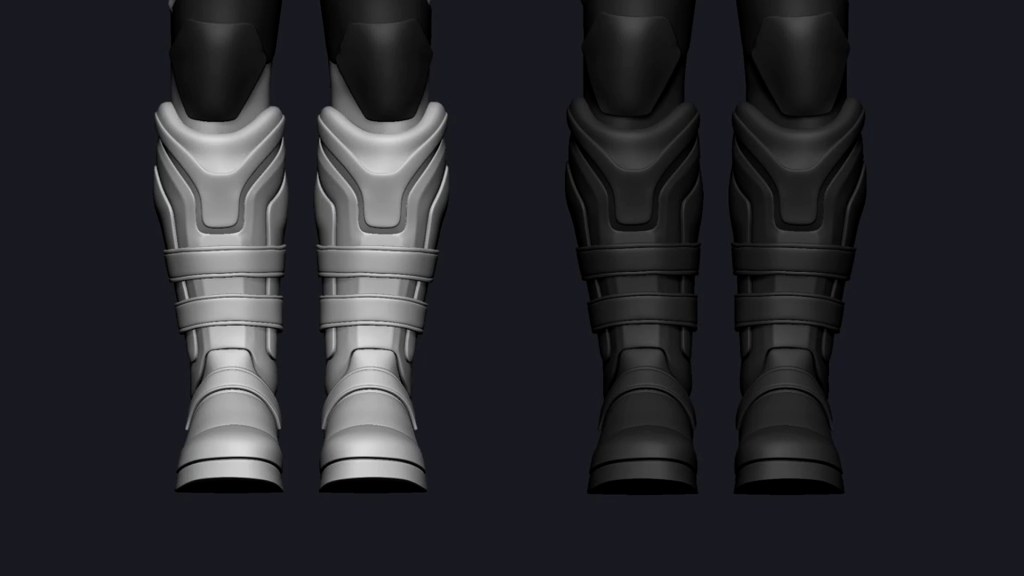
For assets where rapid form exploration is more important than clean topology, a different approach works better. I clone the main tool, delete unnecessary areas, and Dynamesh the leg and foot into a sculptable volume. Dynamesh allows you to explore shapes freely without worrying about topology. I usually separate the sole into its own Dynamesh object so I can iterate on the upper and bottom independently. Using cutter brushes, I sketch panel divisions directly onto the sculpt — essentially drawing in 3D instead of 2D.

Manual Retopology with ZSphere and Polygroups
Once the boot silhouette is locked in, it’s time to rebuild clean topology.
Append a ZSphere and switch to its topology tools to manually place points and connect quads. This approach gives full control over edge flow and ensures the topology follows the sculpted volume precisely.
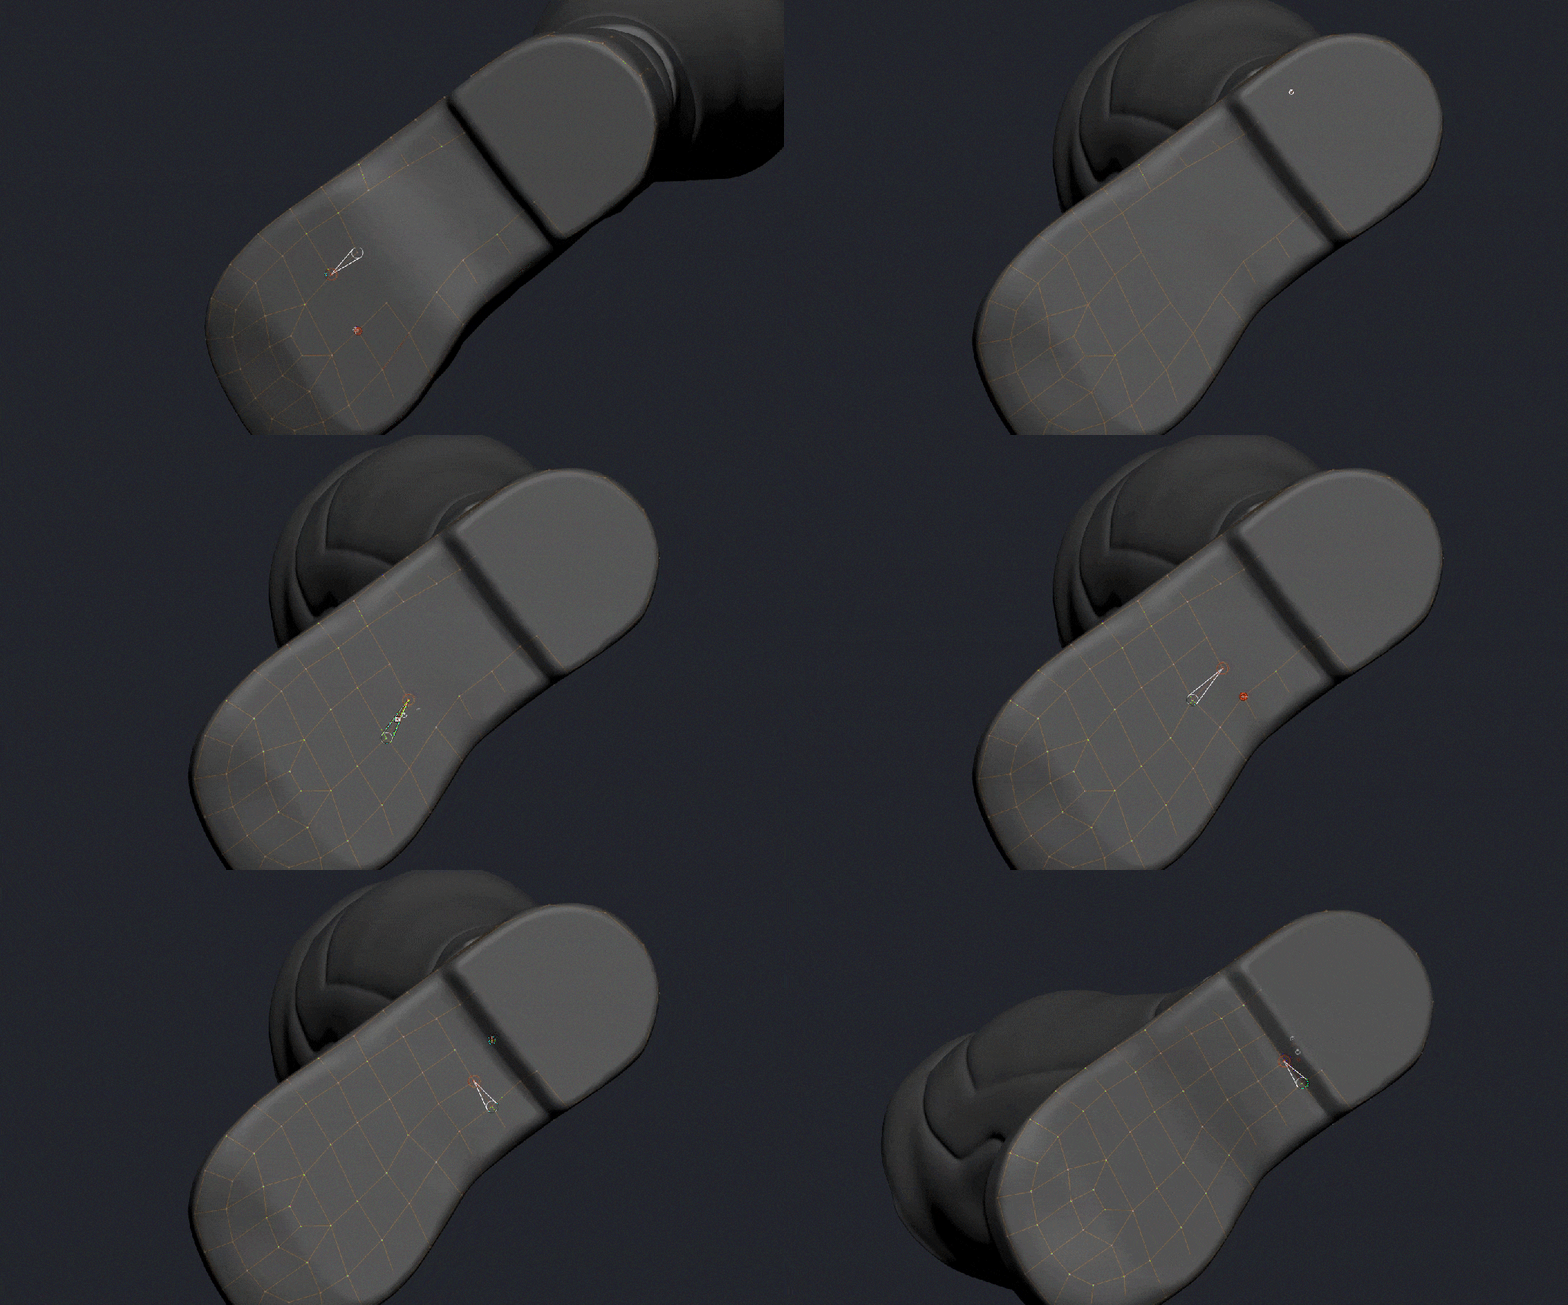
After creating an adaptive skin, set Dynamesh to zero and use the topology layout to assign polygroups. These polygroups become the foundation for further panel extraction and detailing. Using ZModeler, you can QMesh or extrude specific polygroups, vary thickness, and add edge loops where sharper corners are needed.


Once one boot is complete, mirror and weld it to finish the pair, then add straps or buckles as separate modular elements.
Preparing Armor Assets for Character Creator 5
With all armor geometry finalized, the next step is bringing everything back into Character Creator 5. CC5 significantly streamlines this stage of the pipeline. Multiple subtools can be reorganized into logical layers and groups, improved auto-skinning minimizes deformation cleanup, and export-friendly options preserve mesh separation and polygroups for clean texture baking. Spending a bit of time here to organize folders, label materials, and structure assets clearly pays off later, saving hours during texturing and look development.
With all armor geometry finalized, the next step is bringing everything back into Character Creator 5. CC5 significantly streamlines this stage of the pipeline with:
- Multiple subtools that can be reorganized into logical layers and groups.
- Improved auto-skinning reducing deformation cleanup
- Export-friendly options for preserving mesh separation and polygroups for clean texture baking.
Spending a bit of time at this stage to organize folders, label materials, and clearly structure assets will pay off later, saving hours during texturing and look development.
Coming Up in Part 4
In the next chapter, we’ll generate clean UVs for all sculpted assets using Rizom UV, then transfer everything back into Character Creator 5 with GoZ Plus. We’ll fix deformations, finalize skin weights, and fully prepare the character for texturing in Substance 3D Painter.
Related Posts
- CC5 x ZBrush: Create a HD Sci-Fi Vanguard (2/7)- Sculpting the Body and Simulate the Nano Suit
- CC5 x ZBrush: Create a HD Sci-Fi Vanguard (4/7)- UVs Unwrapping, Asset Transfer, and Skinning
- From Concept to Motion-Ready Alien Character: ZBrush and CC5 HD Step-by-step Workflow
- Building a Custom Vampire Character from Scratch with CC5 and Unreal Engine 5.7