In Part 4, we generated clean UVs, transferred all sculpted assets back into Character Creator 5, fixed deformations, finalized skin weights, and validated the character for texturing.
For this part 5 article, the focus shifts entirely to Substance 3D Painter—exporting from CC5, setting up UDIMs correctly, baking mesh maps, and building non-destructive materials for the suit and gear.
Pablo Munoz Gomez
Hello, my name is Pablo Munoz Gomez, and I’m an enthusiastic 3D concept and character artist who is deeply committed to the spread of knowledge. My expertise lies in 3D sculpting, visual development, and engaging in mixed-media projects. I take immense pride in being the creator of Pablander Academy, serving as an outlet for showcasing my work, sharing my workflows, and assisting fellow artists in honing their skills across a wide range of subjects.

Exporting from Character Creator 5 to Substance Painter
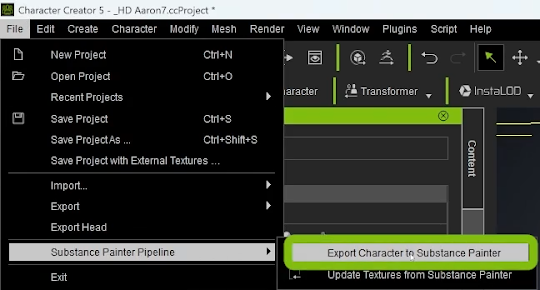
From Character Creator 5, I open the File menu and use the Substance Painter pipeline. After choosing an export location, CC5 generates the OBJ along with all required textures and metadata that Painter can read directly. This automated export saves a significant amount of setup time, as per-material assignments and texture references are already prepared correctly for Painter.
Import into Substance 3D Painter
When importing the OBJ into Substance 3D Painter, the New Project settings are critical. I always double-check the following settings:
- Normal map format is set to OpenGL.
- Use UV Tile workflow (UDIMs) is enabled.
- Preserve UV Tile Layout per Material is checked.
- Enable Painting Across Tiles is turned on.
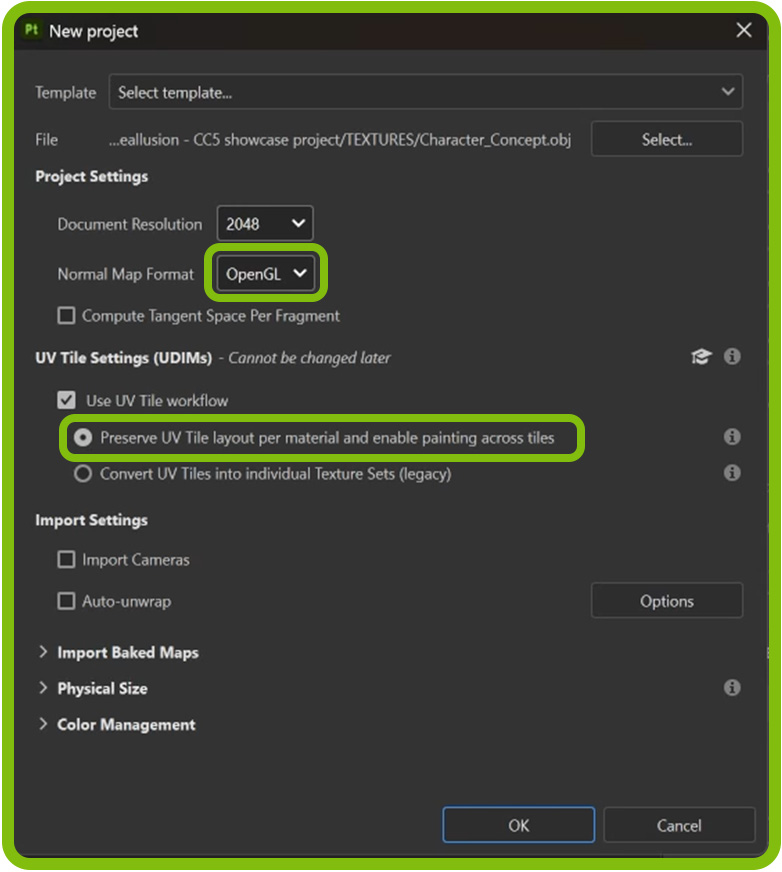
With these settings, the character appears in an A-pose, and each material shows up as its own Texture Set, allowing for precise, per-material painting across UDIMs.

Selective Reuse of CC5 Textures
In some cases, I selectively reuse textures from CC5 while rebuilding the rest inside Painter. For this project, I keep the high-quality head textures and recreate the suit and gear from scratch. To do this, I select the head texture set and create a Fill Layer named “Head”. I then import the CC5 head textures into the shelf and manually assign:
- Diffuse map → Color
- Normal map → Normal
- Roughness map → Roughness
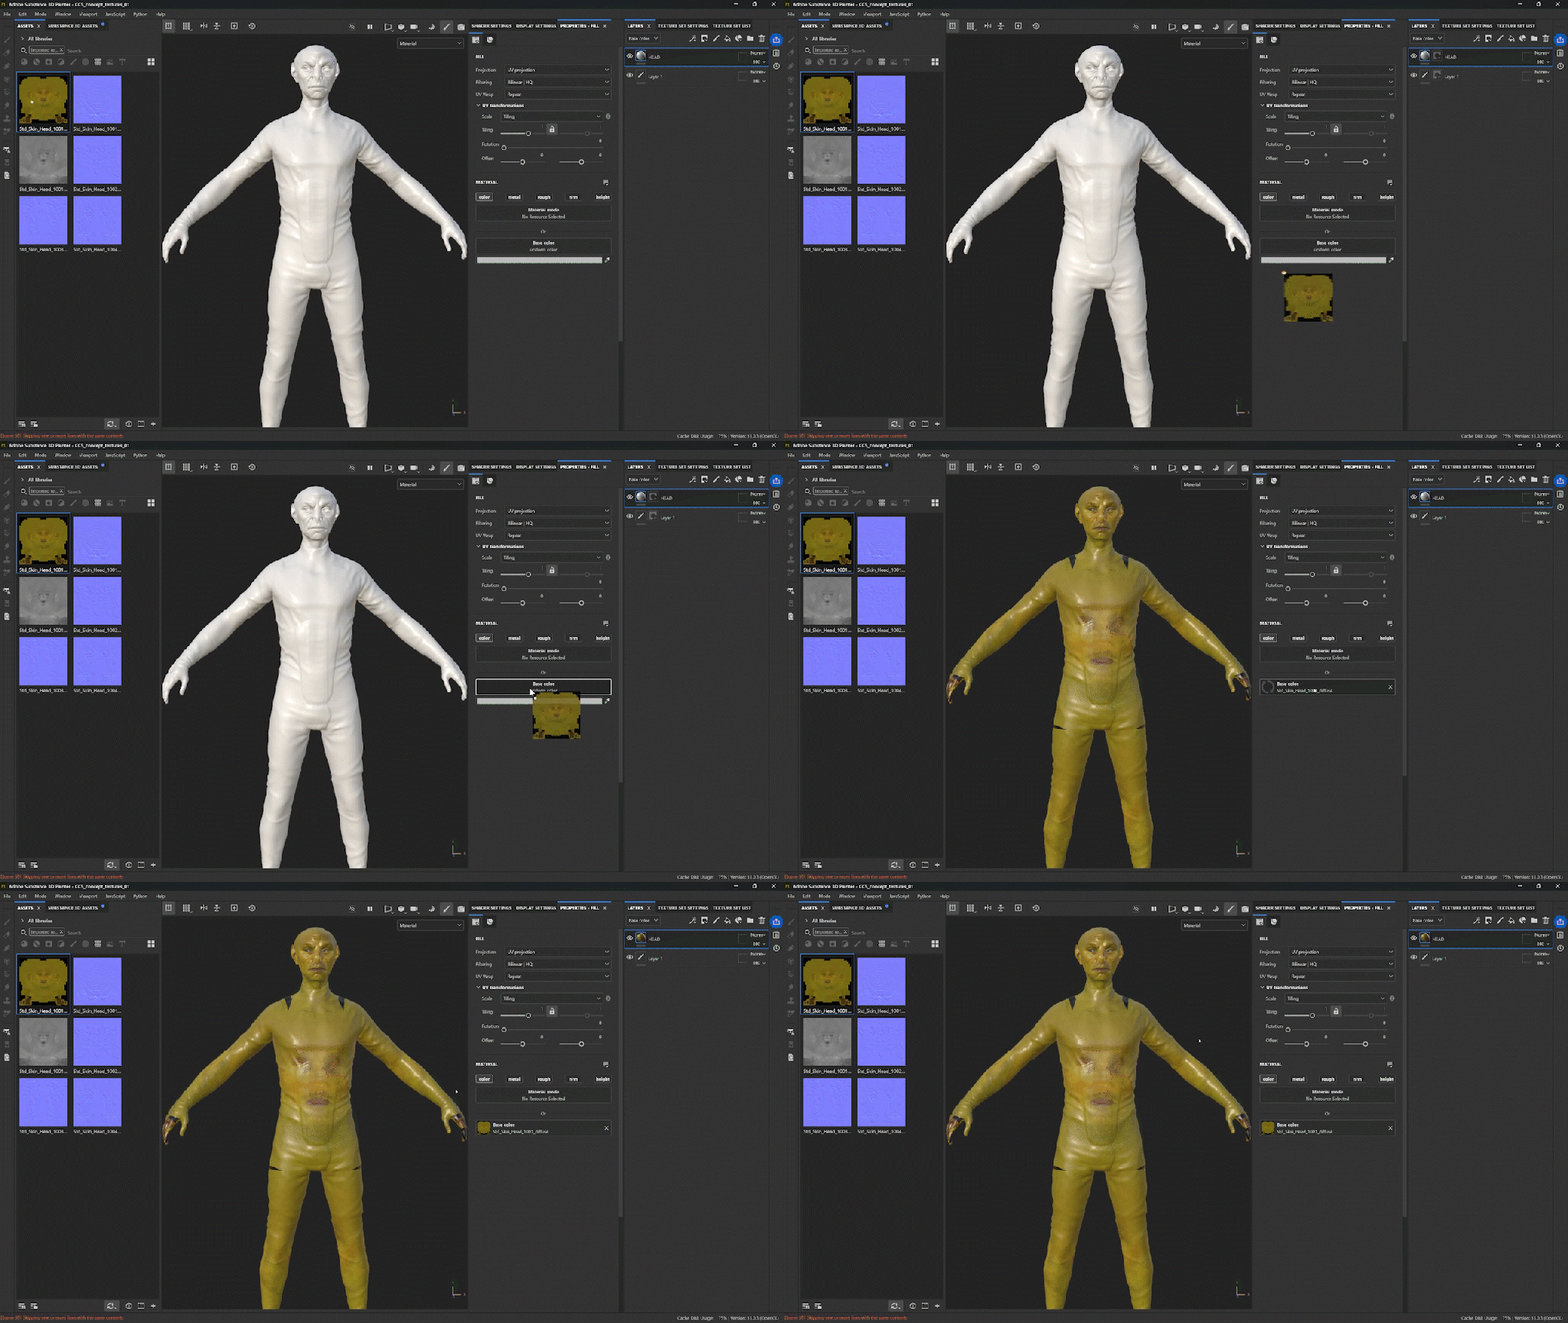
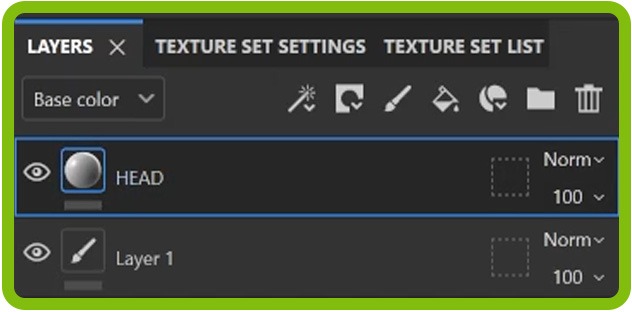
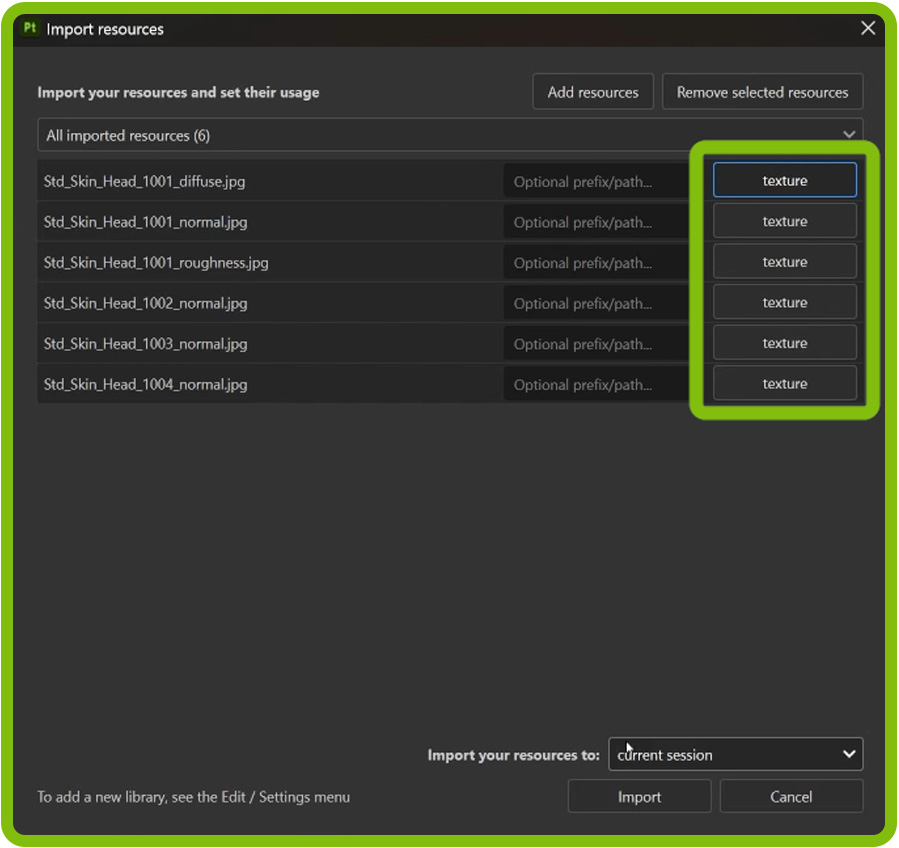
Because the mesh uses UDIMs, the head texture may appear repeated across tiles at first. To fix this, I open the tile list and disable all tiles except the one corresponding to the head.

Baking Mesh Maps for Generators and Masks
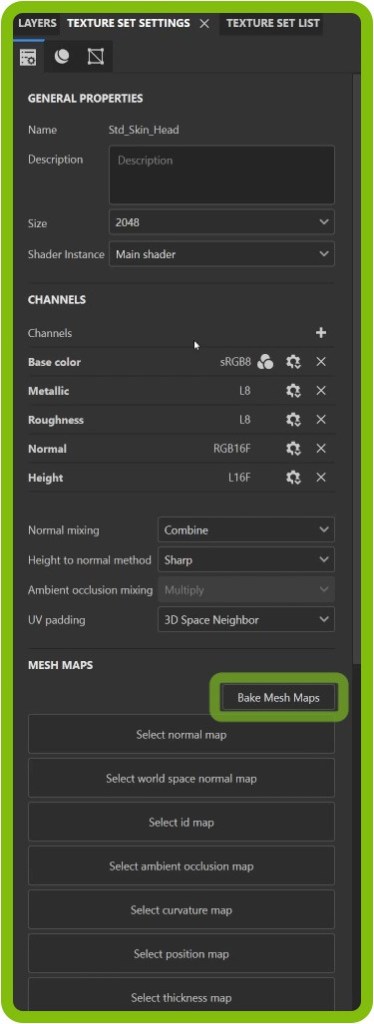
Baking mesh maps is essential, as generators such as curvature and ambient occlusion depend entirely on these maps. From Texture Set Settings, I open Bake Mesh Maps and follow a few key rules:
- Disable texture sets that don’t need baking.
- Set output resolution to 4096 for clean detail.
- Click Bake Selected Textures.
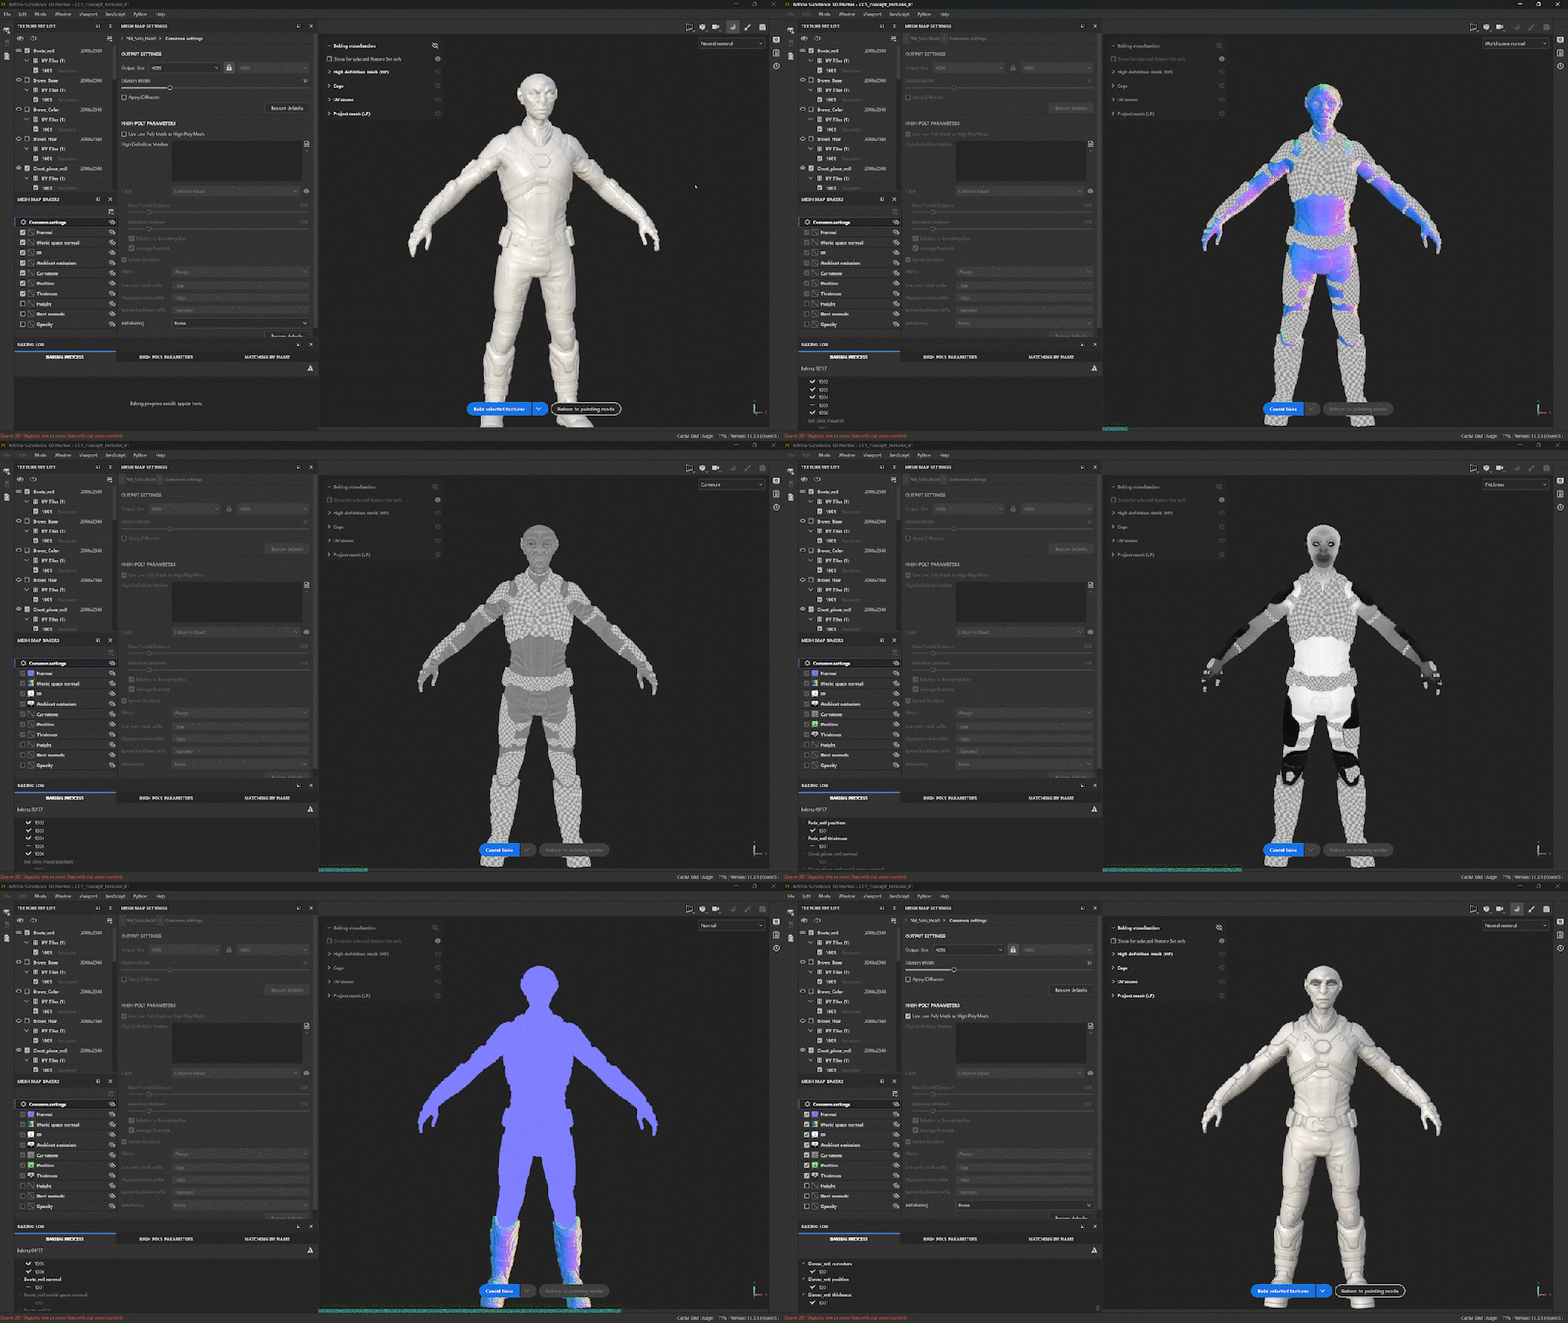
For thin or single-sided geometry, such as eyebrow planes, ambient occlusion can become too aggressive. When that happens, I rebake AO only and switch the self-occlusion mode from Always to Only Same Mesh Name. This prevents unwanted cross-mesh shading and produces cleaner, animation-friendly results.
Establish a palette and experiment with materials
I start material work by exploring material families and surface patterns, rather than locking colors too early. Built-in Painter materials and assets from the Substance 3D Asset Library are ideal for rapid experimentation.

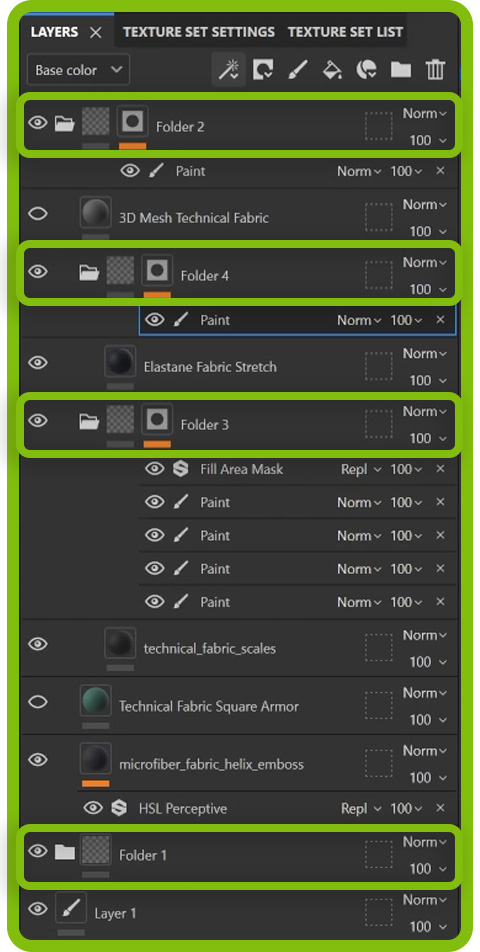
I drag candidate materials into the layer stack, preview combinations, and group selected materials into a single folder. To isolate the suit, I add a folder mask and paint black over the head area. Anything inside the folder then affects only the suit, keeping the workflow clean and organized.
Non-Destructive Patterning with Path Tool and Fill Area Mask
For padded panels and fabric joins, I rely heavily on a non-destructive setup. I start with a technical fabric material, add a mask, and use the Path Tool to draw panel shapes. The key advantage is flexibility: points can be moved at any time to refine shapes.

The Fill Area Mask automatically fills any closed path and updates dynamically as the path changes. This allows for rapid iteration without committing to destructive edits.
Using Anchor Points for Consistent Details
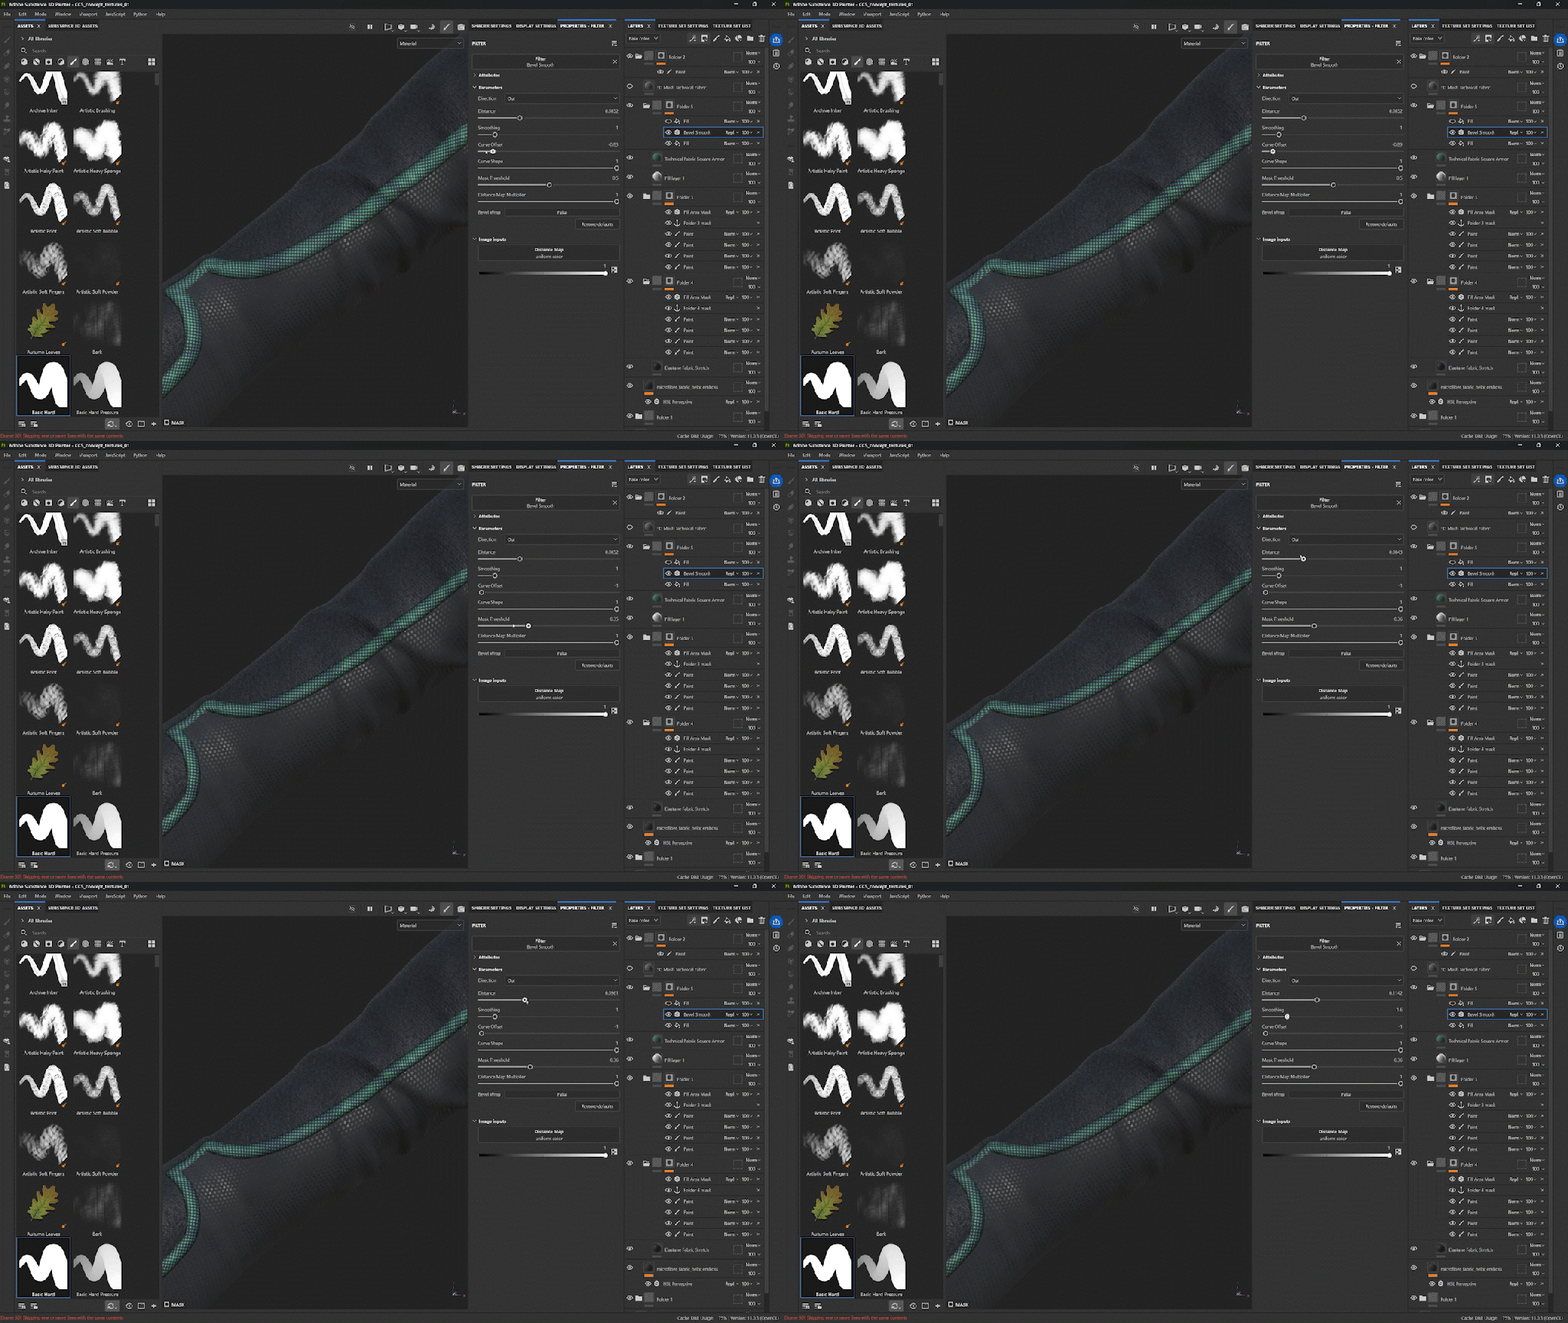
To add borders, seams, or tubing around panels, I use Anchor Points. I place anchors on the path-based shapes and reference them inside the masks of secondary materials, such as colored edges or piping. Anchors are placed below the fill area mask so they reference only the intended shapes. If I later adjust the panel shape, all dependent details update automatically. This keeps the entire material system flexible and easy to iterate on.

Why the CC5 ↔ Painter Pipeline Matters
The Character Creator 5 Substance Painter pipeline significantly reduces manual errors. OBJs, materials, and UDIM layouts transfer cleanly, even for assets created entirely in ZBrush.
This setup allows me to reuse CC5 textures selectively, while still giving full creative control over the suit and accessories inside Painter. The result is a non-destructive workflow that supports rapid iteration without breaking consistency.
Coming Up in Part 6
In the next chapter, we’ll refine materials further—adding smart materials, emissive accents, painted normal details, and using instanced layers to maintain consistency across the entire armor set. We’ll also export textures back into Character Creator 5 and fine-tune the look before rendering.
Related Posts
- CC5 x ZBrush: Create a HD Sci-Fi Vanguard (4/7)- UVs Unwrapping, Asset Transfer, and Skinning
- CC5 x ZBrush: Create a HD Sci-Fi Vanguard (6/7)- Refining Materials and Look Development
- From Concept to Motion-Ready Alien Character: ZBrush and CC5 HD Step-by-step Workflow
- Building a Custom Vampire Character from Scratch with CC5 and Unreal Engine 5.7