首頁 » Page 46
realistic digital human by character creator and texturing XYZ

Making Realistic Emotive Characters using VFace & Headshot 2

Reallusion, the proud creator of iClone, Character Creator, and corresponding ZBrush plugins unveils the remarkable synergy between TexturingXYZ’s VFace models and Headshot 2.0, demonstrating how they harmoniously converge to craft an impeccably rigged character, brimming with personality and versatility.

Usually, transforming static character sculpts into animatable figures demanded substantial time and effort from character artists — a process that also necessitated extensive training, knowledge, and skill sets to execute proficiently. The challenges are alleviated with the arrival of Headshot 2.0, offering a quick and seamless pathway for conversion of 3D mesh to 3D animatable head. Continue reading to discover how this groundbreaking workflow accelerates production schedules, navigates around technical intricacies, and grants you the freedom to channel your energies into the creative aspects of your project.

Preparation of Source Assets

For this demonstration, we will be using the “Mykhaylo #115” VFace asset.

VFace asset “Mykhaylo #115”

In Zbrush, open the VFace file and export it as a “XYZ_head” Subtool for ZBrush.

For a better user experience, we’ll also need to export a low-poly version of the VFace for use with Headshot 2.0. Here, I am reducing the model to SDiv3, which lets me strip away some of the taxing details while keeping the contours of the mesh intact. Next, we’ll need to export a high-poly of the VFace as a reference model for the baking process by upping the model to SDiv6.
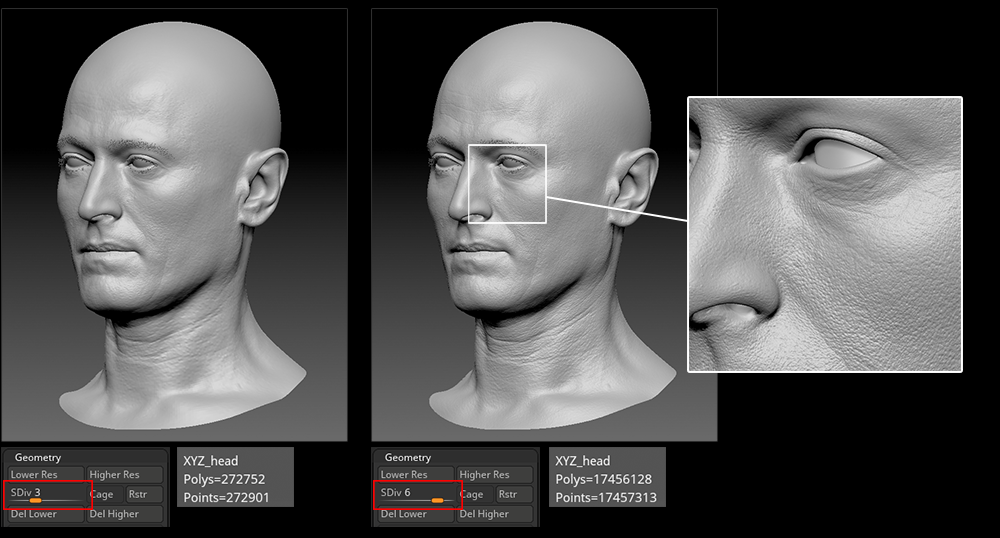
*Opting for greater subdivisions will result in more intricate details within the baked texture maps. However, it’s important to note that this choice will significantly extend the time required to bake the textures. Additionally, bear in mind that the ultimate resolution is constrained by the chosen texture resolution.

Using Headshot 2

Importing the Mesh

Drag the SDiv3 mesh into the Character Creator viewport, and then access the material texture channels (‘Modify > Textures’). From there, simply drag and drop the texture files into their respective channel slots.

We now proceed to open the Headshot 2 panel in order to utilize the newly introduced ‘Mesh to CC’ feature. To do this, simply click on the ‘MESH’ button located near the upper part of the interface and then follow the instructions provided below (indicated in red in the following illustration). Once you have properly configured the mesh accordingly, click the ‘Start Head Generation’ button to begin the procedure.

Deploying Alignment Points

In the initial phase, the left viewport displays the CC base model, adorned with multiple marker points, each marked with its unique identification number. On the opposing right side, the prior imported source model is displayed. For the model fitting procedure, HeadShot 2 will analyze the alignment points between these two models.

To ensure precise outcomes, it is essential to apply corresponding alignment points on the VFace model, aligning them with those on the CC base model on the left. Utilizing the auto-deployment feature is advisable, allowing HeadShot 2 to determine the initial placement of the 24 foundational points. Subsequently, manual adjustments can be made to swiftly establish the matching feature landmarks.

Next, manual point deployment will be needed to complete other features like the ears, neck, etc.

Model Selection

In stage two of the process, you can discard areas of the source mesh that shouldn’t be factored into the model fitting process using ‘Effective Area’. Essentially, we are allowed to hide mesh faces at this step and let HeadShot 2 compensate for the missing parts with auto-generated geometry. 

During the second stage of the process, you have the option to exclude specific regions of the source mesh that are not relevant to the model fitting process. In essence, you can conceal mesh faces at this juncture, and HeadShot 2 will intelligently generate geometry to fill in the gaps caused by the hidden portions. This capacity to intelligently fill the absent portions of the geometry proves invaluable when dealing with fractured or flawed source meshes.

There are three preset options for ‘Effective Area’ in HeadShot 2, which allow for the swift concealment of geometry intended for removal, each tailored to a different scenario. Given that we began with intact source mesh that had no discernible flaws, we will opt for the comprehensive area selection located at the far right.

Using the Projection Brush

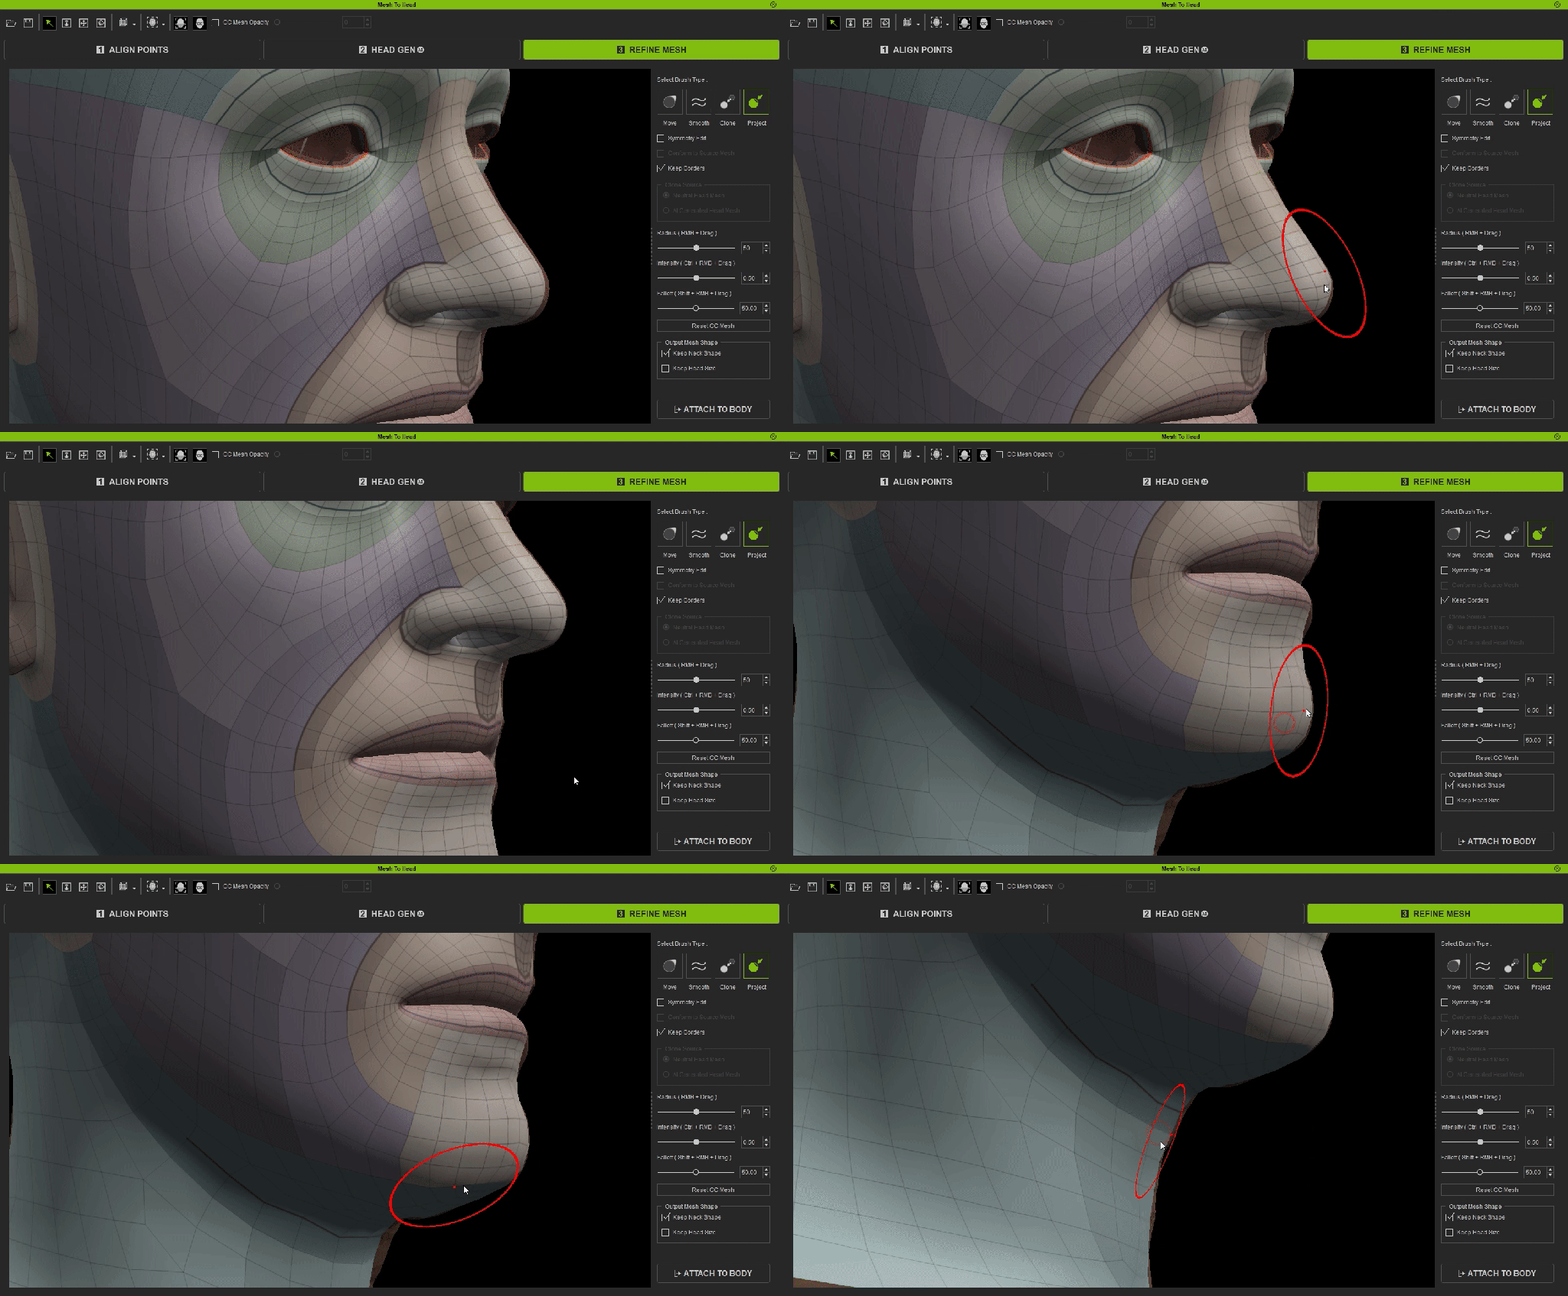
At this stage of the process, HeadShot 2 has already transformed the VFace source model into a CC model. Our next step involves utilizing the 3D paint brush located in the right panel to enhance the appearance of the new CC model, ensuring a closer resemblance to the original VFace character. Simultaneously, we will address any mesh imperfections and problematic edge loops that may be present.

Usually, the mesh surrounding the eyes requires adjustments, similar to the current situation where the alignment of the eyelids with the VFace model is not optimal. It is advisable to deactivate the ‘Keep Border’ and ‘Projection’ settings to facilitate geometry adjustments without being overly constrained by the underlying topology. Subsequently, we employ the ‘Move’ brush to nudge the eyelids into proper shapes and positions. After the corrections have been made, remember to reactivate the ‘Keep Border’ and ‘Projection’ options.

Similar techniques can also be applied to address other areas of imperfection. In instances where the contours of facial features significantly diverge from the source model, the ‘Projection’ brush comes in handy to nudge the mesh back to likeness.
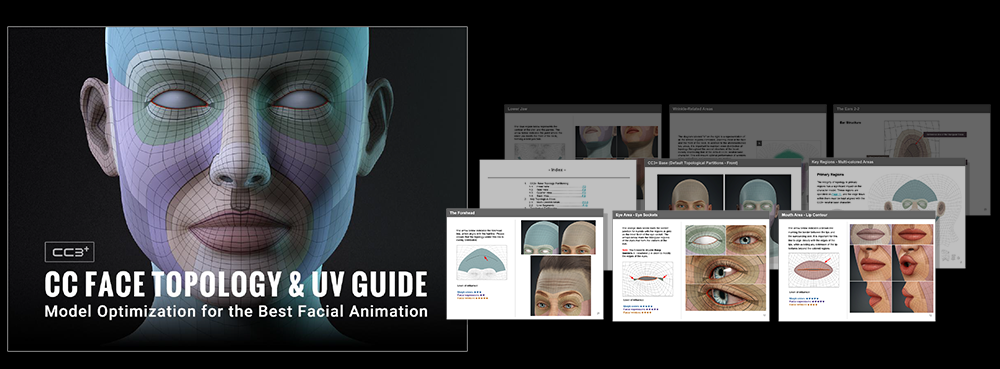
Optimize face topology for the best facial animation

Achieving enhanced character expressions in facial animations relies on ensuring that the primary edge loops closely mirror the structure of the CC3+ base topology. As a result, it becomes imperative to prioritize the accuracy of these primary edge loops. To gain insight into the desired form of proper edge loops, refer to the official topology guide available on Reallusion’s website.
With the finer details and corrections now addressed, we can advance to the actual character production phase. In the case of this VFace model, I will activate the ‘Keep Neck Shape’ option to ensure that the generated head seamlessly integrates with the subsequent base body, all while preserving the authentic neck shape of the source model.

Character Creation

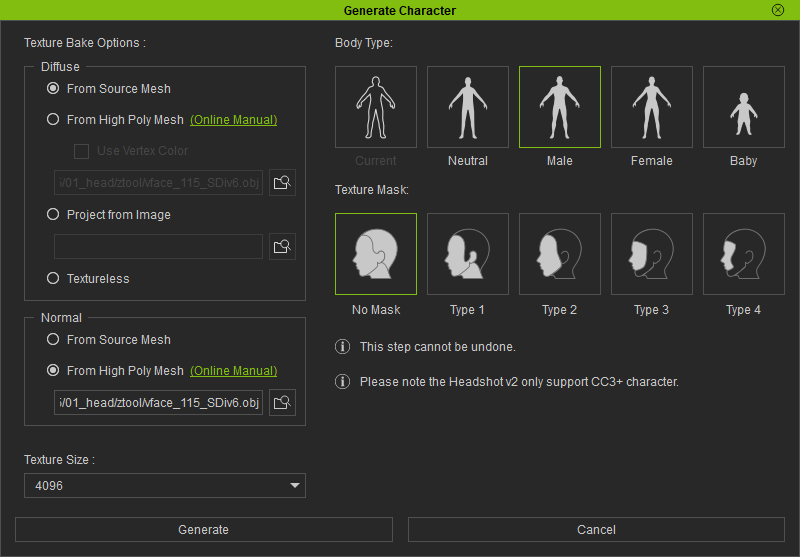
In the ‘Texture Bake Options’ section, I opted for ‘From Source Mesh’ since the source model includes its own diffuse texture. As for the ‘Normal’ setting, I selected ‘From High Poly Mesh’ and designated the high-poly geometry exported earlier from ZBrush. In terms of the geometry, I chose the ‘Male’ preset for body type, and ‘No Mask,’ as the original textures adequately fulfill all the requirements. To finish the process, I clicked on the ‘Generate’ button to kick off the creation of the complete character. Please note that, Character Creator morph sliders can also be used to adjust the body shape.
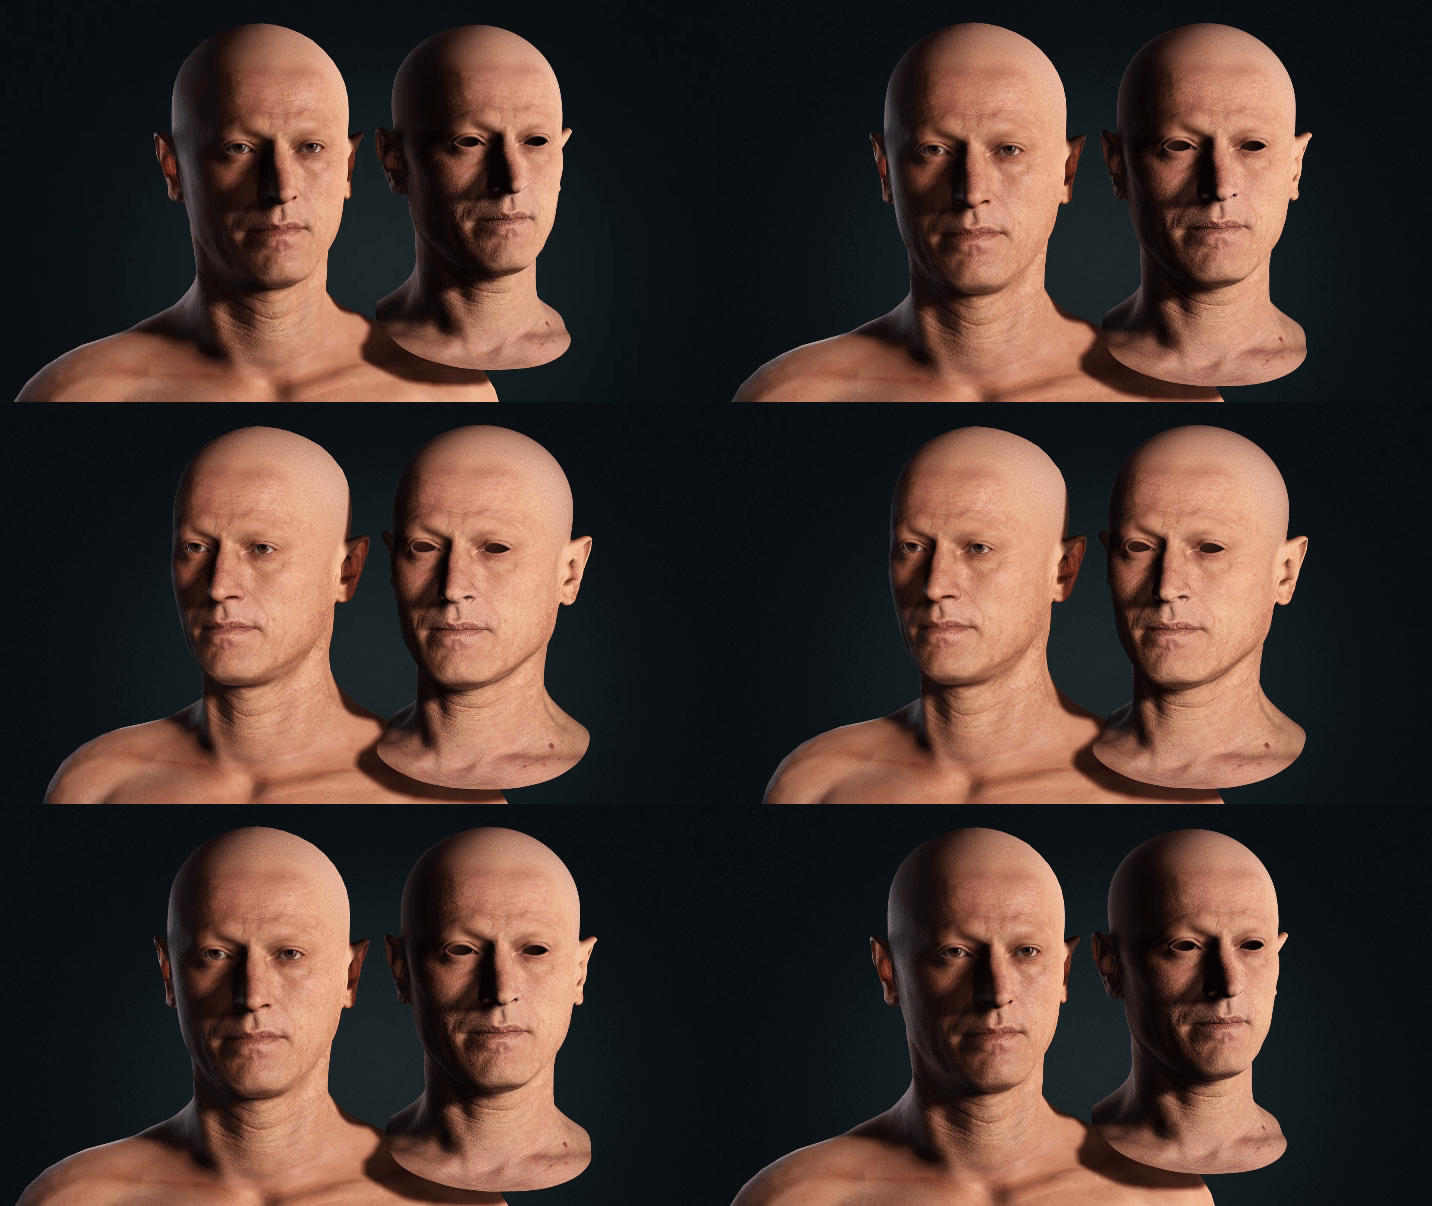
In the following illustration, the result speaks for itself: The HeadShot generated character on the left, and the source VFace model on the right.
Polishing the Model

Refining the Textures

To rectify color imperfections around the mouth, we can opt to launch the texture maps into Photoshop for small adjustments.

Repositioning the Eyes and Teeth

Morph sliders are also available for readjusting the positioning of the eyes and teeth.

Modifying Facial Expressions

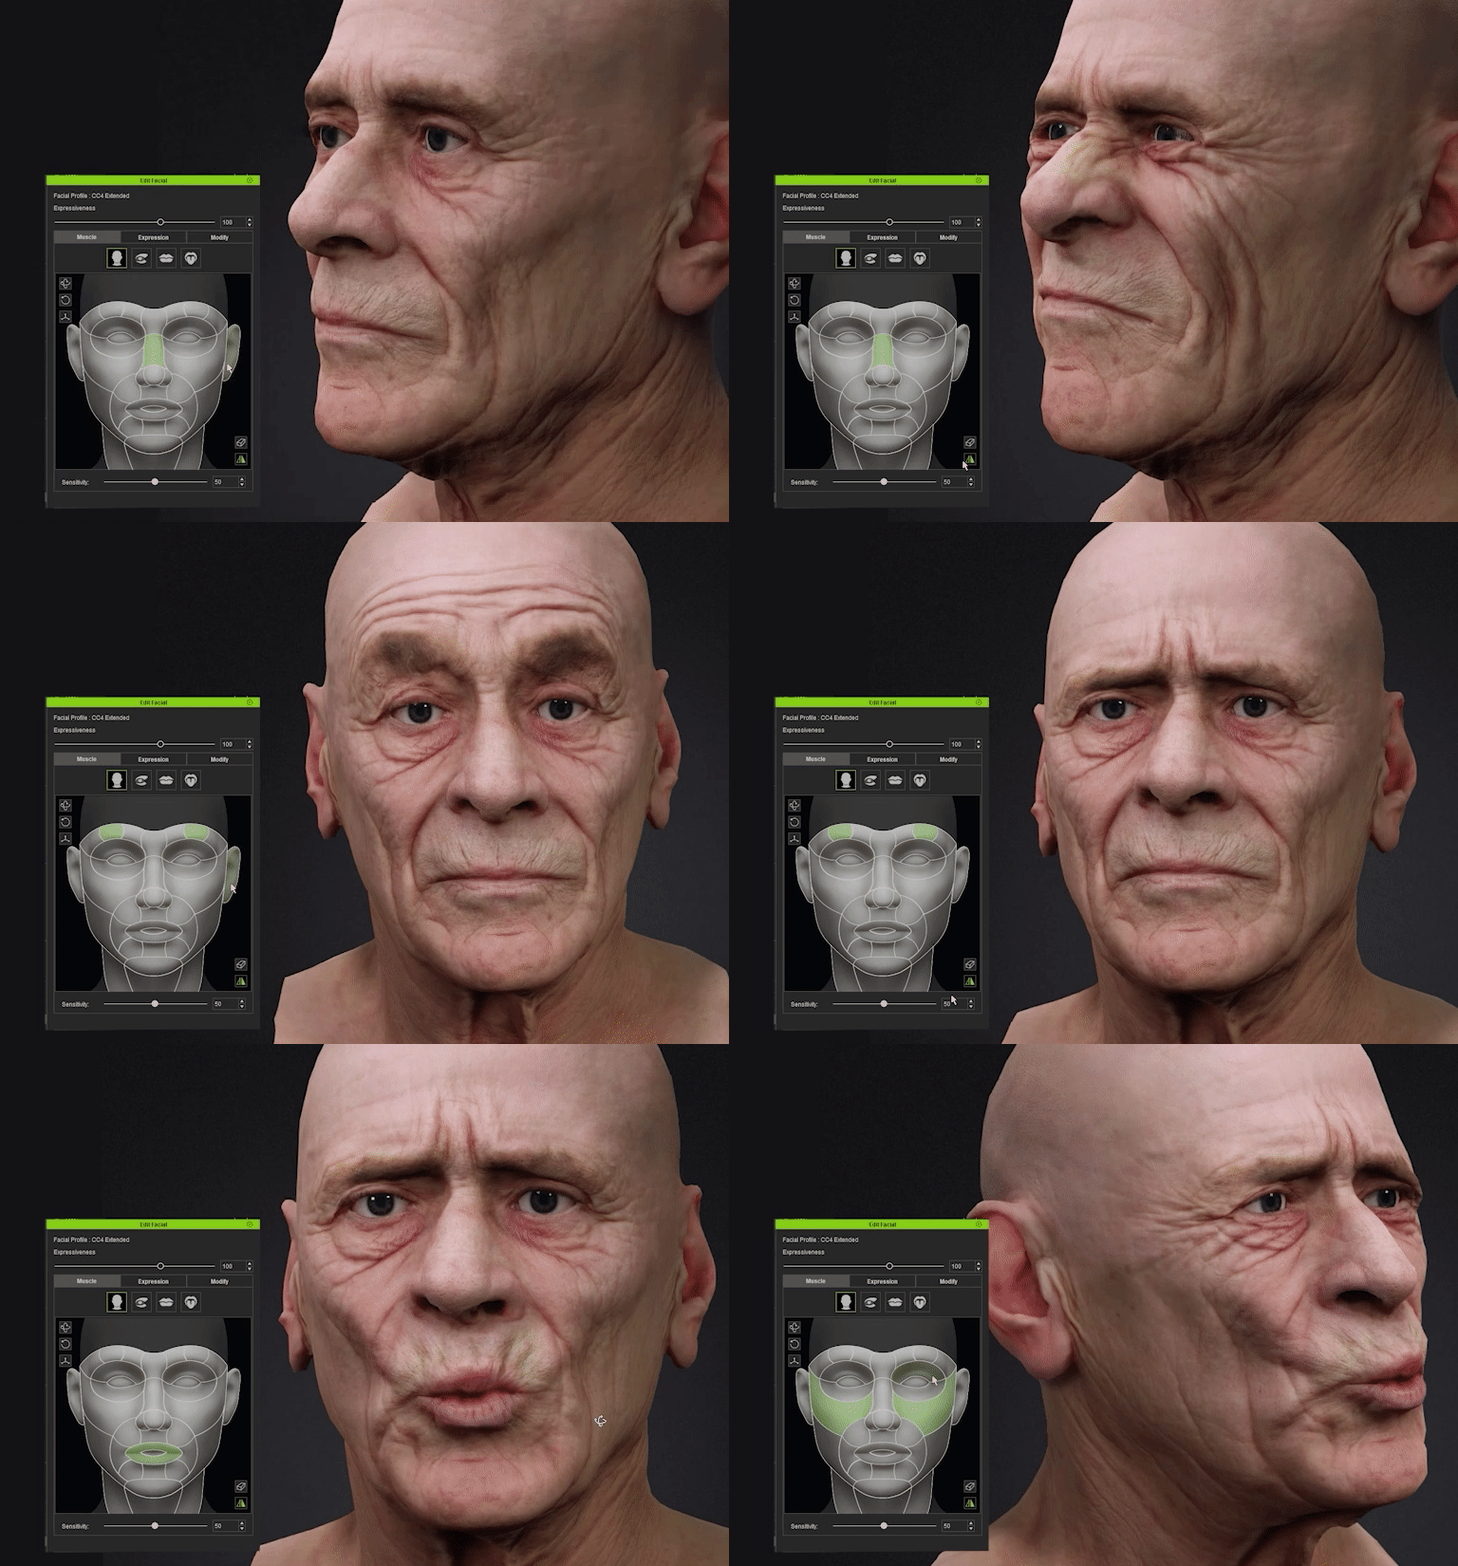
While HeadShot 2 offers comprehensive facial expression data, there might be instances where these expressions display minor imperfections. In such cases, utilizing the ‘Facial Profile Editor’ is recommended to rectify and refine the facial expressions.
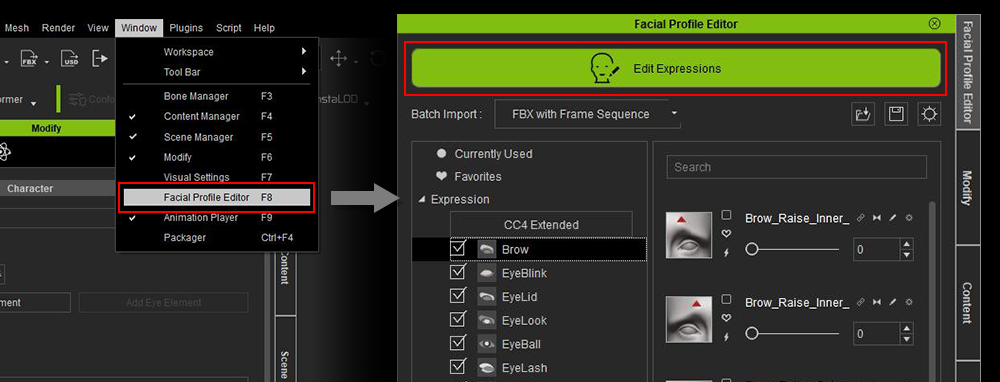
The two most frequently encountered expression morphs that require adjustment are closed eyes and an open mouth. The steps to address these issues are outlined below:

  1. Locate the specific morph slider requiring correction within the ‘Facial Profile Editor’.
  2. Utilize GoZ to export the affected morph shape to ZBrush, where you can rectify it using a selection of ZBrush’s brushes.
  3. Upon completing the necessary corrections, bring the refined morph shape back into ZBrush to finalize the adjustments.

Applying Different Styles

Another significant advantage of utilizing Character Creator is the speed with which you can don different attires, hairstyles, and accessories. Simply access the ‘Content Manager,’ search for the hairstyles and clothing that appeal to you, and effortlessly apply the assets by either double-clicking on them or dragging them onto the avatar.

Character Performance & Unreal Render

Once the character is dressed and prepared, we can start to make it perform. Through the utilization of Unreal Live Link, we can transfer the character to Unreal for look dev. This allows us to apply animations to the character within iClone and observe the same outcomes in the Unreal environment.

For this character, we employed Live Link to capture facial performances and utilized timeline tools for making minor refinements to the animation.

In Closing

TexturingXYZ’s VFace provides 3D artists with the opportunity to operate from meticulously detailed scanned models featuring highly intricate diffuse textures. By synergizing the capabilities of VFace with the advancements offered by HeadShot 2, we are able to rapidly craft a fully developed 3D character that approaches lifelike realism. We appreciate your dedication in reading this article to its conclusion and trust that you’ve garnered valuable insights for your upcoming artistic pursuits.

Explore the Vface content pack in Reallusion website

Headshot 2.0: AI 3D Head Generator

Know more:

Character Creator: 3D Character Design Software

FREE for 30 days & get 2,000+ ready-made assets:

3D Character Generator Free Download | Character Creator

BAD TO THE BONE Tutorial – Making 2D and 3D dance together with Cartoon Animator and iClone

Tom Jantol

Tom Jantol, a filmmaker and animator who has been a professional animator for more than 15 years.

He first started with game engines as part of the Machinima movement, then further delved into software such as iClone, Cartoon Animator for 3D and 2D animation, Unreal and Unity game engines, and After Effects for post-production.

The main purpose of making this video was to attempt to make a new breed of tutorials. A movie that is a “self-making off”, a hybrid of an animated story, and a tutorial about making that story at the same time. Or, to put it simply, to bring “behind the scene” to the front of the scene.

To make it happen, first I needed 3D environment in which I could import animated 2D materials and make them behave as 3D materials.

iClone is a perfect tool for this 3D part of needs.  Cartoon Animator for 2D. Together, they are merging into a best of all dimensions, one that doesn’t have a number because it is infinite – a dimension limited just by imagination.

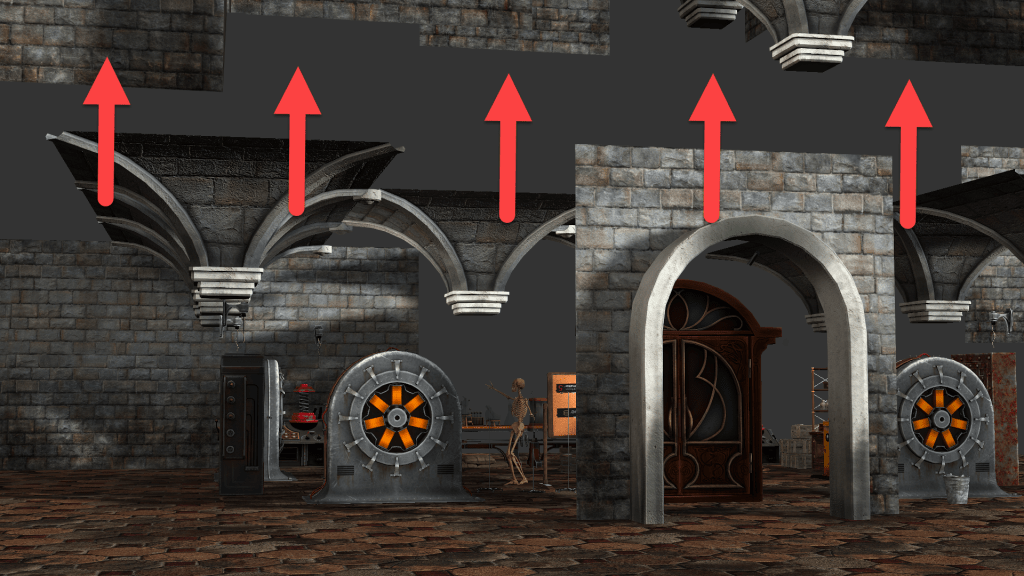
3D environments of the retro-futuristic laboratory were made in parts, so I could move walls and objects for easier camera management. 

The main object is a corkboard, an animatable plate that will hold inner tutorial graphics. 

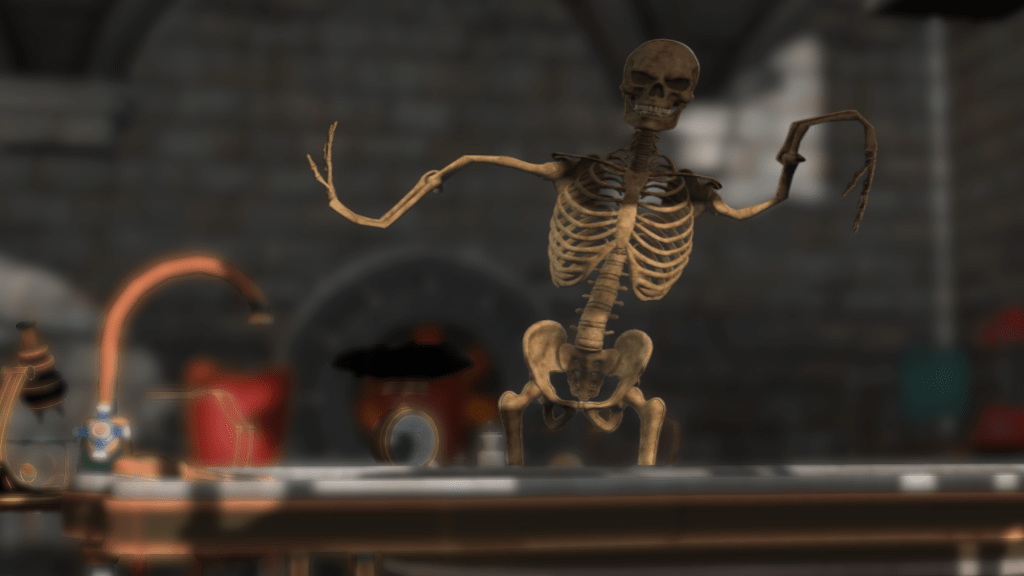
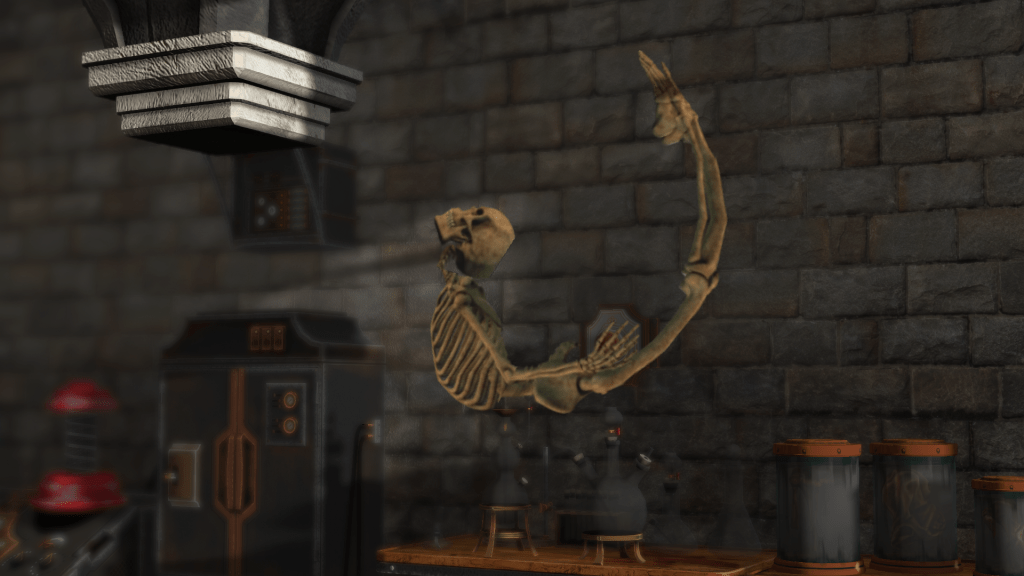
The main character, the skeleton, had to be made in a couple of different versions. One as 3D model plus several 2D renderings of the same model for use in Cartoon Animator.

Renderings made in iClone, of course.

In Cartoon Animator skeleton is rigged as G3 human character. That job was done in a couple of minutes, thanks to the dummy character included in Cartoon Animator. It was enough to bring that dummy to Photoshop and replace dummy parts with skeleton parts.

And… with that, preparations for a movie are complete. All that’s left is to combine footage from two software, as seamlessly as possible.

What was much easier to achieve than it sounds. Mainly because of the excellent MotionLive plug-in. With MotionLive, dance animation made in 3D iClone can be assigned to 2D skeleton, so motion is consistent between two dimensions. 

One of the main features of the movie is the use of the extremely useful Spring Bones option in Cartoon Animator. 

For some scenes, I animated just a hands in Cartoon Animator with a spring effect and then attached that 2D sequence to 3D iClone skeleton. After hiding “real” hands of iClone skeleton.

Again, much easier than it sounds. For importing of 2D videos into iClone I used PopVideo, a very efficient tool for making videos with alpha channel. Path can’t be much simpler; rendering video with hands and transparent background in Cartoon Animator and assigning that video as a texture to a plane in 3D environment of iClone. That plane is then a 3D object and as such, it can be additionally animated, attached to other objects, etc… 

That way we can achieve the best of both worlds.

This is, actually, all.

With careful planning of the camera moves and timings of imported 2D animation, both software is becoming one tool. If we upgrade that tool with our creative minds, possibilities are endless.

Follow Tom Jantol

https://www.youtube.com/@TomJantol/videos


WarLord’s Workshop: Hands-On Review Business Crowd Set Vol 1

One of the major flaws to a lot of animated scenes is the lack of people present in the scene. While this is improving there are still a lot of good scenes out there that have less than a half dozen actors in them with some only having one or two characters. While this works for some setups it does not work for creating a busy office or hotel lobby, restaurant, or other public place.  

A hotel lobby may be mostly empty at certain times of the day and night but not all the time. In a lot of cases, it comes down to a lack of resources to make a crowd. Even a small one. Crowd solutions are not cheap and low poly characters, while becoming more plentiful are still not widely available. 

It’s difficult to give a sense of a busy office or lobby without a lot of people but one thing to remember in animation is that a few can look can a lot in the right situation with the right character assets. That being said, it still takes upwards of twenty to thirty or more characters to make a convincing outdoor scene in a busy public area. 

The demonstration video of this pack is at the bottom of this article including details on the project used for review testing.

This can be different in an office-type situation, or part of a hotel lobby like the main desk or elevator area. They don’t need a huge crowd, but they do need people. Even if you only look at a half dozen to a dozen people you are still talking about having to create or acquire significant resources so paying attention to the versatility of those resources becomes very important. 

If you lay out some hard-earned dollars on ten to twelve or more characters, then they need to be able to be easily duplicated and colors changed from hair and skin down to the clothing and shoes so you can use them in a lot of situations going forward, not just the project in hand. 

Reallusion has provided just such a pack with its Business Crowd Set. This set is not only low poly with pro-grade clothing and 3D scans but also contains some very important maps like an RGB mask for skin, hair, and teeth and a Color ID Mask for outfits, accessories, and eyes.  

RGB and COLOR ID Masks

As you can see from the image above these maps cover specific areas like the skin, clothing, and other parts of the character. There is one hitch though: you must drag and drop a tool, proved by Reallusion, onto the character to access the Substance texture layers. It’s just a simple drag and drop then, by the digital magic of the Reallusion engineers, you have sliders available within the texture menu that were not visible previously. 

DRAG AND DROP TOOL

The drag and drop tool will activate the Substance tool allowing us to alter the newly available sliders for Color, Roughness, Metallic, Ambient Occlusion, Glow, and Mask. 
 
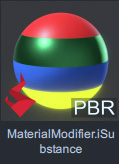
This modifier is supplied by Reallusion and must be dragged and dropped onto the character directly otherwise you will not see the sliders necessary to make easy edits like color changes. If iClone is up to date this modifier should already be in your Substance folder in the materials section. 

Material Modifier

actorSCAN CHARACTERS

This is a great feature of these actorSCAN characters. The Substance tool can be a time saver in diversifying the characters into a much larger crowd with different color clothing and skin tones. If, like this pack, you use fifteen characters, you can drag and drop the material modifier on the first set of characters and duplicate them for additional crowd or background characters quickly creating a larger crowd than just the initial set of characters. 

DRAG AND DROP PROCESS

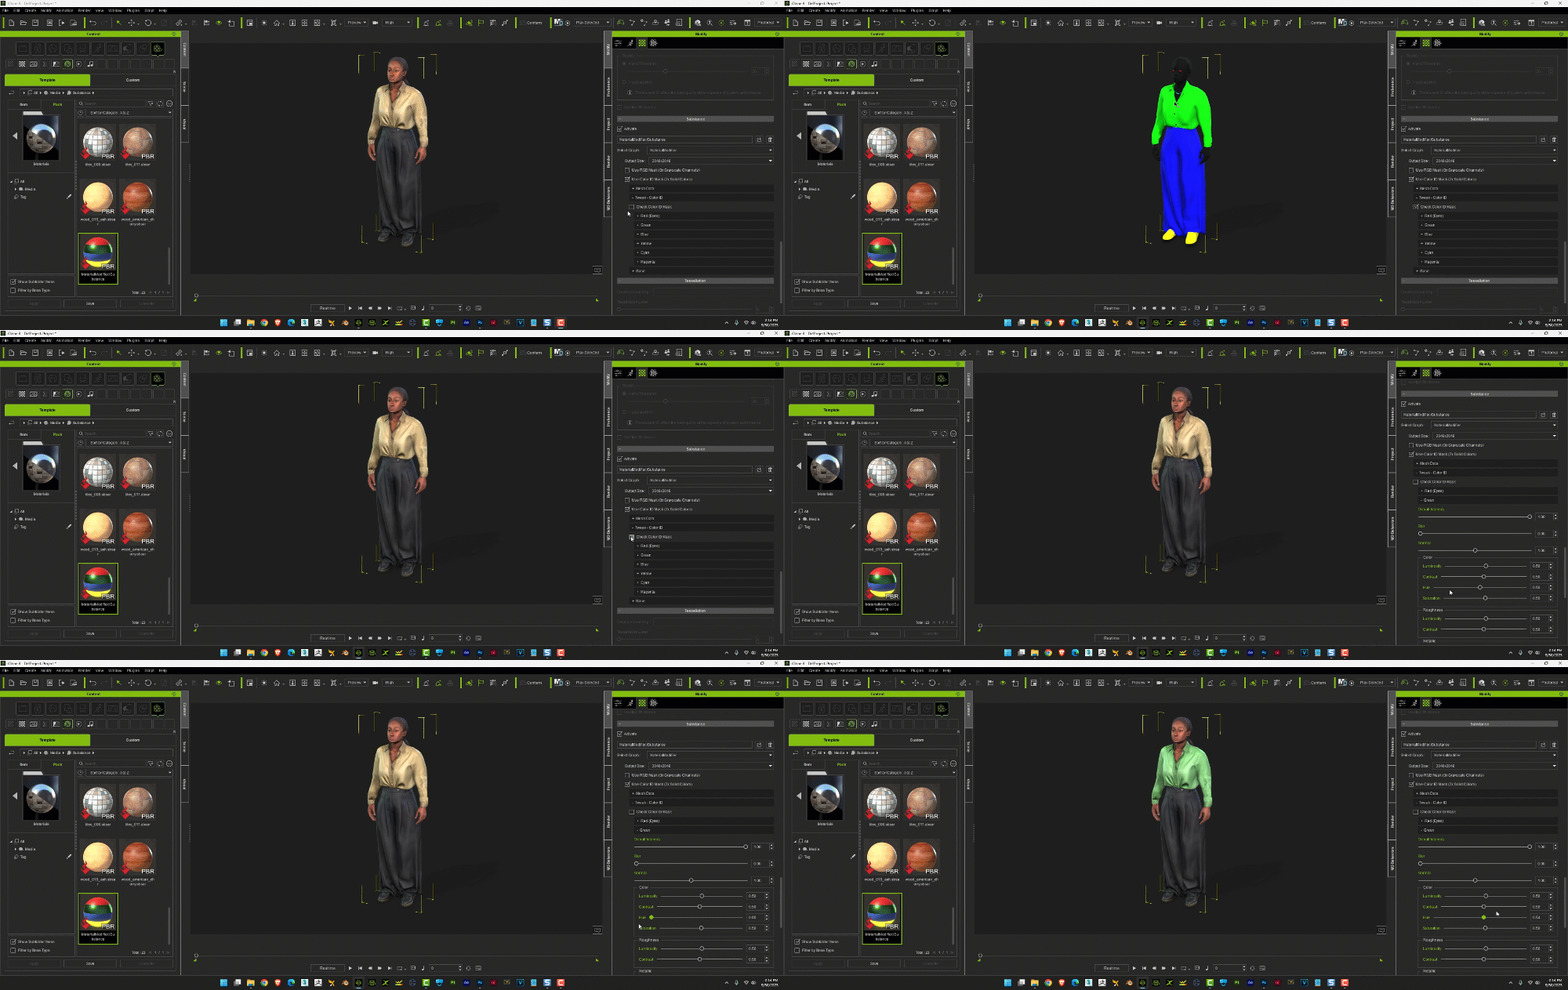
Initially, you notice the Substance section of the Modify Material Menu is blank and inaccessible. After activation with the modifier, the section will become active, and the sliders will be available after checking the appropriate boxes to make them visible. 

Drag and Drop Material Modifier
Drag and Drop PBR Material Modifer – Necessary for Quick Changes

DRILLING DOWN TO THE SLIDERS

Clicking the available checkboxes will bring up the RGB Mask and Color ID Mask making their subsections available, and you can click your way down through the Tweak RGB and Tweak Color ID menu. 

Experimentation is highly encouraged in this area. If you are not sure what each slider does, then use them, as you can always reload the character if it gets away from you. Experimenting is part of 3D animation.  No matter how many tools we are given there always be something not covered by an available tool or method that you must solve by other means. 

It can also lead to undocumented methods never envisioned by the development team which might even lead to further development of the discovery. Such was the case many years ago when I first brought destructible props into iClone after physics was introduced. They would run, for a bit, then crash. Before long a Reallusion dev had stabilized the procedure and Reallusion issued a patch. 

This is just one example of how Reallusion pays attention to its user base. Don’t get “married” to a few or a certain set of sliders in iClone or Character Creator. When time allows, experiment, play around, and push iClone to the limits of what can and cannot be done. 

Drilling Down to the Sliders

HUE AND OTHER SLIDERS

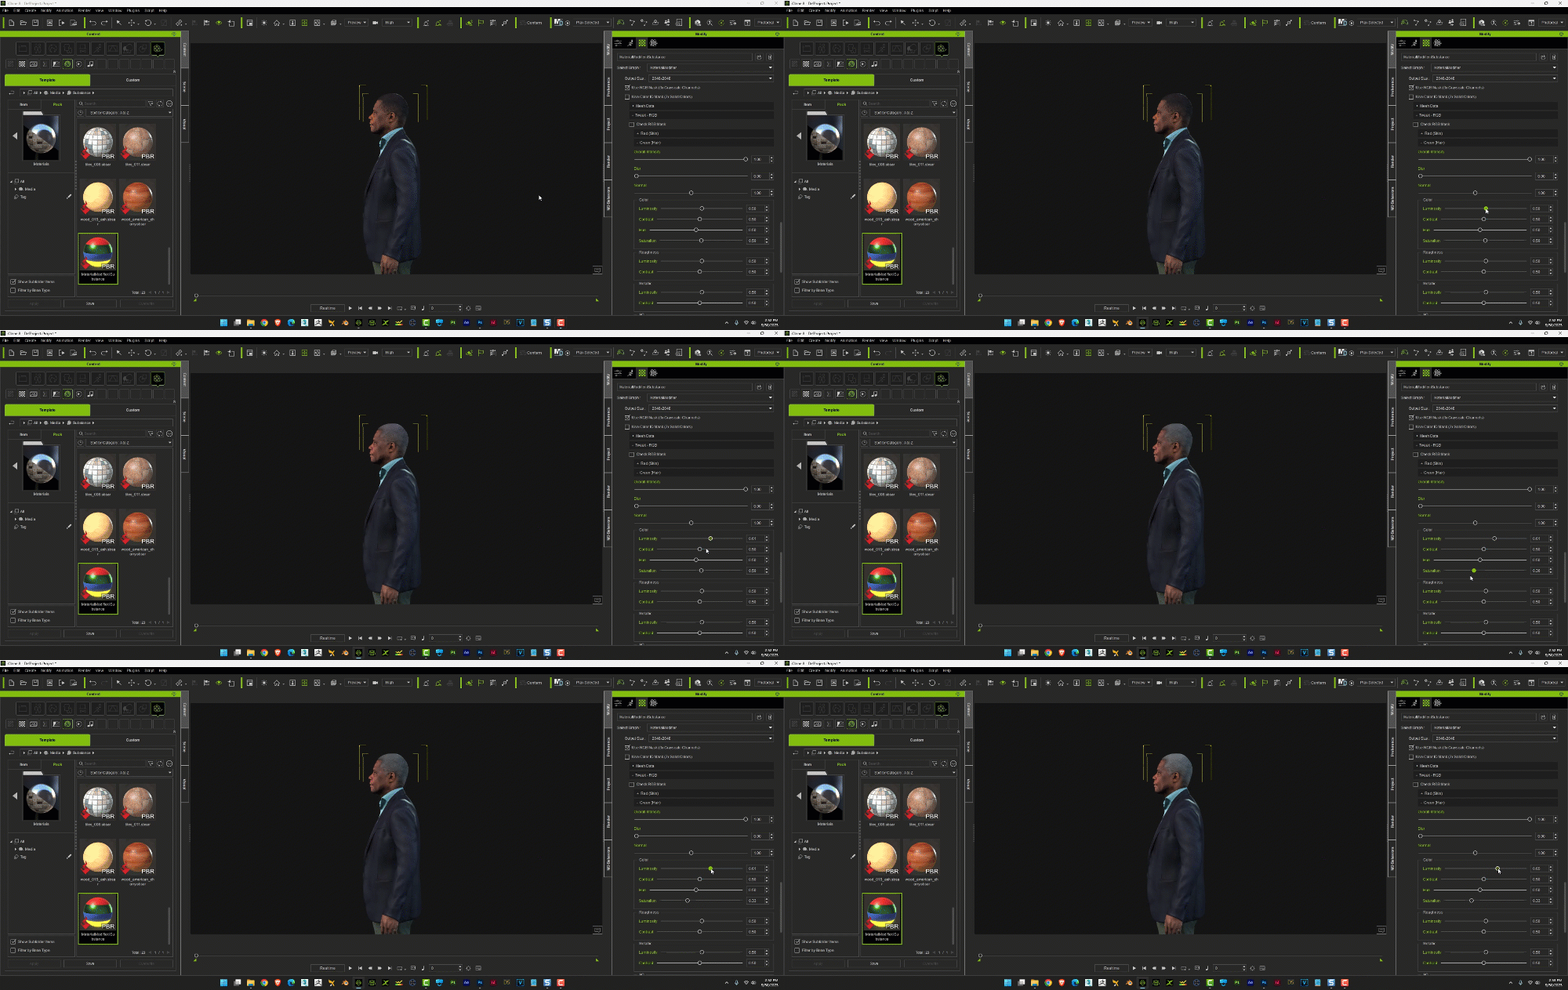
I like the Hue slider as it is a time-saving tool just like the Adjust Color popup. It gives you many color variations in a short time. While there are input boxes, it is very quick to go through the sliders just to see their effects. 

Using the Hue Slider for Quick Color Changes

HAIR COLOR EXAMPLE

In this case, I just wanted an older-looking man and extras like these are usually not in close-ups. A simple hair desaturation and lightning would do the trick quickly and painlessly and, in this case, would pass in a closeup as well.  

Easy Graying of the Hair with Saturation and Luminosity

It only takes a few times using the modifying sliders to see what they can do and how they can help save you a lot of work in building up a business crowd or even a bar crowd after work. 

TEST PROJECT

The test scene was set up in a high poly design studio environment with simple lighting that utilizes HDR, Tone, and IBL lighting. This project had 25 avatars that can be used from closeup on out with good results in a final render. This, of course, depends on the lighting like any render. 

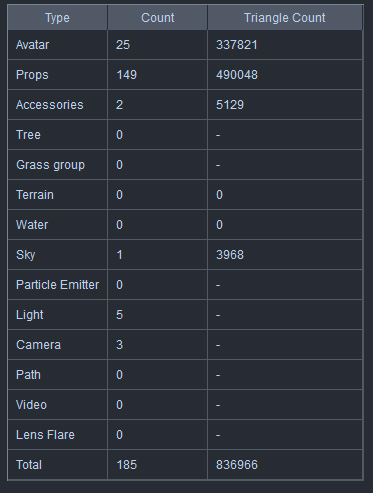
Project Stats: 

Project Stats

As you can see the scene contains 25 avatars and 149 props as the major assets. I built this scene on an older 2017 Intel i7 HP Omen instead of my newer XPS i9 to see how it would handle it.  
 
It was a pleasant scene build without any thought given to the fact that it was a five-plus-year-old HP system. It did start to react a little sluggishly towards the end but could have held more avatars if needed.  
 
I worked in the minimal view mode when it started to drag a bit and had no problem working with the test scene in either minimal or full mode. 
 
This type of scene would have been very hard to work with just a few years ago but the old Omen breezed through building out the scene, animating, and testing the characters.
 

To be honest, my Intel i9 is not that much faster or quicker to respond than the older Intel i7 and this scene presented no issues. I could work in full mode at any time. 

TIP: You can use Depth of Field (DOF) to blur characters into the background to further disguise the usage of duplicated characters. 

Demonstration Video of Characters in Use.

SUMMARY

These characters are lower poly than most standard characters, so they won’t tax the engine as much and are multitudes lower than many competing character solutions.   While a high poly character makes for a great image render, running several low poly characters in the same poly budget is a real plus for animated renders. 

Oh, by the way, I got this far and haven’t even mentioned another great feature. You can edit these characters in Character Creator. Since they are actorSCAN the morph sliders are not available but other tools like Optimize and Decimate, Edit Mesh, Adjust Bones and Proportion are available. 

The next time you need a business crowd, the Business–Crowd Set – Vol. 1 can go a long way towards filling out a conference room, staff meeting or even a small auditorium. 

MD McCallum - WarLord

MD McCallum – WarLord

Digital Artist MD “Mike” McCallum, aka WarLord, is a longtime iClone user. Having authored free tutorials for iClone in its early years and selected to write the iClone Beginners Guide from Packt Publishing in 2011, he was fortunate enough to meet and exchange tricks and tips with users from all over the world and loves to share this information with other users. He has authored hundreds of articles on iClone and digital art in general while reviewing some of the most popular software and hardware in the world. He has been published in many of the leading 3D online and print magazines while staying true to his biggest passion, 3D animation. For more information click here. 

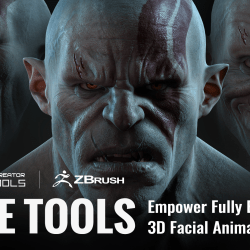
Zbrush Face tools

ZBrush Face Tools Help Character Artists Bridge the Skill Gap to Achieve Expressive Animations

Reallusion remains steadfast in its commitment to advancing interoperability within its character production ecosystem and third-party platforms. This dedication extends beyond mere interoperability, striving to establish inventive ways to bridge products and enhance the overall user experience. In pursuit of this vision, Reallusion is proud to unveil a revolutionary pipeline tool called Face Tools, facilitating seamless integration between Character Creator (CC) and ZBrush. This solution marks a significant leap forward in interlinking these two powerful tools and underscores Reallusion’s dedication to pushing the boundaries of creative possibilities.

Embracing an artist-centric design philosophy, Face Tools is a liberation of ZBrush artists from their technical limitations. This newfound empowerment is made possible by condensing an entire studio pipeline, that typically requires a seasoned team of modelers, sculptors, riggers, and animators, into one seamless workflow that is both straightforward and efficient. The resulting 3D characters are not only ready for iClone facial mocap, facial animation editing, and lip-syncing but also fully compatible with industry-leading platforms such as Unreal, Unity, Blender, Maya, and more.

Groundbreaking Design Solutions

The power trio of Character Creator, ZBrush, and Face Tools opens new creative avenues beyond existing possibilities by crossing the traditional divide between artistic and technical disciplines. 

  • From 3D Concepting to Final Animation: Character artists, who were previously confined to sculpting concepts and producing static models, can now handle the entire character production process from modeling to animation, regardless of their skill levels.
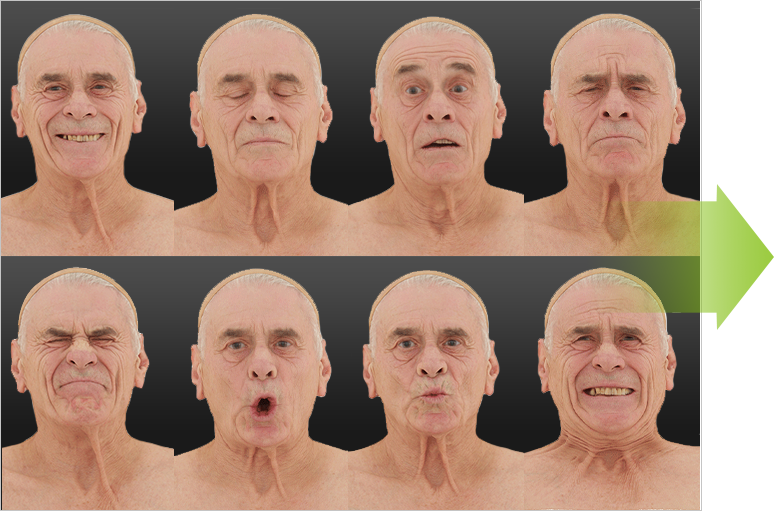
  • From 3D Scans to Digital Doubles: Crafting digital doubles with lifelike resemblance and precise facial expressions was once confined to high-budget game and film studios. Now, any ZBrush artist, regardless of skill level, can effortlessly create custom expressions using FACS scans.

  • Create Memorable Cartoon Performances: Comic, cartoon, or stylized characters exhibit distinct expressive qualities compared to photoreal digital humans. Face Tools empower you to explore this diverse range of expressions, enabling you to bring your imagination to life and craft original animation styles and character designs.

Express Pipeline

Face Tools provides artists with a comprehensive set of tools designed to enhance productivity and achieve previously unattainable results. Among its features is the capability to leverage ZBrush for sculpting 3D scans or utilizing premade models, seamlessly converting them into CC characters for real-time animation. This remarkable functionality is enabled by the extensive depth of the Reallusion tool stack, which encompasses iClone for keyframe and mocap animation, along with Headshot 2.0 for converting 3D heads from both models and photographs.

  • Rapid Iterations using Pre-rigged Base Meshes: Utilize CC morphs to quickly approximate the character’s appearance. With just one click, send it to ZBrush for detailed sculpting and polypainting. Easily update the sculpting details back to the CC model, complete with baked diffuse, normal, and cavity maps.
  • Make Unique expressions: Face Tools detailing capabilities can make character personalities shine! Transfer a set of 13 core expression morphs to ZBrush for further customization and selectively update them to Character Creator for brisk turnarounds.
  • Generate Lifelike Wrinkles: Effortlessly transform your high-poly details into intricate wrinkle patterns. Crafted using a blend of diffuse, normal, ambient occlusion, and redness textures, CC wrinkle effects are imbued with a lifelike vitality, bringing your creations to a new level of realism.
  • Animation-Ready for Game, Filme, VR and AR: ZBrush Face Tools can export characters perfectly suited for any medium, whether it’s games, films, or extended reality experiences. Easily infuse your characters with life via a power combo of advanced facial controls and motion capture technology.
  • 3D Scans to Realtime Models: Transform a neutral 3D scanned head model into an animation-ready facial model effortlessly. Utilize Headshot 2.0 to seamlessly convert a high-resolution mesh into CC base topology and efficiently translate intricate details from millions of polygons into texture maps optimized for real-time performance.
  • Mesh & Texture Projection for True Expressions: For achieving the utmost likeness from FACS expression scans, designers can employ ZBrush to project intricate model details and coloring from a high-subdivision mesh onto CC core expressions. Additional feature deformations and transformations are also supported for the eyes, teeth and tongue to correspond with each core morph shape.
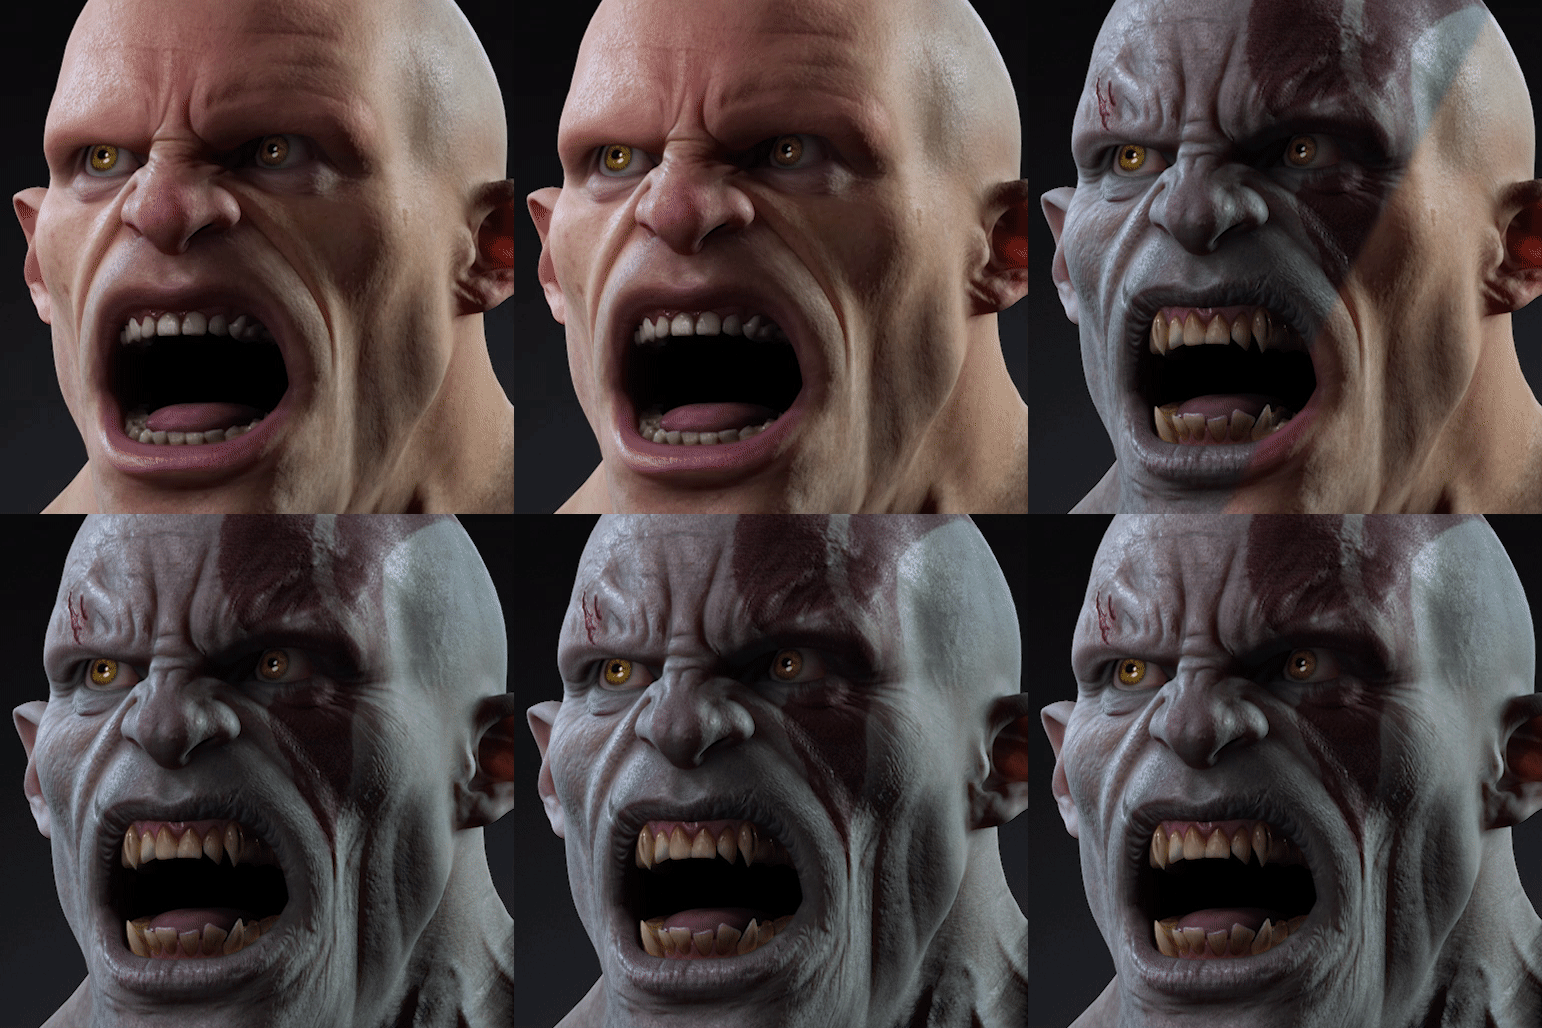
  • Exaggerated Styles: ZBrush Face Tools empower artists to craft stylized characters with heightened expressiveness, unlocking the creative potential for shaping distinctive morphs and wrinkles that define their unique looks.
  • Wrinkle Stencils: Brush up your polypaint techniques and delve into the fun of adding drawn-on wrinkles! By using ZBrush polypaint, you can also explore the art of “manpu”, a Japanese manga symbology designed to express movement and emotions.

Core Technology

Face Tools is backed by a powerful feature set that distinguishes it from the standard fare of ZBrush plugins. These features facilitate greater interaction between CC and ZBrush subtools and polygroups, while also providing conversion techniques to optimize the use of ZBrush’s native displacement and polypaint channels. Ultimately, these underlying technologies focus on delivering the best user experience by intertwining the strengths of CC and ZBrush.

  • Subtool Support: Experience the convenience of breaking down your character into ZBrush subtools, benefitting from identical model structures that effortlessly facilitate character transfers between ZBrush and Character Creator.
  • Polygroup Support: Predefined ZBrush polygroups streamline the design process by allowing designers to concentrate on specific mesh sections during editing. Polygroups play a crucial role in preventing brush overspills, particularly when working on border regions of the lips, eyelids, eyelashes, and more.
  • Expression Layers: The 13 core expressions are intricately linked with ZBrush layers to facilitate rapid sculpting. Upon selecting a particular expression, it is automatically applied to the character and associated with the corresponding ZBrush layer for recording.
  • Normal to Displacement Conversion: Face Tools proprietary feature turns CC normal maps into ZBrush mesh details. These finely detailed layers can serve as a foundation for sculpting micro-skin textures.
  • Displacement to Normal Conversion:The Face Tools detail layer represents a finely detailed mesh displacement that facilitates cross-layer recording in ZBrush. Upon import into Character Creator, it undergoes conversion into a normal map for realtime rendering.
  • Polypaint to Diffuse: Enhance your character’s skin with nuanced blood vessels, scars, tribal tattoos, and more. Overlay these elements onto CC’s original diffuse map, and seamlessly bake and optimize them for real-time presentation.
  • Cavity to Blend & Roughness: Face Tools can effortlessly transform deep shading within the recesses of high-mesh models into cavity maps. When blended with subtle ambient occlusion maps, artists can leverage it to enhance skin details or accentuate nuances in the roughness texture.

For further information

Creating a Digital Double with Character Creator Headshot 2.0 for Blender Fantasy Film

Onur Erdurak – Director / 3D Generalist

Onur Erdurak

I’m Onur Erdurak, a director, writer, and 3D artist from Turkey and I love telling stories.

I earned my bachelor’s degree in Cinema from Izmir University of Economics. While studying in Izmir, I applied and got accepted to the Erasmus Student Exchange Program and studied Cinema in Slovenia for a year.

While studying I made my first short film with no budget, one location, and one actor – which was with my uncle. Luckily my uncle Kemal Erdurak was already a professional actor so I put my skills in VFX, writing, and everything in between to the test, and with the help of a great team we made; my debut short film “STRANDED”. The film premiered at the Cannes Film Festival Short Film Corner in 2018. You can watch it for free on YouTube.

Currently, I am a Fulbright grantee, and I am pursuing an MFA degree at Loyola Marymount University in Los Angeles. After a few failed attempts over the years trying to learn Blender. I finally got started after watching Ian Hubert’s “World Building in Blender” video. This was when the COVID-19 pandemic struck, I viewed this as a chance to enhance my skills and knowledge.
After a couple of months of learning, I started @blendreams to share my creations.

“Blendreams” got started as and still is my passion project. I share my renders and animations over there and share what I’ve learned during my journey on my YouTube channel as tutorials. I am incredibly grateful that this passion project now has over 100,000 followers on Instagram.

About a month ago I was testing Character Creator (CC4) for my short animation The Apple Thief, which caught Reallusion’s eye and contacted me to see what I could do with their AI Headshot plugin for Character Creator. So I used Headshot with a scan of my head I did with Polycam to recreate myself as a medieval warrior in Blender. The results were amazing as they allowed me to live my childhood cream of staring in my own action movie!

“Character Creator and iClone have truly streamlined the character creation and animation process for me. With these remarkable tools, I can craft and animate characters within mere minutes, a fact that continues to amaze me. What’s equally impressive is the level of customization and quality they offer for character creation. Now, I can feature lead actors in my renders, a level of versatility that’s immensely valuable to me.”

Onur Erdurak – Director / 3D Generalist

From Plastic Action Figures to Kinetic 3D Animation with iClone & Blender

Make It Move Media

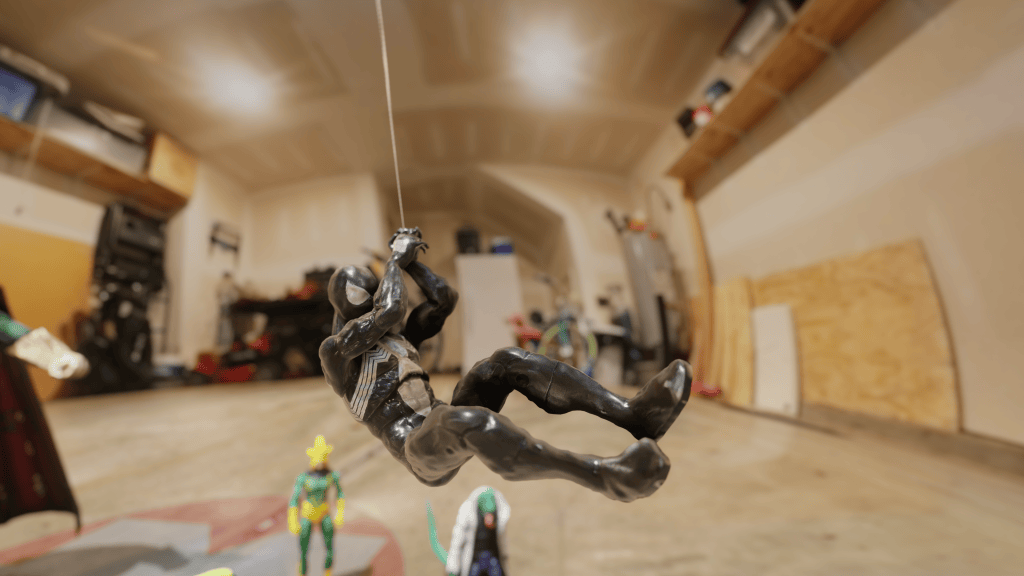
Hello everyone! I’m the face behind Make It Move Media. Over the past decade, my journey into 3D scanning and animation has been nothing short of exhilarating. It’s been an adventure that transformed my Instagram channel, where I showcase 3D-scanned action figures brought to life. I’ve immersed these characters into dynamic scenarios, and yes, many, many fight scenes.

To breathe life into my creations, I’ve used a myriad of software. One suite that stands out in my toolkit is Reallusion; Their 3D animation software, iClone, is truly game-changing. 

Today, I’m diving deep into the specifics of how I use iClone 8 to enhance my animations.

Why Reallusion, You Ask? Here’s My Take

  • User-Friendly Interface: For beginners and seasoned animators alike, Reallusion presents an interface that is both intuitive and powerful. This combination accelerates the learning curve and enhances productivity.
  • Streamlined Workflow: My process, from scanning to animating, is significantly more efficient thanks to Reallusion. The integration capabilities of their tools, like ActorCore for rigging, save me countless hours.
  • Vast Library of Assets: No need to start from scratch! With Reallusion, I’ve access to a plethora of templates, mocap motions, and 3D assets. This is a boon when working on tight deadlines or seeking inspiration.
  • Seamless Integration: Importing animations from other platforms, like Mixamo, is a breeze with iClone 8. It truly bridges the gap between different animation tools.
  • High-Quality Results: The proof is in the pudding, or in my case, the animation. The realism, smoothness, and dynamic range I achieve with Reallusion are testimony to its prowess.
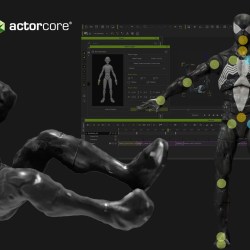
My Workflow with Reallusion Software

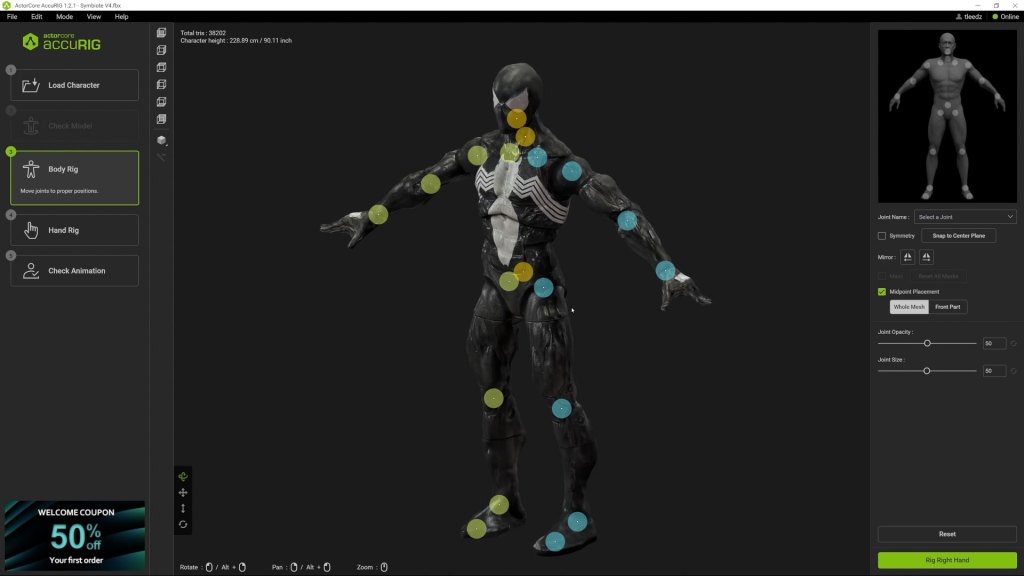
  1. Rigging and Animating: Once my action figure is 3D scanned, I upload the file to start the rigging. Tools like AccuRIG are instrumental in this phase, helping me rig right from the hands to the entire body.
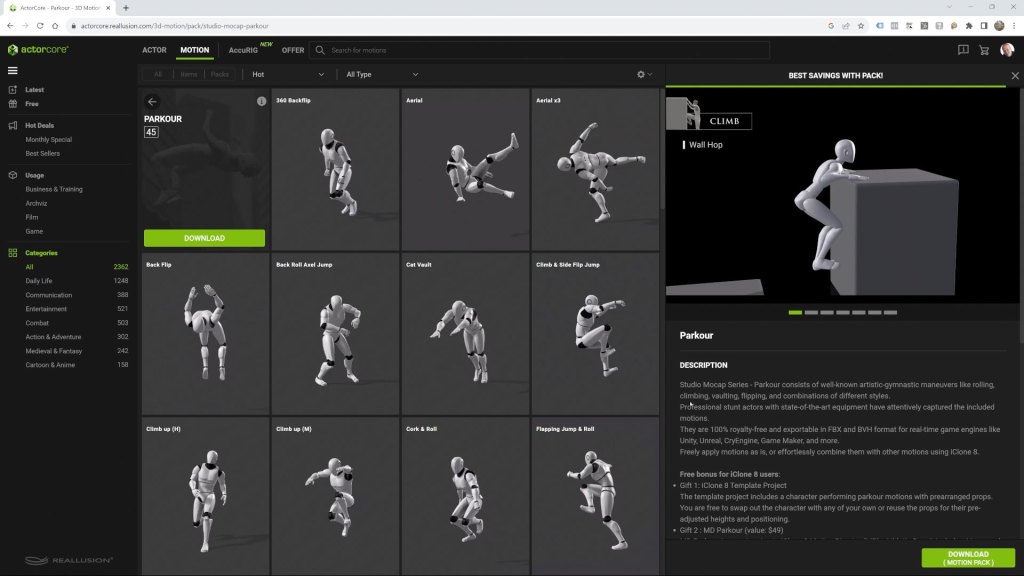
  1. Motions and Movements: Next, I head to ActorCore to source high-quality motion capture files compatible with iClone 8. After rigging, I can easily import these animations and witness the magic unfold. Using iClone 8, I bring my Spider-Man character to life. This software enables me to select from templates, custom packs, or even create from scratch. With a few clicks, my character is animated and moving seamlessly.
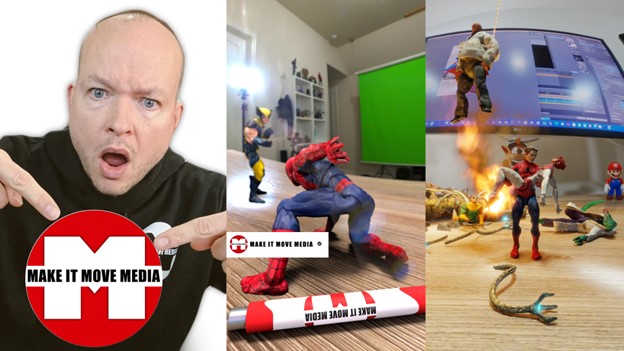
  1. Merging Animations and Custom Motion Capture Files: The motion blending function of iClone 8 ensures smooth transitions between various motions, making the character’s movements appear natural. One unique feature of iClone 8 is its ability to merge animations from different sources. For instance, I can import animations from Mixamo, retarget them, and blend them into my existing animation.
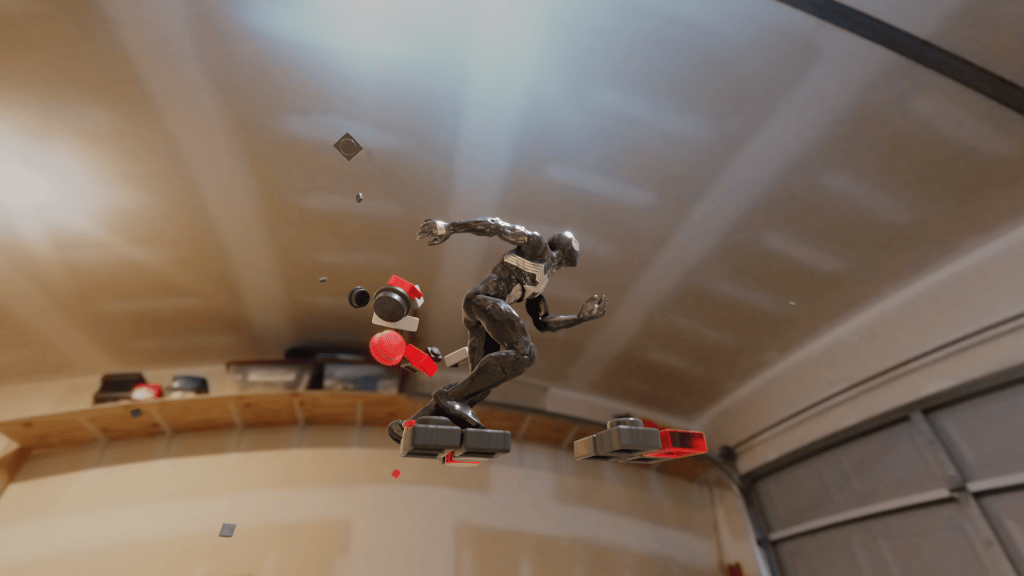
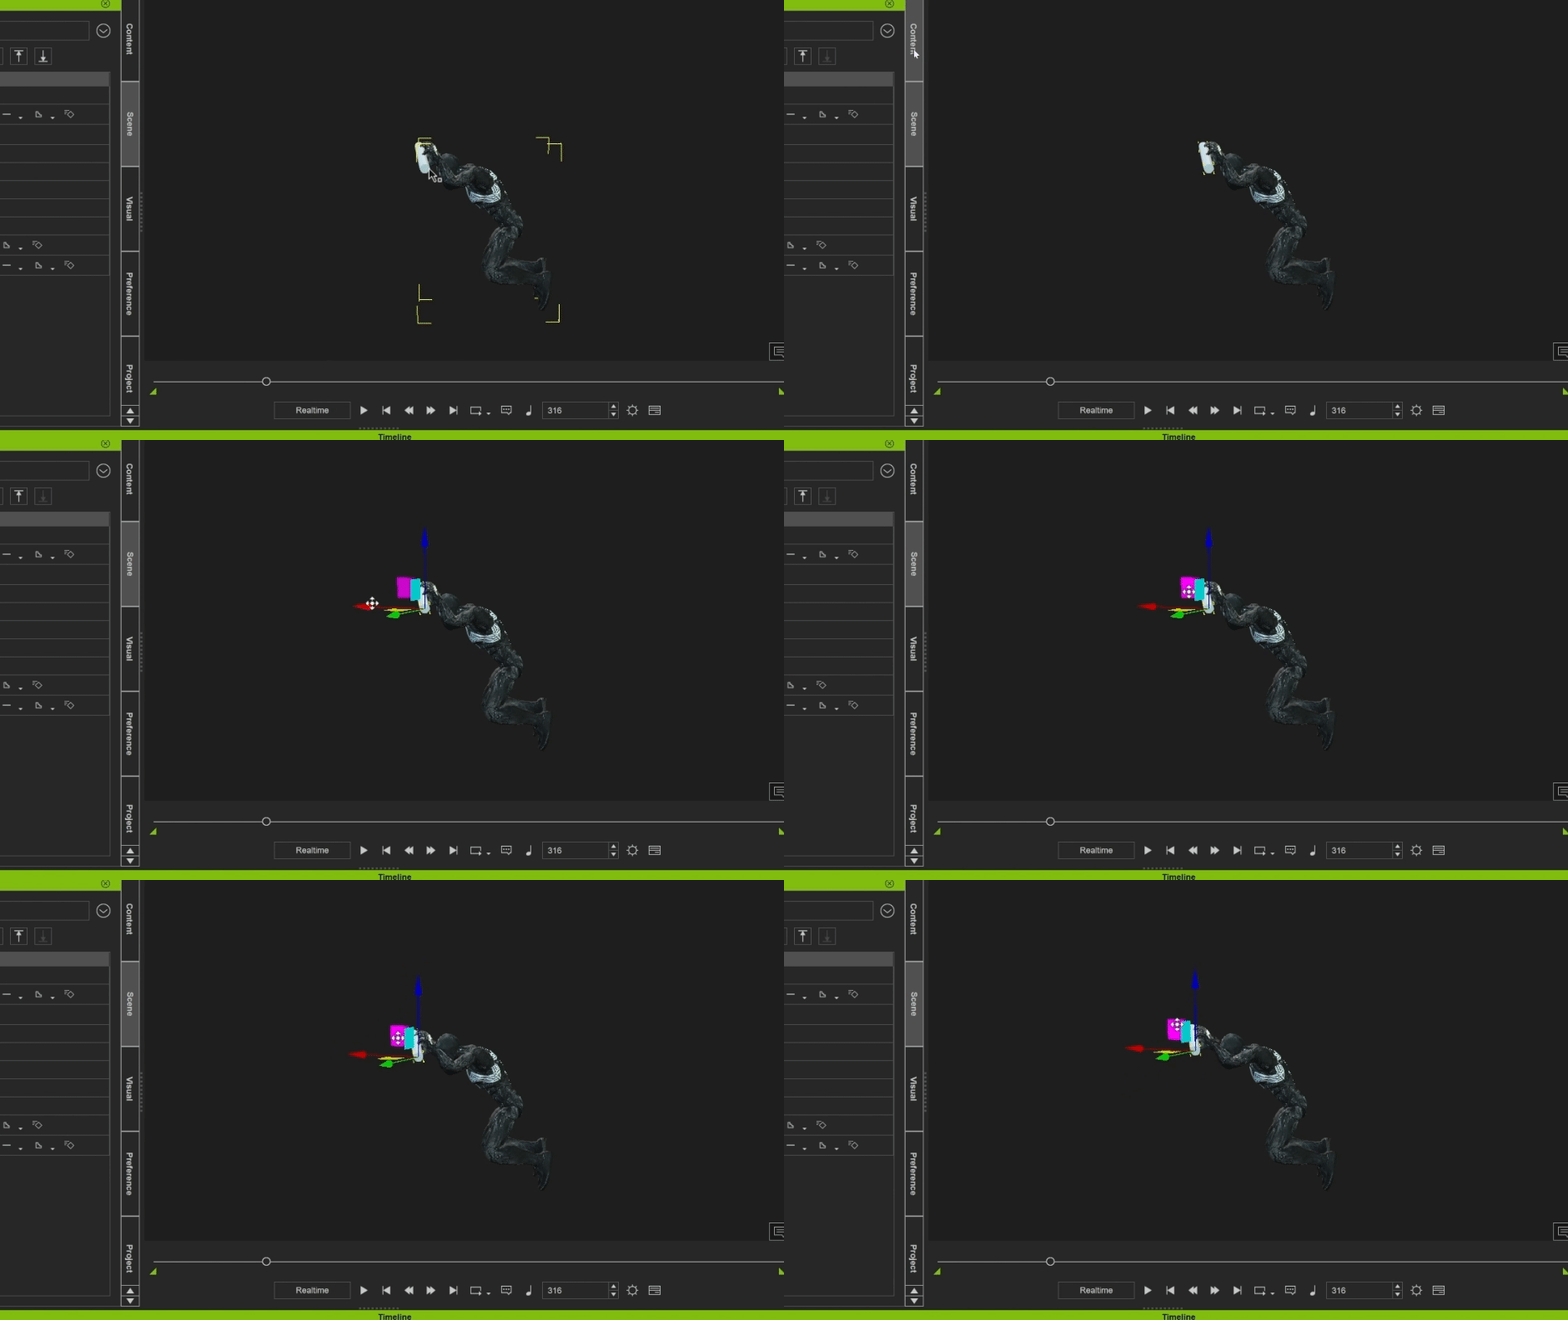
  1. Perfecting the Movements: With iClone 8, I can refine my animation, ensuring details like hand positions remain accurate. The Edit Reach Target tool is particularly useful for this, ensuring Spider-Man’s hands remain fixed on a cylinder during a swing sequence.
  1. Blender Render and VFX: A mesmerizing animation ready for export. Taking it to Blender for final touches is as easy as exporting the animation optimized for Blender in FBX format.

In conclusion, the capabilities of iClone 8 and other tools in my arsenal have enabled me to create compelling, realistic animations. Whether you’re an animator, a fan, or someone intrigued by the world of 3D, I hope this behind-the-scenes look offers you insights and inspiration. 

Keep moving, and keep creating!

Learn More

Related Posts

WarLord’s Workshop: Unique Characters with Hide Body Mesh Tool

One of the great things about Character Creator 4 is its ability to reuse assets from previously built characters to make new characters. Since CC4 clothing is interchangeable with other CC4 characters it allows us to mix and match previously made or purchased assets for an entirely different character. This is a boon for filling scenes with extras and works for leading characters as well.

An example would be a Jack Lantern character I recently made while experimenting with ZBrush and the new CC4 head mesh wrapper in Headshot 2. This incredibly powerful plug-in now allows us to use either an image or a head mesh to create a compatible CC4 character and I took advantage of that to create the pumpkin head.

It became apparent after this that I could also make a Headless Horseman type of character for Halloween using two characters. One character for the body and one for the head. This has long been an experimental way to combine character parts when iClone was less powerful. As you can imagine, it requires the Head to be attached to the Neck of the second character. A proper attachment point is important for motion if you are mimicking one character.

THE FIRST CHARACTER – JACK LANTERN

My Jack Lantern Test Character using Headshot 2 mesh.

The Jack Lantern character is one of my experimental characters that has evolved over the years. I use it for experimentation since it’s kind of a benchmark as the clothing and accessories are low poly, so they don’t tax the engine and will work for stylized or cartoon-type characters. It’s my go-to model for this sort of thing.

I used ZBrush to make the pumpkin head, but you can use a head mesh of your choice. ZBrush was easy because it let me use GoZ to jump back and forth between Character Creator 4 and ZBrush with no importing or exporting.

Hiding the Body

I removed the clothing from the character except for the Tie which was originally an accessory but I skinned it with the Transfer Skin Weights tool so I could use it as a cloth to hide the rest of the body. As an accessory, the Hide Body Mesh tool is not available.

Left: The full character with only the bowtie. Middle and Right: Using the tie to hide the body parts with the Hide Body Mesh tool.

Why the tie? Because it looks good and can be used with the head if needed. It became a convenient cloth to use for hiding the mesh that is available should the need arise.

Leave the upper part of the neck. Do not hide this or you will have to deal with the big slit in the bottom of the head mesh this leaves.  It is much easier to scale it down and radically shorten the neck (with sliders).  Manually input the negative numbers to go past the 100 percent stop if needed.

Now all I had to do was turn the opacity of the bowtie down to zero or use a black texture in the opacity channel to make the tie disappear. Out of sight, out of mind… until you need it.

Working with the Head only:

Scale the neck to very thin and very short to pull it up into the head mesh. Otherwise, you will have a large open spot where the neck attaches that goes across the bottom of the head or a neck sticking out from the head mesh.

Character Creator 4

Scaling Down the Remaining Neck

Scale down the circumference of the neck to very thin and short with the CC4 sliders. Input the numbers manually in the box to go past the one hundred percent limit. If done properly the neck should be up inside the head mesh leaving a small hole. You could use the Mesh tool to select the neck at the vertices level then scale down and/or push it up into the head mesh but this risks topology distortion in the mesh if you aren’t careful.  

Left: Original shape with neck scaled down and pushed up into the mesh. Middle: Shaped more like a pumpkin
instead of the back of a skull in ZBrush with GoZ. Right: Bottom of head showing small hole after scaling down neck.

OPTIONAL: Reshape the Back of the Head

If you have a 3D program capable of sculpting, then you can alter the skull-like pumpkin head mesh to look more like a pumpkin. If no other tool is available, then the original mesh will work just fine. You can always hide the skull shape with lighting, props, camera angle, or a cloth if it bothers you. I used the original skull shape in the final image render.

How to make the eyes black:

  • Select eye parts with Digital Human Skin and change their shaders to PBR.
  • Select all eye properties and load a solid black image in the diffuse channel (note: you will not see the final all-black result until you set the shader to PBR.
Character Creator 4

The Headless Body Character

My favorite and easiest part is making up the body of the character. I already had a premade character in mind. My budget character set, the Masked Swordsman. The clothing could fit the period in question, and it was already black. From reference pictures, it ticked off a lot of the important parts like boots, bell sleeves, tucked-in pants, and many other aspects of those times.

Plus, it had a mask that I could use just like I used the bowtie earlier. The mask would be my on/off switch for the body and lower neck. This was convenient just like the Jack Lantern bowtie.

I was going to use a muffler or scarf to cover the top of the character’s neck so the big hole wouldn’t show where the head is supposed to be.  While there are neck mufflers and scarves available, I decided to jump into Marvelous Designer and just throw a single piece of cloth over it and see how it draped. I was lucky as it did just what I needed it to do on the first attempt.

Left: Original Character. Right: New cloth draped, and mask with hide head mesh invoked. Right: Mask hidden with its opacity setting.

HIDING THE HEAD

Using the same method as I did earlier with the Pumpkinhead, I used the mask as the cloth that hides the head and upper neck. After this, I hid the mask with opacity which can be one with the slider or using a black image in the opacity channel.

Next, I added, skinned, and textured the shoulder wrap I made in Marvelous Designer to cover the open neck. If you don’t have any kind of wrap that works, then alter a muffler with the mesh tool as all I was trying to do was cover the bare flesh of the original character’s chest. You could also resort to texturing the character’s chest black since it wouldn’t affect the character any further.

Headless Horseman Pesade Image

I was working with two characters for the Horseman and another for the horse. To do the Pesade with the horse I loaded the Pesade motion from the Horse and Tack Theme Pack into the horse while using the corresponding Rider Pesade for the headless body. In this case, I can go a step further and add the Rider Pesade to the head, or I can use another motion, keyframing, or puppetry.

This makes three distinct characters that can be animated in a scene. The horse is the Farm Horse from the Horse and Tack Theme Pack and is actually an avatar instead of a prop. There is a lot more going on in this scene than it looks like at first glance.

The background is AI-generated so there are only the three characters and the background image plus the camera and a blue image overlay to cut down on the contrast between the background image and the 3D characters.

The Headless Horseman

Versatile Setup

If you are using something like this for a video, then the head will talk, and it also has dynamic expressions since I activated the wrinkle system so it can have a fiery conversation or tell a Halloween tale with enthusiasm and passion.

As I mentioned earlier you can also link the two characters together but be careful to link to the proper neck bone on the body character for motions to work properly if you are mimicking the actual full character. In this scene the head is linked to the hand.

Also, keep in mind that the linked “character” is in reality two characters that will require two different actions for loading or creating motions. If you want the head to use the same motion as the body, then you will have to load that motion into each character.

It can and does get a bit confusing when you first work with a combined character like which character am I on, wait… I loaded that… oh, not for this character but it also creates a character with a lot of possibilities.

Using AccuRIG to Mask Unused Bones

On a closing note, and I tested this, you can run the characterized head character through AccuRIG, being sure to preserve the existing facial bone structure when asked, and then use the masking tool to completely mask out the body or head so no motion will be accepted. This does replace the characterized skeleton and I haven’t tested it enough to know of any pros and cons. It seems to work fine and completely immobilize the unused, hidden parts of the character.

Keep an Open Mind

One thing about this animation journey is to always think outside the box when it comes to problem-solving or innovation in animation. While this sounds like corporate speak it is true because as easy as animation is getting there is still not an easy button for everything. Don’t let the lack of a documented method keep you from experimenting to see what can be done.


MD McCallum – WarLord

Digital Artist MD “Mike” McCallum, aka WarLord, is a longtime iClone user. Having authored free tutorials for iClone in its early years and selected to write the iClone Beginners Guide from Packt Publishing in 2011, he was fortunate enough to meet and exchange tricks and tips with users from all over the world and loves to share this information with other users. He has authored hundreds of articles on iClone and digital art in general while reviewing some of the most popular software and hardware in the world. He has been published in many of the leading 3D online and print magazines while staying true to his biggest passion, 3D animation. For more information click here.


Jose Cuervo Tequila enters the Metaverse with Character Creator, iClone, and Unreal Engine

Bringing Jose Cuervo tequila to the Metaverse with Character Creator, iClone, and Unreal Engine

Alex Kong

I’m Alex Kong, a 3D artist with a journey spanning 17 years in the animation industry. Throughout my career, I’ve collaborated with industry giants like Sony Imageworks, Animal Logic, and Squeeze Animation, contributing my artistry to captivating animated series, movies, and AAA games.

Today, I’m excited to dive into a unique chapter of my journey. This chapter revolves around a singular ambitious project that has led me to push the boundaries of animation. In this endeavor, I’m thrilled to harness the power of Reallusion’s iClone 8, Character Creator 4 and Unreal Engine!

You can read my original article on my website Alex Kong.

A Daring Challenge from the Metaverse:

When ACHE Agency presented an opportunity to breathe life into the Metaverse experience that they created in Decentraland for Tequila Cuervo, I saw the chance to not only embrace an audacious challenge but also to harness the combined power of Reallusion tools with Unreal Engine in the process.

The project came with a tight one-month deadline, a feat that might have appeared insurmountable at first glance. However, armed with the incredible capabilities of Reallusion and Unreal Engine, I took the plunge into what would become a transformative journey.

Jose Cuervo is bringing tequila to the metaverse

This project was undeniably multifaceted, demanding not only the creation of multiple characters but also intricate animations on uneven terrain. After all, it required a substantial amount of lighting and rendering work to bring the vision to life.

Discovering Reallusion and unreal: A Fresh Perspective on Creativity

With the versatile Character Creator tool from Reallusion and a wealth of assets available from the Reallusion marketplace, I eagerly accepted the challenge. Basically, I managed to produce over 25 beautifully designed characters in just one week! This alone was a true game-changer. Without these innovative tools, achieving such a feat within a traditional workflow would have taken several months.

Moreover, considering the project’s budget constraints, this rapid character creation was nothing short of a miracle. Reallusion’s tools not only met but exceeded expectations, making the seemingly impossible not only possible but also practical.

Animating with Finesse: From Actors to Xsens Magic!

Once the characters were ready,  they needed movement and life. Using the extensive motion capture animation collection from the ActorCore library , I was able to find what I needed.

I was able to do the body animation for all these characters and then using the Facial animations from the Digital Soul pack their faces came to life instantly!

For more specific actions, I turned to the Xsens suit, seamlessly capturing the necessary motions and applying them to my main characters. Drawing from my prior experience with MotionBuilder for AAA projects, I can unequivocally attest to iClone’s suite of tools for motion capture editing as simply amazing!

You can blend, loop, and align clips, stretch and contract them, polish the curves, and control all your characters from a simple UI. But where iClone truly shines is in its seamless, no-hassle retargeting from various motion capture solutions.

The hand and feet stabilization features, hand puppets, premade hand poses, and the AccuLIPS tool for automatic lipsync made animation a breeze. And the Motion Director tool, which allows you to control characters like a video game, was the cherry on top.

Above all, the Motion Director tool stands out as a remarkable asset. With ease, you can connect a gamepad and maneuver not just one character, but an entire crowd, akin to playing a video game! As you record the motion, it’s as simple as that – BOOM, it’s completed! And to add the final touch, it includes uneven terrain detection, acting as a true savior in challenging situations.

Basically, mocap editing and animation become a breeze thanks to iClone’s highly intuitive tools!

A Brilliant Finish: Lighting and Rendering with Unreal Engine:

As the project approached its climax, the need for lighting and rendering became increasingly essential. This was where Unreal Engine’s real-time rendering capabilities truly shone. Moreover, Reallusion’s seamless integration with Unreal proved to be a lifesaver. It facilitated the smooth transfer of characters, crowds, animations, and cameras, streamlining the workflow. The addition of the Unreal LIVE LINK tool further simplified the process, ultimately saving me precious time and enhancing efficiency.

Reallusion has truly put a lot of effort into making this transition smooth, and it showed in the results.

Navigating Learning: Reallusion’s Rich Tutorial Goldmine

I’d be remiss not to mention Reallusion’s tutorials. A true treasure trove of knowledge, these tutorials were my guiding stars whenever I hit a roadblock. From their website to YouTube, Reallusion has invested thoughtfully in nurturing artists with the skills needed to navigate their pipeline effectively.

Reallusion and Unreal, a tale of triumph: Achieving Realistic Success

Fast forward four weeks, and there it was – I had accomplished what seemed like a monumental task. In just a month, the project, with all its intricacies and challenges, had transformed from a concept into a tangible success story.

But the real star of this narrative? The unsung hero was none other than the Reallusion pipeline itself. This real-world account highlights the significance of innovative tools. It showcases how a well-crafted pipeline, like Reallusion’s, can weave its magic and make a palpable impact on the creative process.

It’s stories like these – grounded, authentic experiences – that truly exemplify how innovation can turn challenges into accomplishments.

In Conclusion

As I stand here, with the project finally wrapped up, I can’t help but feel a surge of excitement for what lies ahead. Despite its imperfections, that very imperfection fuels my enthusiasm. Moreover, if I could achieve this mostly on my own within such a tight timeframe, just imagine the potential we could unlock with a small, dedicated team and a bit more time on our side.

I’m confident that this project is merely a stepping stone. The Reallusion pipeline has unlocked a realm of fresh possibilities, and my curiosity is piqued about the future of animation.

Navigating this solo endeavor over four intense weeks wasn’t a cakewalk. However, amidst the whirlwind, one element stood out as a guiding star: the Reallusion pipeline. It wasn’t merely a sidekick; rather, it served as the true powerhouse behind this remarkable accomplishment. Acting as my secret weapon, it effortlessly infused innovation into each stride, helping me surmount every challenge that came my way.

Indeed, projects and challenges like these serve as poignant reminders of how technology can not only magnify creativity but also breathe life into ideas, transforming them into tangible achievements.

So here’s to the project’s triumphant culmination, celebrating the transformative tools that fueled it, and raising a toast to the exciting horizons that await. Cheers to the boundless possibilities of animation, as we continue to explore, innovate, and create!

Join us on an incredible animation journey!

Credits

Project comissioned by Ache Agency to promote the Metaverse Experience that they did for Tequila Cuervo in Decentraland
https://www.ache.ooo/

Mocap editing
Alex Kong
Peter Podesser –
https://www.youtube.com/@iclonevuze7777

Crowds optimization
Peter Alexander – https://www.artstation.com/mythcons
Alex Kong

Lighting
Alex Kong
Alex Chavez –
https://www.artstation.com/lexkan

Environment creation
https://rojkindarquitectos.com/

Lighting
Bernabe Guerrerop Guzman

All else
Alex Kong

Created with Reallusion’s iClone, Character Creator, Unreal Engine 5, Reallusion and Actorcore Marketplace’s assets and Xsens Technology

Kitbashing in CC4

WarLord’s Workshop: Kitbashing a Character in CC4

Kitbashing in CC4

BACKGROUND 

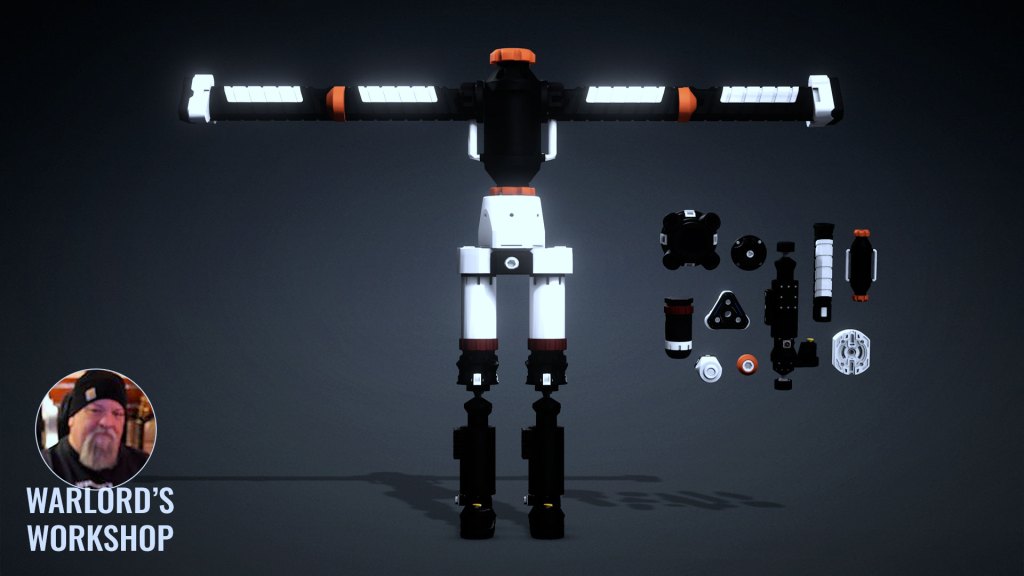
Kitbashing, putting something unique together from a kit or parts, has been around in various forms in movies and television for a long time. The current, digital version of kitbashing includes free and commercial kits of parts that look like something out of a Popular Mechanics magazine, or an industrial warehouse or garage. This depends on the type of kit you are looking for, but general science fiction-based kits are clamps, frames, pulleys, hydraulic cylinders, and similar industrial-style parts. 

Some people can just look at a pile of parts and see a robotic character or tool. This type of asset creation is usually done with apps like Blender, 3DS Max, Maya, and Cinema 4D but it can also be kitbashed together in Character Creator and then rigged for animation in iClone. 

BREAKING OUT THE KITBASH PARTS

A video tutorial that explains this written overview in detail is located at the bottom of this article. It is broken down into several parts with timestamps available in the description. There is also a 4X speed clip of the kitbashing process towards the end of the video.

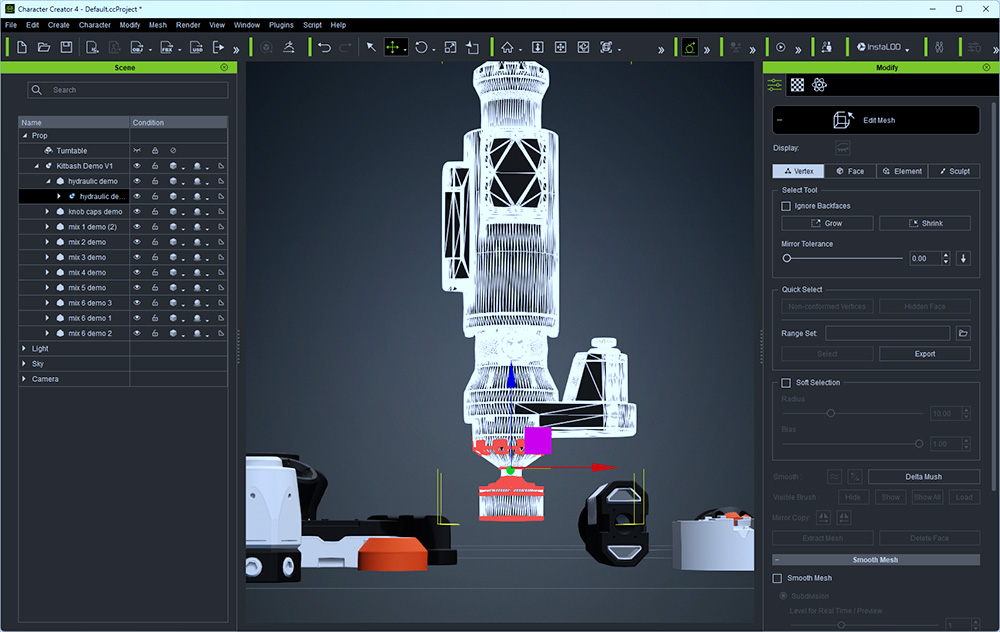
One of the biggest problems facing a new kitbasher is the fact that a lot of these assets come placed in one FBX or OBJ file and at times one combined object. Some must be broken out at the vertex level while others, as in this case, just have to be detached to be used. They are also usually high poly and that is the case with the kit I’ll be using in today’s example of kitbashing a simple robot together. We’ll lower that count in CC4 later in the tutorial so as to not make the body-building segment any longer than it needs to be.  

The Kitbash Kit from Enrique Bono. Link at the bottom of this article.

Kitbashing might be a very misunderstood approach by those new to the nuts and bolts of character creation. In this example I build an entire robot body and rig it, also showing how to mask unused bones, but most of you will catch on quickly. There is also a 4X clip of the body build towards the end of the animation for those who just want to see the process. 

I try not to create video tutorials over twenty minutes which is about five minutes longer than my attention span when I’m looking for tutorials, but I shaped it in such a way that you don’t have to watch all of it. Once you see a few body parts put together you can skip around or view the 4X Speed Clip to get an idea of what is going on. If the concept baffles don’t be worried, you are not alone. 

TUTORIAL BREAKDOWN 

The tutorial is broken down into the following parts: 

Part 1 – Kitbashing the Body 

Part 2 – Optimizing the Body Parts 

Part 3 – Rigging with Character Creator 4 

Part 4 – Optional – 4X Speed Clip of Body Build  

GETTING STARTED 

I will drag and drop the kitbash assets, FBX in this case, into the CC4 workspace. Next will be to detach the actual meshes from the dummies and delete them to clean things up a bit. After that, I’ll jump right and start with the leg and how to alter it a bit if it does not fit your needs. 

ALTERING MESH AT VERTEX LEVEL 

With the Mesh tool, we can alter one particular piece to make it the lower leg. At the vertex level, I will grab all the mesh I can get sticking out from the flat surface of what we will use as a lower leg and foot. I push the pogo stick-looking bottom piece up into the “foot” mesh and scale it back, so it won’t poke through the outer mesh. 

Starting the process of using the Edit Mesh push the unwanted vertices up into the “foot” and then scaled down to not poke through.

After this, still at the vertex level, I will carefully grab what looks like the front of the lower foot and stretch it out to resemble a foot. Character Creator 4 gives us a good Mesh tool so let’s not just relegate it to minor shaping and flaw fixing.  

For this character, we won’t be altering any more mesh, but this demonstrates what can be done with the Mesh tool when needed. You control the scene assets, don’t let the scene assets control you or your vision of what you are producing unless it just can’t be helped otherwise.  

BUILDING THE LEG(S) AND PELVIS 

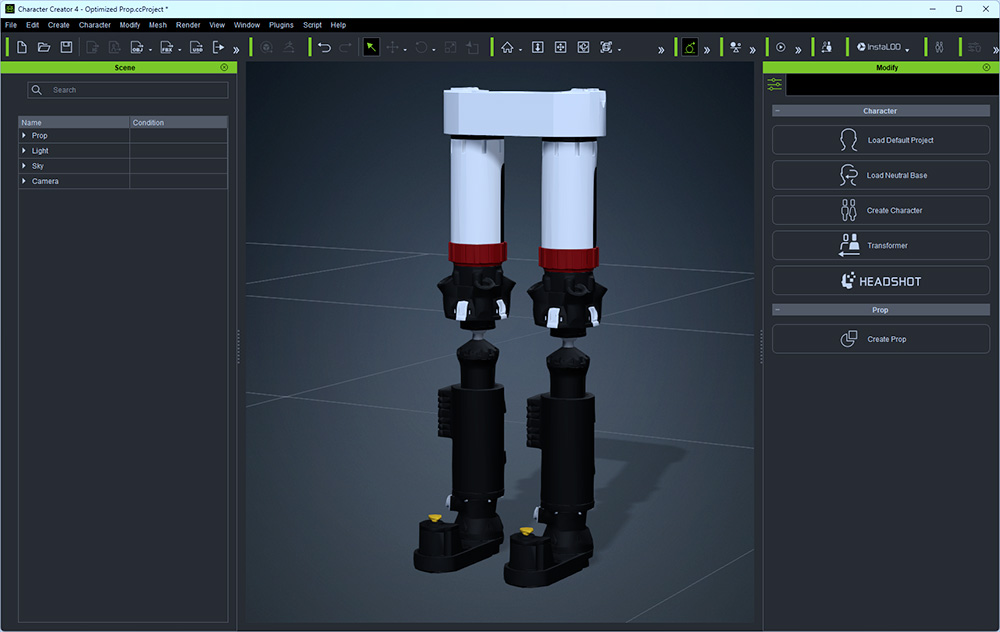
As you can see, I’m starting with one leg, mainly because I could easily visualize that leg from the pile of parts. I built the leg up with a “knee” and an “upper leg” attached the Upper Leg and Knee to the Lower leg, then scaled them to suit my needs. 

From there I added a simple, one-piece pelvis and scaled it. I then duplicated the “leg” and moved it into place. Later, when we optimize, I’ll delete that duplicated leg and an arm, so we don’t have to optimize them twice. I then will duplicate the optimized leg and arm and move it into position just as I did when I was building the body.  

Pieced together one leg then duplicated for the other leg while using one scaled-up piece for the pelvis.

This is where you will notice that when you duplicate the leg, the dial on the ankle will be on the same side of both legs. You might be able to push the dial into the mesh and scale it back with the mesh tool at the vertex level if you want to hide it but I just left it like it was.  

The LOWER, UPPER TORSO & ARMS 

The lower torso and upper torso are one-piece objects each making that a quick and easy attachment that only needed to be tweaked in scale to your personal preference. 

The kitbashed body is ready to be optimized. You can optimize as you build or after building but each piece must be run through InstantLOD to optimize.

The arms were built out and duplicated then moved into place just as the legs were. They were attached to each other as one unit just like the legs. 

CENTERING AND SCALING UP 

This was a ZBrush-based kit, as many are, so it was at a much smaller scale than we work at in Character Creator or iClone. With this in mind, I built the body first and scaled up later when needed. You may choose to scale up the parts to start but I found this to be a simpler method as I can just scale the kitbashed body to match an iClone character which you can add to the scene then delete after scaling up. 

Added a male character for scale then repositioned and scaled up the body mesh to match the male character. The male character is deleted afterward.

AccuRIG – THE EASIEST PART 

Since we will be using AccuRIG to skin the robot body, I decided to experiment a bit and try not to change any markers from their initial placement by the plug-in unless I had to. In the video, you will notice that I had to lower the top of the leg markers as they had settled on the pelvis which would make the pelvis twist with movement. I lowered these markers to just below the pelvis on the top of each leg. Everything else stayed in its original location. 

Left: I only moved the selected markers (with symmetry) so the pelvis wouldn’t twist. Middle: Unused bones masked out. Right: Final skeleton before skinning.

I then set the rig up for zero fingers and let it create the skeleton. After this I let Character Creator 4 AccuRIG do the skinning and had a very usable kitbashed animated robot body. 

WHY JUST THE BODY? 

To give you as the user an opportunity to finish out the character with a head and hands that you can make, kitbash, or get from SketchFab. A quick search for “robot head” and “robot hands” will yield some nice results. Take the finished character into AccuRIG again to rig the new parts.  

We can also rig partial robot characters like a walking set of legs or a functional upper body complete with a head. You could then link and unlink those characters for some unusual results. The same should hold true for a “Headless Horseman” type character.  

Now I want to stop working on this article and make a Headless Horseman but that is just how a good piece of software can creatively inspire you so I will push on to finish this up. 

SUMMARY 

There was a lot to pack into this tutorial, but kitbashing is something almost anyone should be able to do. At this level, it is not advanced by any means. The body could have been rigged better or shaped better in the shoulders for a more squared-off result, but the tutorial was already going to run long so I just moved on. Besides, that can be tweaked with Character Creator 4’s Proportion or Pose Offset tools. 

Kitbashing is like gluing together a model in your bedroom as a kid like some of us did back in the old pre-digital days. Except without the screaming, cursing, and general throwing of tantrums when things didn’t fit or look as good as the box did! For the rest of you who have no clue what “gluing together a model is” then you might consider kitbashing to be the equivalent for your generation. 

And of course, I would never suggest, over a 3D model, that any of us would scream, curse, or throw a tantrum today…  

…unless… maybe… we knew no one was around. 

Thanks for stopping by. Hope to see you next time! 


Kitbash Kit used in this tutorial: 

Hard Surface Kitbash Demo Kit: 

https://cubebrush.co/enriquebono/products/vgtqq/kitbash-hard-surface-demo-v1


MD McCallum – WarLord

Digital Artist MD “Mike” McCallum, aka WarLord, is a longtime iClone user. Having authored free tutorials for iClone in its early years and selected to write the iClone Beginners Guide from Packt Publishing in 2011, he was fortunate enough to meet and exchange tricks and tips with users from all over the world and loves to share this information with other users. He has authored hundreds of articles on iClone and digital art in general while reviewing some of the most popular software and hardware in the world. He has been published in many of the leading 3D online and print magazines while staying true to his biggest passion, 3D animation. For more information click here.