Hello, I’m Scott Evans, founder ofDigital Puppets, an animation studio specializing in motion capture and VTuber production. We’ve collaborated with Disney, Cartoon Network, BBC, and creators worldwide.
I’ve received many inquiries about the differences between Adobe Character Animator, Live2D, and Reallusion’s Cartoon Animator 5. While I’ve created numerous videos on Character Animator, I’ve recently switched to Cartoon Animator 5 due to its new features that suit my workflow perfectly.
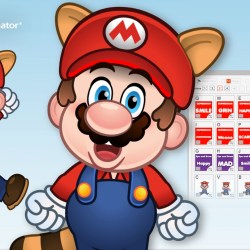
Instead of just explaining, I’ll show you Cartoon Animator 5‘s capabilities with a new Super Mario puppet I’ve created. Recognizable characters like Mario allow me to showcase the full potential of motion capture and trigger-based animation. Let’s dive in!
Setup a Living Mario
Before I started the design, I collected lots of Mario images and videos and tried to find his unique expressions and postures.
Once the character concept design was complete, I layered it in Photoshop, ensuring all elements were correctly organized.
Next, I imported the graphics into Cartoon Animator and aligned it with CTA’s PSD Character Templates, which offers a straightforward setup process. I positioned the character’s key points, like the arms, neck, knees, and feet, using anchor points. This step is crucial as it allows for smooth movement and animation. Once the character is set up, it’s almost ready for animation!
Animate Mario with 360 Head Turn
One standout feature is the 360 Head Turn, offering more dynamic motion than Live2D’s parallax system. While Live2D is popular, it can be somewhat limited for puppet creation. The 360 Head Creator, however, enables complex movements. I’ve layered Mario’s head with elements like the jaw, nose, eyes, and shading, resulting in a smooth 2.5D effect in 360 Head Creator that lets him look in any direction seamlessly. For those exploring advanced animation, I highly recommend trying this tool.
Smooth Facial Animations with Sprite Sequence
The enhanced image sequence feature allows us to create complex animations directly within characters, enabling precise control over facial movements, something difficult to achieve with basic face tracking alone. I’ve also created sequences for eyelids and eyebrows, allowing for seamless combinations of various expressions. This flexibility makes it easy to mix and match, giving characters more natural and expressive animations.
Real-Time Animation with Trigger System
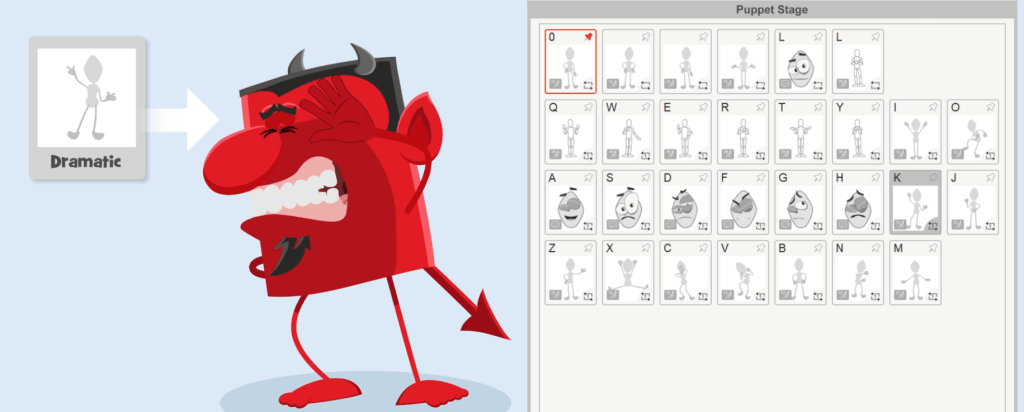
Puppet Stage lets users build up custom triggers to make character animation easy and interactive. I’ve set up expressions for Mario, like happy, sad, and surprised, which can be activated instantly with key presses. I’ve also added different body triggers and camera angles, making the animations more engaging. This allows quick emotion changes to create expressive performances, perfect for live shows or real-time content.
Facial Mocap and Audio Lip Sync
The facial mocap and head-driven body movement features create smooth, lifelike animations that bring characters to life. With tools like Live Face, you can capture detailed facial expressions and achieve precise lip-sync in real-time. Head movements drive full-body actions, allowing characters like Mario to pivot, gesture, and move naturally, adding a dynamic and realistic touch to the animation.
Engaging Animations with Versatile Cameraworks
The Camerawork allows for multiple dynamic views during animation. You can easily switch between angles like full-body, upper-body, head and shoulders, or close-up, making live shows more engaging and professional. You can also create scrolling animations, like in classic Mario games, by setting the camera to follow the character along a path, keeping them centered on screen. It helps make the animation flow better and keeps the audience focused.
Massive Asset Library
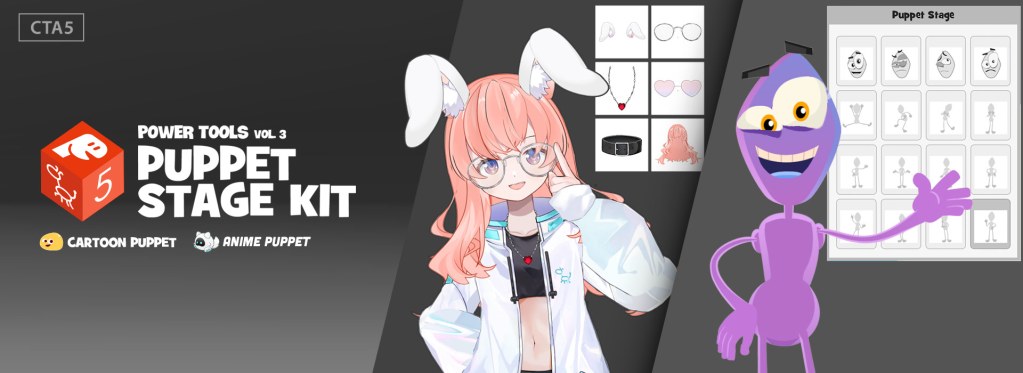
The software offers a vast library of assets, including animations, VFX, and motion packs, for creating puppets. New packs likeCartoon Puppetand Anime Puppetallow you to mix facial and body movements to create unique performances. You can also add VFX, props, and backgrounds, linking them to character movements with custom hotkeys. For example, you can synchronize a happy expression with sparkles or a sad face with tears using the same key. This flexibility makes it easy to create visually rich animations with minimal effort.
Green Screen Setup for Live Streaming
You can activate a green screen background with a single click. This lets you place your character onto different backgrounds, which works well for platforms like OBS, Twitch, and other streaming services. It’s an easy way to add animated characters to any virtual setting during live shows.
Conclusion
The software offers a great workflow for making eye-catching animations, ideal for live shows or YouTube. It’s perfect for VTubers and animators wanting to improve their content. This is just a glimpse of what’s possible, explore more on the Reallusion YouTube channel. For questions, contact me at info@digitalpuppets.co.uk. Stay tuned for more tutorials and comparisons. See you next time!
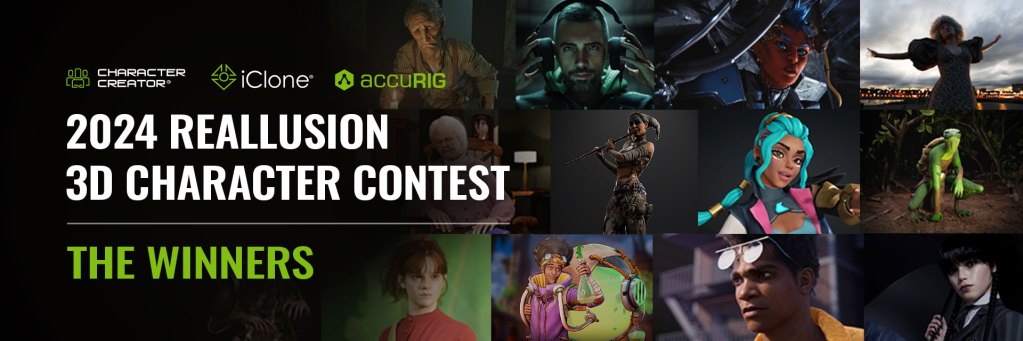
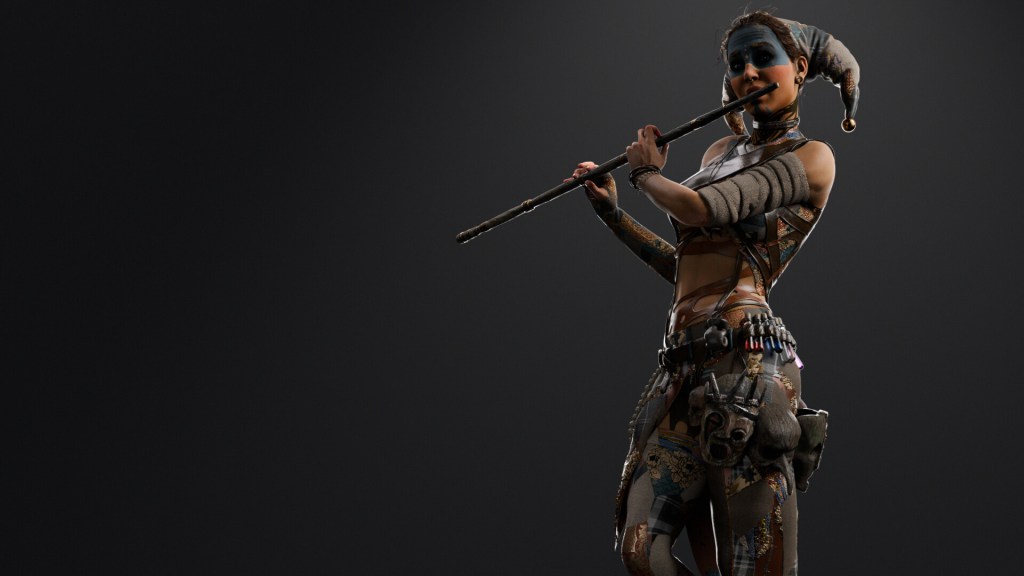
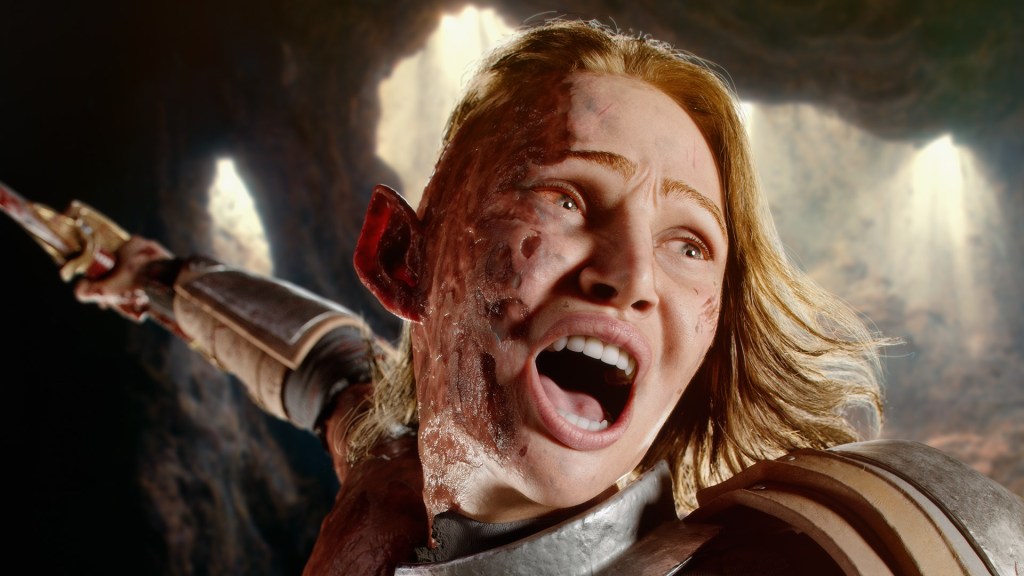
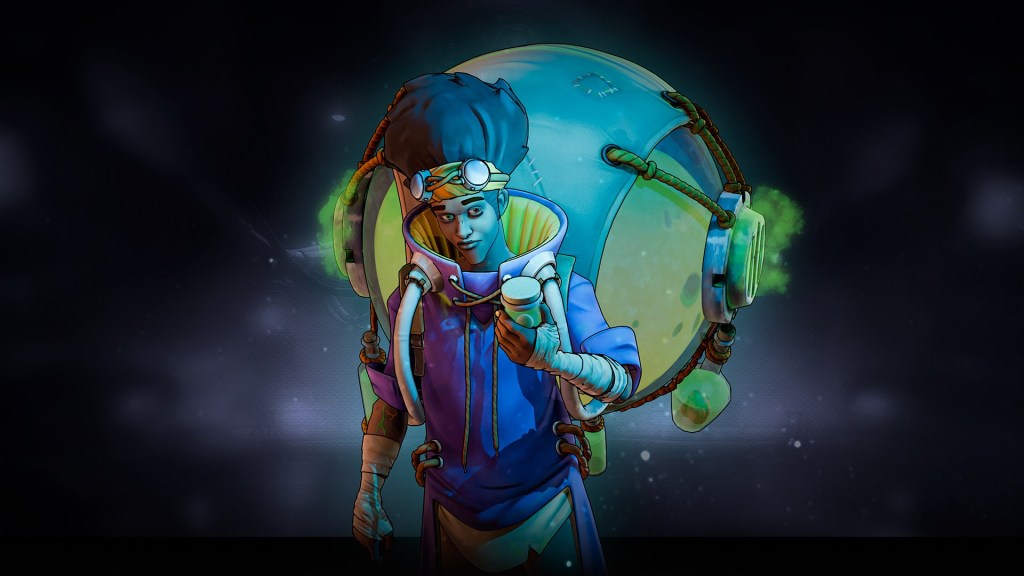
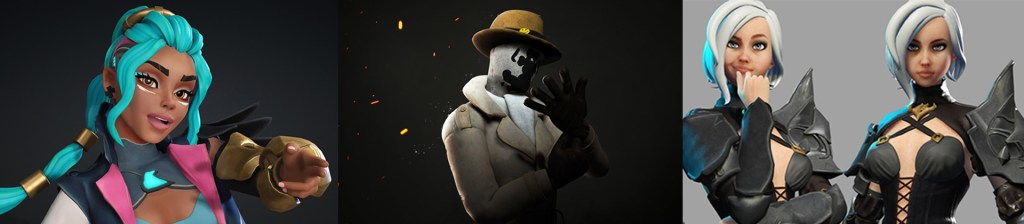
Reallusion’s 2024 3D Character Contest was held between May 1st to September 30th, 2024. Within 3 months, 267 submissions were submitted from 55 countries. showcases the best 3D character design and animation created using Reallusion’s powerful character production ecosystems – Character Creator for 3D character creation, iClone for facial and body animation, and AccuRIG for rigging.
“At Reallusion we are proud to see an influx of high-level character artists who are adopting Character Creator and iClone into their professional pipelines. The contest proved the viability of using Character Creator to create unique 3D characters without thematic limitations. We congratulate all who participated, and look forward to bringing more innovations to the industry.”
– Enoc Burgos, Reallusion Director of Partnership Marketing
Prize Sponsored by Renown Industry Leaders
The 2024 3D Character Contest was hosted by Reallusion and sponsored by industry leaders such as NVIDIA, Maxon, Rokoko, Noitom, KitBash3D, 3DConnexion, KeenTools, TexturingXYZ, and Fox Renderfarm. Through this contest, Character Creator’s extensive pipeline allows artists to seamlessly integrate a new workflow designed for rapid creativity with zero sacrifice in character quality.
Meet our winners
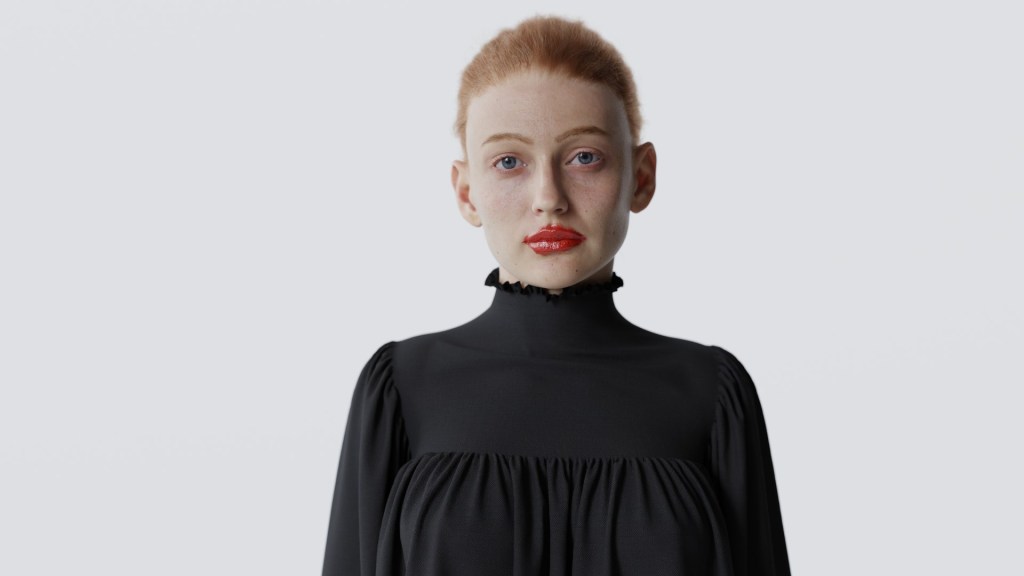
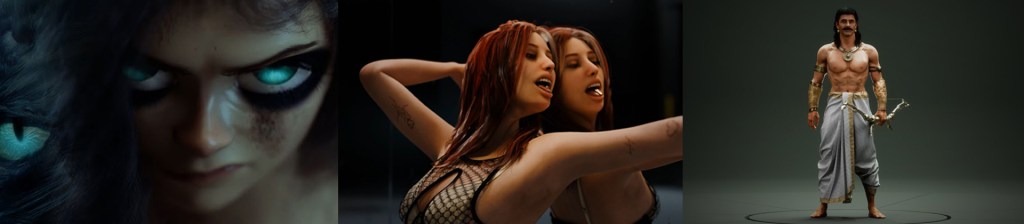
REALISTIC CHARACTER DESIGN
Under this category, entrants create a realistic human character in Character Creator by combining the character base with tools like ZBrush, Substance Painter, Marvelous Designer, Blender, Wrap, Texturing.xyz, and Maya.
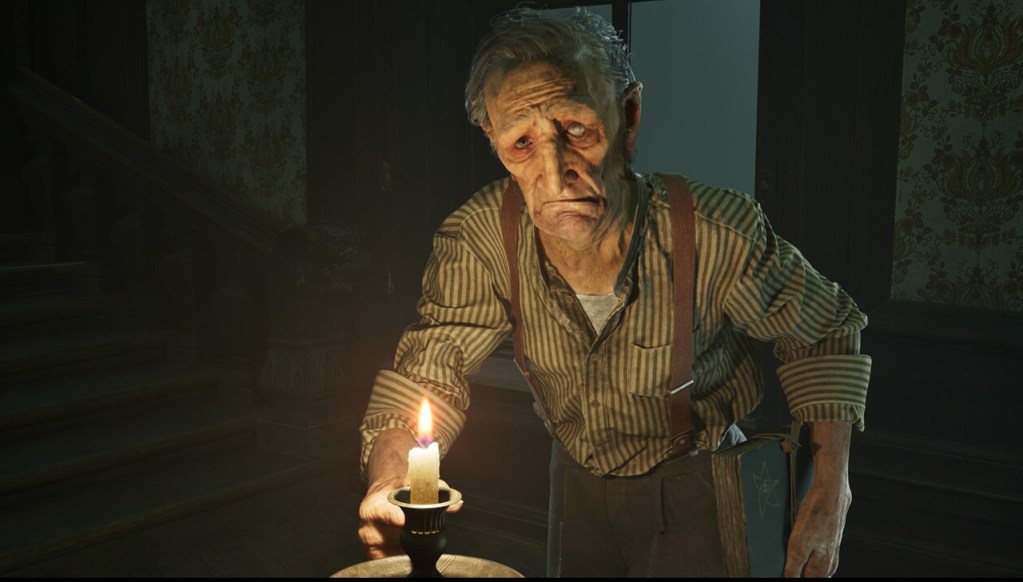
1st Place: The Last Entry – by Konrad Hetko, 3D Character Artist | Poland
“Reallusion’s tools were incredibly helpful, especially the ease of switching between Character Creator and ZBrush using GoZ. But what I appreciate the most is FaceTools, which takes care of the most tedious aspects of working with morphs and dynamic normals by automating everything with just one click!” – Konrad Hetko
2nd Place: Shannaz – by Tomáš Babka, 3D Artist | Czech Republic
“I really like tools from Reallusion. Especially the Character Creator. They help me speed up the character creation process tremendously. Quality textures, Topologies, Meshes and Morphs are of a high standard and very well made. As well as tools and addons for Blender, ZBrush, Unreal or Unity. Any pipeline including characters can be significantly sped up.” – Tomáš Babka
3rd Place: Hard Battle – by Jeet Shah, 3D Character Artist | India
“Character Creator introduced me to a refreshing new way of creating 3d characters with a very non-destructive approach with its hundreds of sliders (if not thousands using additional Headshot sliders) for full body modifications. I could easily try out new proportions, new ideas without fearing that I won’t be able to revert back to the old one. And on top of that the GoZ link allowed me to fine-tune the primary shapes that I could achieve with using only CC4. All of this flexibility comes with an additional benefit of having the character pre-rigged with both body and facial rig.” – Jeet Shah
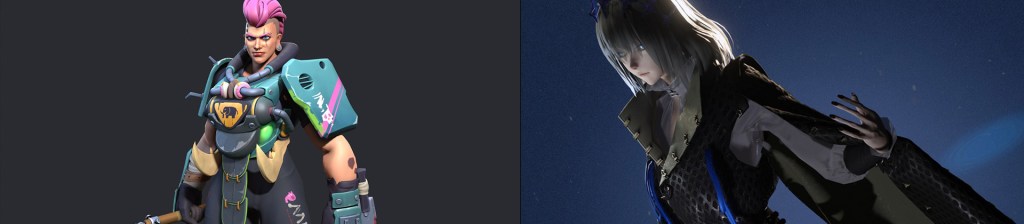
STYLIZED CHARACTER DESIGN
Under this category, entrants create a stylized character in Character Creator by combining the character base with tools like ZBrush, Substance Painter, Marvelous Designer, Blender, Wrap, Texturing.xyz, and Maya.
“It’s such an ease to have a faithful base to the concept, reducing the time to see in action for the created assets and the character. Character Creator provides the possibility and versatility of adding bones for extra accessories, giving life to the character.” – Jorge Leonardo Ayala Arias
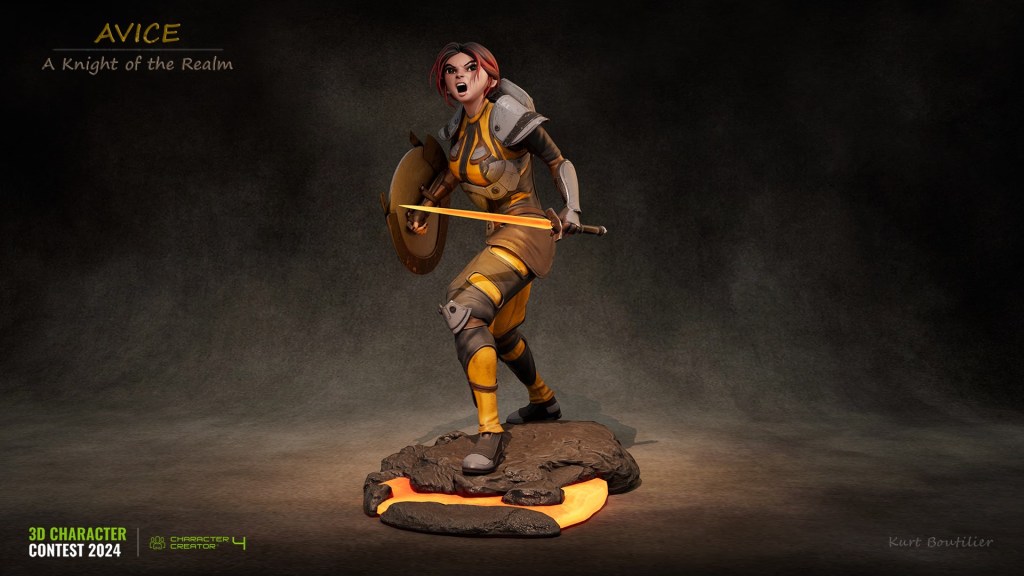
2nd Place: Avice – A Knight of the Realm – by Kurt Boutilier, Digital Sculptor / 3D Print Artist | Canada
“Reallusion tools helped me create a base mesh for my character, as well as the ability to rig and pose her much faster then modeling or rigging a character from scratch.” – Kurt Boutilier
“Character Creator 4 is an incredible software; it helped me save 50% of the time in my character creation pipeline. Additionally, it allows me to pose characters quickly without needing complex rigging methods. Its integration with ZBrush is so seamless that they almost seem like a single program.” – Duai Sebastian Florez
REALISTIC CHARACTER ANIMATION
Use iClone to create a realistic animation for a character made with the CC3+ Base. The character model can be customized with Reallusion tools and content or third-party software like ZBrush, Blender, Unreal Engine.
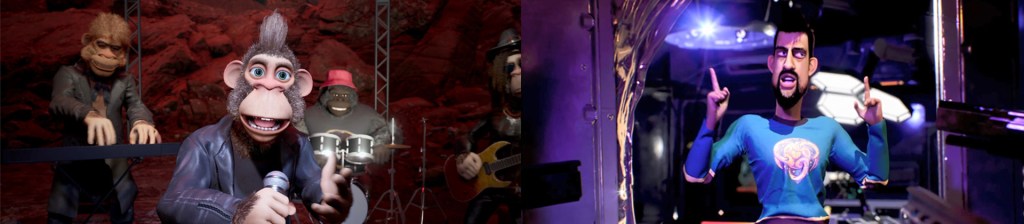
1st Place: Lisa & Fia – by Robert Lundqvist, 3D Hobby Artist | Finland
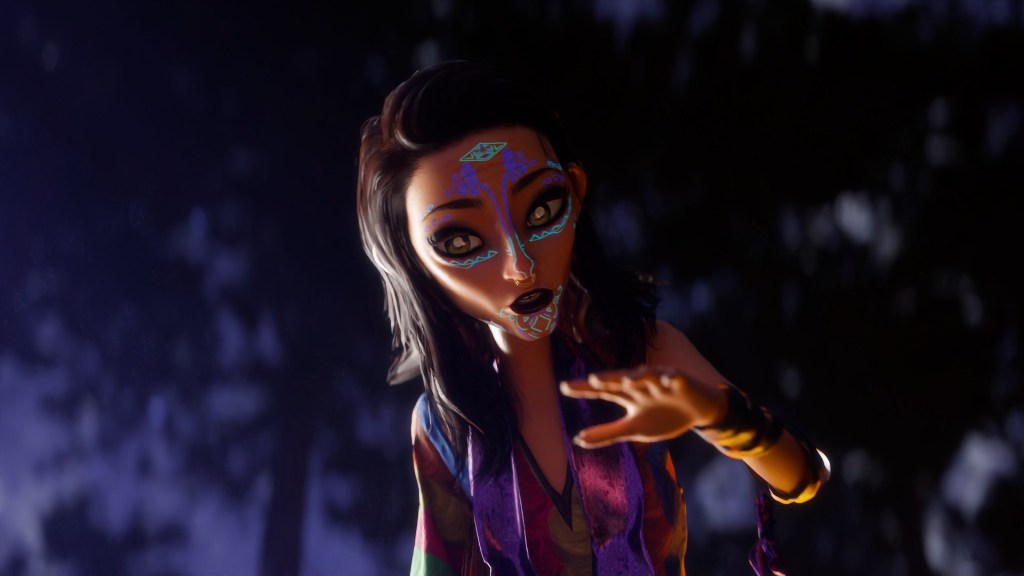
2nd Place: The Playful Deity – by Kay John Yim, Architect by day / CGI Artist by night | United Kingdom
“Character Creator 4’s Ultimate Morphs allowed me to create my character’s foundation non-destructively, which seamlessly integrated into iClone for posing and animation. SkinGen enabled me to add detailed skin textures and facial makeup, which I then exported as high-res textures for rendering in Houdini & Redshift. I utilized ActorCore motions as the base for the character animation and relied heavily on iClone’s ‘Edit Motion Layer’ and ‘Motion Correction’ for user-friendly animation adjustments. Digital Soul helped me test various realistic facial expressions before refining them with Face Key.” – Kay John Yim Watch the full entry: https://vimeo.com/1001507778
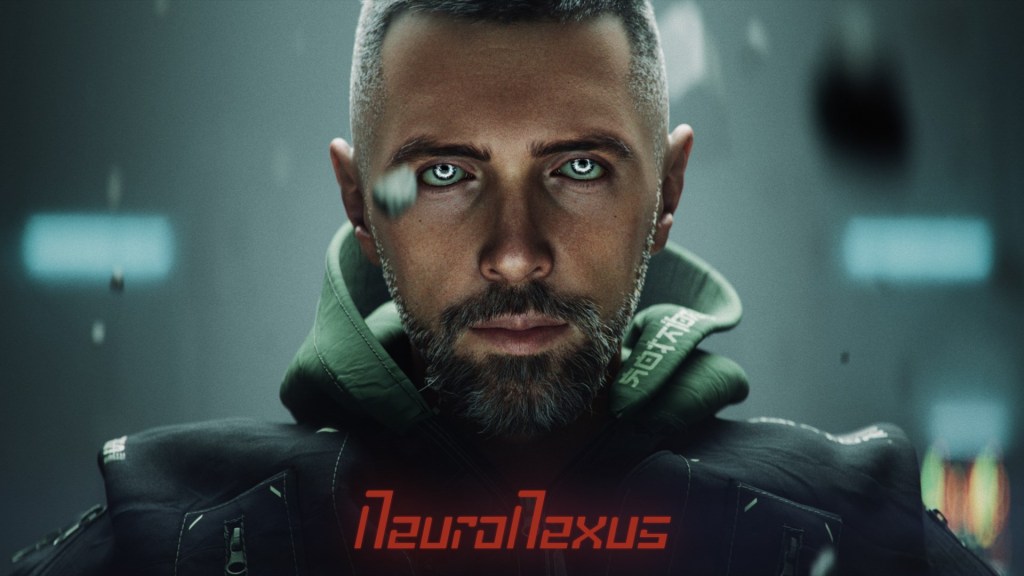
3rd Place: NeuroNexus – by Hamidreza Hamzehpour, CG Generalist – Film/Animation Maker | United Arab Emirates
“Initially, I used the base 3D model of the character creator and sent it to ZBrush using the ZBrush Face Tool Plugin to sculpt my character on the base m, then exported the rigged character to Cinema 4D. Also, I’ve used iClone to mix some animations like walking to stop, start to walk, etc.” – Hamidreza Hamzehpour Watch the full entry: https://vimeo.com/1004667047
STYLIZED CHARACTER ANIMATION
Use iClone to create a realistic animation for a character made with the CC3+ Base. The character model can be customized with Reallusion tools and content or third-party software like ZBrush, Blender, Unreal Engine.
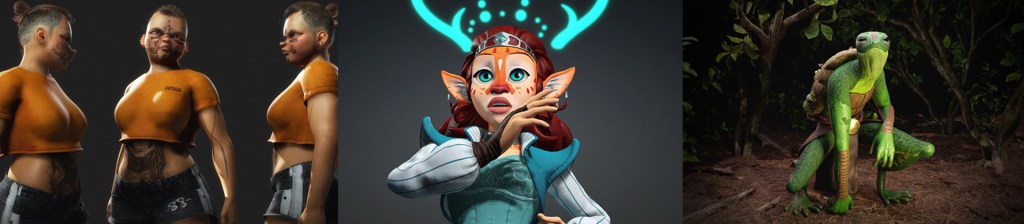
1st Place: HellGal – by Loïc Bramoullé, Cinematics for indies and AA studios | France
“I started with Camilla in CC4, customizing her proportions to follow my concept, small hands and feet, elongated silhouette. I then started to design her face with FaceTools in ZBrush, already defining her custom expressions and wrinkles. I then used her body as a base to sculpt in 3DCoat, knowing I could use the skinning from CC4 to transfer the weights on my final low poly. I exported the character to Blender to make a simplified version to mocap in VR with Mocap Fusion, using my low poly environment blockout to walk around. And then import back the same animated armature into iClone. I gathered everything in blender in the end to keep polishing the environment while matching the animation, lighting, vfx, final edit, all in a single blend file. Character creator is always amazing to kickstart any humanoid character production, already supporting the really accessible facial motion capture in iClone, here with my iPad via LiveFace.” – Loïc Bramoullé Watch the full entry: https://www.youtube.com/watch?v=2elUL3Fhjis
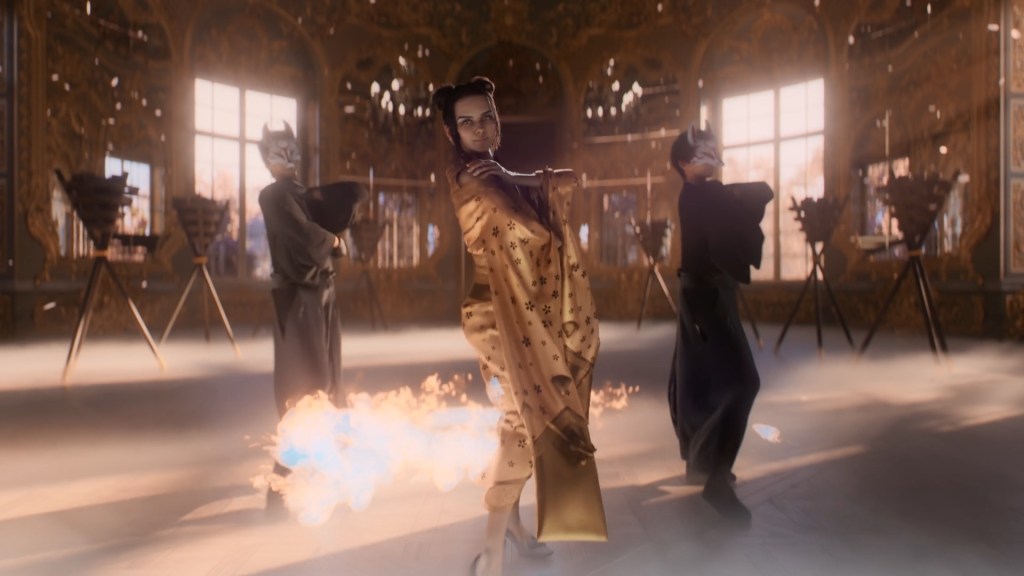
2nd Place: Dance of the Flying Spirit – by Melis Caner, 3D Generalist | USA
“As a 3D generalist, creating a character from scratch has always been challenging. Reallusion tools helped me build my character and animation significantly easier, faster, and more efficiently.” – Melis Caner Watch the full entry: https://www.youtube.com/watch?v=1r5JcroWf70
3rd Place: Nesting Realm Keeper – by Varuna Darensbourg, Artist & Game Dev | Canada
“For this challenge, I was able to complete everything using CC4, iClone, PS and GoZ+. Since I switched my direction on the final deadline week, haha! I needed to work as streamlined as possible. CC4 & GoZ+ really helped me finish my character efficiently and helped to quickly create props, like the Dragon egg, pillar and more. Another super massive time saver was using the facial capture from the Voice over video, using AccuFace.” – Varuna Darensbourg Watch the full entry: https://www.youtube.com/watch?v=TyiYUhXJnhI
BEST ACCURIG CHARACTERS
With the use of AccuRIG, artists can turn their static characters into fully animatable projects in any topology. The winning characters showcase high sculpting details with attractive poses and professional renders.
Special Awards and Prizes are reserved for outstanding achievement in certain areas of the competition. These awards are juried by our judges and add more to the winnings.
The judging process for the “2024 Reallusion 3D Character Contest ” proved to be quite difficult and took many hours of deliberation. Besides the top 3 placements from Best Character Animation & Best Character Design, Reallusion also selected 48 winners for AccuRIG characters, Special Awards, and Honorable Mentions. See the Winner Page for winner details and showcases.
Hello, I’m David, a multimedia producer and 3D designer from Cali, Colombia. A year ago, I studied at Libel Academy and completed a master’s program in Character Creator 4 (CC4) and ZBrush. This course provided me with a solid foundation in ZBrush, Character Creator 4, Blender, and Substance Painter. It allowed me to hone my skills and techniques in 3D design.
Although my professional background is in multimedia production, I decided to delve deeply into 3D design. I traveled to San José, Costa Rica, for an internship at a Virtual Production studio. There, I rediscovered my passion for 3D design. I created my first virtual environment using Unreal Engine 5.
My favorite tools for working include ZBrush, Blender, Substance Painter, and Character Creator. Each of these tools enables me to explore different aspects of design and elevate my ideas to new heights.
What I love most about being a 3D designer is the ability to create worlds and characters from scratch. I can bring my ideas to life. It pushes my creativity to the limit. It’s incredible to see how my designs come to life and interact with people in real-time.
One of the most notable projects in my career was creating a 3D character for an event in Malaysia. This character was designed in Character Creator and refined in ZBrush. It was integrated into Unreal Engine and connected with artificial intelligence. This enabled real-time verbal interaction during the event. This project not only allowed me to apply my technical skills. It also allowed me to use my ability to innovate and solve problems. This was especially true when we had to set everything up remotely using Pixel Streaming technology.
“One of the most notable projects in my career was creating a 3D character for an event in Malaysia. This character was designed in Character Creator and refined in ZBrush. It was integrated into Unreal Engine and connected with artificial intelligence for real-time verbal interaction during the event. This project not only allowed me to apply my technical skills. It also allowed me to use my ability to innovate and solve problems. “
David Pinzón – Multimedia Producer | 3D Designer
Character Creator and ZBrush integrated with Unreal Engine and artificial intelligence for real-time verbal interaction during event
“Would you recommend the union of these two software? ZBrush and Character Creator?
Totally! The truth is that I believe it is a lot easier to reach final results that look really professional. The truth is that I believe it is a lot easier to reach final results that look really professional.
It helped me so much being able to integrate Character Creator to my design workflow, because not only could I achieve a base for the character, but also a base that I could later animate with ease.
So we can say that we save many spaces (labor), and many moments to say it that way, to reach the final result.
How did you achieve your first 3D contract?
Well I was super happy because in a matter of months I was able to find a very good project. Through a client in Colombia we were able to take a project in Malaysia for an international event. It was a very good experience. The truth is that I had very good tools that allowed me to reach that final result.
What would you recommend to 3D Designers?
To research well the facilities we have with artificial intelligence and these new tools. They have served me much in saving effort, and in having this plus that in the final result.
David Pinzón – Multimedia Producer | 3D Designer
Workflow Description
Project Objective
The objective of the project was to present a 3D avatar at an international event in Malaysia.
The avatar could interact in real-time with the presenter and audience through artificial intelligence.
To achieve this, a combination of tools where used from the original character base, to the advanced design.
Later, artificial intelligence was used for the voice and lipsync of the talking avatar.
This was later used on a hologram to greet attendees at the event.
Character Creator and ZBrush integrated with Unreal Engine and artificial intelligence for real-time verbal interaction during event
Reallusion Tools Used
For the base design of the character, I used Character Creator 4 (CC4). Afterwards, I made adjustments and customized the character in ZBrush.
Main Challenges and Solutions
One of the main challenges was the need to prepare everything from Character Creator for remote execution. We used Unreal Engine’s Pixel Streaming technology, relying on third-party services to ensure the best quality.
Steps from Conceptualization to Project Completion
Planning Stage:
Executive Approval: In the early stages of the project, iClonewas instrumental in creating and presenting preliminary animations. Company executives then approved these animations.
Avatar Design
Base Design: I used Character Creator to get a solid and easily manipulable base.
Customization: I customized the character in ZBrush to give it a unique look.
Texture Editing: I edited colors and textures in Substance Painter.
Integration into Unreal Engine
Integration: I integrated the finished character into Unreal Engine using the “Unreal Auto Setup” tool.
Adjustments: I made adjustments to the lighting and camera in Unreal.
Implementation of Artificial Intelligence
AI Integration: I used Convai technology to integrate artificial intelligence into the character.
Training: I trained the character with the necessary information for the event. I gave it a name. I provided a voice generated by Eleven Labs.
Lip Sync Synchronization: I synchronized the lip sync using tools provided by Convai.
Remote Projection
Projection Setup: I used Eagle 3D Streaming technology for projection via Pixel Streaming.
Server Setup: I set up the project on their servers. I ensured the quality needed to obtain a remote connection link.
Opening & Presentation at Event: iClone was used to generate the introduction to the event. It was also used to create some supporting videos. These videos were shown throughout the presentation.
This project allowed me to combine various tools and technologies innovatively. I achieved a unique interactive experience for the event in Malaysia.
Sometimes you just need to get something done and get it done quickly. This is what we will look at today, Skinning Vs Rigging. Skinning is a bit easier, most times faster and simpler than AccuRIG. While AccuRIG is a powerful tool for skinning bipedal characters it can be a bit tricky when pushed outside of that box, but it can be done with enough effort if one needs the masking feature.
One of the biggest problems with using AccuRIG for a non-bipedal, “sort of character” or basically a block of mesh that some body parts defined but not all are usable, is a proper pivot point. Depending on where the mesh comes from or how it was created it may never have been given an appropriate pivot or worse the pivot is off from the center of the body because an arm is pointing outward like the example we will be using in this article.
This type of pose will naturally put the pivot in the center of the entire mesh, not just the bottom and between the legs. Odd pivots and other ways the mesh was made can make it very difficult for AccuRIG to properly place the markers on the mesh. It can also take a long time to create those markers even though they aren’t in optimal locations. If the mesh has proper clean topology this is not a problem, but statues are not made with animation in mind.
The best we can do is determine what limbs we think we can rig or skin and how we can accomplish that task in Character Creator 4. In this case it wasn’t rigging with AccuRIG but rather skinning the statue to the mesh as a cloth then using the Hide Mesh tool to hide the body.
AccuRIG Not the Best Choice for this Task
As I said earlier rigging a non-bipedal mesh is tricky and will take longer and sometimes it can be a lot of work for a result no better than simple cloth skinning. This is not the fault of AccuRIG as it simply wasn’t made for this task but that doesn’t mean we won’t try. In the tutorial at the end, I start with a sped-up clip of the failed AccuRIG process along with my narration.
LEFT: AccuRIG Struggles with Initial Marker Placement. RIGHT: Markers after being moved into place.
It took a long time for AccuRIG to place the initial markers on the statue mesh as it has few discernable limbs and only two that are not connected to the rest of the mesh. This is the arm and head which is all we need to animate. As you will see in the embedded tutorial, AccuRIG didn’t like my edited marker placement and widened out the skeleton to comical proportions.
LEFT: Disproportionally wide skeleton from previous manual marker placement. RIGHT: Tried masking to activate only the arm and head bones.
Even with masking enabled I could not get decent movement from the arm or the head as they were not lined up properly with the bones, basically disregarding most of manual marker placement. To top this off the skeleton jumped around refusing to stay centered on the mesh. This made animating the arm and the head very problematic as the pivots were way off and caused unusable mesh deformations due to the poor rigging.
Skeleton moved from center of mesh to left side when skinned making the arm and head useless as the mesh distorted with movement from the poor placement.
Like I said earlier, AccuRIG was given the task of almost having to rig a mesh brick making it very difficult to create proper rigging envelopes. The skeleton jumping out of place during skinning was the nail in the coffin because I knew I could try skinning and didn’t need to try again with rigging.
Skinning is Our Friend
Skinning is so much easier in this instance that it’s almost comical and this isn’t the only instance skinning will be better than rigging. It mainly depends on if the arms and legs have enough separation from the body or rest of the mesh to be skinned properly. The tolerances are much more forgiving for cloth skinning because again, we are only looking to animate certain parts of the mesh.
After we load the statue mesh as a prop, we can then load a character. In this case I chose the base Neutral Male. Again, the tutorial goes through all of this in more detail but all we have to do next is pose the Character as near as we can to the pose of the Statue. Then we move the character over to better align it with the statue.
LEFT: Load Avatar for Cloth Skinning. MIDDLE: Pose Avatar to Resemble Stature. RIGHT: Move Avatar to better align with statue.
After we have posed and placed the character nearer to the statue mesh, we can:
Select the Statue Mesh
ATTACH the Statue Mesh to the Character (this activates the Transfer Skin weights choice)
Skin the Statue Mesh as an “Other” cloth (I didn’t try any of the other choices)
Use the HIDE MESH tool after skinning to hide ALL of the body parts of the character mesh
Delete what unneeded features of the CC mesh as necessary
Turn off the visibility of the Tongue
LEFT: USE the HIDE MESH tool in CC4 to hide character. RIGHT: Only the Skinned mesh remains visible but the character will selected when chosen.
It is VERY IMPORTANT that we set the DEFAULT POSE in the Pose Editor otherwise the bind pose will revert to an A Pose and the mesh will be distorted badly when saved as a character instead of the native statue pose we need to keep for use in iClone.
Be SURE to set the Default Pose before sending to iClone or Saving, Otherwise the default will become an A Pose that will badly distort the mesh.
After saving the default pose, we can now transfer the character to iClone for a very simple keyframe animation of the arm and head. In fact, it is only a couple of keyframes. One each for the head and arm that can be on the same frame or different frame for variance. You can move down the timeline to your desired frame to rotate the head or move the arm to create an animation of the moving parts.
The Cloth Skinned Statue to Invisible CC3 Character animated with only two keyframes to raise the arm and rotate the head.
SUMMARY
Sometimes, as I said in the opening paragraph, you just need to get something done without taking several days to do it. There are times the animation calls for that much work, but, if you can figure out a way to skin for rig a static block of mesh like a statue that may be only partially defined, then you can add some nice touches or nuance to your scenes by animating objects that would generally be static or a more involved process just to move a couple of limbs.
If you need lip sync, expressions or anything like that then you have to resort to a more involved process that may or may not work in the long run depending on the statue mesh. Skinning is also a way to create quick prototypes or proof-of-concepts in the right situations.
Get creative and there is no telling what mesh you might be animating next with Character Creator and iClone.
MD McCallum – WarLord
Digital Artist MD “Mike” McCallum, aka WarLord, is a longtime iClone user. Having authored free tutorials for iClone in its early years and selected to write the iClone Beginners Guide from Packt Publishing in 2011, he was fortunate enough to meet and exchange tricks and tips with users from all over the world and loves to share this information with other users. He has authored hundreds of articles on iClone and digital art in general while reviewing some of the most popular software and hardware in the world. He has been published in many of the leading 3D online and print magazines while staying true to his biggest passion, 3D animation. For more information click here.
Cartoon Animator has just received a free update packed with brand-new features and tools that are going to have you animating like never before. I’m Garry Pye, and I will be taking you on a tour of what’s new in Cartoon Animator 5.3, including the incredible Puppet Stage, where you can control your actors’ body and face movements in real-time with a new trigger system and Motion Live mocap. Now you can activate motions, performances, and effects for your actors with a single button press for real-time animation. This is the perfect tool for live performances and streaming, so you become the actor in your movie.
Cartoon Animator 5.3 now has multiple cameras which you can cycle through in real time, putting you in the director’s chair with total control. And this update introduces image sequencing for character parts like eyes and mouths, meaning you can create the smoothest lip-synching ever, and even create animated face and body parts with amazing results.
Realtime animation Control with Triggers
Besides working with your custom characters, Puppet Stage lets you build your own scenes using characters and backgrounds from the Content Store and Marketplace. With Motion Live, you can capture your own full-body performances and apply it to your actors.
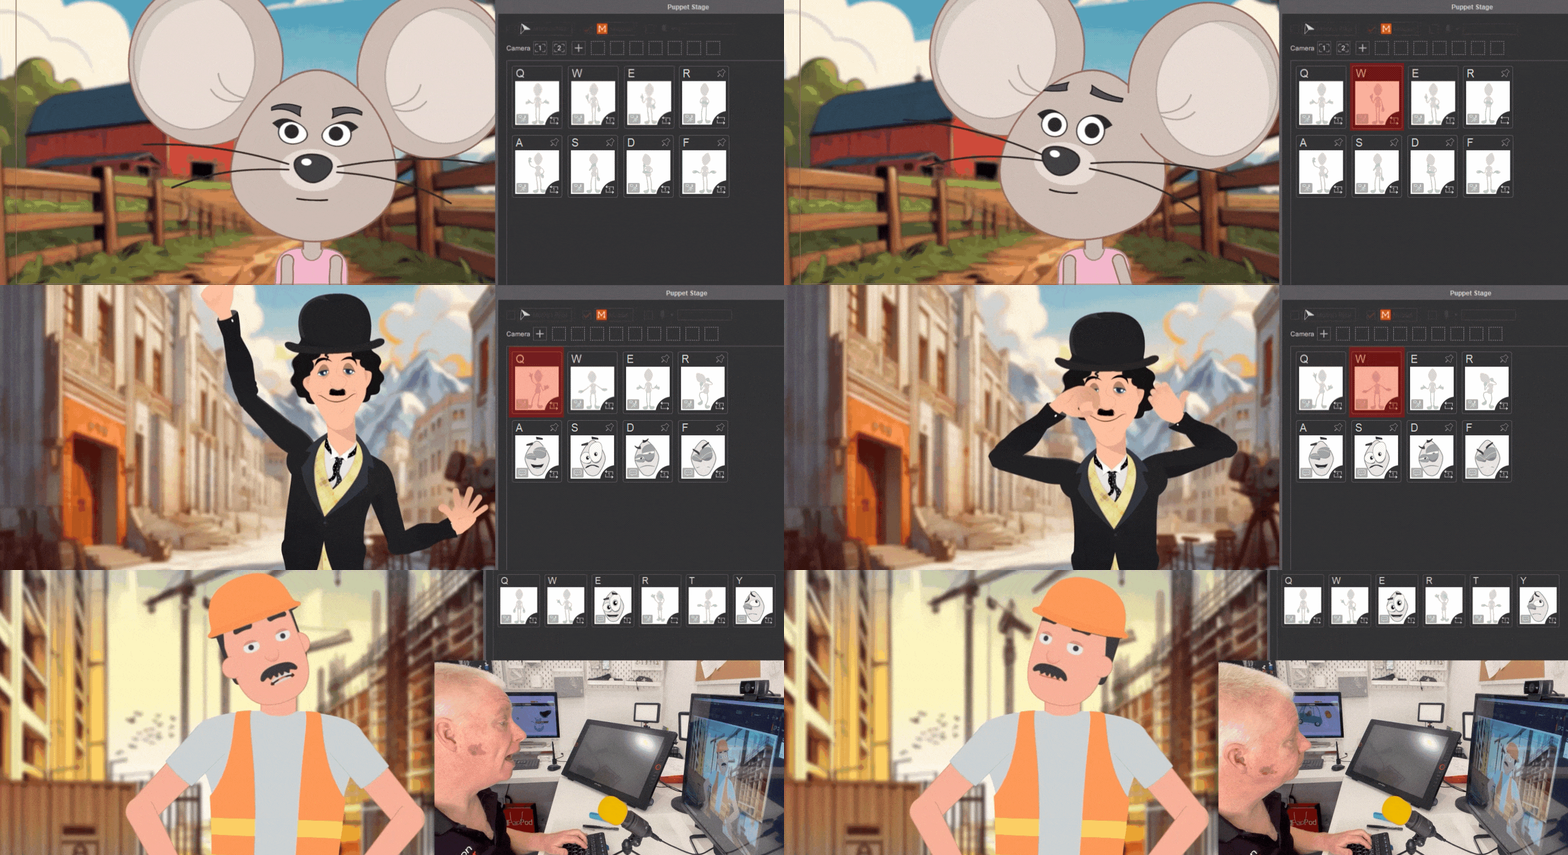
One of the revolutionary features is the use of Triggers, which activate animations including motions, perform actions and more. With Motion Live recording, you can activate these triggers in real time, and your character responds instantly. By pressing the hotkey for each trigger, your actor comes to life. You can even apply Triggers while still capturing your performance with Motion Live and a webcam, so you can perform as your character and even lip-sync them to your voice, all while activating any animation you want.
Customizing Triggers for Unique Performances
Triggers can be fully customized to fit your project needs. You can use preset decks or modify your deck by rearranging, deleting, or adding triggers as required. Each trigger’s parameters can be adjusted to affect different parts of your actor’s face. For example, by disabling the Face Targets, you can still capture facial expressions with a webcam. This allows your character to respond to preset Triggers while also capturing face expressions and lip-syncing simultaneously.
Hotkeys can be set for Triggers, and each Trigger can be configured to play once, loop, or be controlled by mouse movement.
Puppet Stage is ideal for those who want a character to host their videos or live streams. With Puppet Stage, you can embody your character, perform real-time voiceovers, lip sync, and control body movements—all with a single button press using hotkeys. Additionally, you can easily greenscreen your actors over any video.
Compatibility with Various Characters
The best way to introduce yourself to the new Puppet Stage is to load the Klaang character from the Cartoon Puppet Pack, which gives you everything you need to get started including 3 entire new sets of character performances called Chill, Cute and Dramatic. Each of these packs has a number of different Triggers for the face and body which you can activate to change the emotions, expressions and reactions of your characters. And you can apply these packs to any character. Additionally, you can also experience the Anime style live performances from Anime Puppet Pack, which includes the dressing room for changing wardrobes and Pet Bot for 360 head rotation.
>> Get puppet sample projects and actors from here
Here, you can practice working real-time animation with triggers, cameras and Live Motion to get the results you want. Experiment with the different triggers to see what each of them does. You can use these packs as a guide for learning how to build your own custom Puppet Stage packs for any character.
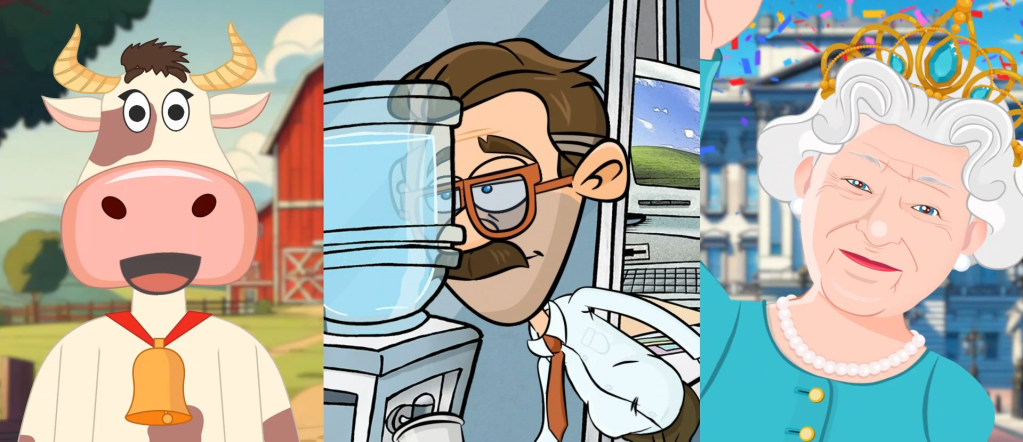
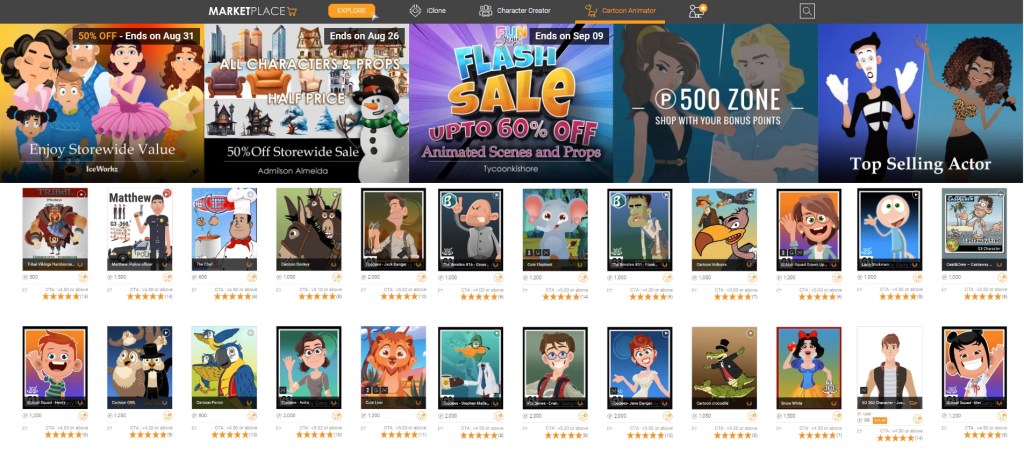
The best thing about the new Puppet Stage for Cartoon Animator is its compatibility with your actors. This is going to work with many of the actors you already own, and then there are hundreds of quality actors available from independent developers in the Content Store and 2D Marketplace. You can take any actor, find the right scene to place them in, set up your deck of triggers, record your character’s performance in real-time and even add in some fun special effects.
>> Explore the huge character library from Reallusion Marketplace or Content Store, all CTA characters are compatible with Puppet Stage
Live Perform with Effects and Props
Cartoon Animator 5.3 also has a collection of the most amazing animated effects that you can control using triggers, which have been created by veteran animator Declan Walsh. Declan has contributed a wonderful collection of hand-drawn animated effects that will help your characters express themselves in fun ways. With your actor and props loaded to Stage Mode and with Puppet Stage activated, you can use hotkeys to activate the effects while recording your actors’ performance.
>> Find more VFX from developer DexArt in Reallusion Marketplace
Another new feature for the Cartoon Animator 5.3 update is Sprite Sequences which can be applied to actors. In the same way you can create sprite sequences for creating animated props, you can now use Sprite Sequences for body parts like eyes and mouths, so instead of only swapping between single frames, each new sprite selection will play an animated sequence.
With Sprite Sequences, a single mouth movement can be made up of many individual sprites which animate the mouth’s movement, helping to transition between mouth shapes more smoothly and make lip synching more accurate.
You can also use this process to add Sprite Sequences to any face part, including eyes, so you can create some fun emotions and reactions from your actor and you can create all your own animated sequences for every part and even change the speed of the Sprite Sequence in Composer Mode.
Dynamic Camera Tracking
Your cameras now offer a brilliant new feature: they can track and follow actors or objects within a scene, adding a dynamic element to your shots. Camera tracking is simple—just select a camera and lock its focus on your actor or prop. As the actor moves, the camera stays locked onto them, eliminating the need for manual keyframing of camera movements. This innovative tracking capability will transform your storytelling.
Empowering Everyone to Animate
All these new features just add to the incredible lineup of tools we already have in Cartoon Animator. Tools like Spring Bones, Free Form Deformation, SVG Colour Adjustment and Motion Pilot all work together to speed up the animation process and are designed to make real-time animation experience faster, easier and as much fun as possible.
Now anyone can animate. Even if you have no animation experience or any ability to draw, you can be producing quality animations in no time. And you can even do it live! The Cartoon Animator 5.3 update gives you more control over your characters’ performance than ever before, with smoother animation results and advanced camera controls that will have you filming like a pro.
The world’s first motion pack that synchronizes human and accessory movements with a single click
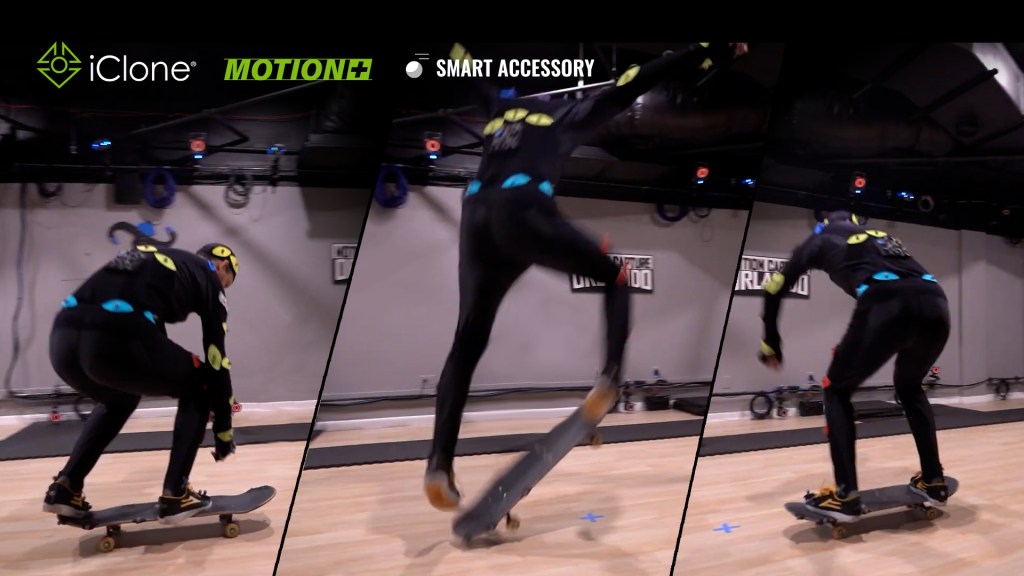
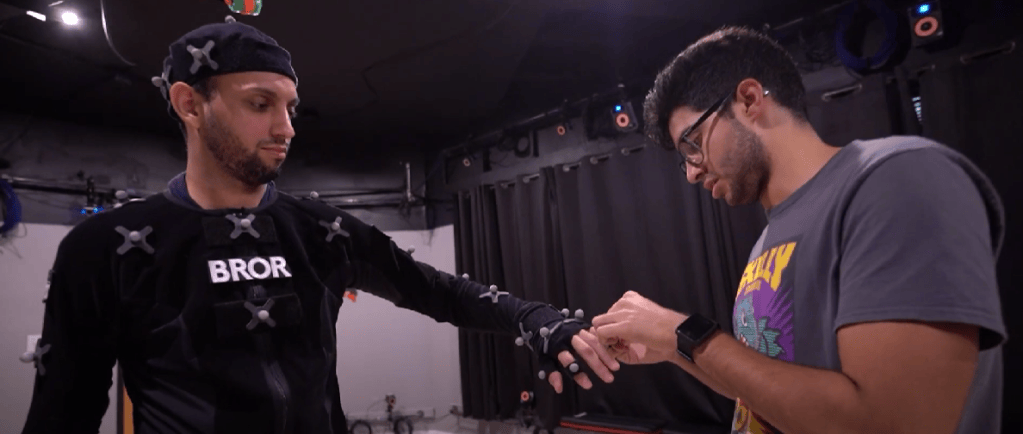
Monkey Chow Animation Studios and Motion Capture Orlando, in partnership with Reallusion, presents the groundbreaking “Skateboard – Flatground Skate Tricks” motion pack. Captured at Motion Capture Orlando’s advanced motion-capture studio, this pack showcases professional skateboarding moves. It is the first-ever motion series to be fully integrated with Reallusion’s innovative Smart Accessory animation system, which automatically syncs the skateboard with its animations, eliminating the need for manual matching. Now, adding realistic flatground tricks to character animations is easier than ever!
You can watch this exciting collaboration unfold in the video below!
Master the Streets with “Skateboard” Motion Pack
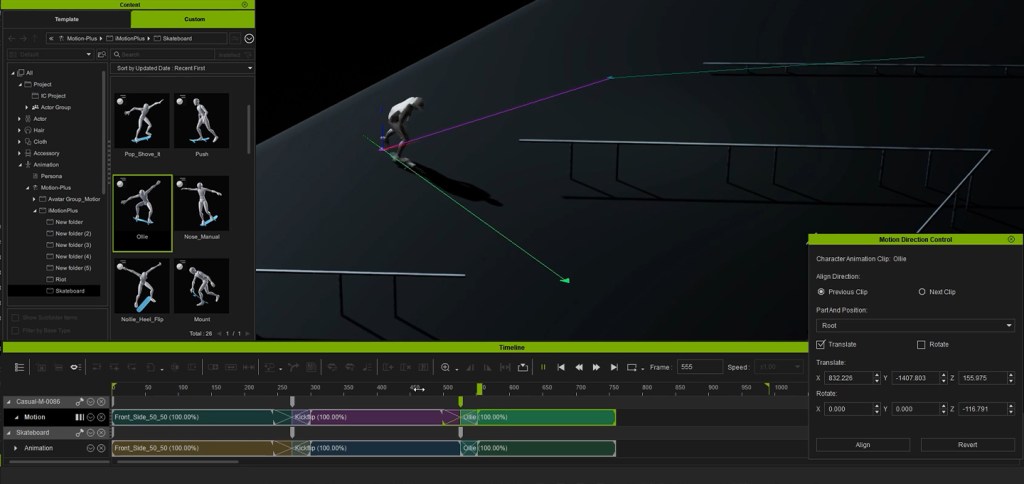
This motion pack features 26 flatground skateboarding motion capture animations, in the new Motion+ (Motion Plus) format. Ranging from basic moves like Push, Tic Tac, and Ollie, to advanced tricks such as Spin, Flip, and Shove-It. These animations enable the creation of complete and realistic skateboarding scenarios on the street.
Once the skateboarding motion is applied to an iClone character, items with matching tags will automatically attach themselves. The animated accessory design also allows users to easily combine Motion+ animation clips. For example, users can apply, combine, rotate, blend, and trim both human and accessory motions as a single animation, without needing to micro-edit two separate objects.
Behind the Scenes
Monkey Chow Animation Studios is known for having developed a series of Hollywood-style action motion packs that are wildly popular. These include titles like Run for Your Life, Bank Heist, and Riot on ActorCore, the premier online 3D content store featuring Reallusion certified content.
Their latest and most innovative release of “Skateboard” stands out as a groundbreaking project inspired by VFX and mocap artist Nelson Escobar, who recognized the potential of capturing skateboard tricks using modern mo-cap technology. All animations feature American skater and influencer Brian Ortiz, brought to life through high-end optical systems.
A Cutting-Edge Approach to Advanced Motion Capture
Despite the limited cameras needed to cover a skate park, many tricks could be executed on any flat surface, known as Flat Deck Tricks. Armed with his camera, Nelson documented Brian’s splendid array of flat deck tricks. Together, they compiled an impressive list of tricks, which Brian then performed in the studio.
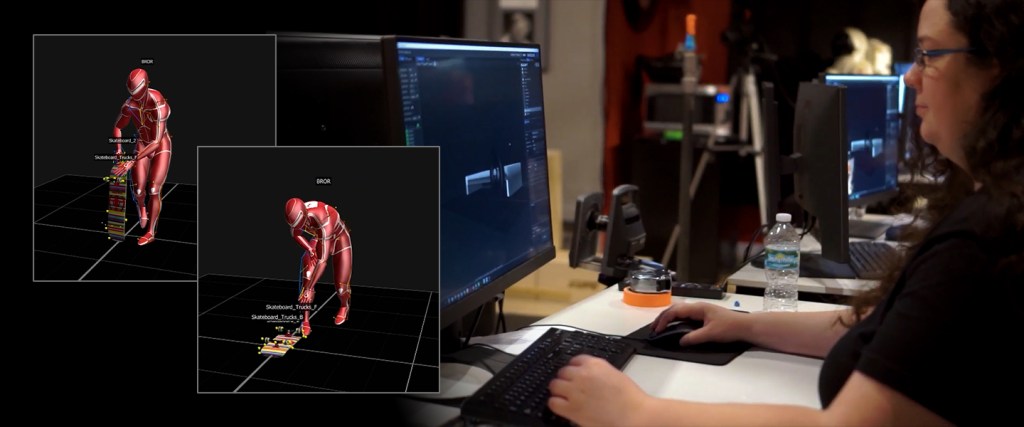
Tracking static props like a gun is easy. Getting the skateboard ready was another issue. It’s not like we can link the board to his foot and start shooting. The board is like another character that has its own motions that are often separated from Brian’s motions. But for this to work, we had to record both the top of the board and its relationship to the movement of the axils or trucks.
Jeff Scheetz, Monkey Chow Productions and Motion Capture Orlando
To address this, the experienced technical professionals of Motion Capture Orlando utilized Vicon Shogun to reverse-engineer a skeleton, or rig, for the computer model of the skateboard.
iClone Smart Accessory System
Synchronizing human motion with accessory animation brings a new level of visual fidelity and data handling. The innovative design workflow for animated accessories unlocks a new frontier of assets with the construction of the Smart Accessory system in iClone. Adapting this workflow, Motion Capture Orlando was able to convert human and object mocap data into a synchronous Motion+ sequence, and simplify further clip connection or animation editing.
Motion+ Syncing with Dynamic Accessories
Having 3D characters hold objects like cell phones or spears is straightforward, but more complex actions—like rolling a suitcase or flipping a skateboard—require coordinated motions and extensive editing to appear realistic. The introduction of iClone Motion+ format has vastly simplified this process.
Full integration of facial performances and metadata for attached accessories, enabling advanced animations such as cycling or skateboarding.
Automatic attachment of accessories, randomization of models and materials, and precise alignment of motion and accessories with flexible editing options.
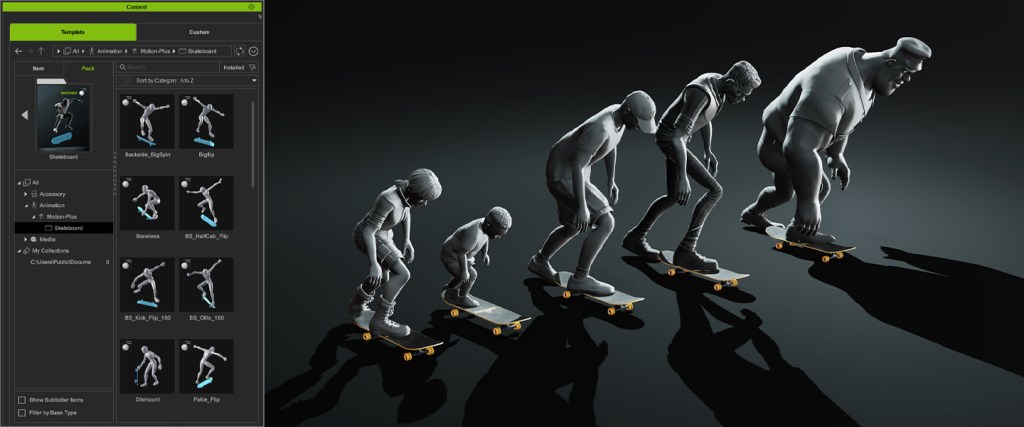
Regardless of body type, Smart Accessories can adapt to various body shapes and sizes, properly aligning to their intended positions while retaining structural integrity, whether stiff or form-fitting.
Motion+ combines prop and character motion into a single editable file, making it easier to manage complex tasks like pulling a suitcase, pushing a cart, or operating a wheelchair.
Get the Best in Skateboard Animations
Unlock access to 26 dynamic skateboard motions, perfect for standalone use or for blending with other motions using iClone’s robust editing tools. These royalty-free animations are available in FBX and BVH format, ensuring smooth integration with real-time game engines like Unity and Unreal Engine, along with popular 3D software such as 3ds Max, Maya, Blender, and more. Explore “Skateboard – Flatground Skate Tricks” in the Reallusion Content Store and ActorCore.
Phil Browne (BiggsTrek) is an old and well-known name in the iClone community. When I say old, I mean all the way back to when we had to tame squirrels to run in cages just to power our computers. Ok, maybe not that old but I have a hard time remembering the early days of iClone without him being around. It wasn’t just being around either, it was inspirational to see his work back in the days when iClone was more toy than the tool it is today.
His work has always pushed the envelope for iClone. He has consistently demonstrated what is possible with iClone and CC4. His smooth style and lack of concern for over-the-top visuals versus a strong story (narrative) are hallmarks of his work. I’m not knocking his visuals either. This man can take community assets from the iClone users Marketplace to build an aesthetically pleasing scene, well laid out and pleasingly lit to a point that you don’t have to squint to see everything.
He can adapt to different genres with his own clean, eye-pleasing personal style that puts his stamp on a production as if he had signed it.
To top it off, he is a non-professional (I hate using amateur as that doesn’t do this animator justice) storyteller, citizen director, hobbyist… whatever term you wish to use, and he is not alone in the iClone userbase. This type of user is essential to the growth and stability of iClone and other Reallusion products. Their support and feedback have shaped these products into what they are today.
One other thing to know about BiggsTrek is that he has a history of following through and finishing projects that include an interesting story and great visuals to move that story along. He proves you don’t need a huge budget or team to produce great animated stories.
It is with great pleasure that I present to you the following questions and answers from the talented iClone community member and digital artist known to many as BiggsTrek aka Phil Browne and I hope that you will take time out from your busy schedule to jump on over and watch the inaugural episode.
The Interview
Q: You are a longtime iClone user. Do you remember when you first discovered iClone and what drew you to it and to stick with it over the years?
I used to use “The Movies” by Lionhead. When TMO (The Movies Online) was about to shut down I started looking for alternate software to do my animated movies. There were a few options at the time, like Moviestorm, but the best and most advanced seemed to be iClone, so I gave it a try. I wasn’t disappointed! I’ve been using it ever since and even though I probably use less than half its full potential, it has served me well.
The Robot and Control Room from Forbidden Planet – Children of the Krell. Click to Play on YouTube.
Q: What do you feel the advantages are of using iClone and/or Character Creator (like ease of use or short learning curve and so forth)?
For me, iClone was fairly easy to use, and more importantly, allowed me to do pretty much anything I wanted regarding animation and storytelling. I’ve tested a few other animation packages over the years, but I always come back to iClone. Character Creator can feel a little daunting to use at times (so many sliders!), but I love the quality of the results, and you can’t argue with that.
Q: Like many of us you use community assets, and you were around early on when there were practically no assets. Do you feel that the community Marketplace has matured into a more diverse market of assets that can serve many needs removing one of the earlier hindrances to iClone production?
I love the Marketplace! These days, it’s the first place I go when looking for a particular asset or even just browsing for inspiration. The quality of props, costumes, etc. has definitely improved over the years. I used to use the 3D Warehouse (was Google, now Trimble) and while that had a diverse range of props, the quality wasn’t that great. The Marketplace has definitely helped fill that gap as it has grown and made available many fine artists and their work.
Q: Some iClone pipeline users turn to 3rd party software like Unreal Engine or Omniverse for more advanced rendering but you have always made the iClone native render work for your productions. Is there a specific reason you like the native renderer and/or do you have any tips to pass along when using iClone as the production renderer?
Making movies isn’t a quick process for me (I tend to tinker a lot), so I try to keep things simple where I can to help offset that. Adding an extra step (3rd party rendering) doesn’t really appeal to me, plus I don’t have a PC that can actually support Unreal at this time. As it is, I’m actually pretty happy with what iClone itself can produce. And I sure hope they keep improving it in the years ahead.
Q: What draws you to animation? Storytelling, animating… both?
I guess it comes down to storytelling, mostly. I like being creative, and animating allows me to do that in a more entertaining way than with just words or images on their own.
Q: As a filmmaker/animator is your work driven more by the visual, narrative, or a bit of both?
Narrative. I certainly like the visuals, but I have to have something more going on than just “pretty pictures”. I remember a time where most people seemed to just make music videos (not that’s there’s anything wrong with that!) but when I made one, I made sure it had a story as well. (For those that are curious, it is “Some Of Us” a song by Ally Miller, created in “The Movies”.)
Haunter of the Dark Made in iClone 4, 2011. Click to Play on YouTube.
Q: When did you start to realize that you had artistic/creative traits?
This goes back to my childhood. Even as a young adult, I used to draw just for fun, and write silly little stories. And now that I’m older it hasn’t changed much, all these years later. Just the means to do it!
Q: Your past work shows an interest in Lovecraft and science fiction with Haunter of the Dark coming to mind and now Forbidden Planet. Are there other genres that you have a fondness for?
My first love is Science Fiction, but a close second is Fantasy. I made a movie a few years ago called “Under The Shards Of Athena” that is mostly Fantasy with a little Sci-Fi. I like mixing genres together. For instance, I’m also working on a Noir movie that has elements of horror, fantasy, and comedy. And who knows what I’ll do after that!
Q: Your iClone production of HP Lovecraft’s Haunter of the Dark hit YouTube in October of 2011 with, as of recently, over 110,000 views and I thought it was one of the best iClone projects to come to fruition, particularly at that time, considering that iClone had not matured into the animation software it is today. Do you remember what version of iClone Haunter was produced with?
Yes, I do indeed. iClone 4. I actually did some tests in iClone 3.5 (that was my first version of iClone – I still have the box on my shelf!), but when iClone 4 was announced, I delayed production until I could get the upgrade. I believe they had several improvements to character creation that I wanted to exploit, and some other new features that I can’t remember offhand. I also remember thinking that I wanted to show people what iClone was capable of; that it was more than just a music video creator. It was challenging, but worth the time and effort.
Q: Can you speculate on what it would be like to produce Haunter with iClone 8 versus the version you used back in 2011?
First and foremost, the characters would look SO much better if created in Character Creator. (The faces and bodies of the old characters could certainly do with a makeover.) And maybe the assets would be better, now that the Marketplace has so much more to offer. I’m pretty sure 90% of the props in the old movie came from the 3D Warehouse and were pretty basic.
From Under the Shards of Athena. Click to Play on YouTube.
Q: Do you have any advice you would give to anyone wanting to get into animation? How to get started?
I’ll pass on something that a friend told me, many years ago: Just do it. (No, it wasn’t Nike!) Even if what you create doesn’t go well, you can always go back and fix it, or try again. But if you never start, then you have nothing.
Q: Why the Forbidden Planet series? What inspired you to produce this?
I’ve always loved the original 1956 movie, and Robby the Robot in particular. When I first started animating, I wanted to make a movie based on it, speculating what may have happened after (the original movie never got a sequel or remake, which is surprising for Hollywood.) But it wasn’t until I got iClone that I saw that it was possible for me to do so. While it took a few years, even making a few test clips with Robby now and then, I’m glad I finally got the story started.
Q: You used AI voices from Eleven Labs if I remember right. I suspect a lot of readers and users will be interested in this aspect as we don’t always have a budget or resources to hire voice actors. How was the learning curve on getting the AI voices to “act” as you wanted them to?
It was remarkably easy, though you do have to play around a bit, and try various voices to find the right fit. The website is simple to use and the results are remarkably good. This film (Forbidden Planet – Children Of The Krell) became a test of the concept to use only artificial voices. I think it worked!
Q: In my case, I learned little things like typing in “eye clone” instead of “iClone” for a proper readback. How long did it take before you were comfortable with using the AI voice interface and getting acceptable results with the AI voice acting?
While some of the voices I used worked well, others did not always pronounce things the way I wanted. In some cases, you can do as you said, basically spell things phonetically (“Bellerophon” was a challenge) but in other cases, I had to use different methods. While most of the voices I created using Text-to-Speech, eleven labs also supports Speech-to-Speech. This is basically a voice changer, but way more advanced. It keeps the performance pretty much intact, but changes the voice dramatically. For instance, I actually voiced the two female roles using this method to get the performances I wanted. While they aren’t perfect, it still worked pretty well (not many people have actually noticed the voices were artificial!)
Q: Was using AI voices the experience you thought it would be? Something you’d readily do again?
It worked better than expected. When I first started playing around with these artificial voices, I figured I’d just use them for a couple of the characters but ended up doing them all this way.
I’ll definitely use it for the rest of the Forbidden Planet series. However, there’s nothing quite like a human that you can explain things to and get a better performance. At least not yet…
Q: What are your future plans for the Forbidden Planet series?
Well, I’m working on Chapter Two right now. Initially, I was going to go back to my Noir film, but as the “Children Of The Krell” has been so well received, I felt I should get stuck into Chapter Two before doing anything else. I have a couple new characters I want to introduce in the next chapters and I’m trying to keep them as diverse as possible, e.g.: the new Chief Engineer and the Captain of the Perseus. I believe the whole story will have between three to five Chapters, depending on how long I make each part. I have the story written down in note form, but I like to change things occasionally, so it’s not set in stone. But the script for Chapter
Two is complete and right now I’m gathering assets and creating the new characters in CC4.
Digital Artist MD “Mike” McCallum, aka WarLord, is a longtime iClone user. Having authored free tutorials for iClone in its early years and selected to write the iClone Beginners Guide from Packt Publishing in 2011, he was fortunate enough to meet and exchange tricks and tips with users from all over the world and loves to share this information with other users. He has authored hundreds of articles on iClone and digital art in general while reviewing some of the most popular software and hardware in the world. He has been published in many of the leading 3D online and print magazines while staying true to his biggest passion, 3D animation. For more information click here.
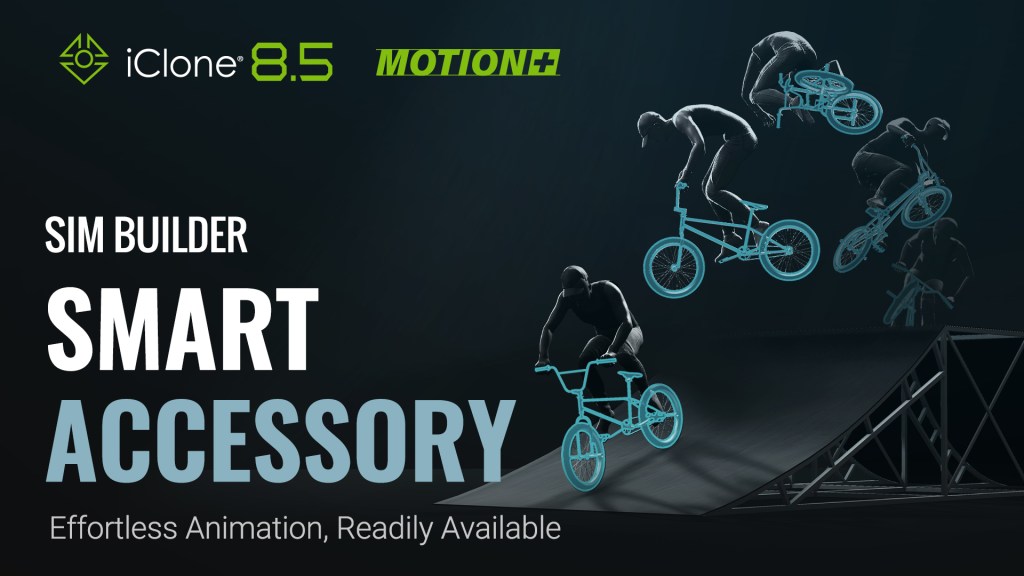
iCloneSmart Accessory is a revolutionary system for editing motions and integrating accessories in a streamlined process. Animators can now generate and simulate virtual crowds adorned with unique accessories and props that automatically sync to mocap animations. Handheld objects can also trigger realtime interactions for added dynamism.
MotionPlus – Pairing with Dynamic Accessories
The iClone MotionPlus format seamlessly integrates facial performance and accessory metadata for complex animations like cycling and skateboarding, where precision in motion and accessory alignment is essential. MotionPlus automates accessory attachment, randomizes models and materials, and ensures perfect synchronization between character movement and accessory interaction
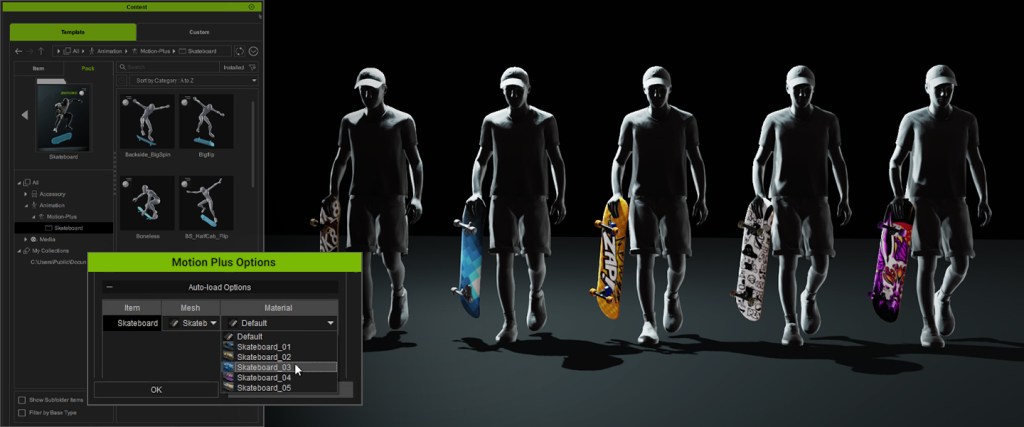
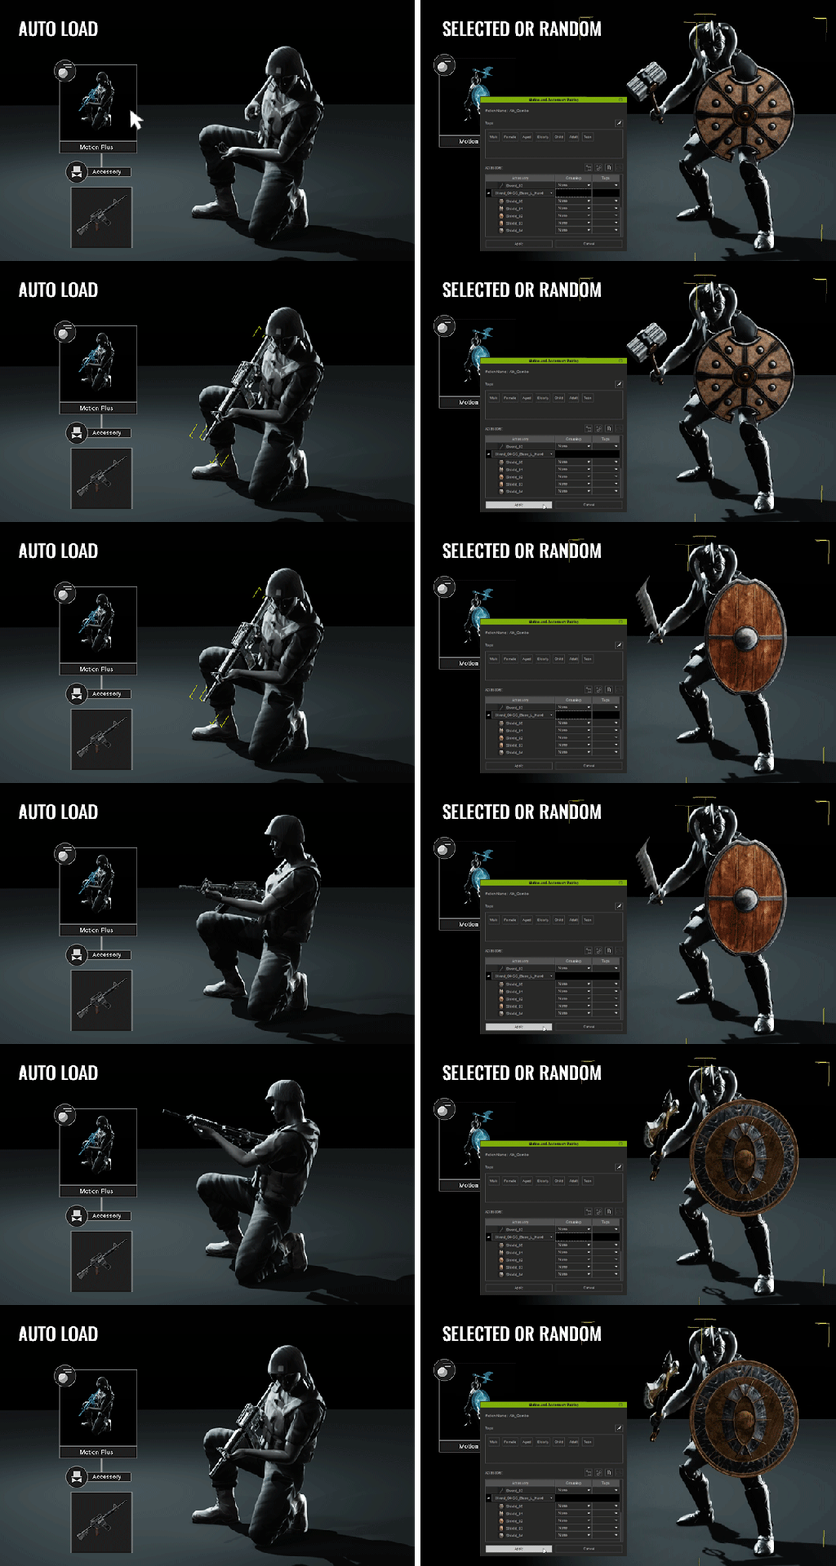
Auto Load: Once a MotionPlus file is applied to an iClone character, accessories with matching tags will automatically snap to their appropriate positions.
Selected or Random: Specific accessory items can be picked when right-dragging a motion file to the actor, or the default accessory can be picked by left-dragging instead. These accessories can be further modified with custom models and materials.
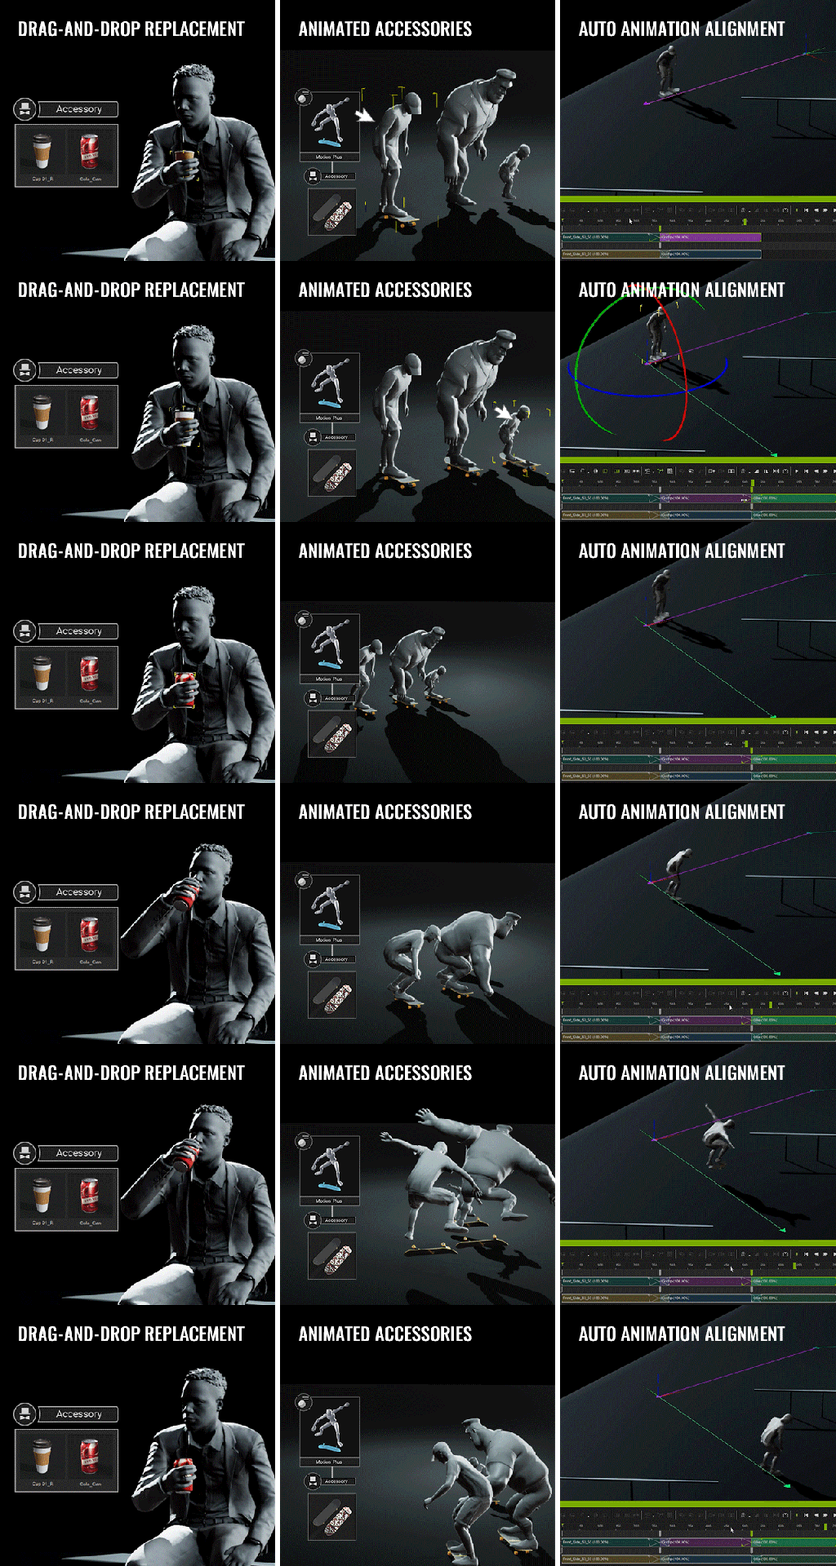
Drag-n-Drop Replacement: Applied accessory models can be swapped and still retain their original positions and orientation.
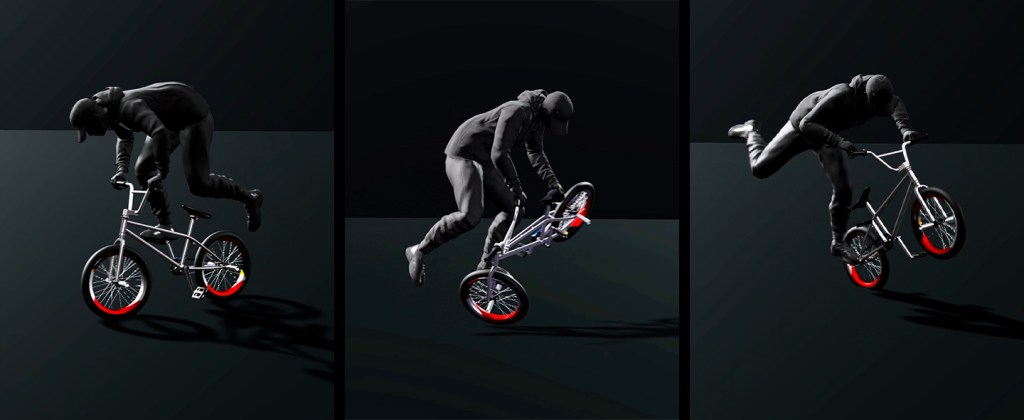
Animated Accessories: MotionPlus files can store and sync human motion with accessory animations. This level of synchronization comes in handy for coordinated human-object performances such as biking and skateboarding. Animated accessories also dynamically adapt to the proportion and size of the character.
Animation Auto-Alignment: Human and accessory animation can be aligned for motion editing, making it easy to combine, rotate, or trim MotionPlus clips as one congruent animation.
Creating Smart Accessories
The Smart Accessory system offers robust features for creating and customizing accessories. With Motion-Accessory Pairing, animators can assign multiple accessories to specific motions, restoring default accessories or assigning new ones as needed. This flexibility allows for highly personalized animations, where characters can interact with various accessories in a lifelike manner.
Primary tools allow users to customize their own smart accessories:
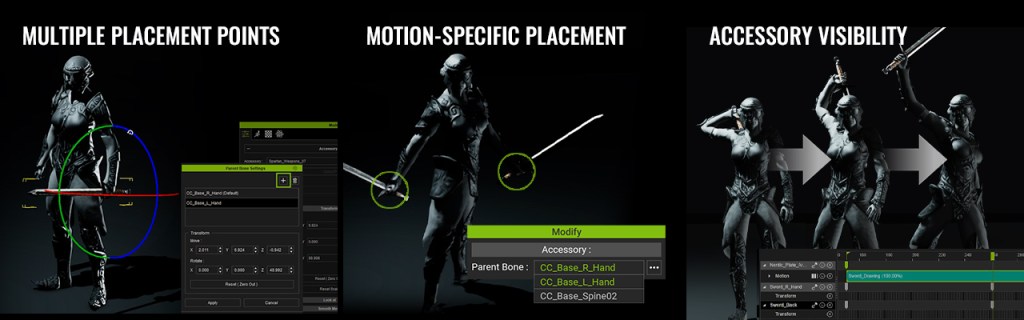
Multiple Placement Points: One accessory item can store several placement points, for instance, a sword can be held with either one hand or both hands, and sheathed at any designated location on the body. Users can select where this accessory is attached while right-dragging it onto a character.
Motion-specific Placement: In the Motion-Accessory Pairing pane, the accessory attachment points can be defined for specific MotionPlus files. A motion-accessory relation, like holding a sword with both hands, can be directly stored in the MotionPlus file.
Accessory Visibility: MotionPlus supports visibility keys, allowing for quick repositioning of accessories during animation. For instance, the accessory can snap to the hands or relocate to other points on the body.
Downloadable Assets (coming soon): A large library of Smart Accessories that is available in ActorCore. These accessories are perfectly paired with motion files with platform-specific download options.
Creating Animated Accessories
The ability to synchronize human motion with accessory animations adds a new layer of realism to animated projects. The Smart Accessory system simplifies this process, allowing for seamless data handling and enhanced visual fidelity.
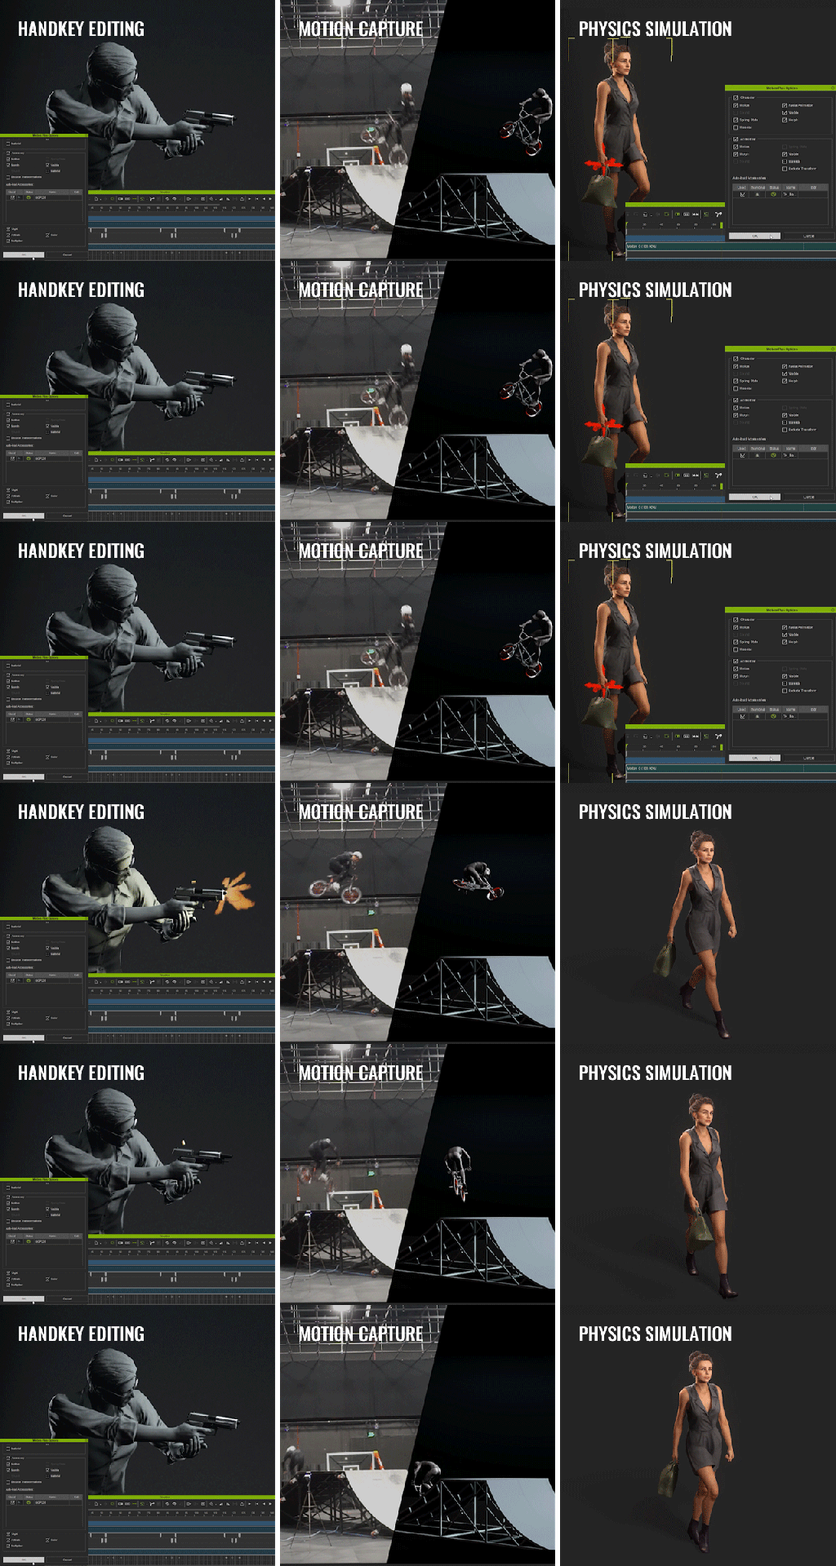
The several ways to create animated accessories:
Handkey Editing: Accessory animations can be produced via keyframes, curve editor, from imported FBX data. VFX made with particles, PopcornFX, material animation, and lighting effects are also supported.
Motion Capture: Human and prop mocap data can now be combined into a single, fluid MotionPlus sequence, benefiting teams and studios of all sizes by enabling seamless clip connection and unified animation editing.
Physics Simulation – iClone physics simulation is instrumental in creating lifelike accessory dynamics. Calculated rigidbody and soft-cloth animations can be baked into the base animation of a moving accessory and synced to a loaded motion file.
Flexible Motion Controls
One of the most powerful features of the Smart Accessory system is its support for a wide range of motion controls, which are essential for crowd simulation and interactive animations made by Motion Director.
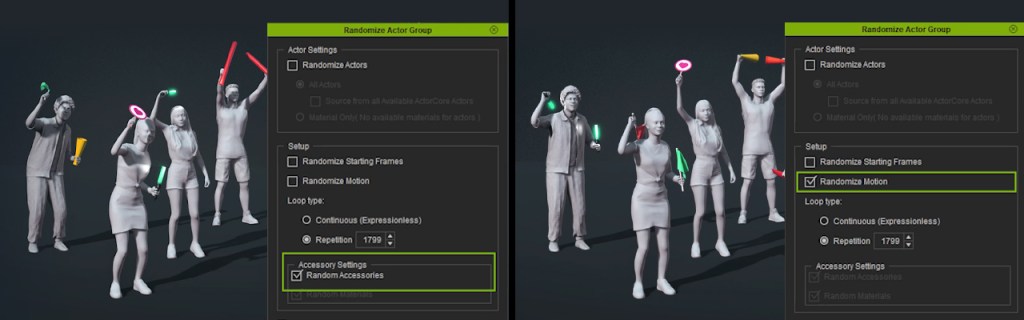
ActorGroup – Automated accessory placement allows you to define the types of accessories that different Actor Groups can wear or carry. The distribution of these props can be deliberate, random, or a mix of both.
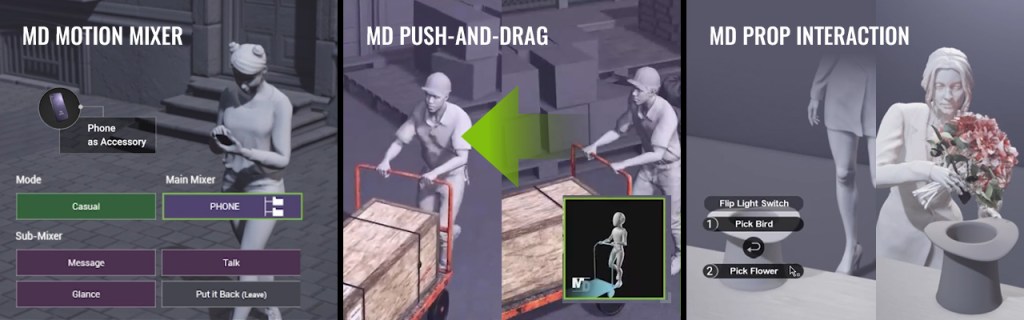
MD Motion Mixer – Mixer motions allow for dynamic blending of upper- and lower-body movement. Now, animation triggers can spawn corresponding accessories for 3D actors to interact with.
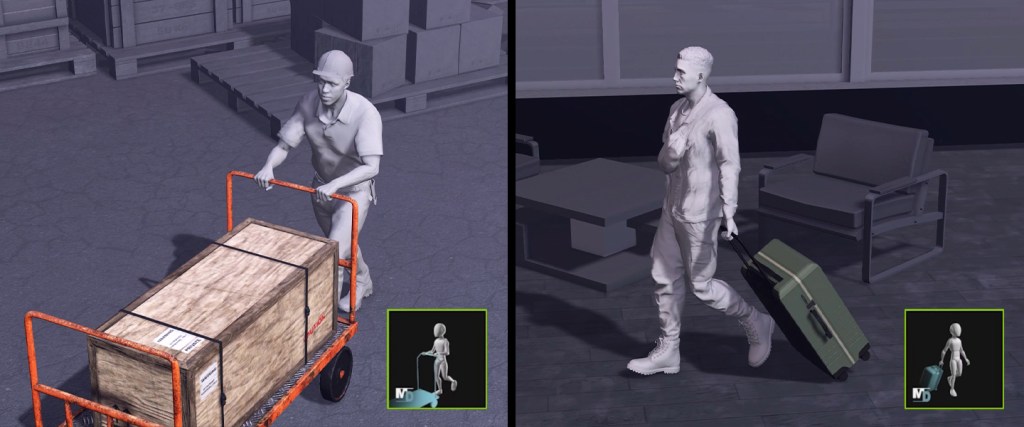
MD Push-and-Drag – 3D actors can move items around, such as pushing a cart or pulling a wheeled luggage.
MD Prop Interaction – Unique MotionPlus animations can be associated with specific MD props, and triggered using customized radial menus.
Crowd Gen – By adding MotionPlus files with predefined accessory pairings to ActorGen Motion Pool, large crowds can be effortlessly animated with corresponding accessories, significantly reducing the time and effort for manual prop assignment.
ActorCore Library of 3D Assets
Discover a vast collection of high-quality 3D content in ActorCore. From mocap animations and hand-keyed motion to fully rigged characters, accessories, and props—everything you need to enhance your scenes is in store. Why wait? Take your 3D simulations to the next level with Reallusion’s extensive content library today.
MD Props is a significant leap forward in virtual actor-environment interactivity. As a new feature designed to complement iClone Crowd SIM, it lets artists breathe life into 3D environments, making simulations more immersive and dynamic than ever before.
Give Life to Props
MD Prop Tools give iClone characters the ability to interact with 3D environments. By replacing the proxy components with custom 3D models, MD props manifest into visceral objects that 3D actors engage with.
All manners of interactive behavior can be generated from just FIVE TEMPLATES representing the core of MD TOOLS.
ACTIONABLE: The most frequently-used interaction type that initiatives a behavior from the interacting actor while responding with an animation of its own.
STATE-SWITCH: Transforms an actor’s animation state from one to another. Each state includes its own idle loop and triggerable animations, such as standing, sitting on a chair, leaning against the wall, or indoor cycling.
BI-DIRECTIONAL: Focuses on scenarios requiring two-point mobility. A common application is for characters to move between two designated locations, such as entering or exiting automatic sliding doors, or traversing a crosswalk.
PORTABLE: Supports the movement of items from one placement point to another. This includes picking up an object, carrying it around while using it, and placing it back down in the same or different location.
DOLLY: Allows 3D actors to maneuver a cart and drag a wheeled object like a luggage. Once activated, a designated character will approach the dolly prop, grasp its handels, and steer it along a custom path.
Intuitive Radial Menu
MD Prop takes user experience to the next level with its intuitive Radial Menu system. These menus are designed to be easily accessible, launched by a simple mouse-over or click. The radial menus offer a range of interactive options, all of which can be customized with multi-level command groups and assignable hotkeys for quick and efficient access.
This feature also introduces Self Interaction, where a 3D actor can be directed to perform personal actions like using a phone, looking around, or even smoking a cigarette. These actions are not only gender-specific but also adapt to the actor’s profile, ensuring realistic behavior.
Action List & Concurrent Behaviors
Action Lists support the chaining of multiple motions to extend action sequences. When the scene simulation is paused, individual Action Lists can be assigned to every character in the scene. Upon playback, all the appointed characters will move simultaneously according to their own set of instructions.
Action List allows animators to chain multiple actions together, creating seamless sequences that can be assigned to individual characters.
Concurrent Behaviors When the scene simulation is paused, individual Action Lists can be assigned to every character in the scene. Upon playback, all the appointed characters will move simultaneously according to their own set of instructions.
Prop Customization
Customizing an MD template tool is straightforward: simply replace the proxy objects with a 3D model of your choice. Once the prop appearance is finalized, you can assign new animations or adjust the actor’s associative movements with minimal tweaks. This includes repositioning reach target positions to account for hand placements and varying arm lengths, as well as adjusting the look-at point to focus the character on specific features of the prop.
Replace Mesh, Assign Custom Animations
Refine Entrance Position, Look-at Point, Reach Point
Object Animation
MD Prop offers robust tools for animating itself. Creators can freely move, rotate, and scale any 3D item, with additional options for object morphing and particle effects. Morph Animator in iClone allows for intricate morph animations, while PopcornFX enables particle effects for added realism. Additionally, texture UVs can be adjusted and scrolled to create dynamic visuals, and video textures can be used to mimic interactive slideshows or film sequences.
Reactive Crowd Behavior
Beyond just triggering interactive behavior from individual actors, the MD Prop system enables autonomous crowd behavior. Crowd characters no longer roam aimlessly; they can now gravitate toward points of interest and even explore various props around the scene. Groups or individuals can find a spot to sit, visit the vending machine, or gather around a busker show—unleashing endless possibilities for dynamic crowd interactions.
Simulation Modes – Characters moving along paths or spawning in a zone have a probability of engaging with the surrounding MD props.
Following Options – Groups can be instructed to wait on members engaged with MD props before proceeding to their next destination.
Random or Initial Occupants – Predefine multiple positions to attract passersby to stop and participate in an activity, or characters can be designated to occupy specific positions right from the start.
Enter and Exit Probability – Interaction with MD props can be regulated according to character types and probability scores. Engagement frequency for MD props can be specified. Common settings include random, never, or a finite number of interactions.
Smooth Motion Transitions
iClone “Turn to Stop” and “Multiple Entry” functionality simulate natural human behavior in approaching and engaging with a target prop. This includes slowing to a stop, making a turn, and approaching with measured pace, distance, and orientation. MD props take care of the rest with smooth and natural interactive motions that are tailored to the gender and characteristics of the interfacing actor.
Multi-Platform Export & Render
Exporting these creations is seamless, with iClone Auto Setup plugins available for 3ds Max, Maya, Blender, Unreal Engine, and Unity. Live Link support also allows for synchronization with Unreal Engine and NVIDIA Omniverse, providing a two-way workflow that’s essential for modern animation and game development pipelines.
ActorCore Library of 3D Assets
Discover a vast collection of high-quality 3D content in ActorCore. From mocap animations and hand-keyed motion to fully rigged characters, accessories, and props—everything you need to enhance your scenes is in store. Why wait? Take your 3D simulations to the next level with Reallusion’s extensive content library today.