Yarnhub, a popular historic YouTube channel, has been steadily gaining awareness and a growing fan base. Known for its meticulously crafted narratives and captivating animated stories, the channel garners an impressive 4 million monthly video views. To further expand its reach and maintain high visual standards, Yarnhub has once again chosen Reallusion’s top-notch tools, namely Character Creator and iClone, for their daily video production needs.
Yarnhub Animation Studios
Yarnhub is an entertainment company founded by industry veterans and employs talented young animators to produce history-related animated films. Led by David Webb and Manager Sergey Peresleni, the team consistently produces incredible, awe-inspiring true stories that give you goosebumps and make you feel something for the amazing people who lived them. They try to do these incredible yarn justice by animating them in an amusing and informative way and bringing them to a broad international audience.
Since its inception in 2019, Yarnhub has grown in experience and wrinkles, moving from 2D cartoons to excellent 3D graphics, with more than 30 animators, comparable to some modern video games. The team heavily adopts Reallusion’s software into their daily production.
Why choose Reallusion tools?
Yarnhub faced difficulties in creating captivating 3D animations featuring diverse characters from various historical periods and nations. However, the team has now upgraded their pipeline by incorporating the advanced features of iClone, Character Creator, and the Unreal Live Link Plugin. This enhancement allows them to efficiently produce high-quality historical animations with speed and precision.
Animating an authentic tank scene
Creating a realistic tank scene animation has been a thrilling collaboration between Yarnhub and Reallusion. In their recent video, titled “M26 Pershing vs T34-85“, Yarnhub found immense value in utilizing specific features from the latest iClone Unreal Live Link plugin update. This partnership has allowed them to bring their story to life and enhance the overall quality of the production.
Yarnhub began by implementing the two-way data link, which facilitated the transfer of mesh data from Unreal to iClone 8. Through this link, they were able to synchronize keyframe animations, aligning character positions with the surrounding environment. The following video demonstration showcases the seamless and accurate integration of their characters within the tank hull.
In their routine production, they frequently rely on the Curve Editor as a valuable tool. Within iClone 8, this integrated plugin proved instrumental in accomplishing fluid and lifelike animation.
They have integrated an additional Motion LIVE and Rokoko Mocap profile into their workflow, enabling them to directly capture motion data from a Rokoko suit into iClone 8. By utilizing a transferred static motion correction mesh as reference points, they can fine-tune character movements accordingly. Once the animation is completed and the character’s actions appropriately respond to the environment, they employ the bi-directional link to transfer all necessary elements from iClone to Unreal. The inclusion of the Timecode Sync feature addressed a long-standing request since iClone 7, allowing for seamless animation recording in the Unreal sequencer without frame drops. Lastly, they configured the lighting and camera setup to achieve the desired final shot.
Applying realistic wrinkles to aging soldiers
Known for its meticulous and comprehensive portrayal of historic military battles, Yarnhub caters to a vast audience of millions who appreciate the company’s commitment to objectivity and accuracy. However, they understand that war encompasses more than just the physical elements of planes, ships, guns, and bombs. Above all, YarnHub recognizes that war is fundamentally intertwined with human emotions.
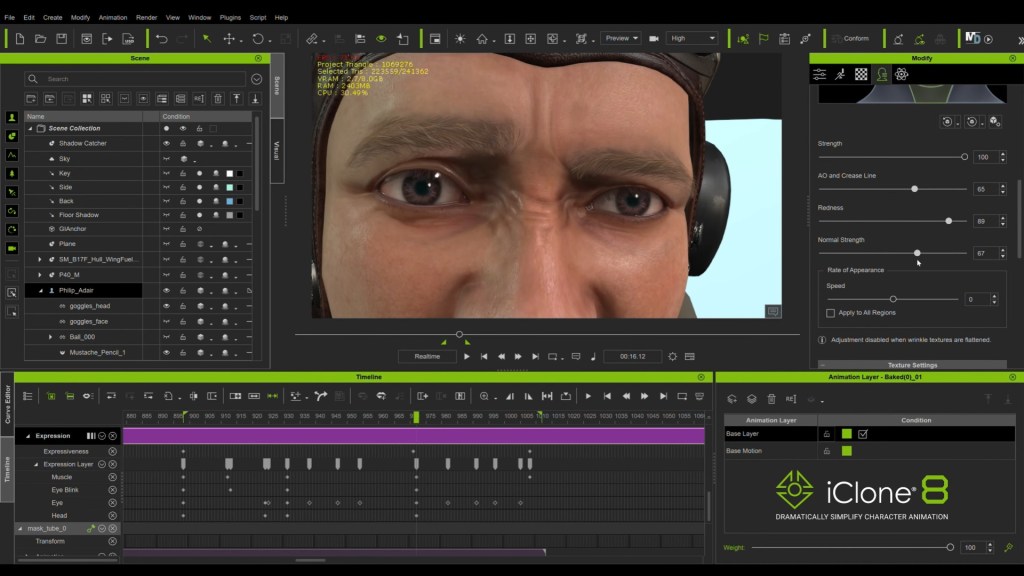
“We are very happy to be the first to try a revolutionary new Dynamic Wrinkle System from our friends at Reallusion. It’s a fresh and powerful wrinkle-blending system for our character expression workflow.”
David Webb, YarnHub CEO
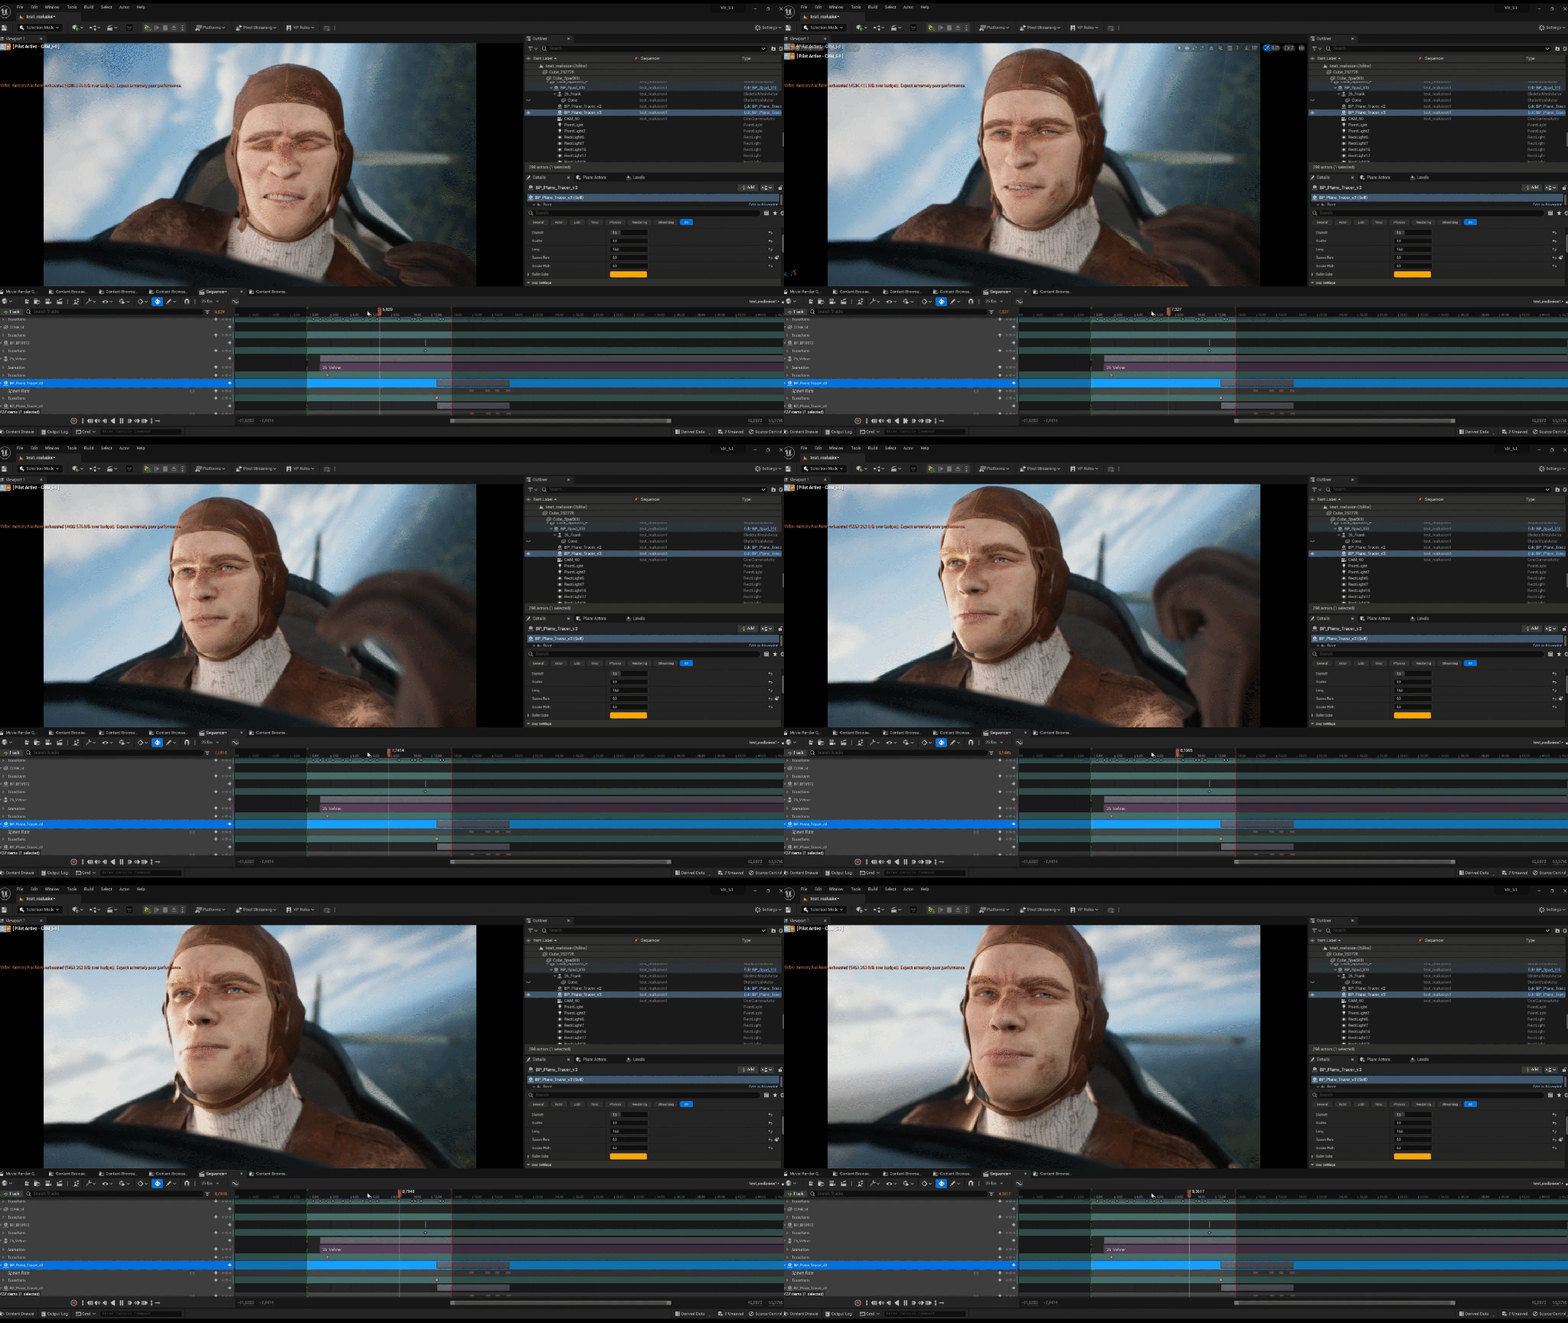
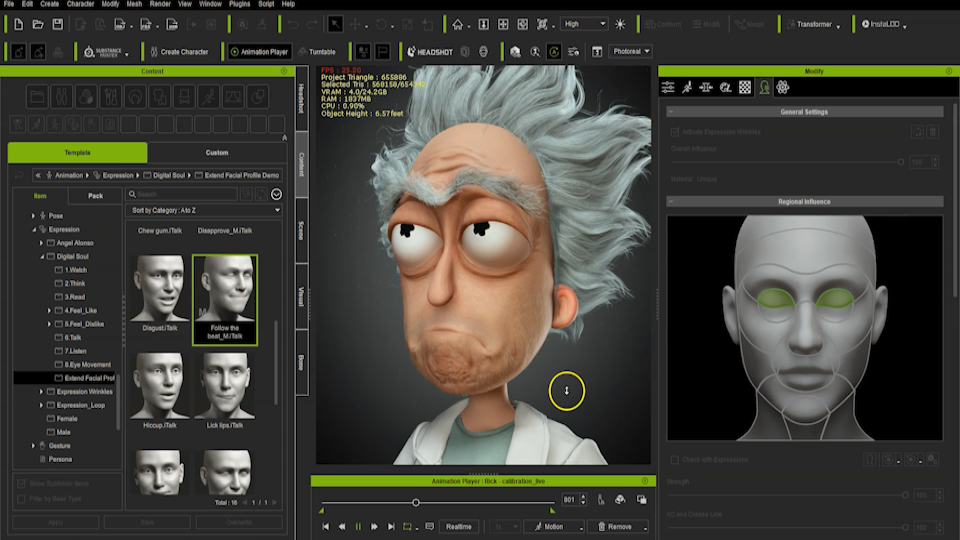
The Dynamic Wrinkle System proved to be remarkably advantageous and efficient when it comes to characters with both high and low polygon counts. Several shots featuring Yarnhub’s own characters were created and tested, showcasing the tool’s capabilities. Not only did it enable the addition of wrinkles and the creation of realistic emotions, but it also facilitated real-time triggering of subtle facial changes. Furthermore, they successfully applied the “Wrinkle Essential Pack” to optimize the appearance of certain soldiers.
And what was important for the pipeline was that with just a quick FBX export, the most complex wrinkles and facial expressions seen in Character Creator could be mirrored in the Unreal Engine, Unity, and Blender.
The rise of AI-powered animation has given rise to fresh aesthetics, yet due to the limitations of the current AI technology, the shapes of objects and characters from one frame to another tend to shift about in a sort of amorphous fashion. Some individuals view the instability of the generated images as an aesthetic side-effect of nascent technology — a je ne sais quoi, while others opt for incorporating additional tools into their pipelines to smooth over the animation, regarding the visual artifacts as unsightly glitches.
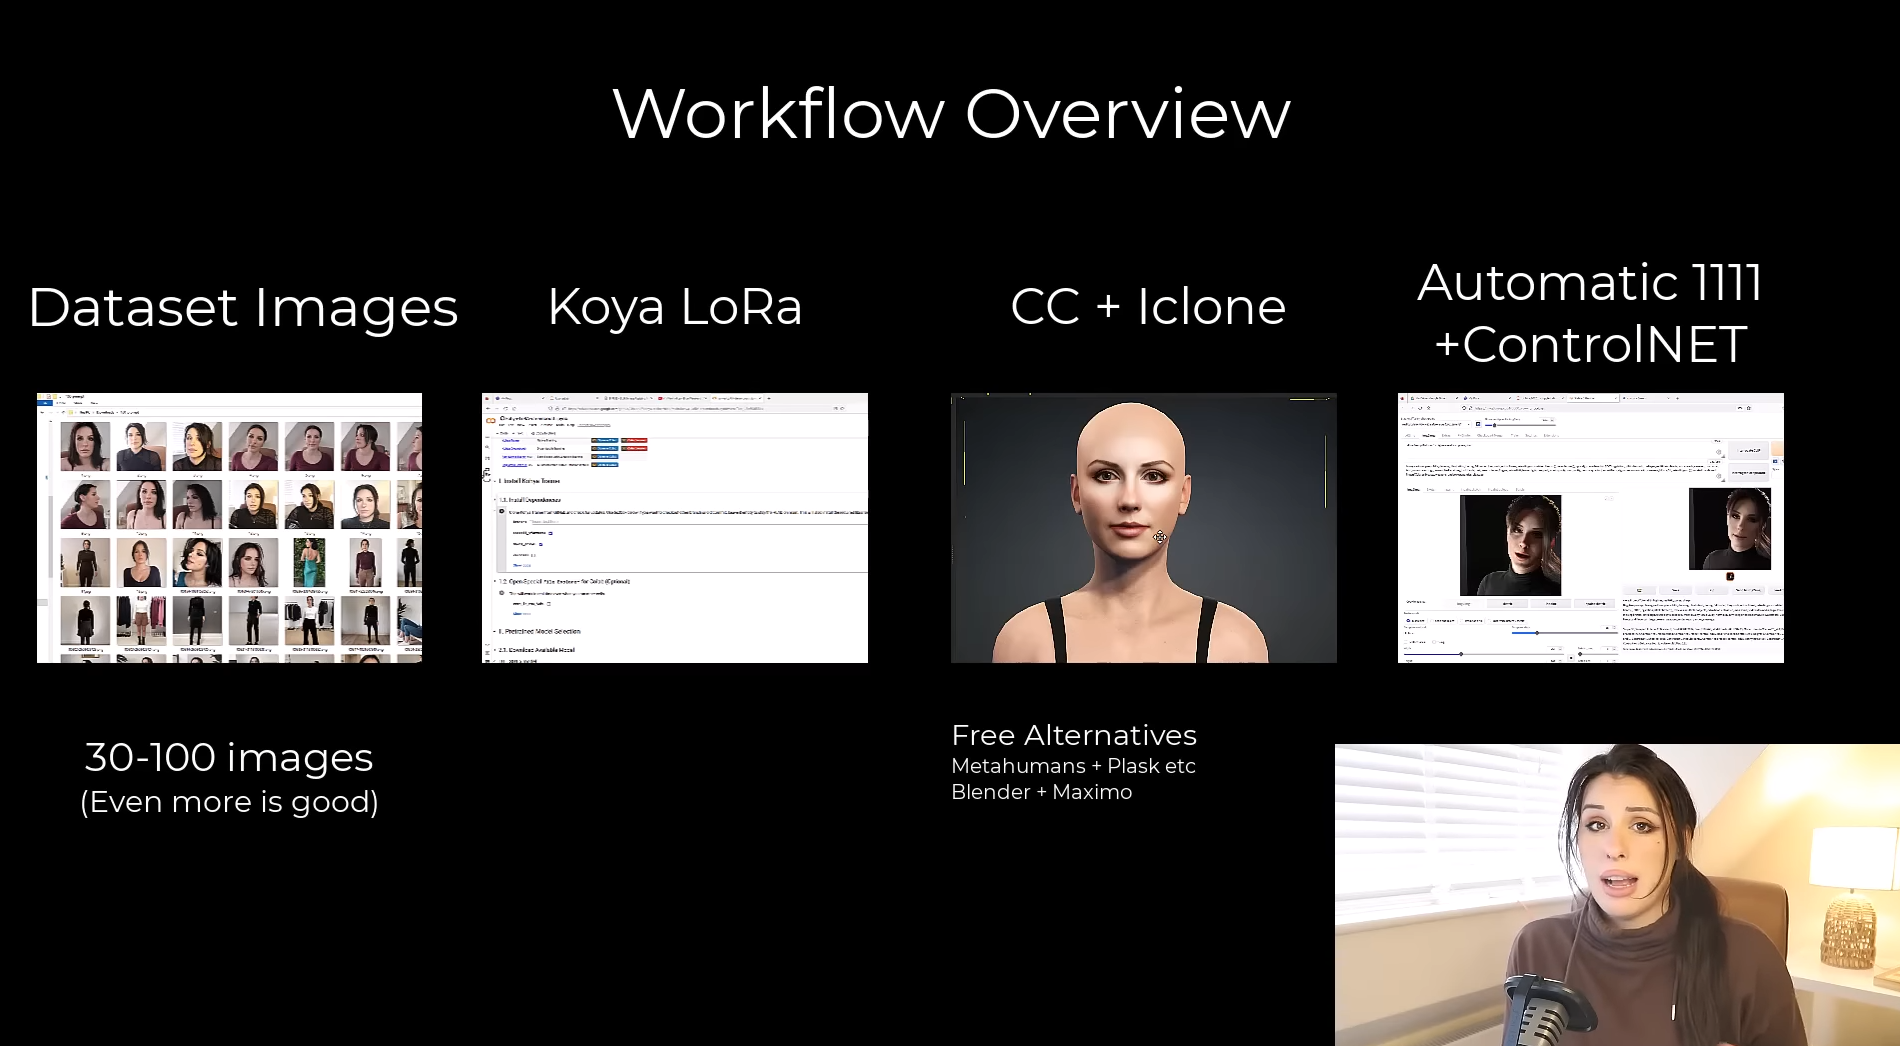
Amelia Player, co-founder of Prompt Muse, seamlessly incorporated Headshot, Character Creator, and iClone into her AI-generated animation workflow. By utilizing CC Character and iClone Animation, Amelia effectively addresses the instability that commonly occurs in video-driven AI animations. Reallusion’s tools were chosen for their user-friendly approach to 3D character creation, what she referred to as a “zero-learning curve” solution. These tools integrated with the animation pipeline, alongside MetaHuman and Blender, enhancing the overall user experience.
I use Character creator to create a puppet. You do not need to know any 3D. There is no learning curve to this software. You’re basically using sliders and dragging and dropping assets onto your 3D character. It is super simple to use.
Amelia Player, co-founder of Prompt Muse
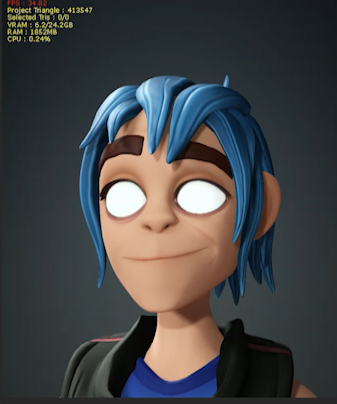
After preparing the data and getting the AI model trained using Google Colab, Amelia simply uploaded her images into Headshot and AI-generated a 3D character of remarkable resemblance.
I’m going to be taking this bald image of myself and dragging and dropping that into the Headshot plugin, which then generates a 3D model of my face. I can go in and sculpt this further if I want to, but I’m just using this as a puppet or a guide for the AI.
Amelia Player, co-founder of Prompt Muse
Next, she explored Reallusion‘s content ecosystem, carefully selecting and incorporating her preferred hair and clothing options onto her 3D character.
Once I’m happy with the face and the body shape, I then add some hair. Again, it’s super easy. I’m just dragging and dropping from a library.
Amelia Player, co-founder of Prompt Muse
The extensive asset library included in Character Creator 4 and iClone 8 provides fully-rigged characters, over two thousand 3D outfits, hairstyles, dynamic wrinkles, expression morphs, light presets, and more. >> Learn more
Upon finalizing the design of her 3D character, Amelia proceeded to export it to iClone. Additionally, she downloaded the free facial motion capture application, LIVE FACE, with the intention of capturing her expressive performance data. The data was then used in iClone Motion Live to enhance the realism of the facial animation.
iClone is more of an animation programme. So this is where I’m going to be adding the facial animation as well as the body idle.[…] It’s super easy to use. All you’re doing is recording your facial movement and that’s being applied to your 3D model in real time.
Amelia Player, co-founder of Prompt Muse
After speaking with Amelia, her motivations for selecting Reallusion tools became evident:
Headshot and Character Creator conditioned the source videos, leading to more stable AI-generated animations.
Character Creator provided the flexibility to have complete control over the appearance of a character. It eliminated the need to hire a dress-up model for AI rendering.
With the extensive ecosystem of content available in Character Creator, including options for hair, clothing, shoes, and more, the desired look can be achieved effortlessly.
iClone provided the freedom to create top-notch animations, with adjustable camera distances and angles to capture the best visuals.
Different lighting setups were readily available to establish the desired atmosphere for each shot.
It has been truly delightful to witness how Amelia utilized Reallusion’s tools and resources to streamline her workflow and produce professional-level, AI-generated animations with such efficiency. To see the complete process, watch the detailed steps below, and for additional professional tips, be sure to visit Prompt Muse’s website.
How to create your own AI-generated animation with state-of-the-art techniques :
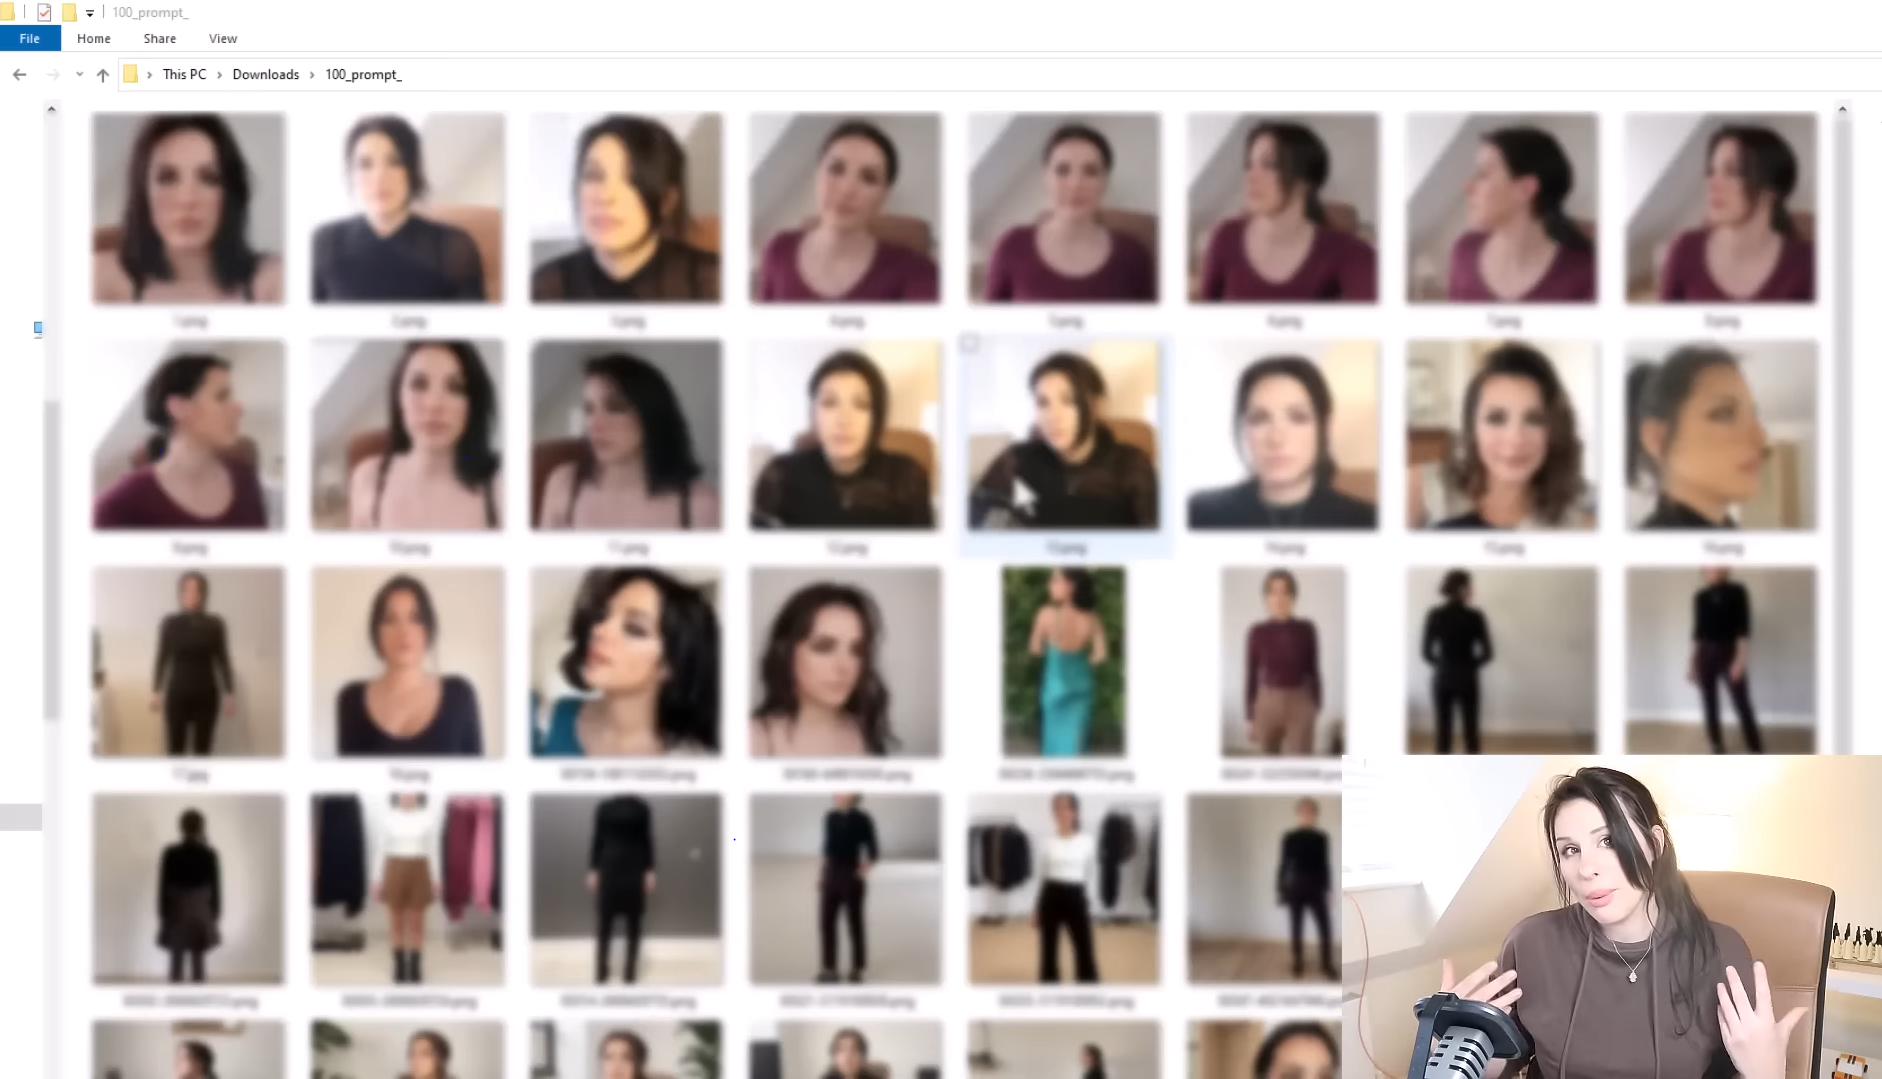
Step 1. Preparing Your Data for Training
Step 2. Training Your AI Model with Google Colab
Step 3. Creating and Animating Your 3D Character with Headshot, Character Creator and iClone
Step 4. Rendering and Finalizing Your AI-Generated Animation
Nathan Smith – 2D animator, a member of Studio Ghibletz
Nathan Smith
Greetings, my fellow animators! I’m Nathan—an esteemed member of Studio Ghibletz. Today, I’ll be your guide as we explore Cartoon Animator 5’s latest features. We’ll learn how to use the vector character launcher, how to create props in Photoshop and Illustrator, and how to add GIF animations to your next cartoon.
Cartoon Animator 5 ushered in a new generation of vector characters. Vector assets enable you to produce characters and props which can be enlarged without a loss of quality. In the past, however, CTA5 lacked the ability to launch vector characters to an external image editor, but Cartoon Animator 5.1 remedies this issue.
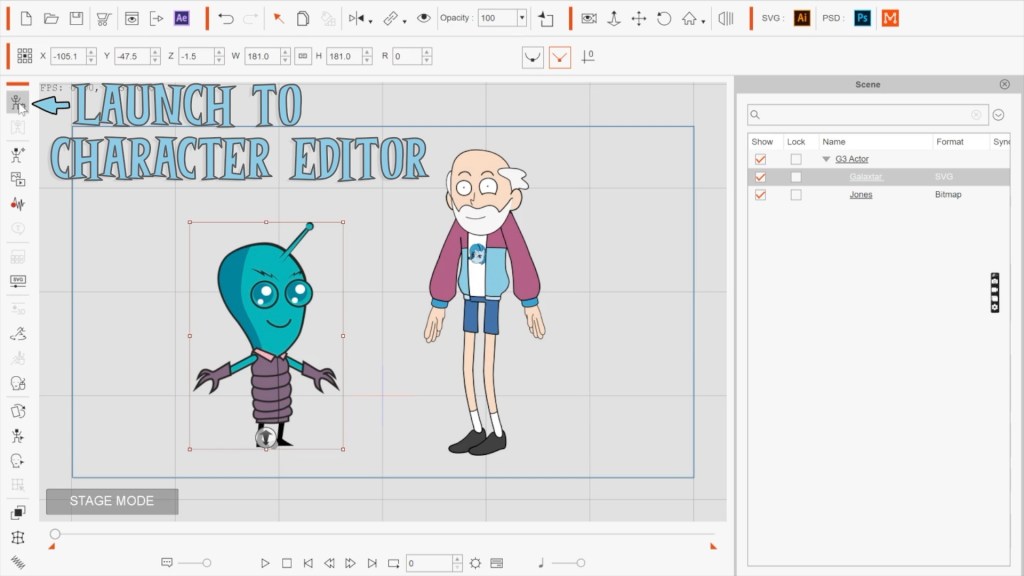
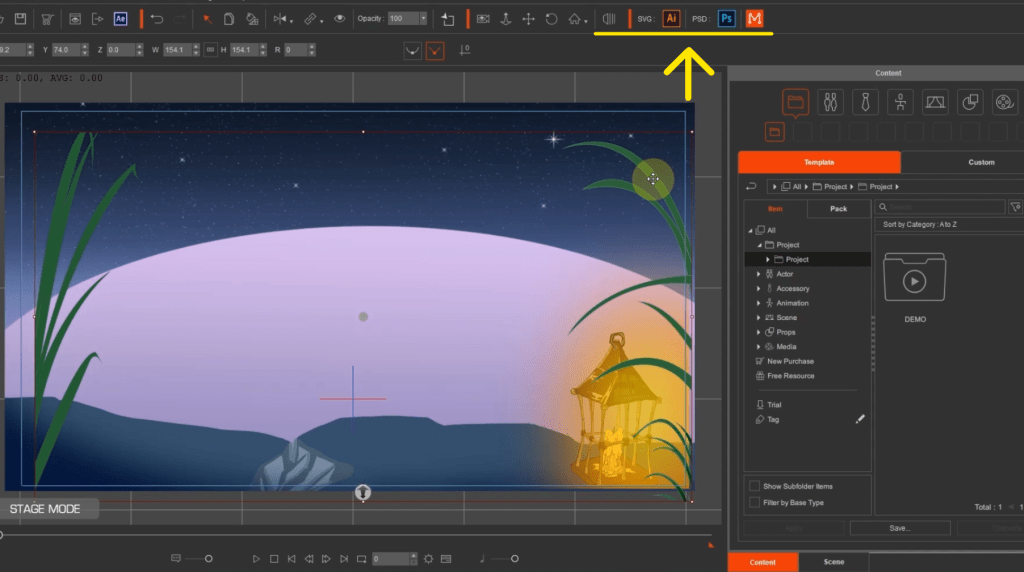
You can now launch vector characters to Adobe Illustrator. To make edits to an SVG asset, bring it into the character composer. From here, select the SVG launcher, which is conveniently located beneath the PSD option. Seasoned CTA5 users will notice this follows the same pipeline as the Photoshop launcher.
CTA5 will then export your prop or character to Adobe Illustrator. For now, Illustrator is the only supported vector editing software, but this could change in the future. After bringing your character into Illustrator, make your desired changes, save, and then exit. Your character will automatically update in CTA5.1.
Certain types of 2D animation, like water, fire, and smoke, can’t be rigged with a bone structure like characters. They require a hand-drawn, frame-by-frame sequence. To make use of these assets, you must create a prop. In the past, you had to import your prop’s sprites one by one. This was time-consuming, especially if you had a ten-frame sequence for something like this flame. CTA5.1 now offers an alternative.
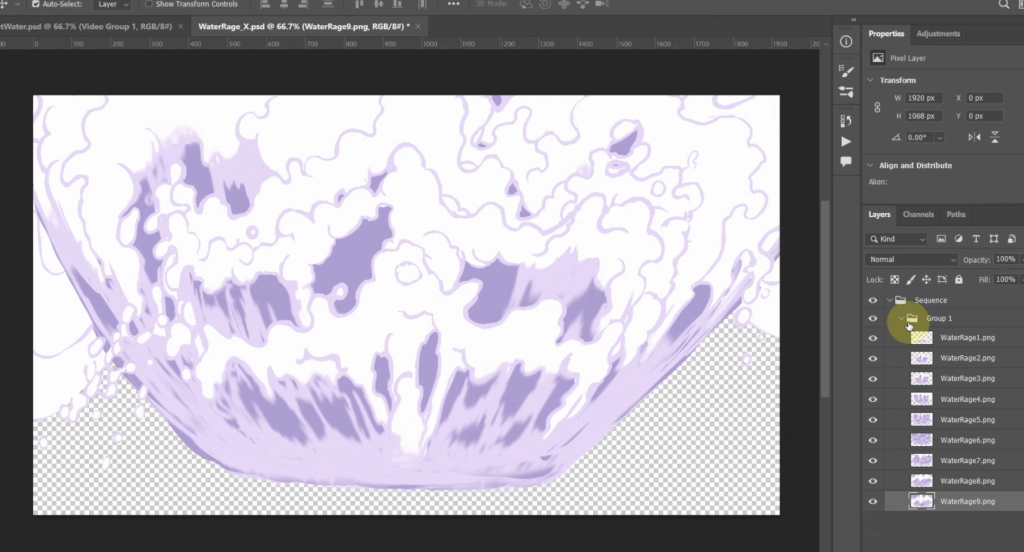
With CTA5.1, you can import multiple sprites at once. The pipeline begins in Photoshop. To import a prop with multiple sprites, you must correctly format it in Photoshop. If the file is not correctly formatted, your prop will fail to generate. You can format your prop in Photoshop by following these four steps:
Step 1: Create a folder named sequence. This tells CTA5.1 that you want to play the following sprites in a loop.
Step 2: Create a second folder with the name of your action sequence, then place it inside the folder named sequence. For example, the folder in the screenshot below is called flame.
Step 3: Load all of your sprites into the action folder. Here, you can also create multiple actions by using additional subfolders. For example, I added a second action sequence image called blue flame.
Please note: In Photoshop, the sprites will play from the top down. In Illustrator, however, the sprites will play from the bottom up.
Step 4: save your document as a .psd file, then drag it into CTA5.1. Your prop will automatically generate. From there, you will then find the sprite sequences under the action menu.
Sequence Images – SVG Prop Pipeline
If you want to make an SVG prop, Adobe Illustrator employs a similar pipeline. Again, it all comes down to correctly formatting the file. To make your first vector prop, follow these five steps:
Step 1: The first layer should bear the name of your prop. In the picture below, the prop’s name is “bread”.
Step 2: Add another layer. Name this one “sequence:” Don’t forget to add the colon. This is very important because without the colon the prop will not generate correctly when you import your file into CTA 5.1.
Step 3: Create another layer and name your action sequence. In the example below, the layer is named “bread_falling.”
Step 4: Place your sprites in the next layer. Remember, in Adobe Illustrator the sprites will play from bottom to top, which is why these five sprites are ordered in reverse. You can also create multiple sequences in the same prop, just like in Photoshop by creating another layer under “sequence:”
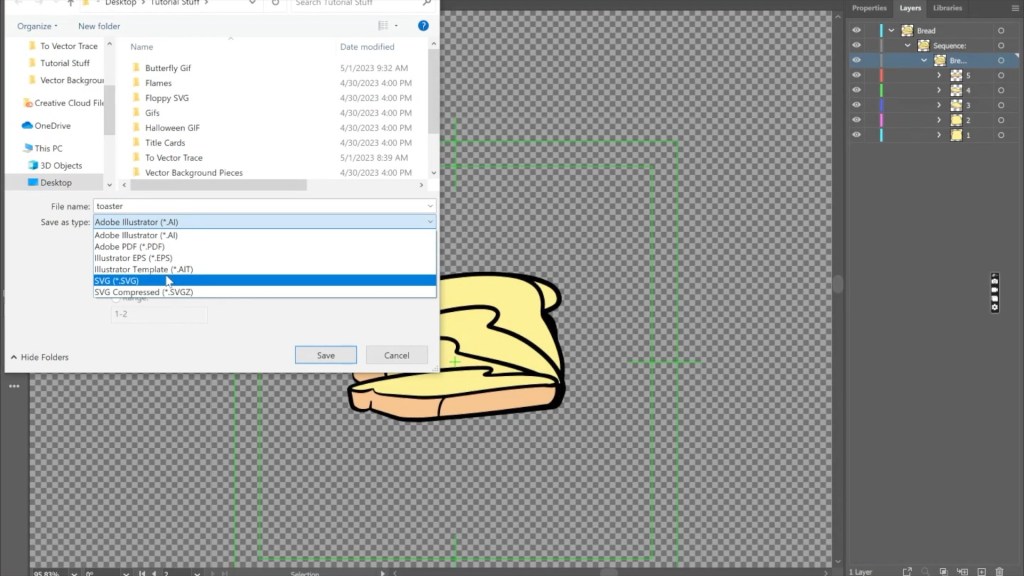
Step 5: Save your prop as a .svg file. Other formats, like .ai, won’t work. Finally, drag this .svg file into CTA5.1 to generate your new animated prop. As with traditional props, you’ll find the sequence image you created under the action menu.
A Quick Q&A about GIF and APNG Compatibility
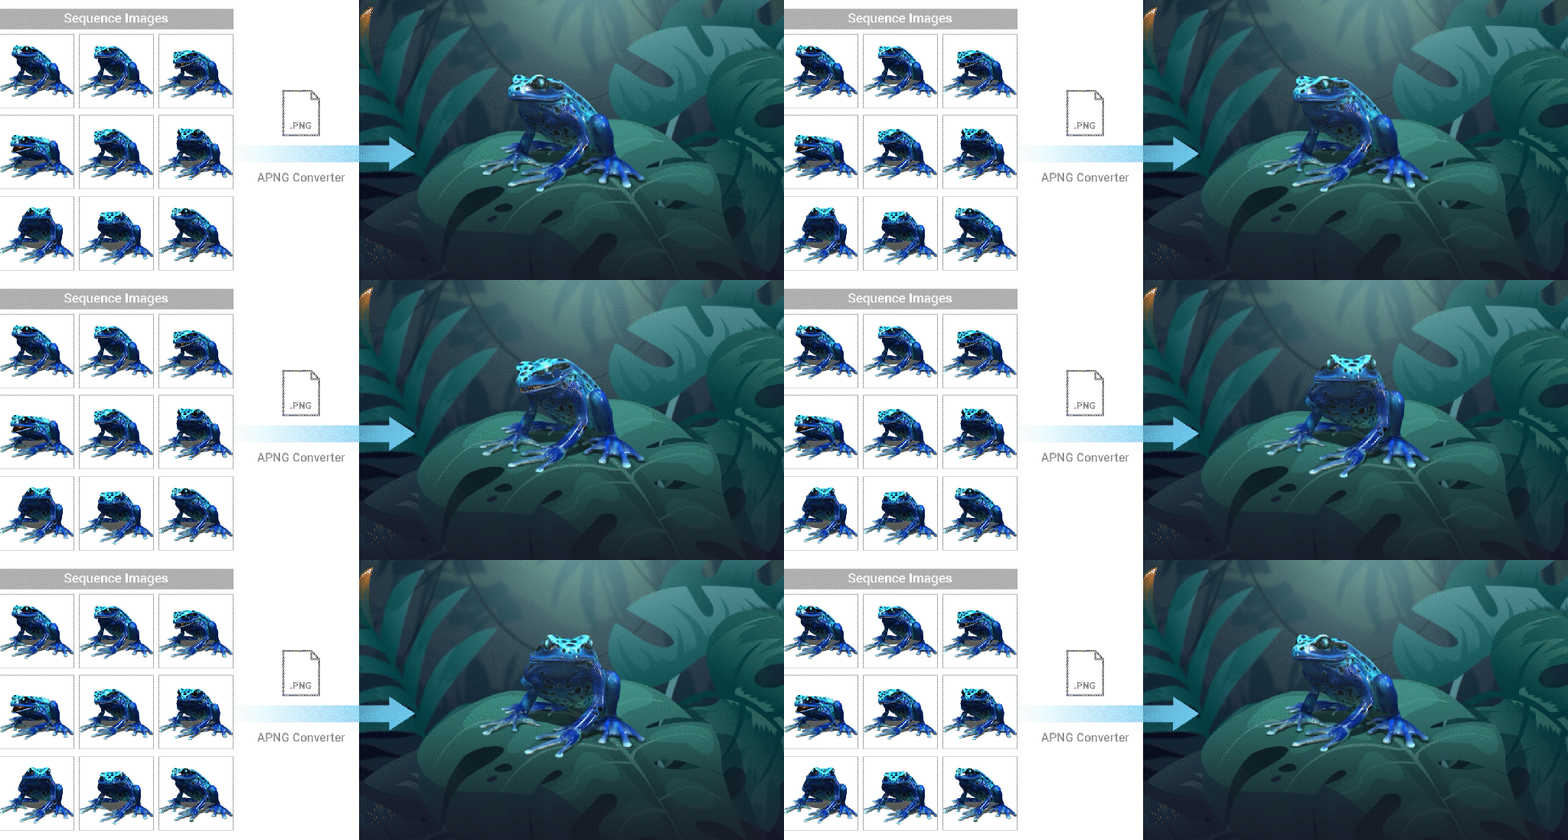
The next exciting feature to grace CTA5.1 is GIF and APNG compatibility. You can now import animated GIFs directly into Cartoon Animator 5 with ease. This feature requires no elaborate set of instructions. Simply drag your GIF or APNG directly into CTA5.1. You’ll then be prompted to set the number of times you’d like the gif to play, then presto — you have a fancy new prop.
To make the most of GIFs, use them for props that require a constant loop — things like water, fire, and smoke. Additionally, you could consider using them for blinking lights or static computer screens. For Floppy’s Obstacle Course, I imported several butterfly GIFs to add flourish.
GIFs and APNGs perform the same role. They create short, looped animation sequences. The primary difference, as Cody explains, is: “ GIFs and APNGs are both types of animated image files, but the main difference is that APNGs can have more colors and be better quality than GIFs.”
Where can I get free GIFs?
You can find animated GIFs all across the internet. The gifs used in Floppy’s Obstacle Course came from Envato. These butterflies were originally video files which I converted into GIFs to add into CTA5. Another great place to find GIFs is giphy.com. Here, you’ll find all the GIFs your heart desires, any of which are sure to boost the production value of your cartoon.
How can I create a GIF?
Funny you should ask! The butterflies used in Floppy’s Obstacle Course were originally video files. You can convert .mp4 files to GIFs using software like Premiere Pro, or a free GIF converter online.
Raise Production Value with CTA 5.1
I hope these new features help you produce excellent cartoons. If you have any questions, I’ll be hanging out in the comments section and in the Cartoon Animator Users group on Facebook. The CTA community is large and supportive. Never hesitate to reach out if you’re curious about 2D animation. Farewell brethren!
Antony Evans – Co-owner and Animator at Digital Puppets UK
DIGITAL PUPPETS UK
In the world of animation and virtual avatars, creating realistic and stylized characters is an essential skill. My name is Antony Evans, I am the co-founder of Digital Puppets, an animation studio in the UK. I have worked as character designer for many years and recently worked with Vtuber company Taiyaki Studios as well as studios such as Disney, Warner Bros, and the BBC.
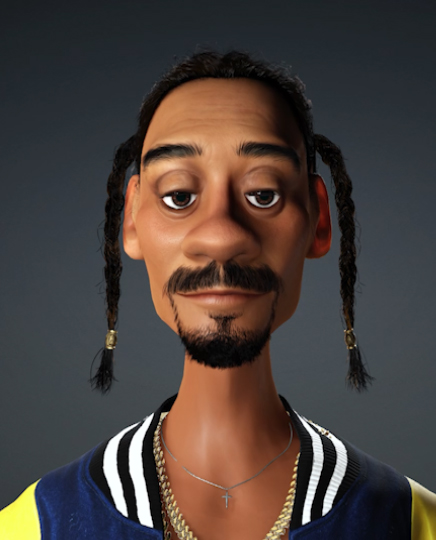
In this video I will share my insights and workflow for developing a stylized Snoop Dogg avatar. Leveraging tools like Character Creator 4and ZBrush, I will run through the process of transforming a realistic base into a captivating cartoon version.
“One of the key advantages of Character Creator 4 is its ability to sculpt detail directly into the mesh. The software provides powerful sculpting tools that allowed me to add specific features and refine the character’s face to match the unique characteristics of Snoop Dogg. I could sculpt the shape of the nose, eyes, lips, and other facial elements with greater precision, resulting in a more accurate representation.”
Antony Evans – Co-owner and Animator at Digital Puppets UK
Establishing a Realistic Base
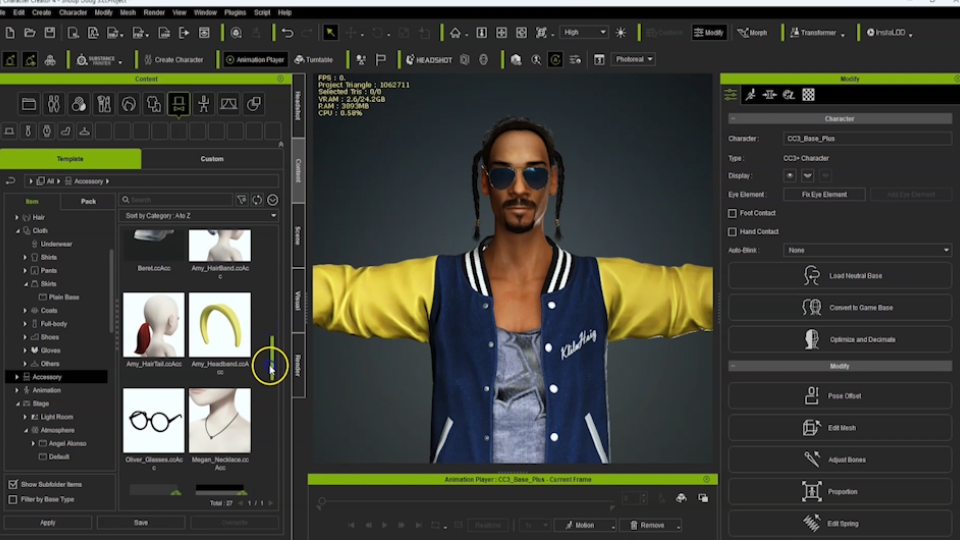
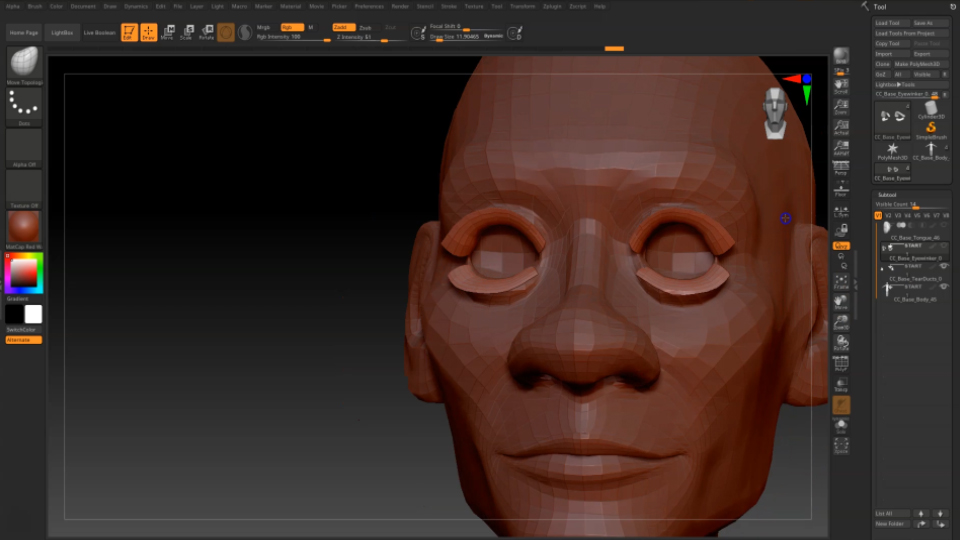
To begin the character creation process, I started by acquiring a reference image and using this with the Headshot plugin for Character Creator 4. The image I used was from ArtStation and was actually a 3D render but was perfect for a front-on-image of his face. When working with Headshot a good image with even lighting is important to get the best results. With some tweaking using morphs and the Edit Mesh tool in iClone 8, I fine-tuned the character’s features, trying to achieve a close resemblance to Snoop Dogg.
I started the process by creating a realistic version, as this gives me a great base to create the cartoon version from. I can then test out exaggerating different features and trying different styles until I get the look I am after.
Creating a realistic base with unreal Mesh to Meta Human
In the video the next step was to try the same process of creating a realistic Snoop Dogg but using the Mesh-to-MetaHuman tool. I found that this did work really well, and the process of turning my mesh created inCharacter Creator 4 into a MetaHumanwas easy to do.
It was only when It came to adjusting the mesh that I found that the MetaHuman editing tools were limited. I would have liked to have more control over the areas I could manipulate and be able to push them further than its limits. The final animation results in the Unreal Engine and with the MetaHuman were however impressive, but for my goal of turning the model into a stylized cartoon version – Character Creator allowed more options for me to achieve this.
Why I used Character creator instead of MetaHuman?
In the video I go back to the CC4 base, this is because using tools like the Edit Mesh and the Sliders I had more control over editing the mesh. One of the other big advantages is the GoZ plugin which opens up all the sculpting tool available in ZBrush. Its in ZBrush I can really push and pull the mesh around and test out different looks for the stylised character.
Creating a Stylized character from CC4 realistic base
With our realistic base established in Character Creator 4, we embark on an exciting journey of stylization. Drawing inspiration from beloved Disney characters and other stylized designs, we explored how pushing and pulling mesh elements in ZBrush can transform our realistic base into a captivating and unique stylized character. We embrace the trial-and-error process, leveraging the flexibility of ZBrush to achieve diverse looks and evoke a specific style.
Final Thoughts
One of the key advantages of Character Creator 4 is its ability to sculpt detail directly into the mesh. The software provides powerful sculpting tools that allowed me to add specific features and refine the character’s face to match the unique characteristics of Snoop Dogg. I could sculpt the shape of the nose, eyes, lips, and other facial elements with greater precision, resulting in a more accurate representation.
Additionally, by using the GoZ integration, I could switch between Character Creator 4 and my preferred sculpting software with ease. This streamlined workflow enabled me to sculpt intricate details onto the mesh and achieve a higher level of realism, ensuring that the Snoop Dogg character closely resembled the real-life counterpart.
While the Mesh to Metahuman feature in Unreal Engine provided a solid starting point, Character Creator 4, along with the GoZ integration, offered a better way to sculpt fine detail into the mesh. The ability to directly manipulate the mesh and seamlessly transfer sculpted details between software packages significantly enhanced the level of customization and realism achievable in the character creation process.
Also, a great addition to CC4 is the new wrinkle map feature. Whether you are creating a realistic or stylized character, the additional wrinkle detail brings an extra level of life you your character designs. At the end of the video you can see these examples of different characters and you can use the different wrinkle map options to get the right look for your character.
Follow Digital Puppets
Check out our Discord channel at https://discord.gg/28DNM9A94P So if you are a iClone, Unreal, Character Animator, LIVE2D user and you want advice or to share your work, come join us. We’re hoping it’s going to be an active community. Also, if you are an animator in general, join us too, tell us what programs you are using, we are always keen to learn about what others are doing and using
Create Superior Digital Doubles from Images and 3D Meshes
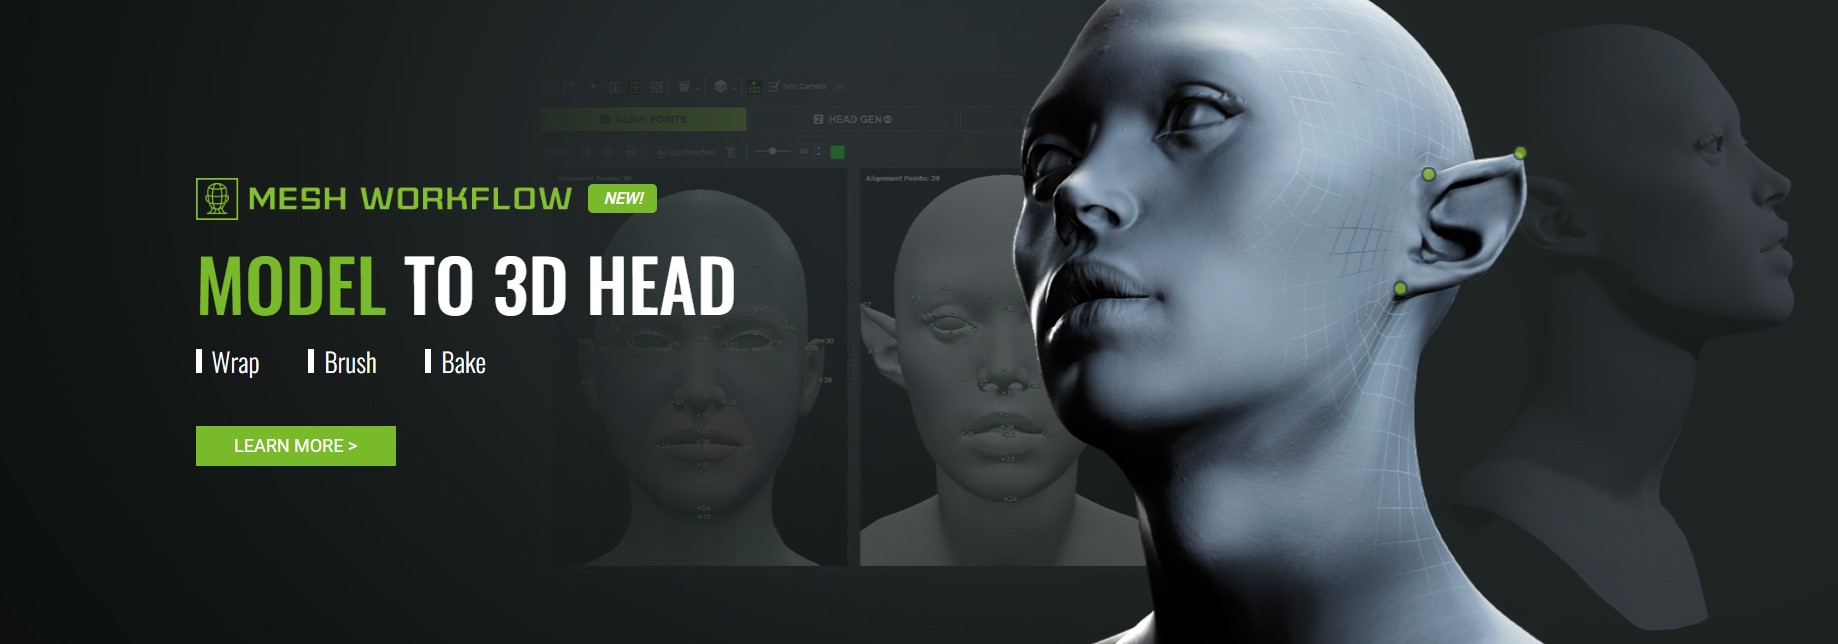
Headshot 2, the AI-enhanced plugin for Character Creator, lets you create advanced 3D real-time digital humans from photos and 3D models. It offers precise model fitting, texture baking, and full body animation capabilities, surpassing its predecessor and competitors. With Auto and Pro modes, it provides one-click generation of low-res virtual heads with 3D hair, as well as high-resolution texture processing with extensive morph options and advanced tools for refinement. Its versatility and comprehensive feature sets make it the industry’s go-to solution for converting static models into fully-rigged 3D heads.
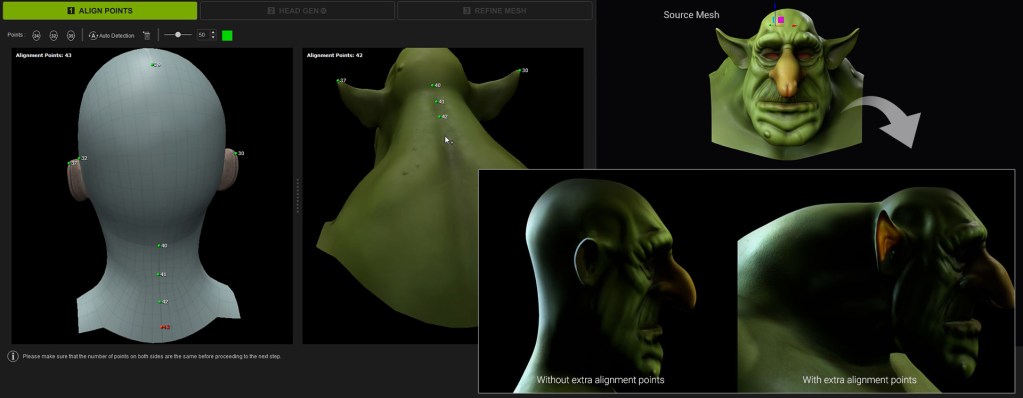
Headshot 2 harnesses the power of AI to handle diverse mesh conditions in just five simple steps, transforming your static models into fully-rigged characters. Firstly, it automatically detects your mesh and populates the essential 24 alignment points. Secondly, the flexible system allows artists to add extra alignment points to highlight specific anatomy, making it particularly suitable for meticulously sculpted characters in ZBrush and Blender. Thirdly, even if your scanned mesh is incomplete, Headshot AI’s advanced capabilities intelligently fill in the missing parts while preserving priority areas such as the face and ears.
The robust native 3D brush system not only enables accurate projection of head shape, topology smoothing, and optimized edge loops, but also enhances the likeness of your digital doubles by improving facial expressions like smiles and winks. Furthermore, Headshot 2 is not limited to just the head! You can easily attach the generated head to a suitable body type and gender within the Character Creator ecosystem. Artists can further refine the body type using morph sliders at any point and utilize SkinGen to add personalized details such as pores, freckles, scars, makeup, and dynamic wrinkles.
Headshot 2 is the only system that supports high-poly normal baking, vertex color to texture conversion, and UV remapping. It meets the demands of professional production while remaining intuitive enough for everyone. Download it now to enjoy more exclusive features that make your digital doubles look natural, convincing, and unique!
Turn 3D head models into fully-rigged characters. Whether covered or fragmented, Headshot 2 can create a complete 3D head from diverse mesh conditions.
Create superior digital doubles from a variety of resources. Mesh made from photogrammetry, digital sculptures or mobile 3D scanning supply the seeds for creating animated 3D heads, ranging from digital humans to stylized characters.
Intuitive wrapping process in 5 steps. From auto-detection, point alignment, AI head generation to brush tools for mesh refinement and body attachment, Headshot 2 has it all.
Challenging scenarios can be resolved with efficiency. Dealing with eyes and ears after model fitting can be tricky as well as attaching to head to the body and preserving hairstyle. Headshot 2 offers a set of powerful brushes to workaround hairy problems.
Versatile texture baking options help retain high-poly detail. Headshot 2 enables the conversion of vertex color to texture, normal baking, image projection, and UV remapping (see below).
1. Turn 3D head models into fully-rigged characters
Headshot 2 harnesses the power of AI to handle diverse mesh conditions with a remarkable level of tolerance. It particularly excels at working with severely flawed models, effortlessly generating fully-rigged, professional-grade characters.
2. Create superior digital doubles from a variety of resources
PHOTOGRAMMETRY
With a range of services including custom scans and a professional 3D head library, photogrammetry offers unparalleled model details and texture resolution. Headshot 2 leverages this technology, enabling studios to effortlessly create and animate celebrities, game characters, and photo-realistic crowd simulations for movies and archviz.
DIGITAL SCULPTURES
In the media entertainment industry, digital sculptors skilled in tools like ZBrush and Blender create high-definition 3D characters for intellectual properties. Headshot simplifies the process by seamlessly converting these highly detailed models, regardless of whether they are realistic or stylized, into real-time characters.
MOBILE 3D SCANNING
Mobile scanning provides a convenient and cost-effective method for creating 3D models. However, unwieldy scanning conditions may result in compromised quality. By selecting the effective surfaces, Headshot AI can overcome these challenges by seamlessly filling in the missing areas, such as the ears, skull, and neck, ensuring high-quality results.
Bring In Stylized Characters
CUBIC STYLES & SHARP LINES
Accurate depiction of eye blinks and iconic expressions on stylized characters with exaggerated eye sockets and angular contour lines relies on precise alignment of mesh points and edges. Headshot’s distinctive normal baking technology makes this achievable.
EXTREME HEAD & NECK SHAPES
For stylized creatures with a bold design, achieving resemblance is made easier by adding additional alignment points to define exaggerated areas like the ears and neck. These specific details can also enhance the otherworldly characteristics of the creatures.
3. Intuitive wrapping process in 5 steps
(1) Automatic Feature Detection
Get started quickly with three preconfigured options: 24, 32, or 35 alignment points. Alternatively, use auto detection to automatically populate the essential 24 alignment points. By synchronizing the camera navigation, you can easily compare the positions of the alignment points between the source and target meshes.
(2) Add Details with Extra Alignment Points
The system offers flexibility by allowing the addition of extra points to accommodate distinctive facial and body features. Whether it involves adding points for stretched elf-like ears or incorporating more points for a prominent hunched back, the system is fully compatible with any standout anatomy.
(3) Generate 3D Heads Based on Effective Areas
With the advanced capabilities of Headshot AI, you can effortlessly generate a comprehensive 3D head from a partial mesh. Enjoy the flexibility to choose which details to preserve according to your preferences, whether you prioritize the face, include the ears, or encompass the entire head. Regardless of your choice, Headshot 2 guarantees exceptional results delivered with speed and efficiency.
(4) Refine Topology with 3D Brushes
Benefit from robust 3D brushes, which can efficiently project the head shape, smooth out topology, and optimize edge loops. This process not only enhances the likeness of the character but also enables improved performance with facial expressions, particularly in the areas of the eyes and mouth. >> View the CC Face Topology Guideline (Free Download)
MOVE : Shift Point Positions
SMOOTH : Refine the Model Surface
PROJECT : Map onto the Source Mesh
CLONE : Align to Target Topology
(5) Assign Body Shape & Bake Textures
Effortlessly assign the suitable gender or body type to the generated head and ensure a seamless attachment with the corresponding neck shape. Achieve professional-grade results by utilizing image masking and a wide range of texture bake options. Refine the body type further using morph sliders at any point in the process for added customization.
4. Challenging scenarios can be resolved with efficiency
FACE
Wrapping a sophisticated or creatively designed 3D head can present challenges and potentially yield unintended results. Headshot provides a multitude of options to effectively handle difficult cases, such as stylized eyes, ears, and even slightly parted lips. By employing specific techniques tailored to each situation, artists can confidently achieve their desired outcomes with precision.
ATTACH TO BODY
The advanced body type options enable effortless retopology of the head, allowing for easy modifications using your own assets. The mesh wrap tools simplify the process of achieving a striking resemblance, even for stylized characters with unconventional neck shapes. Additionally, the body morph sliders offer precise control over the configuration of the character’s physique.
PRESERVING HAIRSTYLE
Maintaining the hairstyle is crucial to achieve a faithful resemblance between the source and target models. By designating the entire head as the effective area and using the “No Mask” option, the original hair shape and textures is kept intact, while editing tools offer surplus ways to clean and refine the final geometry.
5. Versatile texture baking options help retain high-poly detail
TEXTURE BAKING
Headshot 2 stands out from other model fitting solutions with versatile texture baking options. It is the only system that supports high-poly normal baking, vertex color to texture conversion, and UV remapping. Other exclusive features include image-based color projection and textureless rendering with stand-in eyes. The outcome is an astonishingly detailed CC3+ head at 4,000 quads, showcasing remarkable resemblance and geared for real-time performance.
TEXTURE MASKING
No Mask
To ensure the integrity of bust models with desirable hair or coverings and without distorted textures, choose the “No Mask” option. Additionally, for the correction of minor texture artifacts that occur when blinking or opening the lips, apply eyelash and lip masks to achieve the right results.
Template Mask
When generating a 3D head from a partial mesh, texture tearing or stretching can occur due to degradation. Even with a flawless source mesh, accurately projecting eyelash and inner lip details can be challenging. Headshot 2 offers a convenient solution by providing predefined texture masks to quickly hide problematic areas, ensuring a seamless and visually appealing result without the need for image editing.
Custom Mask
Typically used in conjunction with custom painting of diffuse and normal maps, the “Custom Mask” option offers maximum flexibility for texture refinement. Designers can easily create and modify maps using an image editor, with the results automatically updated in Character Creator when the image is saved.
ENHANCE WITH SKIN DETAILS
SkinGen
Low-resolution textures often result in deficient close-ups. With the dynamic skin editor, SkinGen, you can overcome this limitation by layering intricate details like pores, veins, freckles, sun tan, scars, and even apply makeup to enhance the realism of the eyes and lips. >> Realistic Human Skin. Makeup & SFX
Dynamic Wrinkle
Take realism to new heights by seamlessly incorporating dynamic wrinkles into the generated digital doubles. Witness the remarkable level of expression details that come to life in real-time when you apply face key, facial puppet, and tracking techniques.
Hey there, I’m Declan Walsh. Let me take you back to my first-ever interview in the animation industry. When they asked about my experience, I must have frozen like a deer caught in headlights! My previous gig involved packing TV cases on a factory floor, but I had a feeling that wasn’t exactly what they were seeking. So, I decided to approach it differently… I leaned in, looked the interviewer straight in the eyes, and declared, “If I can’t nail this job in three months, I’ll give myself the boot!” That momentous occasion took place 25 years ago, and I’m proud to share that I’ve since amassed a wealth of experience working on classic movies, games, and various other projects.
However, here’s the thing… I’m still learning! In this industry, learning never stops. My latest escapade brings me to Cartoon Animator (CTA), where I got to collaborate with Reallusion to showcase its features. The thing I absolutely adore about CTA is its inclusive approach that embraces artists of all skill levels. It allows me to keep honing my traditional animation skills, even in the face of the latest industry advancements. And let me tell you, their community is incredibly supportive — just like any top-notch animation studio would be!
A Glimpse into A 90s Animation Studio
Amidst the cubicles, the faint sounds of muffled music seep from headphones. Two nearby animators are engaged in conversation with their attention focused on a shot sequence. They rewind the VHS tape back to the beginning, eagerly watching as the animation came to life. Rewinding, playing again, and scrutinizing every movement with their trained eyes. They kept a keen eye for any imperfections, any slight pops in motion that lacked follow-through. And when it worked, a smile spread across their faces. This was a routine part of my daily life for many years, and I cherished every single second of it.
During those times, animation was entirely hand-drawn and traditional animators were adept at rolling the paper quickly to assess the timing of their rough animations. Then, they would take it to the video by carefully placing each drawing on the animation disc, ensuring the lighting was just right, so the blue foundational drawings are clearly visible.
In those days, cameras weren’t particularly advanced. Each frame had to be captured on video before you could witness your animation. I relished the anticipation that accompanied this process.
But what I loved, even more, was the soundscape of an animation studio — pencils roughly scratching as artists brought the next scene to life, the rhythmic flipping of crisp paper, and the tactile sensation of the pages gliding through my fingertips. It instantly transports me back to a time when animators from Los Angeles, Brazil, Canada, the Philippines, and all corners of the globe converged to create the next classic animated feature for the silver screen! I vividly recall being told two things:
“You’re only as good as your last scene.”
“Whatever you put out into the world, remains there for all time; there’s no going back.”
In those days, the creation of animation was an immense undertaking! It required the collaboration of over 350 individuals, including story writers, storyboard artists, color design teams, character animators, background professionals, special effects artists, and many more. They seamlessly worked together within a vast studio equipped with colossal cameras!
Fast-forward to The World of Animation Today
The year is 2023 and animation has changed drastically! With the rapid advancement of computers and software like Cartoon Animator (CTA) and Photoshop, our ability to draw, color, and animate directly on-screen has revolutionized the game. Gone are the days of traditional methods; now, we can wield an entire studio’s worth of tools and resources on a single laptop. A vast library of characters, backgrounds, effects, and built-in animations awaits, limited only by the boundaries of our own imagination. It’s a breathtaking reality I could never have envisioned.
Yet, I’ll confess, there are moments when I yearn for the tactile sensation of flipping through paper with my fingertips. As I write this, my collection of old animation discs adorns the walls, gazing down upon me. If those discs could speak, I imagine they would share tales of a remarkable journey and murmur, “Hell of a ride, kid…” before succumbing to slumber, lost in dreams of bygone glory. Meanwhile, I press forward into the current era and adapt, wielding my XP-PEN tablet in pursuit of artistic expression and preserving the age-old tradition of 2D animation.
At its core, the process of animation remains unchanged: crafting a compelling story, storyboarding, creating color keys, and more. The difference lies in the abundance of tools now at our disposal, and it’s truly awe-inspiring! In CTA, an entire studio lies within reach, with an array of tools readily available at our fingertips.
The Art of Storyboarding
Let’s dive into the topic of storyboards! But before we delve into it, let me make one thing clear: you don’t have to be a skilled artist to create one. Stick figures or written descriptions in panels will suffice.
What truly matters is focusing on the camera angles and ensuring they capture the motion of the piece in the best possible way. Consider the character’s trajectory and how it aligns with the connected scenes. Express your thoughts on the page, freeing them from the confines of your mind. I assure you, your animations will flow more smoothly once you accomplish this.
Achieving the right timing can be challenging, so here’s a handy tip: grab your phone and time yourself acting out the character’s movements. For instance, if you’re timing a character’s breathing and you know the timeline operates at 30 frames per second, you can measure your own breath — two seconds for inhale and two for exhale — for the first board. Consequently, your first keyframe would be at frame 60, and the second at frame 120. Repeat this process for each panel, so you have a rough idea of timing before you start.
I also recommend recording yourself performing the scene so that you can utilize it as a reference for your 2D character animation. CTA is very flexible and allows you to do this easily.
My Choice of 2D Animation Software
Now, let’s talk about the tools available to us. I must admit, the abundance of tools in Cartoon Animator is simply mind-boggling — it’s a veritable playground for individuals like myself!
To illustrate, I recently created an animation featuring a character breathing under a blanket. To achieve the desired effect, I utilized the Free Form Deformation (FFD) editor. This powerful tool allowed me to manipulate and deform the blanket as the character breathed, enhancing the realism of the scene. By keyframing the transformations on the timeline, I seamlessly brought the prop and character to life.
Furthermore, Cartoon Animator offers a range of presets that greatly aid in the animation process. For instance, I made use of the squash and stretch presets, making slight adjustments to tailor them precisely to my needs. These presets provided a solid foundation upon which I could build the desired results. Additionally, in a particular moment of my animation, bubbles needed to appear on the screen, and once again, the FFD editor proved instrumental in achieving the desired effect.
One thing I truly appreciate is infusing subtle movements into my scenes, as it adds a captivating level of vitality. I meticulously identify areas where I can introduce motion, always ensuring it complements the focus and main action without overshadowing them. It could be something as simple as floating bubbles, twinkling stars around the character’s head, or gentle ripples on the water. These subtle touches breathe life into the animation, making the scenes more immersive and captivating.
Create Animated GIFs & Sequence Image Animation
In one of my scenes, I depict a character seated on a massive lantern, gazing at the Moon character literally sitting in the water. It presented a perfect opportunity to add a candle flame, subtly enhancing the scene’s atmosphere. However, I wanted to ensure the candle flame didn’t overpower the main focus on the characters in the scene.
Thankfully, Cartoon Animator (CTA) now supports the import of GIF and APNG motions. In previous versions, when these files were dragged onto the stage, they remained static as individual graphics.
It’s worth noting that GIF files have a limited color palette, supporting up to 256 colors, while APNG files can accommodate millions of colors. For my specific purpose, I opted for a GIF format as the flame would be positioned behind a soft glow, ensuring it wouldn’t dominate the scene.
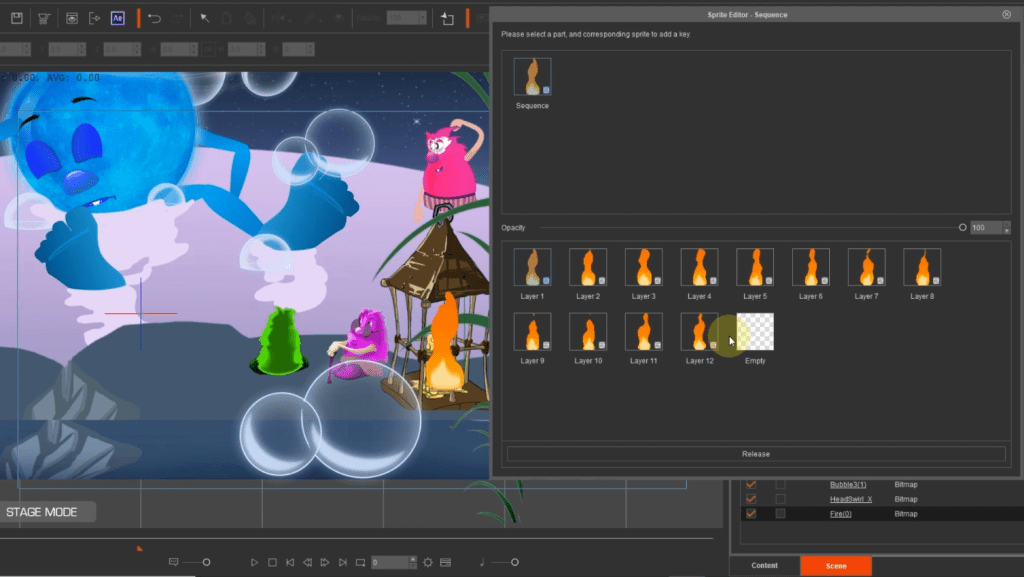
Importing a file with sequence images directly into CTA doesn’t grant access to its individual frames within the software. However, if you need to manipulate the GIF, such as erasing a color background, removing, or adding frames, here’s how you can do it:
1. Bring your GIF into Photoshop.
2. Photoshop will separate the images into layers, allowing you to view the individual frames. You can then edit them as needed.
3. Group the images into a folder within Photoshop; it doesn’t matter what you name the folder at this stage.
4. Place that folder inside another folder and label it “Sequence.”
5. Import the modified GIF into CTA and open the sprite editor. Now, all the frames will be displayed there for further adjustments and animation.
Real-time Editing with PSD Editors & Illustrator
In the scene featuring the Moon sitting in the water, I wanted to incorporate ripples around the character’s body and feet. Since the character’s feet remained stationary, I separated them into their own element. Within CTA, I disabled the character’s feet and animated the ripples around them in Photoshop. This approach allowed me to layer the ripples effortlessly, achieving the desired effect. I anticipated that some adjustments might be necessary after completing the animation. It could be a matter of aligning elements properly or tweaking the timing. The thought of repeatedly switching between CTA and Photoshop, setting up frames in the sprite editor each time, seemed like a daunting task. However, this recent update offers a more streamlined workflow.
Within CTA, I utilized the “create in PSD editor” feature by opening the file at the top right corner. This functionality also works with SVG files, extending the flexibility. By locating and selecting the PSD file, CTA seamlessly launched Photoshop while establishing a link between the two programs. Any adjustments made in Photoshop now automatically update in CTA. I can fluidly switch back and forth, working on the animation and making necessary edits without the need to repeatedly set up the frames. This real-time production flow process with synchronized updates significantly enhances efficiency, whether using Photoshop for PSD files or Illustrator for SVG files.
Pro Tip: When transferring sprites from the sprite editor to the timeline, utilize the arrow keys for swift navigation between images, making for a faster process.
Animating Spring Bones on 2D Characters
In the initial scene where the Moon tumbles out of bed, I had already animated the bedclothes cascading away. As the scene progressed, the Moon falls past the camera and through the clouds. Always eager to infuse motion into my scenes, I swiftly set up spring bones on the cloth held in the character’s hand. Once he was in motion, the spring bones automatically handled the realistic flailing of the cloth during his descent. Spring bones are a remarkable feature that adds secondary motion to characters or props. With their pre-set options and precise adjustment controls, achieving the desired effect is effortless.
Now, a final note. Personally, I haven’t utilized the camera feature in CTA extensively, although it is an exceptional tool. In this particular project, I embraced its capabilities, and I must say, it truly enhances the overall outcome. If you, like me, have underutilized this feature, I highly recommend taking the time to familiarize yourself with it. The camera feature can elevate the storytelling and presentation of your animations to new heights.
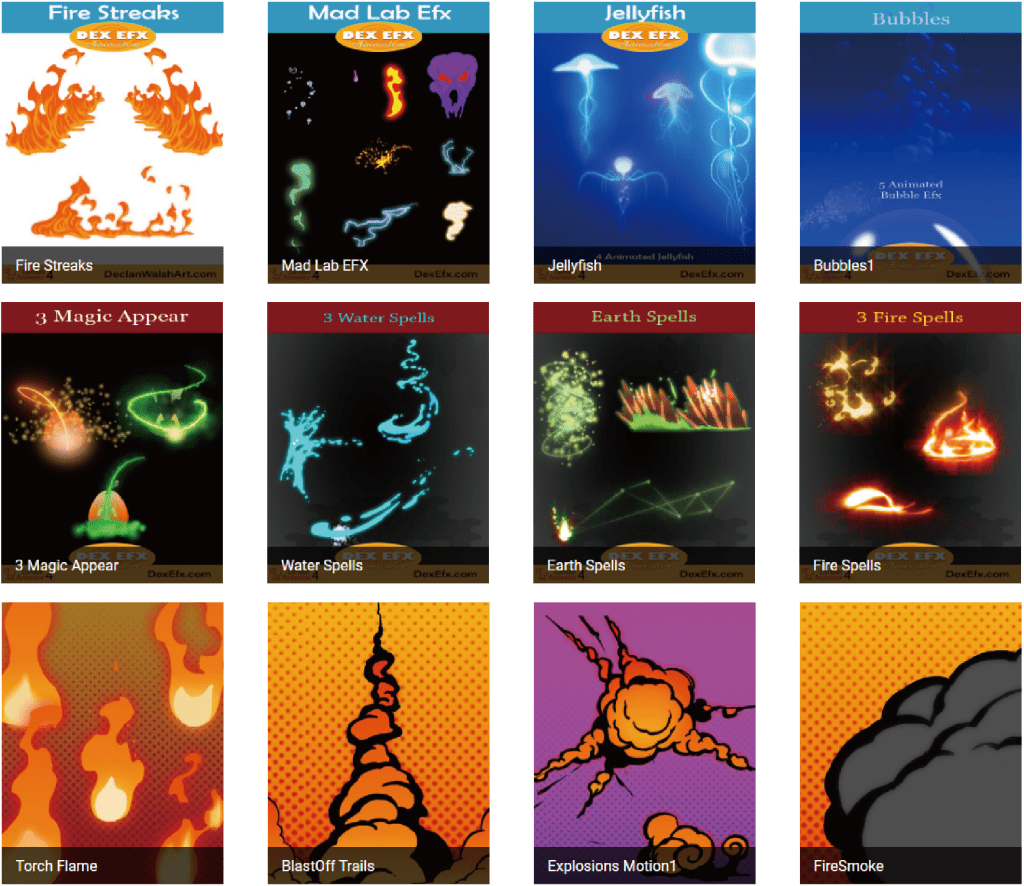
The process of creating animations has become incredibly accessible, especially with CTA providing us with a vast library of characters, backgrounds, and props. Additionally, I have curated over 200 hand-animated special effects available in the store, each containing 3 to 5 unique animations. Feel free to explore DexArt for these remarkable resources.
With a solid workflow in place, anything is achievable, from simple animations to the most intricate and elaborate scenes. So, go ahead and unleash your creativity. It’s time to create and bring your visions to life — just as I have done!
Cartoon Animator 5.1 (CTA 5.1) is a powerful 2D animation software created specifically for illustrators and professionals in the field. It offers a wide range of features, including lip-sync generation, drawing tools, photo animation, and PSD/SVG animation capabilities. CTA has been continuously evolving its feature set in recent years, and the 5.1 update introduces two major additions.
The first significant feature is the roundtrip vector editing workflow with Adobe Illustrator. By leveraging the power of Illustrator, artists can bring their vector artwork seamlessly into CTA, enhancing their animations with detailed and scalable visuals. The second highly anticipated feature is the introduction of image sequences. This addition is particularly exciting for traditional 2D animators who excel at free-hand sequence drawings. With image sequences, artists can now unleash their creativity and explore a wide range of expressive possibilities beyond the limitations of 2D bone-driven animation. Furthermore, CTA 5.1 supports popular GIF or APNG sequences, offering the ability to apply instant animated effects sourced online or derived from third-party tools.
Cartoon Animator revolutionizes the world of design by bridging the gap between static graphics/images and captivating animations. Through the power of CTA and its compatibility with PSD/SVG tools, it effortlessly resolves all design challenges. Regardless of whether you’re undertaking ambitious projects or just beginning your creative journey, CTA 5.1 offers the ultimate solutions for achieving time-saving, high-quality production that propels you to new heights in 2D animation.
See the latest updates in CTA 5.1:
Sequence Image Animation
By utilizing image sequences, artists can explore various forms of hand-drawn animation to break free of prior limitations. This includes showcasing intricate frame-by-frame drawing processes, crafting dynamic 360-degree rotations, and integrating visual effects. It’s as simple as synchronizing the sequence image layers with your preferred PSD/SVG tools like Photoshop or Illustrator to achieve a fluid workflow.
*Having the PSD/SVG sequences stored in the Sprite Editor allows artists to apply frames to the timeline or start the animation directly from the Action Menu.
*A simple right-click gives access to various motion effects for the object.
New Key Features:
Effortlessly import image sequences to CTA, with support for both PSD (bitmap) and SVG (vector) formats.
Transform grouped sequences into multiple animations that can be triggered with a single click on the object.
Refine sequence image effects using the Timeline Editor.
Integrate motion enhancers, including free-form deformation.
Supports ongoing modifications of sequence images via Photoshop and Illustrator.
GIF & APNG Animation
With CTA, users can effortlessly import animation assets in GIF or APNG format with ubiquitous support on the web. These assets can be easily obtained online or created by the artists themselves. Simply drag and drop premade GIFs or APNG files into CTA, or convert them into animation sequences for further editing with just a few clicks.
*Seamlessly integrate GIFs into CTA & retain their original animation settings
*High-quality transparent APNGs can be obtained from widespread auto-converters and image editors.
New Key Features:
Once GIFs are imported into CTA, they are automatically converted into standard image sequences, opening new avenues for editing.
Users can effortlessly create APNGs by generating 24-bit true-color frame data using 3D software or a video editor of their choice.
Vector Animation: Roundtrip Editing
CTA offers a comprehensive solution for animating in Illustrator by enabling real-time roundtrip editing of SVG files. By offering a way to unleash your creativity with highly optimized vector graphics, you can bring your ideas to life like never before.
New Key Features:
Launch exciting vector characters or props to Illustrator and synchronize SVG updates with CTA.
Add new elements to existing objects with bone-rig and motion effects while retaining the original settings.
Recommended Assets
To fully take advantage of CTA 5.1’s powerful new features and see what CTA5.1 can do, make sure to look into these new content series.
Make Me Actor – Bring any object or image to life as a talking actor.
Hi there, my name is Artur Szóstakowski. I am a CG artist and architect based in Poland. In the past, I often used static people to display human activities in my architectural design. Recently I was introduced to 3D character animation so I decided to integrate animated 3D people to my work.
My first task was to find a viable solution, including fully controllable rigged characters, realistic 3D motions, and a tool which can put everything together nicely. I was so happy to find all I needed in one company, Reallusion with their well-integrated workflow that was ready for the Blender pipeline.
So this is my first attempt to migrate from static to animated visualization, using 3D content from ActorCore, iClone and Blender software. This article demonstrates my workflow so that everyone in archviz can easily understand how I have achieved it and get their hands on it quickly.
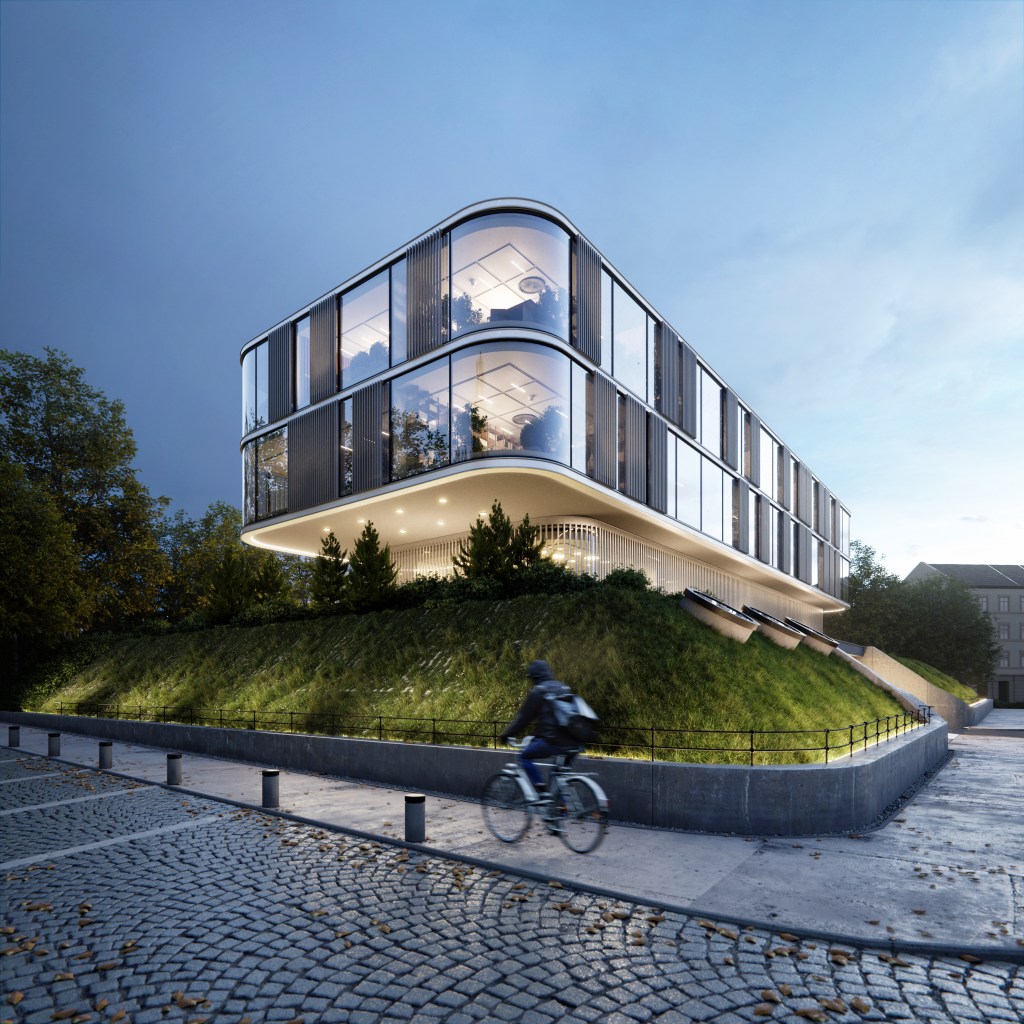
Image credit: Artur Szóstakowski, Bergen OfficeImage credit: Artur Szóstakowski, Brick House
Introduction
Riverside is an architectural animation project which I’ve developed with an intent to work on a solution for adding animated 3D people to my pipeline. I created an urban environment that would reflect some possibilities for daily interactions of pedestrians and I made use of 3D characters and 3D motions from the ActorCore asset store together with the iClone animation software.
Here you can watch how I have populated my project with animated 3D people:
Inspirations
I started with gathering ideas and references for the project and I made use of PureRef software for that. It is really a simple tool for organizing images into a collage which is very useful when looking for some inspirations.
Image credit: Artur Szóstakowski
I decided that I wanted to explore an urban environment with a river that would reflect the architecture. I thought that would be a nice setup for pedestrians, as usually similar places in cities are popular destinations for outdoor activities and meetings.
Working on the Scene
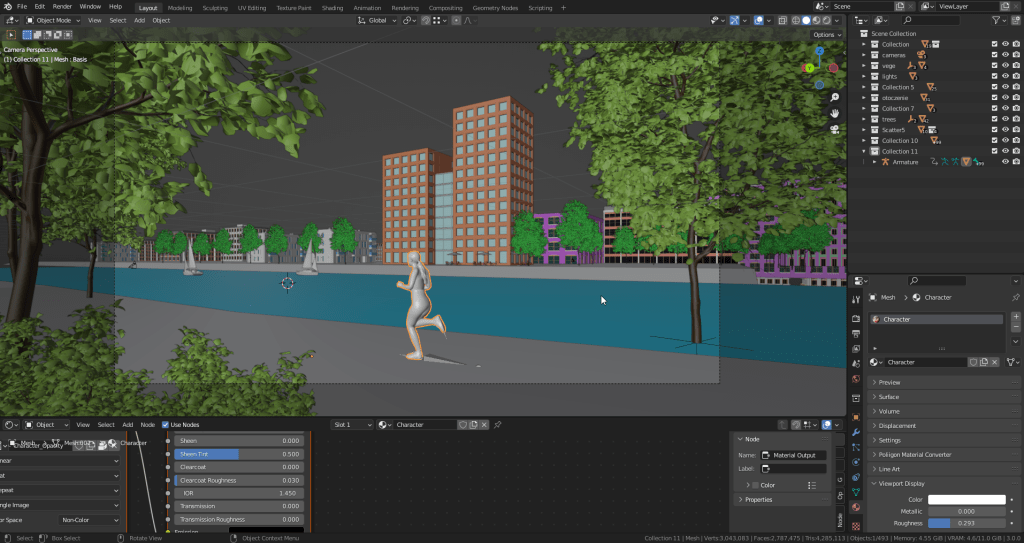
First, I built a basic architectural model together with the site which I could experiment with. For modeling and rendering, I used Blender together with some useful add-ons like E-Cycles, scatter, vegetation and Poliigon plug-in for textures.
Image credit: Artur SzóstakowskiImage credit: Artur Szóstakowski
I made sure all the elements which I planned from the beginning were in the project. I added some green areas between the river and the building and I worked on the background to give it a solid urban feel.
Adding 3D People
Now it was time to add 3D people in the scene and see how they could interact with the project. Here I would like to show how I did this for the first part of the animation which is a shot of a moving camera with jogging people.
Image credit: Artur Szóstakowski
I went to the ActorCore website and picked the right model for the scene. There are hundreds of 3D people for all kinds of scenarios. I clicked the Actor tab and then the Sportswear category to look for a good asset. I could view my selected model in the 3D preview window and check it with sample motions and lighting.
ActorCore Asset Store with over 300 Rigged Characters. Image credit: Artur Szóstakowski and Reallusion
When I got the right model, it was time to find motions. Again I clicked the Motion tab on the website. There are even more motions — thousands of them! The contents are well organized by category and theme. I could also use keywords or tags to narrow down my search and find the relevant motions. I looked specifically for jogging motions and chose the one I wanted. By clicking on that motion, once again, I could see a preview of the motion together with the model I picked earlier. In this way, I was able to confirm the model and animation were exactly what I was looking for before purchasing them.
2000+ 3D Motions in the ActorCore Content Store. Image credit: Artur Szóstakowski and Reallusion
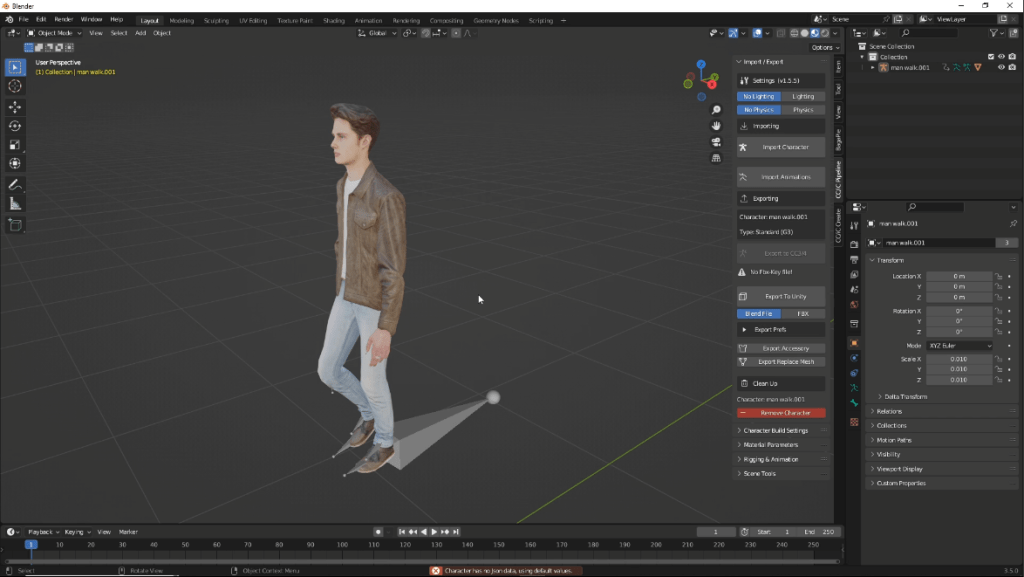
After selecting my jogger and the motion, I went to the checkout and then opened iClone. In iClone, I loaded up my model together with the motion and I checked to make sure they were compatible.
One of the useful features of iClone is motion blending. I was amazed how easily I could blend motion clips together with perfect motion alignment. I also used animation layer editing to alter some sequences on top of those mocap clips.
I was happy with the results so I exported everything as FBX for use in Blender.
Motion Blending in iClone. Image credit: Artur Szóstakowski and Reallusion
Getting Started in Blender
For fast and easy importing of characters and motions, I used the Auto Setup for Blender add-on offered by Reallusion to bring my FBX model to Blender. It automatically converted the materials and shaders of the model with a correct look in Blender, saving me time and effort for all the material settings.
Reallusion’s Auto Setup for Blender. Image credit: Artur Szóstakowski and Reallusion
In Blender I could place the model wherever I wanted and for that I designed a nice path along the river and the main building so everything played out in the center of the animation.
Image credit: Artur Szóstakowski
Animations
As for the animation, I wanted to add a slow camera movement revealing the main building from within some vegetation models. I added keyframes to the camera and moved it around 3 meters from first to the last 400th frame. Lastly, to push the visual side of the animation, I added vegetation like grass, animated trees and bushes from the vegetation addon which has pre-generated keyframed motions that you can adjust for your scene.
It is also good to check if the motions on the 3D people play out nicely within the timeline. I thought that revealing the jogging person midway into the animation is the best way to showcase it since at the beginning viewers will need a few seconds to familiarize themselves with the building, and just before they lose their attention, a person would be jogging into the camera – that will definitely help keeping viewers’ attention and in that way we won’t show all the interesting aspects at the same time.
Image credit: Artur Szóstakowski
Final Comments
Overall, it was an exciting exploration for me to break the barrier from static archviz presentations. Now I can easily build a simulation with lively people, making my projects much more interesting and realistic.
And this is a very simple process of adding 3D people to an architecture project which I would recommend to any archviz artist, especially if you are familiar with Blender. I learned a lot about animation and managing a heavy architectural 3D scene to work properly for the animation.
ActorCore assets turned out to be really useful. You can simply choose models and animations in the asset store, and apply them to Blender without any trouble. Using iClone, you can edit motions even if you are new to animation. I fully encourage you to give ActorCore and iClone a try and work on 3D character animations for your next archviz project.
The “Winner Tips & Tricks ” series covers practical workflows and techniques shared by winners from the “2022 Animation At Work Contest”. To let users see the full spectrum of the Cartoon Animator pipeline, we are introducing projects that received attention and credit from the community. Let’s now take a look at “Ninja” to see how Ronny Gomez worked his magic with Reallusion Cartoon Animator (CTA).
About Ronny Gomez
Ronny Gomez is a composer and music producer specializing in music for video games and cartoons. He is also the Director of Music for PowerUp Kids and a music composer for the Cartoon Network, Sony, Google, Nickelodeon, and Hasbro, among others. His love for video games and animation has not only led him to compose music but also to learn Cartoon Animator. In 2020, his PowerUp Kids video entry: “Color by Color” won third place in the YouTuber category for the Reallusion Animation At Work contest of that year.
Why choose this entry topic?
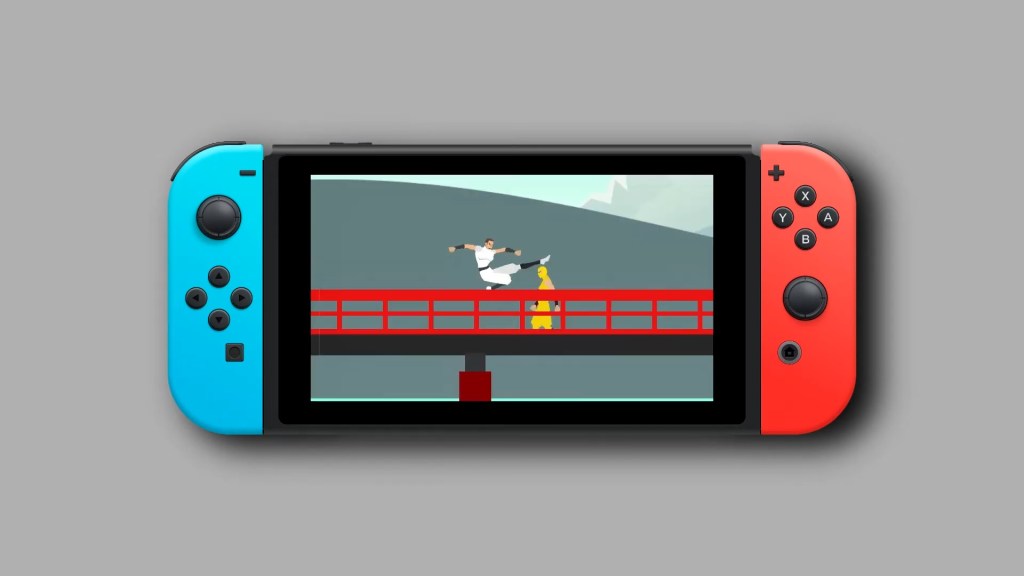
I chose this topic because, since I was a child, I have been fascinated by classic Super Nintendo and arcade games as well as anime and cartoons. In addition to this, I have always liked traditional martial arts, so I put all of these interests together, put them in a blender, and out came “Ninja”.
Why choose Cartoon Animator?
Pre-rigged characters and facial animations are, in my opinion, the two crucial areas that CTA dominates. As a 3D animator, I can confidently say that these aforementioned facets take a lot of time in production. CTA makes the turnaround twice as fast with results that can compete with other software. User-friendliness and large, clear user interfaces are a must for me, and CTA provides it in spades.
How I did it with CTA
Step 1: Character Creation & Rigging
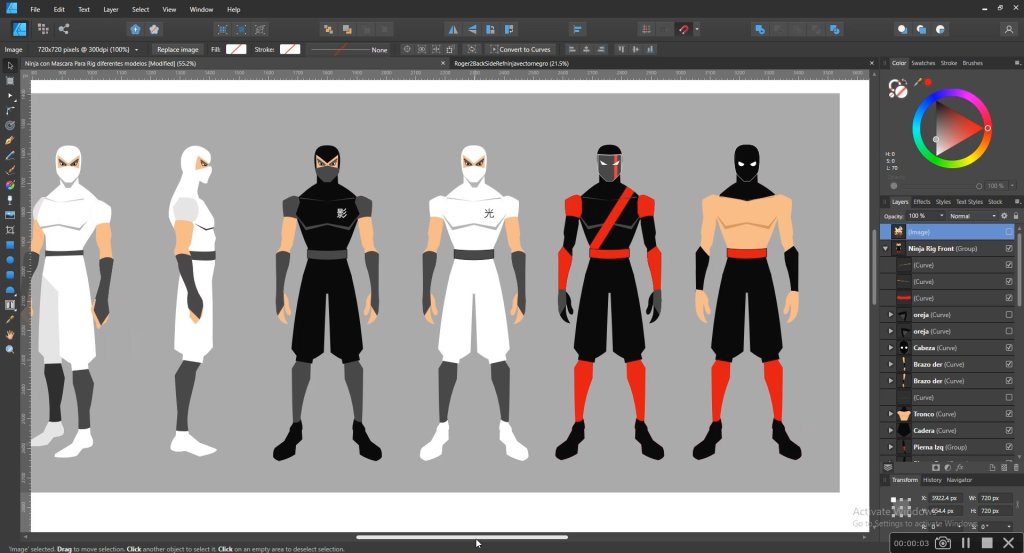
As for the creation of the characters, I first made some sketches on paper, then when I’m satisfied with the results, I turn them into vector drawings with Affinity Designer and mount the rigs from the templates provided by Reallusion.
Step 2: Character Customization (Facial, Hands)
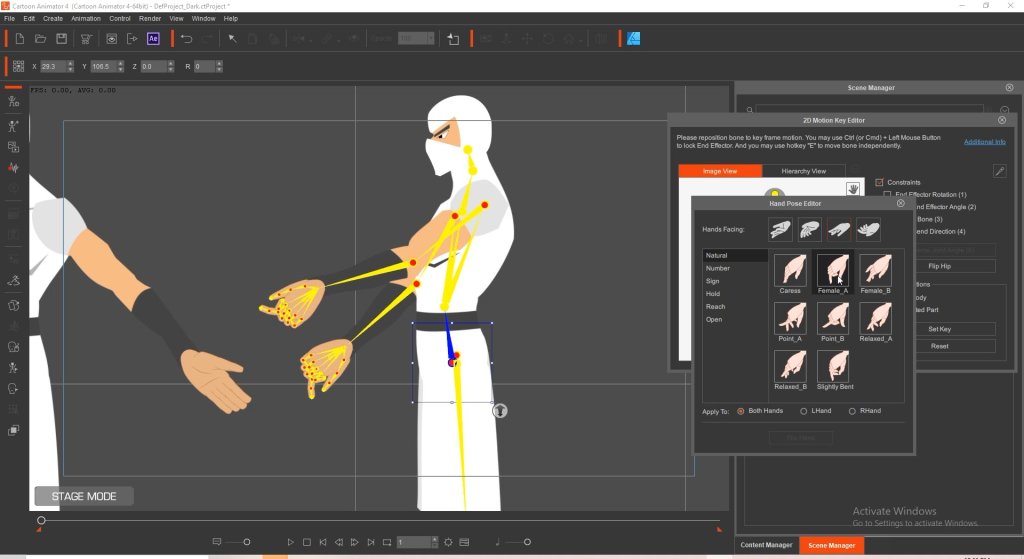
First, I reused the face of one of the characters that came with Cartoon Animator. I make modifications to the eyes, face, and eyebrows. For the hands, I chose to use the ones that CTA4 comes with.
Step 3: Character Animation (Facial, Lipsync, sprite)
For the lip sync, I used the automatic function, and once ready, I manually corrected the synchronization of the details. For the sprite animation, I imported the first image of the sequence and then added the missing sprites in Composer and Sprite Editor mode. Then I animate them in the timeline.
Step 4: Scenes creation & composition
For the scenes, I was looking for something minimal, simple, and with a composition that looked cinematic.
Step 5: Camera setting
My aim was the cinematic use of cameras especially paired up with the 3D depth of the tunnel scene at the end.
This year, we are accepting new submissions from June 8th to August 13 (PST). Partnering with XP PEN, Magix, and Affinity, we have prepared a total value of $15,000 in cash and prizes! So get your entries prepared, and good luck on winning!