Reallusion is hosting its annual 2D competition Animation At Work from now until August 13th, 2023. Participants are encouraged to utilize Cartoon Animator 5’s realtime character creation and 2D motion capture technology to create entries in categories including Business & Commercial, Comic & Art, and Educational Animation. The total prize pool is over USD 15,000 for worldwide contestants, with multiple sponsored prizes from XP-Pen, Magix, and Affinity.
6 categories, 12 winning spots, and MORE!
The contest invites participants to animate reallife projects for business promotions, educational training materials, animated comics, YouTube videos, and more.
Business & Commercial: Create an animated video commercial to promote a reallife or fictional concept, product, or service.
Comic & Art: We invite graphic art designers who possess the ability to transform original static drawings, illustrative art, or comic images into captivating animations.
Education: Utilize animated videos for educational purposes, including storytelling, kids’ songs, or instructional videos.
Best Use of CTA: If you are using Cartoon Animator 5 to compete, try to incorporate secondary animations such as Spring Dynamics and Free Form Deformation.
Best Animated Mascot: Promote your brand with your own unique character and demonstrate its animations using Cartoon Animator!
Vertical Shorts: Create a mobile friendly vertical 2D short and upload it to YouTube, Instagram, or TikTok. Video length must be 15 seconds above.
The best chance for aspiring artists to enter the contest
Reallusion welcomes worldwide 2D artists to leverage a 2 month free software and free educational resources to participate in this event.
Free trial: Don’t have Cartoon Animator to compete? No worries! You can always trial use it for 30 days first from our FREE Trial Page.
Free webinars: Hosted by Reallusion’s certified trainers Mark Diaz and GarryPye. This webpage is a place where you can back up your Cartoon Animator knowledge before diving into contest entry production. Mark is the founder of 2D Animation 101 and a TED Talk speaker. Whereas Garry is Reallusion’s Community Manager for CTA and a CTA veteran. They will guide you on how to get started with Cartoon Animator and master the key skills for the contest.
Learn more
About the Animation at Work Contest: register today! The Reallusion Animation At Work Contest is an event that invites EVERYONE to use their imagination to animate real-life projects like business promotions, educational training materials, how-to videos, animated comics, YouTube news videos, and more. Would-be participants can freely enter any of the four categories to compete with the 2D animation community.
About Cartoon Animator: Cartoon Animator is a 2D animation software designed for both abilities of entry and productivity. You can turn images into animated characters, control characters with your expressions, generate lip-sync animation from audio, accomplish 3D parallax scenes, produce 2D visual effects, access content resources, and wield a comprehensive Photoshop pipeline to rapidly customize characters and create content.
The “2022 Animation At Work” contest was a runaway success that consisted of 30 winning submissions, with more creativity and skill in a single contest than we have ever witnessed. Winners not only walked away with big prizes but also got the chance to be featured on the web page and become featured developers on Reallusion content stores.
Matt Belshaw – Game Developer, Digital Artist, Educator
Matt Belshaw
Matt Belshaw is a British self-taught game developer and digital artist.
’Ello Mate! I’m Matt Belshaw, in this second of a two-part tutorial we’ll Import our character into Unity, use the Auto-import tool to process our clothing, animations, wrinkles and physics and then use the animator and cinemachine to start our cut-scene. (See PART 1)
Thanks to the work of Victor Soupday it’s now easier than ever to use realistic humans and animations created in CC4 and iClone 8 within Unity projects. Because Unity is well optimized and very customizable, being able to leverage the powerful Reallusion tools in synergy with Unity is a huge leap forward in being able to create stunning and diverse games and visuals without needing years of training or a vast budget. If you followed along with the previous tutorial, you have everything you need to follow along with this one. If you haven’t done so already, now is the time to download the Auto Setup addon >> Download Here.
Creating our Project
With Unity hub open, create a new project and ensure that you select 3D (HDRP) as your core type. Set your project name and folder and then click on the Create project button. After a few moments the Unity editor will open.
Installing the Auto-import tool
Click in the Window>Package Manager menu item and the package manager interface will open.
Click on the + dropdown menu in the top left corner and select Add Package from Disk and in the file selector menu, open your downloaded auto-import tool files which your downloaded earlier.
Note that nothing will change in your editor initially. Once you’ve installed the package, you need to save your project and restart the unity editor.
Once it’s been restarted you will see a new Reallusion menu option available on the top bar of the Unity Editor.
Importing our Character
Before we import our character let’s create a separate folder in which to store them. In the Project pane, right click on the assets folder and create>folder and name your new directory.
If you want to keep all your characters in separate folders, you can of course create sub-folders.
It’s time to go back to wherever you saved the exported character files from the previous tutorial.
Copy all the contents from your original export into your Newly created sub-folder within your Unity Project. You should have 4 items to copy, the .json, .fbx, a textures folder and a .fbm folder.
After a few moments your files will be added to your Unity Project.
Now the files are within our project, click in the new Reallusion menu item and select Import Characters
This will open the Unity auto-import window as shown below.
There are many options here but so long as we select the right options in our initial import, we shouldn’t need to use any of the extra functions. For the purposes of this tutorial, we’ll use the following options in our drop-down menus
High Quality Materials
Refractive Eyes
Two Pass Hair
Everything
Bake Custom Shaders
Bake Separate Prefab
Once you have these selected, Hit the Build Materials button. This will take a minute or so, and when it’s completed Unity will automatically open the file location of the new prefab with the Project browser.
We’re now ready to start animating!
Sorting our animations
In the previous tutorial, we applied all our animations to the iClone timeline in a sequence. We now need to unpack that sequence back into separate animations.
Drag your prefab into the scene and you’ll see that it looks identical to the way it did in Character Creator.
Now navigate back to the original character file which you imported into Unity (as opposed to the prefab)
Within this folder you will see a new icon
This icon represents the animation controller for our new character but just to make sure it’s assigned correctly, drag the animation controller onto the character in the scene window.
Now if we double click on the animation controller, the Animator window will open, showing us the current assigned behaviours for our character when the scene starts.
In the Project pane, select the character file and note that the Inspector window changes. At the top there should be four options, Model, Rig, Animation and Materials. Select Animation.
In the upper half of the Inspector, we can now see our current Clips. There should be one 0_T-pose clip and a *_TempMotion Clip.
As you select each clip note that the preview window at the bottom of the tab reflects the starting frame for that clip.
With the TempMotion clip selected, you can preview the sequence of animations that the character currently has.
Depending on how many animations you added, you will need to repeat the following process for each one.
In the Clips section, select the “+” icon to create a new empty clip and assign it a name that will allow you to recognise which animation it contains.
Now using either the time sliders or entering the frame numbers in the Start and End boxes isolate a single animation from the entire frame sequence.
Don’t forget to check Loop Time if your animation loops.
Note that each Clip you create, adds a new animation to the Character within the Project Pane.
Applying the Animations
Once you have separated out all of the animations, now it’s time to add them to the animation controller.
Reopen the Animator screen by double-clicking the animation controller within the Project Pane.
One of your clips might have been automatically added, but drag the remainder of the new clip files into the animator window.
You can now delete the TempMotion box from this window. It should be the orange box connected to the green Entry box by an arrow.
The green Entry box represents the moment that the character enters the scene.
We can now plot the animations we want to be played from this point onward by right clicking the Entry box and adding a transition to our first animation, you’ll see an arrow line connecting to the animation, now right click that first animation and create a transition to the next and so on until we have a daisy-chain representing our animation sequence.
For this demonstration I’ve kept it simple with just one animation, but there is nothing to prevent your from stringing together as many as you want. Just remember that if one of the animations has “Loop time” checked, it will continue to loop and not move on to the next animation in the sequence.
Moving the Camera
To animate our camera, we’re going to use the Cinemachine package. Re-open the Package manager from the Window menu.
Make sure that the Packages: Unity Registry option is selected from the second drop-down menu.
In the search bar start typing Cinemachine and once You’ve located it, download and import the package to your project.
Save your project and re-start the editor to make sure all new options are available.
We’re going to use Cinemachine Virtual cameras to tell our scene camera where to be at any given time.
In order to do this we need to add a timeline to our project.
In the Project Hierarchy, right click and add a new Empty Game object and name it “Timeline” or something similar which will tell you what the object is for.
Next we need to open the Timeline window which is located in the top menu under Window>Sequencing.
With our “Timeline” Game object selected in the project Hierarchy, click on the Create button within the timeline window.
You’ll now see that the Timeline window looks a little more like what you would imagine an animation timeline to look like.
Now we’ll create a camera which will be used for our animation, by right-clicking within the Hierarchy tab and Create>Camera
Now it’s time to put our camera in the initial position. Navigate to the position that you want your first camera position. Basically line-up the shot as if the scene window were going to be what the viewer sees.
Making sure that you have the new Camera selected within the Hierarchy tab, press CTRL + Shift + F to align that camera with your viewport.
With the Camera still selected, right-click in the Hierarchy pane once more and select Cinemachine>Virtual Camera
This will add a virtual camera at the exact same position as our Camera. We can now move our scene camera and the Virtual Camera will remain in place as a marker.
You can learn more about using Cinemachine to create more exciting shots, as it’s a powerful cinematic tool. For this demonstration I’ll keep it simple with static shots.
Continue lining up shots, using CTRL+Shift+F to move the Camera and then adding a Virtual camera at that position until you are happy that you have enough camera angles to work with.
Putting it together
The last piece of the puzzle is to move the virtual cameras onto our timeline and deciding how long we will remain at each shot and in what order we want to change between them. Make sure the timeline window is open and visible.
Drag your first Virtual Camera into the Timeline window and choose between the two options. For this demo we will create a simple Control Track
You will now see that your virtual camera has been added to the timeline and we can now see at which frame we move to this camera position and for how long. You can change these properties by moving the box along the timeline and dragging the edge of the camera’s timeline box to adjust the duration.
From here it’s a simple matter of dragging all your virtual cameras into this control track and deciding what order you want to play the shots in and for how long.
If you place two adjacent camera boxes touching in the timeline, the camera will do a short sweep from one shot to the next.
If you leave a small gap, the Camera will Jump to the next shot instantly instead.
By pressing the Play button in the Timeline window, you will see the Camera move from each assigned position. This is a good way of checking your sequence but the characters within the scene will not animate.
Now to preview our animation all we need to do is hit the main “Play” button in the Unity interface.
At which point our Game window will play our animations and camera movements in their entirety.
From this point it’s a case of tweaking your camera positions, moving your characters and props to make better shots, and applying your post processing volumes to get the desired look and effects. Experiment with different settings until you get something awesome and don’t forget to tag #Reallusion when you upload your projects so that we can see your amazing creations!
Matt Belshaw – Game Developer, Digital Artist, Educator
Matt Belshaw
Matt Belshaw is a British self-taught game developer and digital artist.
As a recreational workaholic, when he isn’t in the Gym or creating tutorial content for his popular YouTube channel – Game Developer Training, Matt will be working his full-time job as a teacher or creating content for his own video games
In this two part Unity tutorial series, Matt walks us through how he creates a full-rigged and animatable digital human for use in Unity’s High Definition Render Pipeline (HDRP) using Reallusion’s Character Creator, Auto Setup for Unity script, and iClone animation tools.
’Ello Mate! I’m Matt Belshaw, in this first of a two part tutorial we’ll create a character using Character Creator 4, add animations using iClone 8 and save our project ready for importing into Unity using the HD Render Pipeline extension.
Thanks to the work of Victor Soupday it’s now easier than ever to use realistic humans and animations created in Character Creator 4 and iClone 8 within Unity projects.
Many people want to harness the power of Character Creator, iClone and their many fantastic addons, but don’t have the time or desire to learn an entirely new game engine, which puts those people who have always preferred Unity to Unreal Engine at a disadvantage, until now. Using Victor’s Auto Setup addon, it’s now incredibly easy to get your favourite characters out of iClone, including all animations and use them in Unity.
Before we start working on the Unity side of things though, let’s build ourselves a character that we can use.
In order to follow this first part of the tutorial you don’t need to download any special tools, although I do recommend downloading the Auto Setup addon Download Here.
Also, since we’re downloading stuff, let’s browse the Reallusion Content Store for any skin, hair, clothing and mocap assets that we might want to use now that we can work in Unity.
Creating the Base Character
First things first. We need to create the base character which we’ll then customize. Inside Character Creator, with an empty scene, open the Modify window and click on the load neutral base button.
After a few moments our character will appear (undies added for safety). This androgynous character can now be customized to whatever shape we want using the extensive morphs available in Character creator 4.
Applying Morphs
Whilst still in the Modify window, note at the top a selection of sub-menus.
We’re going to click on the third icon from the left which looks like a square being squished by two arrows.
Ensuring you have the character selected and not one of the items of clothing that you’ve already added for modesty, you will see all the morphs that are currently available to apply to the character.
There are some morphs which apply to the whole body, some which apply to single body parts, all of which use a slider allowing you to apply these morphs to any degree.
Any character presets you own will also be available from this menu. This is your opportunity to get creative and design your character. Don’t expect to create the perfect specimen quickly, these things take time and a lot of fine tuning. Take your time and create the character of your dreams before moving on to the next step.
Applying a new skin
To apply a new skin to our character it’s as simple as double clicking on something!
Open the Content window and with our character still selected, browse to the “Skin” sub-menu.
From here, it’s just a case of browsing to the skin or skin-pack that you want to use and double-clicking on it to apply your choice to your new character.
If you’re happy with the way your realistic human looks, then you’re good to move on, but if you want to tweak the skin colour a bit, then it’s time to re-open the “Modify” window and select the materials sub-menu.
Within this tab we can select all the Digital_Human Skin materials using Shift-Click
Just below this within the materials tab, there will be a section called “Shader Settings”. Open it up and more options will be visible.
Open up the accordion tab for Skin Colour and check the “Activate Skin Colour” box.
Open up the Colour Adjustment tab and Check the “Activate” box
You can now customize the colour of your character using the three colour sliders within this sub-menu.
Once You’re happy with your colour, click on the Bake Skin Colour to Diffuse Map Button. This will make your changes permanent.
Add Clothing and Hair
Using the Content Menu, browse through your library, ensuring your character is still selected in the scene and double click on whatever clothing and hair you wish to add to your character.
Remember that there is no right or wrong thing to do here, what clothing and hair you choose to add is entirely down to your personal preferences. Once your new friend is sporting a nifty new hairdo and sharply dressed, move on to the next step.
Adding Wrinkles (good ones of course).
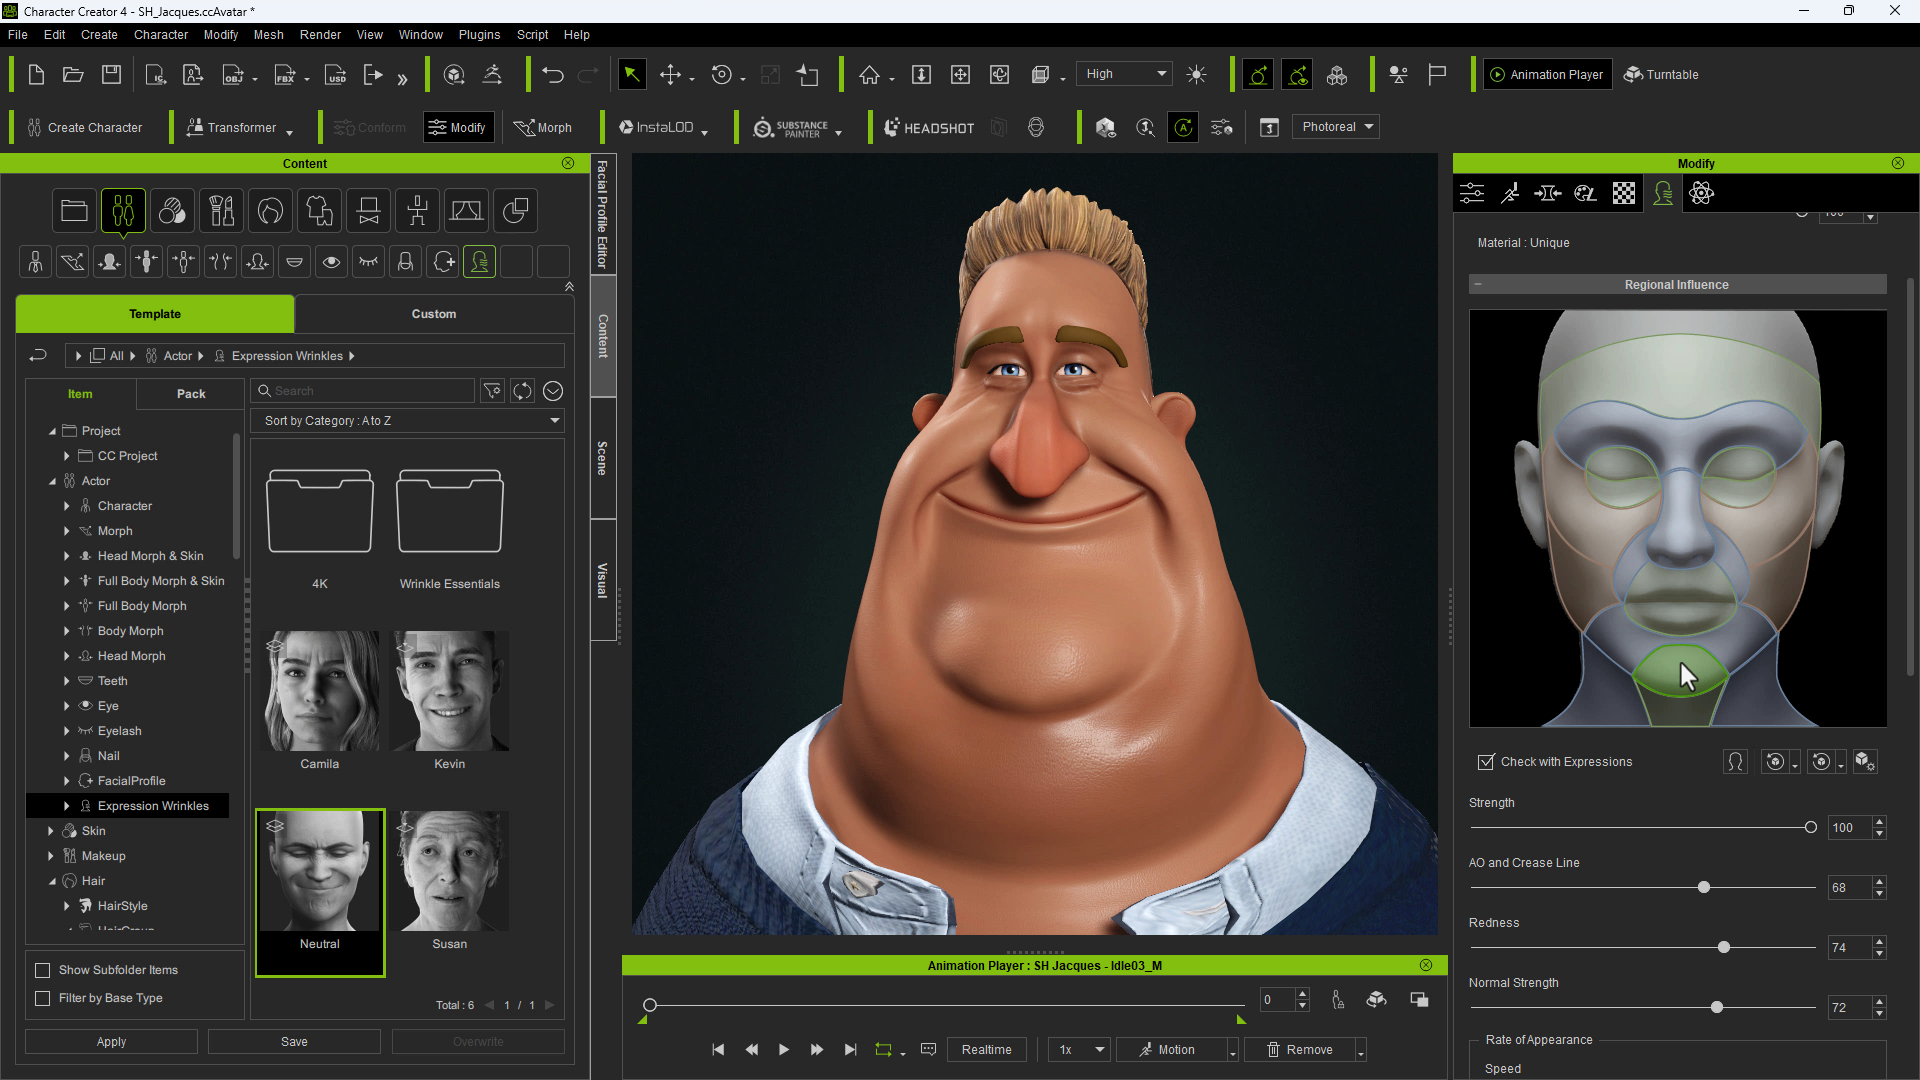
Back in the “Modify” window with our character selected, select the Expression Wrinkles sub-menu. (The icon that looks like a head with a vent on the side.)
Check the Activate Expression Wrinkles Box
iClone will now apply a default expression facial profile to our character.
Check the “Check with Expressions” box and double click on any of the facial areas to apply an extreme expression which shows the wrinkles in action, allowing you to tweak the strength, redness etc.
Once you’ve wrinkled / unwrinkled your character the desired amount, export your character as an iAvatar to save your progress and then move on to the next step.
Exporting to iClone
Now it’s time to open iClone. This isn’t mandatory as it should open automatically.
Once iClone is open, click on the “Send to iClone” button
iClone will start importing your character.
Once this has been completed, you can close Character Creator.
Adding our animations
Before we start, I highly recommend having a text document open and ready for you to record the start and end frame numbers for each of our animations, since once we import the character into Unity, we will have to manually chop up the animation into individual parts again.
Make sure the timeline window is open and visible.
Browse through your content library and add any animations that you want the character to be able to use. It’s not completely vital to get them all at this point but it does avoid unnecessary messing about later if you can get all the animations you need in the first place.
As you double-click on an animation you will see it being added to the timeline
Note down the animation start and end frame numbers and of course what the animation is. You can press the play button to see how your character looks doing each animation. This is often a good idea as it can identify any potential clipping that might occur or animations that just don’t suit.
Once you have all the animations that you wish to export added to the timeline, it’s time to move onto the final step!
Exporting our character for Unity
Click the menu option at File > Export > Export FBX…
In the dialogue box that appears, ensure that you choose the Unity 3D Preset. Set your frames per second to Project(60) and make sure that you check the “All” option in the Export Range. Adjust your max Texture size if you wish and then check the “Delete Unused Morphs” and “Delete Hidden Face” checkboxes.
Hit Export and save your character in an empty folder whose location you will be able to find later.
That’s it, you’ve completed this tutorial. In the next stage we’ll import the character into unity using the Auto Setup tool, break the animations up and apply them to our character.
Robert Saitzyk – Independent filmmaker, Editor, Post-Production Manager
Robert Saitzyk
Robert is an independent filmmaker as well as an experienced editor and post-production manager who has a passion for not only the creative process but for all things technical.
He has written and directed three feature films. His first film, “After the Flood,” shot in 35mm film, was awarded the Grand Prize for Best Director at the 2002 Rhode Island International Film Festival. “White of Winter,” Robert’s second feature was an official selection to the 2003 Sundance Film Festival, and his third film, “Godspeed” – co-written with Cory Knauf – was awarded the Special Jury Award for Exceptional Artistic Achievement at the 2009 CineVegas Film Festival. The film was subsequently invited to screen at such festivals as the Austin Film Festival, also in competition, and the prestigious Stockholm International Film Festival. “Godspeed” was also awarded The Golden Ring for Best Film at the 2010 Ravenna Nightmare Film Festival in Italy.
Robert’s background also includes producing and editing high profile music videos for such artists as Keith Urban and he has also directed three music videos for singer-songwriter George Adrian. His latest project is entitled “Wicked Flower,” a short film to be made entirely using Unreal Engine, motion capture, and other 3D animation software such as Reallusion’s Character Creator and iClone.
“In addition to how good scenes could look in Unreal, the ease of creating great looking characters, including adding wardrobe and animating them, using Character Creator and iClone, made the whole process possible for someone like me without prior experience or training. The ease of adding, adjusting, and tweaking Character Creator characters in Unreal was also crucial to making the workflow and pipeline one that was both fluid and possible for essentially a beginner into this world.”
Robert Saitzyk – Independent filmmaker, Editor, Post-Production Manager
Spruce Up Game Characters with ZBrush Pose Tools & Character Creator
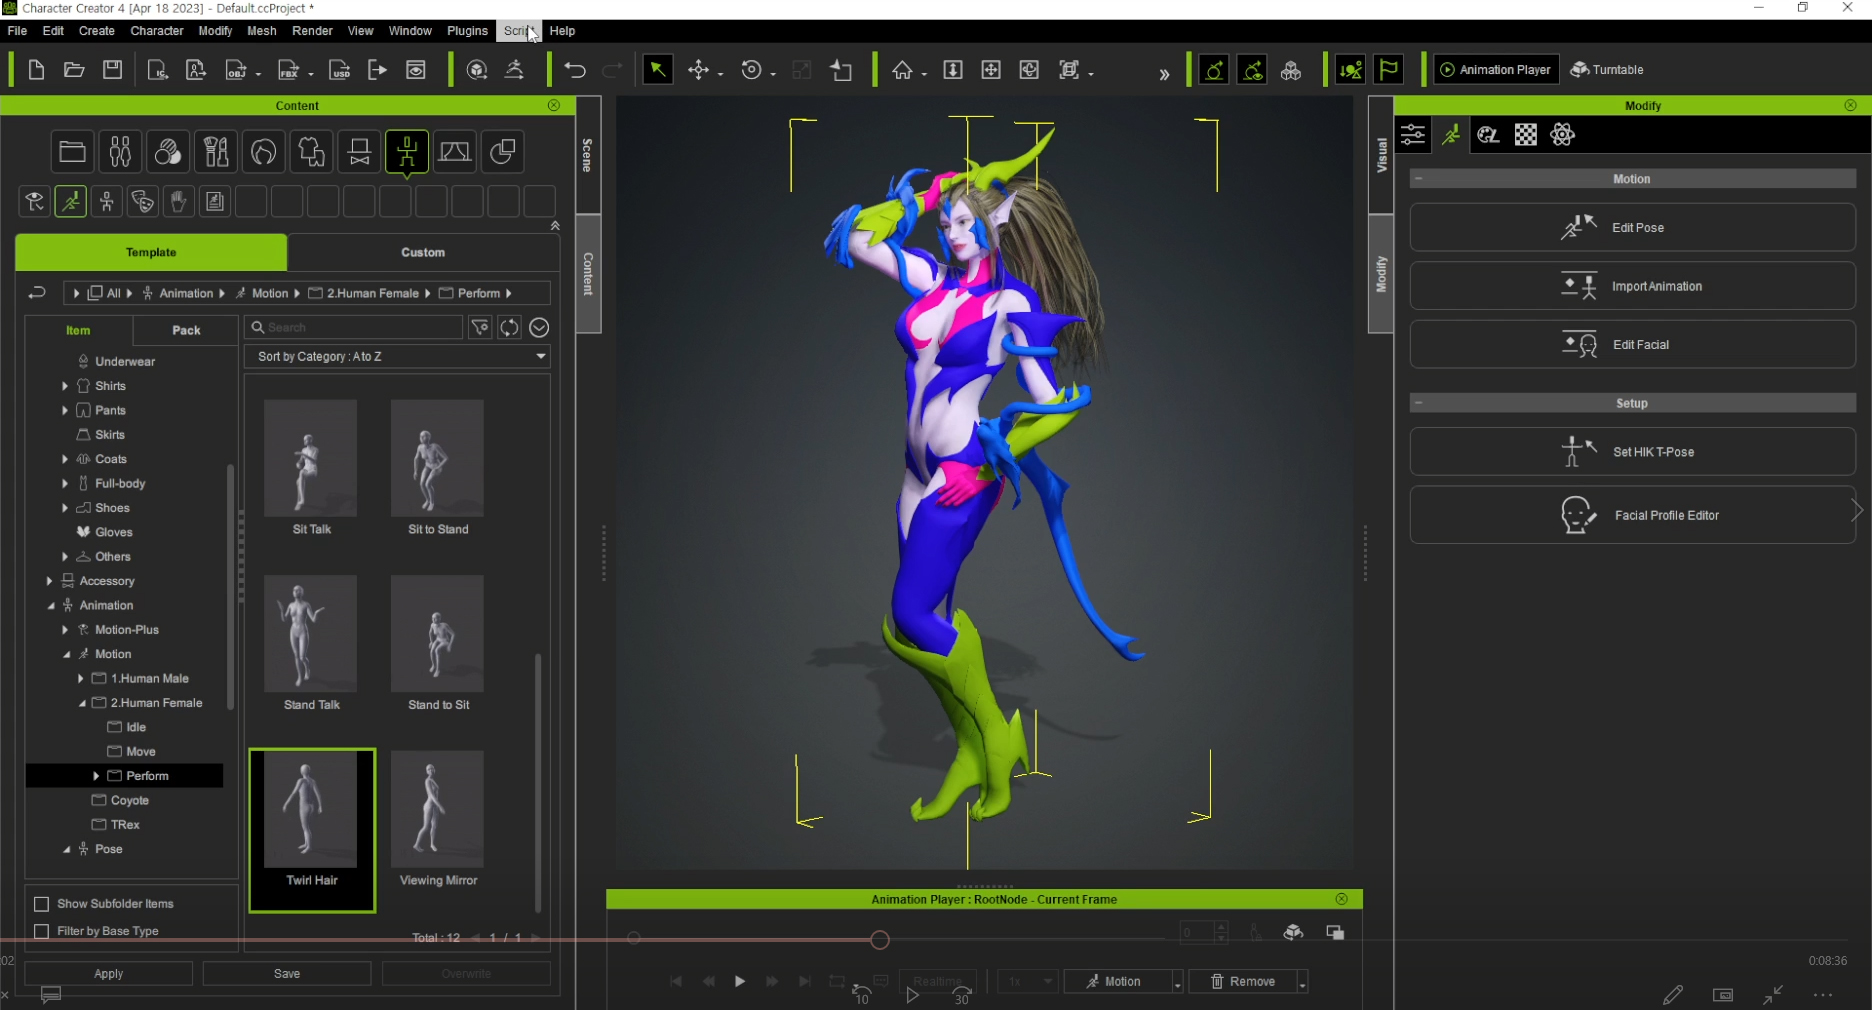
After winning the first prize in the student division of the Korea 3D Character Creator (CC) contest, Go Eun Kim has been diligently honing her 3D modeling skills. She is now exploring unconventional tools to enhance her real-time animation pipeline. In this interview, Kim discusses her innovative use of ZBrush Pose Tools & Pose Link in conjunction with Character Creator 4 (CC4) to enhance the poses of her cherished game characters, specifically Dragon Sorceress Zyra.
She also delves into leveraging the rich assortment of shaders offered by Auto Setup for Unreal Engine and offers valuable insights on seamlessly integrating various 3D tools, including 3ds Max and CC AccuRIG (an auto-rigging tool). Her expertise enables her to transform static ZBrush sculptures into dynamic, lifelike game characters.
Go Eun Kim
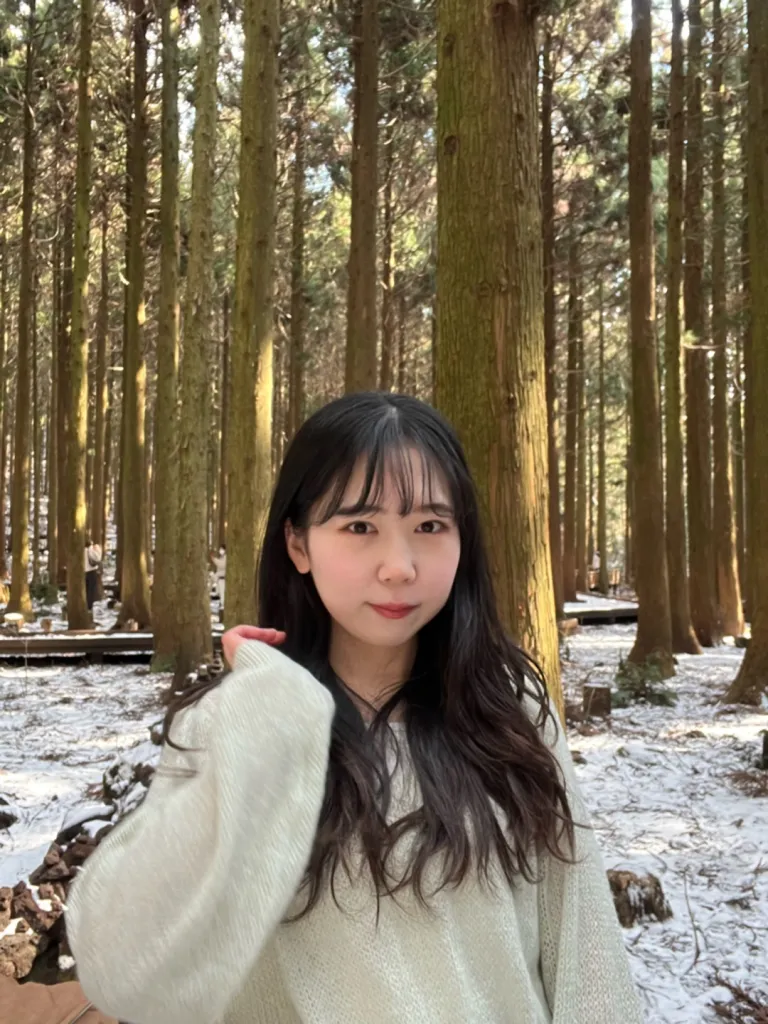
Hello, my name is Go Eun Kim, a college student majoring in computer engineering, and I am from South Korea. In 2021, I started studying character modeling through a graphics academy. At first, I studied using 3ds Max and gradually studied how to model characters using programs such as ZBrush, Substance painter, and Unreal Engine. And by participating in a contest held in Korea, I could learn how to easily implement high-quality characters using Character Creator.
Learning various programs was not an easy process, but visible results are satisfying and fun to me. Also, I was able to concentrate on studying 3D modeling with passion because I always get excited when I imagine people playing future game characters that I have made.
For this project, I decided to deviate from creating a typical human character and instead explore a different character archetype, such as an elf or monster. During my reference search, I came across the concept art of Dragon Sorceress Zyra from League of Legends. I found it particularly fitting for this project’s character concept, envisioning a formidable humanoid boss monster in an RPG game. You can follow my tutorial below to achieve similar results:
Part I. CHARACTER CREATION
Step 1) Character Concept
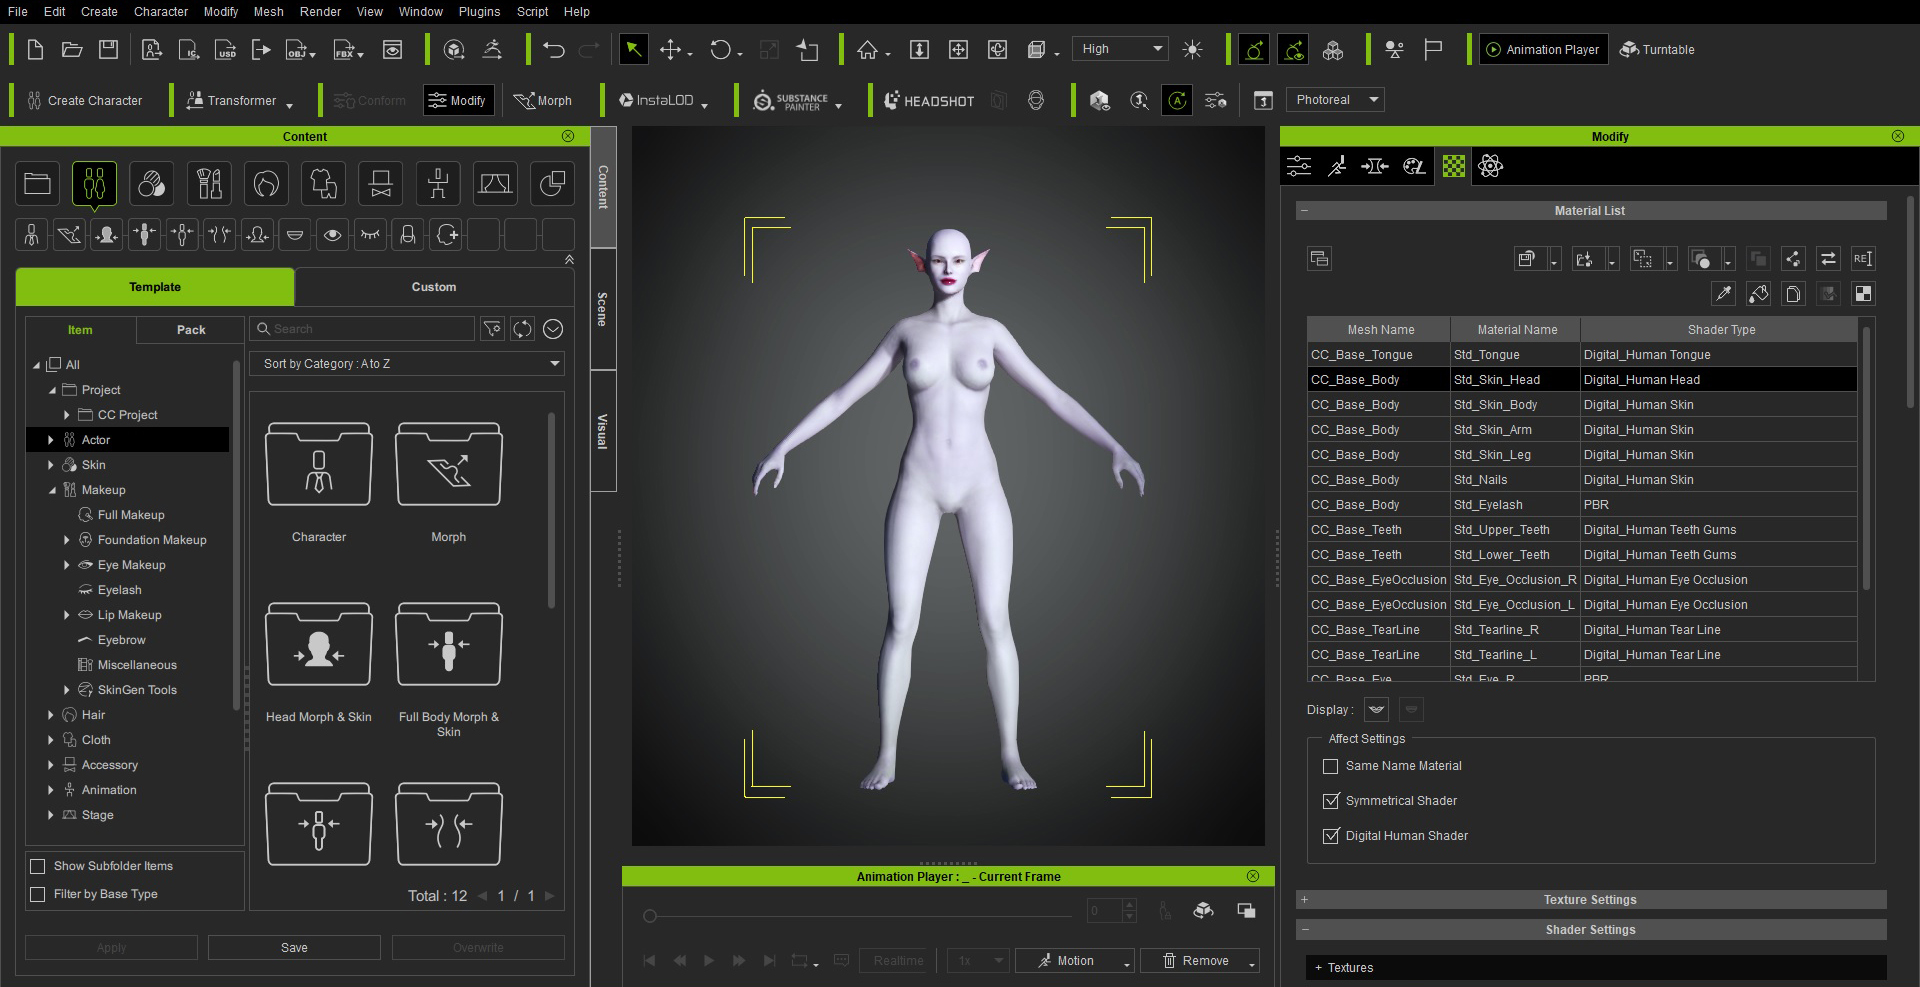
Use Character Creator 4 to change the appearance of basic characters and create purple-colored skin and pointed ears to match the character concept.
To bring this concept to life, utilized the capabilities of Character Creator 4 to modify the appearance of the base characters, by introducing distinctive features like purple-colored skin and pointed ears to align with the envisioned character concept.
Step 2) Sculpting Characters, 3D Assets, Textures with 3ds Max, Substance Painter and ZBrush
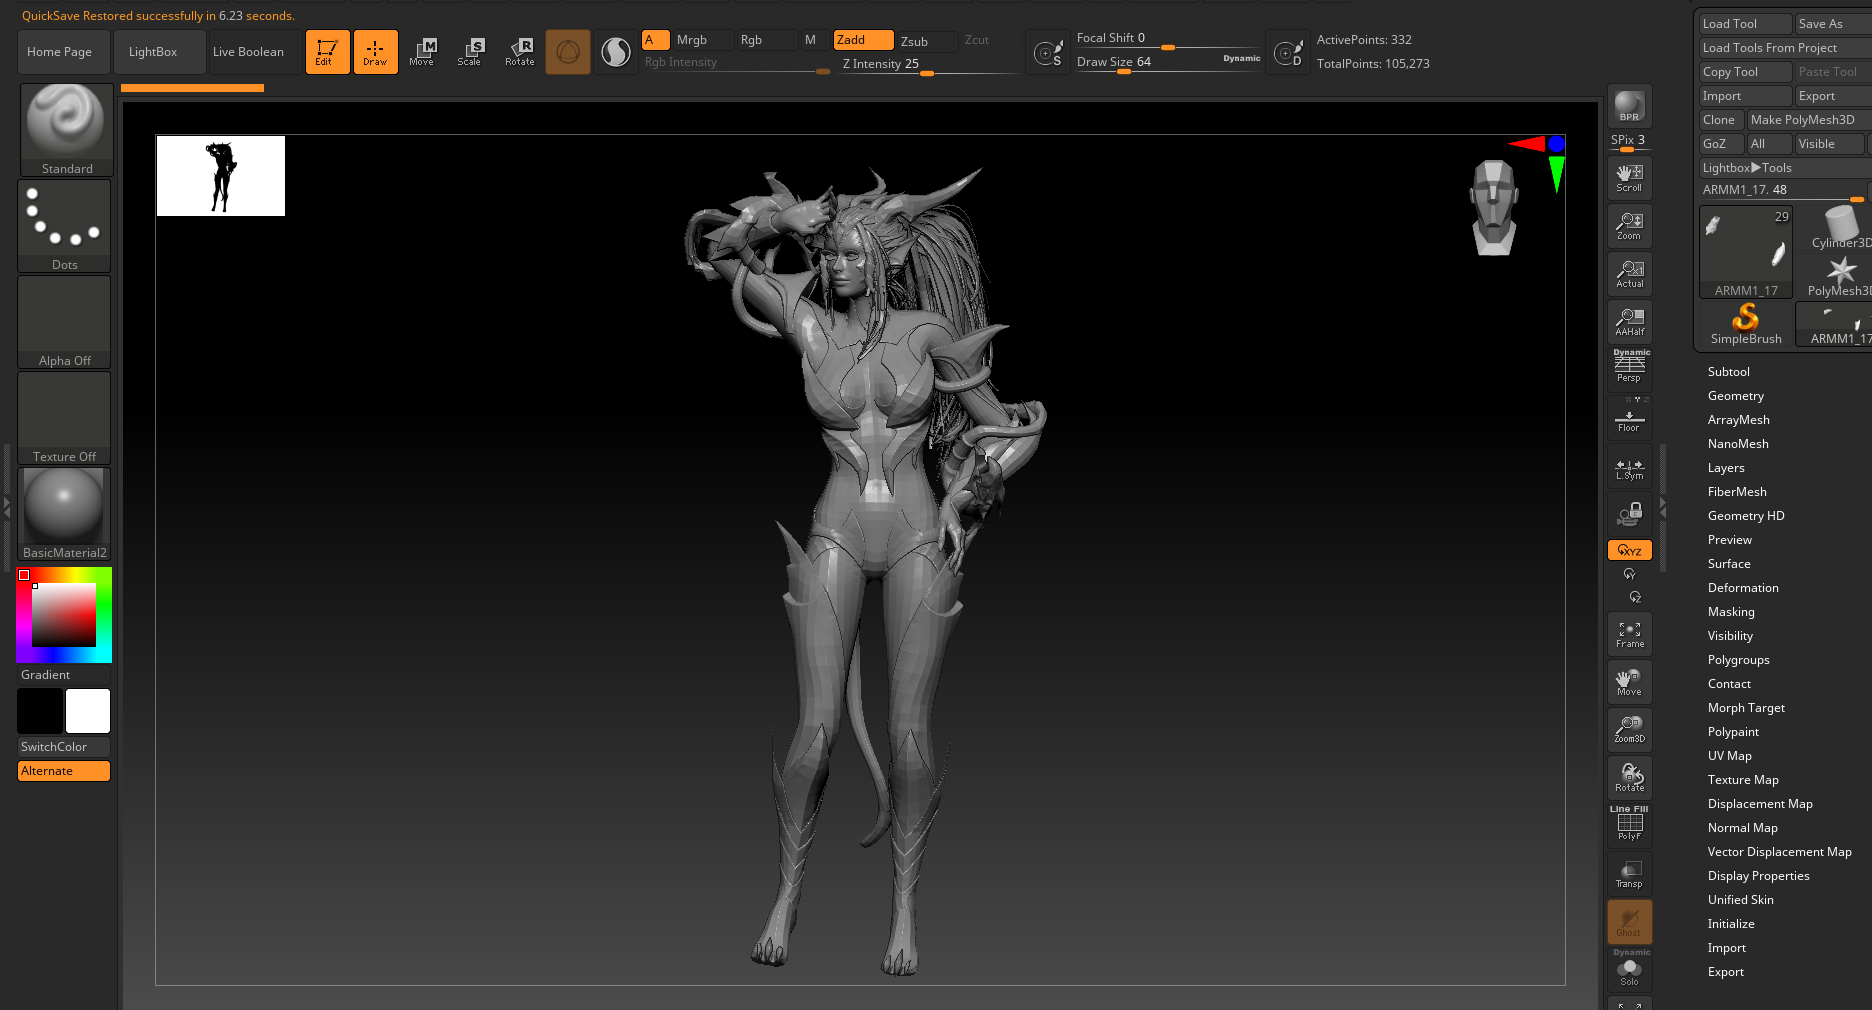
After exporting the model from Character Creator, proceed to work on it in ZBrush. For example, to infuse a dragon-like essence, I meticulously sculpt scales onto the character’s skin.
Following that, I created a dragon ornament in ZBrush to embellish Zyra’s design.
Employ 3ds Max and ZBrush to design and create the accessories and clothing for yourcharacter. Generate both low-polygon and high-polygon versions of these elements and proceed to bake the normal map.
With the freshly baked normal map, proceed to work in Substance Painter. Here, you’ll need to apply the map to the model and meticulously craft a texture map, bringing the clothes and whatever prop, like my dragon, to their final completion.
You can also utilize the face and body texture maps provided by Character Creator 4 to further customize the character’s appearance. By making adjustments to the skin details and applying dragon-like textures and makeup in Photoshop and Substance Painter, I was able to achieve a distinct dragon skin aesthetic.
To achieve a suitable hairstyle for the character, employ hair cards in 3ds Max. These hair cards enable you to meticulously craft a hairstyle that complements the overall character design.
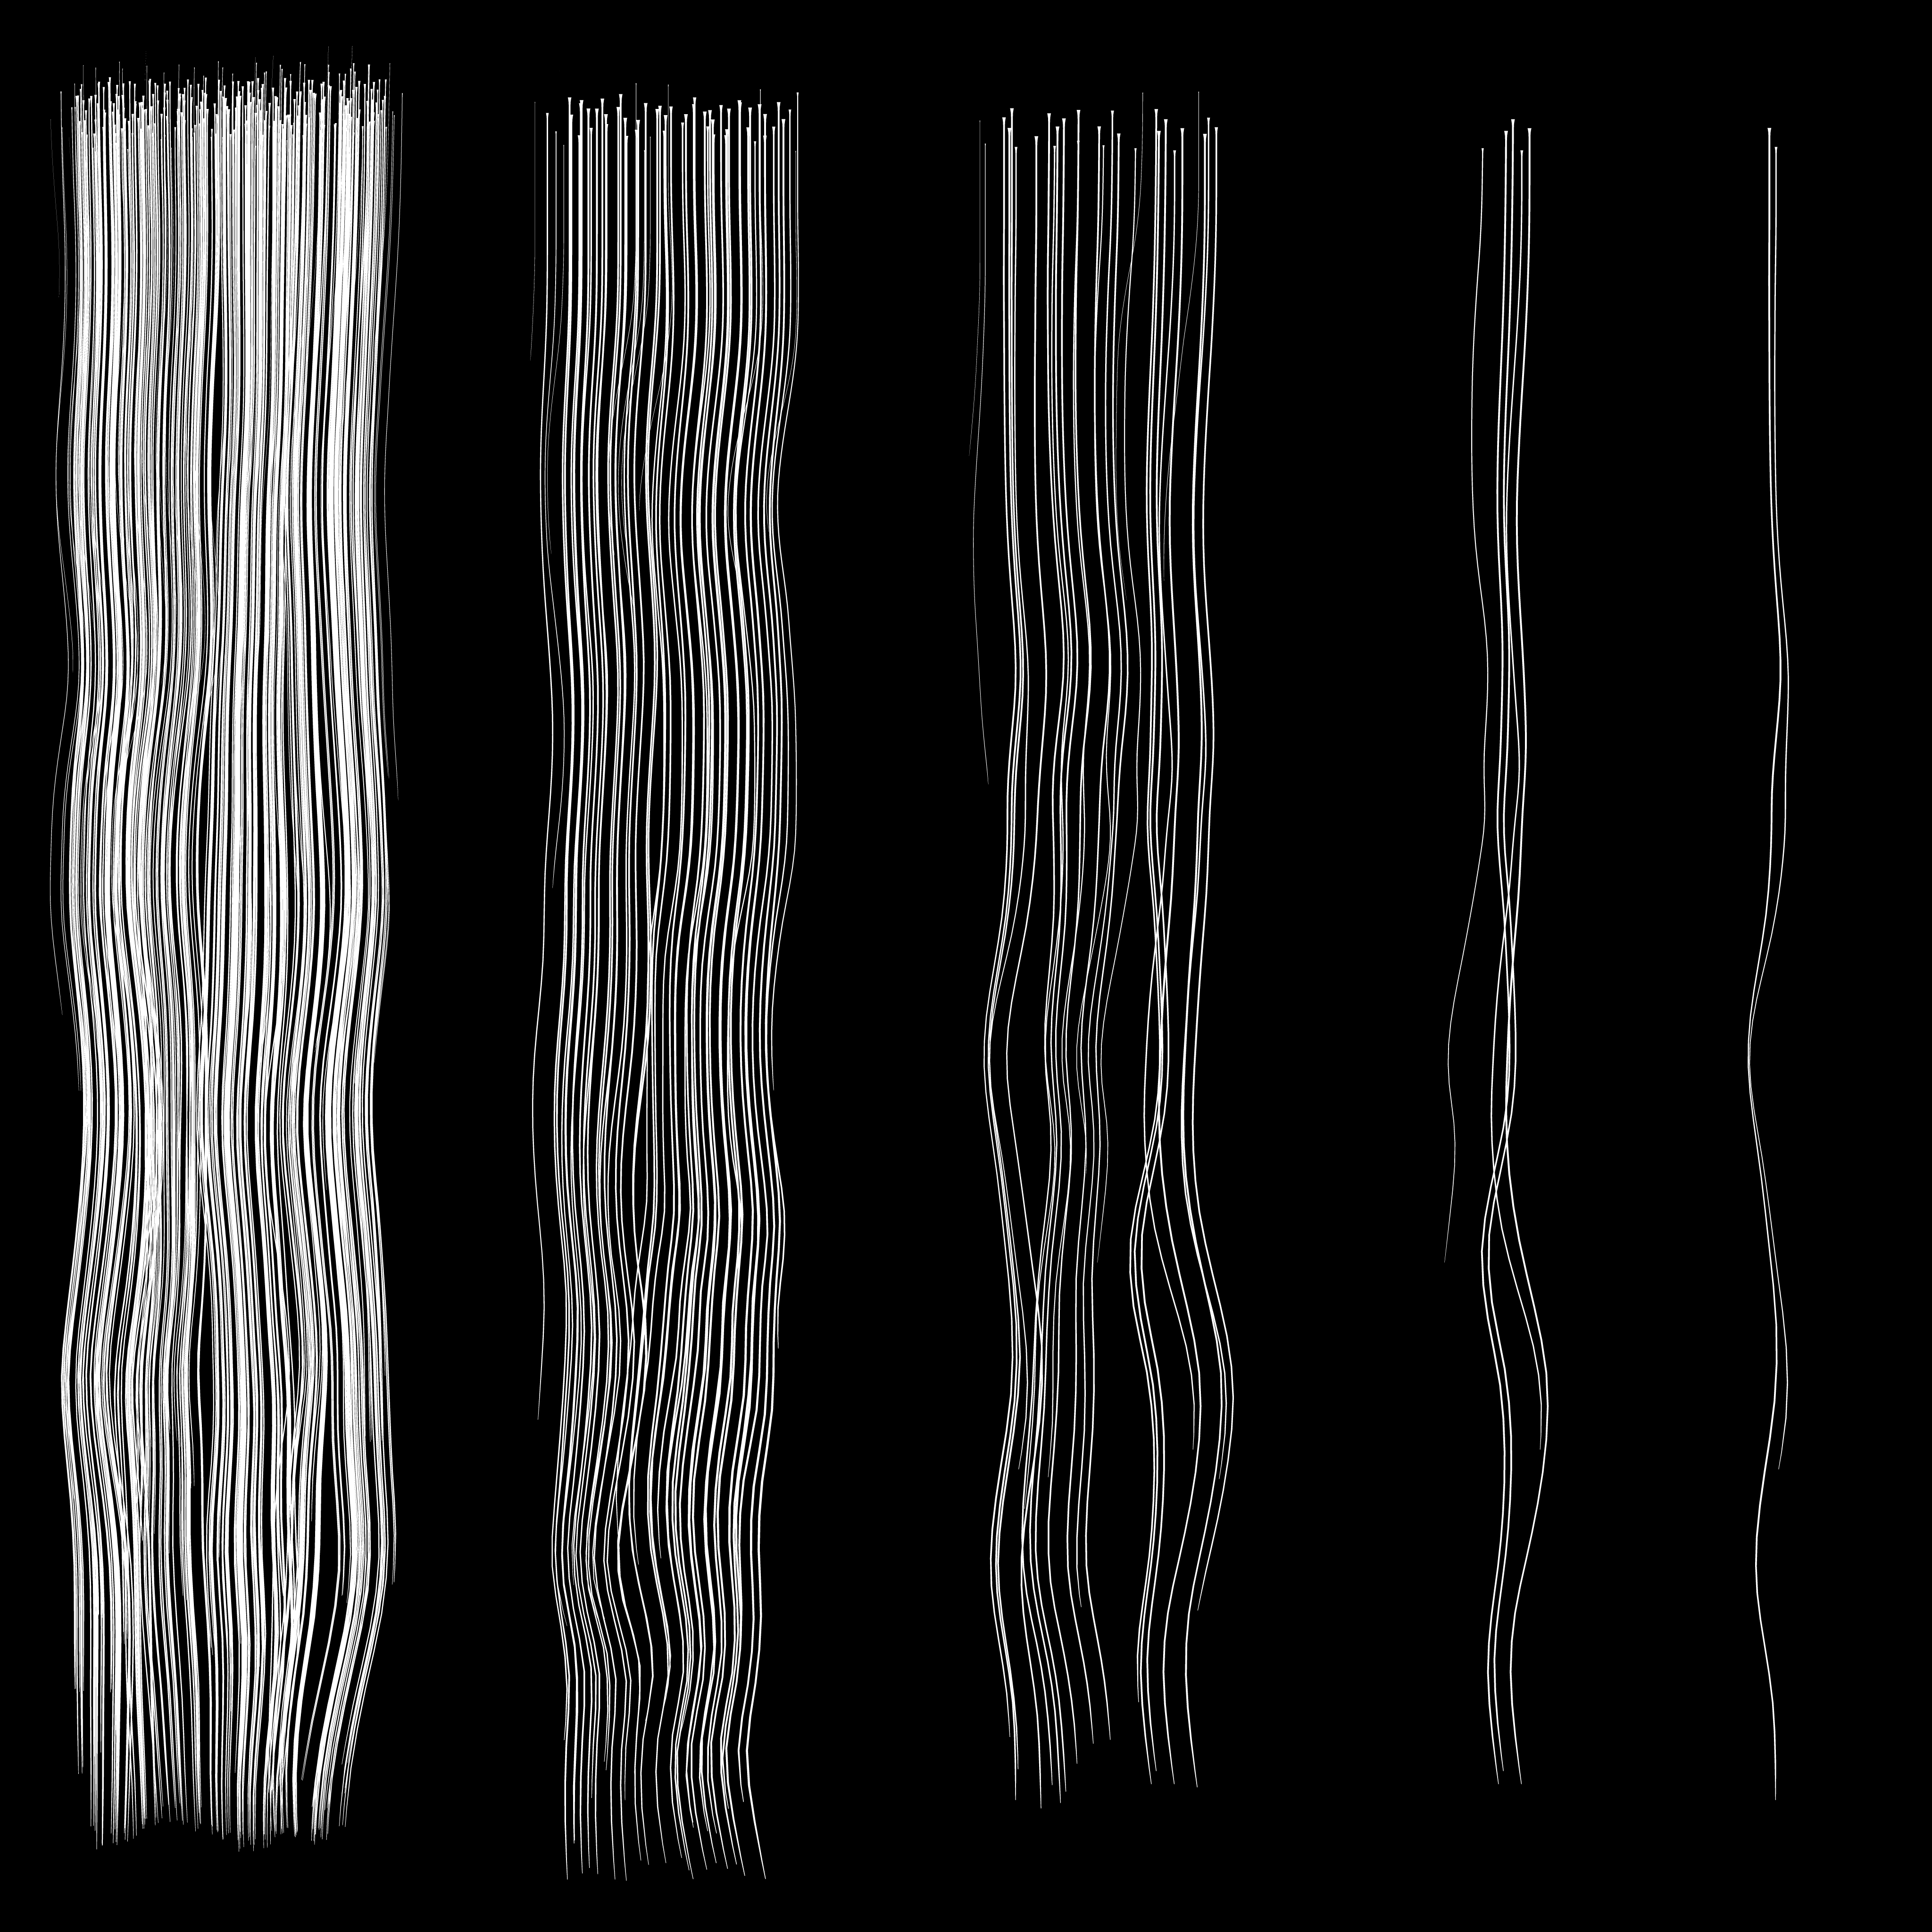
Additionally, you can utilize ZBrush’s FiberMesh to generate a hair texture, which is then applied to the hair cards, resulting in a realistic and visually appealing hairdo.
Part II. ZBRUSH POSE TOOLS
Q: Hi Go Eun, first of all, thank you for sharing your amazing idea of creating Zyra with her Dragon. Posing characters in ZBrush can be quite challenging. Could you please elaborate on how you utilized CC AccuRIG and ZBrush Pose Tools plugins to create multiple poses for your character?
Here’s how I created multiple poses using the “ZBrush Pose Tools” plug-in:
To begin, you need to send the character in either a T-pose or an A-pose state from Character Creator to ZBrush using the “ZBrush Pose Link” feature. Once in ZBrush, you can record the character’s pose by selecting “Record New Pose” in the “ZBrush Pose Tools” plug-in and saving the pose.
Creating additional poses follows a similar process. First, generate a new pose for the character in Character Creator. You can use an existing pose provided by Character Creator or create a new one by directly manipulating the bones through the “Edit Pose” function.
After creating the new pose in Character Creator, select “Record New Pose” in ZBrush and then click “Send Current Pose to ZBrush Pose Tools” in Character Creator to transfer the new pose. Remember to save the pose by selecting “Save New Record”. By repeating this process, you can switch between the T-pose and multiple poses as needed, storing them as “pose1”, “pose2”, and so on.
This method allows for the creation of various poses, providing flexibility and versatility to bring the character to life in different positions.
Q: In comparison to your previous method of posing characters in ZBrush or other 3D tools, what are the advantages of utilizing the AccuRIG+Posing workflow with Character Creator?
The benefits are manifold. With this workflow, you can effortlessly change poses within a single project, eliminating the need to create a new project for each pose. The “Edit Posture” feature in Character Creator enables swift pose adjustments that can be seamlessly sent back to ZBrush. Moreover, by utilizing layers, you have the ability to modify the mesh for each pose independently, without altering the mesh in the original T-pose. This grants greater control, allowing for the expression of distinct clothing folds and details.
Q: What are your thoughts on the overall experience of using the ZBrush Pose Tool plugin in terms of time and results?
Initially, setting and using a pose required exporting and importing it into other programs. Any modifications also involved going through the same process. However, ZBrush Pose Tools has simplified the workflow by establishing a seamless connection between CC and ZBrush with just one click. This not only saves time but also allows for quick adjustments. Additionally, leveraging the layer on/off feature enables the addition of intricate details by sculpting each mesh differently when capturing a screenshot.
Part III. ANIMATE WITH UNREAL AUTO SETUP
Step 3) Animation Process
To enhance the natural and lively feel of the dragon animation, incorporate the spring effect function in Character Creator 4 after integrating the bone structure in 3ds Max.
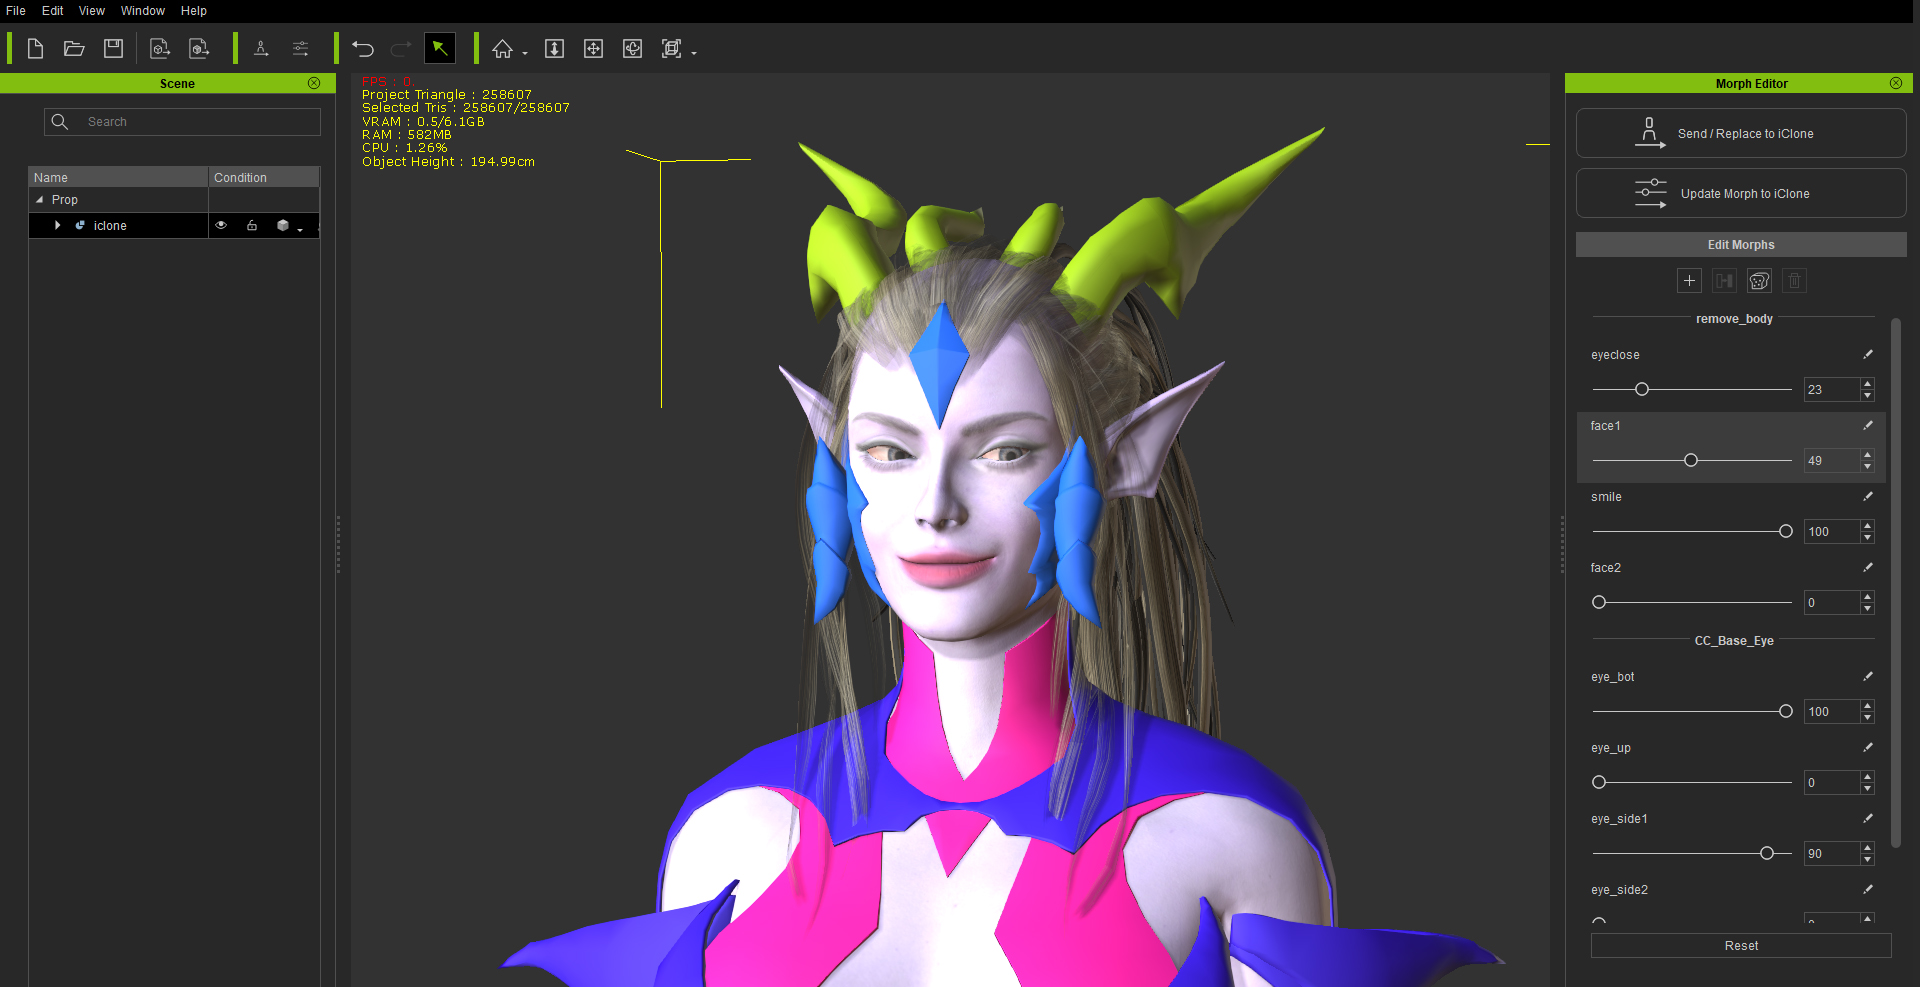
To transfer facial expressions and eye movements from 3ds Max, export them as an OBJ file. Then, utilize the iClone morph creator to update and refine the morphs. This allows for seamless integration of the facial expressions and eye movements into iClone, enhancing the realism and expressiveness of the characters.
Once you have updated the morphs using the iClone morph creator, employ the morph animator to seamlessly incorporate a range of facial expressions and eye movements into the specific sections of your desired animation.
Afterwards, export the animation and bring it into Unreal Engine 5 (UE5). Apply all the texture maps generated in step 2 to the material node in UE5.
Step 4) Lighting Setup
The CC4-to-UE5 AutoSetup provides a variety of shaders. By applying the skin shader, you can adjust the details of the skin using micro normals. The Eye Shader allows you to freely modify the color, reflective light, and more. The Eye Occlusion shader creates a realistic appearance for the eyes.
Once you have applied the materials to the character as described, proceed to select a background in the Unreal Engine that complements the character’s mood.
Enhance animation with lighting effects and camera movements for dynamic visuals. Capture a screenshot and record the video to complete the process.
Part IV. Conclusion
With the aforementioned steps completed, my “Dragon Sorceress Zyra” character is finished. I thoroughly enjoyed designing and adorning characters according to my desired concept. Undoubtedly, Character Creator 4 greatly facilitates this process, making it both easy and efficient. Thank you for following my workflow and tutorial.
Greetings, this is Peter Alexander. In this video I’m going to demonstrate how to use the wrinkle system for a stylized character.
Overview
There will be two main sections to this tutorial: one for basic users, and one for advanced. The advanced section will delve into areas of normal map modification.
Software Used
I will be using Character Creator and an image editor known as Krita. I chose Krita because it has a height-to-normal map filter, which is very useful for non-3D generation of normal map details.
Part One: Basics
Understanding Wrinkle Maps
The wrinkle system uses three sets of maps, with 5 main maps in total for each set.
Loading a Wrinkle Map
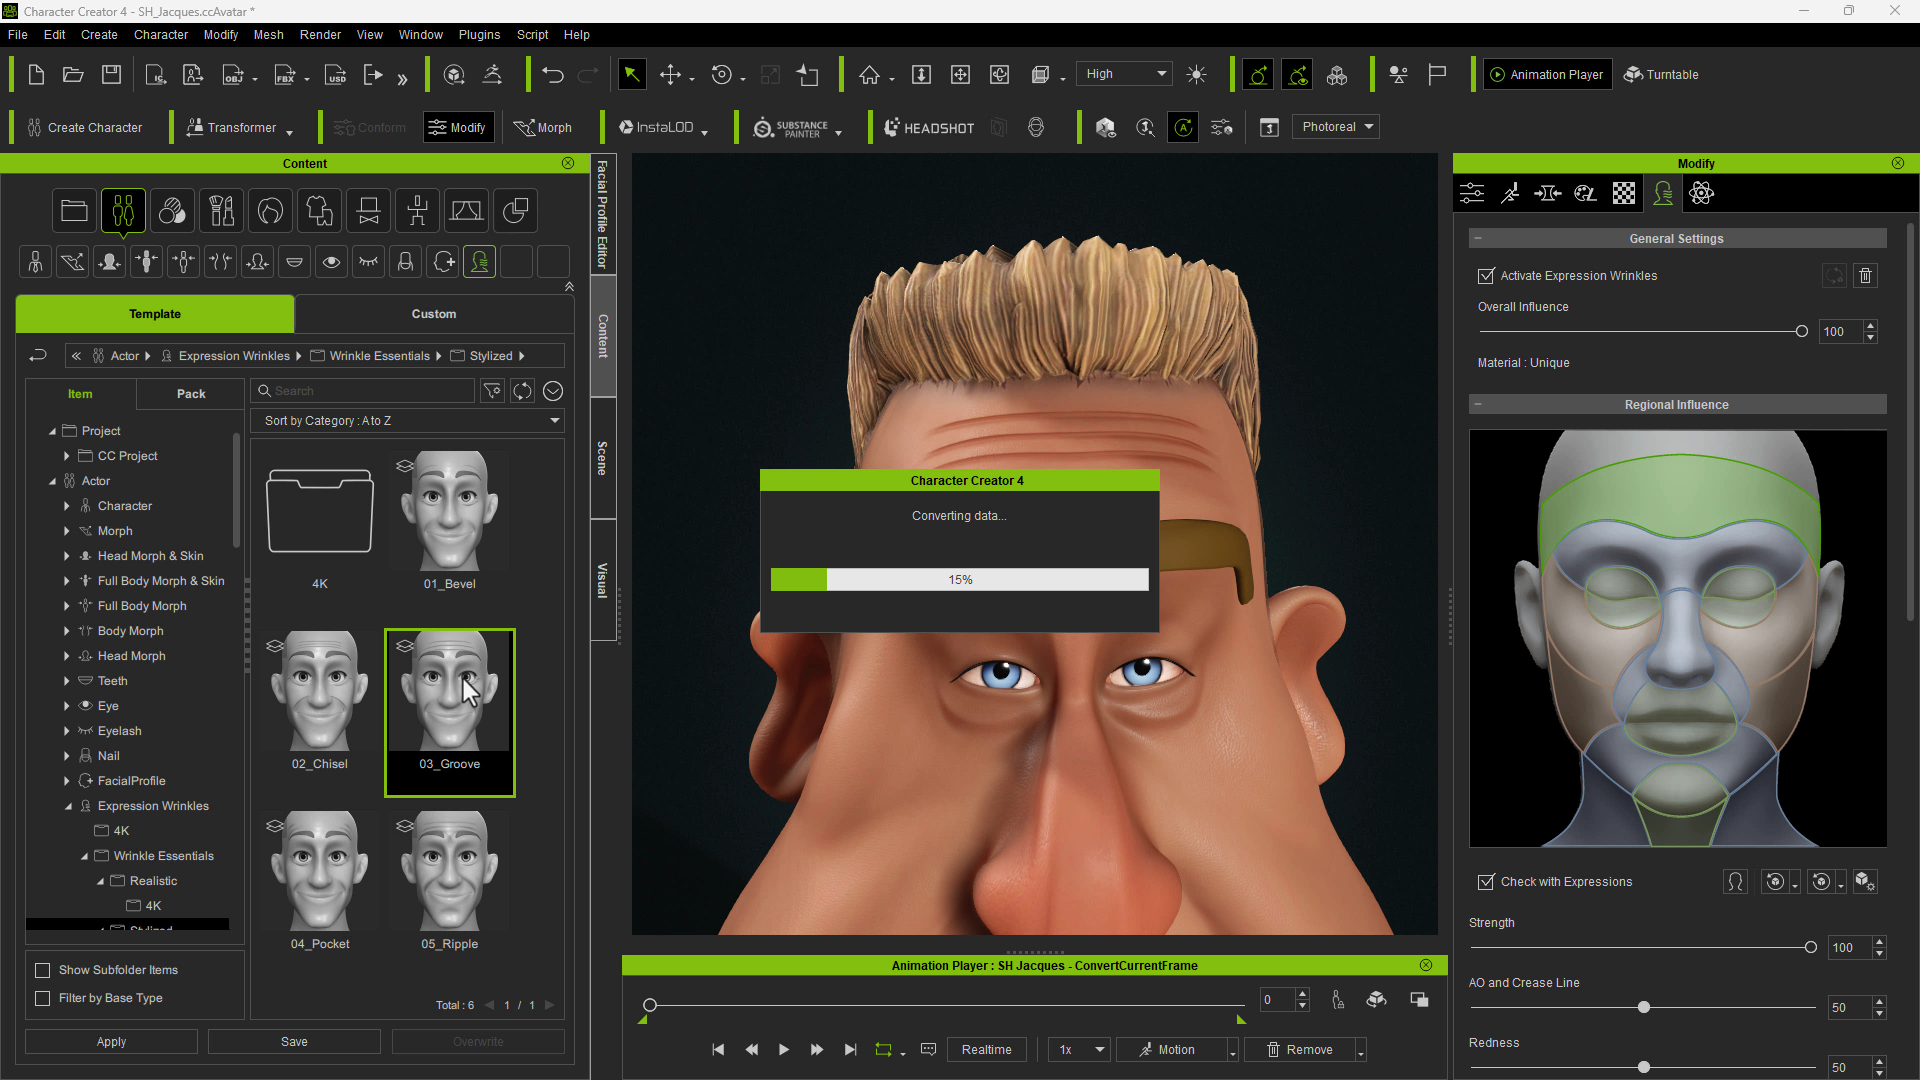
The process of adding wrinkles to a character is very simple. Just find a preset in the Wrinkle tab of the Content window, which is a subsection of the actor properties.
Character Creator has some facial animations preloaded to the animation player, to allow you to check your wrinkles and other animation properties.
Choosing the Right Set
After experimenting with the realistic sets, I’ve decided to apply the stylized wrinkle presets included in the “Wrinkle Essentials” package.
Keep in mind that you can only apply one wrinkle preset at a time, meaning one preset will overwrite the other; but you can manipulate and combine maps from multiple sets.
Using Wrinkle Settings
Once your wrinkle preset is loaded, you can play around with various settings in the wrinkle panel under Modify.
You can adjust the overall influence of the set, and below that you can select parts of the face and apply strength settings to the active part. The strength settings are divided up by map effect. Normal maps provide much of the detail, while ambient occlusion and redness are significant components, especially for more realistic characters. There’s also the speed of the wrinkle effect, which I do not have much experience in using.
Adjusting the strength for part of the character’s face can be important for a character with, say, a large forehead but a small mouth, or other combinations of exaggeration.
Part Two: Advanced
In this part of the Demo, I’ll show you a method for combining wrinkle map effects with a custom expression.
Where to Find More Info
Without getting into the exact mechanics of this system, which I’d not be fully accurate in describing, I will say that the expression sliders are linked to the data, which triggers the wrinkle effects.
If you want a more in-depth overview of the relationship between the sliders, wrinkle data and textures, I highly recommend going to the Reallusion webpage linked here. There it kind of goes under the hood of the technology and its features. I’d especially point to this breakdown.
These texture maps are the final textures, which generate the wrinkle effects. Below this is the tier of textures I previously mentioned.
Which Map Normal to Edit
It can be a tad confusing, especially if you don’t know what all these textures do. That said, the final texture map is a combination of maps. For example, the character’s normal map, and the normal map, would blend together, like this.
However, you don’t want to edit the result, but the wrinkle part of this equation — which would be this map here:
Using Wrinkles with Custom Expressions
By default, custom expressions are not linked to the data which triggers wrinkles. Even if you were to use sliders with wrinkles and combine them into a new custom slider, the wrinkle data would be lost. There are ways to use wrinkle data with a custom slider, however. I will go over one such method.
Step 1)
Dial in your expression components or utilize one of the presets in the facial editor. These presets are linked to the expression components which trigger wrinkles. Once your expression is dialed in, save it as an expression asset.
Step 2)
Open the facial profile editor. Your expressions will be reset while in this editor for better editing. However, you can apply the expression preset you just created. This will dial in the various sliders which comprise your expression. Send your character to a sculpting application, preferably ZBrush.
Alternatively, you can use the mesh editor, which can perform basic mesh sculpting functions.
Step 3)
As you edit your expression, note that the final expression should be a fix, enhancement or exaggeration of the original expression , as it will use the same wrinkle data.
Step 4)
While still in the facial profile editor, your character should now have the combined expression dials and the sculpted data. Now reset the expression sliders, leaving only the sculpted data.
Step 5)
Bake the remaining changes, the sculpting data, as a custom expression.
Bringing it Altogether
You can apply both your expression preset and the custom slider you just created. This combined data can now be saved as another expression preset, which will trigger the wrinkle data.
This final expression is now a combination of many partial expression sliders, and one custom slider. Each of these can be adjusted independently.
Limitations
Keep in mind that unless another character has a custom expression of the same name, only part of this data will apply to other characters.
Choosing the Right Wrinkles
Now to apply a wrinkle set. I will start by experimenting with some of the realistic sets. While the realistic sets are great, it is not the style I am looking for. The stylized sets have some chiseled wrinkle effects, which suit this character better.
The “Groove” set is almost perfect, so I will export the maps and tweak them slightly in Krita, a free painting application.
Editing Wrinkles in Krita
What I am going to do is add a bit more emphasis to certain areas. I will do this by painting in displacement detail, then converting it to normal map detail with a filter Layer.
Why Krita
Krita is a great tool for 3D artists as it has been developed with texture artists in mind. There is a filter layer called “Height to Normal Map”. Add this layer below the original normal map, and then set the original normal map’s blending mode to “Overlay”. This will combine the two normal maps. A third paint layer will allow you to add height. However, to add negative height, you will need a gray layer below the paint layer. So, I will add a fill layer with gray selected.
The gray layer allows the “Height to Normal Map” filter to read black as a negative value.
I’m now painting on the paint layer with white, and occasionally some black. Black basically allows you to add deep cuts to your normal maps.
The original normal maps in this case are mostly cuts into depth, rather than elevation. As this expression is a boxer being struck in the face, I figured some height would add more emphasis. You can use tools and brushes like smudge and erase to soften and remove detail. The Layer above it calculates the changes, so you don’t have to worry about the technical aspects of painting a normal map. Since there are three normal maps to edit, you get to practice this procedure three times:
Create a gray fill layer.
Add a paint layer for displacements.
Add a filter layer with “Height Map to Normal Map” selected.
And drag your original normal map to the top, with blend mode set to overlay.
Other Methods
I’d also like to point out that you can use ZBrush, 3D-Coat, Blender or other applications to create and edit wrinkle maps. This is probably the best 2D method, but 3D sculpting and texture painting applications have significant advantages. Just remember that you do not have to start from scratch. Use the presets as both a guide and foundation for any changes you make.
Similarly, when crafting a custom expression, you can use the facial presets as a starting point, especially the components of those presets are linked to wrinkle data. Back in Character Creator, you can load the wrinkle maps from the folder containing the changes you were just working on.
Depending on your changes, the effects may be subtle or extreme. It takes a while to get the right look. The changes I implemented are not too extreme, but there is a noticeable difference compared to the originals.
Before and After
I hope these tools and tips will provide you with a foundation for altering or even creating your own wrinkle map set. Thanks for reading!
My name is Marcel Brynard. I am a digital artist with a background in architecture, inspired by working some years at a bronze sculpture studio in Cape Town, South Africa and by my travels to various archaeological sites.
My love for beautiful forms intertwines with a fascination for the chimeric and arcane, resulting in art that exudes story-telling and mysticism.
Embracing digital tools, I explore new possibilities intersecting architecture and sculpture. Fueled by a love for these things, I am working on an animation project titled “Transcendental Rebirth,” narrating the transformative journey of two shamans on a pilgrimage.
Image credit: Marcel Brynard
In this video I will be taking users through the process of auto-rigging my original models in AccuRIG and uploading to ActorCore for motion previewing and retargeting, as an easy workflow to achieve animation and concept art.
From a Static Sculpture to a Fully Rigged Actor
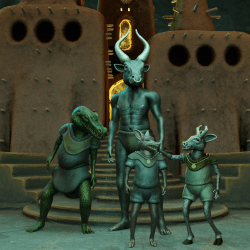
All my creations are inspired by ancient religions and lore from different places. The Deer character that I have used in this project is inspired by an ancient Peruvian relic.
In order to bring my model to the 3D production, I have chosen AccuRIG to do the magic. There are other rigging tools. But AccuRIG, new in the market, is not only free of charge but provides really accurate results.
With only five simple steps and some very useful functions such as symmetry, I have completed the body rig and hand rig of my model in no time. With minor adjustments, the end results are above my expectations.
Automatic rigging with AccuRIG. Image credit: Marcel Brynard
Situate the Best Poses for My 3D Model
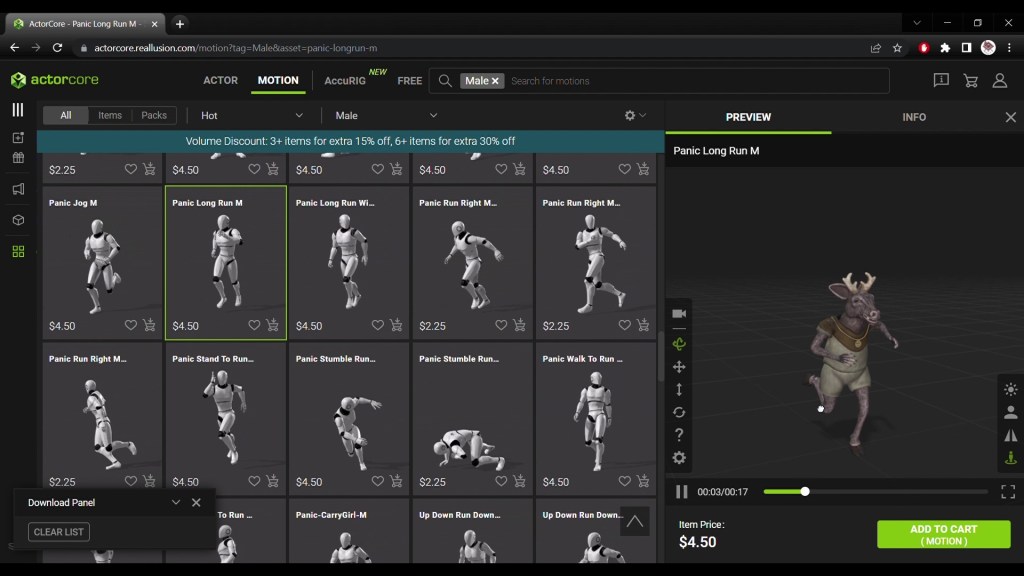
Next I uploaded my rigged Deer character to ActorCore on the cloud and tried out animations. In my account, I can see all my uploaded actors, and I can go ahead and test different motions in the 3D preview window. There is a whole range to choose from, including 32 free motions; totalling over 2,000 animations on ActorCore — way more than I need!
I can select and download any motion on the model that I have uploaded. Classic “Sneak”, “Wondering Walk”, “Normal Walk” — it’s all very straightforward.
Preview animations on ActorCore 3D asset store. Image credit: Marcel Brynard
Flawless Export to Blender
I want to export everything included, not only motions. I like to choose 24 frames per second, original size, and embed the texture. And it downloads in a zip folder containing the FBX, and I can easily import that FBX straight into Blender.
Now I have got the 3D character in Blender. If I were to scrub through the timeline at the bottom, I can see that the animation is included in the FBX, as per the motion that I have downloaded. I can set it up with cameras and lights, and it is ready to render out.
Easy export to Blender for further production. Image credit: Marcel Brynard
Conclusion
Overall it is really very simple, from rigging with AccuRIG, motion previewing on ActorCore and sending to Blender. The AccuRIG to ActorCore workflow has given me an impressive result to continue my production in Blender. I recommend other 3D character artists to give this pipeline a try and see for yourself how the workflow can be largely enhanced.
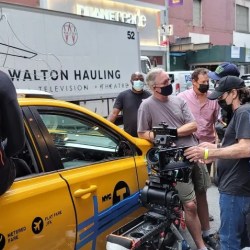
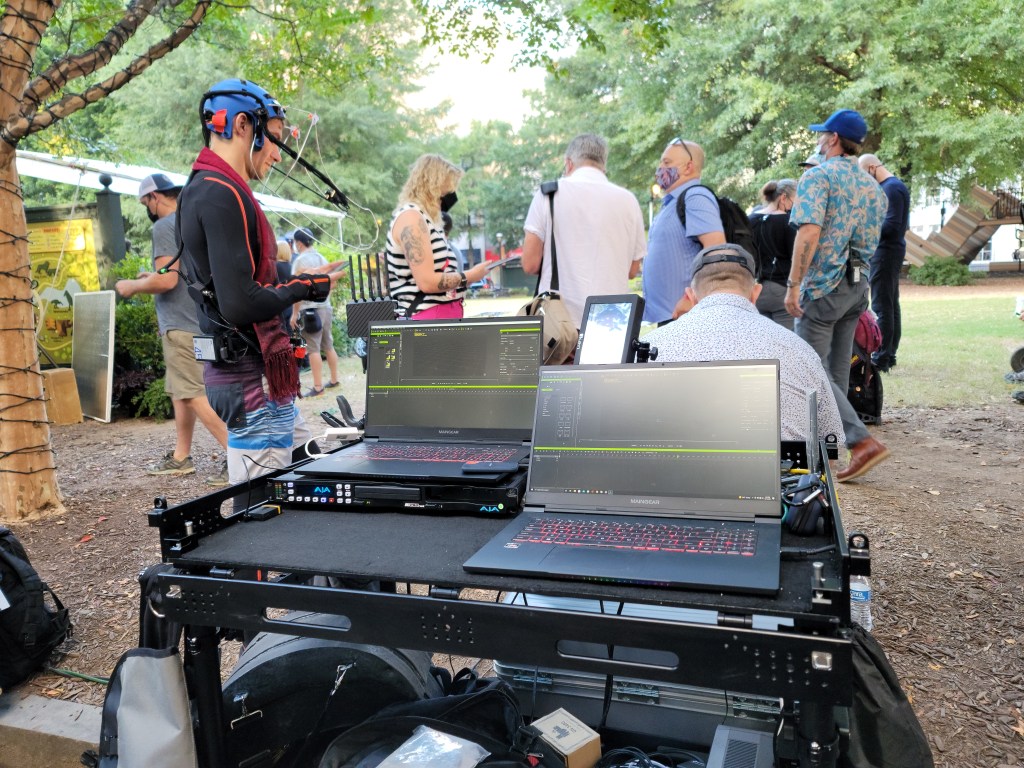
The Sony Pictures movie Lyle, Lyle Crocodile brought the lovable childhood story to life by the crew at Actor Capture, responsible for the motion capture over the 16 week film production. The team worked with the VFX department and VFX producer, Kerry Joseph and VFX Supervisor Joe Bauer on Mocap and virtual production on location in New York City, at Shadowbox Studios, and locations in Atlanta. Actor Capture provided motion capture with Movella Entertainment – Xsens for the on-set stage performances, over 40 locations, and while even hanging out of taxi cabs in Manhattan.
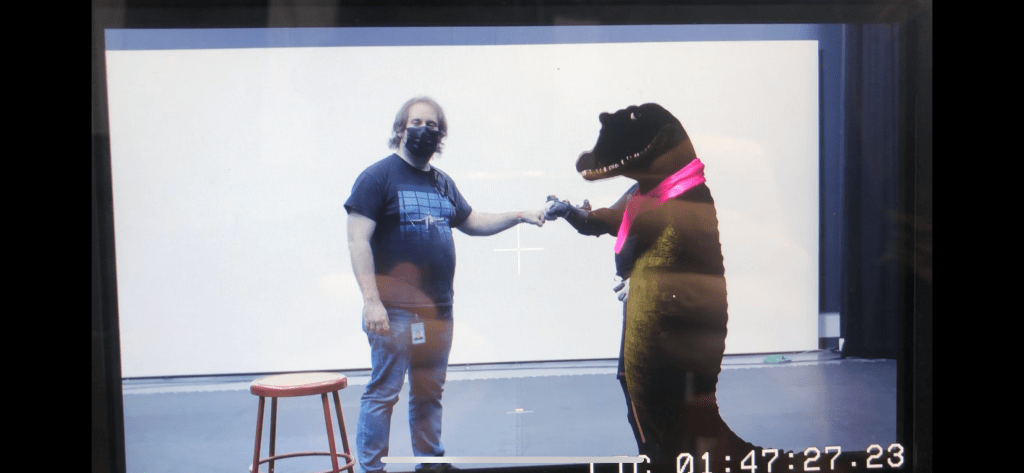
Virtual Production with in-camera VFX visualized the dancing crocodile in real-time allowing the directors and VFX crew to see the Lyle, Lyle’s, performance as it happened through the simulcam.
The actors trained in real-time to personify and get familiar with Lyle using Reallusion iClone for visualization.
To bring the character of Lyle Lyle Crocodile to life, Actor Capture relied on Xsens motion capture suits, Reallusion iClone and Unreal Engine. These powerful tools enabled the team to visualize Lyle in real-time with mocap animation, and quickly meet the needs of the VFX crew for Sony Pictures’ blockbuster musical.
One of the most significant advantages of iClone for the Actor Capture team was the ability to give performers like Rudie Bolton, who played the young Lyle, the opportunity to see themselves as Lyle in real-time. Reallusion iClone helped them get into character more easily during their performances.
James Martin, Technical Director at Actor Capture, highlighted the importance of Xsens as their preferred body motion capture tool and Reallusion iClone for visualization . “The combination of Xsens’ Link Suit, Gloves, and Faceware enabled the team to capture full-body data with best-in-class quality. Enabling our dancers to see Lyle in real-time with iClone Motion Live was valuable to preparing for the dance sequence mocap. From stunt Lyle actors to the main Lyle actor, Ben Palacios, Actor Capture captured every take for Lyle Lyle Crocodile”
Actor Capture’s success in bringing Lyle Lyle Crocodile to life was a testament to the power of Xsens motion capture, Reallusion iClone, Vanishing Point and Unreal Engine. As digital technology continues to advance into AI motion and other machine learning solutions, these tools still remain a vital solution for capturing and delivering authentic and endearing character performances on set or in the studio.
War history YouTube channel Yarnhub has half a million subscribers who tune in weekly to watch heroic and captivating stories from famous wars retold as dramatic animated movies. Creating high-quality animated stories weekly isn’t easy. Not only do Yarnhub’s cinematics need to be engaging and high-quality, they must be historically accurate, which is why Yarnhub turned to Reallusion’s best tools – Character Creator for character design and generation; iClone for animation.
Yarnhub Animation Studios
Yarnhub is an entertainment company founded by industry veterans and employs talented young animators to produce history-related animated films. Led by CEO David Webb and Manager Sergey Peresleni, the team consistently produces incredible, awe-inspiring true stories that give you goosebumps and make you feel something for the amazing people who lived them. We try to do these incredible yarn justice by animating them in an amusing and informative way and bringing them to a broad international audience.
Since its inception in 2019, Yarnhub has grown in experience and wrinkles, moving from 2D cartoons to excellent 3D graphics, with more than 30 animators, comparable to some modern video games. The team heavily adopts Reallusion’s software into their daily production.
Why do we select Reallusion tools
The team at Yarnhub develops around 30 characters a week, and using Character Creator 4 they can create a huge number of characters in a short space of time.
Accuracy with Character Creator 4
The flexibility of Character Creator 4 ensures the team’s historian can create historically accurate costumes and characters in a quick time and with accuracy. The artists are able to use other apps, including Substance Painter, to create accurate and lifelike textures. The team takes their time to research a historical period and make use of photos of historical figures to create their meticulous characters.
The historians and artists Yarnhub use historical references in Character Creator 4 for accuracy
Those 30 characters we mentioned earlier can also be easily adjusted and edited to create further variations. Character Creator 4 has a material creation workflow that fits seamlessly with Substance Painter to ensure Yarnhub’s artists can iterate versions of the same character with pre- and post-battle looks, as well as civilian/military clothes and varying ages.
Character customization with the Modify Tab
Character Creator 4 has new features that enable the animators to check lip-synching, body rig, and facial animation, says Webb, revealing this means the animators can “help us spot and fix any issues early on”.
CC4 enables animators to easily check facial animation, rigs, and lip-synching early in the workflow
“We try to release at least one movie a week and that puts huge pressure on our team to meet the deadlines. In order to succeed we have to use the latest technology and tools like iClone and Character Creator, to produce the best quality we can in the time we have available.”
David Webb, CEO of Yarnhub Animation Studios
iClone 8 makes cinematics easy
When the team needs to create more complex animations they take their characters into iClone 8, Reallusion’s real-time 3D animation software that delivers excellent animation for films, pre-vis, and video games. For the Yarnhub animators, it means they can make use of Reallusion’s ActorCore mocap libraries – a set of readily-rigged characters, including mocap motions and animated 3D humans – to build large-scale battle scenes with variety.
The studio found iClone 8 has a number of new features that perfectly suited a professional studio looking to make animations under tight deadlines. These include the new Control Rig, Advanced Hand/Foot Controller, and Pin Controls that have become go-to tools to provide the flexibility Yarnhub needs when creating and editing its animations. Particularly, the animators are able to save time and speed up their pipeline. Pin Control, for example, prevents joints from breaking.
Adjust hand or footprint position made easy
A key new feature, the improved Reach Target and new Offset function, is one Yarnhub has found incredibly useful. This tool means animators can attach the hands, including both hands together, to an object with ease. This means a character can be set up to interact with other characters, the scenery and objects in a natural way and avoids characters’ hands going through other models or their own bodies. For Yarnhub, which focuses on military animations, where its digital actors need to hold swords and guns it solves many attachment problems.
Crucial new features in iClone 8
Ease and speed of workflow are fundamentals to iClone 8 and Character Creator 4, and it’s been a major reason why Yarnhub has adopted Reallusion’s pipeline. For the team making its weekly content the Animation Layer Editing feature in iClone 8 has been a mainstay.
iClone 8 offers new and improved tools, such as Reach Target and the new Offset function to make interaction easier
“Animation Layer Editing can help adjust the animation without needing to alter every key, or having to flatten the keys,” says Webb, adding: “It’s a useful tool that can save time when animation requires any adjustment.”
Everything created in Character Creator 4 and iClone 8 is taken into Unreal Engine
Making the most of mocap and Unreal Engine
Likewise, Motion Direction Control makes it much easier to combine animations to create more natural movement and transitions between movements with a couple of clicks – iClone 8’s UI is simple and natural, with clear icons dictating animation. “It makes a turn an organic part of a movement,” explains Webb.
iClone 8 is compatible with Rokoko Smartsuit Pro, too. This mocap setup has bee designed for small teams and indies, and is ideal for capturing specific, natural movements that can then be corrected and refined in iClone 8.
Finally, all of Yarnhub’s work in Character Creator 4 and iClone 8 is taken into Unreal Engine where the cinematic comes together. Reallusion’s 3D animation pipeline works smoothly with Unreal Engine, ensuring professional results – 600k Yarnhub subscribers can’t be wrong.