Overview
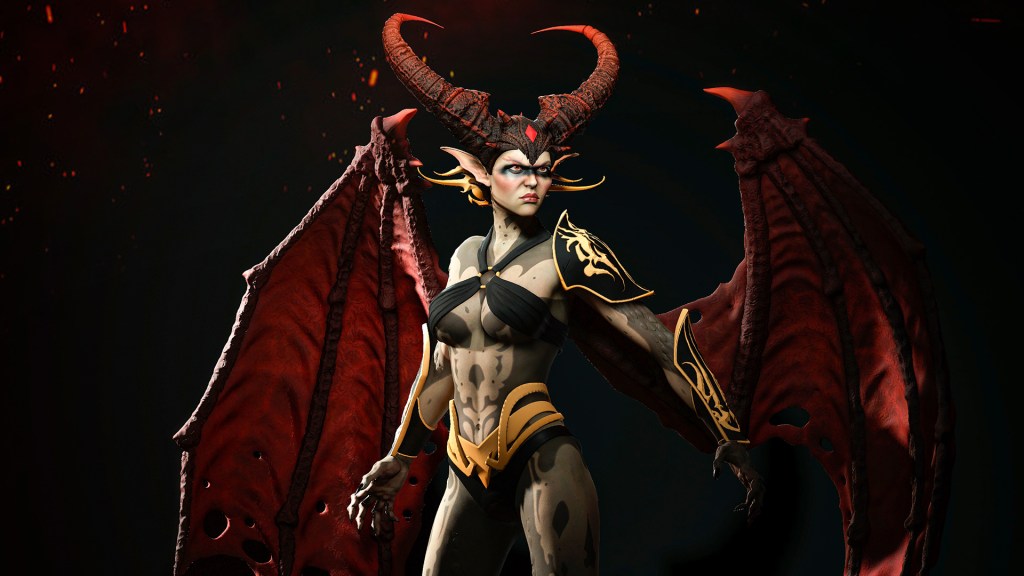
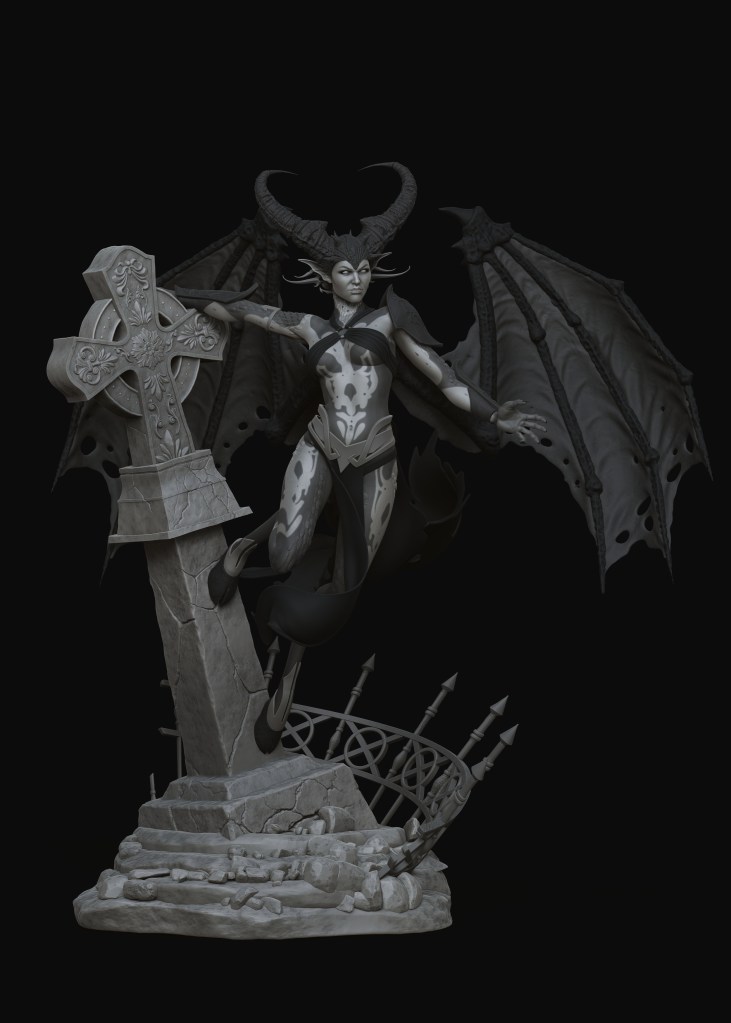
TL;DR: Digital sculptor Óscar Fernández built Veyra, a horned demon with digitigrade legs and full bat wings, using a Character Creator to ZBrush workflow in which CC5 supplies the rigged base, handles skinning, texturing, posing, and final render, while ZBrush carries the sculpting and hard-surface work. The same file ends up both animation-ready and print-ready.
Across a 20-chapter series, Fernández documents the full build on Character Creator 5 and ZBrush, connected by GoZ Plus. What makes the series worth studying is not any single technique, but where he draws the line between the two applications: everything structural and repetitive goes to CC5, everything artistic stays in ZBrush.
Resource Pack Free Download
Fernández bundles everything reusable into a single Resource Pack, including his custom ZBrush interface, the Geo and Slash2 brushes, the free Orb brush set, the CC face region texture that maps expression deformation zones, and the scale alphas used on the shoulders and forearms. The brushes need to be copied manually into ZBrush’s ZStartup/BrushPresets folder before they appear in the palette.
A Demon With No Human Skeleton to Borrow
Veyra is a deliberately awkward test case. She has reversed digitigrade legs ending in hooves, oversized clawed hands, a horned helmet fused to the skull, layered armor, and a wingspan wider than she is tall. Every one of those choices breaks something in a conventional rig.
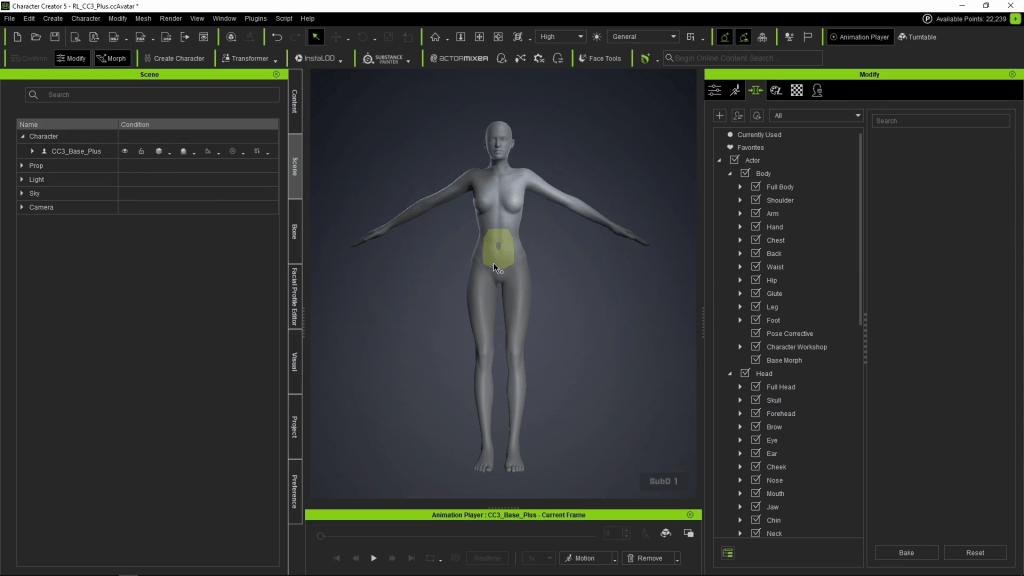
Fernández, who specializes in figures for 3D printing, does not treat that as a sculpting problem. He treats it as a proportion problem, and solves it with sliders before a single brush stroke lands. The CC5 neutral HD base gets an athletic female preset, longer legs, a stretched torso, wider hips, scaled-up hands and feet, elf ears, and extended nails, all through the Morph System before the mesh ever reaches ZBrush.
His summary of what that buys him is blunt: the base alone, he says, has “already saved us a ton of work hours that would have gone into sculpting the body from scratch.” His normal process would be blockout, then DynaMesh, then hours of refinement. Here it takes two clicks.
The Six-Stage Character Creator to ZBrush Workflow
The series follows one loop, repeated at increasing resolution.
|
|
|
|
|
|
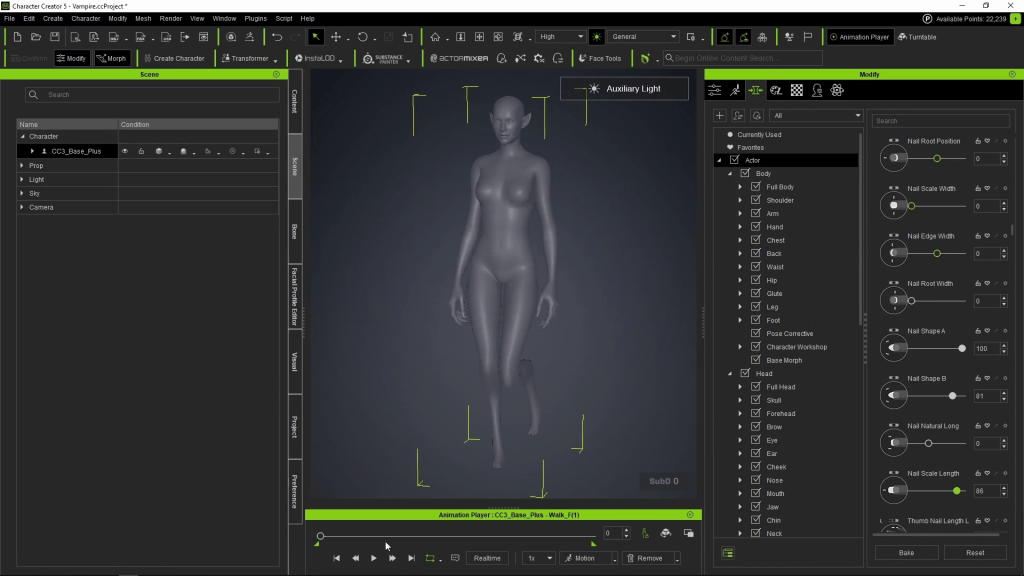
The loop only works because Fernández tests early. After every major proportion change he loads a walk cycle in CC5 to confirm the deformation still holds.
★ The Elite 20-episode Masterclass ★
Explore the full course >

Character Creator 5: The Base That Removes the Blockout
Sliders Instead of Sculpting
The most repeated lesson in the series is that CC5 should absorb anything parametric. Knuckle thickness, finger length, nail shape, ear type, thigh-to-calf ratio: all of it moves faster on a slider than under a brush, and all of it stays symmetrical and topologically clean. When Fernández wants the shins longer and the thighs shorter, he says he could do it in ZBrush, “but as you can see, it’s just a matter of moving two sliders.”
Bones That Follow the Morph
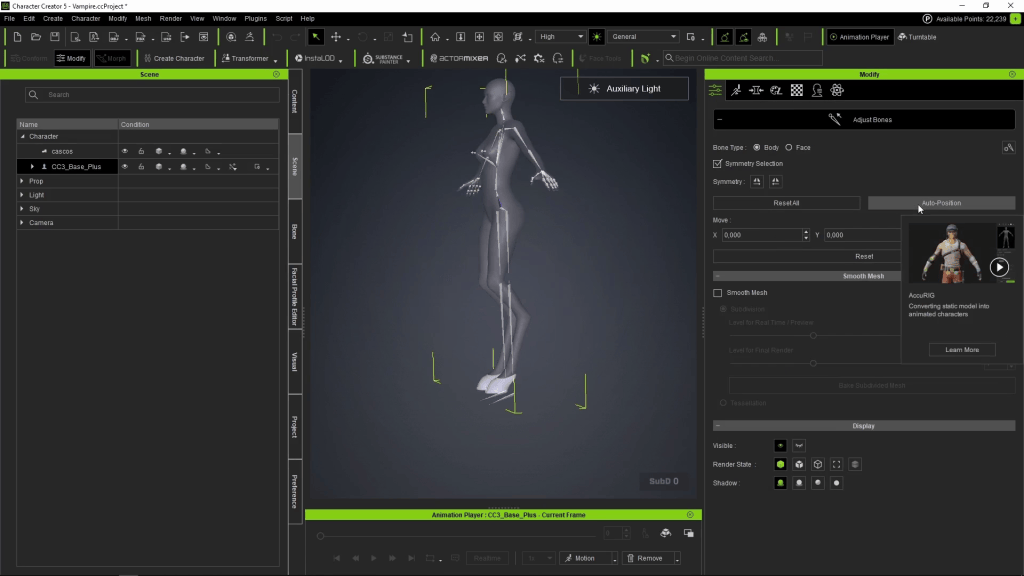
The digitigrade legs are the real test. Fernández splits the ankle joint upward in ZBrush so the hoof can behave as a foot, then sends the mesh back. The first walk cycle looks wrong, and the cause is skeletal, not geometric. Auto Position rebuilds the bone placement against the new silhouette, and the character walks correctly on the tips of the hooves. That single step is what keeps a non-human body plan animatable.
Test at Every Stage
He returns to CC5 constantly, at subdivision level zero, purely to check behavior. It costs seconds and catches problems that would be expensive to unwind later.
ZBrush: Where the Character Actually Gets Made
Sculpt Low, Detail Late
Fernández sculpts the face at subdivision level one, using the CC face-region texture map as a guide so that his edits respect the deformation zones the expression system depends on. He is emphatic about resolution discipline: work high too early and “that plastic effect will start to appear, which looks really, really bad.” Volume first, detail last.

Polygroups as a Hard-Surface Engine
Nearly every accessory in the series follows the same recipe: cut the shape, define polygroups at every intended edge, then alternate Polish by Groups and ZRemesher until the surface is clean and the edges survive. Thickness comes from dynamic subdivision rather than manual extrusion. It is a low-poly, high-control approach that produces armor, helmet panels, and belt hardware without ever leaving sculpting mode.
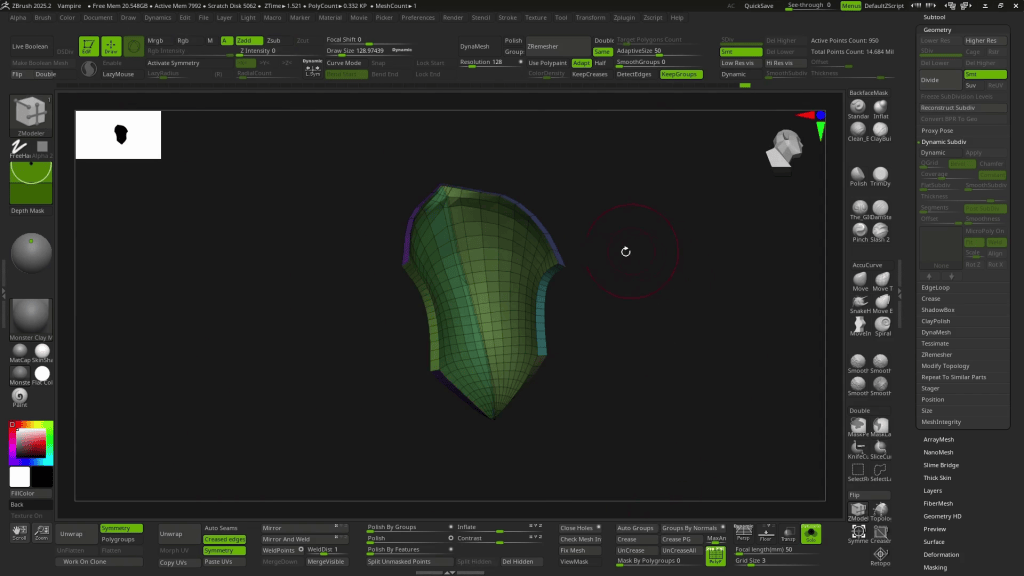
Physics for the Things Sculpting Does Badly
The wing membranes start as ZSpheres, then get a flat plane draped over the finger bones and simulated with ZBrush dynamics against a calculated collision volume. Fernández drops the firmness almost to zero so the cloth sags naturally. The resulting folds, he notes, would be “pretty hard to sculpt.” The same technique settles the skirt against the legs.
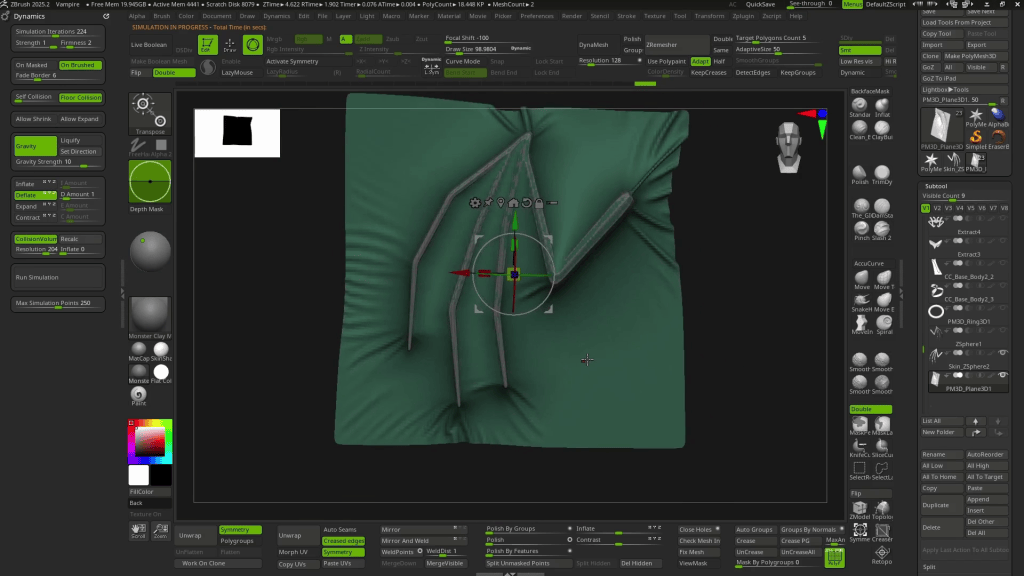
Detail With Restraint
Scales go on the shoulders and forearms via surface noise driven by custom alphas, then get individually lifted with Move and Inflate so the tiling does not read. Everything else stays smooth on purpose. His reasoning applies to any character: “It’s also important when designing a character that not everything has a ton of texture. You need to let it rest.”
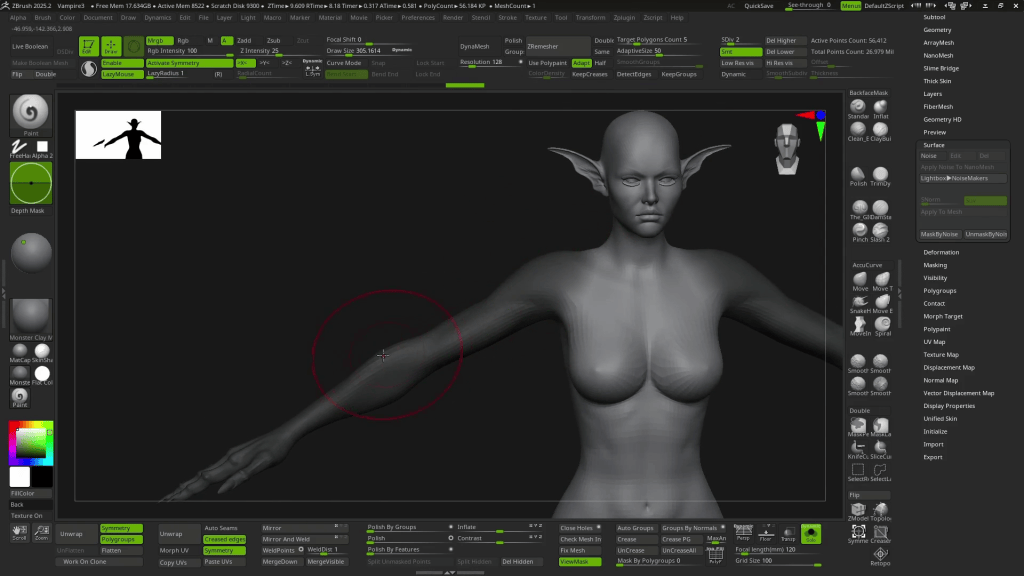
Texturing and Getting Everything Back Into CC5
Split the Texturing Job
Skin, makeup, eyes, and nails come from CC5 content, which handles subsurface behavior and the eye shader better than a hand-painted approach would. The accessories get polypainted in ZBrush using cavity and ambient occlusion masks to drive gradients, plus a consistent top-down light pass that reads as form. Color direction came from concept artist KithKart, whose palette proposals Fernández mixes rather than adopts wholesale.
The tattoos take a third route entirely: masked and painted in ZBrush, exported as high-contrast 2K maps, then composited over the CC5 skin textures in Photoshop as a multiply layer at 50% opacity. It gives full control and takes minutes.

Accessory or Clothing, Not Both
Bringing the pieces back is where the series is most useful. Rigid parts, horns, helmet, shoulder pad, forearm guard, come in as accessories and get bound with Pick Parent to the correct bone. Deforming parts, hooves and the lower garment, come in as clothing with Transfer Skin Weights using the shoes preset, then Conform to calculate collision. Anything left intersecting gets fixed with Mesh Editing sculpt tools directly in CC5.
Displacement and normal maps transfer separately per subdivision level, so level one and level two each need their own bake.
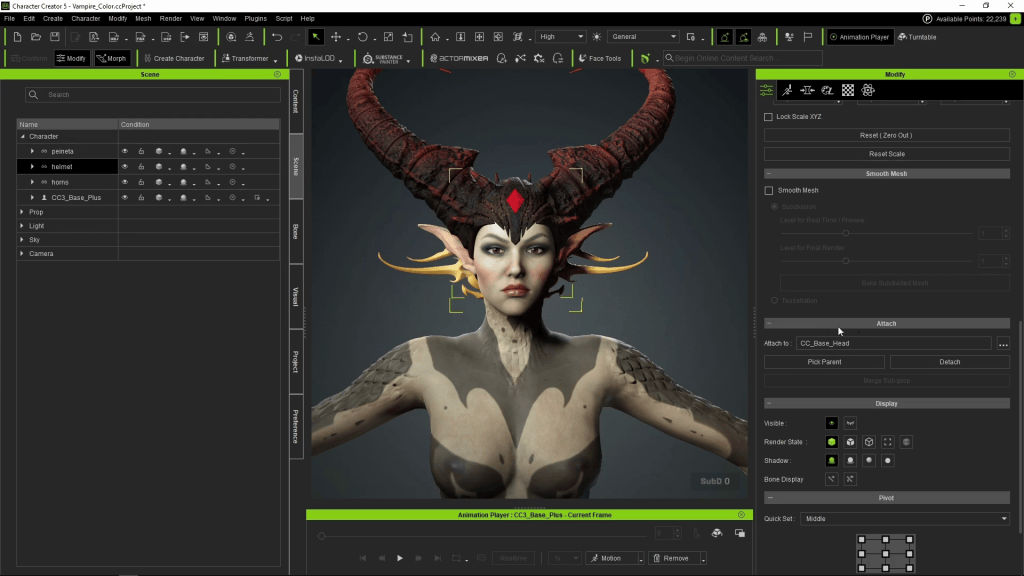
Rendering Without Leaving CC5
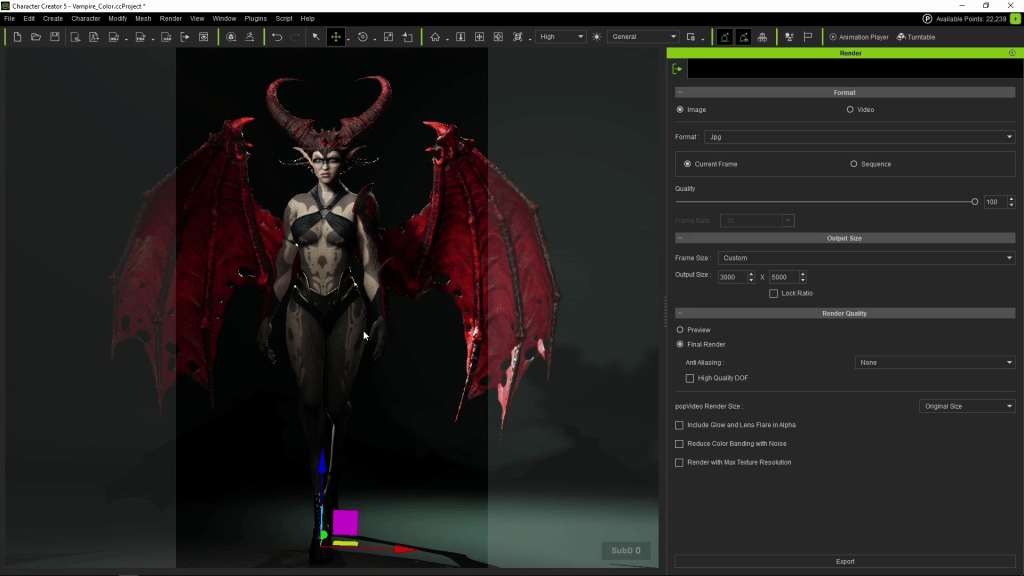
Fernández builds the final image entirely inside Character Creator: a preset stage, a tuned five-light setup, a rescaled and recolored backdrop, then a pose assembled from a preset, hand-adjusted joints, hand presets for the claw gesture, and a facial expression tuned through both muscle mode and sliders. He renders at 4000 x 4000 at subdivision level one, with depth of field. His verdict on the output: “we don’t need any other program.”
From Render to Resin: Preparing Veyra for 3D Printing
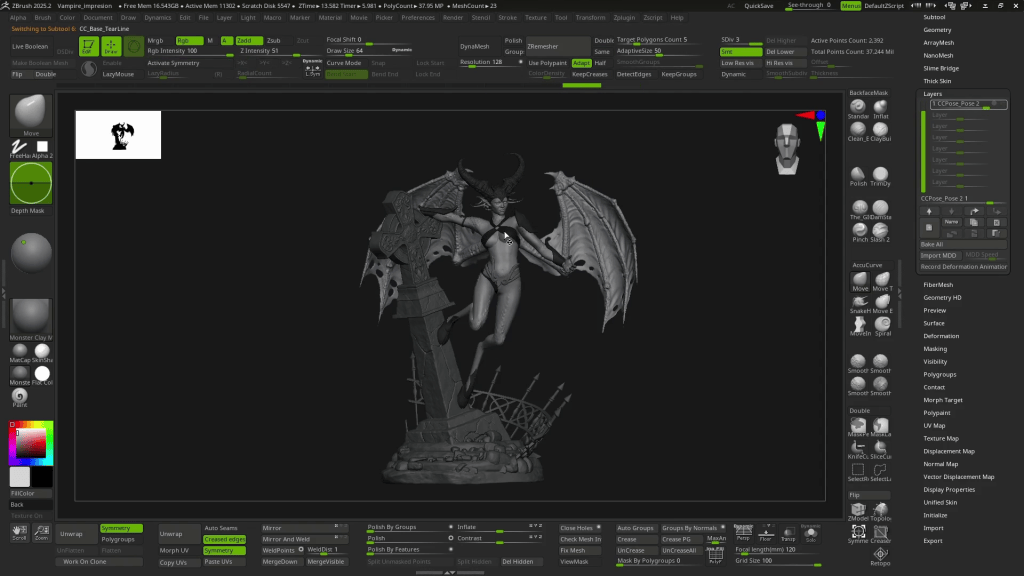
The final chapter is the one that separates this series from a standard character pipeline. Fernández merges his sculpted base prop, runs Decimation Master down to roughly 700,000 triangles, and brings it into CC5 as a prop. He unlocks the foot IK, poses Veyra against the base, then sends the mesh back to ZBrush with GoZ set to deliver only the new position, loaded into a layer.
That layer is the payoff. Pose Tools reads the layer names, so multiple poses live inside one file and can be toggled on and off without duplicating subtools or losing subdivision levels. The final figure gets a Marvelous Designer cloth pass to close the composition, and it is ready to print.
Why This Matters for Solo Character Artists
The interesting number in this series is not polygon count, it is time allocation. By the fourth chapter Fernández observes that he is spending most of his time on accessories and very little on the character itself, “because that’s already done for us by Character Creator.”
For a solo artist selling print files or building animated characters alone, that reallocation is the entire value proposition. Rigging, skinning, weight painting, bone placement, and skin shading are the tasks that historically forced specialization or outsourcing. Handing them to CC5 does not make the artist faster at sculpting. It removes the technical work that was never the artistic contribution in the first place, and it does so without locking the result into a single output. The same file renders, animates, and prints.
Looking Ahead
Fernández closes the series by pointing at the range rather than the result: the same character can go to animation, to render, or to a collectible figure, without a separate build for each. For anyone already sculpting in ZBrush, that is the argument for adding CC5 to the pipeline rather than replacing anything in it.
Key Takeaways for a Character Creator to ZBrush Workflow
- Push every parametric change to CC5 first. Proportions, hand scale, ear type, and nail shape are faster and cleaner on sliders than under a brush.
- Sculpt at subdivision level one for as long as possible. Big shapes at low resolution avoid the plastic look and keep the mesh easy to reshape.
- Run Auto Position after any major proportion change. Non-human silhouettes only stay animatable if the skeleton follows the morph.
- Decide accessory versus clothing before you send anything. Rigid pieces get Pick Parent, deforming pieces get Transfer Skin Weights, and mixing them up costs a full round trip.
- Send the posed mesh back as a layer, not a new file. Pose Tools reads layer names, so several poses can live in one project with subtools and subdivision levels intact.
FAQ: ZBrush to Character Creator 5 Workflow
Q: Can I sculpt non-human proportions in ZBrush and still animate them in Character Creator 5?
A: Yes. Sculpt the proportions at a low subdivision level, send the mesh back through GoZ Plus at level zero, then run Auto Position so the skeleton relocates to match the new silhouette. Veyra’s reversed digitigrade legs and hooves animate correctly using exactly this method.
Q: Should armor come into CC5 as an accessory or as clothing?
A: Rigid pieces that should not deform, such as shoulder pads, horns, and forearm guards, come in as accessories and get linked to the right bone with Pick Parent. Pieces that need to follow the body, such as boots or fabric, come in as clothing and get skinned with Transfer Skin Weights.
Q: Do I need to bake displacement maps separately for each subdivision level?
A: Yes. Normal and displacement maps in CC5 are independent per subdivision level, so a character viewed at level two needs its own bake in addition to the level one bake.
Q: Do I need to buy anything extra to use ZBrush with Character Creator?
A: GoZ Plus is included free with Character Creator and works with recent ZBrush versions. A Character Creator trial is available from the Reallusion Software Store if you want to test the round trip before committing.
ÓSCAR FERNÁNDEZ / DIGITAL SCULPTOR
Óscar Fernández is a freelance digital sculptor from Spain, specializing in creating figures for 3D printing. With deep expertise in ZBrush, he is known for crafting highly expressive characters that capture both personality and motion. His work stands out through the meticulous attention to facial expression, muscle definition, and dynamic posing, giving each sculpt a strong sense of tension and storytelling power.

Related Posts
- From Concept to Motion-Ready Alien Character: ZBrush and CC5 HD Step-by-step Workflow
- Character Creator 5 & ZBrush Accessories, Armor, and Cloth Physics Workflow