首頁 » Page 57

AccuRIG to Blender Pipeline: An Easy & Accurate Way to Auto-rig Any Character

Introduction

Greetings, this is Peter Alexander. In this tutorial I’m going to demonstrate Reallusion’s free auto-rig tool, AccuRIG. There have been many videos exploring this great tool, so I hope I can provide a new angle by exploring these unique characters, each with their own attributes that are useful for demonstrating some of AccuRIG’s potential.

Character One: Non-Human, Stylized Monkey

First up is this stylized monkey character which I purchased through Artstation from an artist named Ali Farsangi. It’s a charming character which I chose because it is very stylized and cartoonish. It served as a nice challenge for AccuRIG, as it’s not a typical human character. The same applies to the other character types, but the monkey has its own set of challenges.

For example, the fingers were too close together which confused the rigging algorithm when it came time to calculate that aspect of the auto-rig. I had to manually increase the space between the monkey’s fingers, allowing it to succeed. Also, as with many cartoon characters, this one had fewer fingers. Luckily, AccuRIG can accommodate hands with zero to five fingers.

As with most characters, the AccuRIG algorithm does a good job of estimating where the bones should go on this monkey character.

Hovering Joint Guides

A feature I really like is that when you hover over a joint, it shows you the ideal position compared to a human model. AccuRIG struggled to calculate the position of the fingers, but thanks to the feature mentioned, it was easy to move the joints to the correct positions.

The Thumb Direction Guide

The thumb has an additional guide which helps alleviate issues with the thumb seen in other character rigging tools.

Mirror Function

Any adjustments to the joint nodes on one hand can be applied to the other hand using the Mirror Function.

Previewing Animations

AccuRIG has several animations selected to preview the rigging of your models, and if needed, to adjust them using the Pose Offset feature. Although most characters will have a high degree of compatibility with ActorCore animations, offsetting a pose can allow for a better flow of movement for highly exaggerated characters.

Uploading to ActorCore

Uploading to ActorCore provides you access to the full animation library, limited only by what you’ve purchased. From here you can preview animations and download them for use in a 3D application of your choice.  This character probably has a childlike personality, so I chose one of the Kids animation packs.

Exporting to Blender

I’m a Blender user, so I’ll be using that format to demonstrate the very useful Rigify integration provided by the Character Creator addon.

Using Rigify through the Character Creator Add-on

By importing through this addon, you can add Rigify controls to your character, vastly increasing the animation integration with Blender.

Expanding on AccuRIG and Rigify

Many times when I import a character for any animation work, I’ll switch to the Matcap shader, which is significantly less laggy than the other shaders (It’s more of a habit of mine and not a necessity).

AccuRIG does not currently rig the eyes of characters, but Rigify does support those controls. For those with slightly more experience in character rigging, you can easily make advancements to the AccuRIG’s base setup into a very capable rig with full eye controls.

Here I am just making sure that smooth shading is applied, then I average out the normals. I do this with most imported characters and items in Blender.

Using IK and FK Controls

Rigify supports both IK and FK controls, which can be found under the Item menu. From here, you can also toggle controls that you don’t need.

In addition, you can import any animation you’ve downloaded from ActorCore to preview, adjust, and apply to your AccuRIG character.

Character Two: High Polygon Werecat with Huge Claws and Exaggerated Limbs

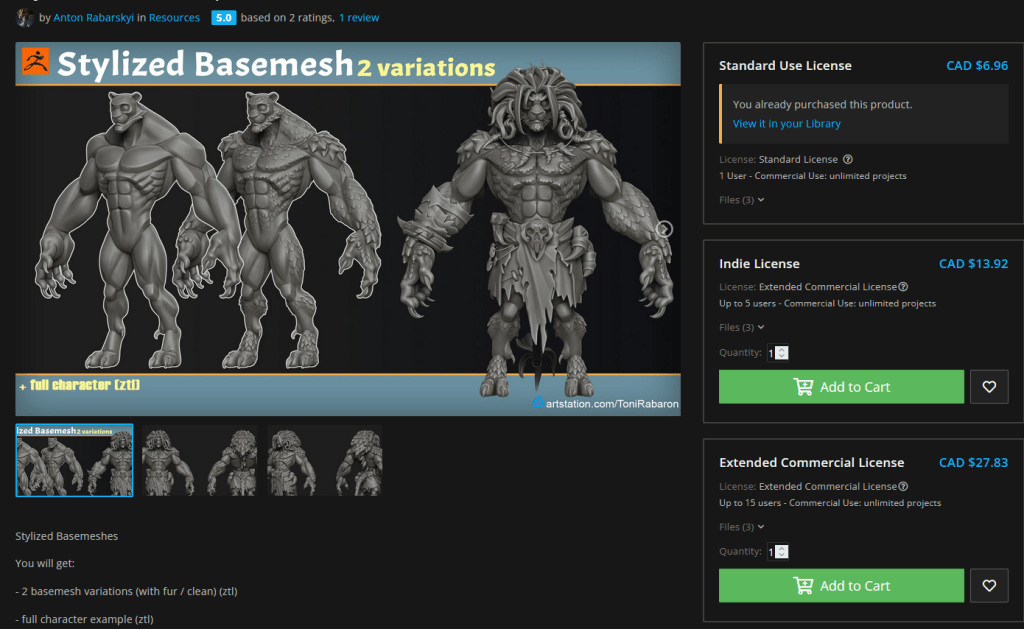
Next up is this stylized werecat model that I’ve purchased through Artstation from an artist named Anton Rabarskyi.
Dealing with Anatomy and Stylization with AccuRIG

Like the monkey, this character is highly stylized but in a different direction. He has exaggerated muscles, limbs and is only partially humanoid. The fingers have claws, and the finger joints differ from humans. The feet have an extended hind-leg aspect to them. Finally, the model has a high polygon count. For this reason, it serves as a good problem-solving demonstration for AccuRIG.

The only real issue I had was some minor distortion due to the stylized nature of the head and neck, but I made some adjustments and didn’t run into any problems after the second run through this process.

I did find the fingers more difficult to deal with due to the claws, and my impression is that this character has limited finger joints compared to a human. Overall I found that AccuRIG was able to accommodate this character very well. It just took a few seconds longer to process due to the much higher polygon count.

Even the fingers, which I was concerned about, seemed fine.

After uploading to ActorCore, I briefly tested some animations to inspect his movements, then I selected the “Grumpy Claw” animation, which fit the character well.

Character Scaling Issues Using Rigify

As with the stylized monkey, I was able to import and apply Rigify and the selected animations with no difficulty. One thing I will point out is that if your character is not scaled similarly to characters you’d find with Character Creator and ActorCore, you may find that Rigify has difficulty assigning controls properly. For example, if your character is thought to be a few millimeters or hundreds of meters in size, your controls will likely be out of place. So if you find your Rigify controls are not fitting your character, this is likely the reason.

Character Three: Very Low Polygon Demon Lord

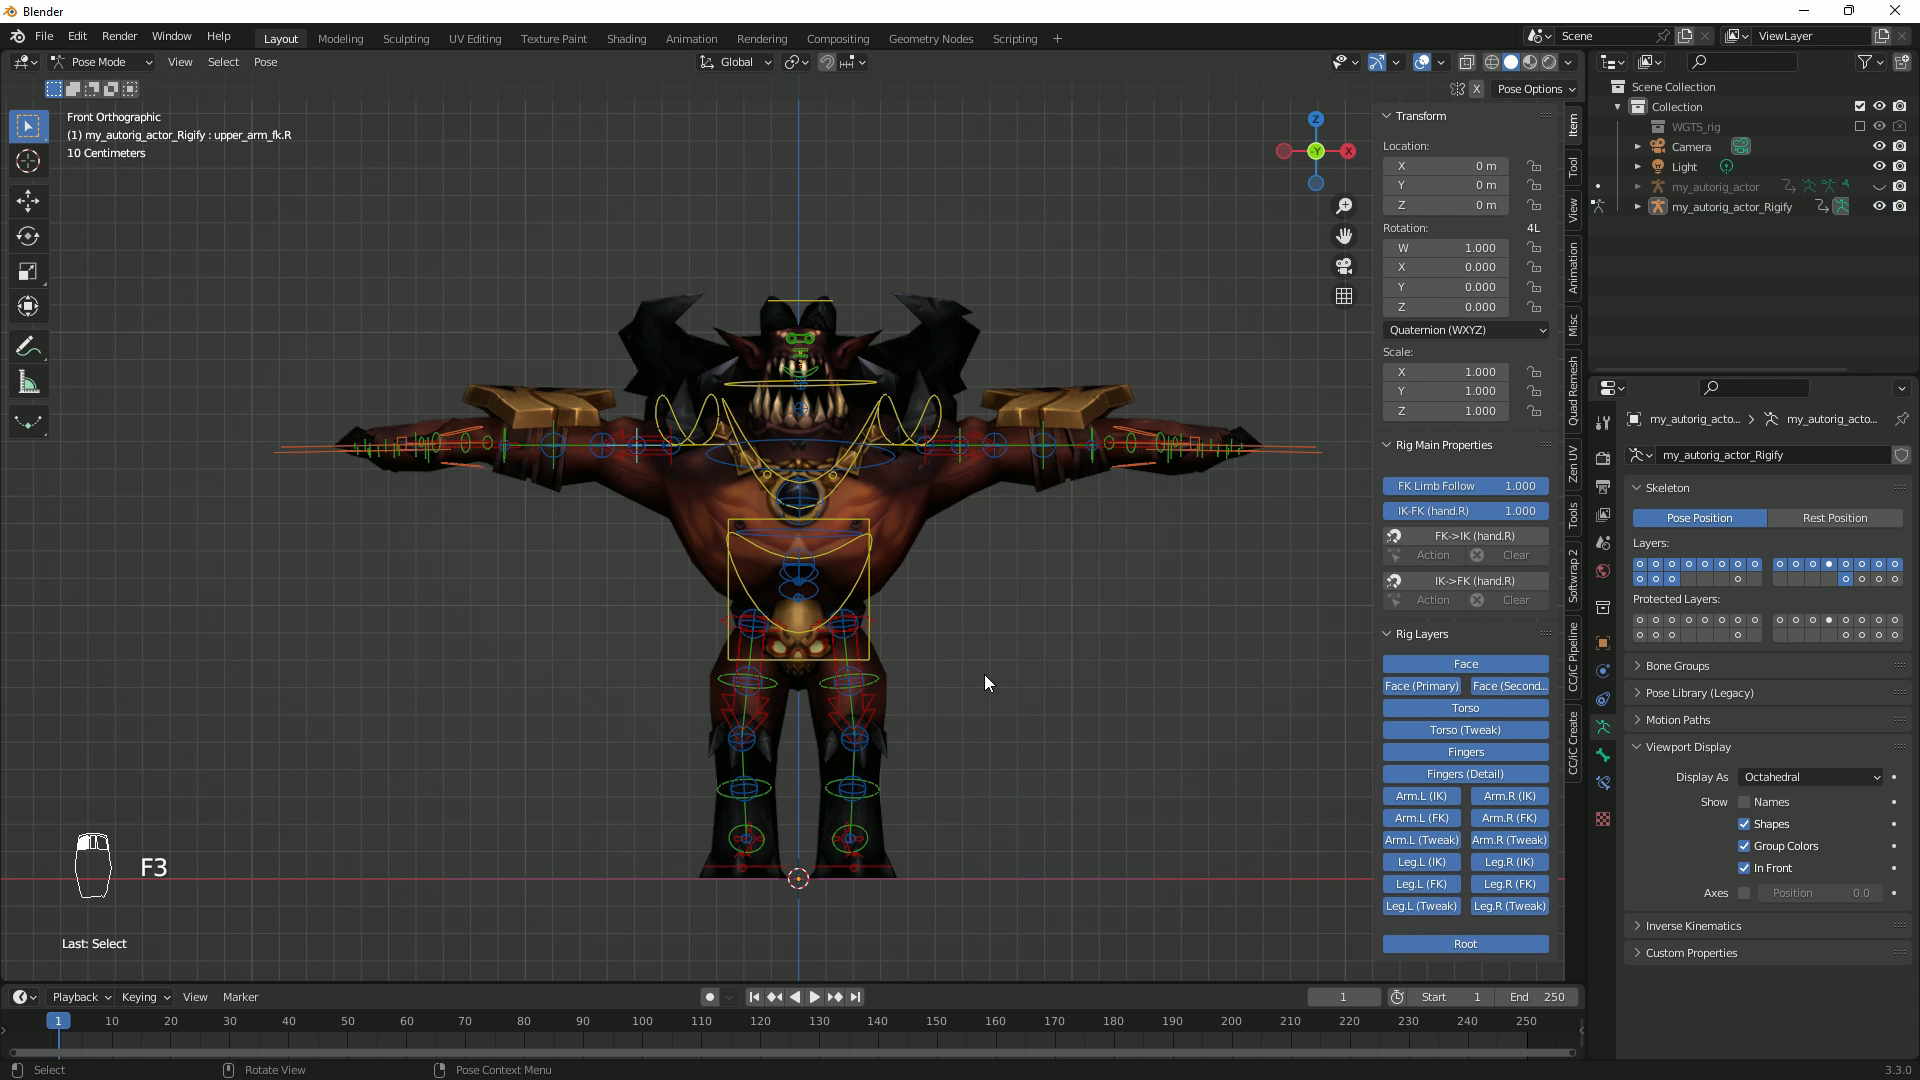
Finally, I tried AccuRIG with a model purchased from Sketchfab, a 2,000+ polygon Demon Lord, from the artist Bitgem. While this model was already appropriately rigged, I wanted to see how AccuRIG would handle a very low polygon character — like the ones you would find in a lightweight mobile game.

I switched the hand rigging to four digits, after which, AccuRIG correctly detected the fingers with only minor adjustments needed.

Reassigning Character Vertices and Weights in Blender

After uploading the character to the ActorCore server, I assigned the character a “spell summoning” animation and downloaded the files for use in Blender. Once in Blender, the Rigify controls were allocated to the rig and worked as expected. The only issue I ran into was that the lower teeth were not identified as part of the face. However, I assigned those vertices surrounding the teeth to the rest of the group associated with the head bone, which has fixed the issue.
Conclusion

In conclusion, I have found AccuRIG is a wonderful free tool for Blender.  All three characters were Rigify-ready in Blender after being rigged by AccuRIG, saving me lots of time.  Although these characters were quite different in shapes and sizes, AccuRIG can handle them easily and the rigged results were impressive. And since the rig is compatible with the mocap animation on ActorCore, it serves as a great way to bring non-standard, animated characters into game engines like Unity or Unreal, or in 3rd party 3D applications like Blender or Maya. 

And with that, I’ll bring this demo to a close. I hope there was something you learned or found useful. I would encourage everyone to check out AccuRIG and see for yourself how powerful it is.

Related Posts

Reallusion Releases Cartoon Animator 5

Level Up 2D Animation with Spring Physics, FFD Exaggeration, and Vector Graphics

Cartoon Animator 5 (CTA 5) launches with several crucial features introduced to level the playing field for amateur and professional artists alike. In addition to overhauling rudimentary animations with the secondary motion from Spring physics, free-form deformation (FFD) makes cartoonish anticipation and exaggeration accessible to any aspiring animator. CTA 5 also supports vector animation giving rise to boosted render quality with high-res output and a highly-acclaimed SVG pipeline.


Cartoon Animator is a 2D animation software designed for ease of entry and productivity. It can turn static images into animated characters, drive facial expressions with facial mocap animation, generate lip-sync animation from audio, create 3D parallax scenes, and produce 2D visual effects. Artists can access content resources and wield a comprehensive photoshop/vector pipeline to rapidly customize sprite characters and create interesting content. While implementing the most innovative workflow by synergizing industry-leading applications, 3D animation resources, and motion capture devices, Cartoon Animator brings the ultimate freedom for high-quality production.

Key Features

  • Whether vector or bitmap, any image can be imported, rigged, and animated in Cartoon Animator. 
  • Automated secondary motion is applicable to any object and extremely easy to work with.
  • 3D Head Creator transforms 2D art into 3D styled characters with 0 to 360° head turns.
  • Motion Link connects iClone with CTA 2D characters to stream and converts 3D motion to 2D animation.

Spring Dynamics

Few things are more rewarding than watching your static 2D artwork suddenly turn into living and breathing animations. CTA’s autonomous Spring dynamics puts you in creative control without fussing over complex physics and follow-through motion. These flashy physics effects are perfectly fit to energize character and prop animation.

New Features

  • Spring bones bring a secondary motion to characters so that they jiggle as they move.
  • An object can have multiple Spring settings set up with different Spring groups with distinctive behavior.
  • Spring physics reacts to all types of movement including simple transform keys, mouse-driven facial puppets, and live performances made by facial tracking or motion capture.
  • Ten Spring presets of different material types make it easy to find the most eligible starting point for Spring animation. 
  • Spring attributes include bounciness, speed, gravity, and angle limitations for squash and stretch characteristics.
  • A set of 14 samples and templates designed after common items work in tandem with manual rigging.

Free-form Deformation

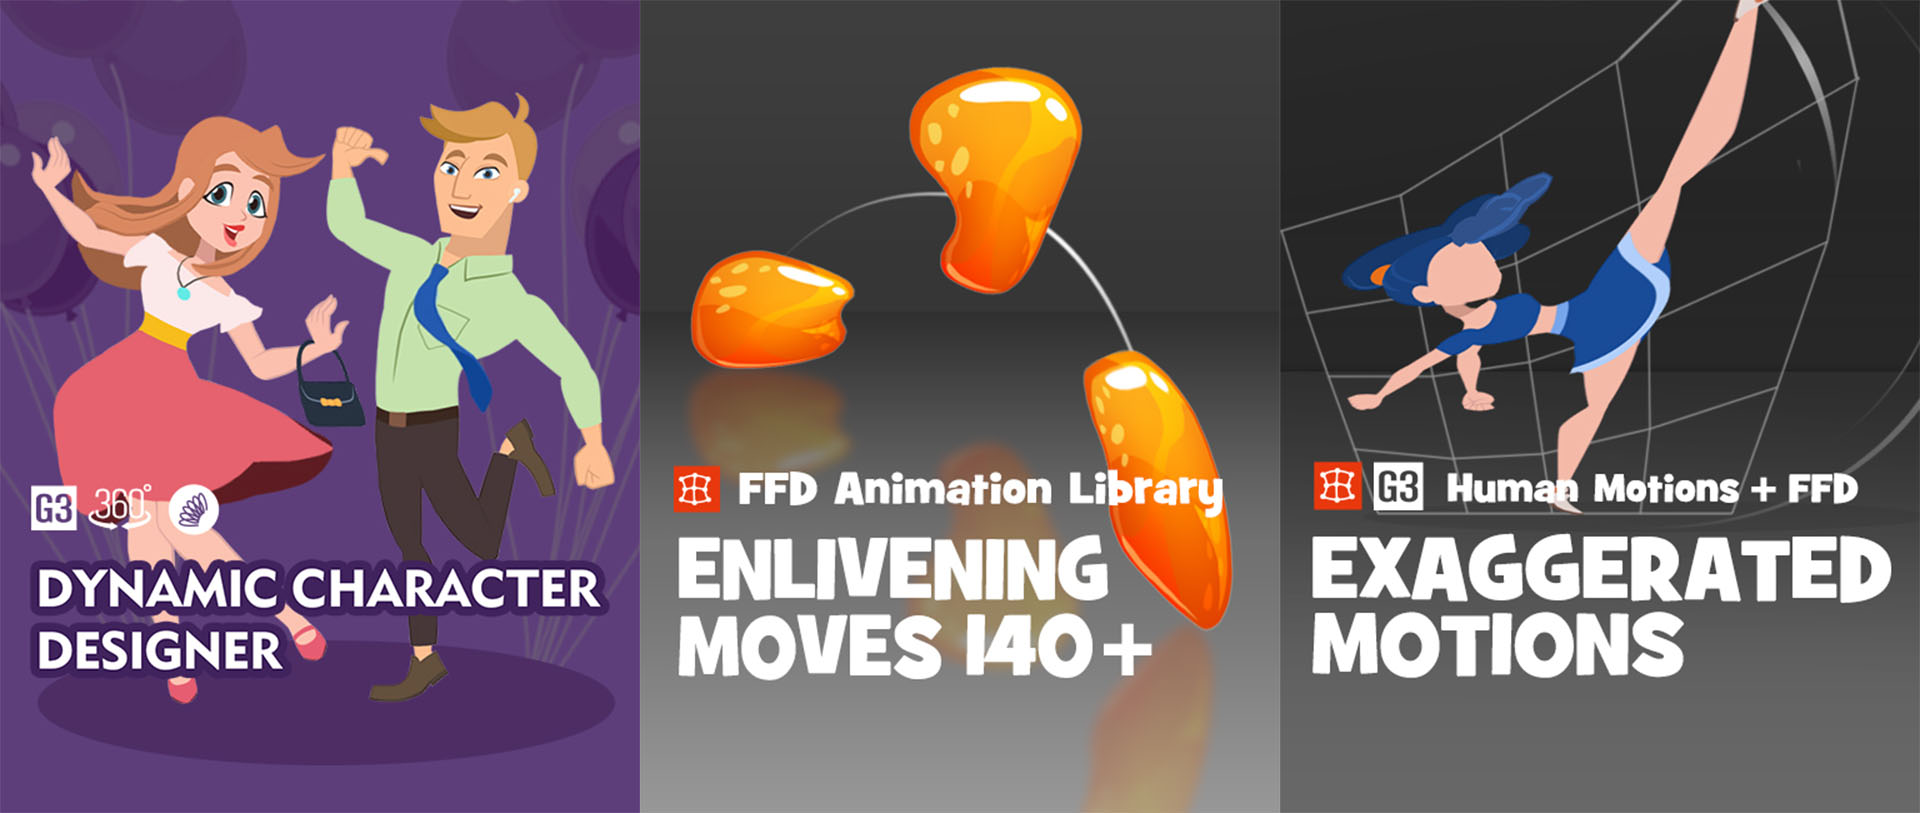
FFD can easily exaggerate motion by simply moving the bounded lattice points. With 109 FFD presets and customizable timeline keys, designers can create cartoonish effects like squash and stretch, anticipation, and exaggeration. FFD presets can be dragged and dropped onto static objects to make them come alive.

New Features

  • By adding FFD to existing animated 2D characters, designers can accentuate different parts of the animated drawing by moving lattice points and adjusting intensity levels. 
  • FFD keys can also be exaggerated by using transition curves in the timeline or deployed with pre-made FFD templates to instantly enrich existing animation.
  • 36 squash and stretch presets in the FFD Editor can give a cartoonish style to any type of animation.
  • The asset library is updated with free G3 Human motion files containing adjustable FFDs.
  • Multiple FFDs can be additively stacked to fine-tune exaggerations and deform with precision.
  • FFDs can be dragged and dropped onto photos and vector graphics to make them come alive and emote.

Vector Graphics

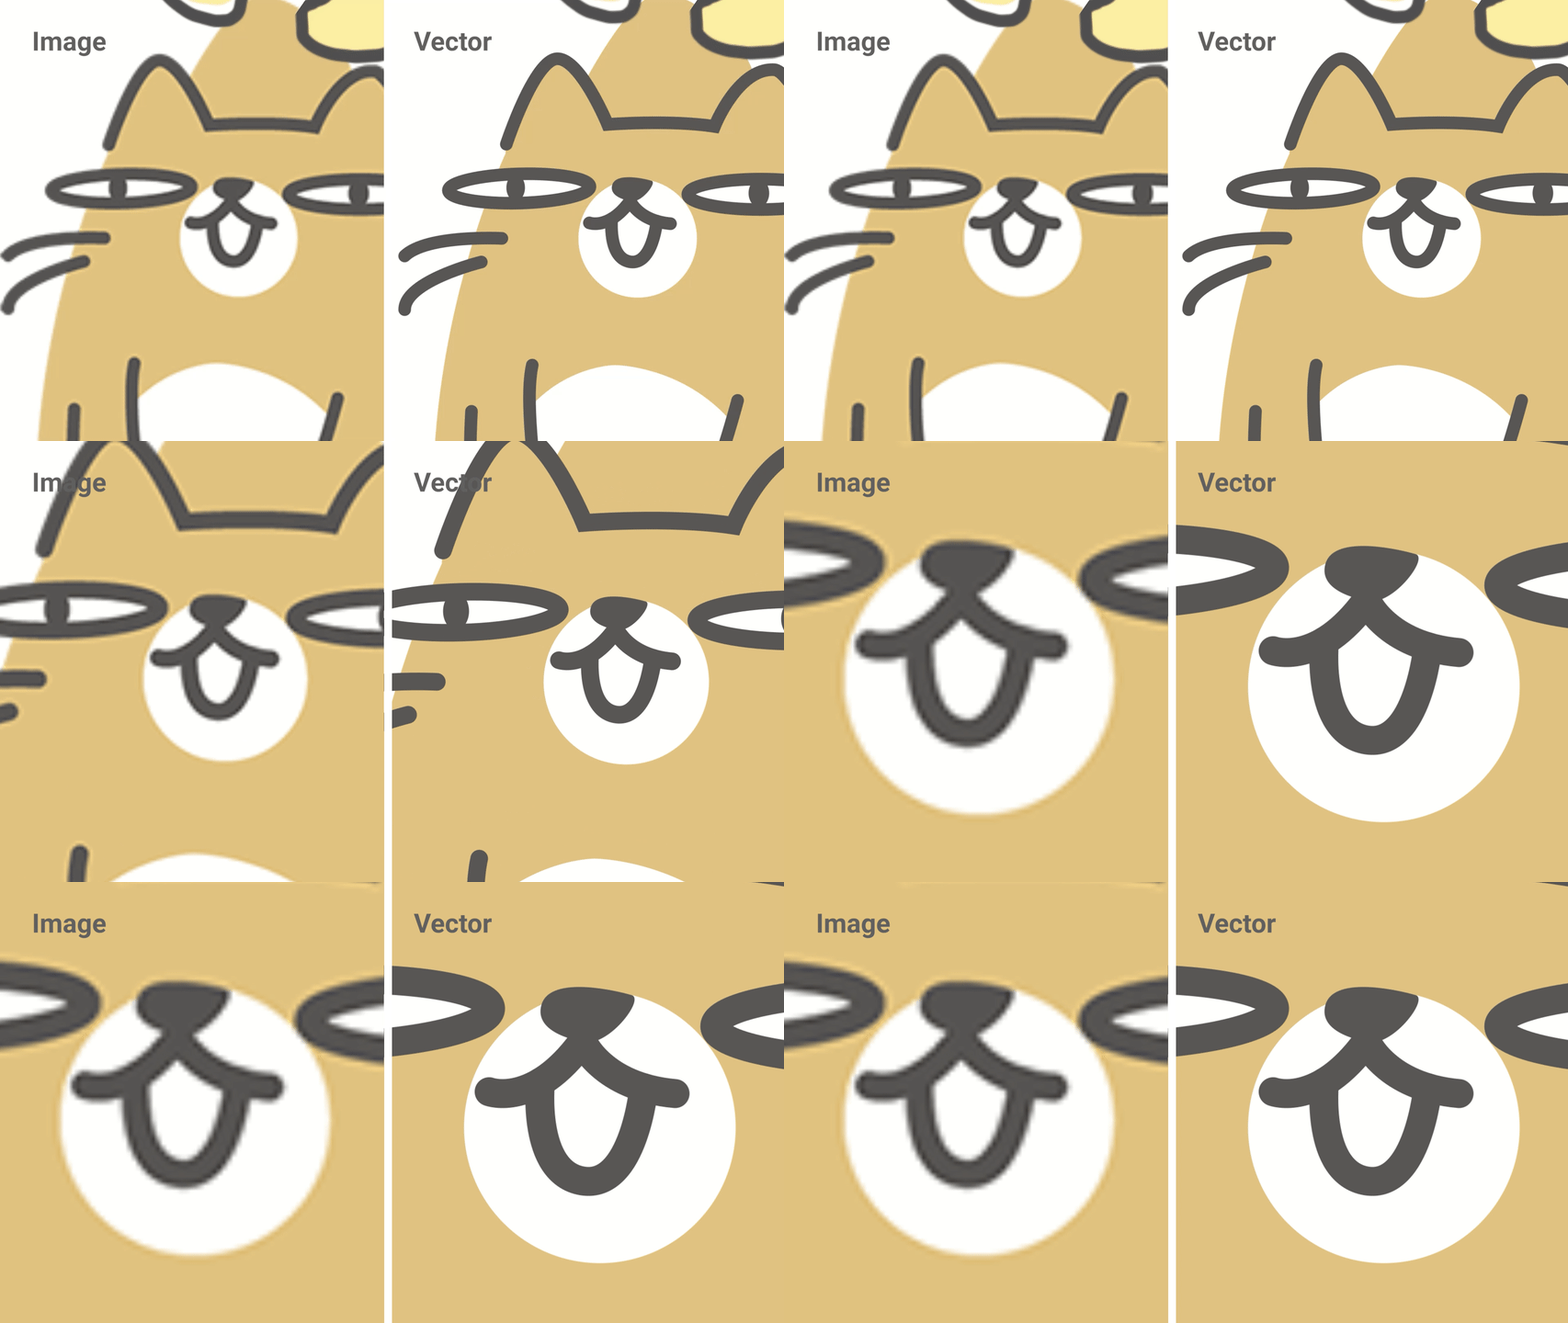
Vector graphics support lets users import widely available SVG vector assets to CTA5; whether they are downloaded from stock image sites, or custom created with Illustrator, CorelDRAW, or other compatible tools. Unlike raster images that allocate file size to store pixel data, you can zoom in and out of vector graphics and still enjoy a picture quality that is both crisp and sharp. There is no better way to build a large scene than with vector graphics that can be scrolled, zoomed, and navigated throughout.

New Features

  • Vector Grouping Tool gives designers the power to define color combinations and opacity settings, letting users set color options for any vector object or sprite character and create various looks in a snap. 
  • Adjustable coloring for entire groups that do not break the cohesion of custom color schemes. 
  • Color grouping and opacity settings can swap clothing styles and even adjust cuts of clothing.
  • Any visual style can be realized with the aid of spline curves, line styles, gradient fills, and vector layers. 
  • New tools make it easy to animate sketches, line art, fashion designs, and photo-realistic images. 
  • Vector graphics of various formats can be converted to SVG and imported into CTA for a variety of applications. 
  • Color Grouping Tool automatically bands together elements and defines associated vector groups for effortless color change. 

Smart Content Manager

Smart Content Manager lets users one-click install purchased assets and free designer resources. Artists can easily search and browse personal works, upload, and download items to and from their online inventory.

New Features

  • Newly purchased assets from the Content Store, ActorCore, or Marketplace automatically sync to the Smart Content Manager during checkout and are immediately accessible in CTA.
  • New purchases download and install directly within the application.
  • Marketplace trial assets are directly downloadable from the Smart Content Manager.
  • Content of any type can be searched and filtered by category, keywords, and tags.
  • Content can be found based on user-defined categories: project, genre, usage, abbreviations, and more.

Complementary Paid Assets 

To fully take advantage of CTA5’s powerful new features and see what CTA5 can do, make sure to look into this new series of content releases.

Know more about Cartoon Animator 5:

2D Animation Software for Cartoon Maker | Cartoon Animator

FREE for 30 days, and get 1,700+ ready-made content:

2D Animation Software Download | Cartoon Animator

The Making of He-Man VS Skeletor with AccuRig, Character Creator, iClone and Unreal Engine

Based out of Los Angeles, California – Taiyaki Studios builds avatars and avatar collections optimized for Tiktok and YouTube content creation. They help to build a community of virtual creators across all genres and platforms by educating, collaborating and honoring their hard work. Whether you’re using Unreal Engine, Unity, or never touched 3D at all, Taiyaki Studios can help you learn and grow in the world of virtual production and audience building.

Taiyaki Studios also partners with select creators to help them build and design custom avatars and universes with their staff of highly skilled 3D artists, animators and tech wizards.

Cory Williams

In July of 2022, Cory Williams – Unreal Engine Technical Artist at Taiyaki Studios animated one of his favourite childhood toys He-Man in an animated short film, by use of photogrammetry, clever rigging, motion capture and Unreal Engine.

His first video proved to be a wonderous success with audiences, who were amazed at the smooth animated results delivered onto a renown plastic figurine.

Both Mr. Yaki and Virtual He-Man were created by Cory. With voice acting, cinematography and animation all performed by him using an Xsens MVN Link motion capture suit, Manus Prime II gloves, an iPhone X (Apple AR Kit), iClone 8 and Unreal Engine 5 (UE5).

After the introduction of Reallusion’s free AccuRIG tool, Cory decided to one-up himself by introducing a second well-known character – but this time using a much faster and easier process.

In the end, He-Man battles his long-time nemesis Skeletor in an epic dance-off that was possible thanks to Blender, AccuRIG, Character Creator, iClone, and Unreal Engine 5. Enjoy!

Now, the Making of He-Man VS Skeletor might sound like a daunting task to many… and rightfully so. But Cory has been able to distill the process into an easy to follow process that involves a collection of new and powerful tools.

His original step was to take many pictures of his characters with an iPhone in a process known as photogrammetry. But Cory was able to enhance that process by purchasing a portable scanner known as a Revopoint MINI, which he used to scan his Xsens character for a test, prior to scanning Skeletor.

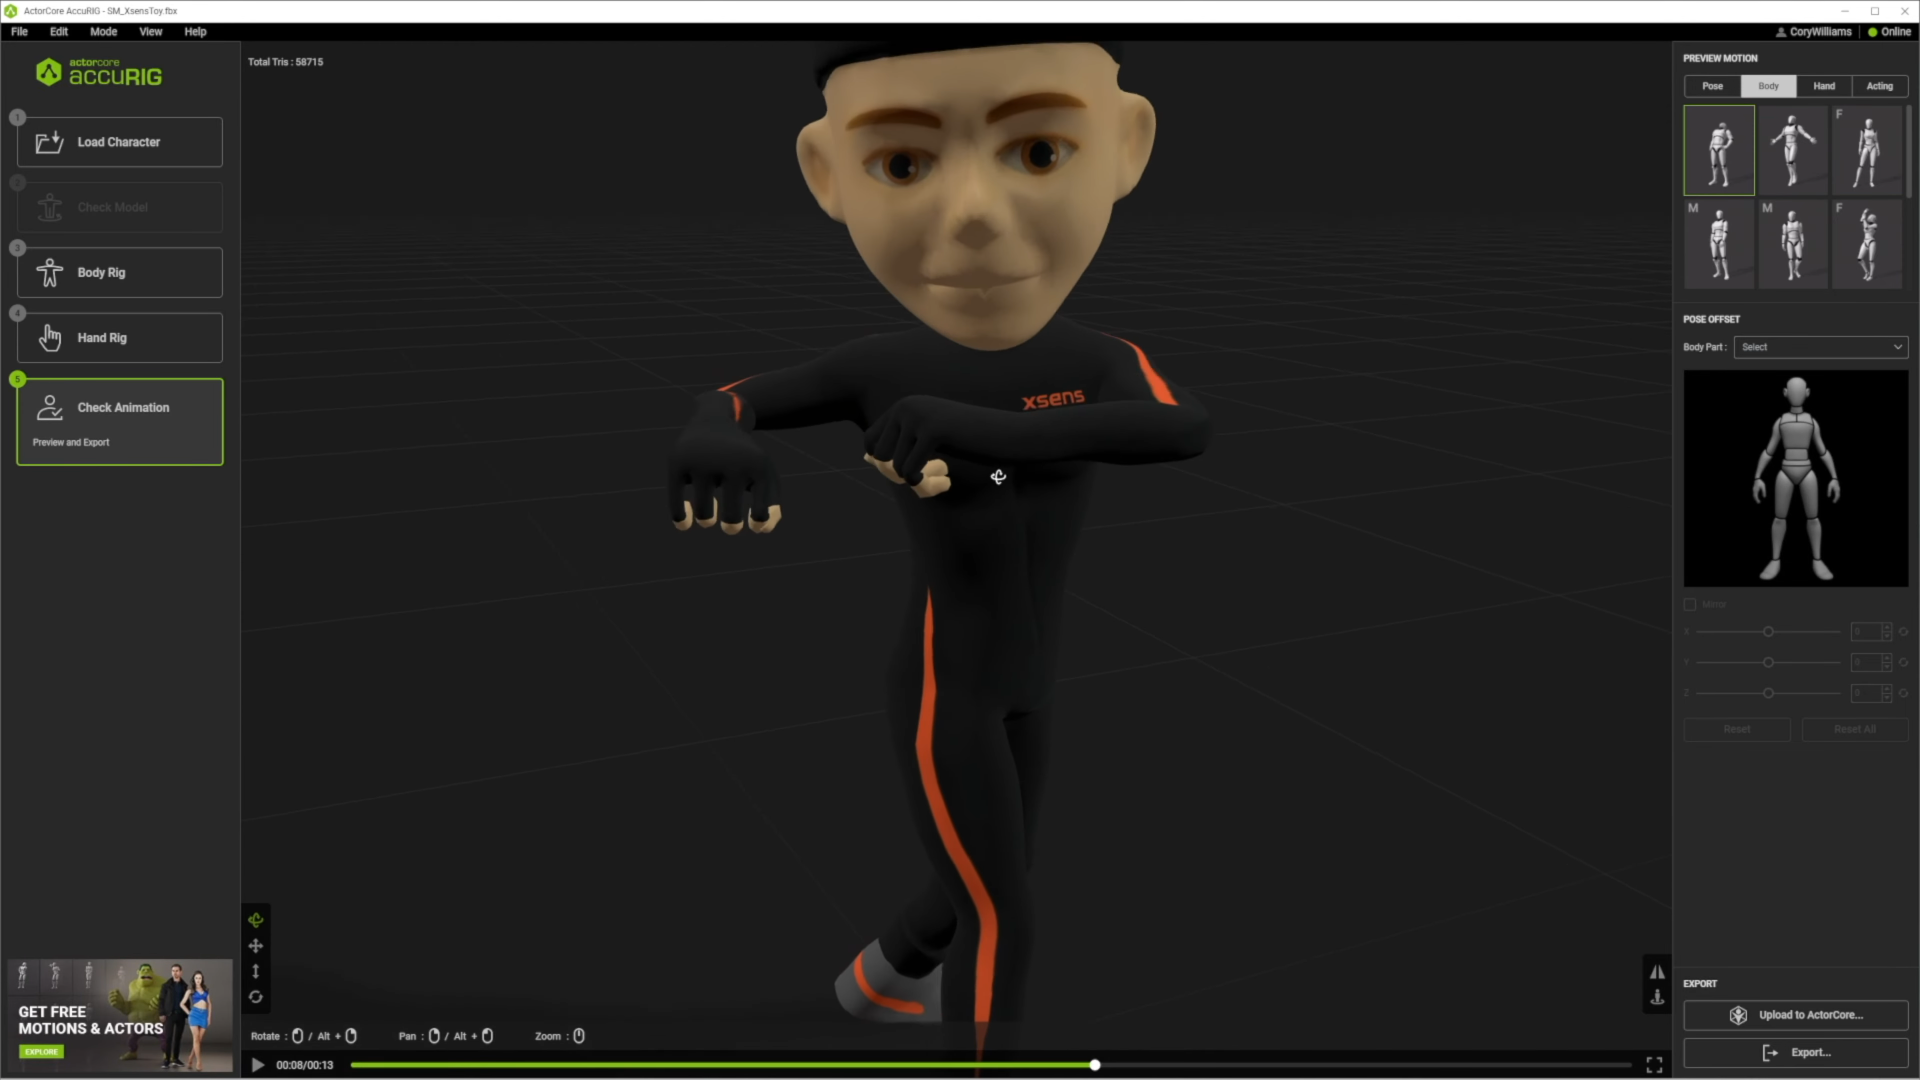
Next Cory used his new secret weapon — ActorCore’s free AccuRIG tool to import the scanned FBX character and auto-rig it for full body and finger animations. This process takes about 15 minutes and is perfect for working with all kinds of static poses and well known 3D character rigs, to later export as FBX, which you can even test and correct for mesh deformations caused by motion stretching.

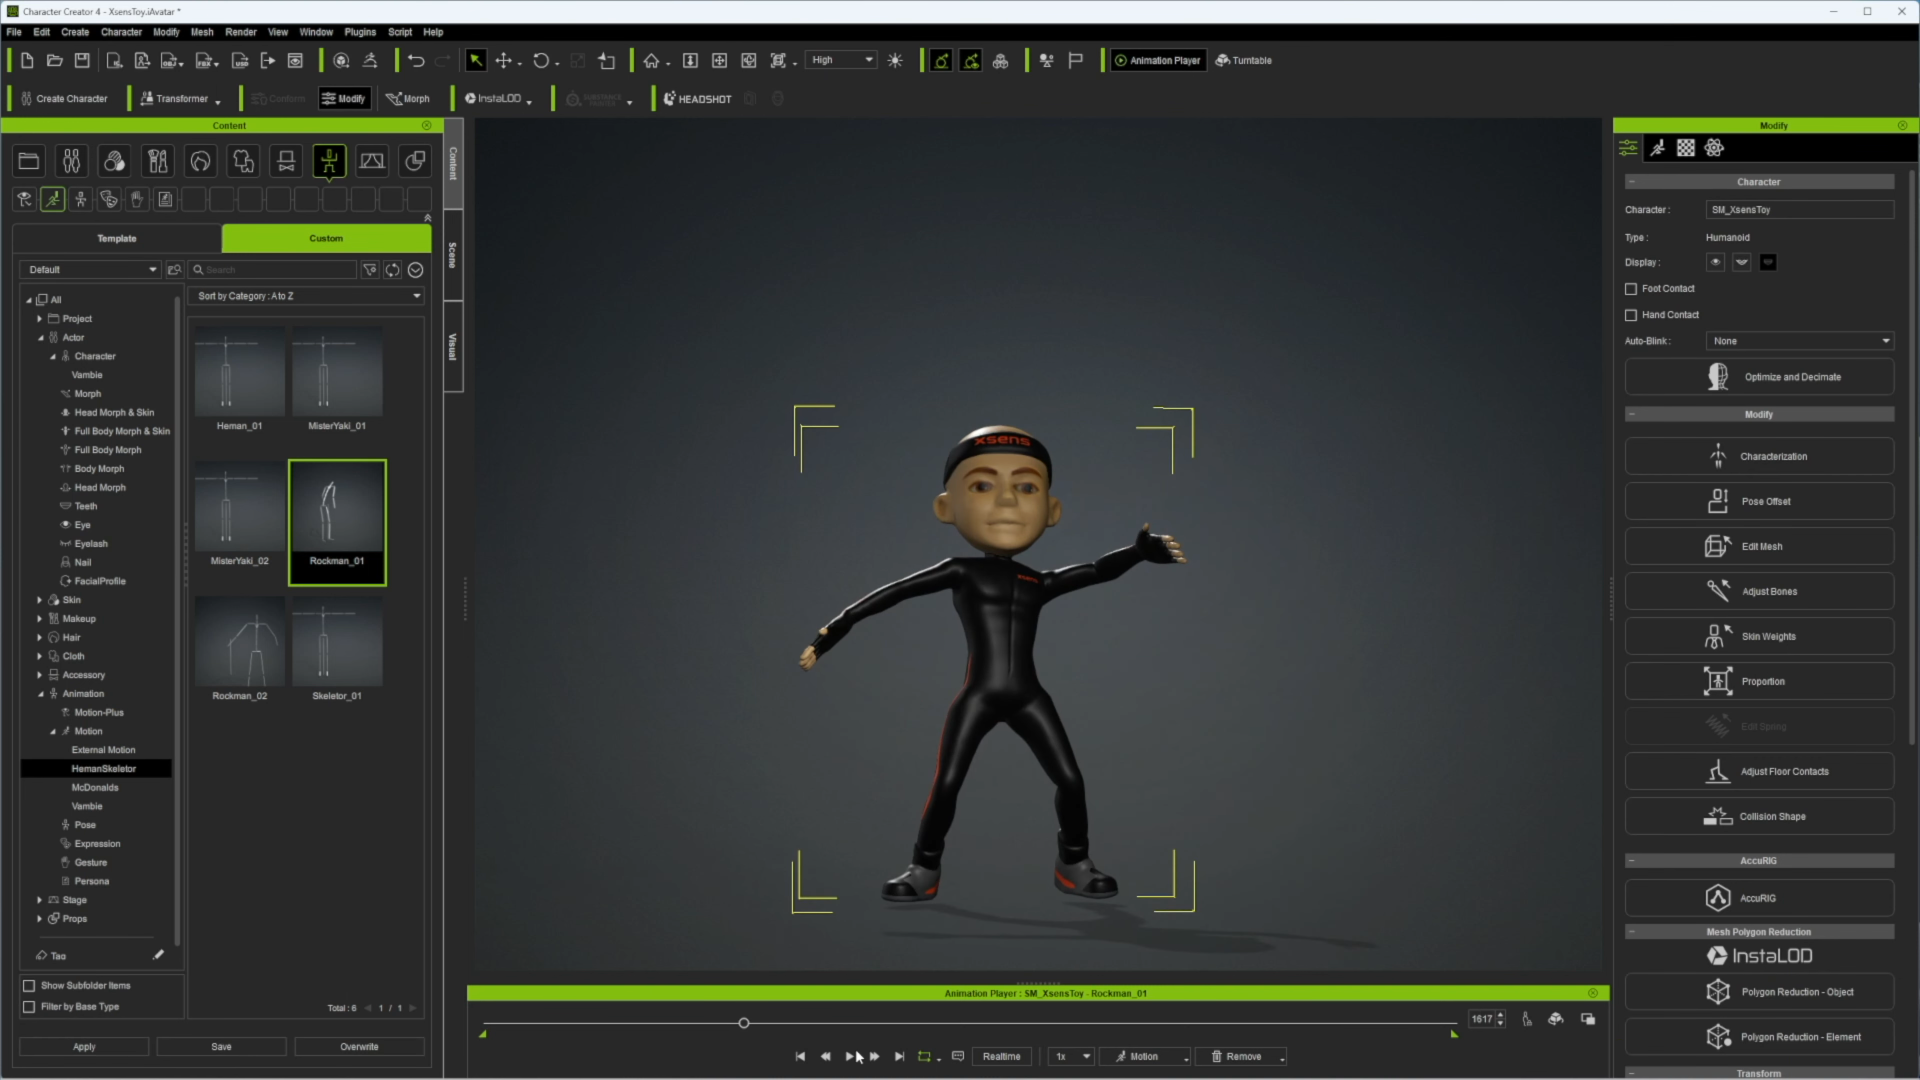
Then Cory used Character Creator 4 to import his new AccuRIGGED character to test and add custom dance animations he captured with his mocap suit, including individual finger tests which AccuRIG definitely rigs for. Inside Character Creator you can even do specific characterizations for non-standard 3D characters which will allow you to work with any specific motion you design through your mocap suit.

Once you know your character is ready, Cory starts production by doing all the voice recordings, and animations for each character. Amazingly he does this all by himself, which gives him a mental picture of each character’s gestures, nuances and performances.

When the custom 3D animations are ready, they are brought into iClone 8 with the auto-rigged characters. Now there is a reason why iClone is used instead of going straight into Unreal Engine, because iClone allows you to correct any offset motions that are much easier to fix in iClone rather than Unreal.

iClone is especially useful when you really want that high quality feel in your performances where you want to do small motion editing like on hand gestures in specific timeframes.

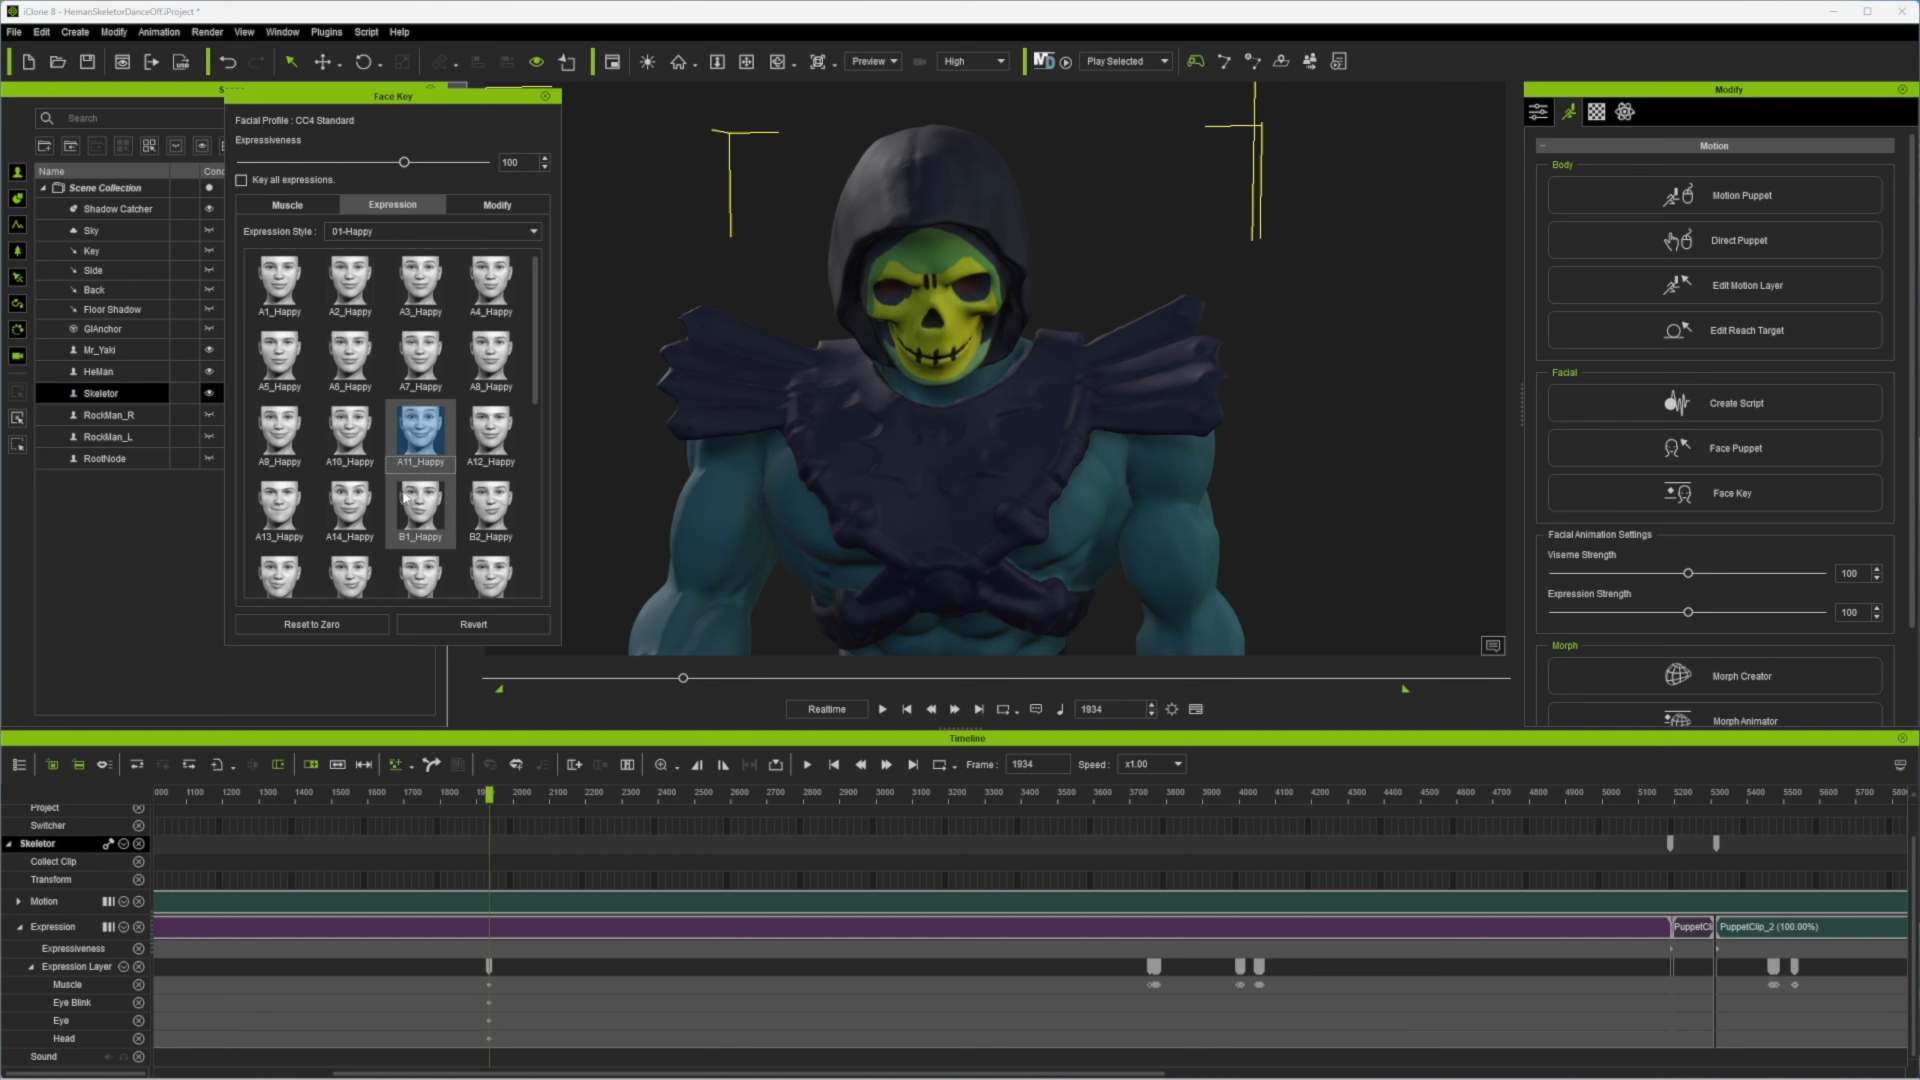
For example: you can easily adjust any facial expression or lipsync on Skeletor (if you are not using a face mocap device), or if the Mr. Yaki character needs to look up because he is missing the mark of He-Man’s face, then with iClone you can easily correct this by motion editing any specific track for face, eyes, hands, and fingers.

Finally, Cory adds everything into Unreal Engine to start setting up his shots by creating a level sequence, synchronizing everything with his audio wave forms, positions and 3D animations, cameras, lighting and any special effects! Done!

Follow Taiyaki Studios:

Website:
https://taiyakistudios.com/

YouTube:
https://www.youtube.com/c/taiyakistudios

Twitter:
https://twitter.com/taiyakistudios

Natural MetaHuman Control using iClone

Intro

My name is Petar and today I’ll be showing you my workflow of animating MetaHuman with the latest iClone tools. As iClone has updated to version 8.1, there are plenty of new animation features to improve your MetaHuman Animation. In this showcase, I am building everything from scratch, but you will see my sharing with the use of Rokoko SmartSuite and learning how to deal with motion capture data. Let’s see what we made and work toward that.

Scene preparation in Unreal Engine

Before we jump into motion capture we should do some block out of our scene or have already the final scene where we’re going to place our animation. We made a simple scene with a few things in the background, and our main props which include a chair, a table, a few lights, and a laptop. It’s good to have some plans for what you are going to capture and how the environment is going to interact with it.

Set-up: Use the Metahuman Kit

Prior to jumping into iClone, be sure to download and install the necessary plugins. Reallusion provides you with the LiveLink plugin and Dummy models which are retargeted MetaHuman bodies. Just copy and paste dummies in your iClone content folders and copy and paste Livelink folders into your Plugin folders inside the Unreal project. The next thing on the list is to set up our MetaHuman blueprint so it can receive real-time animation data. There is a step-by-step tutorial on the official Reallusion youtube channel so be sure to check that out. Once we are done, we are ready to animate.

Motion recording in Rokoko

Once done with a motion capture session, we made a few tries so we can pick the best one for the job. We will use Rokoko to post-process effects on our data to get a much cleaner export to iClone. I always use Locomotion and Drift fixes just to be sure that weird noise in data is processed. Once we are done with the effect we can export our animation as FBX. iClone also provides a Rokoko Profile for iClone which allows us to stream data directly onto our character.

Overview: use iClone as your main 3D animation software

Before we do any work, let’s see the iClone user interface and tools we’ll use. On the left, there’s Smart Gallery and Content Manager. It is an intuitive and streamlined library for managing the various iClone 3D files such as models, animations, and everything associated with a project. On the right side. The Modify Panel contains adjustable parameters that belong to the selected object. It contains the main and powerful animation tools that we’ll use. Timeline is your main playing area, where you can mix animations, set keyframes, filter, sample, and so on. iClone 8 got major timelines upgrades and my favorite is the ability to have independent channels for every bone and morph target. This comes in handy when you want to polish your animations. The great thing that works with timelines is Curve Editor. For the ones who are not familiar with curves, it’s basically just a different interface of keyframes and a much more initiative way to inspect and edit your animations once you grasp the concept.

iClone 8 Highlights: Animation clean-up

Let’s talk about Reach Target, one of my favorite tools in this 3D animation software. Instead of setting several motion layer keys to reach a character’s head, hands, feet, or target object, you may use a Reach Target key to easily accomplish this animation. What it does is, when you set a target, iClone uses IK from your body to align animation.

In the timeline, you can set the transition type and duration when the reach target will be activated or released. In our project, we use it when our character pulls a chair, lays down their hands on the table, or grabs the laptop.

Next, we use the Curve Editor to inspect some jitters in movements and try to locate them. Using curves you can easily spot areas that need fixing. We delete the selected keyframes, set tangents, and smooth out a little bit. Be careful not to smooth too much, you may get a really generic movement then. To edit animation you can head to the modify panel and use the Edit Motion layer. A window will pop up with a bone picker and FK and IK options. Click on bone, select mode, and adjust animation. To spot pop-ups in the Curve Editor, it takes a little bit of practice but the basic principle is searching for spikes. Curves should be mostly smooth with some little noise. Any sharp spikes that break patterns are errors we need to fix.

In the end, we can animate fingers. iClone provides you with a great number of poses called Gestures. You double-click on them in Content Manager and they will apply to your body. You can use more Gestures, mix them, and set transitions for smoother animation. Once you are done animating fingers, you can adjust them manually to fit around your props.

Facial animation: animate lip-sync and facial expressions

There are a number of different tools to animate our faces. I’d like to start with mouth first, so I’m gonna use the one and only, AccuLips for lipsync animation. AccuLips feature for you to convert voice to readable text, and align the text to the audio waves to ensure the correctness for generating accurate visemes. Once I imported my audio and AccuLips will generate the text from me. I’ll modify and fix some words. After the talking animation is applied, you can still edit it and tweak individual visemes and their strength, smoothness, and moods all while being in the timeline.

Once I’m finished with AccuLips, I laid down a layer of live facial animation. For that I’ll head to the motion live plugin, connect my iPhone and capture the animation. Be sure to make a mask to exclude the mouth and jaw since they are influenced by the AccuLips. I’ll also set some smoothness and record my animation. This will give me a great start for animating the rest of the face.

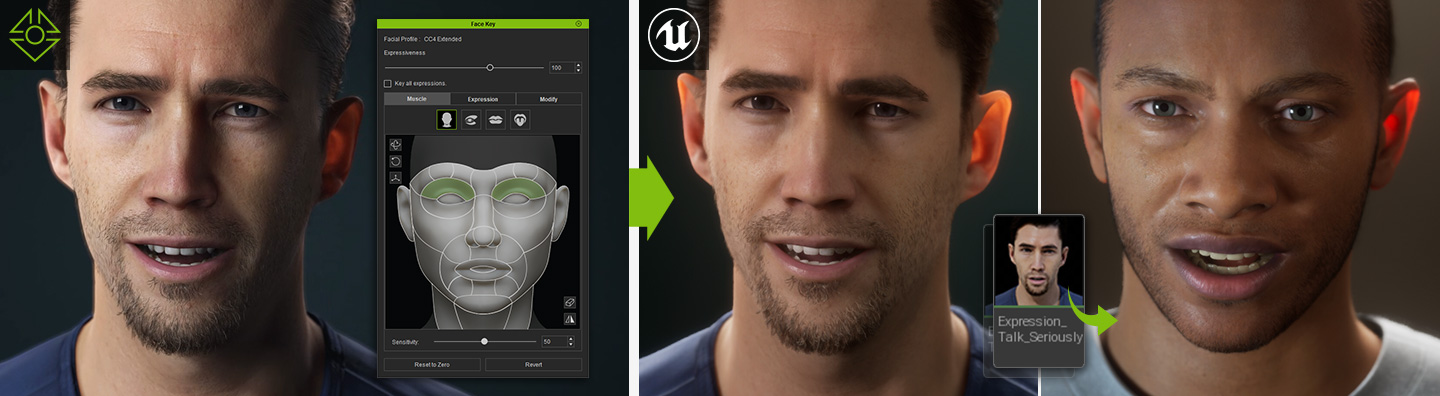
For additional editing, you can use the Face Puppet System or Face Keys Systems. Face Keys are basically manual keyframing with an awesome bigger interface. They can be used to emphasize some crucial facial expressions while using a puppet system is great for a neck, in this case. Using a puppet this time, you play the animation in real-time and move your mouse cursor to increase or decrease the strength of the movement.

Bonus: AccuRIG

New stuff worth mentioning is Reallusion is the new AccuRIG: it lets you easily rig any character. Why is that cool? Because Reallusion expects iClone for animation and AccuRIG has a library of high-quality animation called ActorCore, allowing you to purchase motions, put on your character and mix and edit character animations in iClone. iClone is really becoming a one-stop solution for animating characters!

iClone 8.1 Highlights: Transfer character animation data to Unreal Engine

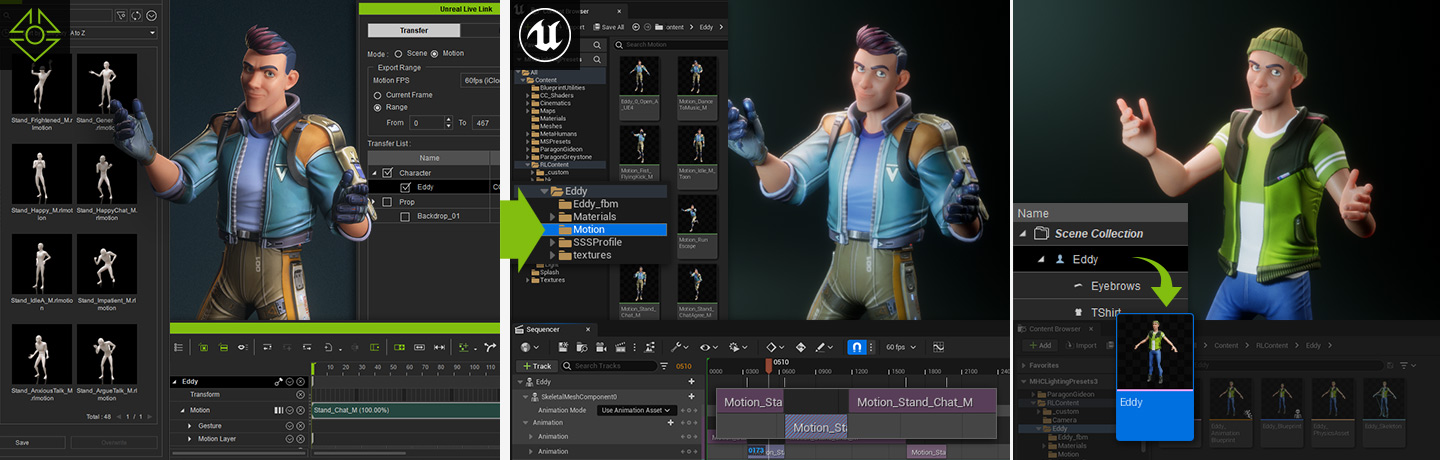
Once we finished the animation, it’s time to get it to Unreal Engine. There are a few options you can use, like exporting FBX or using the iClone Unreal LiveLink plugin, the one we are gonna use it now. Open take recorder in Unreal, select your actor, and record. It’s a really fast workflow. In Reallusion’s iClone 8.1 update, there is a major update. In the past, you could encounter some frame drop issues while using Live Link. Quite frankly, juggling between apps not only increases CPU loading but also causes a drop in productivity. However, with iClone Unreal Live Link starting to support timecode sync, it makes sure the motion data is always sent out in the full frame. Making the recording process less painful.

Making cloth simulation

When the export is finished, our animation will be saved. For this showcase, we are gonna use Simulation on our clothes so we need to export our MetaHuman so we can import a Marvelous Designer. We’ll make a new level export whole blueprint of MetaHuman. Then we open Blender where we’ll import our MetaHuman and all other animated props that we’ll be needed for collision.

Lastly, I export everything from Blender as one alembic one and import it to the Marvelous Designer, run the simulation, and export as OGAWA Alembic.

Conclusion

Reallusion’s iClone is truly a one-stop solution for Unreal MetaHuman animation. From my experience, it is best that you have a clear concept of how you’d like to tell your story and start with a nice script. Once you have passed the concept stage, then you will need to learn how to build your technical pipeline with the needed skills. Luckily Reallusion had incorporated all its official tutorial and learning materials online at a combined portal called Reallusion LEARN. To help, let me also share the webpages that I have mentioned in this page, so everyone can also learn and create as I did!

Animate MetaHuman | https://www.reallusion.com/iclone/live-link/unreal-engine/metahuman/default.html
Rokoko SmartSuite | https://mocap.reallusion.com/iclone-motion-live-mocap/rokoko.html
Animate Facial Expression (Face Key and face Puppet) | https://www.reallusion.com/iclone/3d-facial-expression.html
iClone | https://www.reallusion.com/iclone/default.html
Curve Editor | https://www.reallusion.com/iclone/animation-curve-editor/
Try iClone MetaHuman Kit | https://www.reallusion.com/iclone/live-link/unreal-engine/download.html

Follow Petar:

YouTube | https://www.youtube.com/channel/UCQ8v3H6fBsNB8QPkAlvqriQ/featured

Learn from Winners : Animating Korean Justitia with Cinema 4D, Character Creator and iClone

Hello, I’m Seungchan Lee, an NFT artist who is active under the nickname Leesaek. I am a professional designer who is working on various late-stage graphics such as synthesis, motion graphics, VR, etc. at the same time as producing personal works.

Sometimes working on NFTs, it’s fun to meet with the buyers, so I continue to study and learn new things to improve and perfect my personal work. As a hobby, I spend a lot of time watching movies. As I like movies, I am very satisfied with my work on graphics related to video.

A few years ago, I was very impressed by the Netflix series LOVE DEATH + ROBOTS, and since then, I’ve been working in this field, studying 3D graphics tools and doing personal work after work hours, and I think I’ve come closer to my goal of making short animations like LOVE DEATH + ROBOTS. I will continue to study for personal NFT artwork and short animation production goals.

Part I. Winner Entry Workflow

Step 1. Reference Search

I spent the most time searching for references during the process of working on the ‘Goddess of Justice-DIKE’ project.

I thought it was most important to decide gender, age, story, concept, etc. when creating a character, and after deciding which character to make, it took a long time to decide on the costume of the character, space for the character, and pose of the character.

Step 2. Character Creator

I bought Character Creator (CC) and tried making a test character. With CC, a lot of the elements to think about when a character was already set. So it was possible to do morph work on all the parts, and since it was templatized, I only had to pick the parts I wanted, one by one.

Step 3. iClone

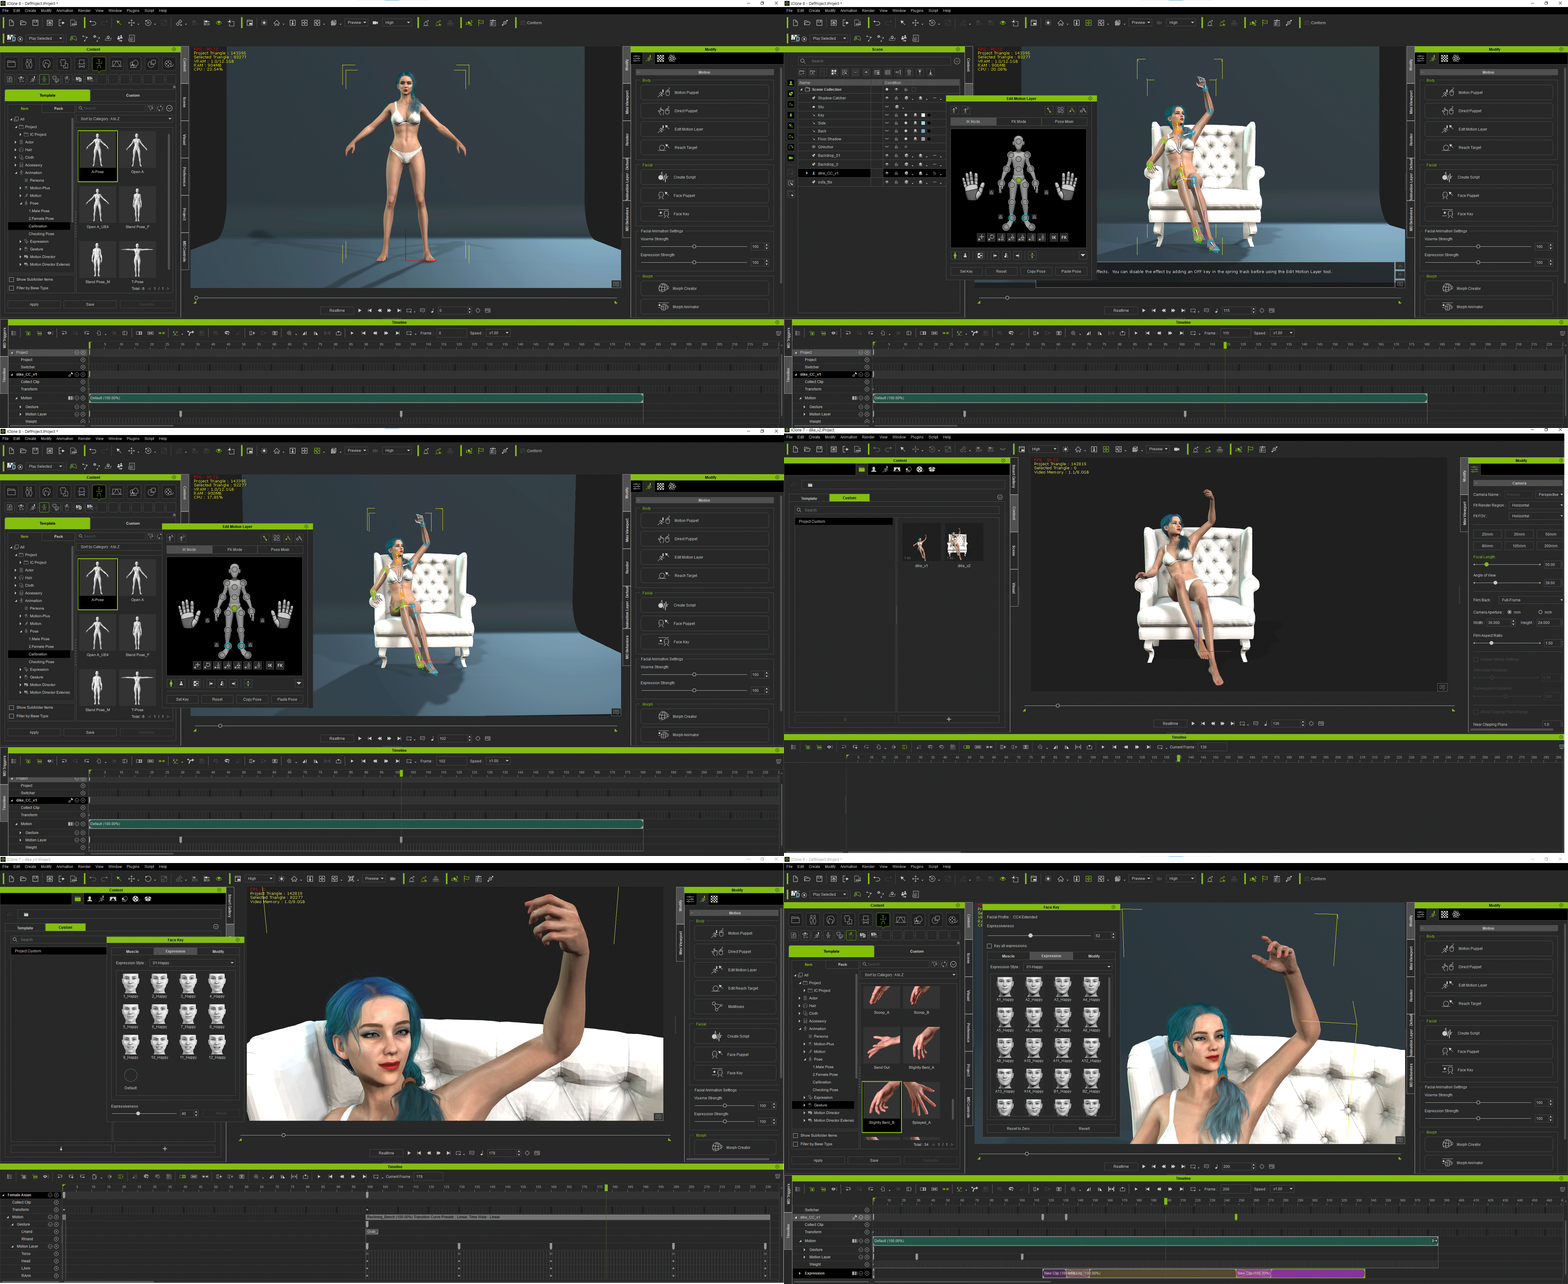
iClone is quite intuitive for character animation, especially facial animation, so it didn’t take as long as I thought. In fact, there are very few 3D animations for ‘The DIKE’ character. In the animation where I posed and turned the character’s head, I simply added in a facial template and it was finished.

Step 4. Marvelous Designer

There were high-quality costumes in the Reallusion Content Store and Marketplace, but the character pose that I decided to make was sitting on a chair, so after making the costume that fits the character mood, we brought the animated character from iClone to create a character costume with natural wrinkles in the sitting position. For the texture of the outfit, the color map was produced in Photoshop after setting and snapshotting the UV map in Marvelous Designer.

Step 5. Cinema 4D

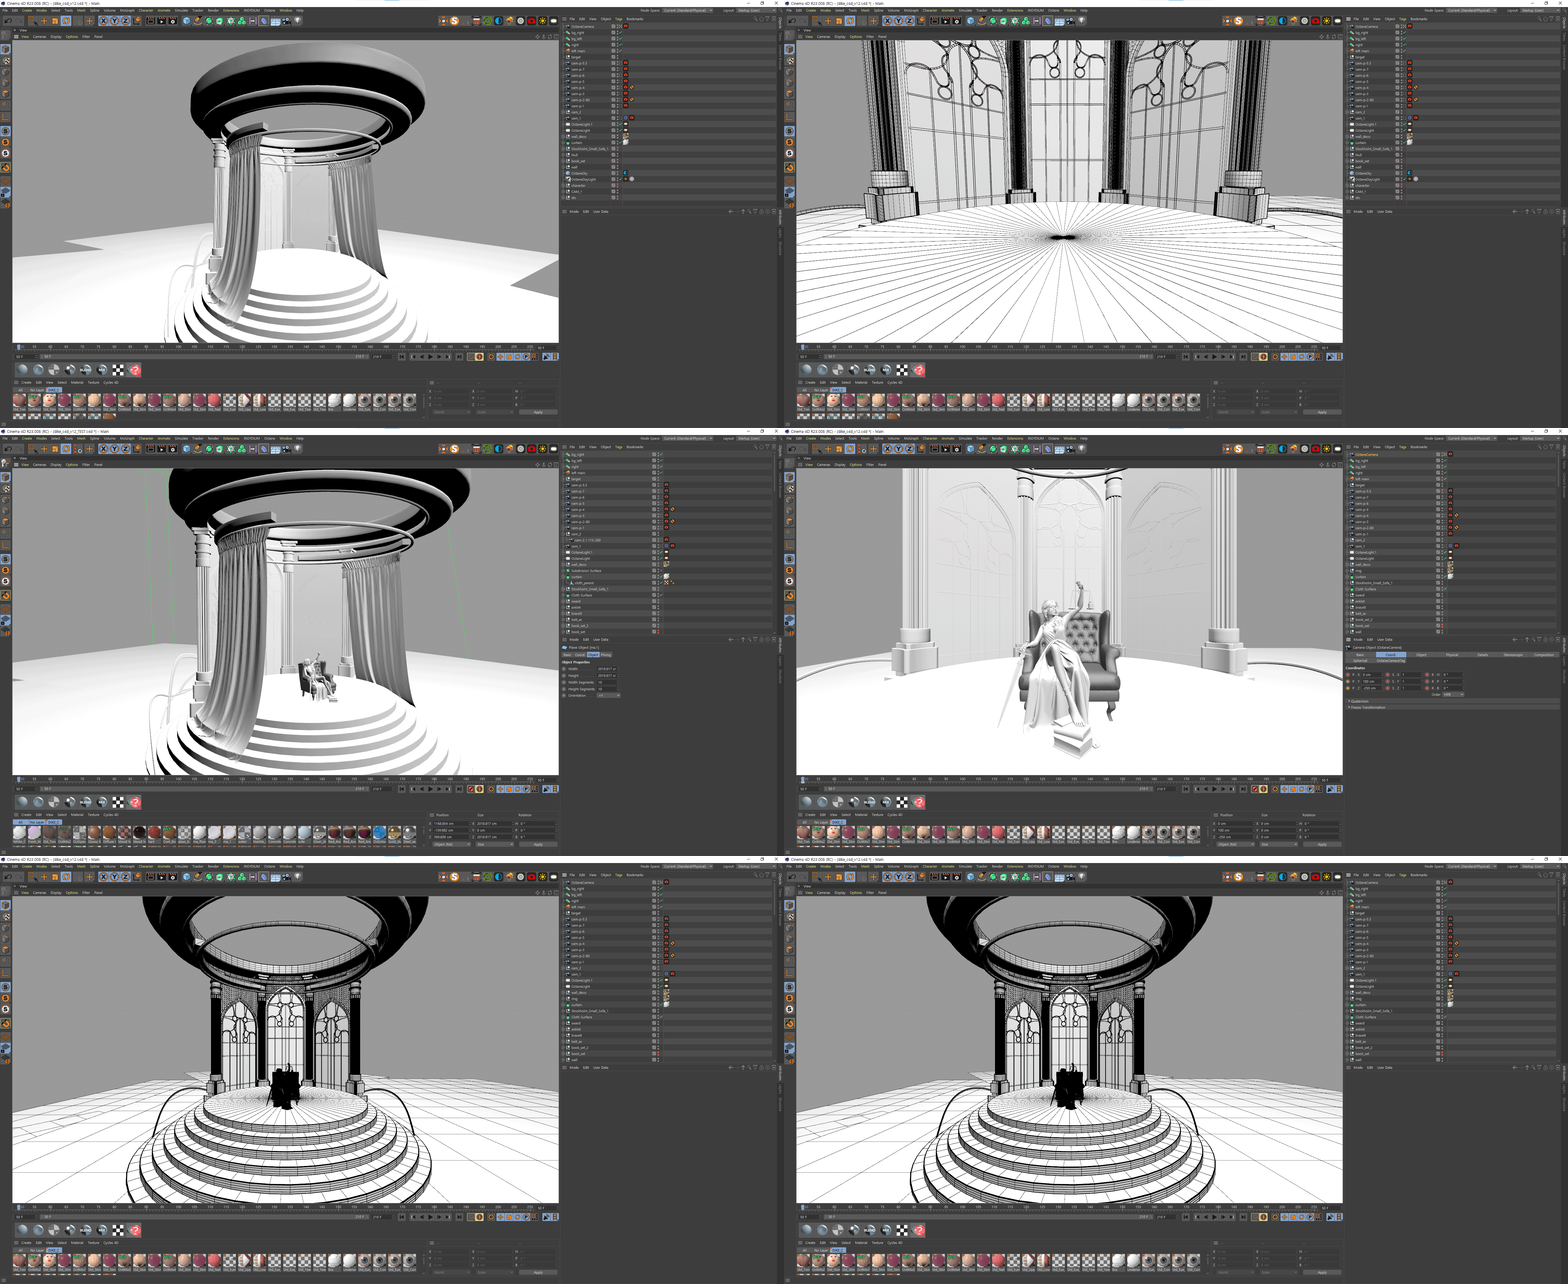
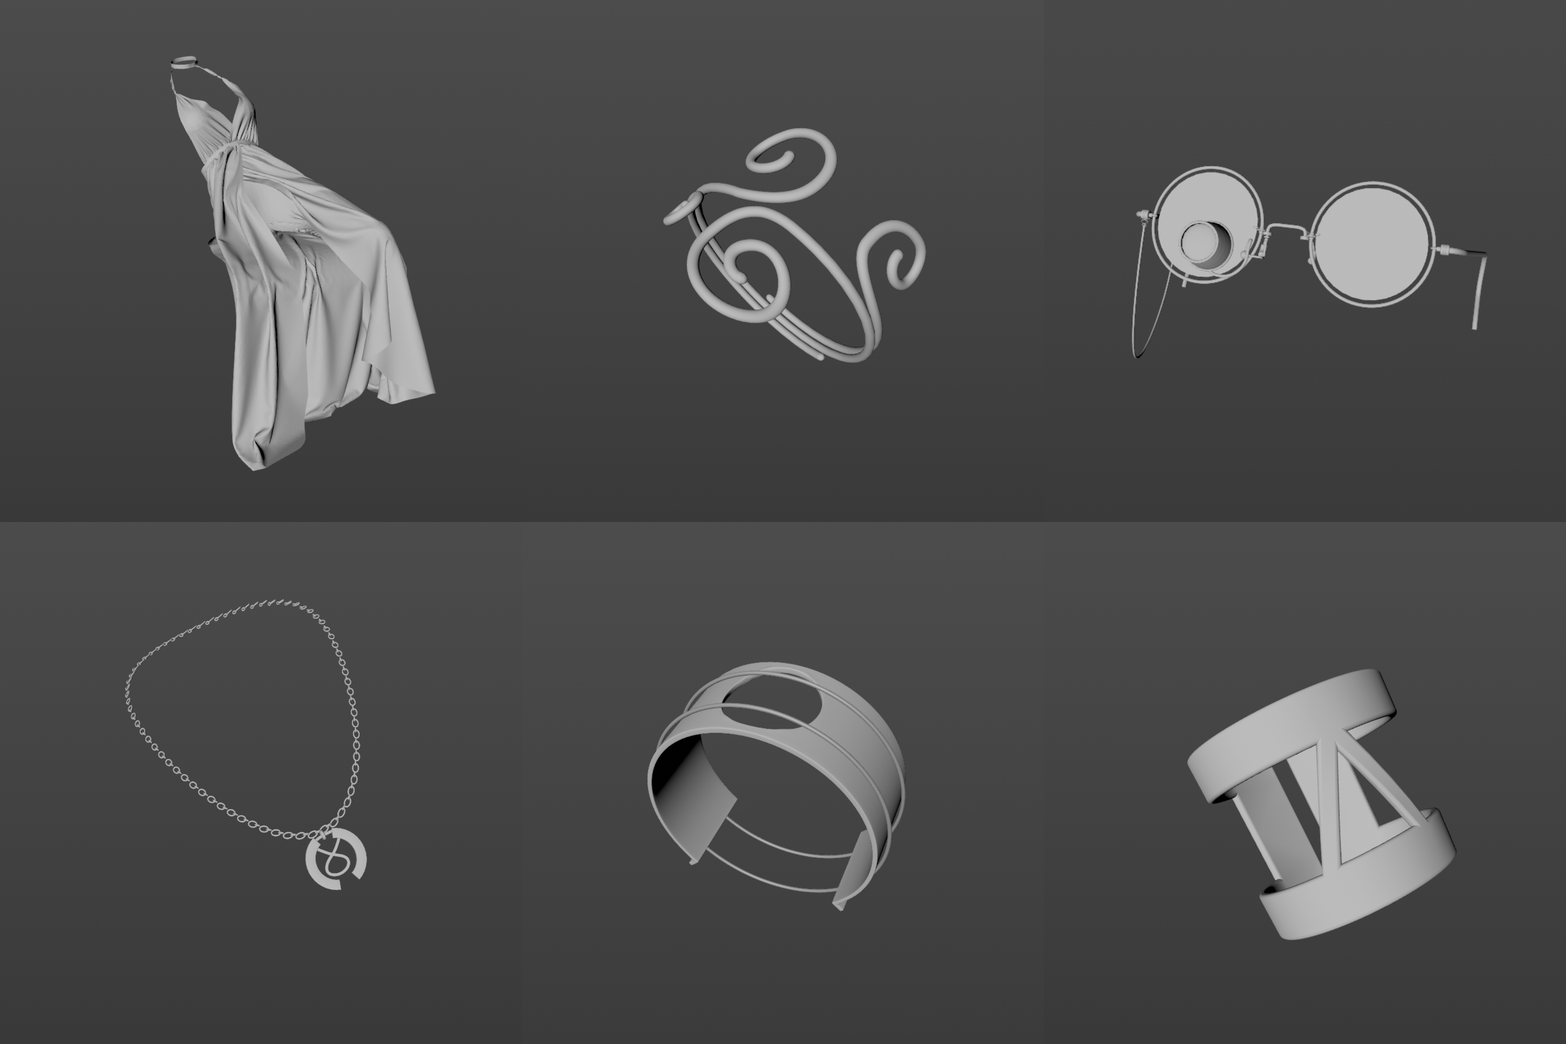
After combining the animated character in iClone and the costume in Marvelous Designer with the character in Cinema 4D, I modified the material of the skin in Octane Render, and then modeled and create the costume texture, background, character accessories, and other props in the renderer.

Step 6. After Effects

Compositing and post-processing were done on all images outputted from Octane Render in Cinema 4D. And since it takes a lot of time to render high quality in a 3D program, I improved the image quality with Topaz Video Enhance AI.

Part II. Feature story

Q : Hi Leesaek, thank you very much for sharing the workflow with us. First of all, congratulations for winning first place!

The Goddess of Justice DIKE has a very intriguing setup, from the character design to the surroundings, not to mention there’s an organ on the weight scale.

Could you share more of your artistic thoughts behind this project?

Hello!

The sculptures of goddess Dike are often loaded with symbolism related to courts, fairness, and justice. She holds a scale in one hand and a knife in the other and judges when justice is off balance. I infused the subject matter with modernity and mythical symbolism befitting of the character.

In other words, it’s a scene where Dike, the goddess of justice, is emanating luxury and materialism, weighing a heart and a dollar bill while checking for likes on (Korean) Social Networking Service (SNS), which is reminiscent of the theme in Netflix series Squid Game!

Interestingly enough, this “organ on the scale” setup also appeared in your previous work Value. Compared to DIKE, the banknote and the hourglass in Value reveal more clues to the audience.

It’s easily associated with organ trafficking which showed up in the survival drama Squid Game as well.

The previous work Value was made in the early days while studying 3D tools, and it is different from Dike, but it is also a similar topic. At that time, I was impressed by Vanitas still life paintings, and it touched me from the perspective of “life’s futility,” and I thought of time flowing in an hourglass, the time of labor, the time of life, and the heart being reduced by working hours.

Q: I’m curious about what kind of messages you intend to convey through these two projects?

The message contained in the two projects is simple. It’s a story about choice and priorities. It’s the priority of work and life, life and matter.

Q: Also, what’s the advantage and disadvantage of using Cinema 4D for modeling and rendering your design, including character creation and character animation?

It’s too much to talk about the pinnacle features of Cinema4D one by one. Among them, the reason I work with Cinema 4D is accessibility—I’m not good with English, so I have to use a translator for the software manual, and I’m watching a lot of tutorial videos on YouTube because I learn tools by myself. In this regard, Cinema 4D has a lot of materials online. If you get stuck while working, you can find a solution relatively quickly. So I use Cinema 4D, and there are a lot of renderer and sub-plugins that I can choose from, so I can work flexibly on the final output.

The disadvantage is that the use of external plug-ins may be relatively essential when working on a project that includes character and character animation. Cinema 4D will do the job, but I understand it takes a lot of time and effort, so the use of Character Creator and iClone can be a very efficient workflow combination!

Q : Working as a professional designer in your day job, doing motion graphics and compositing are probably second nature to you.

So what interests you most about being a NFT artist in your free time? Can you elaborate more about your good and bad experiences of meeting the buyers?

As an NFT artist, the charm of my work is that I create the pictures that I want to create, and as a career, motion graphics and compositing are largely based on the needs of my client and my boss, and at some point, I’m falling into mannerism. I can work with NFTs in a way that I want and I can freely put in messages, thoughts, and stories that I want to embed.

Making an NFT is very meaningful in that it’s a graphic that’s recorded as an original in a digital work, and that it’s shared with the buyer, and of course, it’s also meaningful in terms of purchasing a work. My work is not expensive, but there is a person who bought it with cryptocurrency. And the fact that I sometimes communicate with the buyer about the work is so attractive and enjoyable as a creator.

Maybe the temptation to start making NFT works as a commercial project will lead to a bad experience. With that said, I also became an artist at a time when NFTs were getting a bad reputation, so there were a lot of false messages and suggestions, and I hope the NFT market will go in a good direction.

Q : Does that inspire you to do more creative projects, such as Beyond Light which won second place in the Rhythmical NFT contest last year?

Please share with us more of your concepts behind its melancholic story with the theme of “Finding the happiest moment beyond the light”, and how you created it in Cinema 4D.

Thank you for asking about Beyond Light which is my first NFT work, and it has a special meaning. My stories and ideals are self-contained such as a story that is impossible in reality or a wish that comes true in a virtual world.

Most of the production was done in Cinema 4D and the rest of the compositing was done in After Effects after rendering using Octane Render.

Q : With good use of camera movement, you created a warm and magic moment in the Christmas Ball and Santa Works at Home. Both of them have great coordination on music and lighting.

I wonder if you began these two projects with music? Could you share three things that inspire you the most when you start a new project?

In both projects, Christmas Ball and Santa Works at Home, I wanted to create a motion-graphic with a warm atmosphere, so of course the music selection was important. When I heard about the theme of the contest, I started with a small story setting that came to mind on Christmas Day when the Corona virus was in full swing, which goes like this: 

In a cold country called Corona where giants and Santa Claus lived, a giant would leave presents for Santa every night that he worked tirelessly to prepare gifts for children.

I think the three things that inspire me when I start a new project are daily experiences, movies, and music. When I think of a keyword or subject in a movie or music, I write it down briefly. If I decide to proceed with the work, I will search for images on websites such as Behance or Pinterest.

Q : You mentioned that the Netflix series LOVE DEATH + ROBOTS motivated you to start learning 3D graphics tools. How did the transition of software upgrade impact your creations, for example, from CC3 to CC4?

Did you confront any hindrance? How did you solve that? Or did it give you new inspirations for your NFTs? What are your favorite features of Character Creator 4 and iClone 8?

I think LOVE DEATH + ROBOTS is a cool piece of work, the theme and the concepts are my favorite kind, and they are attractive characters. While working as a designer, I wanted to try it.

As I learned Cinema 4D, I was able to work on the background and motion graphics to some extent. However, there were many cases where I was disappointed in the character. So while I was looking for an easy way to make a character, I got to learn Character Creator, and I thought it would be good to organize a workflow to make a character from CC on the existing workflow with Cinema 4D and Octane Render. And fortunately, I entered the contest and won the award.

What I like about CC4 and iC8 is that it’s very intuitive and easy to use, and all the materials for character production are already ready. It didn’t take much time to work on the Dike character. It took longer to think about the identity, image, accessories, background elements, and character poses of the Dike than the actual production.

In short, the biggest advantage is that we can spend more time on what to make than how to make it.

Q : We’re curious about your next move; Are you planning to mix 2D graphics and 3D animations in your upcoming projects, just like the distinctive style of LOVE DEATH + ROBOTS?

I’m going to continue studying and working on my personal work after work hours. I need to practice more with CC4 and iC8. I’m going to continue working as an NFT artist even if I’m slow. And when I’m ready, my final goal is to make a short animation by myself.

Thank you for reading the long article!

Learn more :

• Leesaek on Behance https://www.behance.net/solelsc

• Leesaek on Social/NFT patfroms https://linktr.ee/SeungchanLee

• Character Creator https://www.reallusion.com/character-creator/download.html

• iClone https://www.reallusion.com/iclone/download.html

iClone 8.1 Feature Highlights

Following the buzz of iClone 8’s release in May 2022, the version 8.1 update introduces Unreal Live Link 1.1, and a brand new feature of Motion Director known as Snap to Surface. This release further empowers the popular “Animate in iClone and Render in Unreal” workflow with Live Link headlining features such as Scene Imports from UE5, iClone to Unreal Motion Transfer, and Timecode Sync for Full-frame Recording while iClone 8.1 presents a substantial upgrade for artists who desire to take final renders to the next level, thanks to the industry-only Subdivision Export for fully-animated characters.

Release notes: iClone 8 & iClone Unreal Live Link 1.1v

Unreal Live Link 1.1 – Watch More

Timecode Sync Recording – Watch More

Frame drops were a common downside of Live Link being heavily dependent on hardware performance — especially prevalent while live recording heavy data streams. Live Link 1.1 addresses these hiccups with the advent of timecode-based recording which transmits and records full-frame data, even on substandard system specifications.

Live Link Timeline Sync

Provides lossless frame-by-frame recording. Watch More

Recordable Live-Linked Items:

Character Animation, Facial Performance, Prop Animation, Camerawork, and Light Animation.

High-Performance Production 

Send multi-selected or a group of animated characters from iClone to Unreal Engine for full-frame recording and turn into Unreal Engine sequence files. Watch More

Two-Way Data Link – Watch More

Whether you want your iClone characters to interact with the Unreal scene or simply try to position them in the right places, you’ll benefit from the scene transfer feature thanks to the power of bidirectional data linking. 

Seamlessly adapt iClone animations to Unreal environment   Watch More

Unreal Scene Transfer 

Three different modes allow you to transfer your Unreal scene back to iClone to reposition standard re-editable meshes, merged meshes, or simplified/decimated meshes.

  • Standard (Items): Standard (Items): Keep separate items for the most accurate alignment. Selectively Show/Hide for flexible scene management. Supports landscape.
  • Merged (1 Mesh): Keep the high-poly for better performance and proper alignment.
  • Simplified (Remesh): Low-poly for the best performance. For large/far scenes sent into iClone as camerawork reference.

On top of scene transfer, Motion Director 1.1 Snap to Surface can constrain characters traversing across the terrain and adhere to elevations produced with a displacement map

  • Response to Terrain Height: Character moments can react to ground elevation. Watch More
  • Accurate Reach Target: iClone characters can seamlessly interact with the Unreal scene with the one-step target reach, motion layer editing, and smooth IK/FK transition.  Watch More

Motion Transfer and Animation Retargeting

Circumventing the long-winded process of exporting FBX models and motions from iClone to Unreal, iClone can now directly transfer selected models along with their motions to Unreal projects and turn them into animation assets that can be edited in Level Sequencer. These features offer a new avenue for animators looking to integrate iClone and Unreal in practical and intuitive ways. 

Direct Character Animations Unreal

Rapidly replace the iClone/CC characters in UE and retain the same motion assets on identically named characters.  Watch More

Motion Retargeting for UE Characters & MetaHumans

iClone motions are reusable on UE characters and MetaHumans via standard UE IK Rig and Retargeting process.  Watch More  |  Bring MetaHuman to life

Drive MetaHumans with iClone Facial Animation

iClone facial animation can be sent full-framed into iClone/CC characters in UE, or retargeted to MetaHumans to drive facial expressions and talking character animations.   Watch More  |  Bring MetaHuman to life

Prop Animation

Prop animation transfer includes animated objects, vehicles, and non-humanoid characters such as creatures.  Watch More

Morph Animation Support

Live Link morph animations to UE via iClone Morph Animator. Perform organic motion by applying morph animation to props or skin-bone characters.  Watch More

Motion Director – Watch More

Motion Director is handy for navigating your characters in 3D space, and great for making NPC animations. In this update, we focus on bringing the ability for characters to move smoothly atop a mesh surface. 

React to Surface – Watch More

Characters can now react according to changes in ground elevation while maintaining contact with the floor. Snap to Surface within Motion Director control settings can also support every MD Control Mode for designated characters.

Advanced Surface Sensor Settings

By tweaking the surface sensor settings, you can determine the climb and fall limit on every step.

  • Climb/Fall Limit: Cap the character’s upper and lower distances from the current ground level to reach a different elevation.  Watch More
  • Transpose Damping: Adjust the damping intensity to reduce or smooth jittery movement caused by changes in ground height.  Watch More
  • Input Forecast: Define the prediction time for surface detection to raise and lower the character ahead of its movement.  Watch More

Supports Displacement Terrain 

Snap to Surface feature works for irregular mesh generated from displacement texture, and it is fully compatible with the Natural Terrain Generator plugin for iClone.

UE Live Link to Target Scene

Adapt iClone/CC animations to UE scenes via iClone Unreal Live LinkWatch More

Subdivision Export – Watch More

Along with the Character Creator 4.1 update, you can now export your subdivided, animated characters into USD and FBX, then bring them to other major applications like 3ds Max, Maya, Cinema 4D, and Blender. You can even directly live-link subdivided animation to Unreal Engine and Omniverse for detailed real-time rendering.  Level of Subdivision | Compatible to All Renderers

Other New Features

Bake Morph Supports 

iClone 8.1 lets users bake morph shapes that can be exported to other 3D applications.  Watch More

Displacement Texture Supports 

iClone Live Link Auto Setup 1.25 creates a Displacement texture channel for proper modulation of surfaces.

Website: iClone 8  |  iClone Unreal Live Link  |  iClone Motion Director

Forum : iClone 8.1 Discussion

Fast Realistic 3D People in ArchViz with ActorCore & Unreal Engine

The original article was written by Ronen Bekerman, and featured on Ronen Bekerman Archviz Hub.

Introduction

Showcasing a residential house at night while hosting a party is difficult. A party means people, in order to sell the scenario. No matter the quality of the 3D people model and texture, the selling in this case, is done with mocap animation.

The offering of quality animated people is limited even before you bring motion into the mix. This is where ActorCore offers high-quality 3D asset libraries for mocap animations and animated 3D humans for crowd rendering.

Behind the Scenes

Pasquale Scionti is a Principal Lighting and Lookdev Artist. Below you will see his work in Unreal Engine and how he manages to sync the visualized animated people and subject matter.

Create Your Archviz with ActorCore Scanned People

The difference from other scanned people is that ActorCore is fully rigged for facial and body motion. For this scene, Pasquale wanted to create a sunset scenario with a house party going on. The house model is from Evermotion and was modified a bit before he imported it into Unreal Engine using Datasmith.

“Populating your scenes using ActorCore is very simple, and in minutes, you have animated crowds.”

Pasquale Scionti – Principal Lighting / Lookdev Artist

To know more about Pasquale’s process using ActorCore and Unreal Engine, to create an Archviz project, read the complete article on Ronen Bekerman architecture visualization hub, or visit the dedicated Guide for using ActorCore and Unreal Engine.

Generate Accurate Lip Sync Animation For Japanese Children Songs

The “Winner Tips & Tricks ” series covers practical workflows and techniques shared by winners from the “2022 Animation At Work Contest”. To let users see the full spectrum of the Cartoon Animator pipeline, we are introducing projects that received attention and credit from the community. Let’s now take a look at Takeyoshi Sugihara’s: “Pekoten”, and see how he works his magic with Reallusion Cartoon Animator (CTA).

About Takeyoshi Sugihara

When I was in elementary school, I came across a wrestling manga called “Kinnikuman,” and I was always copying the drawings of the characters from that manga. The manga is still being serialized today and has had a great influence on many manga artists and martial artists, and because of it, there was a time when I thought I would become a manga artist in the future. 

When I was 22 years old, I entered the Visual Illustration Department of Yoyogi Animation academy. It was a very exciting two years for me as I had been away from drawing for a while. At that time, I was drawing only cats with pastels. At the same time, I was also drawing a few illustrations that led me to my current style. Little by little, I began to draw illustrations with stories, like picture books, and although I did not get published, I also started to draw picture books. At that time, I did all my illustrations by hand, but since I was born with red-green color blindness (For example, I painted human faces in green), I was made aware of my limitations with hand drawing, so I began to use computers to create my illustrations. 

I wanted to create something with a story rather than just a single illustration and it became a natural progression. Although I could not become a cartoonist, my childhood dream came true when I started using Cartoon Animator. I am a morning person, so I spend about two hours creating cartoons before going to work. In addition to making use of my off-hours and holidays, I have grown a lot by communicating with Japanese animation creators and participating in film competitions.

Why choose this entry topic? 

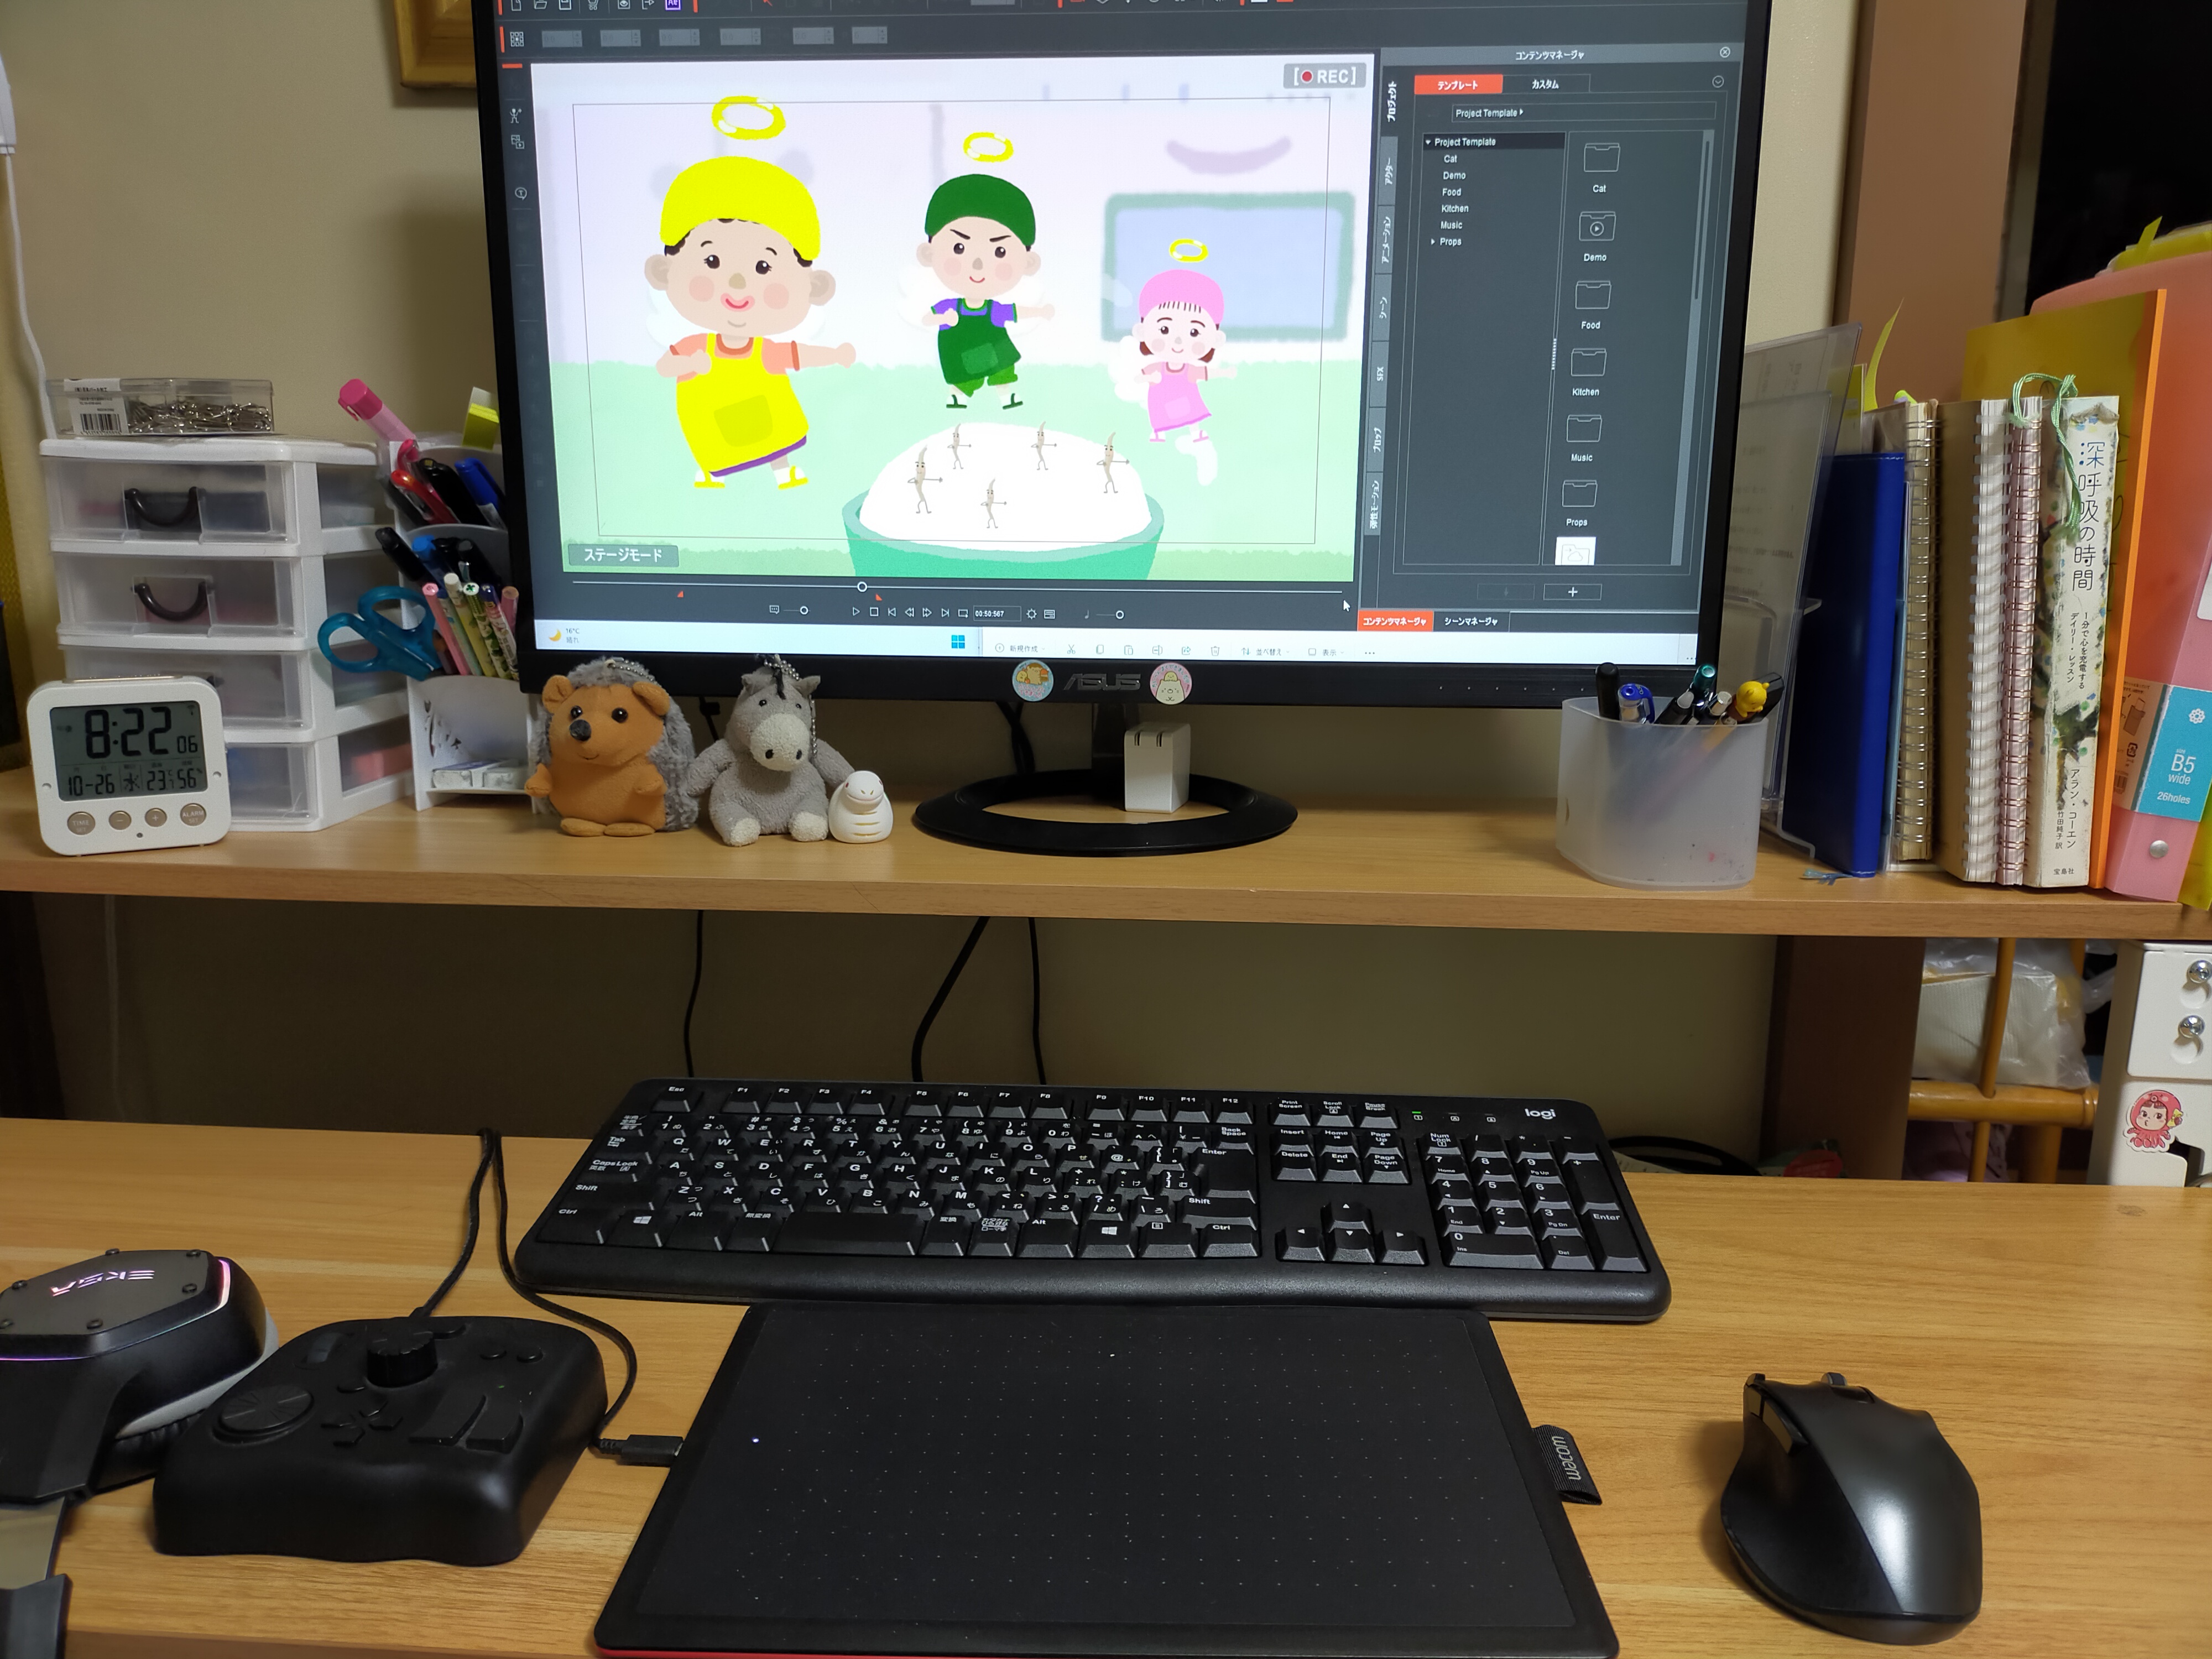
My mother is a single mother who has been a dorm auntie in a high school baseball dormitory for over ten years. Growing up watching her work, I began early on to draw the character of a mother in an apron. It is my longing to portray her living happily together with her family on the island where she was born. The title of this animation: “Hara Pekosan Tenshi” has been on my mind for more than ten years. Because I had many opportunities to cook with three of my best friends — going shopping, putting on an apron, and sometimes making mistakes has helped me in the creation of this work. The 2D character design had changed several times but settled on the current form.

Why choose Cartoon Animator?

There was a lot of other animation software out there, but for me, at the time, with no 2D animation experience, the simple and visually appealing control panel and the ability to apply animations for actors with a simple click were very appealing.

How I did it with CTA

Step 1: Scripting and storyboarding

I wanted to create a 2D animation in which the characters move in time with the background music and song, so I started by drawing a storyboard. I drew up a storyboard and wrote out what the lyrics of the song would be. I picked out a few songs that I liked and tested them by singing along to see if the lyrics and tempo matched. Once the lyrics were adjusted, I asked the singer to sing the song. Until the song was ready, I sang the song myself and adjusted the timing and choreography.

Step 2: 2D character design and creation

To draw “Hara Pekosan Tenshi”, I took a character I had previously drawn and modified it for CTA. When I create a new actor, I reuse an existing actor from CTA and replace the images in Clip Studio Paint.

Because I learn a lot from the embedded actors, I often refer to their structures when I create an actor with similar elements. It’s also important that I pay attention to the way the actor’s arms are built.

This is because many of the Actors I create have two or three heads, and sometimes the neck is not visible in the design. When animating actors, I am careful about the order of the layers of each body part and whether or not the shoulders and elbows move in a way that is impossible for the skeleton.

Also, since the same actor cannot put on and take off clothing, it is necessary to know how many directions (0 degrees and 45 degrees) the actor needs to be facing. However, the mesh planes can be controlled to be visible or invisible on the timeline, so we did not need to increase the number of actors for this purpose.

Step 3: Animating the character and sprites

To animate the characters according to the lyrics, I would apply various dance animations from the content library. Then I looked for the best fit by watching the actors in action. In many cases, we applied existing 2D animations to the actors, and we also used items purchased from the Reallusion 2D Marketplace.

Then I adjusted the speed of the actor’s animation (the length of the clips on the timeline). If necessary, I would arrange the movements by breaking down the clips by sampling motion clips.

Step 4: Creating and structuring the scene and setting up the camera

The creation of the scene was divided by the changing themes of the music, and because of this, there were some major changes from the initial storyboard.

Originally, the storyboard was about an angel washing his hands under a faucet. Although I had created the image material for this scene, I didn’t want the screen to be too busy switching between scenes, so I switched to an animation of soap bubbles being rinsed off.

Step 5: Selecting background music, sound FX, & voice acting

Some people may choose the background music later, depending on their preference. But in this case, the animation was to be set to music, so I chose something that would help the viewer visualize the enjoyable process of cooking. I used After Effects to add shadow, light, and atmosphere. And I used Shadow Studio 2, which made lighting very easy.

The book I referenced is “動画でわかる After Effects 教室” (“Dōga de wakaru After Effects kyōshitsu”). I hope you can also try to use some of the mentioned techniques, and hope you will enjoy doing animation as I do. See you next time!

Follow Takeyoshi Sugihara

Youtube | https://www.youtube.com/channel/UC08ZqNgbH8wJ9TBQcPvPnSg/featured

Chartered Architect Conjures a Metamorphosis of Ballet into Kagura with Character Creator and iClone

This article is featured on Fox Renderfarm

Project “Kagura” is a one-minute full CG animation, and the sequel to John Yim’s “Ballerina” project, made with Character Creator, animated in iClone, and rendered with Redshift and Cinema4D.   

Kay John Yim is a Chartered Architect at Spink Partners based in London. He has worked on a wide range of projects across the UK, Hong Kong, Saudi Arabia and Qatar, including property development and landscape design. His work has been featured on Maxon, Artstation, CG Record and 80.LV.

Yim’s growing passion for crafting unbuilt architecture with technology has gradually driven himself to taking on the role of a CGI artist, delivering visuals that not only serve as client presentations but also as means of communication among the design and construction team. Since the 2021 COVID lockdown, he challenged himself to take courses in CG disciplines beyond architecture, and has since won more than a dozen CG competitions. 

The project’s concept centers on a fantasized version of Kagura (神楽) – a type of Shinto ritual ceremonial dance in Japan. According to tradition, a Kagura dancer turns into a god during the performance, thus depicted as the dancer’s ballerina tutu dress transforming into a hakama as she dances on the floating stage, signifying the purifying spirits of nature.

This article focuses primarily on shots three and four of project “Kagura”, where Yim begins to give details on his design and technical process of the four main aspects below: 

  • The Architecture 
  • The Animation 
  • The Transformation 
  • Rendering 

“Kagura” was made with the following software:

  • Rhino
  • Moment of Inspiration (MOI)
  • Cinema 4D (C4D)
  • Redshift (RS)
  • Character Creator (CC)
  • iClone
  • Marvelous Designer 11 (MD)
  • Houdini

This making-of tutorial article is a short version of “The Making of ‘Kagura’, A Photorealistic CG Animation”, written by Kay John Yim. For the full version, please visit Fox Renderfarm News Center.

Shot One
Shot Two
Shot Three
Shot Four

1. THE ARCHITECTURE

The architecture was loosely based on Ookawaso Hotel’s lobby in Fukushima Prefecture, Japan.

PureRef board for the project

It was probably one of the most challenging interior spaces that I have ever modeled, due to the following reasons: 

  1. Most photographs available online focus on the floating stage and thus were quite limited in showing the actual space.
  2. With no access to architectural drawings, I had to eyeball all the measurements from photographs.
  3. The space does not conform to a single orthogonal grid, for instance, the stairs and the 1F walkway did not align to the columns. 

I first gauged the size of the space by the balustrade height—as a rule of thumb, balustrades are usually 1.1 meters tall, and it varies slightly depending on exterior vs. interior space and the country’s building regulations. 

By estimation, the distance between the columns is about 7.7 meters. 

Estimating measurements from photo

Looking at the orientation of the floating stage and the columns, I assumed that the space was designed with two sets of grids: a construction grid that aligned with the columns (which structurally holds up the space) and a secondary grid diagonal to the construction grid (which serves only as a design grid). 

I drew up the construction grid uniformly (7.7 x 7.7 meters), and placed columns accordingly. Then I drew diagonal lines on top of the construction grid to get the secondary grid, and this gave me a starting point for the floating stage as well as the 1F walkway. 

Drawing up the grids, stairs and 1F walkway

A large portion of the architectural elements then instantly fell into place according to the grids I drew up. 

Having said that, the modeling process was not exactly straight-forward though. With the lack of references (especially for the corner details), I spent most of the time re-designing and tweaking wall panel sizes and wall stud positions to get to proportions that were aesthetically pleasing. 

Most elements fell into place according to the grids

Modeling by grid

I then exported the Rhino model to .3dm, opened it up in MOI and exported it again into FBX. Doing so gave me clean, quad meshes that I could easily edit and UV-map in C4D.

Model turntable

While the majority of the space took less than a week to model, I spent an additional month solely on fine-tuning the details, tweaking the lighting, and framing a composition that I was satisfied with.

Render iterations
The final composition

2. THE ANIMATION

2-1 Character Animation made with Character Creator and iClone

The character animation was created with Character Creator (CC) based on mocap animation, which can be found on the Reallusion Marketplace. 

I kept my animation workflow as simple as possible; In fact, I exclusively used “Set Speed” and “Edit Motion Layer” functions in iClone to get to the final character animation. First, I imported my CC character into iClone, applied the mocap animation onto the character via drag-and-drop, and altered the speed with “Set Speed” to create a slow-motion effect.

Slowing down mocap animation in iClone with “Set Speed”

*Note: Please see my previous article for CG Character creation: Ballerina: A CGI Fantasy made with Character Creator and iClone.

Altering the speed however, exaggerated a lot of movement that looked distracting; Hence, I played the character animation on loop and deleted keyframes that I found unnecessary.  I then used “Edit Motion Layer” to lift up the arms and modify the finger positions. 

Edit Motion Layer

2-2 Garment Preparation

Once I have gotten a decent character animation, I moved on to Marvelous Designer (MD) and Character Creator to prepare the garments for animation and simulation. 

Cloth simulation in Marvelous Designer is extremely finicky: multiple layers of clothing too close together causes a lot of jittering, and that could take an infinite number of simulations to resolve. For the above reason, I separated the two sets of Marvelous Designer garments (ballet tutu and hakama) into two categories: skin-tight vs loose garments. 

The skin-tight garments would be animated in Character Creator & iClone, a technique most commonly used in game production. This technique excels in speed but falls short in simulating loose garment details compared to MD. The skin-tight garments in this project included the ballet tutu leotard and the hakama’s inner layer.

Skintight garments

The remaining loose garments would be simulated in MD (the ballet tutu skirt and the hakama’s outer layers).

Lose garments

2-3 Skintight Garment Animation with Character Creator and iClone

My preparation for the garments in CC are as follows: 

  1. Export garment from MD to FBX as T-pose.
  2. Import FBX into CC by “Create Accessories”. 
  3. Assign “Skin Weight”. 
  4. Export to iClone

The skin-tight garment would then be automatically applied to the animated character in iClone

Ballet tutu leotard animation in iClone

2-4 Loose Garment Simulation with Marvelous Designer and iClone

MD in general simulates garment better by using CPU rather than GPU when there are multiple layers of clothing. Having separated the tutu leotard from the tutu skirt in this particular case, I found GPU simulation actually gave a cleaner and faster simulation than using CPU alone. 

Ballet tutu skirt simulation

For the hakama I wanted to create a calm but otherworldly aesthetic, so I reduced the “Gravity” under “Simulation Settings” to 0, and upped the “Air Damping” to 5. This resulted in a constantly floating sleeve and a clear silhouette throughout the entire animation.

Hakama simulation

With all the garments animated and simulated, I exported all of them as separate Alembic files. The Character was exported as an animated FBX from iClone.

2-5 Pose-simulation clean-up in Houdini

Garment simulated in MD could sometimes result in too many details or polygons with messy connectivity. The former I personally found distracting and the latter would cause problems down the line in C4D when used in combination with “Cloth Surface”. 

I imported the Alembic files into Houdini and used “Attribute Blur” to smooth out the garment, eliminating extra wrinkles.

3. THE TRANSFORMATION

3-1 Setting up the Camera

Having imported the character FBX and all the Alembic files into Cinema 4D (C4D), I then move onto setting up my camera based on the character animation. This prevented me from spending extra time working on details that would not be visible in the final shot. 

I used “PSR” under “Constraint” to bind the camera’s height position to the character’s “neck” position; doing so stabilized the camera and avoided distracting movements. 

3-2 Tutu Dress to Hakama

The transformation of the tutu dress into hakama was driven by a combination of “PolyFx”‘s and animated fields within C4D.

Working with “PolyFX” 

C4D’s “PolyFx” breaks down objects by their polygons; any Mograph effectors assigned thereafter will then affect the object on a per-polygon basis rather than affecting the object itself as a whole.

I assigned a “PolyFx”, a “Random Effector”, a “Plain Effector” and a “Spherical Field” to each of the following parts: 

  • Tutu leotard 
  • Tutu skirt 
  • Hakama sleeve 
  • Hakama top (outer layer) 
  • Hakama top (inner layer) 
  • Hakama bottom 

Each of the “Spherical Fields” were then bound to the character’s skeleton “pelvis”.  With the Spherical Field bound to the character, I animated the sizes of the “Spherical Fields” and tweaked the timing to different garment parts to gradually scale down/scale up by their polygon divisions. For specific steps, please see the detailed guide in the full version.
*Note:When in doubt, press Shift-C then type in the Mograph or function you are looking for—I use Shift-C all the time in C4D.

 Garment animation driven by “PolyFx”

3-3 Tutu Skirt to Butterfly Hakama

In addition to the garment transformation driven by “PolyFX”s, I added an extra layer of animation with a “Cloner” of animated butterflies; this created an illusion as if the tutu skirt disintegrated into a swarm of butterflies and flew away. 

I use an animated butterfly created by Travis David (click to download) cloned onto the simulated tutu skirt, driven with a plain effector in scale to make them appear and disappear in flow with the PolyFx animation.

Ggarment transformation with butterfly “Cloner”

For the final rendering, I added “Cloth Surface” and “Subdivision” to each garment part to break up the polygons to even smaller parts; this resulted in an illusion of the tutu dress being disintegrated and subsequently reintegrated into the hakama. 

Technically speaking it was a relatively simple animation, the most challenging parts were timing and developing an aesthetic that flowed naturally with the character movement. The ten seconds of transformation alone took me more than two months to get to the final version; I was constantly adjusting the Spherical Fields’ animation through the plugin “Signal”, rendering the viewport sequence, tweaking and re-rendering over and over again.

“Cloth Surface” and “Subdivision” are computationally expensive—each viewport frame took at least two minutes to process, totalling about ten minutes per viewport sequence render. 

Iterations

Final shot 3 breakdown

4. RENDERING

4-1 Texturing

I kept my texturing workflow fairly simple—apart from the characters, I used Megascans material and foliage in the final renders.

4-2 Redshift Limitations & Workaroundsturing

Though Redshift is my favorite offline renderer for its unmatched rendering speed, there were a few limitations regarding Motion Blur and Cloner/Matrix that I had to have a workaround in preparation for the final rendering. 

“Motion Blur”, or “Deformation Blur” to be specific, contributes to the realism of CG animation. However, there is a known limitation of Redshift automatically disabling “Deformation Blur” on “PolyFX” objects. This would cause glitches (objects look as if they pass through each other) in the final render if “Deformation Blur” is turned on globally. While keeping global “Deformation Blur” on, I added a Redshift Object tag on every character and garment object and unchecked “Deformation Blur” on the RS object tags.

On the other hand, while “Cloner” and “Matrix” both serve the same purpose of cloning objects, they differ in viewport feedback and rendering speed. Using “Cloner” has the advantage of wysiwyg in the viewport, as opposed to using “Matrix” where you have to render out the frame to see the final result. 

Rendering-wise, “Matrix” has the advantage of being rendered by Redshift much more efficiently than “Cloner”; Taking Shot 4 for instance, the final render duration per frame is three hours using exclusively “Cloner” as opposed to 2.5 hours using exclusively “Matrix”. Hence, I used “Cloner” while working on the shot composition and used “Swap Cloner/Matrix” to replace all “Cloner” into “Matrix” for the final render.

“Cloner” viewport feedback

“Matrix” viewport feedback

4-3 Redshift Environment

I used Redshift Environment to give all the shots an atmospheric and mysterious look; it also helped to convey the depth of the scene, especially in a busy composition like Shot 4. 

The Redshift Environment’s Volume Material was driven by two “Null”s in height; a fake Spot Light directly above the dancing character and two Area Lights from below the stage also contributed to the Redshift Environment. 

4-4 Redshift Proxies

Having finalized the look of the shots, I exported as many objects as possible into Redshift Proxies for rendering efficiency. I used “Redshift Proxy Exporter” to batch export objects—this saved me a lot of time, especially when exporting foliage. With everything replaced as Redshift proxies, this brought my final render time per frame from 2.5 hours down to two hours.

Conclusion

“Kagura” is by far the most challenging personal project I have ever done. I learned along the way as I worked on “Kagura” and “Ballerina”, all through trial and error, rendering out iterations after iterations throughout the past six months. 

With Reallusion and Fox Render Farm’s support, I eventually brought “Kagura” to life, and this has been the most rewarding project since I began my CGI journey.

Learn more :

• Kay John Yim’s personal site https://johnyim.com/

• Kay John Yim’s ArtStation https://www.artstation.com/johnyim

• Character Creator https://www.reallusion.com/character-creator/download.html

• iClone https://www.reallusion.com/iclone/download.html