Benjamin Sokomba Dazhi – Professional iClone Animator
Hi, I’m Benjamin Sokomba Dazhi and I welcome you to this iClone 8 (iC8) tutorial where we are going to talk about how to apply iClone 8 Motion Blur to your action animations in order to give them a more energetic and cinematic look.
The new features of iClone 8 Motion Blur effects provide a solution for streaking or blurring objects in motion to simulate speed. This is a must-have effect to help you create more believable animations which can be be adjusted for intensity and blending frames. Motion Blur Effects can be used for moving object or backgrounds, but in this tutorial we will use it on a character.
Let’s get to it.
To star, I’ve got my entire scene set up with Light and a character already in place. I’ve also put a fast paced fight motion in the character. Now the first thing we are going to do here is go to the Visual tab by the left. (Fig 1.0)
Fig 1.0
Under Visual, you’ll see a panel called Motion Blur.
Fig 2.0
Tick the Motion Blur. (Fig 3.0)
Fig 3.0
Now you’ll see that there are different parameters here. (Fig 4.0)
Fig 4.0
We have Intensity which is by default on 50 .
Then we have the Frame Blend. (Fig. 6.0)
Fig. 6.0
The Frame Blend is on zero by default, but you can make the value less or more as shown in Fig 7.0.
Fig 7.0
So now that we have already ticked the Motion Blur, we are going to play it to see how it looks. You can see the Motion Blur is obvious in the scene and you can see the effect in real-time as shown below.
Next, if you want to reduce the Intensity of the Motion Blur, you just go to the parameter slider as shown in Fig 9.0 below and take it lower or higher.
Fig 9.0
Let’s try it on a lower value say 20 and see the effect. You can see it’s there but it’s not too much, so it’s kind of balanced. (Fig 10.0)
Fig 10.0
However if you want it to be more obvious in the scene then you can just increase the value.
Fig. 11.0
Now let’s increase the value to say 70. You can see that 70 is way too much as shown in Fig 12.0 below.
Fig 12.0
Hence, we should reduce the value to 50 which is the default value. In Fig 13.0, this gives a more balanced effect.
Fig 13.0
You can go a little lower with the value as well, say 25.
Fig 14.0
It looks much better now. (Fig 15.0) Based on your preference you may either stick to 25, or you can go back to 50 as the default. Here I’m going to work with 25 in this tutorial.
Fig 15.0
Next, there’s a feature called Frame Blend and the value is either 0 or 1.
Fig 16.0
The Frame Blend has this ghosting effect that you can use if you want to achieve a “dreamy” type of look. It just depends on the type of visuals you’re trying to create. (Fig. 17.0)
Fig. 17.0
Now, you can also drag the slider to the middle, in order to reduce the ghosting effect as shown below. (Fig 18.0)
Fig 18.0
The ghosting effect can come in handy when creating visuals depending on what you’re trying to achieve. So I’m going to leave it at 0 as I prefer just the Botion Blur effect I already created.
Fig 19.0
I played the animation from the Camera View and you can see the Motion Blur in real-time. You can play with the parameters too and work on the effect you hope to achieve.
This is pretty straight forward and it’s something you can create out of the box by working with the different Intensity levels of the Motion Blur.
Finally, there’s also a feature which is the Reset Motion Blur for a switch effect on the camera. This may be used when you want the Motion Blur to always reset when there’s a Camera Wwitch. That is another way to work with Motion Blur. This is shown in Fig 21.0 below.
So, this tutorial shows exactly how I achieve Motion Blur effects with iClone 8 in my scenes.
I hope this gives you an insight and helps you implement Motion Blur the proper way in your projects, to make your scenes and visuals more cinematic and appealing.
Salutations to my fellow animators and animation fans around the world! My name is Jop, and three years ago, I embarked on a journey to master the craft of animation. My tool of choice is Cartoon Animator, especially its latest edition, CTA5. If you have a chance to check out its features, you’ll notice that it is chock-full of awesome features, which I have also explored in my short animation.
Storyboarding with Photoshop
It all begins with an idea, which I jot down using keywords and sketches on my iPad. Once my thoughts are captured, I create all my panels in Photoshop. This saves me a lot of time and allows me to visualize what visuals or action sequences work best for my story. My storyboards are usually loose and sketchy, often featuring stick figures instead of detailed characters. As long as they serve the purpose of establishing the story, they don’t have to be perfect. The initial steps of creating an animation aren’t very different from those of a painter or sculptor, that is starting out with the broad strokes before splitting hairs.
Creating Background Art
To set the stage for my story, I envisioned a desolate desert landscape, a place where you wouldn’t want your car to break down. Starting with a basic horizon line in my initial sketch, I gradually added layers to create a sense of depth and dimension. With Cartoon Animator 5, I was able to layer the mountains and ground planes to give the scene more visual interest and enhance the dynamic camera movements in my animation.
To populate the scene, I drew various reusable props such as loose rocks, cacti, and skulls, which I scattered strategically in different backgrounds throughout the story. Not only did these props save me time, but they also helped maintain visual consistency and continuity between scenes.
2D Character Design
To rig my characters, I used Reallusion’s PSD templates, which are incredibly user-friendly and intuitive. All I had to do was swap out the default 2D character design and sprites with my own creations. If you’re just starting out with animation, I recommend studying existing examples of how the rigging templates work and how characters move their joints and facial features. Reallusion’s website has plenty of examples, and you can also find helpful videos and courses on platforms like YouTube. While it may require some time investment, it will definitely pay off in the end, as it did for me when I was a beginner at rigging.
Create Animated 2D Character
Cartoon Animator 5 has a great feature called the 360 Head and Facial Animation Set Up. If you set up your character properly in a PSD Editor beforehand, it becomes simple to use in CTA5 with these tools.
2D character animation
I then began outlining the movements by keyframing essential actions and facial expressions. The only exception was utilizing a 3D walk cycle, which makes 2D character animation in CTA5 a breeze. Here I rest easy and let the new features in CTA5 bring my 2D character to life.
Compositing in After Effects
For compositing, I relied on After Effects. I utilize various blurs with different blending modes to achieve a more cinematic look, and also apply basic color correction techniques such as saturation and color filters.
Video Editing and Sound Design
My editing process began by combining my voice-over with the storyboard panels. As I completed my animation scenes, I replaced the storyboard panels with the final animation clips. I want to give a special shout-out to my talented friends at Studio Ghibletz who helped me with their amazing voice-over and writing for my project.
Wrapping Up
I highly recommend CTA 5 for all users, for beginners and pros alike as it is an easy-to-learn and intuitive-to-use animation tool. CTA 5 includes a bunch of user-friendly features and toolsets which give me the ability to unleash my creativity without compromise. Like no other tool I tried in the past, CTA really allowed me to kick-start my dream to become an animator. I therefore am, for sure, a great fan and will keep on using it for many projects to come.
A Dev Guide to Creating Reusable Asset Library for the Reallusion Marketplace
Introduction
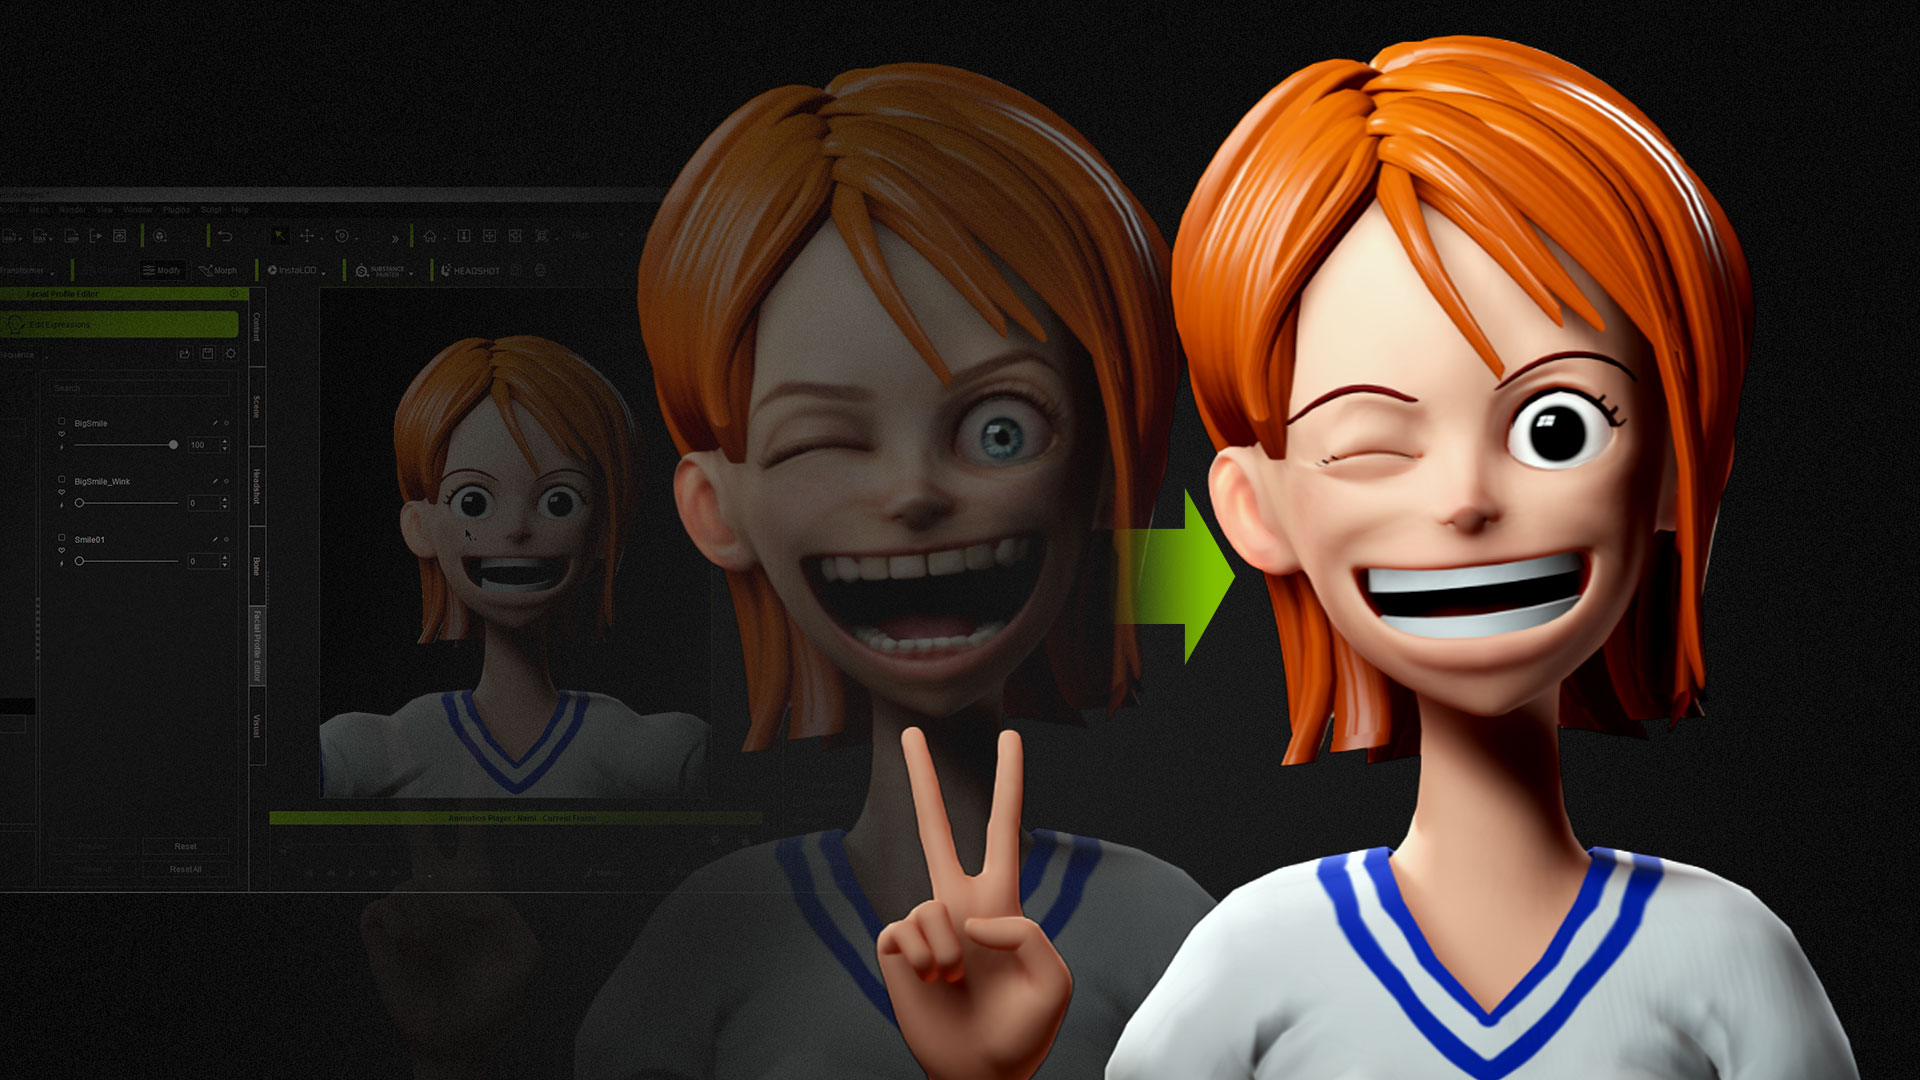
Greetings, I’m Peter Alexander, in this article I will demonstrate some advanced tricks in creating anime-style toons in Character Creator 4 (CC4). The problem I was facing is that CC’s design is focused around realistic characters; Yet, I was aiming for the imaginative style of One Piece. The areas I’ll be focusing on are the teeth, eyes, eyelashes, and skin. I’ll also be adjusting the facial profile, creating a Head Preset, and applying elements of the newly created components to another stylized character. So I encourage you to read on to equip some of the core concepts that can be expanded upon for your own projects.
To start off this tutorial, you’ll need to download and install the “CC4 Blender Pipeline Tool Plugin” for CC4. >> Download here.
Then you’ll need to download and install the “CC/iC Blender Tools” plugin for Blender. >> Download here.
Creating New Teeth
While some cartoon styles do comprise realistic teeth, I’m specifically going for a very simplified, anime style.
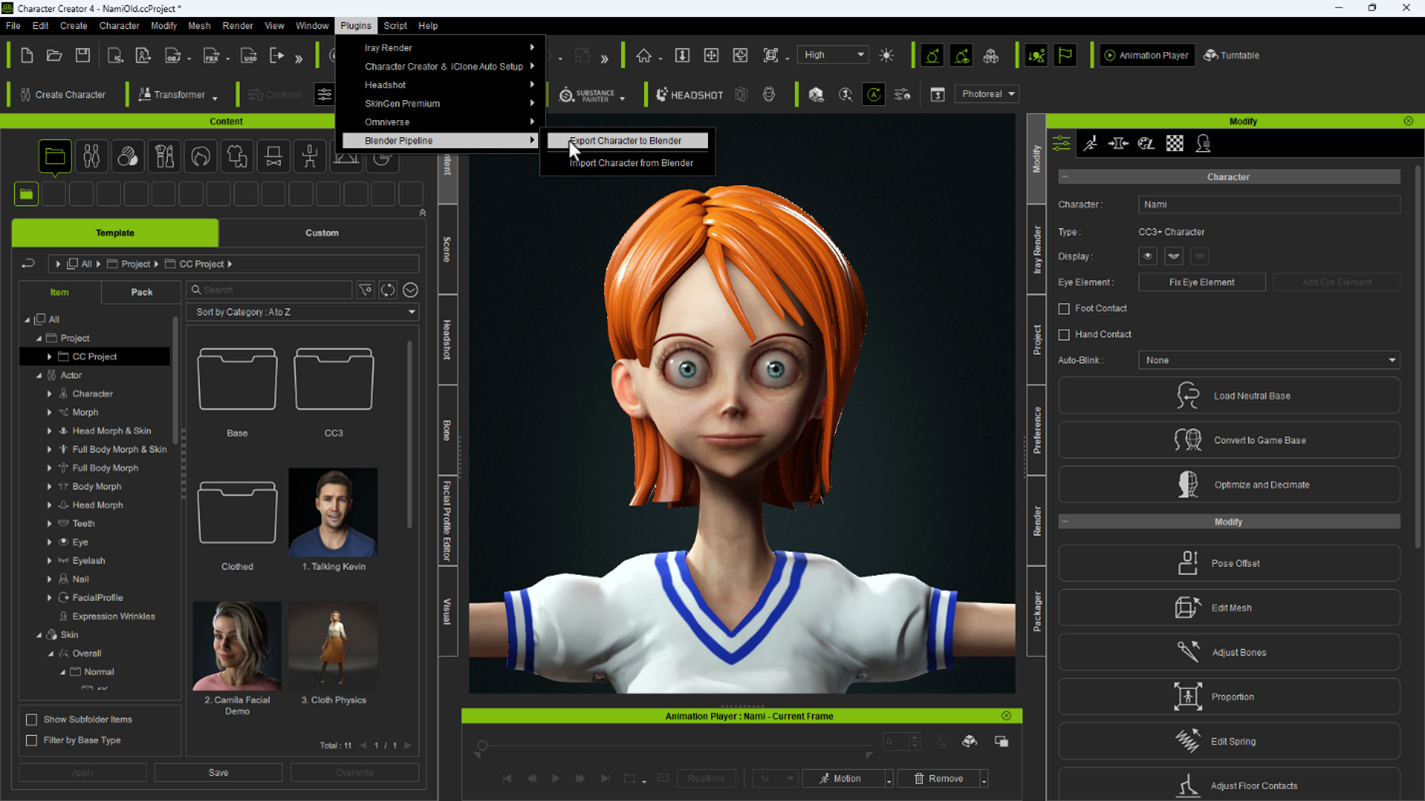
1. I’ll start by exporting the character using the Blender Pipeline Add-on in Character Creator.
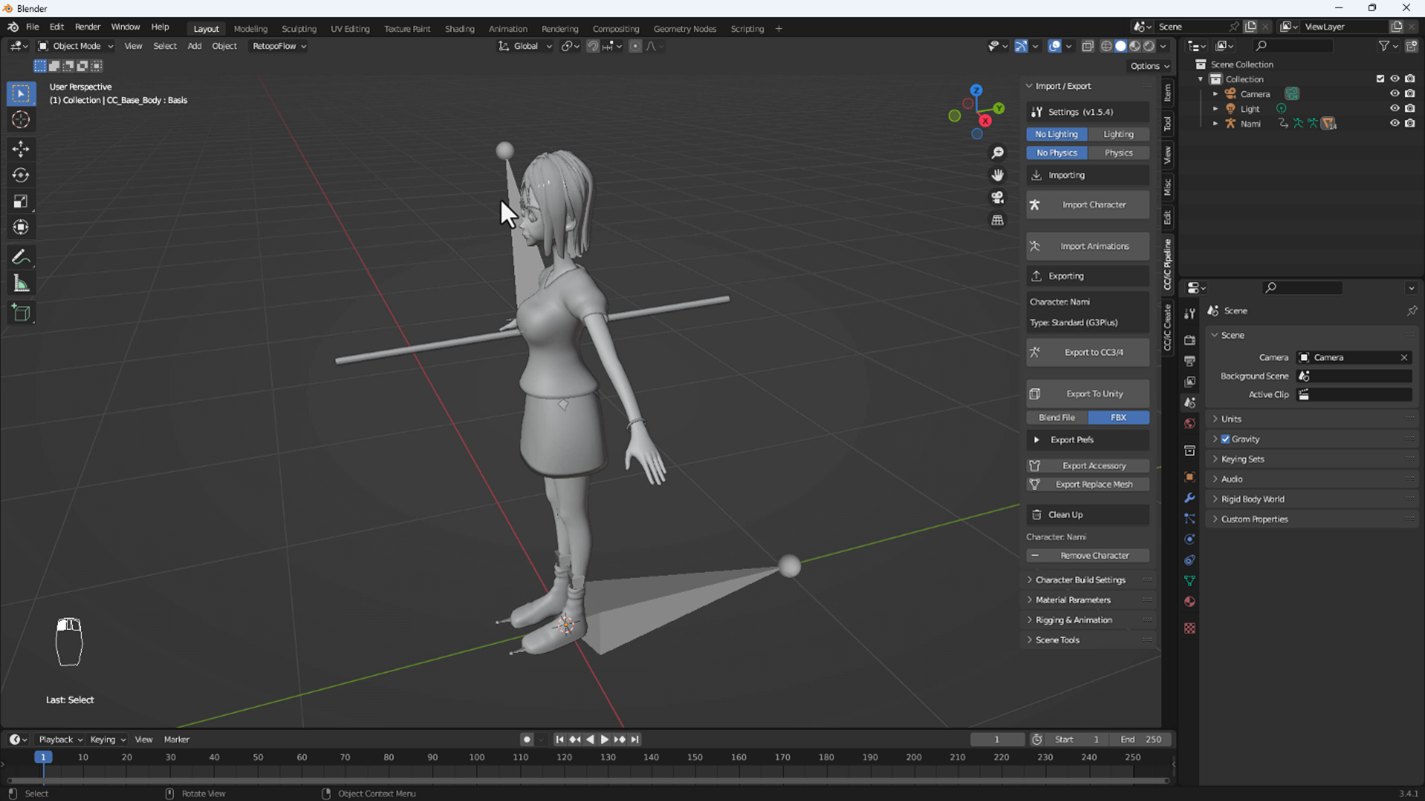
2. Then, I’ll import the FBX file using the CC/iC Add-on in Blender.
3. With the avatar imported, I’m going to use the geometry of the original teeth to build the anime teeth. I’ll grab an edge loop from the top of the gums and extrude a simple shape for the top teeth. Then I’ll extrude and add some depth. I will then delete the top row of polygons, which will allow for easy UV unwrapping.
4. I will repeat this for the bottom teeth, then combine the teeth into one object.
Note:
Since the geometry has been extruded from the original teeth, I do not need to add vertex groups or weight maps. These teeth are also bound to the armature by default, using this method. If you create more complex teeth using another method, you will need to assign the appropriate groups and weight maps and bind it to the armature.
For the Top Teeth, the vertex group must be “CC_Base_Teeth01”.
For the Bottom Teeth, the vertex group must be “CC_Base_Teeth02”.
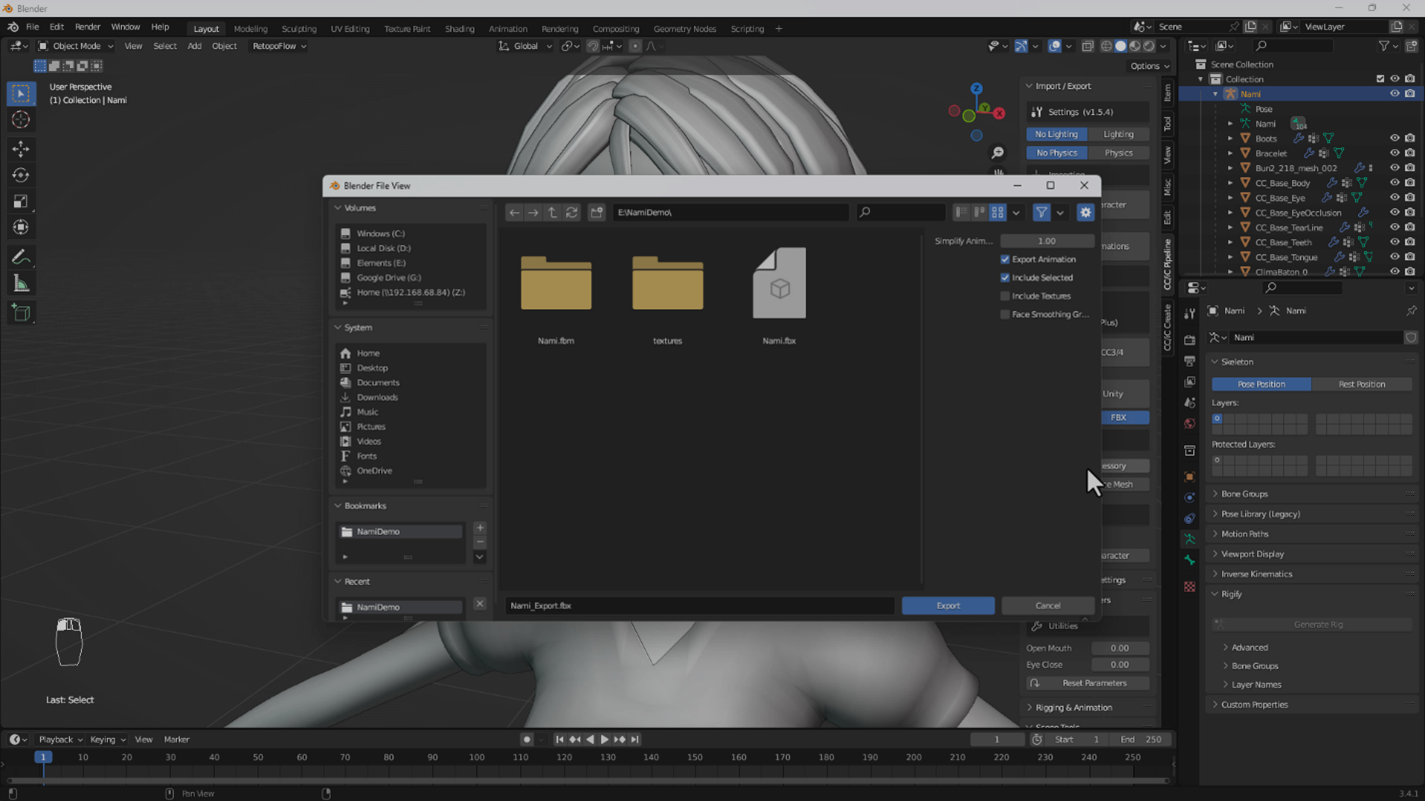
5. With the teeth created, export the character using the CC/iC add-on and import the FBX using the Blender Pipeline Plugin in Character Creator.
Note:
You may experience a warning during the import process, but the import should otherwise be successful.
Adjusting the Eyes
With the teeth created, I will work on the eyes. This is a simpler process than the teeth, as I’ll mostly be altering the textures. You will need an image editor for this process; If you do not have Photoshop, you can use an alternative such as Krita.
Clicking on the material channel and initiating the texture launcher will send the texture to your image editor. I will be editing the diffuse texture.
In Krita, I will be creating a very simple texture to replace the realistic version. Just a white to pink radial gradient for the sclera and a black circle for the pupil and iris. I will save the texture, which is linked to a temporary file. Unless the link is broken, saving the file in Krita will update the texture in Character Creator.
I will then manually copy this eye texture over to the other materials for the eye, as they are not linked to the saved file.
I see that this is still insufficient, due to the properties of this material, so I will adjust the Sclera brightness.
I will use this same process to create stylized eye lashes. In this case I will edit the opacity map, and use it as a reference when making the adjustments. Opacity operates on a black to white spectrum. Black is invisible, white is visible.
Creating New Skin
Next, I will simplify the skin texture. There are a few ways to do this — I will use the simplest method. Select the diffuse texture slot for the head. In the Adjust Color dialog, dial the Contrast to -100.
Copy the texture then save it in the same slot. This will be the same as importing a gray texture. Adjust the Saturation, Hue and Brightness until you achieve the desired skin tone.
Copy this texture and place it in the slots for the Body, Arms, and Legs. This will create a simple foundation for your skin. If the normal maps are providing too much detail, dial down the normal intensity.
You can make further adjustments to the skin by activating the Skin Color options. I wanted to subtract some detail, so I didn’t use it initially.
I’ll make a few other adjustments before I start altering her facial profile. I will increase the scale of her Pupil and Iris. This can be done through the Morph Editor if you have the Headshot plugin, and can be done to a limited degree by manipulating the materials for the Cornea.
Adjusting Stylized Teeth
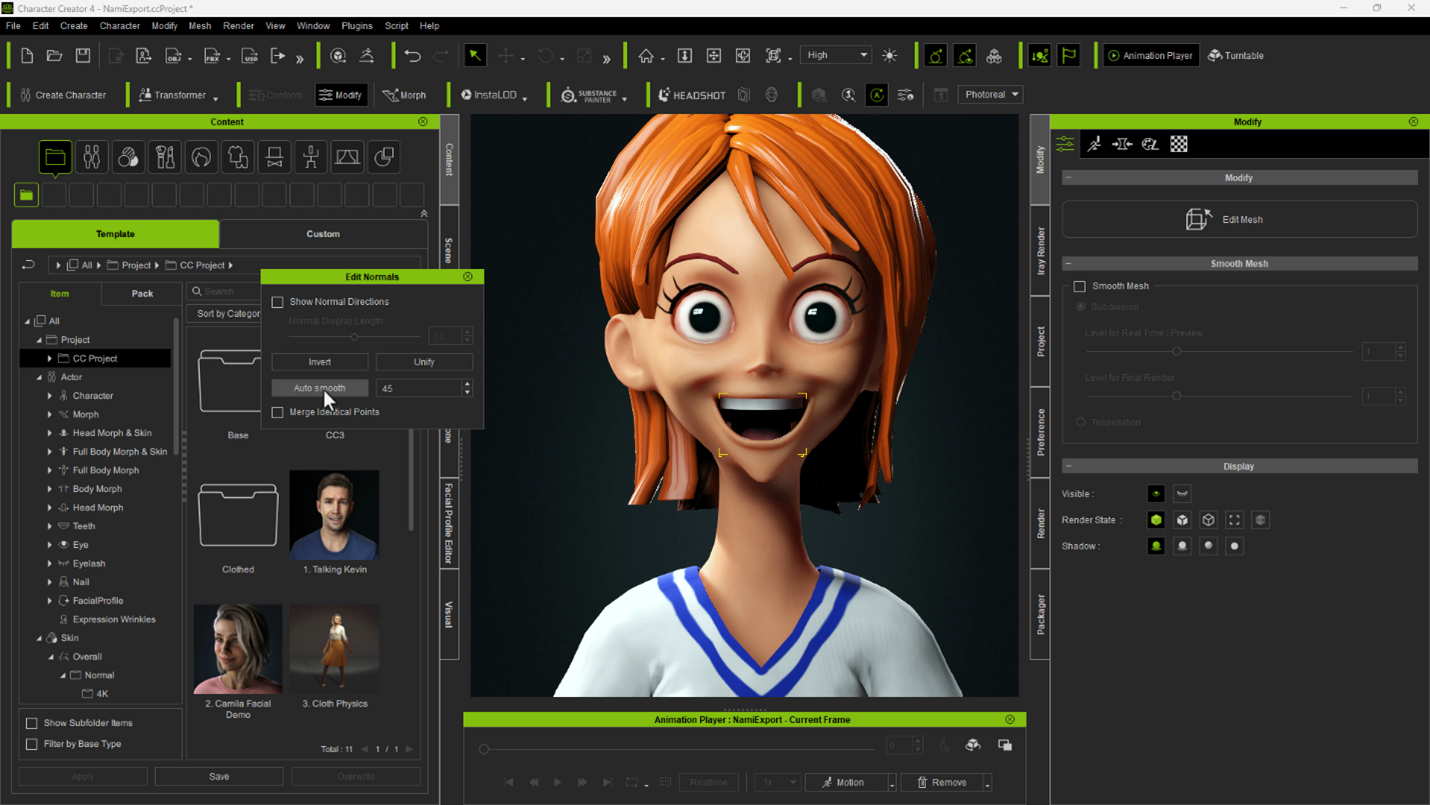
Next I’ll adjust the placement of her teeth. Although first I notice that the stylized teeth have odd normal effects. You can fix this by selecting the teeth and smoothing the normals in the Edit Normals options.
Now I will adjust the teeth by referencing the thumbnails of each major expression.
I will make additional corrections such as the placement of the eyelashes and eyeballs. Make these adjustments prior to using the facial profile editor so you don’t have to redo them.
Using the Facial Profile Editor
The next step is to modify the facial profile. But first, I will adjust the eye elements by selecting Correct Eyeblink in the Character menu. Often the eyelash will need to be manually corrected, especially for stylized characters. In addition, eyes this large present a problem since they bulge beyond the elasticity of the eyelids, causing them to clip through the geometry when the character blinks.
There are two ways to correct this problem: deform the eyeballs for the blinks or adjust their positions. For this character, I chose the latter method because the eye positions can be mirrored as opposed to deformations.
To reposition the eyes, I used the Proportion Editor and switched to Face and made sure that symmetry was disabled. When needed, I checked Show Expression to reference the current expression.
I then selected the eye bones and translated them slightly backwards and baked the expression. The eyeballs will now retreat to mitigate the clipping during the blinks. In all but extreme cases, this should resolve the issue.
Accommodating Custom Expressions
I previously created custom expressions for this character, but the teeth were not compatible with the original data. To fix this, I will dial in the expression and adjust the teeth to fit, then rebake it so that the new teeth will acquire the new data. Adjusting the teeth is surprisingly easy with the transform tools while in the Edit Mesh window.
Saving the Edits to the Eyes and Teeth
Saving an asset generally requires two steps. Select the asset you want to save and go to the designated category in the Content window and click Save. A thumbnail will be automatically generated for you based on the current camera. You can replace it with another image at any time.
Creating a Head Preset
The head consists of several components: The morph, facial profile, eyes, teeth, eyelashes, skin and material settings — and now the wrinkle settings with the latest update (I’m sure in the future it will contain even more components). Each of these components can be saved as a preset, and the Head preset unifies them.
Creating a Head preset is relatively easy. First, you must separate the body and head using the Create > Head & Body Morph Sliders command. Next, go to the content window, select your character, and click save while in the Head Morph & Skin category.
A body preset can likewise be saved, although it contains less components.
I will demonstrate the presets I’ve created on a new character. I’m going to load a demo character and use it as a base to apply the presets I just created. I’ve cleared the existing morphs, leaving the character in its default neutral state.
Any preset or accessory can be applied by double clicking or dragging the item onto the character from the Content window. The preset loads fine, although there is an obvious clash between realism and cartoon styles. Loading the body preset and stylized hair minimizes this.
All of her presets are now loaded to this demo avatar, including the facial profile, which is part of the head preset. The ability to load an entire head setup helps with mixing character designs.
Finally, I will apply the teeth and eyes to another stylized character, so I can explain the issues you may have to solve with your project. First, note that your character must have the same tier of facial profile for the custom teeth or eyes to load. For example, these teeth were created with the Extended Facial profile, so the character must have an Extended Facial profile applied for the teeth to load.
You can see that the initial alignment with this character is off, but it can be easily corrected using the transform tools in Edit Mesh. After which you can align the teeth better by comparing the position with the icons in the Facial Editor.
Using the Facial Editor to examine expressions is an important part of adjusting the facial profile. This menu allows you to go through common expression combinations and see if there are any issues, such as geometry clipping or misalignment with other assets, such as the teeth or tongue. Ideally you want the expression to match the thumbnail, and adjusting the teeth to match key expressions is an important step.
I’ve scaled down the iris size a bit, as I find them to be too dilated. Previously I had used both the sclera UV radius and the morphing options to achieve a large iris, but I can use just the Sclera UV option to decrease the Iris scale. The difference is that adjusting the UV radius impacts the texture, whereas the morphing options impact the geometry.
These teeth were aligned with the previous stylized character, so the offset was based on her teeth’s initial position. For the best results, design your teeth around the avatar’s neutral shape.
The biggest issues are with the custom expressions for this character. The rest of the expressions work well.
You can see the side-by-side comparisons here. As I mentioned, you may not need toon assets to convey a cartoon style, although I think for the anime character it would be difficult to do without.
Conclusion
The presets in Character Creator are extremely powerful and can be leveraged for many different styles, including cartoons. While the base avatar is designed with realism in mind, the ability to save facial profiles and import custom anatomy can push the software into other categories. Character Creator becomes powerful with every update, and I encourage content creators and artists to add this amazing software to their pipeline.
Reallusion was invited by the Korean government for The Global Advanced Technology Training Workshop . Hosted by the Korean Metaverse Industrial Association (K-Meta), the program accumulated over 300 online and offline students with positive feedback. Thanks to K-Meta and Reallusion’s Korean distributor Daoudata, Reallusion Team completed the 3-day workshop and provide a hands-on iClone and Character Creator training to the participants successfully.
K-Meta and the Global Advanced Technology Training Workshop
The Korean Ministry of Science & ICT (MSIT) announced its pan-government strategy on the metaverse project as part of the Digital New Deal 2.0 initiative in 2022. The MSIT appointed the Korean Metaverse Industrial Association (K-Meta), a non-governmental organization to follow this initiative. One of its missions is to design a series of educational training programs to cultivate industrial talents and speed up metaverse development in Korea. The Global Advanced Technology Training Workshop 2022 was the official program, and Reallusion is one of the brands selected as the overseas lecturers for this program.
Mr. MK Kim, K-Meta’s Senior Manager lead the Reallusion Team and completed a three-day training workshop at the Metaverse Campus in Pangyo, Korea. The workshop is titled “Into the Character Metaverse with Reallusion”, covering the fundamental knowledge of Character Creator 4 and iClone 8. Prior to the course, Reallusion designed a dedicated handout and uploaded all the tutorials on its LEARN portal. This portal allows the students to learn the software without time limitations and boundaries.
Nearly 300 students participated in the seminar offline and online. After the workshop, the students will also be assigned homework to practice and enhance their character animation skills. The submitted students will also receive a one-year license for Character Creator 4 and iClone 8, allowing them to polish their skills after the event. K-Meta believes that this workshop will help the Korean government incubate more 3D talents and fill up the labor demand for the metaverse-related industry.
Feedback from the Students
During the workshop, many students experienced the smoothness of iClone and Character Creator. Take a look at the student’s responses here.
Gukil Han / Hanco Systems “I think I will be able to work on 3D games and animations more efficiently, and I think we can actively utilize Reallusion to speed up our development for 3D games or metaverse solutions in the future.”
Ara Kim / Carpenstreet Inc. (Acon3D) “I could use Character Creator much more widely than I thought. Not only character creation, but also skin cloning for clothes, and adding animation as well. I think I will use it a lot in the future”
Suryeon Kim / Loco Ent. “Reallusion is an easy and fun tool, just like playing a game. I think I can collaborate with many artists with my modeling and animation projects.”
Daoudata and the Reallusion Partnership
Founded in 1992, Daou Data Corp.(KOSDAQ: 032190) is engaged in providing IT solutions in Korea. The company’s IT solutions services include software distribution, security solutions, analytical solutions, cloud services, and consulting services. Daou Data Corp. also provides consolidated billing services that facilitate payment by IC-based credit card, cash card, e-money, membership card, and MS card. With over three decades of operation, the company distributes and partners with multiple major accounts, including Adobe, Autodesk, Microsoft, Epic Games, Google Apps, NVIDIA, and Sophos.
Daoudata partnered with Reallusion since April 2021, and they have helped Reallusion gain brand awareness tremendously in Korea. Reallusion clients cover many business sectors, including game studios, academic institutes, corporates, and governmental sectors. At the moment, we already have major Korean clients, including Pearl Abyss, Netmarble, and the Korea Creative Content Agency (KOCCA).
According to Daoudata’s Deputy General Manager Mr. Mun Yong Sam, Reallusion’s software has great compatibility with various 3D software such as 3dsMax, Maya, Blender, ZBrush, and Unreal Engine. These are all commonly used in the Korean media & entertainment industry by creatives. With governmental support in the metaverse development project, he expected growth in Reallusion software demand soon. Therefore, we co-hosted an exciting gathering, receiving positive feedback from all regional sales representatives. If you also wish to promote Reallusion tools in Korea, please reach out to Daoudata Team at ysmun@daoudata.co.kr for more information.
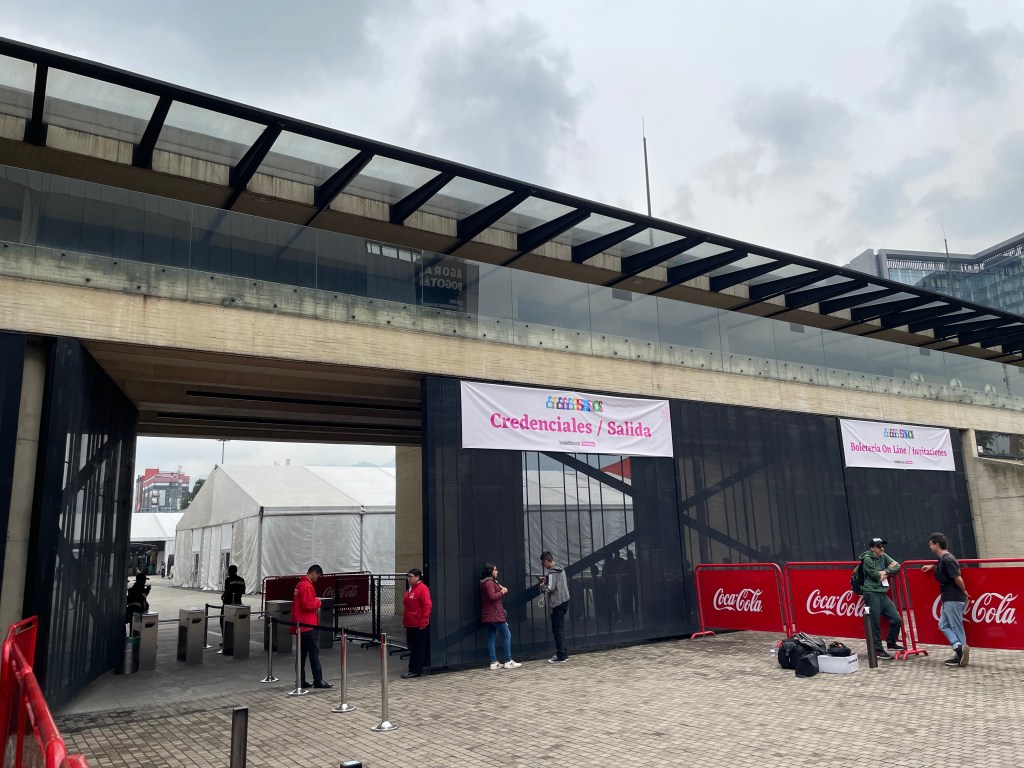
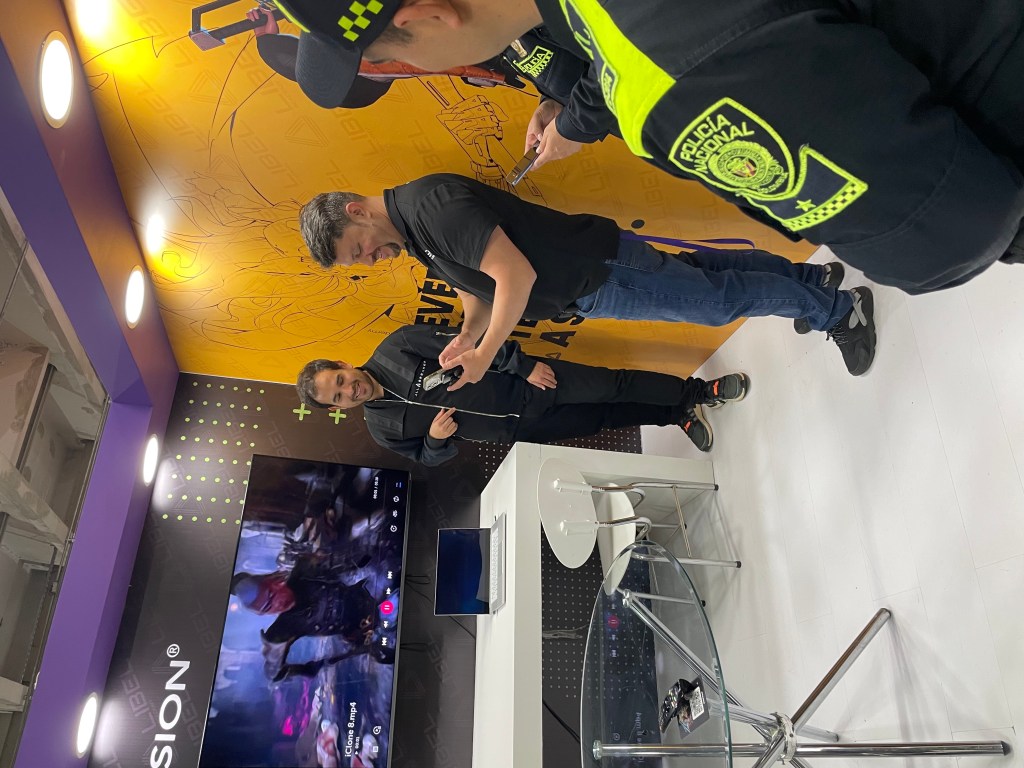
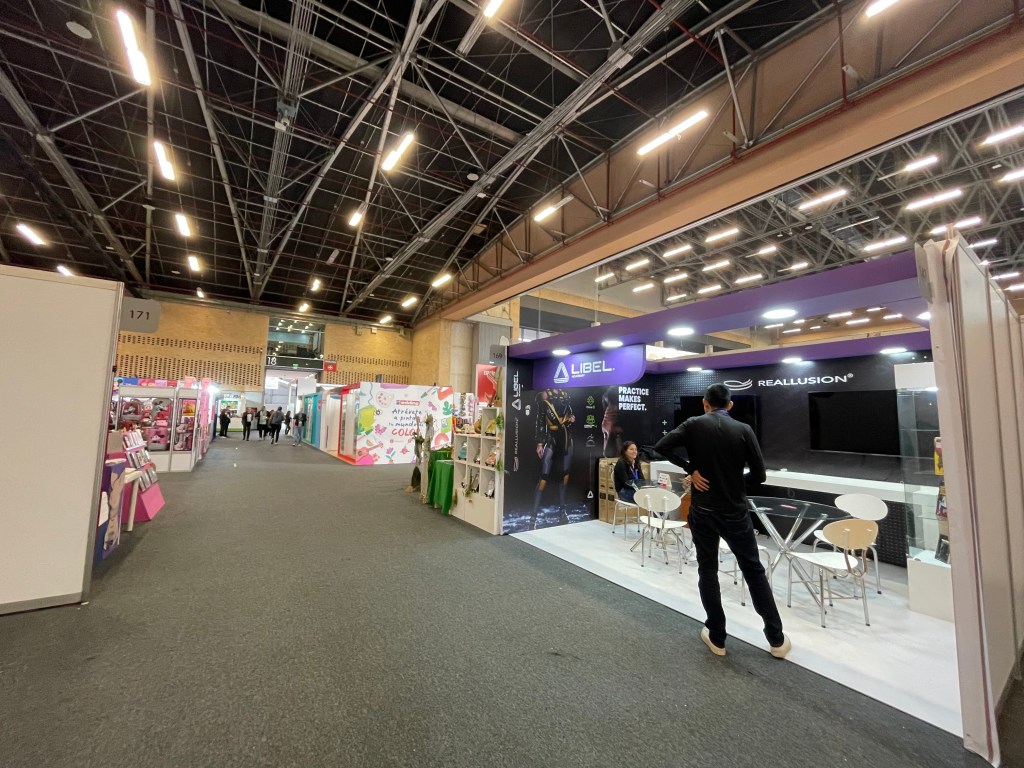
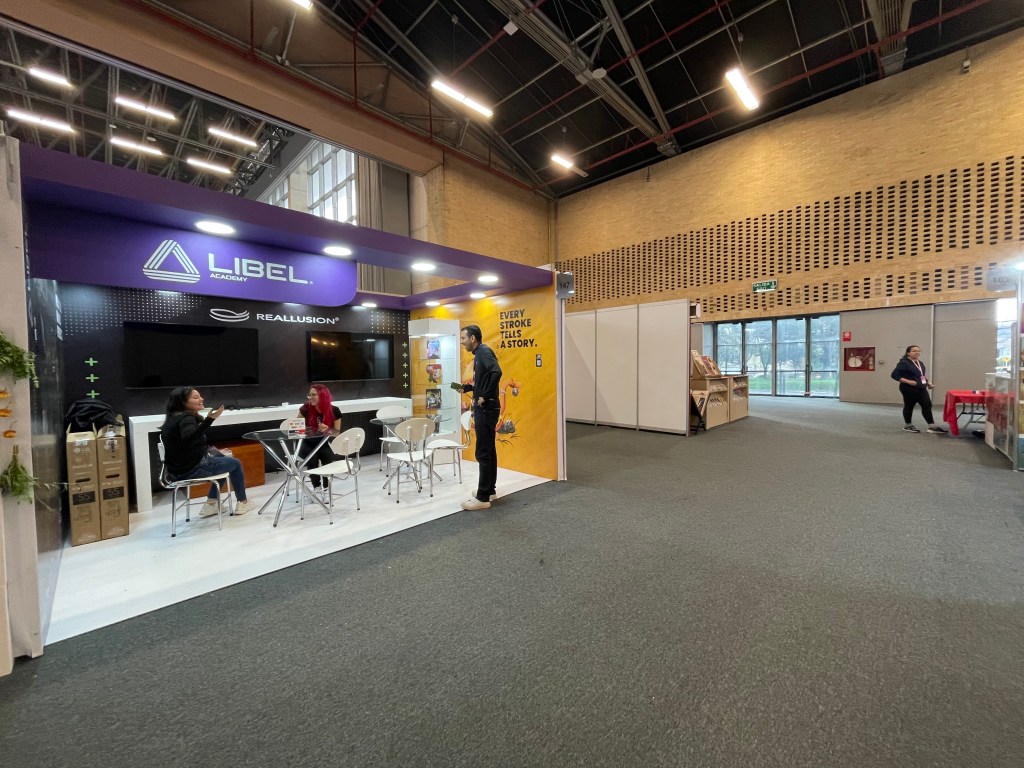
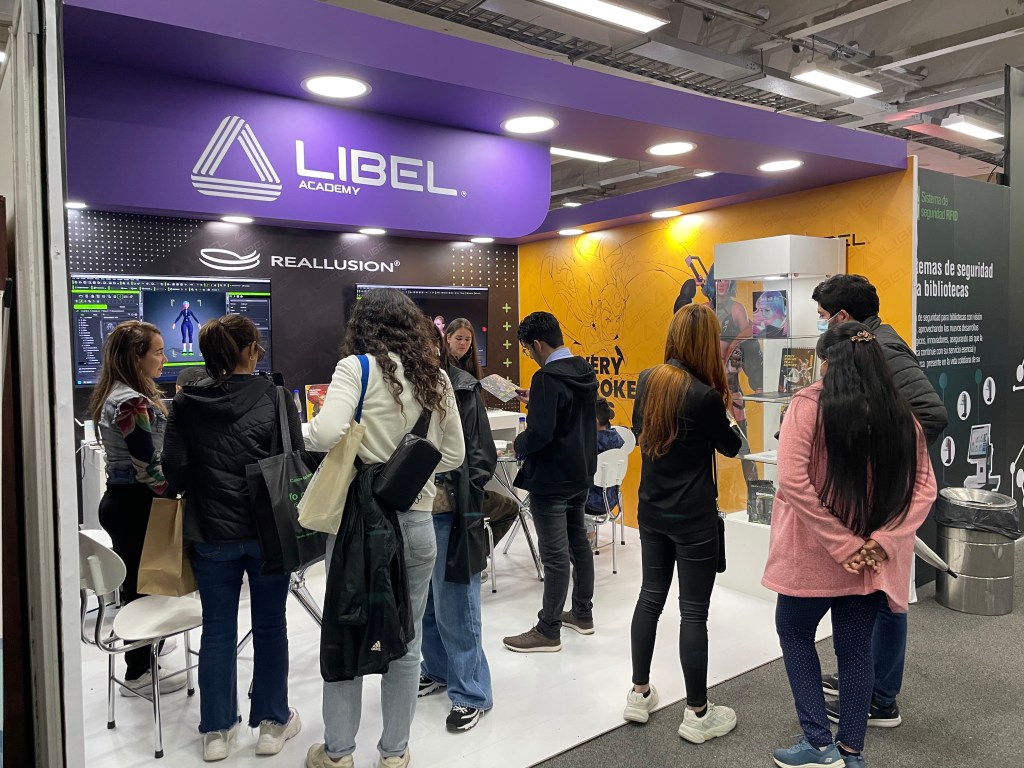
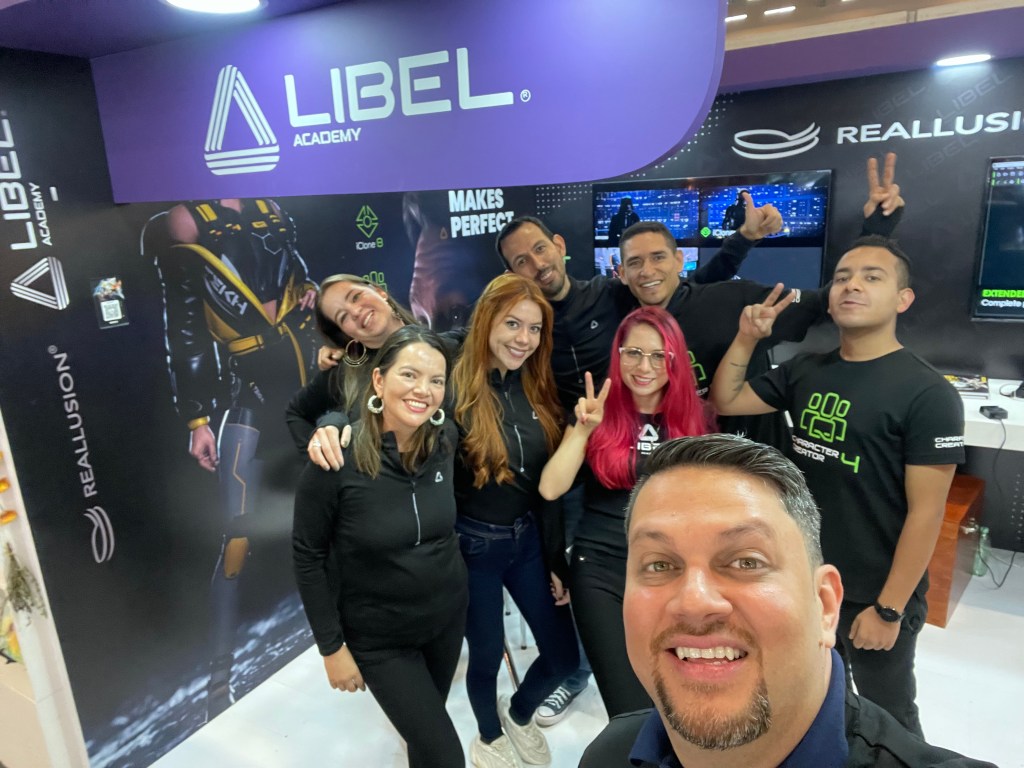
The 35th edition of the Bogotá International Book Fair (FILBO) was a resounding success, attracting over 600,000 visitors who flocked to the event to celebrate the world of books and literature. Lasting for a span of two weeks, FILBO provided a platform for authors, exhibitors, and enthusiasts to come together and engage in a wide range of cultural activities, including talks, workshops, training sessions, and book presentations. Among the participants was Reallusion, a leading provider of real-time creation and animation technology, in partnership with Libel Academy.
Reallusion’s presence at FILBO emphasized its commitment to the Latin American market and its dedication to fostering growth and innovation in the region’s digital art and animation sector.
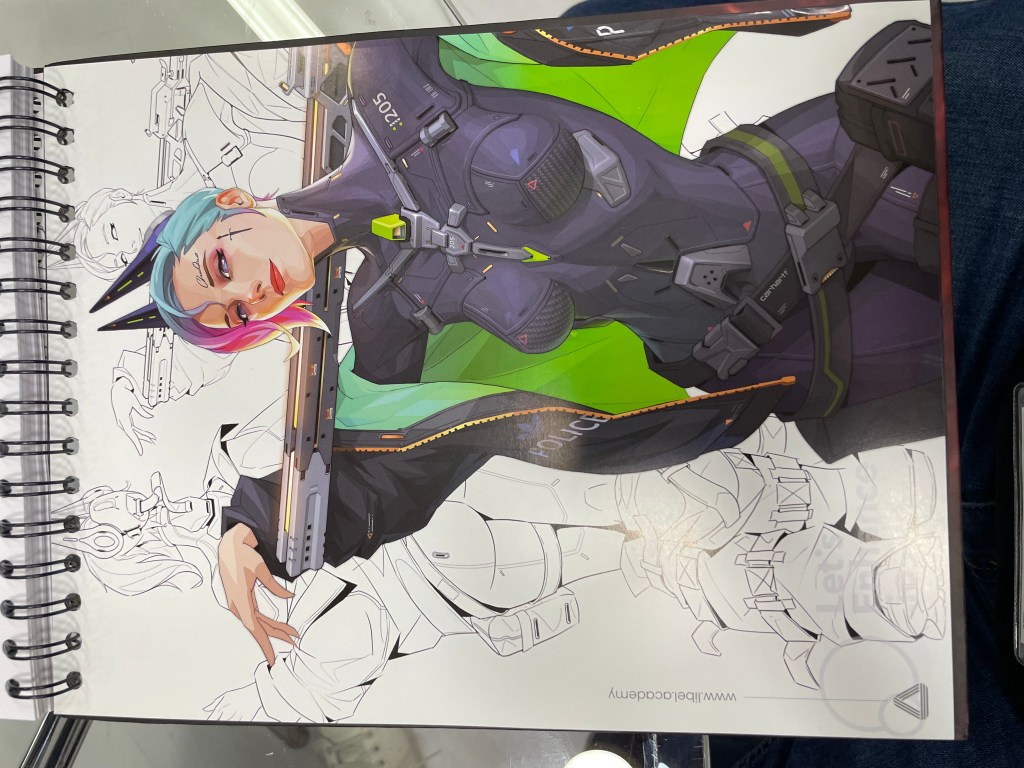
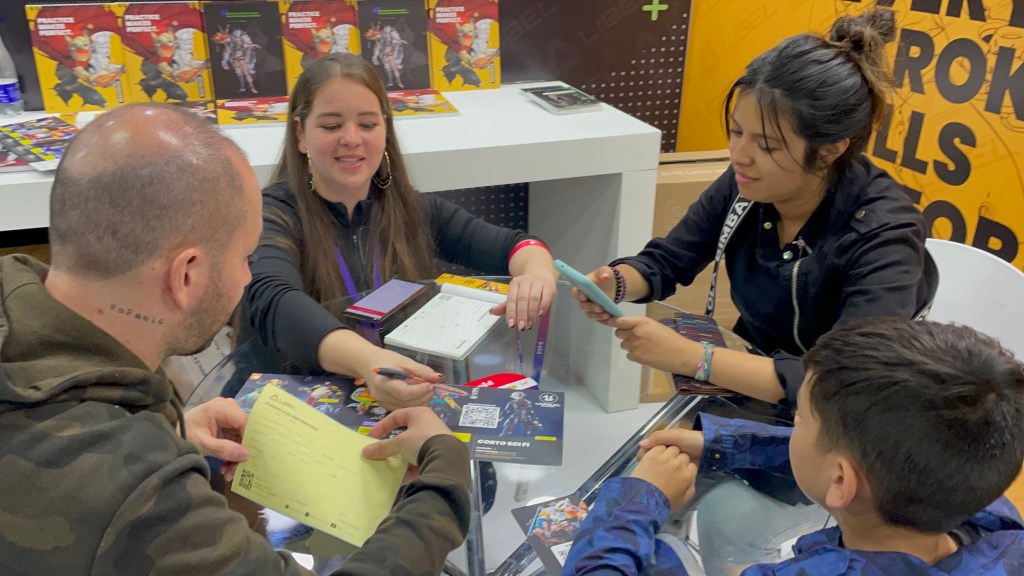
Libel Academy, known for its comprehensive courses in digital art and animation, showcased its various Master Course packages during the event. These packages offered training on popular software such as Character Creator, iClone, ZBrush, Blender, and more. Attendees had the opportunity to explore the latest advancements in these technologies and gain valuable insights from experts in the field.
One of the highlights of the event was the presence of Certified Trainer – Luis Duarte from CGARTIFEX Studios, who presented the latest developments in Libel Academy’s ZBrush-Character Creator Reposing master course. Duarte provided live demonstrations, showcasing the power and versatility of these tools in creating lifelike and dynamic characters. His presentation drew considerable attention and enthusiasm from the audience.
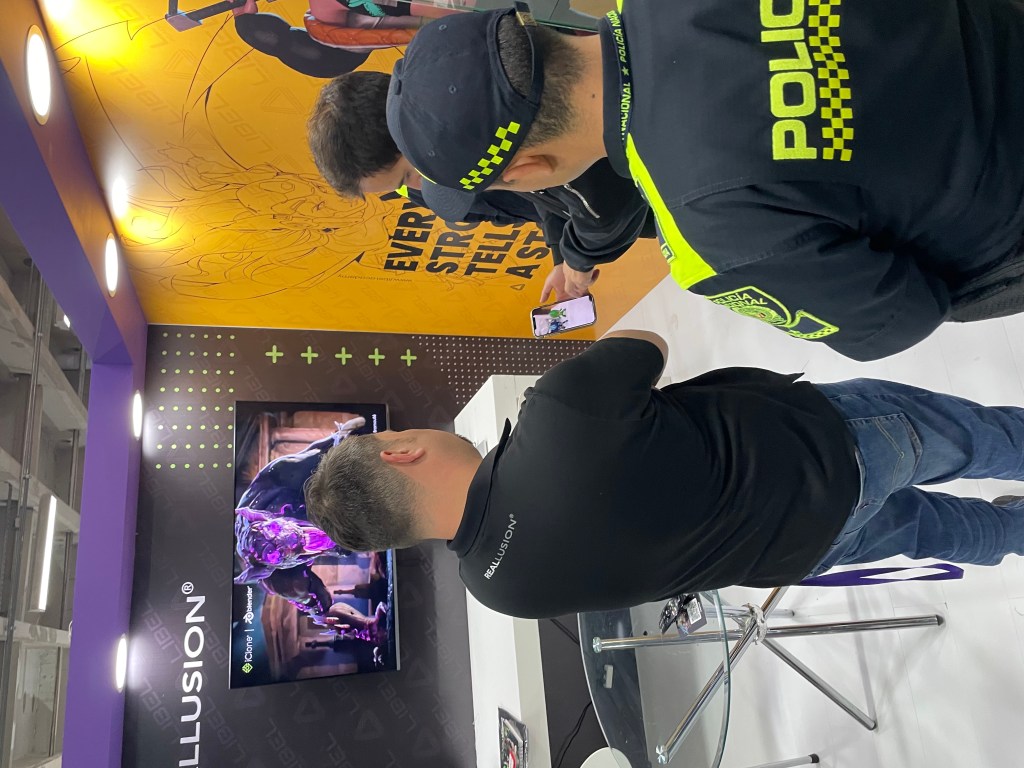
Reallusion’s Director of Marketing, Enoc Burgos, was also actively involved in the event where he engaged in live, one-on-one interactions with attendees, including university students, educators, and even representatives from Colombia’s Police Authority. Reallusion’s Character Creator technology, integrated with Unreal Engine, has been employed by the police for virtual reality (VR) training. Cadets can now practice simulated encounters with the populace on virtual Colombian streets, enhancing their preparedness and decision-making skills in real-life scenarios.
Beyond the professional engagements, Reallusion’s participation in the event was also an occasion to connect with Hispanic fans. By being present at FILBO, Reallusion provided a unique opportunity to engage with the region’s enthusiasts and professionals in their own setting. This direct interaction fostered connections and opened doors for collaborations, enabling the company to better understand the needs and aspirations of its Latin American audience.
Moreover, Reallusion’s presence at FILBO underscored its commitment to the growth and development of the South American region. By showcasing their cutting-edge technologies and providing training opportunities, Reallusion and Libel Academy aimed to contribute to the advancement of digital art and animation in the continent. This dedication to fostering talent and nurturing creativity bodes well for the future of the industry in Latin America.
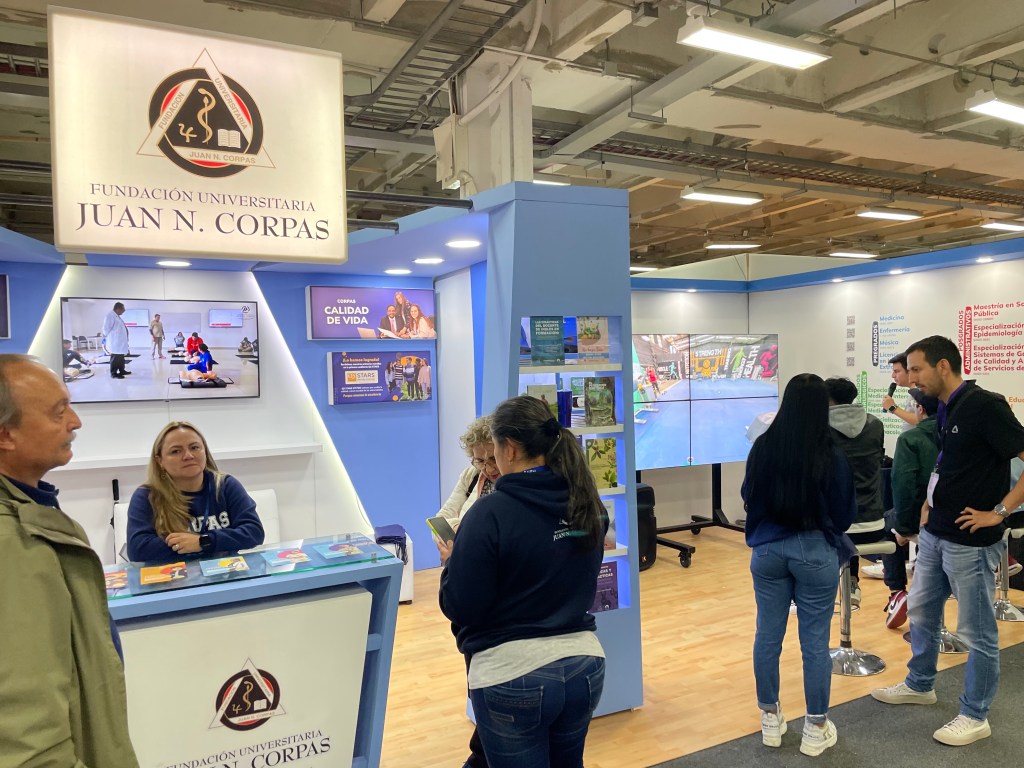
The 2023 FILBO proved to be an excellent opportunity for universities and educational institutes from all over Colombia. They were able to explore and experience the latest offerings from Libel Academy, including courses and software. This exposure allowed students and educators to stay at the forefront of digital art and animation, equipping them with the skills needed to excel in their respective fields.
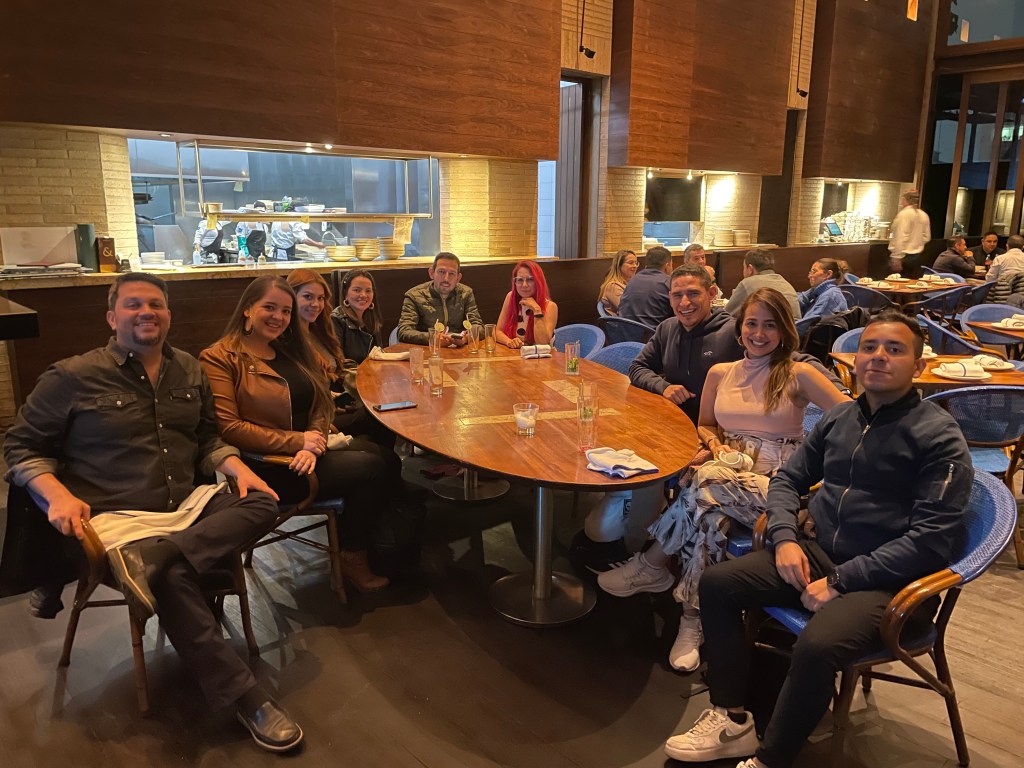
In conclusion, Reallusion and Libel Academy’s participation in the 2023 International Book Fair in Bogota, provided a vibrant platform for professionals, students, and enthusiasts to explore the latest advancements in real-time creation and animation technology. Through live demonstrations, training sessions, and personal interactions, attendees had the opportunity to expand their knowledge, enhance their skills, and establish valuable connections thanks to the tremendous dedication and effort from the entire team at Libel Academy! Here is to the next show! 🥂
Born in Chicago, Libertas started out with a passion for filmmaking at an early age, and ever since he’s had the desire to tell grand and fantastical stories featuring brave heroes on epic quests in lush and vibrant worlds, much like his Assassin’s Creed-inspired micro-short film “Modern Assasin Training Session.”
Libertas admits to always dreaming bigger than his shoestring budget could afford. Even still, he loves creating characters and their costumes to see them come alive, especially in his YouTube short films. Outside of his day job as the Manager of Videography and sole 3D generalist at his company, he spends his free time, once again, dreaming big and crafting new characters, costumes, and props for his digital actors who are instrumental in bringing his epic stories to life for the audience community and not just himself.
My Experience and Honest Review
The Hand-to-Hand Combat motion pack contains sixty-eight motions across four categories, including “Sparring”, “Evade & Counter Attack”, “Takedown & Throws” and “Win or Lose”. These mocap animations are designed for fights in games or films. Each animation is paired with its corresponding reactionary animation, and these combine as short choreographed sequences of high-action stunts that are useful for any close-quarter hand-to-hand combat situations. There are several things that I like about this pack, mentioned below.
Erik Larson (Libertas Review) gives his opinion on Reallusion’s Hand-To-Hand Combat Pack
Paired-up motions
As already stated, each action is paired with a reaction. If you’ve ever looked for any interactive fighting animations from Mixamo or Rokoko Studio, you’ll know how difficult it can be to find matching mocap animations. You will typically find awesome attacking animations, but there are usually no corresponding defensive animations. If you do find one, odds are they are not in sync, and you’ll have to spend a lot of time modifying the animations to match them up. Since these animations are paired up, it makes it very easy to put the characters in visually stunning fight scenarios.
Easy to work with
Since these motions are paired up, they are extremely easy to work with. Typically, all I need to do is add my characters to the scene and then add the corresponding character animations. I positioned the secondary character to line up with the first contact point of the animation. I then drag the transform point for that secondary character back to the beginning, and just like that, my characters are interacting wonderfully. Most of the time that’s all I need to do. The only time I’ve seen this become an issue is if there’s a drastic height difference between my characters. It seems these character animations were recorded with actors of relatively the same height. So, if there is a height difference in your characters, the animations might not connect perfectly. But that’s an easy fix using iClone 8’s animation layers, or even easier with Reallusion’s Reach Target System. You can dial in the animations quickly with these tools, and be on your way.
High usability, diverse motions
Overall, these animations just look great, being that they are recorded with professional stunt actors. I feel like a lot of care went into providing a wide variety of animations that can be quickly applied, and give us good-looking choreographed sequences in no time. I also like how the fights are not completely one-sided in these animations. In most of the sequences, both characters are engaged in the fight; they both throw fight-ending punches and kicks upping the ante for the outcome. This makes it a lot more compelling for the action sequence and keeps the tension high throughout.
Tips & Tricks: What Magic is This?
The drawback of these animations for me is that they’re not all that stringable, and I find it challenging to flow from one fight sequence to the next to create longer choreographed sequences. If you want to overcome this problem and create stunning combat scenes, I have a few tips for you.
Add Expressions
Adding simple facial expressions to your characters makes your characters and actions come to life. I use the face key tool to quickly add changes to my timeline. If you want to use my trick on how to cut between the character’s transitions by focusing on one of the character’s expressions, I would recommend taking a look at the Digital Souls Pack from Reallusion.
Bring more tension to the film by adding facial expressions!
Use Wide Angle Lenses
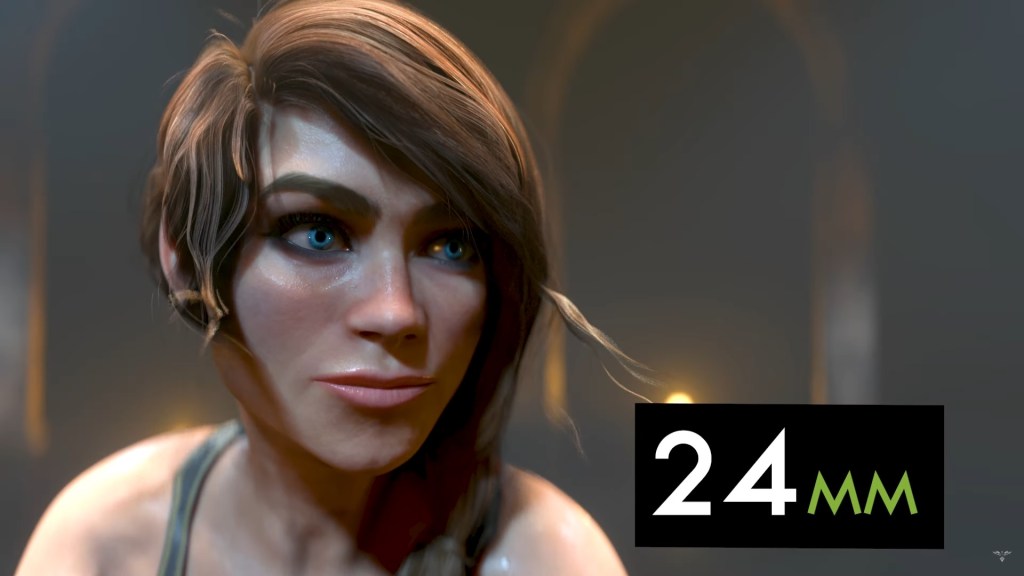
Without getting into too much in-depth on the choice of lenses and camera angles, if you want to accentuate the action, I personally like to use wide angle lenses: either a 35-millimeter or 24-millimeter lens; and bring the camera closer to my characters. This will place the viewer closer to the action, but will also provide a wider field of view in order to get more of your character’s movements in the scene. However, wider-angle lenses can distort your characters. Having lower sweeping camera angles can also bring a more dynamic feel to your scene. So keep your camera moving and avoid static shots for more visual interest.
Animation speed
Last but not least, keep an eye out for your animation speed. These animations were recorded with a lot of speed and intensity, which is a good thing. But it can also work against you. Sometimes, it’s more important to slow down the motions, in order for the viewer to visually comprehend what’s going on. The best fight sequences tell a story in and of themselves. And sometimes, we need to slow things down in order to communicate that story and emotion to our audience. So when using these animations, be mindful that you may want to slow them down a bit to help communicate the motions better to the viewer. This can be done directly in iClone 8, or if you export them out to programs like Blender as I do, you will be able to do that in various ways with your favorite 3D software.
Lower your animation speed and let your audience better comprehend your story!
A Bigger Budget Positions the ActorCore Asset Store as the Premium Source for Mocap Animations with Wider Coverage and Higher Standards
ActorCore is the ultimate destination for 3D animators looking for exceptional mocap animations and rigged characters. With a strong commitment to excellence and being the leading provider for 3D creators, ActorCore places emphasis on diversity, authenticity, and craftsmanship with its offerings. Recently, the asset store has introduced a new line of 3D motion series inspired by Hollywood stunts and action choreography. While Reallusion, the maker of ActorCore, is actively seeking partnerships with outstanding mocap studios to join the ranks of asset creators and collaborate on developing distinct styles for various forms of entertainment, including games, films, and multimedia.
Extensive Assortments of All-Purpose Motions
To help industries overcome their unique challenges, ActorCore has expanded its offerings to cover 2,200 motions in 35 broad-spectrum themes. Whether it’s everyday city and home life, office scenarios, social events like shopping and parties, transportation and commuting, or profession-specific motions such as construction and hospitality, ActorCore has it all. By searching for keywords and tags, everyone can quickly and easily find the contents that fit their needs and satisfy their specific requirements.
Over 2,200 motions pertaining to 35 themes are available in the ActorCore 3D store.
Flamboyant Motions for Hollywood-Inspired Themes
The 3D store has recently introduced mocap animations specifically designed for action adventure movies and games. One of which is the “Run for Your Life” motion pack, featuring 68 sequences suitable for chaotic scenes often seen in disaster movies. Additionally, the “Parkour” pack offers 45 athletic and acrobatic moves, while the “Hand-to-Hand Combat” pack includes 68 moves perfect for intense, paired fight scenes. New motion packs are set to release later this year for other frenetic scenarios like street riots and bank heists, along with Disney cartoon animation and motions for unconventional creatures like apes and orcs.
Thematic motion packs provide action-adventure content for games and films.
ActorCore Mocap Animations Offer Incredible Value
Rarely found in online marketplaces, these exhilarating and risk-taking motions often require the expertise of hand-key artists. Even so, the time-consuming production process often falls short of expectations because editing natural and sophisticated motions by hand is substantially difficult.
Using motion capture, on the other hand, requires professional studios to be well-equipped with skilled staff capable of storyboarding, writing, a group of actors interacting, and stunt performance. Not to mention the auxiliary support required, like directing crews to capture vast amounts of motion data and experts to refine the captured results. An experienced staff may spend several days on a large site, utilizing various props and state-of-the-art equipment for capturing and recording. Such productions require substantial budgets and a peculiar blend of specialists to complete these ambitious projects. Yet, this is precisely why ActorCore stands out, as it provides access to these one-of-a-kind mocap data distilled into multi-functional and highly-adaptive prepackaged motions that can be applied with simple button clicks or drag-and-drops.
Real-life motions of professional stunt actors were captured with the highest standards.
Call Out to Top-Tier Motion Capture Studios
Reallusion is on a mission to provide the greatest selection, highest quality, and broadest range of content to its users. To achieve this goal, the company is inviting the finest motion capture studios to become a part of their asset development community and collaborate with them in creating the most captivating and visually stunning 3D motions for ActorCore. Join Reallusion today and be a part of the most exceptional 3D asset community available. To learn more about the ActorCore Partner Program, simply visit the website or contact marketing@reallusion.com for additional information.
It is common knowledge that in the videogame development industry, what is new today may be tradition tomorrow. This means that from the moment you start a project until you finish it, you have the need to keep evolving and improving both graphically and in terms of animations and character design. Adapting the work done to the latest innovations in software development and the new features they offer.
At the point of development that we were at when Reallusion launched iClone 8and Character Creator 4, it was for us an unprecedented step forward in the history of our studio; as far as character creation and animation is concerned. As originally we began work with the previous software iterations of Character Creator 3 and iClone 7.
We can really see a before and after in our project, once we have obtained the results of applying these improvements from Reallusion to our Lucidus Mortem project, which we initially introduced with the Pitch & Produce program.
A strong point for us has been the intelligent human skin colour function and the magnificent SkinGen Premium tool. Another strong point for us is the advanced controls for morphs and facial expressions. This combined with the eyes, mouth and lips have allowed us to significantly improve the design of our characters, being able to appreciate as we said: A before and after.
The possibility of importing any rigged character into Character Creator 4 and from there being able to characterize and transform it, and then exporting it to iClone 8 for facial and body animation, is extraordinarily useful.
iClone 8 comes into its own with all its power, to create realistic and effective animations; creating transitions that blend one sequence into another with rigorous accuracy. This is just the beginning, as later on we can perform an extra clean-up where we can trim and smooth the sequence of animations even further. The Curve Editor helps us in this in an extraordinary way. At this point, we want to highlight the new and magnificent illuminations included in the software; which allow us to check how the character looks immersed in different environments.
Being able to see the result in real time in the engine with Unreal LIVE LINK and the compatibility with the main MOCAP systems, make iClone an essential software for us.
In short, we are developing a very complex project and we are sure that with the new Reallusion tools our Lucidus Mortem will be born ready for the future. – Indigo Studios
Kay John Yim is a Chartered Architect at Spink Partners based in London. He has worked on a wide range of projects across the UK, Hong Kong, Saudi Arabia and Qatar, including property development and landscape design. His work has been featured on Maxon, Artstation, CG Record and 80.LV.
Yim’s growing passion for crafting unbuilt architecture with technology has gradually driven himself to taking on the role of a CGI artist, delivering visuals that not only serve as client presentations but also as means of communication among the design and construction team. Since the 2021 COVID lockdown, he challenged himself to take courses in CG disciplines beyond architecture, and has since won more than a dozen CG competitions.
“Masquerade” tells a story of a girl with a concealed identity who enters an empty theater filled with statues. As the statues come to life, a mysterious gentleman joins her and they waltz to the rhythm of enchanted flames, lost in a world of magic and fantasy.
This project was my debut for a short CG film, allowing me to develop my skills in storyboarding while working with AccuRIG and motion capture data to create intricate character animations. It was also an opportunity for me to refine my lighting and rendering techniques. That being said, I would like to express my sincere gratitude to Reallusion and GarageFarm for their sponsorship. Their support made this project possible.
Workflow Overview
The software and workflow I used throughout every stage of the project can be summarized as the following:
▪ Redshift > Neat Video (denoise) > After Effects (Heatwave) > Premiere (Magic Bullet Looks) > RIFE-App (interpolation)
1. MODELING
The scene consists of two spaces, the hallway and theater, designed and modeled in reference to the Louvre Palace and Opera Garnier theater respectively. While they are not complicated spaces in terms of architecture, the ornaments are highly detailed and could have easily resulted in extremely heavy models that caused render times to skyrocket. Because of this, optimization became a core tenet throughout the making of “Masquerade”.
The following iconic buildings served as references throughout the modeling process.
Using my past projects “Ballerina”, “The Magician”, and “The Gallery of the Great Battles” as the foundations, I recycled a lot of the ornaments that I had modeled for the Amalienburg hunting lodge in Munich. With the main architectural space blocked out, I then switch between Rhino and C4D, using the following Rhino commands and C4D functions for modeling:
Flow (Rhino): Conform objects to a specified curve, useful for accurately bending ornaments meshes to architraves, bullnose etc.
Flow Along Surface (Rhino): Conform objects from one surface to another, useful for accurately transferring ornaments on flat surfaces to curved counterparts, e.g., balcony balustrade.
Spline Wrap (C4D): Similar to Flow in Rhino but procedural, can not handle heavy meshes like Flow but extremely versatile for changing design.
Volume Builder + Volume Mesher + Quad Remesher (C4D): Useful for topologizing heavy meshes that require close-up details but need to maintain their 3D silhouettes.
Mirror Instance (C4D): I set my scene origin at (0,0,0), placed everything symmetrically under a null, instanced, then scaled the null’s X by -1, which mirrored it procedurally.
While I used a lot of my ornaments previously modeled in ZBrush and retopologized in C4D, I also used 3D ornaments from textures.com. I recycled meshes and used “Render Instances” within the project wherever possible to constrain file size.
Figure 1. Rhino time lapseFigure 2. C4D & Rhino time lapse
2. CHARACTER CREATION
The female character I used for this project was originally created in Character Creator for a short called “Ballerina”. I have since updated her using the integrated SkinGen library in CC4.1 and added an extended facial profile for animation in iClone 8.1.
My CG character workflow drastically sped up when I began to integrate CC4 with Redshift’s Random Walk Subsurface Scattering. Not only had CC4’s integrated SkinGen features allowed for faster procedural texturing, my overall workflow was simplified into a series of drag-and-drop processes with textures automatically exported with the FBX files.
The male lead ended up being a modified version of a default character in CC4.1. While the character creation process had become a lot easier in CC4, making convincing characters remained out of reach for me. I used the following websites as my go-to reference while adjusting character bone structures, facial silhouettes, and skin textures.
This site generates a non-existing person every time the page is refreshed.
This site provides a series of high-res portrait photos.
After creating the male and female leads, I exported both characters to iClone 8.1 for animation.
Figure 3. Face morph
Figure 4. CC4 extended facial profile & Digital Soul test – 1
Figure 5. CC4 extended facial profile & Digital Soul test – 2
3. AccuRIG in CHARACTER CREATOR 4
The statues played a huge role in setting the tone for the scene, in fact, the final theater model and shot framing were designed around the movement of the statues.
Figure 6. Theater clay render
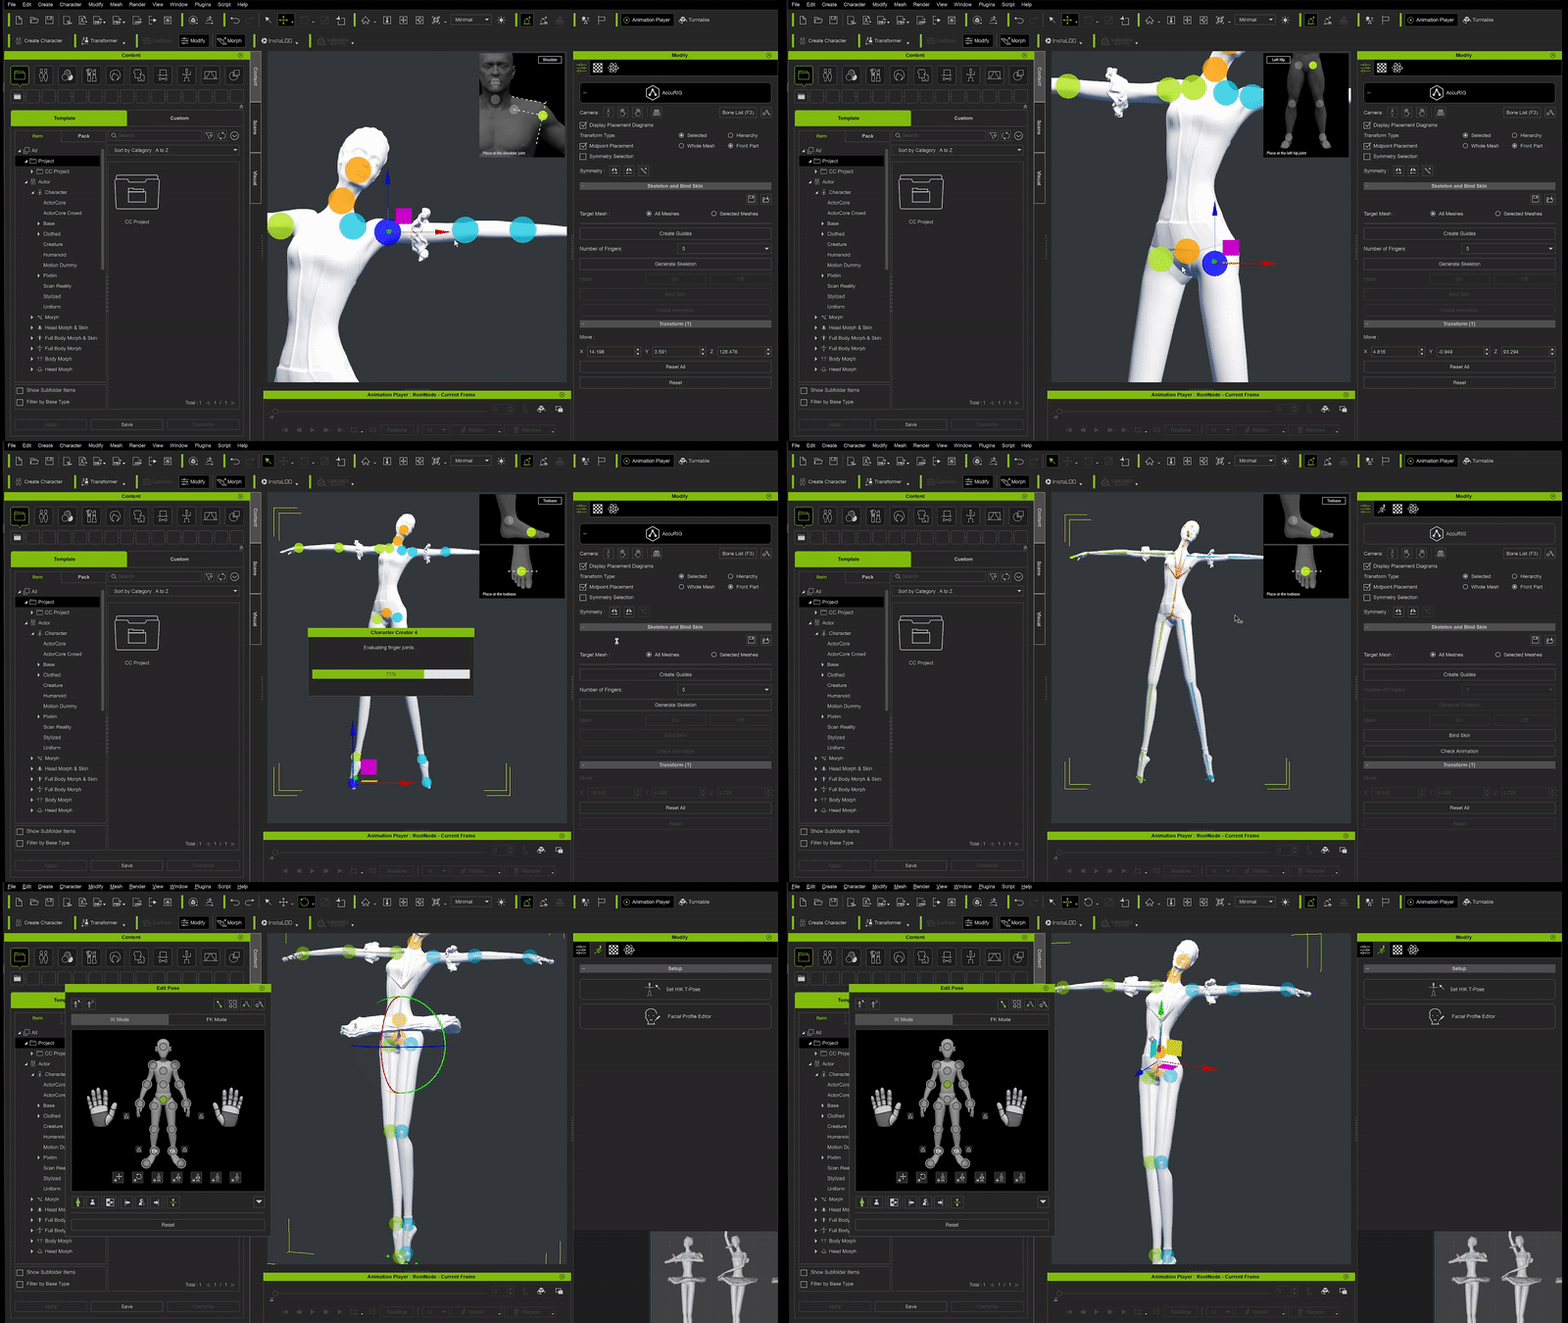
AccuRIG in CC 4.1 lets inexperienced artists rig their models and turn them into animatable characters. For AccuRIG to work its magic, I had to first remove the skirt on the ballerina statue that would have interfered with the rigging procedure. I then reposed the statue into a t-pose using a combination of Cinema 4D (C4D) and Houdini.
Figure 7. CC AccuRIG preparationFigure 8. CC AccuRIG time lapse
For the animation, I used Edit Motion Layer to create three varied movements for use in my scene. I then exported the animated statues into Houdini, removed all of the body parts except for the sleeves, and imported them into Embergen for pyrotechnic simulation. Exporting the pyro VDBs from Embergen became an overnight process much like final rendering.
At the time of this writing, Embergen (v0.7.5.8) did not support VDB export at 24 fps, which would have been the preferred frame-rate for most of my projects, including “Masquerade”. I eventually uploaded the project to GarageFarm for final rendering, hence it was equally important to optimize the file sizes along with the render times. Exported VDB files can easily take up dozens of gigabytes of space (approximately 150 GB in total for the whole project). So, in order to reduce the total files size, I used Houdini’s Retime node to adjust the timing of the VDBs from 60 or 30 fps to 24 fps, which effectively reduced the total file size by 25%.
Figure 9. Embergen pyro simFigure 10. Retiming VDBs in Houdini
I then imported the animated Alembic files, FBXs, and simulated pyro VDBs into C4D. I used Constraints to bind the skirt back onto the FBX skeleton’s pelvis, which would transform according to the animation. Finally, I duplicated the statues into an array and offset every statue’s animation slightly to create a gradual rhythm to the animation.
Figure 11. Animated statue with pyro effect
4. CHARACTER ANIMATION
The character animations were created using a mix of Xsens motion capture data and ActorCore premade motions. For the entrance sequence, I first applied a looping “Cat Walk” cycle from the ActorCore motion library to the female lead. This gave me the foundation for animating the girl’s entry into the theater hall. I then animated her transformation by matching the pace of the walk cycle and using iClone 8.1’s Motion Correction feature to compensate for foot sliding. I continued to use Edit Motion Layer to add the head turn amid her cat walk and used features from “Digital Soul” to apply facial animations.
Figure 12. Catwalk
With the entrance sequence animation complete, I exported the animated character as an Alembic file to Houdini, where I removed intersecting body parts. Particularly, the arms which would have interfered with the cloth simulation in Marvelous Designer (MD).
Figure 13. Dress simulation
For the second half of the animation, I motion captured real-life actors in Xsens suits doing a “Cinderella” waltz and transitioned the animation data to a slow dance motion from Reallusion’s “Studio Mcap Series: Motion for Lovers”.
Figure 14. Motion-Capturing a Cinderella Waltz
With the Xsens raw data imported into iClone 8.1, I used “Digital Soul” to apply facial animations and locked the eyes of my actors on one another. I used Reach Target to correct the glitchy parts of the interactions and Edit Motion Layer to readjust the intersecting body parts wherever necessary.
Figure 15. Editing Motion Data in iClone 8 (mocap clean-up)Figure 16. Using ‘Reach Target’ feature in iClone 8
5. CLOTH SIMULATION
While C4D and Houdini have both made significant improvements in cloth simulation lately, I still find that Marvelous Designer offers a level of control, speed, and quality that surpasses every cloth simulation software I have tried. While realistic most of the time, MD’s simulation rarely gives the perfect result. Generally, I tinker with the Friction settings and Simulation Quality in face of the minor glitches I encountered along the way. I then export various versions of the simulation into Houdini and use Blendshape to blend them together.
Figure 17. Dance dress simulationFigure 18. Tux simulationFigure 19. Adjusting blendshapes in HoudiniFigure 20. Dance animation after mocap clean-up
To add some mystery to the protagonist, I had her wear a cloak at the opening sequence, which gradually vanishes and reveals the character’s 3D face and dress. This was created using C4D’s PolyFX with an improved setup carried over from a previous project of mine called “Kagura”.
Speaking again of the entrance sequence, I used iClone’s camera in combination with C4D Camera Morph to precisely control the tracking camera. At first, I set up a camera in iClone 8.1 and aimed it toward the female lead’s eyes. This created the illusion of the character looking into the camera and breaking the fourth wall. I then exported the camera as an FBX file for use in C4D. Then I positioned a total of four cameras around the entrance and used Camera Morph to smoothly transition among the four cameras.
Figure 23. Camera animation
With the character in place, I played the sequence repeatedly and added three extra cameras along her walking path, with two cameras eventually passing her and switching their focus toward the statues in the theater. The final Camera Morph is controlled and timed with Greyscalegorilla’s “Signal” plugin, which allowed me to use a curve (rather than keys) to control the timing of the camera transitions. For the dance sequence, I used Align to Spline with a circle spline centered on the characters to create a consistent and controlled framing of the characters, as if they were filmed with actual cameras attached to dolly tracks.
Figure 24. Dance in the assembled scene
I kept the lighting setup as simple as possible, using the RS Sun and chandeliers as the primary sources of light and pyro VDBs as the secondary source of illumination. I added a RS Environment driven by a Maxon Noise shader to add an additional layer of atmosphere to the final render. I also kept the materials simple, using only five materials in total to maintain a distinguishable color palette.
Since version 3.5.06, Redshift’s updated Random Walk SSS has provided more realistic SSS models without sacrificing render speed. It simplifies the setup of skin materials and produces better results under a variety of lighting conditions. Prior to this update, Redshift’s ray-traced SSS required multiple texture layers and manual adjustments to create realistic skin materials, which was a time-consuming process that required constant adjustments on animation sequences with significant light changes. While Arnold Renderer has offered Random Walk SSS for some time, Redshift’s implementation has made it much more efficient and practical for use in animation.
For the Subsurface settings of the characters’ skin materials, I used the Skin Diffuse map from CC 4.1 as the color and set Radius to a salmon color (similar to the color one’s dermis when viewed under direct illumination). I set Scale to 0.1 to represent the thickness of the skin, and used Random Walk mode with Include Mode set to “All Objects”.
Figure 25. Redshift skin material graph
As for the look of the fire, I aimed for a more fantastical and smokeless appearance. To ensure that the colors and movements of the fire would match the lighting and color palette of the rest of the animation, I dedicated a lot of time at the start of the project to test different render and pyro simulation settings.
Figure 26. Fire dress test
7. RENDERING
At the time of writing, there was a persistent NVIDIA driver issue (a VRAM memory allocation bug) that consistently caused Redshift to crash on long sequence renders. This issue was widely discussed on Redshift’s Facebook group and official forum. Some 3D artists found that downgrading their NVIDIA drivers to 462.59 worked well, but the only fix that worked for me was to disable half of my GPUs for renderings (two out of four in my case).
The scene for Masquerade was one of the heaviest among all the animation projects I have done — the architectural model alone totalled 4 GBs, while the entire scene (including VDBs, textures, characters, cloth simulations) totalled over 500 GBs. To optimize render times, I converted all static objects, including Matrix objects, into Redshift proxies by groups. For example, ceiling as one proxy and walls as another. This drastically reduced the loading times for geometry during final renders. While I used to shy away from using Redshift proxies for animations due to render farm limitations, I have had the pleasure of using GarageFarm, which fully supports Redshift proxies as long as the proxy material properties are set to “Materials from Object” or “Materials from Scene (Match name and prefix)”.
Aside from its support for Redshift proxies, working with GarageFarm was one of the best experiences I have ever had using a render farm. The 24/7 support from the GarageFarm team was invaluable and they were always available to answer any questions I had. One of the standout features of GarageFarm was the flexibility it offered when it came to rendering. The ability to render single images in strips and having three levels of priorities for rendering jobs allowed me to easily manage my budget and render times. I would highly recommend GarageFarm to anyone looking for a user-friendly and reliable renderfarm solution for their CGI animation projects.
For the final rendering, every shot was saved individually as one project, which included the following:
Static geometry as RS Proxies, for architecture and furniture.
Matrix Objects as RS Proxies, for flower petals scattered across the ground and in the air.
Characters and animated garments in Alembic format
Simulated pyro in VDB format
I experimented with multiple techniques for further optimization and found the following four to have the most drastic reduction in render times:
Deleting everything outside the camera: I created unique scenes for every shot such that each scene only contained what was visible to the camera. This significantly reduced my final render times by up to 80%, especially for the statue close-up shots.
Turning off motion blur for Matrix/Cloner objects with RS Object tags
Keeping render samples low. I kept mine at the default, with Automatic Sampling set to a threshold of 0.03 and denoising with Neat Video in post-processing
Rendering only every other frame and using “RIFE-App” to interpolate frames.
Note:
Technique 3 resulted in relatively noisy renders, which I then imported as sequences into Premiere Pro and used Neat Video 5 for denoising. I left most of the Neat Video settings at their default and “automatic” values, but it’s important that you right-click on the Premiere Pro viewport and make sure the Playback Resolution is set to “Full”. This ensures that Neat Video samples the final renders at full resolution. The Neat Video user interface is easy to navigate, but I recommend checking out their official tutorials to get the most out of the software. Technique 4 worked for the first half of this particular project, but did not work for some of my other projects. Make sure to do test renders before proceeding with the final renders.
Figure 27. Premiere “Playback Resolution”Figure 28. Neat Video
For the final touches, I used Red Giant Universe Heatwave in After Effects to add heat distortions to the fire. I also used Magic Bullet Looks in Premiere for color correcting, adding chromatic aberration, and film grain. The resulting effects were reminiscent of movies filmed with detuned 70s lenses, adding a layer of nostalgia and enigma to the final aesthetics.
Figure 29. Applying Heatwave effectFigure 30. Magic Bullet LooksFigure 31. Raw renderFigure 32. Final still with heat distortion & Magic Bullet Looks
Conclusion
In conclusion, the creation of project “Masquerade” was a challenging but rewarding journey of self-learning and artistic exploration. The process of bringing this character animation project to life allowed me to develop my skills in storyboarding, character design, character animation and rendering.
This project was created amid the rise of text-to-image artificial intelligence (AI) systems, which have the potential to disrupt the field of visual arts and threaten the livelihood of artists. While these technologies offer new possibilities for automation and efficiency, they also raise important questions about the role of creativity and human expression in an increasingly automated world. In the face of these challenges, I believe that it is more important than ever to celebrate and support the work of artists and creators.
By sharing my own process and insights through this article, I hope to inspire others to pursue their own artistic endeavors and to value the unique perspectives and talents of human artists. Despite the advances of AI, we must remember that it is through the passion and dedication of artists like ourselves that the world can continue to be enriched by the beauty and complexity of human creativity.