首頁 » 2022

Create animated drawings with Photoshop and Cartoon Animator

The “Winner Tips & Tricks ” series covers practical workflows and techniques shared by winners of the “2022 Animation At Work Contest”. To let users see the full spectrum of the Cartoon Animator pipeline, we are introducing projects that received attention and credit from the community. Let’s now take a look at “Biker” to see how Vivek Rai worked his magic with Reallusion Cartoon Animator (CTA).

About Vivek Rai

I was born and raised in India. Kolkata, the city where I grew up is immensely rich in literature and cultural heritage. This is where I found my passion for pencil sketching and reading comic books. My mind was completely blown away when I first saw my classmate make a flip book. For those who don’t know what a flip book is: it is a series of illustrations of an animated scene that is bound together on several papers in a sequence, to give an illusion of movement by flipping them rapidly; a common example is a bouncing ball or early Disney cartoons. This was when I realized that artwork could also be turned into animation.

The next 25 years were challenging because we moved to different places in India due to my father changing jobs—new school, new friends, and the increasing weight of academics. The academic struggle continued till I came to the USA to pursue my master’s in electrical engineering in 2008. It was only in 2011 when I earned my first paycheck and I felt that I can now ease off and revisit my old passion for art.

The memories of the awesome flip book animation from childhood were still fresh in my mind, so I bought myself an iPad and downloaded an app that allowed me to create keyframe animation. And just like that…I got into animation. Or so I thought. Because I soon realized that creating a quality keyframe animation of even one second would take a significant amount of work hours, like my first animated video on YouTube contained over 1,500 frames and close to 200 work hours as a beginner (In 2017, I started my own youtube channel by the name Saffire Animation where I would turn sequential comic book art into animation).

Although my first video on YouTube was well received by the viewers, as an animator I soon realized that keyframe animation comes with some limitations, and my job as the sole animator would be a lot easier if I could overcome these limitations. For example, if I can just rig my character for basic motions like walk/run cycle, jump, and talk, then superimpose the same rig on different characters then it will save my time in redoing the same motions repeatedly. Apart from that, I also wanted to spend less effort on creating in-betweens. My google search soon landed me on some name brands in the market but they had a monthly subscription fee and were too complicated with a huge learning curve. Reallusion’s Cartoon Animator had all the features which I was looking for and so I started off with a 30-day trial version and then soon purchased it for good. I soon created a video that had an overwhelming response of 96k views on my channel in just a few weeks. Things were all set and good to go, but just one challenge remained: time management.

Now, with a full-time IT job that requires my attention from 9 am to 6 pm every day as well as being a father of a seven-year-old, comes with its own challenges. So, after dinner, cleaning up, and putting my little one to sleep I don the cape of an animator when everyone in my house is asleep. I had turned a closet in my house into my personal studio which also has a little recording space. I animate three to four hours during the night and at least two more hours in the early morning. This way, I can spend approximately five hours on my hobby. I am happy that in a world where many people complain about things not being under their control, I am able to make time for what I enjoy when and wherever I can.

Why I made “Biker”


I used to own a Ducati Monster during my early years, so the subject I chose for the 2022 Animation at Work contest is about a biker and his love for his vehicle. Keeping the video simple, I wanted to tell a short story about a biker’s passion, drive, and initiative. To keep the opening dramatic, I used a soothing track and ensured that each successive shot ups the excitement to build up anticipation for the next scene.

Usually, motorcyclists are rebellious and stand for freedom, so I added a bald eagle to the video to show its rebellious side and its high-flying attitude as a symbol of freedom that would compete with the biker. I created multiple drawings of the animal and biker that would keep the entire video dramatic. CTA has an amazing real-time synching technique with some photo editing software. I used Adobe Photoshop as the PSD editor and Procreate as the drawing app for hand-drawn scenes.

Why I chose Cartoon Animator


Cartoon Animator is an easy-to-learn software because it is designed to provide a very clear workflow and does not contain a lot of extraneous features to distract you. It’s clean, simple, and easy for beginners to use this software where no prior 2D animation experience is required. One can also use CTA to make the process of 2D character animation intuitive and non-technical. For those who are new to Reallusion’s CTA software, Reallusion holds live webinar sessions where animators can get answers to their questions.

Even though CTA is not known for creating artwork, it can work in tandem with either Adobe Illustrator or Photoshop, which is the second big factor for me. One can build a character with its individual parts as separate objects in Illustrator, or on separate layers in Photoshop, and then use Character Animator to rig those pieces together into an animatable puppet. CTA has a very underestimated feature of supporting frame-by-frame animation; I learned about this feature accidentally when I prepared a sequential 2D animation in photoshop, and I imported the frames in PSD format.

The third and most prominent factor for using CTA is the Live Performance Capture Animation tool. Here, one can use their webcam and microphone to generate live performances for their animated characters and deliver them to the audience or record the performance on the project timeline and refine it further by hand.

How I did it with CTA

Step 1: Script and Storyboard


I kept the video short around one minute with only background, SFX, and music (no dialogue). I chose background music from a general license website. Then I looked up various YouTube videos on bike drifting and created a rough layout of every scene on my timeline. Once I finalized the layout of the rough sketch, I started drawing and adding colors to my scene. Below is an image of a series of snapshots from several videos, which I laid over the music as a reference.

Step 2: Character Creation & Sketching


While going through various YouTube videos, I picked up some basic 3D biker accessories like a helmet and boots, as well as a drift animation. With some drawing skills, I laid out a character in his early 20s, wearing a helmet and riding a Ducati Monster (my first bike) using paper and pencil. Once I was confident with the results, I scanned the drawing and digitally imported it into my drawing tablet.

Before creating the animation, I like to show the animation drawing to my seven-year-old for a second opinion. His wanting to see more of it gives me confidence that I’m on the right track. The following are some of the rough sketches during the development stage.

Step 3: Characters & Sprite Animation


Every shot had its own set of requirements. For the shot where the lead character leaps into the air with his bike, I used different sprites of the character to create a keyframe animation in CTA. Some shots like the lead approaching his bike and the bird flapping its wings required slow motion that needed to be smooth sans the choppiness that often accompanies keyframe animation; for this reason, I used the bone-rigging feature shown below.

Step 4: Scenes Creation, Composition & Camera Setting


I used camera movements to produce dramatic tension by using the Live Camera feature in CTA. With Camera Operation set to Mouse Select mode, I used the Alt key to accelerate the switching of the cameras: Alt+LMB to pan, Alt+LMB+RMB to zoom, and Shift+MW to zoom in. I played with these controls to give some depth to my still shots, especially where the biker lands on the ground after performing a somersault. To achieve this effect, I first downloaded a clip with no camera movement and another clip with camera movement.

To convey depth to the background, I placed the props in a way that would give a parallax effect. I combined both shots in the video editing software and kept the biker in the center of the frame using the “rule of thirds”. The shaky camera effect is a technique that I also commonly use when the biker is zooming past the screen. This took me barely five minutes to produce and it delivered exactly what I wanted out of that shot.

Step 5: Sound FX


I believe that music plays the most important part to produce a dramatic effect on the scenes. So, I like to use copyright-free music from a website like EpidemicSound.com where one can download music of various moods and tones. Apart from that, I looked up some SFX (like bike roaring, brake screeching, etc.) that would give my video a professional quality.

Conclusion


Cartoon Animator can help me to generate satisfying results without complicating workflow. Reallusion also offers FREE online tutorials for users to access at their online portal, making self-learning possible for users like me that have to switch between day-job and nighttime hobbies. I hope with my story and demonstration of the entry workflow, more users will get inspired and start creating more 2D character animations!

Follow Vivek Rai

Youtube | https://www.youtube.com/c/saffireanimation

Instagram | https://www.instagram.com/saffire_animation/

Learn from Winners: Create K-Pop Avatar with Game Modeler in Seoul

Hello everyone! My name is Yunji Jung (Little Gold), I live in Seoul, Korea.

I’m a 3D artist ready to jump into what I love. Sometimes I participate in game environment design, but mostly I do character modeling. Currently, I’m working as a character modeler in the game industry which I’ve always dreamed of becoming since I was a kid.

Having worked in the game industry for several years, I realized that 3D technology was evolving daily and that easy-to-use tools are rapidly entering the market.

Fortunately, I am a person who likes to explore new things. I often just scratch the surface of various tools featured on YouTube in my free time. Among them, I found Character Creator (CC) lets me work intuitively and efficiently without complicated tutorials, so I often use the tool for my work.

Part I. Winner Entry Workflow

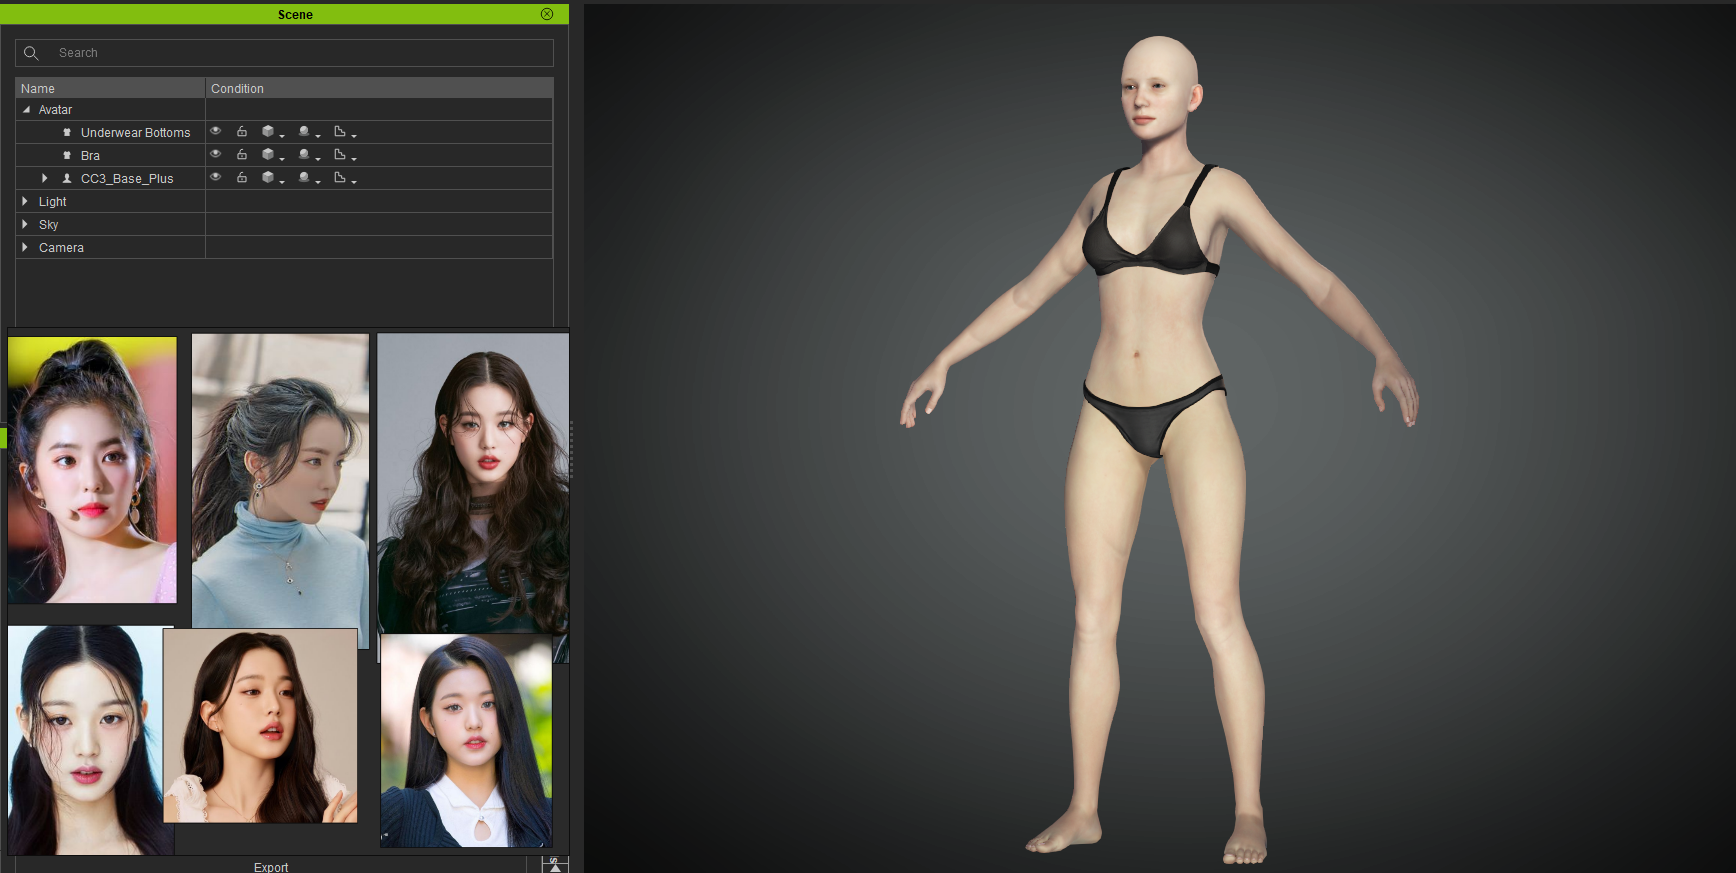
Step 1. Finding Reference

It takes a lot of time to find references for me. It’s a very important process to gather references before starting work. Before I start working, I specifically design who my character will look like and which celebrity my character’s outfit should be inspired by.

For heads, look for references where you can find features such as front, side, 45 degrees, top, and bottom, if necessary. Next, we will decide on the material and overall feeling given by the costume. In this case, K-pop idols gave me a lot of inspiration. And Like many workers, I mainly use the PureRef program.

Step 2. Editing 3D Face and Body

Basically, I used the body provided by CC3 as the base.

Let’s start with the head. CC3 is very convenient because you can intuitively modify the shape of the 3D face. In particular, it is possible to manually control the deformation as you like while connecting to ZBrush with GoZ. In my case, I purchased an additional Headshot plug-in and used it, which enables more sophisticated control of the head.

Step 3. Head Corrections, Adding Hair & Dress

Modify the head more precisely. Then, before making a character pose, apply CC3’s stock hair and dress to get a feel of the character.

Step 4. Making a Character Pose

I made a character pose after putting on my hair and dress. The reason is that the body may look different when the character wears a costume and when it doesn’t, so it is to make additional modifications to the body to the look that you want when they’re dressed.

Step 5. Cloth Modeling

Now let’s make a costume. After positioning the character in CC, import the edited body into Marvelous Designer. The overall silhouette and wrinkle directions are determined in Marvelous Designer (MD).

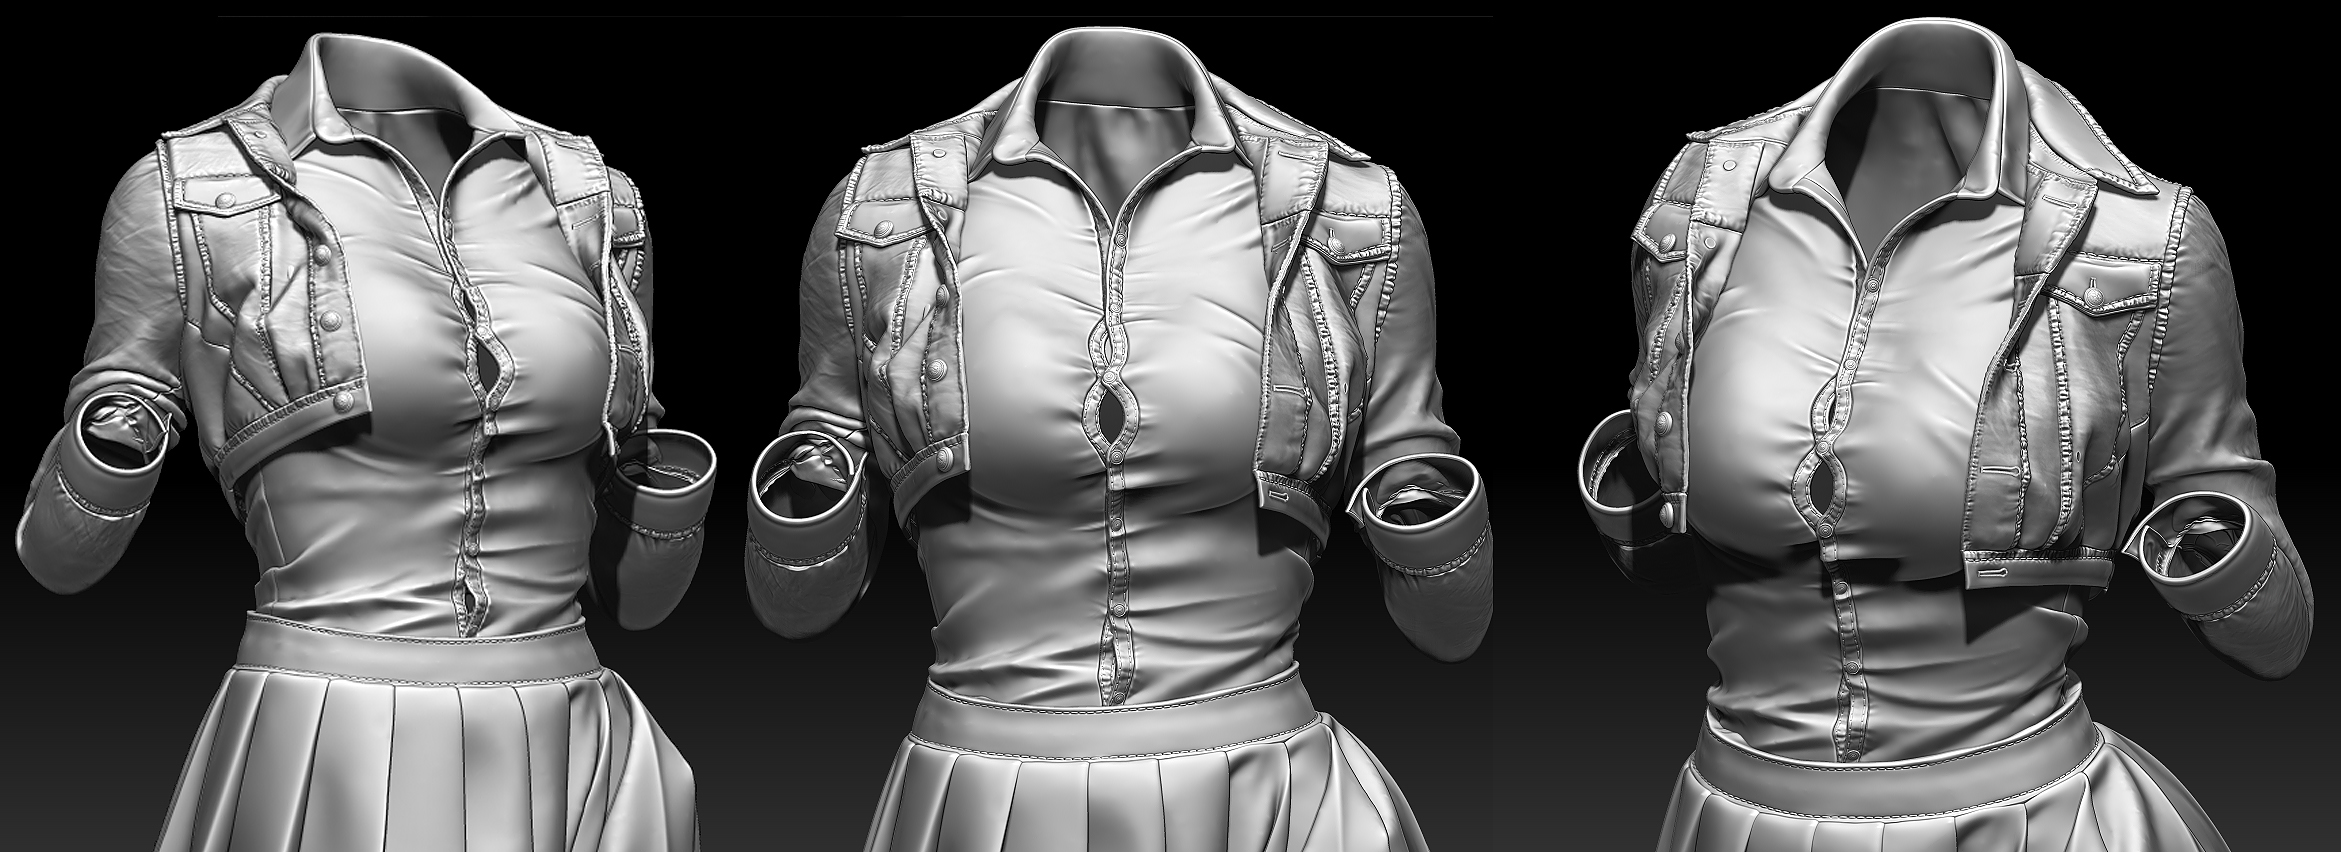
Step 6. Adding Details in ZBrush

Add a bit more deformations, textures, and stitching in Zbrush. Use the large silhouette exactly as it was taken from the MD, but fully express the details in ZBrush that MD can’t. I added the hemlines, fine wrinkles, stitches, and fabric textures.

Step 7. Render To Texture (RTT) and Texturing

It’s not for in-game at this time, so I didn’t put a lot of effort into the topology. Also, I finished a certain amount of low poly and UV mapping for texture work. The next step is to texture the costume using Substance 3D Painter.

Step 8. Facial Expressions & Makeup

Lastly, add an expression and edit the makeup to look like a K-pop idol with Photoshop.

Step 9. Final Polish

After the competition ended, I made additional improvements to the quality of the parts that seemed to be lacking. I edited the makeup and a little bit of the head as well as added hair and accessories to improve the overall quality.

Thank you so much!

Part II. Feature story

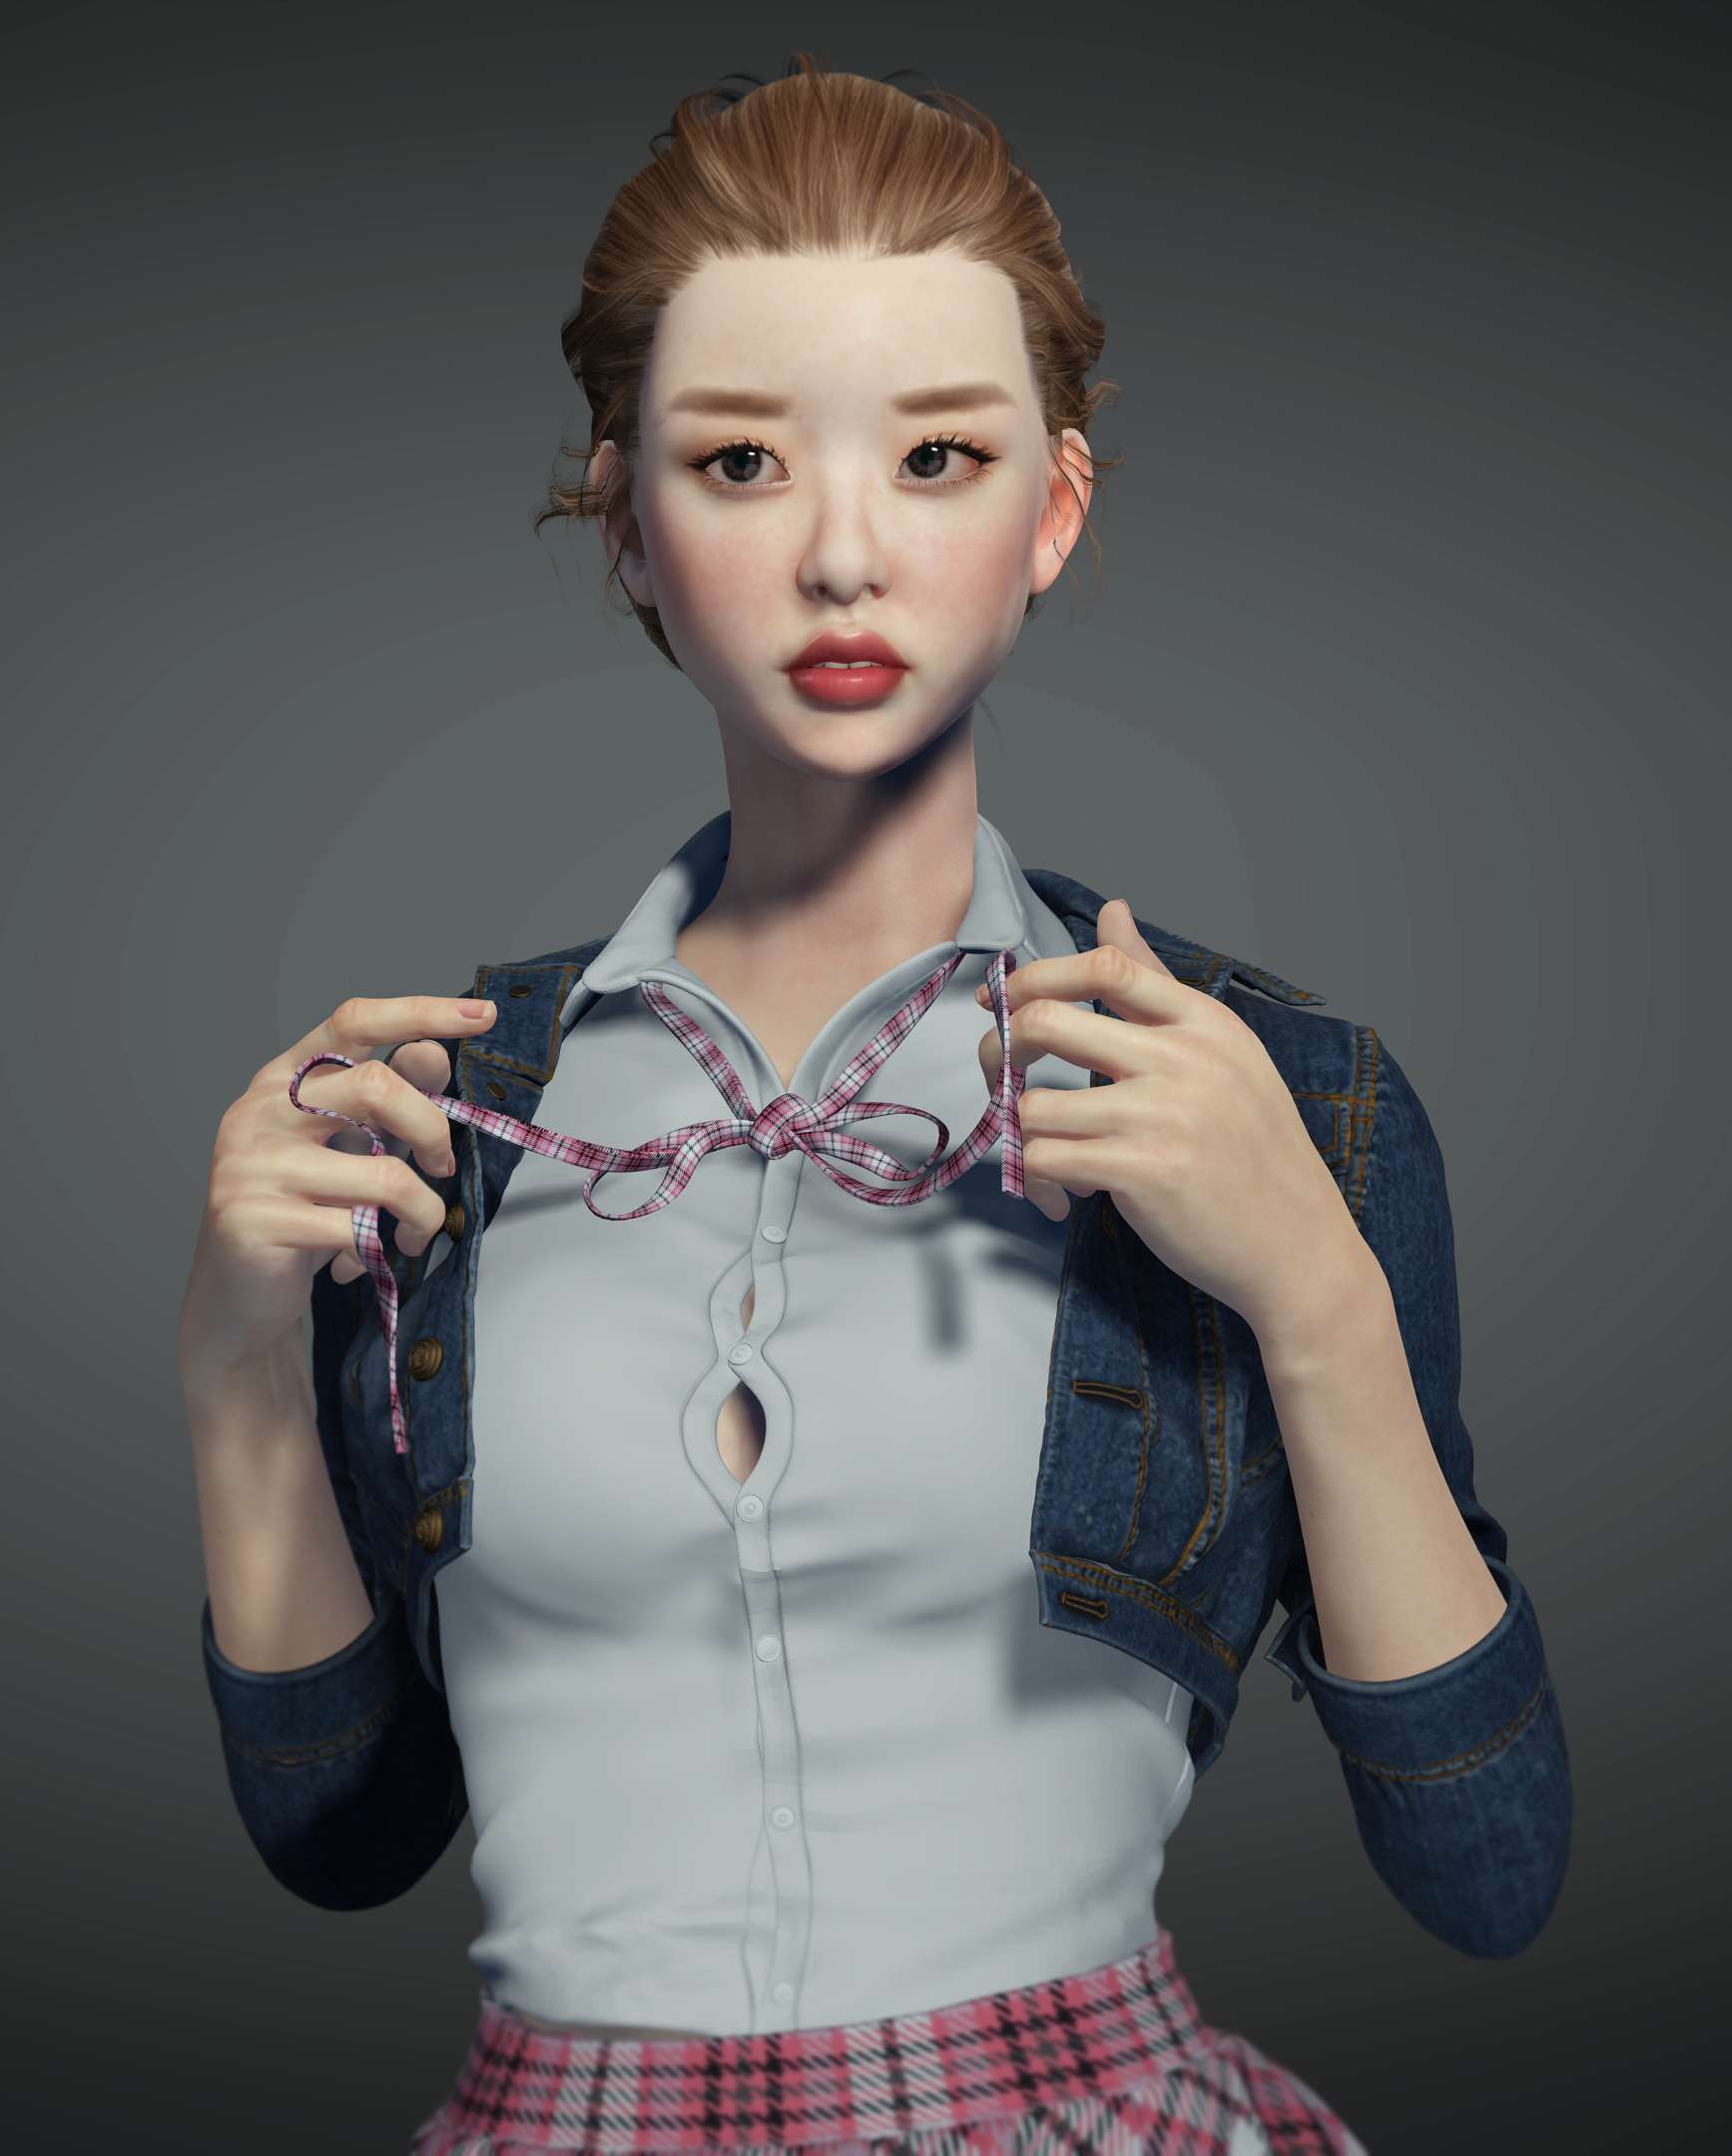
Q : Hi Yunji, many thanks for sharing your workflow with us. Your entry ‘A Lovely Girl’ has a very stunning character and costume design. Whether this girl is tying her bow or eating an apple, you’re good at catching delicate moments to show the character’s aesthetics.

Could you share more of your artistic thoughts behind this project? How do you decide the best angles to demonstrate a character’s unique personality?

I’ve been eager to make a pretty girl character all the time. While participating in this “A Lovely Girl” project, I realized that making a beautiful character is not as easy as I thought. However, making a pretty character is a common request in my industry, so I will continue to work on it. It was my test of whether I could complete a character of desirable qualities in two months’ time from concept to modeling and rendering.

Planning of the beauty shot and overall feel of the piece is about eighty percent complete at the beginning stages. The variety of clothing materials, hairstyles, poses, and facial expressions begin with a dummy. I find a lot of references and keep trying out dummies until the look I like comes out. CC provides a function that makes it easy to change character poses and facial expressions; it is beneficial in reducing working time.

Q : You’ve mentioned how you’ve dreamed of working in the game industry since childhood; what was the trigger for such ambition?

I have liked drawing since elementary school. Of the various fields under consideration, Game Art was a very attractive option. I liked to play games and I thought seeing the game artwork was really cool. 

Because I didn’t recognize the difference between 2D and 3D at the time, I used to save the illustrations I wanted to draw on my hard drive or buy a collection of illustrations and draw along. Naturally, I majored in a related field and 3D from the age of 19. Currently, I am honored to have the opportunity to work with the artists of the illustrations I used to copy.

What are the most rewarding aspects in this line of work? What are the challenges of being a character modeler in the Korean game industry?

Character modeling is too difficult: face, hair, dress, monster, hard surface, nothing is simple. But it is also more rewarding because it is not easy. New concepts always excite me and I’m very happy when I get some satisfactory results. Being a 3D artist is an irreplaceable and attractive role.

The Korean game industry is always mindful of globalization. As a game developer and modeler, the challenge is to think about how to express more realism. For realistic expressions, Korean game companies are willing to invest in increasing their development capabilities by using next-generation engines and 3D scans, etc.

Do you think it’s beneficial to be a trilingual speaker (Korean, English, and Chinese) in the game industry in Seoul? How does this multi-cultural background influence your 3D character creation?

It must be great to be able to speak three languages. However, most of my colleagues are Korean, so there are few opportunities to use various languages in person. Nevertheless, the ability to understand without subtitles seems not very useless because most of the tutorials in the new tools are in English, and if there is a problem, it is also convenient to be able to contact by email directly without using an interpreter.

In addition, most artists on YouTube use English. Because they are like my teacher, sometimes I feel strange and happy to understand their language. Furthermore, I can expect more opportunities in the future in this global world. 😀

Q : Sometimes you also need to participate in environment design for the game. We all know working in the game industry demands huge amounts of time and effort to deliver high-quality pieces.

How do you learn new techniques apart from your busy day job?

Before I start my day, I research and purchase sample files or pin new inspirational works and articles in the morning. I use the data that I’ve piled up when I need to. This routine is actually very helpful when working.

I look for technical deficiencies whenever necessary. Usually, I ask my colleagues or look for overseas articles and YouTube for things I don’t know. There are many ways to work inefficiently in the sea of information, but you should be able to see and choose carefully. Otherwise, I look through the thumbnails of YouTubers artists and click on the videos I am interested in.

Q : How did you know about Character Creator? In your experience, what are the merits and shortcomings of using CC to design 3D characters?

At first, I think I saw an advertisement on the ArtStation. I was wondering if I could fix the shape of the head intuitively like it was advertised, so I downloaded it and used the trial version. The tool was simpler and easier to learn than I thought, especially in that I could use the GoZ function to replace the base I wanted for the basic model itself, and I used the function effectively in the project: “A Lovely Girl”.

Q : “Indian Girl In Saree” looks very photorealistic while “A Lovely Girl” has some CG stylization. How did you achieve different results by using Character Creator, Marmoset Toolbag, ZBrush and 3ds Max?

As mentioned earlier, I aim to make a pretty woman; and both works have this same purpose. The photo-like look as a “due diligence” is fun to make personally, but it is also a model that would not be received well in the game market. Perhaps my goal is to mix the two.

If you look at K-pop idols these days, there are artists who look as unreal as game characters. I want to make a character that expresses details realistically but gives a cool and pretty feel. To do so, I have to look at a lot of material and study it all⁠—I will continue to learn and study what I lack.

Q : Could you share three things that inspire you the most when you start a new project?

What inspires me the most are the K-pop idols these days. Sometimes I am ecstatic when I see artists who are prettier than 3D characters. Or I try to see a lot of well-taken pictures and well-drawn pictures. Because I think it is important to keep my eyes open to new material. In the same vein, I consciously watch sci-fi dramas on Netflix in my free time.

Learn more :

• Yunji Jung (Little Gold) on ArtStation https://www.artstation.com/summerjung

• Yunji Jung (Little Gold) on Instagram https://www.instagram.com/littlegold_jung/

• Character Creator https://www.reallusion.com/character-creator/download.html

• Reallusion https://www.reallusion.com/

Modeling an Outfit for One Piece Jinbe with Blender and Character Creator

Fast Way to Update Cloth Design with Free Blender Plugin

Greetings, this is Peter Alexander and the purpose of this article is to demonstrate the Replace Mesh feature in Character Creator and the workflow with Blender. You can watch the timelapse of the robe creation in the following videos and the process for making a fully functional, properly weight-mapped robe will be detailed in a future video as it is a more complicated effort.

To start off this tutorial, you’ll need to download and install the “CC4 Blender Pipeline Tool  Plugin” for Character Creator 4. >> Download here.

Then you’ll need to download and install the “ CC/iC Blender Tools” plugin for Blender. >> Download here.

Character Setup and Export

First, I start with a mostly bare character, except for his sandals and hair. I export this character using the Posed option in the CC4 Blender Tool Plugin; I’m doing this so that when I import the clothes I’ll be creating, they’ll fit the character pose as a starting point.

Blocking Out Clothing with CC/iC Blender Tools

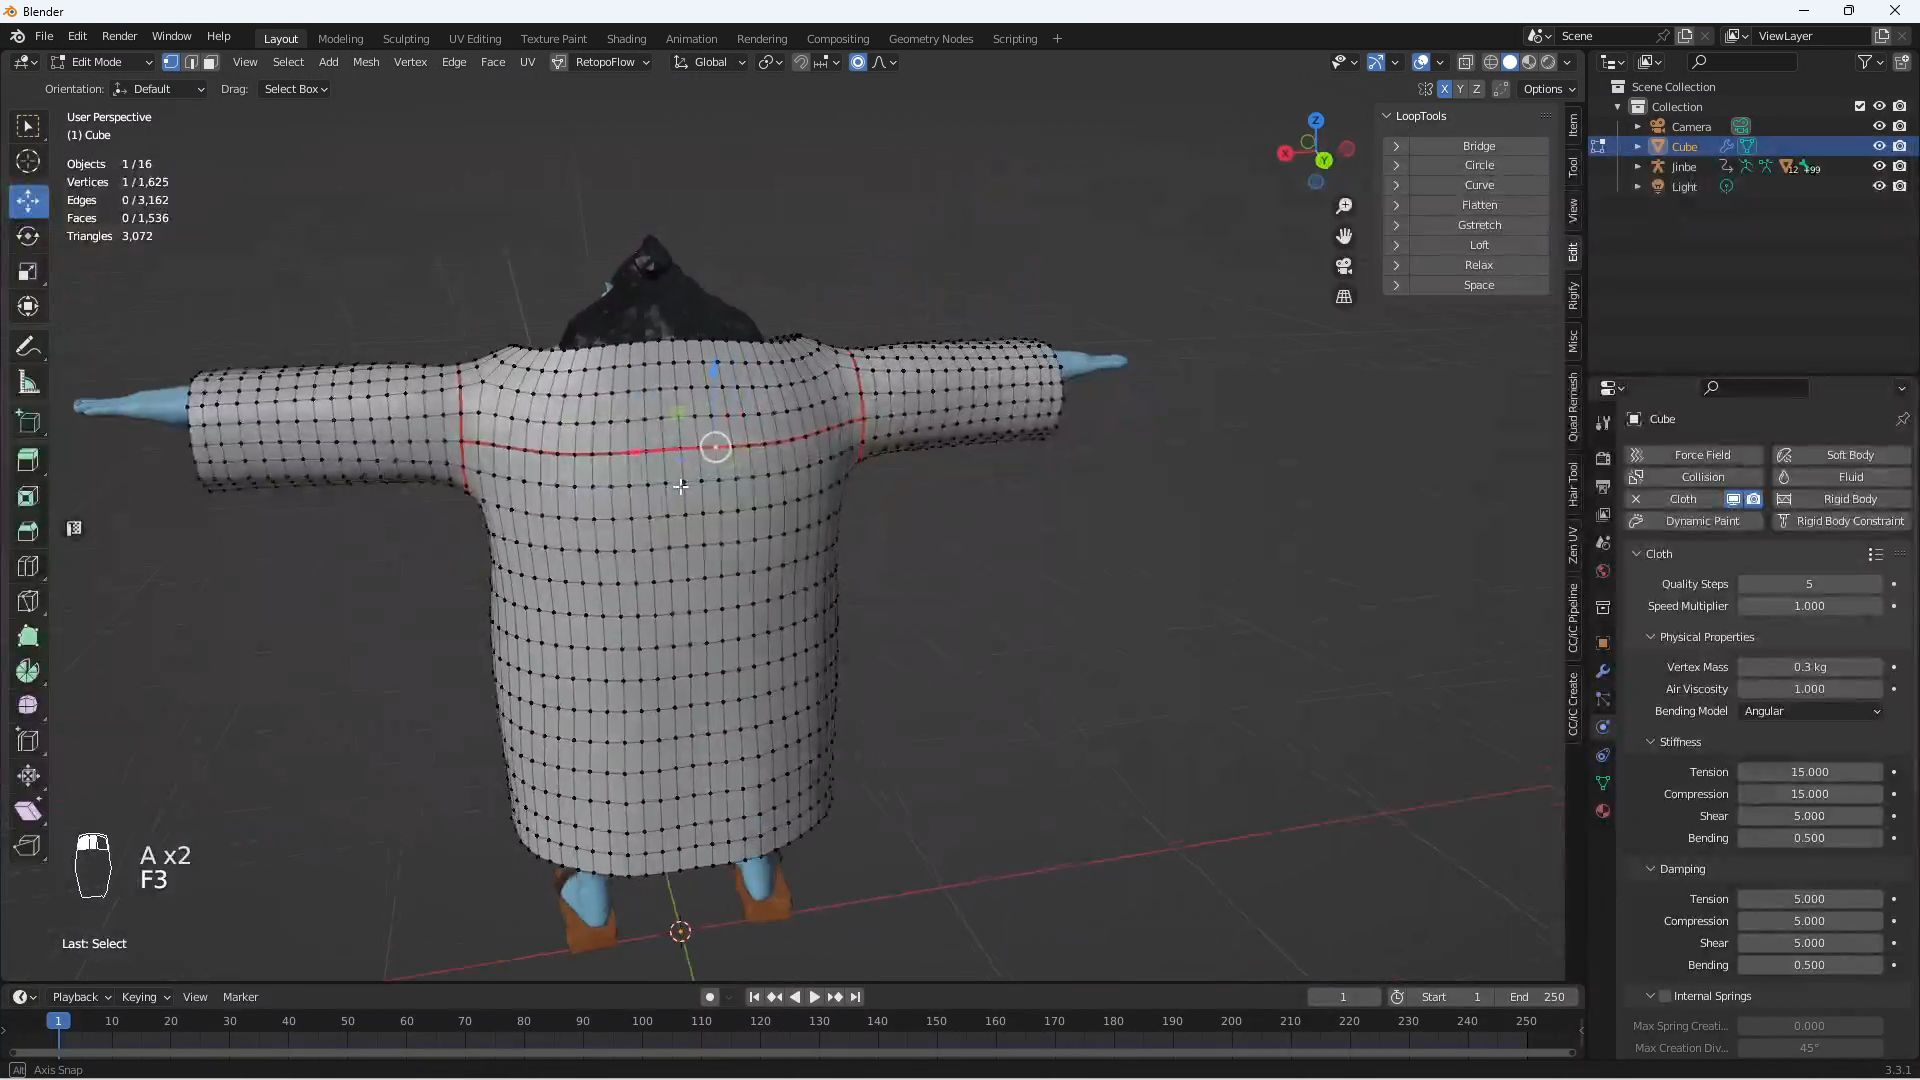
In Blender, I import the character with the Import Character function in CC/iC Blender Tools. Now I start to create the robe by adding a simple cube, then blocking out the shape of the robe. I then add more details with the use of edge loops and subdivisions. Unless you are sculpting on the base mesh or adding fine details to your item or character, you generally want to start modeling with broad shapes and add more resolution and detail as needed.

Creating UVs

After blocking out the shape and adding resolution, I create some seams to generate the necessary UVs, which are essential for most 3D models, especially their utility for this pipeline. Although I’m using a paid addon for some of the UV operations, you won’t need to do this: besides the “Quadrify UV Island” tool, everything else I use is native to Blender.

Using Proportional Editing

Here I break symmetry to close the robe. Closing the robe can be a bit tricky, especially if you’re not used to Blender. I use Proportional Editing with Connected Only turned on to restrict the effect to the mesh and the radius of your selection rather than the entire mesh. Turning up the radius will impact more of the mesh.

Completing Wardrobe

Once the robe is complete, I create a simple belt and cloak. The knot on the belt is the only thing to demonstrate from these items. Instead of tying the belt mesh into a knot, I use three subdivided cubes and polygon strips for the tied portion of the belt. I can sculpt them at a higher resolution and bake out normal maps to make them more authentic in appearance.

Exporting and Importing Accessories in Character Creator 4

This setup is mostly complete, so I export each item as an accessory. Likewise, in Character Creator, I’ll import each item as an accessory.

Transferring Skin Weights

Then I use the Transfer Skin Weights function to convert them into clothing. I usually use the “Dress” preset for items past the knees.

Posing and Second Export with CC4 Blender Pipeline Tool

The clothing is now weight mapped and conforms to character poses, but it’s very rough and needs to be manually adjusted. I export this character with a pose using the CC4 Blender Pipeline Tool  plugin, which will also export all the clothing items. Then in Blender, I start a new scene and import the rigged character.

Adjusting Items in Blender

Now, I adjust all the items to prepare them for the Replace Mesh function in Character Creator. I’m only adjusting these for a static scene, still, this process can be used to adjust items for other purposes. It’s possible to make a piece of clothing snuggly fit a highly exaggerated character and it is also possible to swap out the UVs of an item. The only limitation here is the inability to alter the mesh vertex count and vertex order. For example, I must subdivide this cape because the resolution is too low. Once I do this, it will be incompatible with the process and must be imported as a new accessory.

However, if one happens to have access to Marvelous Designer, then the draped version of the existing article of clothing can be imported, even though Marvelous Designer exports triangulated meshes. The vertex count remains the same, so the process is error-free.

Using Multiresolution Modifier to Sculpt

If you plan to sculpt with the Multiresolution modifier then remember to use the Apply Base function in the modifier which will adjust the shape according to the highest resolution. If you are adept at baking texture maps in Blender, you can create a Normal map for the additional sculpted details and import it into Character Creator.

Creating a Brush Texture

Here, I use Affinity Photo, a Photoshop alternative, to create a texture map for my Blender brush. It’s a very basic diamond design, which I will export as a transparent PNG file and use for painting onto the robe mesh.

Once this texturing is done, I save the robe texture as an image for use in Character Creator.

Baking Normal Maps

Now, I switch the render engine to Cycles, as Eevee does not support texture baking. In my opinion, the process of baking maps in Blender is a little confusing and convoluted, but not difficult once you understand it.

The main thing I must do is make sure I’m in Cycles, select my mesh item, go into the assigned shader of that item, and create a new texture map. The texture baking will take place in this image. For normal maps, I go to the multiresolution modifier and make sure the sculpting level is zero, and the render level is on a higher level, such as “3”. Then, I click Bake with Normals and wait for my maps to generate.

Normal maps can be edited like any other image, but with certain rules regarding how the maps work. If you want to remove detail from a normal map, sample the neutral blue in the image and paint over any unwanted distortions.

Exporting Back to Character Creator with CC/iC Blender Tools

With the maps saved and with the sculpting details applied to the base resolution, I export all of these items with the multiresolution modifier disabled. I use the Export for Replace Mesh option in the  CC/iC Blender Tools plugin.

Using Replace Mesh to Transfer Vertex Positions

In Character Creator, I apply the changes by selecting the mesh and using the Replace Mesh function, and choosing the exported version of the mesh from Blender. I did some minor work on this rigged character after recording the video, which you can see in the final render. 

Conclusion

The Replace Mesh function is a simple, powerful tool, and saves a lot of time — especially for content creators. While I did not demo it here, it can also replace the UVs of an item, which previously could only be done by reimporting the item and setting it up from scratch or using the cumbersome 3DXchange process. It’s a very welcome addition to Character Creator 4, which the CC/iC Blender Tools for Blender is designed to accommodate.

Free Download :

CC/iC Blender Tools (addon installed in Blender) https://github.com/soupday/cc_blender_tools 

CC4 Blender Pipeline Tool Plugin (addon installed in Character Creator 4) https://github.com/soupday/CC4-Blender-Tools-Plugin 

Character Creator https://www.reallusion.com/character-creator/download.html 

Learn more :

• Peter Alexander (Mythcons) https://www.artstation.com/mythcons 

• Blender-Character Animation Pipeline https://www.reallusion.com/character-creator/blender.html

• Reallusion https://www.reallusion.com/

Generate Talking Animation in Seconds with Cartoon Animator

The “Winner Tips & Tricks ” series covers practical workflows and techniques shared by winners of the “2022 Animation At Work Contest”. To let users see the full spectrum of the Cartoon Animator pipeline, we are introducing projects that received attention and credit from the community. Let’s now take a look at “Far From Home” to see how Jop Govers worked his magic with Reallusion Cartoon Animator (CTA).

About Jop Govers

Hello, I’m Jop Govers, a seventeen-year-old living in Eindhoven, Netherlands. I was always curious about the world around me and interested in learning new things. I was either asking questions or creating things from my imagination. Around age eleven, I discovered that producing music was something I could do myself. I watched videos on YouTube and found an online program (FL Studio) and just started to produce and compose my own music. Gradually, I refined my craft and even managed to get my first single record label deal at fourteen. I then taught myself to play the piano by watching YouTube videos and eventually with the help of a teacher who helped me further develop my piano skills.

Once something grabs my attention, as music did, I become really committed to pushing myself to learn as much as I can about it. I don’t overthink it, rather, I love the learning process; and the same has happened with 2D animation. As a young kid, I used to watch a lot of cartoons ⁠— who doesn’t? ⁠— and I remember always wanting to understand how they did it and even trying to make the drawings myself. Having grown a bit older, I sort of forgot about making my own 2D animations and just enjoyed watching them. This all changed when my nephew introduced me to Rick and Morty. Wow, was I hooked? Then on, I started watching all kinds of animated shows beyond the traditional children’s cartoons.

I figured if I could learn to produce and compose my own music, I can also learn to create my own 2D character animations. I researched in my free time on the internet, watched YouTube videos, and tried all kinds of different software and tools to make computer drawings and animations. One of my teachers knew I was diving into this topic and he showed me how he used Adobe After Effects and Photoshop for his graduation project, then I decided to give it a go.

The quantum leap forward occurred a few months later when I found Reallusion Cartoon Animator. I was amazed at how intuitive it was to learn and how fast you could create professional-looking animations. My childhood dream of making my own animations was finally within reach with the help of the Cartoon Animator.

Why I made “Far From Home”

I am a huge fan of Rick and Morty and actually everything on Adult Swim. Since my animation ambitions started with Rick and Morty, I wanted to create something that had the same look and feel, yet, I could still call mine.

Why I chose Cartoon Animator

Cartoon Animator allows me to create professional-quality animations faster than any other software I’ve used. Its easy-to-use interface allows me to tap into my creativity and “just do it”. I can create 360 heads in minutes instead of hours and characters run in seconds with premade motion files while rigging is a breeze with Reallusion templates. Therefore, I highly recommend Cartoon Animator regardless of your proficiency as an animator: from “new kids on the block” to those who’ve already experienced the magic of creating animations. Without a doubt, CTA will help you improve your skills and deliver your own magic.

How I did it with CTA

Step 1: Script and voice acting

I write all my scripts in Google Docs and I look for inspiration by watching and analyzing other shows and cartoons. For my voice acting, I use an amazing tool called Replica Studios which generates some of the best AI voice actings I’ve ever heard.

Step 2: Character Creation & Rigging

I draw all my characters in Photoshop using the default brush. In Photoshop, my characters are created in an 8K document to easily upscale if I wanted to. I rig my characters using a variety of templates which are, by default, available in Cartoon Animator.

If you find it difficult to come up with your own characters, just explore and study cartoon characters you love and list why they appeal to you. Search the internet for interesting shapes, funny, beautiful, or even ugly features. Mix and match all these ingredients ⁠— anything goes as long as it makes you smile. You can even do this on paper if you want. Try as many sketches as you need and don’t overthink it, let your creativity out and go with the flow. Once happy with your paper sketch, try to draw it on your computer.

Step 3: 2D Character Animation & Customization

The one thing that no other animation software does like Cartoon Animator is Motion Clips. The results are mind-blowing and yet it is super easy to make your characters walk when rigged properly for lip sync. I just listen to the audio and apply the appropriate mouth sprites at the right time.
.

Step 4: Scenes creation & composition & Camera setting

I drew all my backgrounds in Photoshop with stock brushes — nothing too special. Textured brushes were sometimes used in Rick and Morty to add details, so I decided to do the same as it adds so much more depth to the scenes, in my opinion.

Step 5: Composition in After Effects

I used a blur that was set to a lesser opacity with overlay as the blend mode. I also added some color correction using adjustment layers. This was applied to all the scenes and then everything was put together.

Conclusion

Easy to learn and intuitive to use with results that impress: that is the essence of why I love CTA, and why I recommend it to anyone who wants to experience the magic of creating your own animations. You don’t need to be a seasoned professional with years of experience. You also don’t need to be a computer whizz or have a professional animation studio, you only need the will to give it your best!

Follow Jop Govers

Instagram | https://www.instagram.com/creativejopstudios/

Subscribe Jop’s Youtube | https://www.youtube.com/channel/UCnLxZn8tb7aXad3uLOu6jqA

Cutting-edge Auto-Rigging with AccuRIG

AccuRIG 1.1 updates with user-friendly features for free download

AccuRIG is the revolutionary auto-rigging technology recently released by Reallusion to the great fanfare within the 3D animation industry. In an effort to reduce production labor for 3D artists and modelers, AccuRIG is designed with fast and accurate character rigging in mind. AccuRIG makes it easy to turn static models into 3D animatable characters by following a few simple steps and have them ready for export to industry-leading platforms; from game engines like Unreal Engine and Unity to third-party 3D software like Blender, iClone, Omniverse, Maya, 3ds max, MotionBuilder, and Cinema 4D; it’s a solution for everyone.

What’s New with ActorCore AccuRIG 1.1 Update

Adopted by over 100,000 users, ActorCore’s free AccuRIG application has proven to be simple, yet powerful, for creating exceptional rigs. The v1.1 upgrade brings several user-friendly improvements as per the requests of professional modelers.

  • Force Symmetry: users can save time by having edits reflected on both sides of a perfectly symmetrical model.
  • Snap to Center Plane: precisely position the selected joints on the center plane.
  • 6 Camera Angles with hotkeys to facilitate the joint placement process.
  • 3 different Shading Options help users visualize the model and make it easy to place joints.
  • Wireframe views of 6 different colors.
  • Show Bones: bones are visible after a character is rigged.
  • Hierarchical Transformation: child joints can be moved in tandem with the selected finger joint.
  • Finger Count can be designated prior to the character rigging process.

Auto-Rigging Technology Benefits All Users

Engineered to rig 3D characters with unparalleled competence, Character Creator (CC) AccuRIG comes with built-in critical functions that process multi-meshes, refine skin weights, and traverse levels of complexity with ease. On top of all that, AccuRIG is completely free of charge for ActorCore. Users can download the free program and visit Reallusion AccuRIG Technology to know how auto-rigging is designed.

Designed for Scan and Sculpt Poses; AccuRIG is made to handle both scanned and sculpted poses for any standard, size, style, and posture.

Accommodate pose variations with automatic axis correction and twist bone allocation.

Accurate bone placement for models with oversized heads, obscured shoulders, beast legs, and hand-held props.

Mimic professional riggers’ weight paint for the natural articulation of body joints for the head, shoulders, knees, elbows, and hands.

Segregates skin weights for rigid accessories by detecting individual surfaces and tracing back to their valid parent bones, instead of having weights indiscriminately permeate surrounding areas onto nearby meshes.

Correct finger rigging even when fingers lie close to one another or for creatures with less than five fingers.

Mask away unwanted joints for partial rigs on models with incomplete limbs and non-standard poses.

Users can download AccuRIG as a free tool from ActorCore, or access the advanced AccuRIG functions in Character Creator. For more information about AccuRIG technology and a detailed comparison between CC AccuRIG and ActorCore AccuRIG, visit Reallusion.

Controlling Motions, Lights and Cameras using iClone 8 Device Live with 3Dconnexion SpaceMouse

My name is Antony Evans and I work for Taiyaki studios and run Digital Puppets animation studio, where we specialize in digital avatar creation and 3D animation. In this video I will be showing how I used 3Dconnexion SpaceMouse®, along with iClone 8’s new Device LIVE hot key triggers, and the Motion Trigger plugin, to create a real time animated character scene.

What is iClone 8’s Device LIVE?

Device LIVE is part of iClone 8’s new feature that offers the ability to use various hardware devices to control elements of your scene to improve efficiency and make your workflow easier. There are several different devices that can be used from, Xbox controllers, to MONOGRAM Creative Consoles, Elgato Stream Decks and more.

In this video I am working with the 3DConnexion SpaceMouse as this device gives you customizable buttons and a movement control they call the cap. The cap allows for smooth real time camera movement or can be used to move and rotate objects in your scene.

How I used the SpaceMouse

For this scene I wanted to create a real time setup that can be used for live streaming. I needed the ability to control everything in my scene easily, so I could also concentrate on other elements of running the live stream.

In the video you can see that the character is being animated using the Motion Trigger plugin. This is a great tool for adding keyboard triggers for your character animations, allowing you to trigger gestures and movements in real time while also having the iClone LIVE FACE plugin with Motion LIVE to control my facial capture.

The SpaceMouse was then setup to control my camera movements and the lighting in the scene. With the new updated Hotkeys in iClone 8 I was able to set up buttons on the SpaceMouse to do exactly what I wanted, I also set the buttons in the places under my fingers so I could comfortably move the camera using the cap and press the buttons without to much movement from my hand, this makes it a lot easier to remember where the trigger buttons are.

What Hot Keys did I use and how I set them up

The hot keys that I used in this scene were, Change Camera, Look-at Camera and turn On/Off Collection.

One thing that really helps with engagement in a scene where the character is talking to the audience, is Eye Contact. In the custom hot key options, there is now a selection for look at camera, so when its triggered, the character will look in the direction of which ever camera is in use. The space mouse has some great options for creating custom buttons, and any button on the device can be customized.

I wanted the Look-at Camera hotkey to be triggered at the same time the camera changed. To do this I had to set up a macro in the space mouse custom settings.  For example, I had the hotkey for change to camera 1 set to (shift + 1) and the look at camera key set to (Shift + 5) using the macros I set a single button on the space mouse to select (Shift + 1 Shift + 5) simultaneously, and did the same for the other cameras, so every time the camera changed the character was still looking at the audience.

The next hot key I used was the show/hide collections, anything you put in a collection can be triggered on or off, so you can setup completely different lighting for your scene and change them in real time. This could also be done for objects or scenery placed in those collections.

Similar setups can be achieved with the other available devices, you could use something like the MONOGRAM Creative Consoles, or the Elgato Stream Deck to control your camera or lighting or even the motion trigger 3D animations. What I liked about the space mouse was the camera movement using the cap. Once you the camera was switched to the free camera, I was able to move around the scene with the smooth cap movement, giving a handheld feel to the camera.

Though this scene was setup with real time streaming in mind, it’s worth mentioning any camera movement or camera switching is recorded on the timeline. It also records the look at head movement on the constraints track, so any live recording you make will keep all the character animation data on the timeline.

Final thoughts

Reallusion’s iClone 8 with Device LIVE and the new hotkeys adds the ability for users to really customize the way they work. Having triggers at your fingertips helps you efficiently navigate your projects in a way that works best for you.

iClone 8 Device Live : https://www.reallusion.com/iclone/device-live.html

Motion Trigger plugin : https://marketplace.reallusion.com/motion-trigger_288707

3Dconnexion SpaceMouse : https://3dconnexion.com/uk/

Taiyaki Studios : https://taiyakistudios.com/https://www.youtube.com/@TaiyakiStudios

Digital Puppets : https://digitalpuppets.co.uk/https://www.youtube.com/@DigitalPuppets

How Studios Create 90s-Style Cartoons with Cartoon Animator 5

This article is featured on AWN

Greetings my fellow 2D animation enthusiasts! My name’s Nathan and I’m a member of Studio Ghibletz. The moment we laid our eyes on spring bones we had a revolutionary idea. Most CTA users prefer a crisp art style, but Studio Ghibletz opted for something messy—something experimental. We developed a new animation design virtually indistinguishable from hand-drawn. We created a sprite character that squashes and stretches. This alone is revolutionary in the world of rigged cartoon character creation. Studio Ghibletz, however, wished to take this concept further. So, we created characters with scratchy line art.

The CTA5 Features that Enabled our Experiment

Stretch and Squash is a vital principle of animation, and it’s the crux of crafting an animated 2D character that looks hand drawn. Stretch and squash give 2D animation its charm, and it makes characters more expressive. This principle of animation, however, has long been unavailable to sprite-based characters. But not anymore.  CTA5 allows you to apply this principle using FFD (free-form deformation) and spring bones. FFD enables a sprite character to stretch and squash, allowing you to emphasize their actions. It’s also useful for putting characters and props into perspective.

The morph tool—the precursor of FFD—was available in CTA4. However, it only worked with props. Now you’re able to morph entire characters. Next, we marveled at spring bones. We watched hats bounce, jello jiggle, and whiskers twitch. We then decided to push spring bones to their limits. We weren’t satisfied with funny noses and springy tails. Nay brethren! We wanted entire characters to bounce like Micky Mouse! 

Using CTA5’s Tools to Develop New Techniques

I pitched a new style of animation design: a character with multiple sprites for each body part, each with slightly different line work. Then, when the character moves, we’d roll through the sprites like an animated prop. In my head, I imagined characters like Baloo from the Jungle Book or Madame Medusa from The Rescuers, characters with intentionally scratchy—almost messy—line work.

Easy, right? Wrong! Rick and I quickly discovered that only one sprite per slot would morph. This means if the character has three sprites, only the first will stretch and squash. This wouldn’t do. After hours of trial and error, we stumbled across a solution. We stacked three characters, each with different line art, then put them on a visibility loop. This held the stretch and squash and allowed for scratchy line work.

To recreate this style, animate the first character, then duplicate it twice. Next, replace the sprites in the duplicated characters. Finally, loop the visibility so that the characters flash through in quick succession. This style delights me. It combines frame-by-frame drawings with modern animation software.

Using Clever Camera Angles

Traditional hand-drawn animation presents the characters from multiple angles. Sometimes they’re shown from the back, sometimes they’re in profile. Traditional animation also uses insert and specialty shots. To achieve this look, Mouse Bros combines over 30 CTA files. Each file contained a specific angle or movement. It’s a huge amount of work, and you must compile the footage in Premiere Pro. This, however, is the price of creating a cartoon with a high production value.

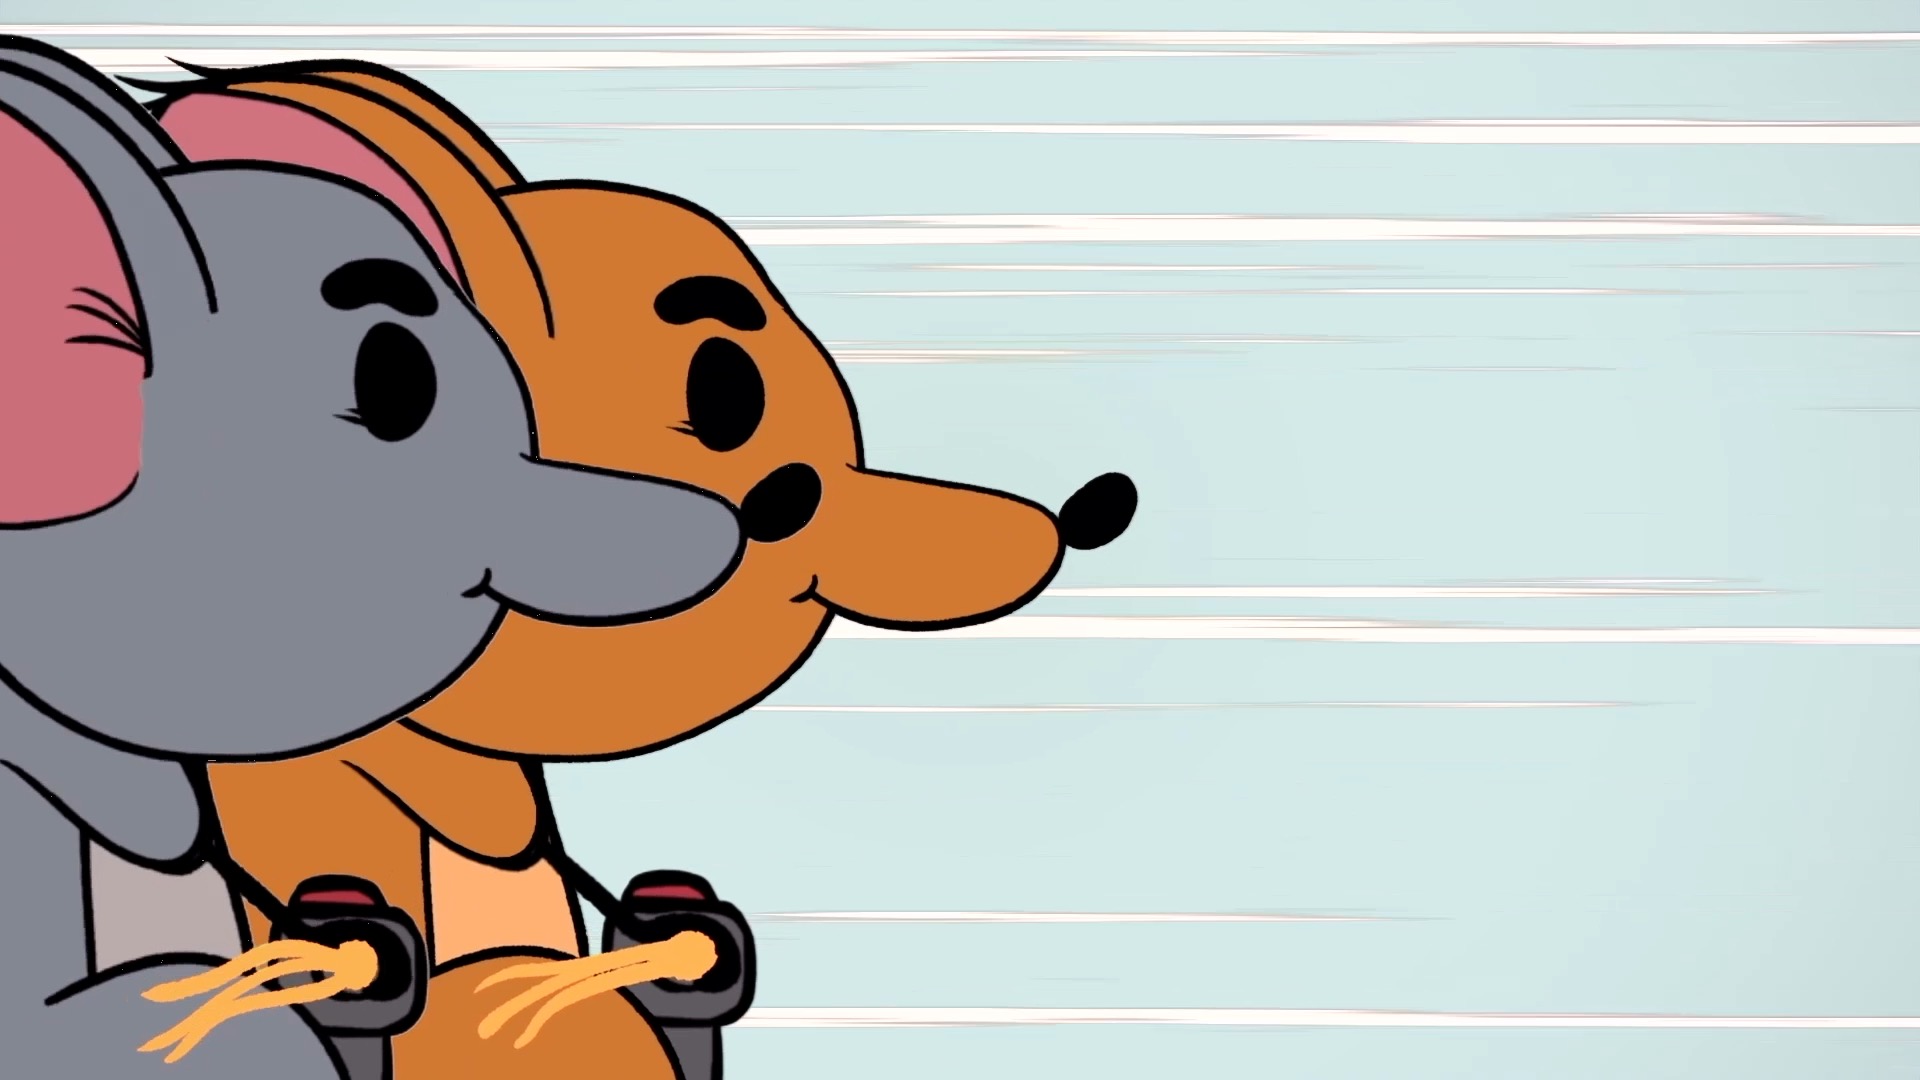
Imagine Mouse Bros from one angle. They race across the screen in profile, jump the canyon like Mario, then converse in a single angle. Would that be interesting? Would it tell a story of hunger and betrayal? No! Failure to animate from diverse angles traps many CTA users (myself included before I was corrected). If you only tell a story from one angle, it’s flat and boring and the mark of a low budget. 

Additionally, you can hide a lot in the cuts. For example, most animated 2D characters don’t turn well. In the past, we’ve created characters like Jowl, the grumpy bird that came with CTA4. This allows for smooth, natural turns. For larger, more complex characters, however, this doesn’t work. Instead, you can “turn” characters between cuts. Imagine two characters facing each other, and you want one of them to turn away. Cut to a different camera angle, then place the character in the desired direction. To the audience, it appears that the character “turned” during the cut. 

Finally, use framing to toy with viewer expectations. As Kevin Keniry, one of our writers, explains, “In the establishing shot of Mouse Bros, we showed the mice holding the handlebars. This shot was the setup for the conflict of the episode, but this focus also allowed us to flip the viewer’s expectations. The handlebars were attached to pogo sticks rather than motorbikes.”

Snappy Dialogue and Tight Writing

To make the most of CTA5, you must tell a good story. As Cody Marcotte writes, we always want to elicit an “emotional response, from happiness to sadness and everything in between.” And in Mouse Bros, we decided to go Shakespearean.

We go to great lengths to perfect a character’s voice, and we have fun doing it. As Peter, the voice of Richard, facetiously writes, “I look the character in the eye and he begins to whisper. The character chooses the voice, and my body is but a vessel.” Phil, the voice of Duncan, shares a similar philosophy. He writes, “Being a great voice actor means that you’re able to fully immerse into the role, bring life to a character, and put on a believable performance as them; though to do so, it’s important to remember to research your character, practice your lines, and to be confident in your performance.”

To build toward the climax, we created an intense race sequence. We’d never before engaged in visual storytelling. Our stories are generally carried by dialogue. With Mouse Bros, however, we wanted to expand our horizons. For the dialogue, we drew inspiration from the Lion King. We wanted to recreate the intensity of Scar and Mufasa. This is why our mice bear the names of two Shakespearean favorites: Richard and Duncan.

Richard and Duncan: Cartoon Character Creation in CTA5

We opted for the traditional CTA pipeline: PhotoshopCTA5After Effects. We brought the characters into CTA5 from Photoshop to create the bone structure. However, we exchanged the sprites in the additional characters (the ones needed for the line art loop) manually. 

For our next project, we’ll make use of vector characters. We’ve never worked with vector-based sprites, and we were already using experimental techniques, so we decided to stick to what we knew by using raster images.  

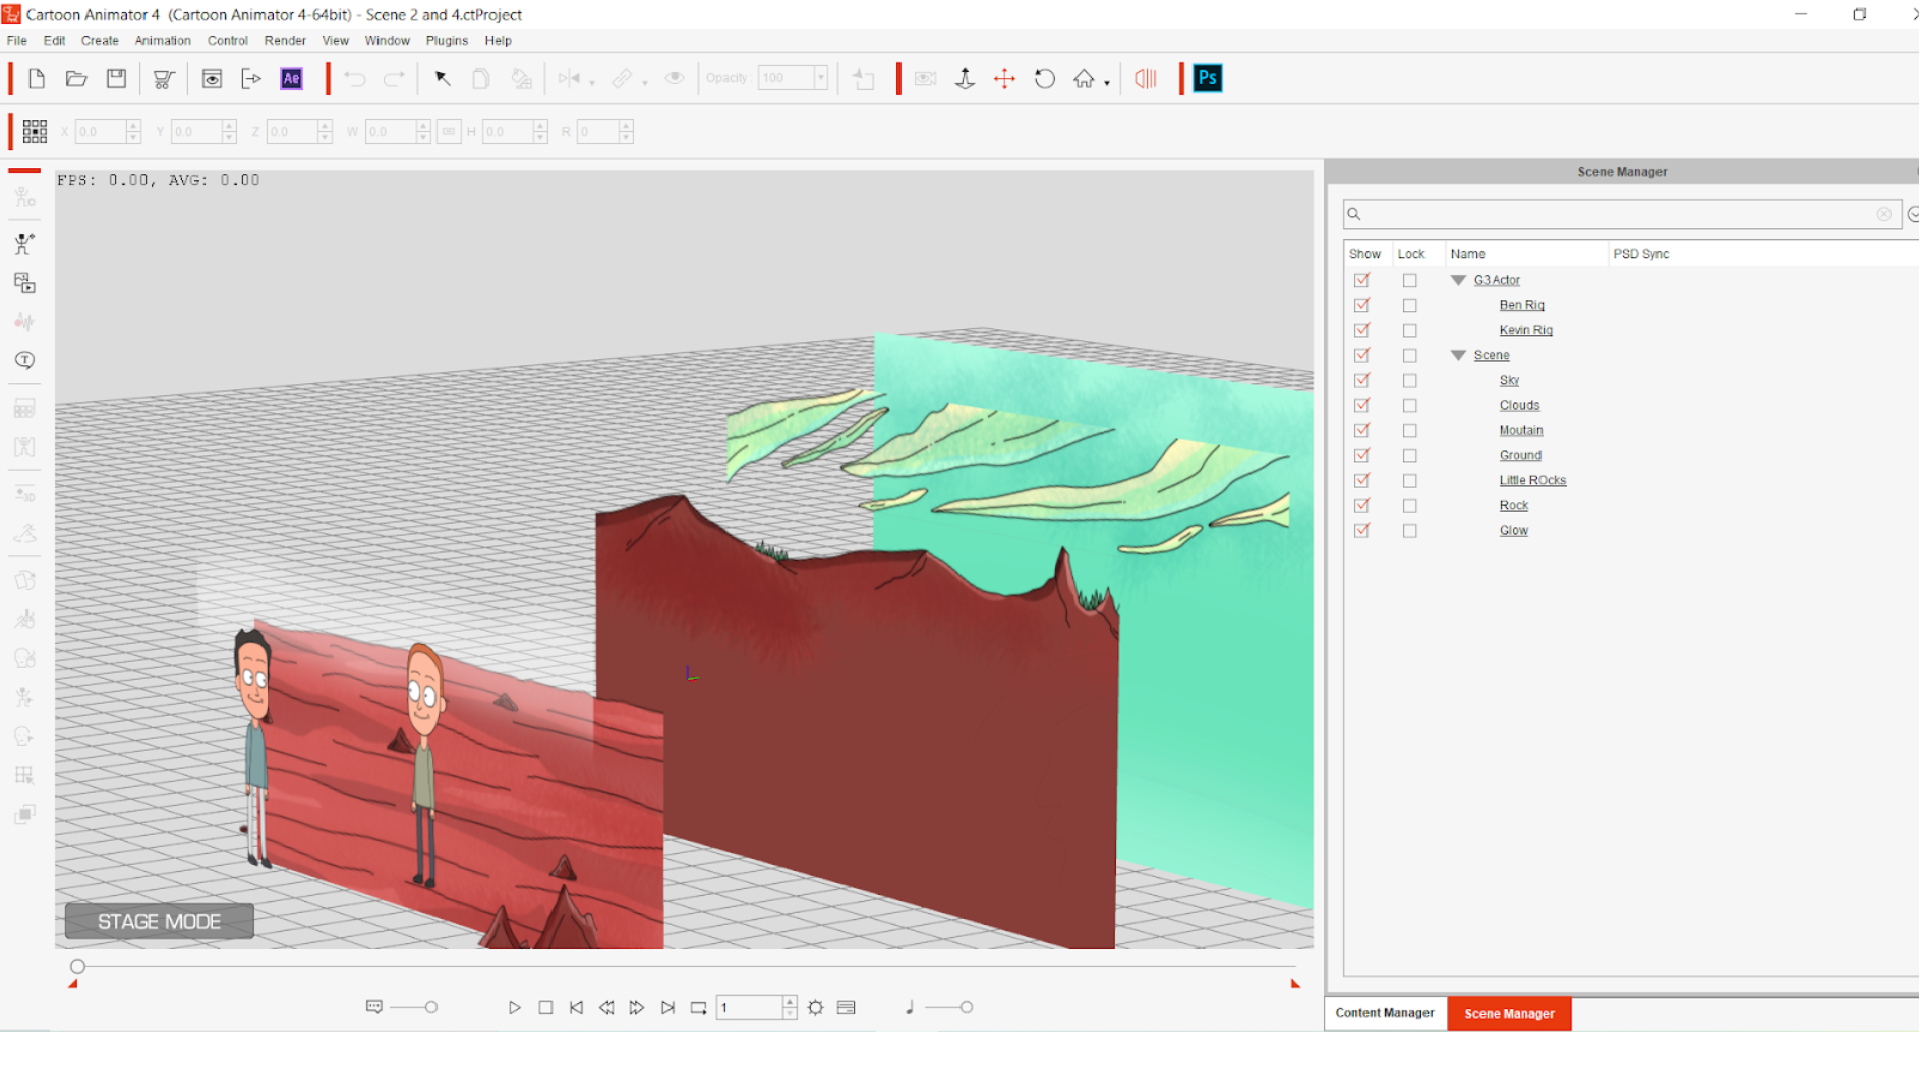
We animate in CTA5, then polish in After Effects and Premiere Pro. When we bring our work into After Effects, we add subtle, final touches to the animation. Fun fact: all of the shadows were done in CTA5 using the FFD tool. With FFD, you can effortlessly morph shadows. For example, the shadow beneath the mouse on the pogo stick deforms as the mouse jumps. This gives the characters additional weight and depth. We then finished editing in Premiere Pro. Mouse Bros combines over 30 unique shots and angles, compiled with Premiere Pro into a cohesive story. 

Elevate your CTA5 Content with Music 

In addition to going full throttle with the animation, cartoon character creation, writing, and voice acting, Rick composed a symphony. Originally, Rick wrote a rock n’ roll soundtrack, but saw Mouse Bros’ intro and decided it needed an orchestra. Rick said he wanted to “modernize what Looney Tunes did.”

In Mouse Bros, each scene is synced with the music. This elevates the action and tells the audience what to feel. The violins duel as Richard and Duncan race, and the piano fizzles out when Richard realizes they’re racing for American cheese instead of cheddar. This isn’t feasible for many animators, especially those who work solo. However, you’ll find a wide variety of royalty-free music on YouTube. While this limits your ability to sync the music like in Mouse Bros, the right background track will still elevate your animation.

CTA5 Opens the Door to Professional-Grade Animation

CTA5 enabled Studio Ghibletz to pioneer a new animation technique. We pushed the limits of what’s possible with rigged characters, and Mouse Bros is only the beginning. Spring bones and FFD change everything. I believe Mouse Bros merely scratches the surface. My hope is that this animated short inspires other CTA users to experiment with spring bones and storytelling. 

If you’re looking for animation software, CTA5 has all the tools you need. Roughly one year ago, I knew nothing about animation. This is CTA’s greatest strength. It puts professional-grade tools in a package accessible to beginners. In a year I went from stick figures to Mouse Bros. With CTA5, you can too.

Know more:

2D Animation Software for Cartoon Maker | Cartoon Animator

FREE for 30 days & get 1,700+ ready-made assets:

2D Animation Software Download | Cartoon Animator

———————————————————————————————————————————————————————————————————

The original article is written by Nathan Smith and also featured on AWN.

Win the 2D Animation Contest with Commercial Projects: Airline Promotion

The “Winner Tips & Tricks ” series covers practical workflows and techniques shared by winners from the “2022 Animation At Work Contest”. To let users see the full spectrum of the Cartoon Animator pipeline, we are introducing projects that received attention and credit from the community. Let’s now take a look at Raknum Animation’s: “Songrea Travels”, and see how he works his magic with Reallusion Cartoon Animator (CTA).

About Raknum Animation

Hi, I’m Onome Egba and I’m a writer and director. I have a background in psychology and have also spent some time working in advertising. I’ve worked on both corporate and personal projects in various capacities including as a producer, director, and animator on ads, music videos, and short films—one of which earned me an African Movie Academy Award (AMAA) nomination for best animation.

As founder and creative director at Raknum Animation Studios, I see the company as an outlet to enable me and my team to find interesting ways to engage with art and creativity. As a relatively young and evolving hybrid art form, I’ve loved the creative potential animation offers. It’s also been particularly exciting to find new ways to leverage innovations in software and technology to make processes simpler and more streamlined; because, though animation can be highly expressive and offer near-infinite possibilities, it can also get very tedious.

Why we made Songrea Travels and why chose Cartoon Animator

We were exploring new tools and solutions for 2D character rigging for a project—where speed and consistency were paramount—when we found Cartoon Animator and the Animation at Work contest. As an iClone user, I’ve always known about CTA but having only recently started to dabble in more 2D-centric workflows, I never really paid it much attention. The contest created an opportunity to force ourselves into putting Cartoon Animator to the test; see how fast we could learn it and more importantly how well it’ll integrate into our workflow. Also, finding out about the contest way past its announcement, meant we were left with only about seven weeks to execute the project, which seemed a good creative challenge for our small team. In the end, we lived up to our billing and we’re more than proud of what we pulled off.

Workflow Summary

Our workflow for this project was pretty straightforward. We like to work in a way that lets us perform concurrent tasks with multiple things going on at the same time. That way, the backgrounds can inspire the character art, music can inspire the writing, and everything just piggybacks off each other till we organically find a common ground everyone’s excited about. About this, the home vs vacation idea came pretty early on and the somber acoustic guitar tune soon became a guiding light for the project. That is until we started editing and got completely tired of the song. Hence, why this 2D animation breakdown is in the most non-acoustic guitar-sounding tune we could find.

How I did it with CTA

Step 1: Ideation

Once we had the home and vacation theme, we started exploring some places that would be cool to explore visually. We fought between making it completely centered around the home or the vacation before deciding to combine them both. At this time, our art director, Funto Coker, was already exploring some background art styles and we were assessing locations that seemed to connect best. Soon we created a script and had a blueprint for everything else.

Step 2: World Building & Layout

Backgrounds were completed before the 2D character animation because that’s what we started with. So we looked at the space, set up the shot, and then added the characters. Another thing we looked out for in the composition, background art, and camera layout, were opportunities to utilize the z-axis to add more depth and visual interest to the shot with a parallax effect. Parallax also helps the audience get a feel for the scale of the scene, which also serves as a story-telling element. For domestic scenes, we kept it intimate and flat and then pushed for more depth as we went outside.

Step 3: Character Rigging & Animation

Once the characters were done, we brought them into CTA 4. With the limbs separated from the PSD file, simple drag-and-drops connected the bones, and in a few minutes, we had a character ready for animation. I also personally liked being able to have a custom GUI for each character—it just added personality to the animation process. Furthermore, the animation was mostly done using the Motion Key Editor. Using key-frames and transition curves, we were able to complete the animation in no time, which was great because, by this time, we were fast approaching the final days of the contest.

Step 4: Clean up & Post Production

We finally get to the most fun part of the process as the heavy lifting has already been done. We have an animation that’s working cohesively and telling a comprehensive story. At this point, we’re focused on supplementing that story by amplifying the background art and further integrating the 2D character animation into the background so they blend as one. We also do some basic relighting to add a bit more contrast and depth. We were also concerned about directing the viewer’s eyes, which entails darkening and slightly blurring out elements that seem to distract the audience from where they are supposed to be focusing. The scene over the temples of Myanmar was especially exciting, it’s a perfect example of an already beautiful scene being further enhanced through compositing.

Conclusion

In the end, it was a fun exercise and we’re glad we took it on. Given the sheer volume of inspiring work submitted to the contest, we feel very honored to have been awarded first prize in the “Business and Commercial” category. I hope this overview helped; We look forward to the amazing things being created by everyone in this community.

Follow Raknum Animation

Website | https://www.raknum.com

Instagram | https://www.instagram.com/raknum.animation

Youtube | https://www.youtube.com/channel/UCEfuGSU2tL-X67IHteI1uxw

What are the Vambies? – Join the competition and WIN and iClone 8 full version with Taiyaki Studios

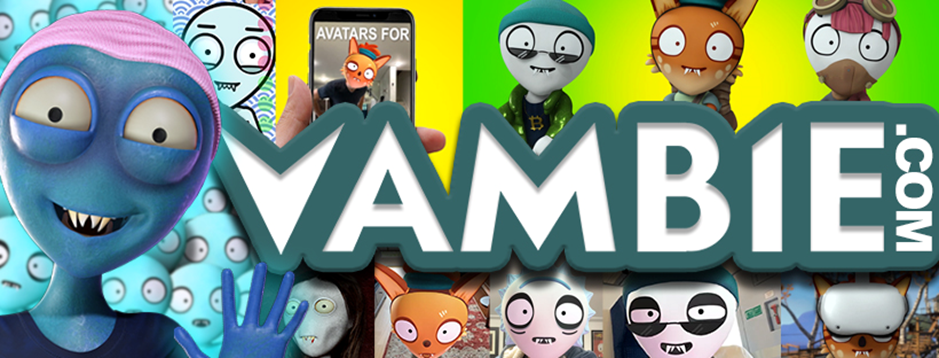
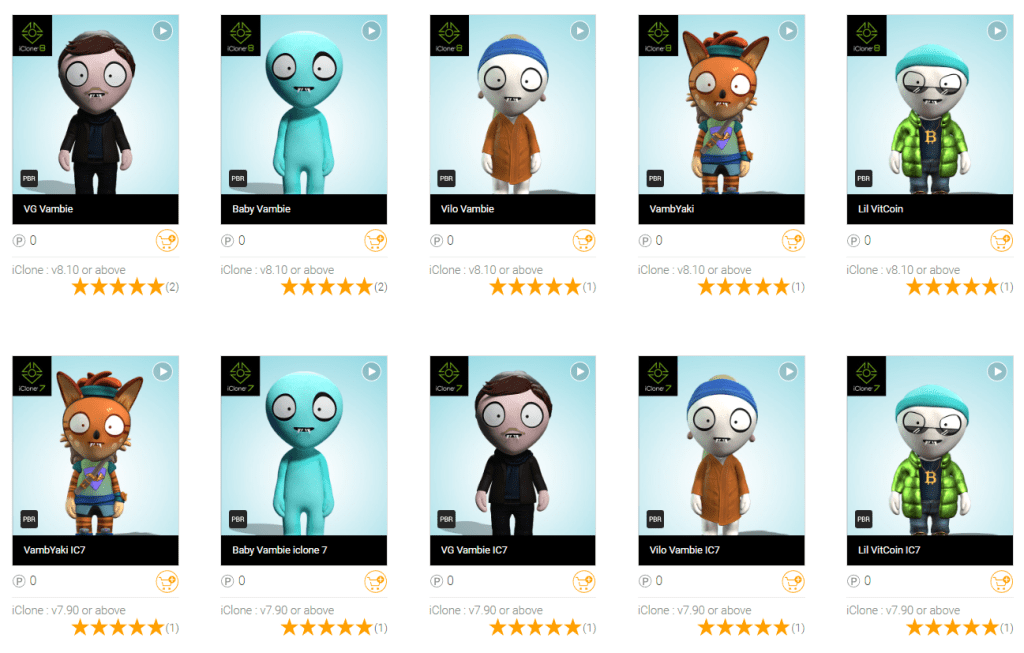
The Vambies are an avatar collection developed by Vambie Inc. and Taiyaki Studios. A quirky cast of vampire/zombie hybrids, they are being released into the world on the Reallusion marketplace and are appearing throughout social media.

Competition

To celebrate the launch, Reallusion and Taiyaki Studios will be running a competition: who can create the best video using a Vambie?

You can download the vambies models for free from the Reallusion marketplace https://marketplace.reallusion.com/iclone/search/vambies

Check out some examples of videos that have already been created with the vambies here:

https://www.tiktok.com/@tiktokvambies

https://www.tiktok.com/@tiktokavatars10

https://www.tiktok.com/@babyvambie

Make your own social media inspired Vambie video, post it to your channel and make sure to Tag #vambies to be part of the competitions. To make sure your video is not missed, also email or post us your video on our discord channel https://discord.gg/taiyaki

Reallusion will be offering one free iClone license to the winner of the competition!

The winner will be announced of the 2nd of January 2023.

The Vambie story

Taiyaki Studios mascot and metaverse tour guide ‘Mr Yaki’ travels to meet Dan, the creator of the Vambies, who explains to him the origins of the Vambies:

This video was created using Reallusion’s iClone and the Unreal Engine. For a behind the scenes look at how Taiyaki Studios uses Reallusion software to produce its videos, check out their latest ‘making of’ video:

Who are they for?

The Vambies are a community-driven animated show living on social media. Anyone interested in character animation and creating fun content is welcome to download a Vambie and begin producing videos: https://marketplace.reallusion.com/iclone/search/vambies with more Vambies to come soon! Creators can use Vambies for free and monetize their creations with no royalties. 

We have a dedicated team of experts ready to help in our discord channel https://discord.gg/mWWS84gS and it’s also a place to share your work and ideas and even collaborate with other Vambie creators.

About Vambie Inc.

Dan was born a vampire but accidentally bit a zombie and found himself turned into a hybrid. Shunned by both the vampire and zombie communities, he founded Vambie Inc. to manufacture clones of himself – the Vambies – and spread them into the world.

About Taiyaki Studios 

Taiyaki Studios builds avatars for vtubers and virtual influencers. The future of media is social-first, powered by virtual characters, and supercharged by fan-generated content. We’re here for it.

https://taiyakistudios.com/

https://www.youtube.com/c/TaiyakiStudios