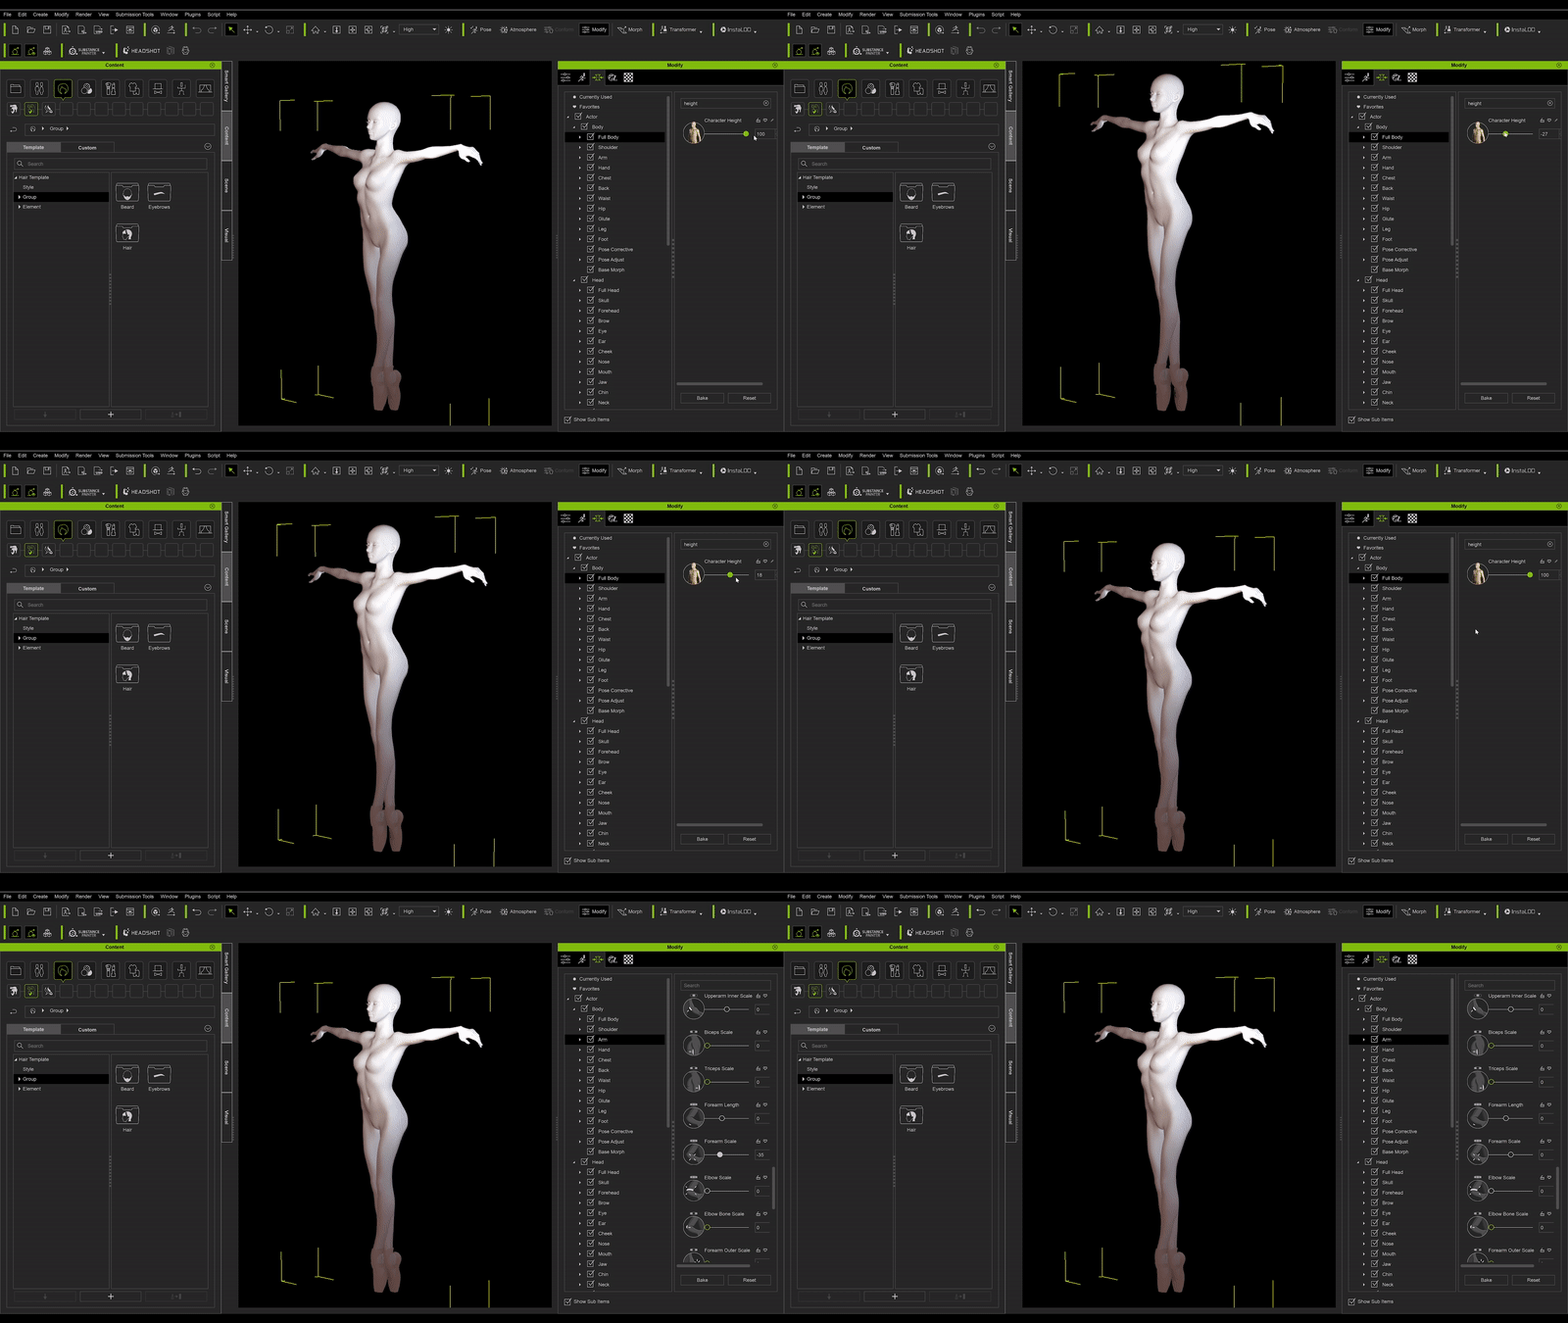
My name is Stanislav (but I prefer Stan). I am a self-taught artist working in the game-dev industry. I started as a motion designer in a small Siberian town and eventually moved to a bigger city chasing my goal to make games. The first job I landed was a startup mobile game, and I think it was a perfect project that helped me to make a transition from video production to a real-time environment. My next job was at a company called Sperasoft, it’s a big outsourcing company that co-developed a lot of great AAA games. I started as a VFX artist and worked on several big titles there – WWE immortals (mobile), Mortal Kombat (mobile), Agents of Mayhem, Overkill’s the walking dead, and Saints Row. It was a great time and it helped me to grow a lot as a professional artist.
After over 4 years at Sperasoft, it was time to move on and in 2019 I moved to Poland. I spent almost 2 years working at Techland Warsaw. In 2021 I moved once again, this time to Stockholm, and currently work at Avalanche studios as a senior VFX artist.
“In iClone 8 I was able to do all the mocap clean-up, previously done in MotionBuilder, but without the complexity or higher cost. Inertial sensors of Xsens understand the movement well but have no idea where they are really located in 3D space.“
Stan Petruk – Senior VFX Artist from Avalache Studios
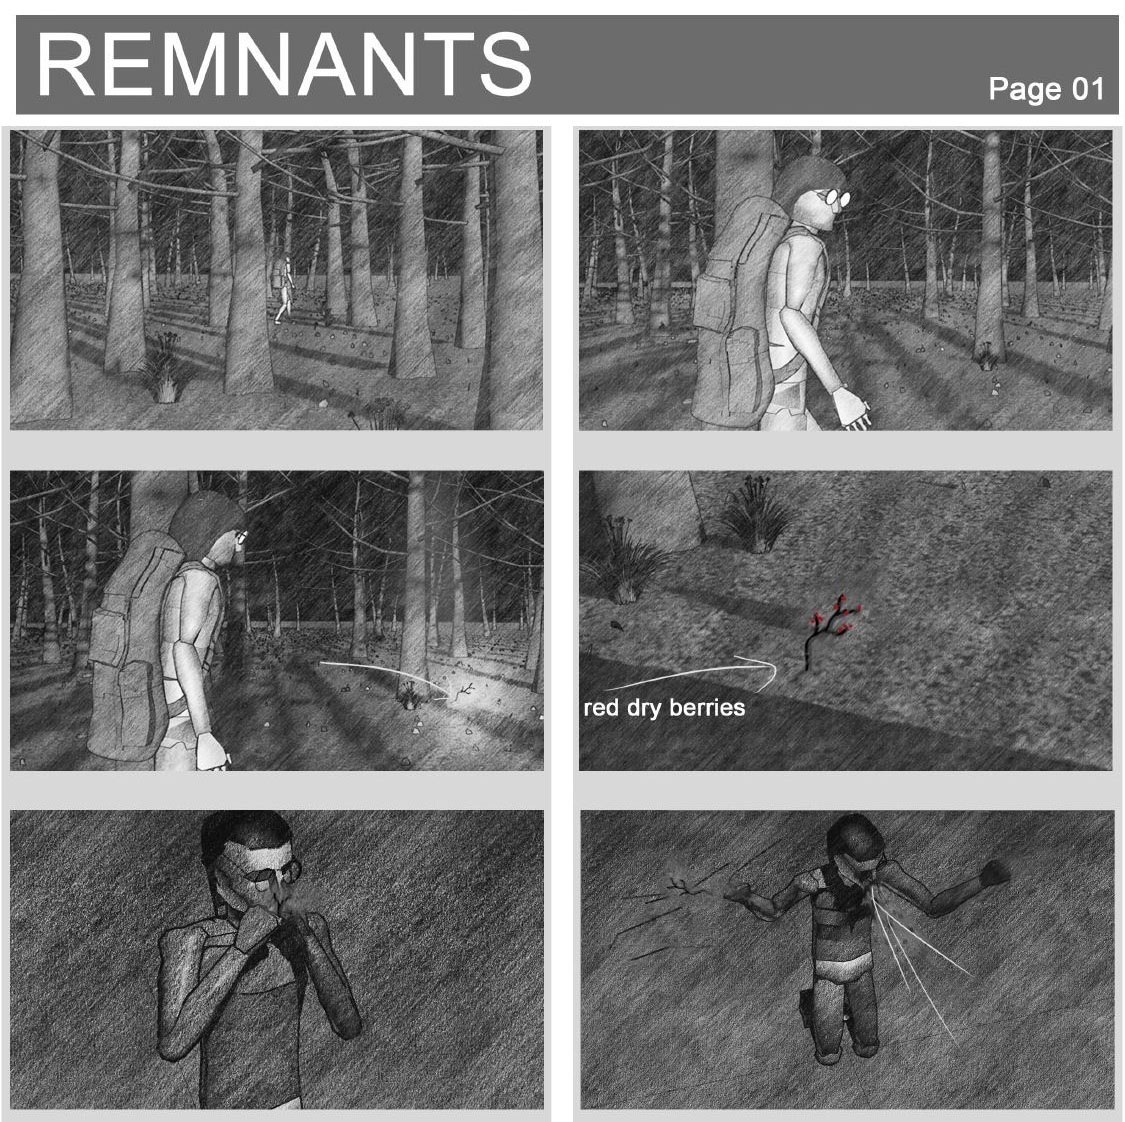
About the Remnants Project
Besides making games, I love films and parallel to my real-time VFX career I am trying to develop myself as a filmmaker. I attended several filmmaking courses, the most recent one was a short online course from Vancouver film school. I am also learning from books and trying to break down the films I watch. But it was all a theory and at some point, I realized that I need to get my hands dirty and make my first film. So, it is when I started to develop an idea for a short film with a simple story. I also explored a similar theme in my previous project, which was a VFX contest two years ago – But it was not a film yet.
The production of the Remnants started maybe a year ago, but in the beginning, it was mostly research and development. I took a pack of sticky notes and started to break down the project into small elements, first breaking it into the story structure acts, adding events in between, and making a list of what software and techniques I must learn to make the project come to life. Everything was glued to the wall and visually looked like there is no way I could make it alone with the skills I currently have. At the same time, I didn’t want the production to turn into only a technical presentation, my goal here was to make a film and the main focus should be exactly film direction.
So, I started to dig into how I can optimize my work. The real-time approach in all possible ways was something obvious. Merging my two passions – gamedev and films – into one was the core idea to get production going.
Discovering the Reallusion Tools
I was very concerned about having characters in my film, they are very important and they must look alive, it must be possible to empathize with them. So, I googled how I can make a character without being a Character Artist, and after some research, Reallusion products seemed like a perfect solution. Simple to use and with some basic knowledge of CG you can get an awesome result from it.
Reallusion software works very well with other programs, especially with Unreal Engine. All file formats I needed are supported, and export presets are there, too. You just use it as a part of a solid pipeline. It simply does the job and helps to save a massive amount of time.
The creation process in Character Creator is as simple as it can be, you just pull the slides and get the shapes you want. But if you want to get the result you must understand what exactly you need. So, I made a virtual film casting. I found some AI that generated a bunch of photos and just chose the ones I liked best. After that maybe an hour per person and you are ready for the next production stages.
Clothes and Hair
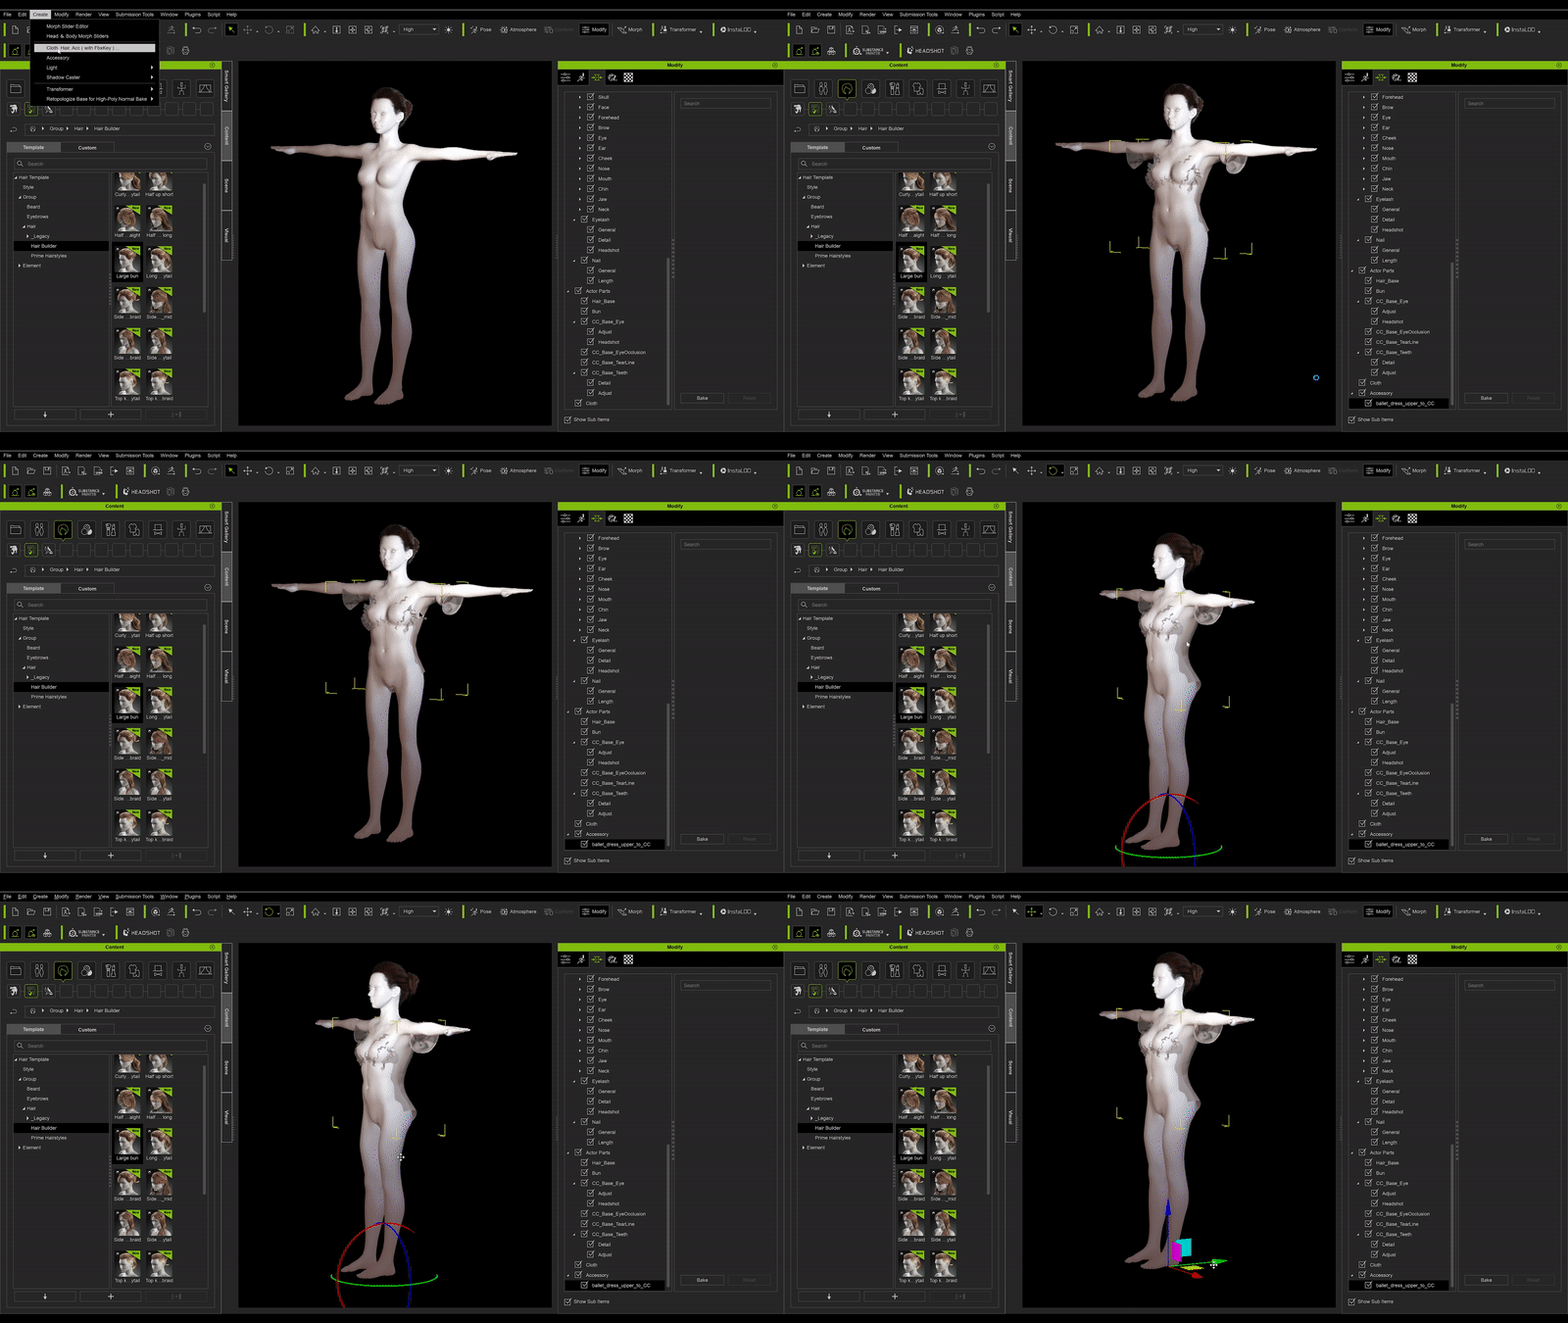
I did not want the clothes on the characters to look like a standard game asset, where they are a part of the skeleton. So, I decided to use Marvelous Designer and simulate the clothes as a separate element. The pipeline was the following:
Export an animated character from Unreal Engine
Import it into Marvelous Designer
Create a 3D model of clothes in Marvelous Designer
Add UV and textures
Simulate the clothes on top of the animated character
Export as alembic
Import into Unreal Engine as a 3ds Max preset with skeleton
Eventually, I used a mix of simulated clothes and 3D model skinning to save some time.
Hair was a tricky part, mostly because I wanted to use UE hair and fur. A lot of hair is also added to the character’s clothes, there are reasons for it – it looks great and hides imperfections of simulated cloth. Here is the pipeline:
Export character (or clothes) from Unreal
Adding particle hair in Blender. Blender has a lot of great tools to style hair.
Export hair as an alembic file (only the first frame, not a whole simulation)
(It is an extra stage which is necessary only if the fur in UE is not binding to mesh correctly, I used it only for clothes). Export the first frame of the mesh as alembic and import as a skeletal mesh in UE
Import fur into Unreal Engine
Create hair binding (use additionally exported mesh as a source skeletal mesh if required)
Add the groom component to a mesh
The real problem with the hair – it is not always sorting correctly, and if for example there is a transparent particle in front of fur, the fur will be rendered on top anyway. So, I had to remove or tweak somehow a lot of smoke and fog because of that.
Creating Animation in iClone
Before making the final animations, I made the whole film as a simplified cinematic. I used a mannequin in UE and was just moving it in the scene, all cameras were also there as well. Thus, I had a very good plan, I knew what animations I need and even how much time should every movement last (roughly of course). In the final version, a lot was changed but the core idea was from the initial cinematic. For the motion capture, I used Xsens, which is really great but requires a bit of cleanup and tweaking anyway.
In iClone I was able to fix most of such issues and also fix some of the mistakes I made during the pre-production stage. The most complicated scenes were the ones with interaction involved. Especially because I had to be both characters at the same time. Such things required a lot of manual fixing, e.g., there is a scene where one character takes a cigarette from the other, or throws and catches a potato, all of that originally was not moving correctly. I didn’t have access to finger tracking so it was made in iClone.
For facial mocap I used an iPhone that also required a bit of tweaking later, e.g., chewing the potato was done manually as tracking was not able to understand the recorded movement. I also used a bridge to export characters to Unreal and it is very simple and smooth, with just a click of a button. The animations were imported manually because I needed to clean up and fix the movements before using them in production.
VFX used in Remnants
All of the effects are animated flipbooks, they are mostly fire and smoke. It was the simplest part for me because I am a VFX artist. The pipeline is standard, make a simulation in Houdini, render it as a flipbook, and make a particle effect in Niagara.
Conclusion
The production started quite a long time ago (over a year ago), mostly because it was a research and development for me in the beginning. So, you could understand better the last 5 minutes of the film were made during maybe a couple of months. So, when I developed a good pipeline, made all preproduction, and had a good plan, the production started to go very fast. So, you basically have a scene set up, add the lights, drop characters to the scene and roll the camera. I really loved this approach, because it actually simulates the film production and shifts most of your attention to actual filmmaking. I think with a traditional approach I would most likely never make it alone. Now with all the knowledge I have, I started a new short animated film with a bit more complicated story. Currently, it is in preproduction, but soon I will be able to share more information about it.
Free application for quickly transforming static models into moving characters.
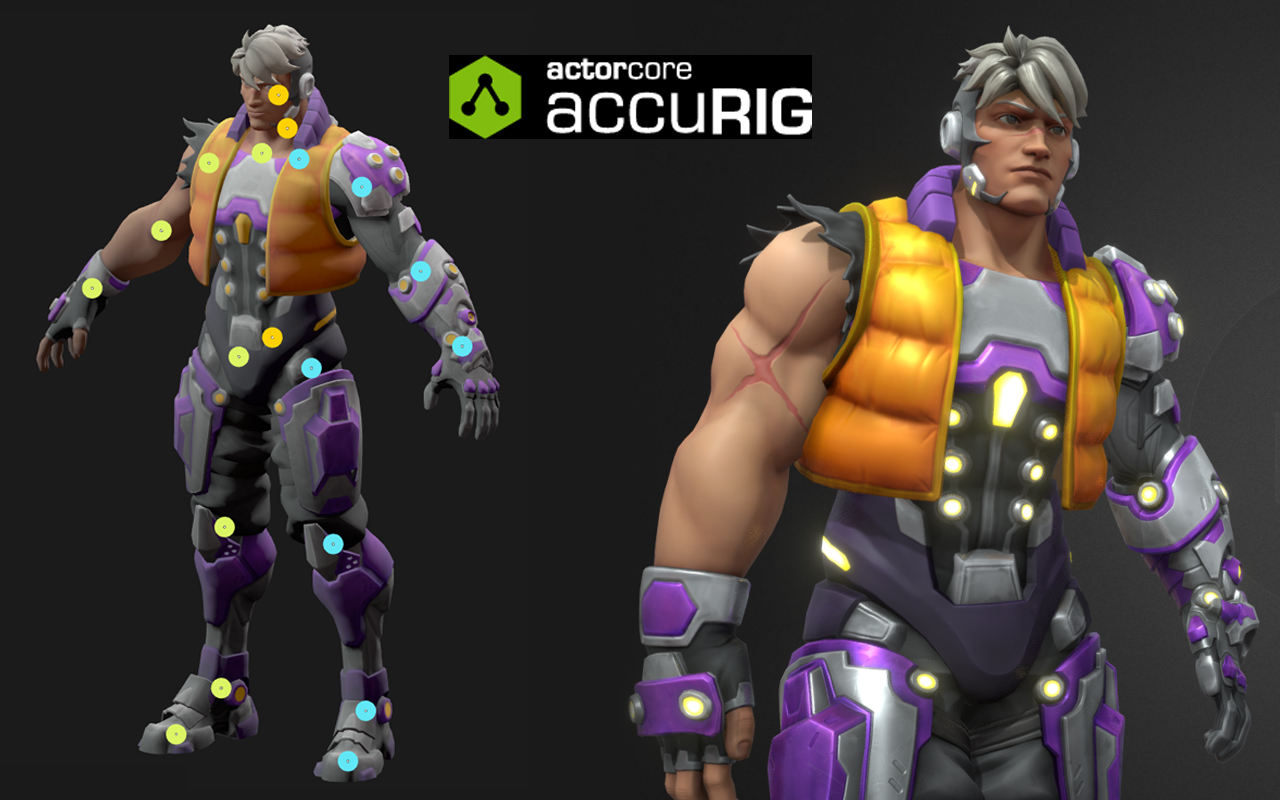
Ever lament the substantial time and energy spent on rigging your favorite characters? Do you desire a one-click solution to streamline the entire rigging process? Look no further – a brand-new solution is in town, namely Reallusion’s AccuRIG!
Presented by the makers of iClone and Character Creator, AccuRIG has direct access to character content on Sketchfab and 3D motions on ActorCore. Not only does it convert static models into rigged and animated characters, AccuRIG also automates tedious and repetitive tasks – all for free!
AccuRIG: A better alternative to Mixamo
Easy steps for character rigging.
As a free auto-rig tool, AccuRIG is available for download from ActorCore online store. The program is designed for fast, easy, and accurate character rigging. Whether you have models in A-, T-, or scan-poses, with low, high, or multiple meshes, you can complete the rigging in five steps.
You can export the rigged FBX file directly to any major 3D tool such as Unreal Engine, Blender, Unity, and C4D, or upload it to ActorCore where you can try out thousands of 3D motions.
Body and hand rigging can be manually refined.
What is amazing about this application is that it also allows you to manually refine the body and hand rigging – with quite impressive results. With manual joint definition, rigging can be customized to match models with different shapes, looks, and scales. The skin weight is optimized for all joints, from the neck, shoulders, elbows, and knees, to detailed finger joints. The volumes for the head, body, and accessories are well-preserved using the AccuRIG rigging technology.
Use Post Offset to correct the avatar posture.
Pose offset is another excellent feature in AccuRIG. It helps correct pose problems such as arm penetration or leg distance when applying animation data to characters with different body scales. It can also generate stylized performances for cartoonish figures.
Enliven unrigged models on Sketchfab
Search ‘AccuRIG’ in Sketchfab and find compatible models to choose (Image credit: Sketchfab)
Online asset stores, such as Sketchfab, offer hundreds of character models for download, paid or free. Many of these assets require further rigging, and the time and effort to complete the rigging process can be a real obstacle for users.
Without the lengthy rigging process, users can take advantage of the large content library in Sketchfab, use AccuRIG to turn unrigged models into animated avatars and bring them to production, quickly and easily.
When searching AccuRIG in Sketchfab, users can find a selection of models designed by different artists that are ready for use. There is also access to the recommended 3D characters, directly from the tool, making it very convenient for users to pick and choose desired models from Sketchfab.
Value-added for model artists
Character artists can benefit from AccuRIG simply because it is free, fast, and offers accurate results. No more hours of manual rigging to make the static creation perfectly fitted for animations. Artists can display their newly rigged models in different poses and increase the asset value in 3D stores like Sketchfab.
“All that can be said about AccuRig is that it’s definitely a game changer and definitely a big upgrade from similar tools like Mixamo,” says Roumen Filipov, senior 3D character artist at Chief Rebel. “The easy and fast workflow combined with a high-quality result is surely a must for character artists wanting to take their models to the next level.”
Thousands of production-ready mocap animations
ActorCore asset store with a variety of 3D motions.
Nowhere to find suitable motions or poses for your newly rigged character? Just upload it from AccuRIG to ActorCore online asset store. Explore over 1,700 well-themed, professionally produced 3D motions in the real-time interactive viewport. Download and retarget character animations from ActorCore to use with all major 3D tools for game, film, arch-viz, and interactive projects.
Download and try it yourself
AccuRIG offers many powerful functions, similar to those found in Maya Quick Rig or Blender Auto-Rig Pro. But AccuRIG is TOTALLY FREE, making it an option that is head and shoulders above the competition.
Hello, my name is Go Eun Kim, a college student majoring in computer engineering, and I am from South Korea.
Since my hobby was playing games and drawing pictures, I naturally became interested in a job related to my hobby and had a dream of becoming a 3D modeler who can implement realistic characters in games. However, graphic classes in college were not what I expected, and I felt the need to study 3D modeling separately to ensure a clear path for my career. So I decided to take a year off from college in 2021.
That year, I started studying character modeling through a graphics academy. At first, I studied using 3ds Max and gradually studied how to model characters using programs such as ZBrush, Substance painter, and Unreal Engine. And by participating in a contest held in Korea, I could learn how to easily implement high-quality characters using Character Creator. Learning various programs was not an easy process, but visible results are satisfying and fun to me. Also, I was able to concentrate on studying 3D modeling with passion because I always get excited when I imagine people playing future game characters that I have made. It was very valuable that I studied 3D modeling for a year. This year, I am studying my major and 3D modeling together because I am attending college.
Part I. Winner Entry Workflow
Step 1. Character Concept
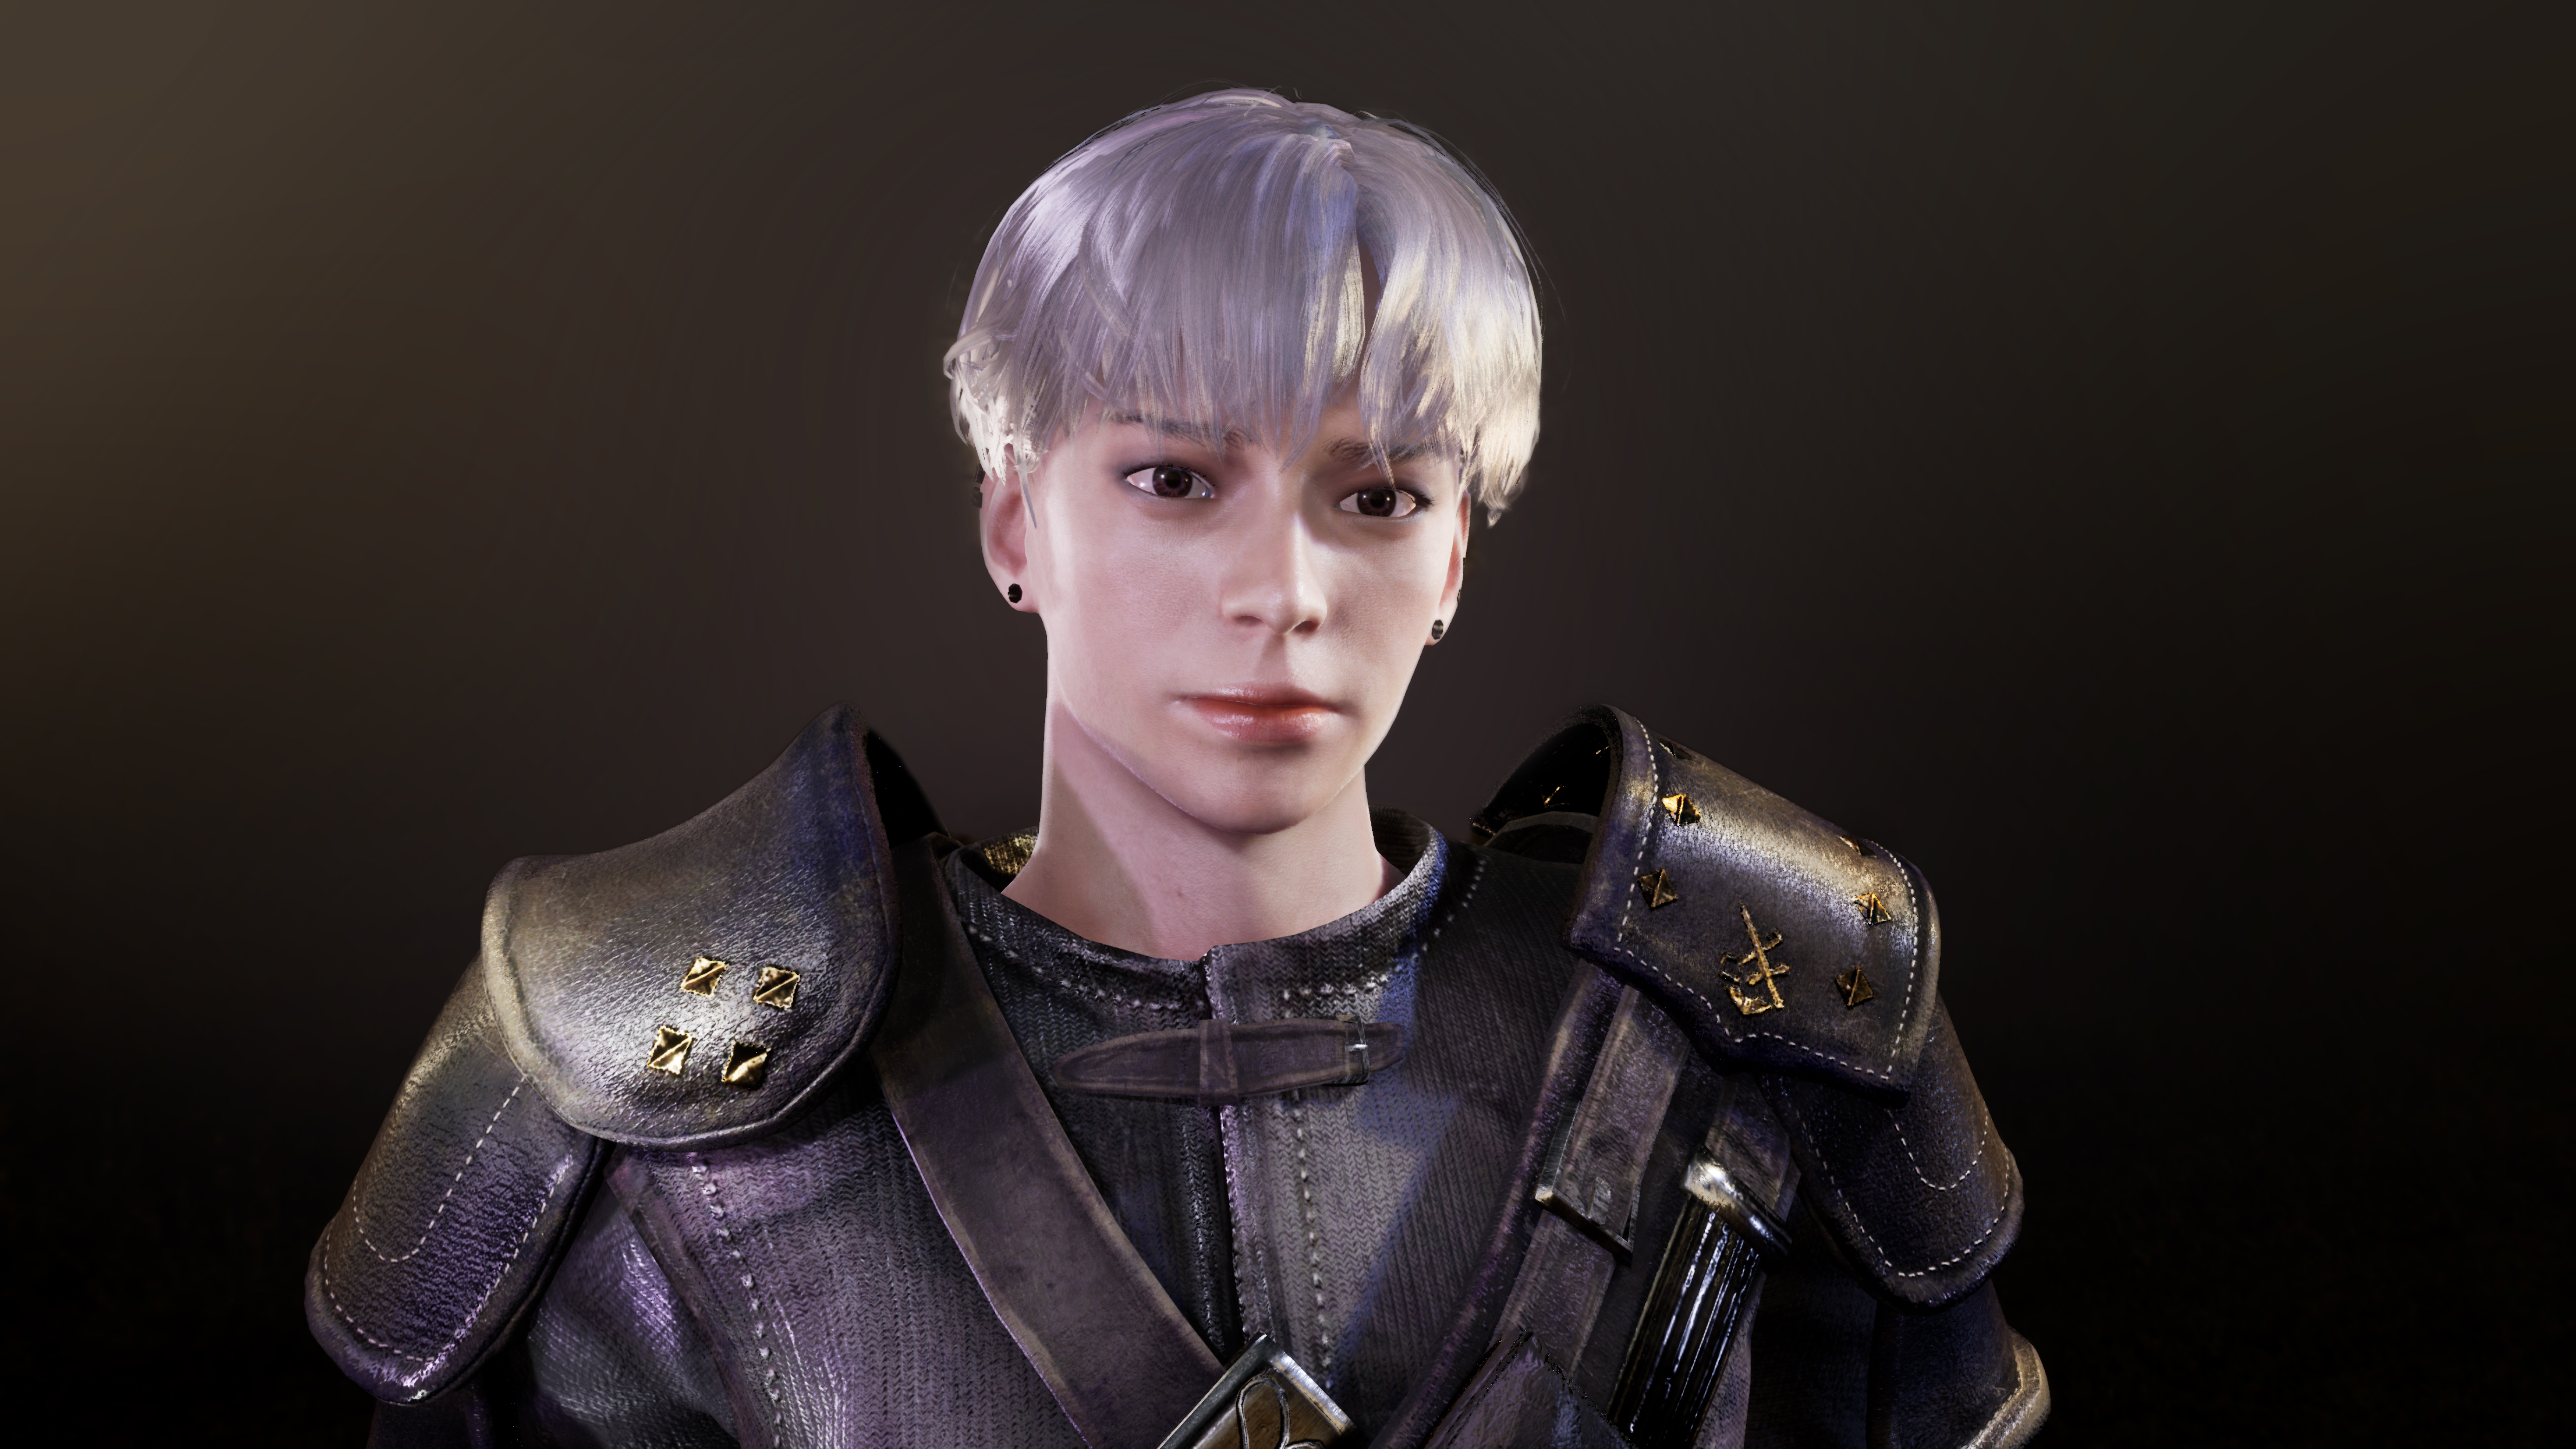
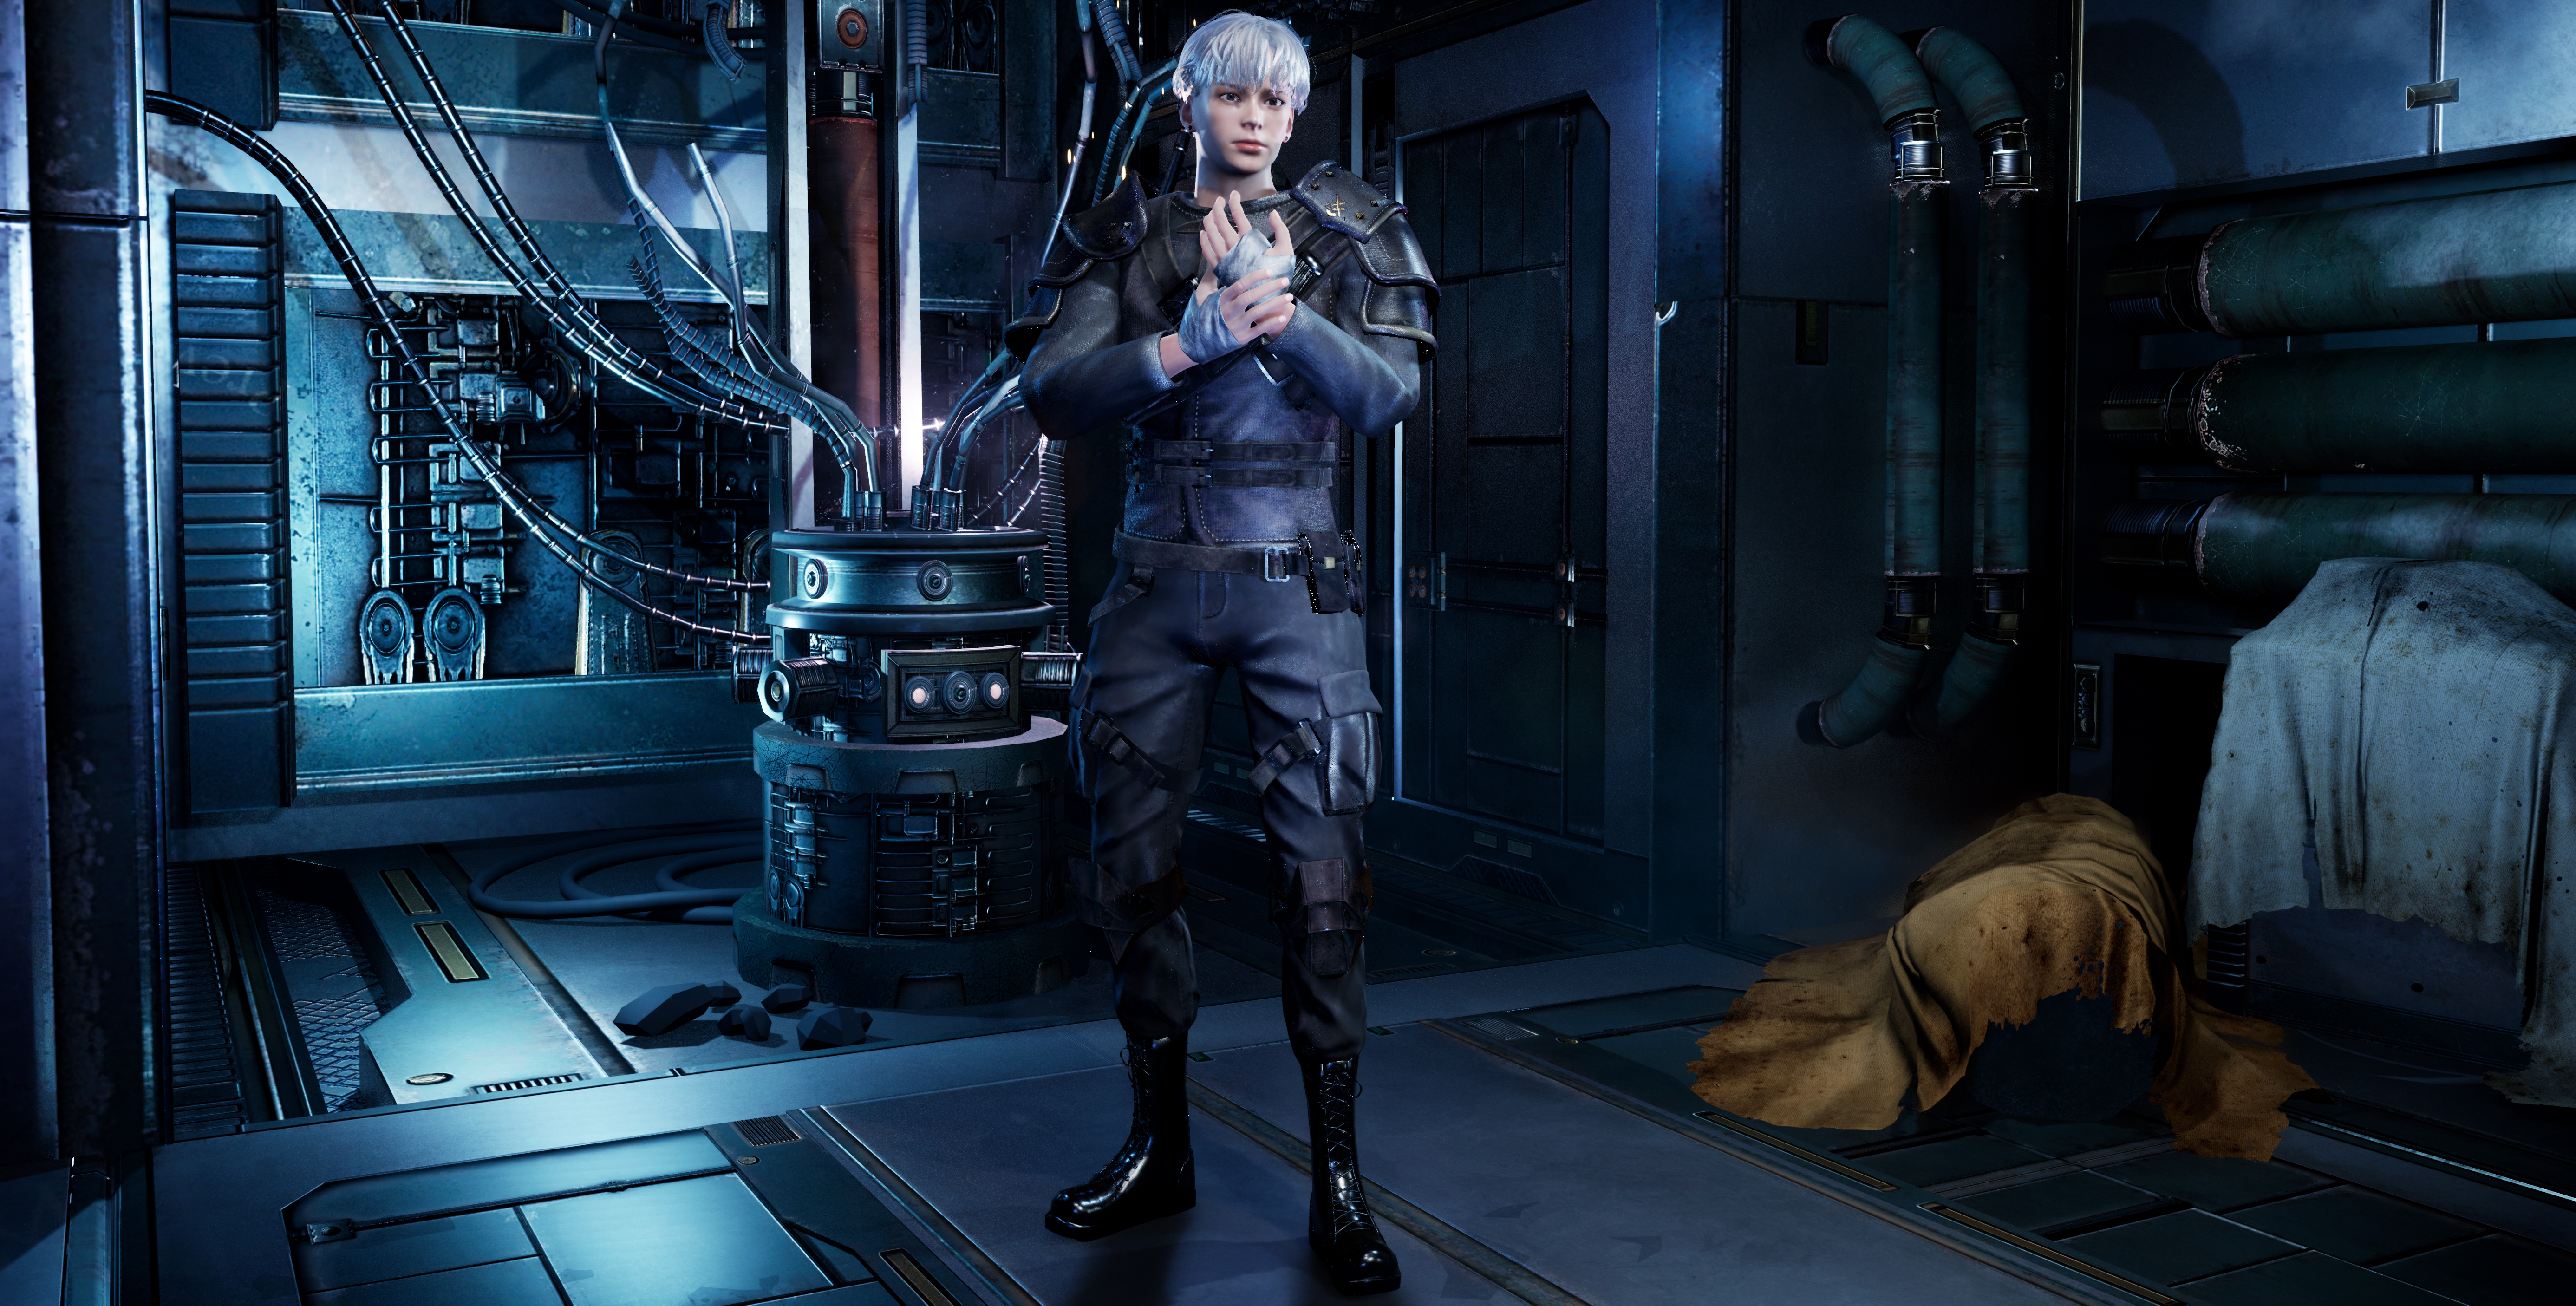
I found various references to make characters that would appear in the game and decided to make characters with the concept of “Adventurer”.
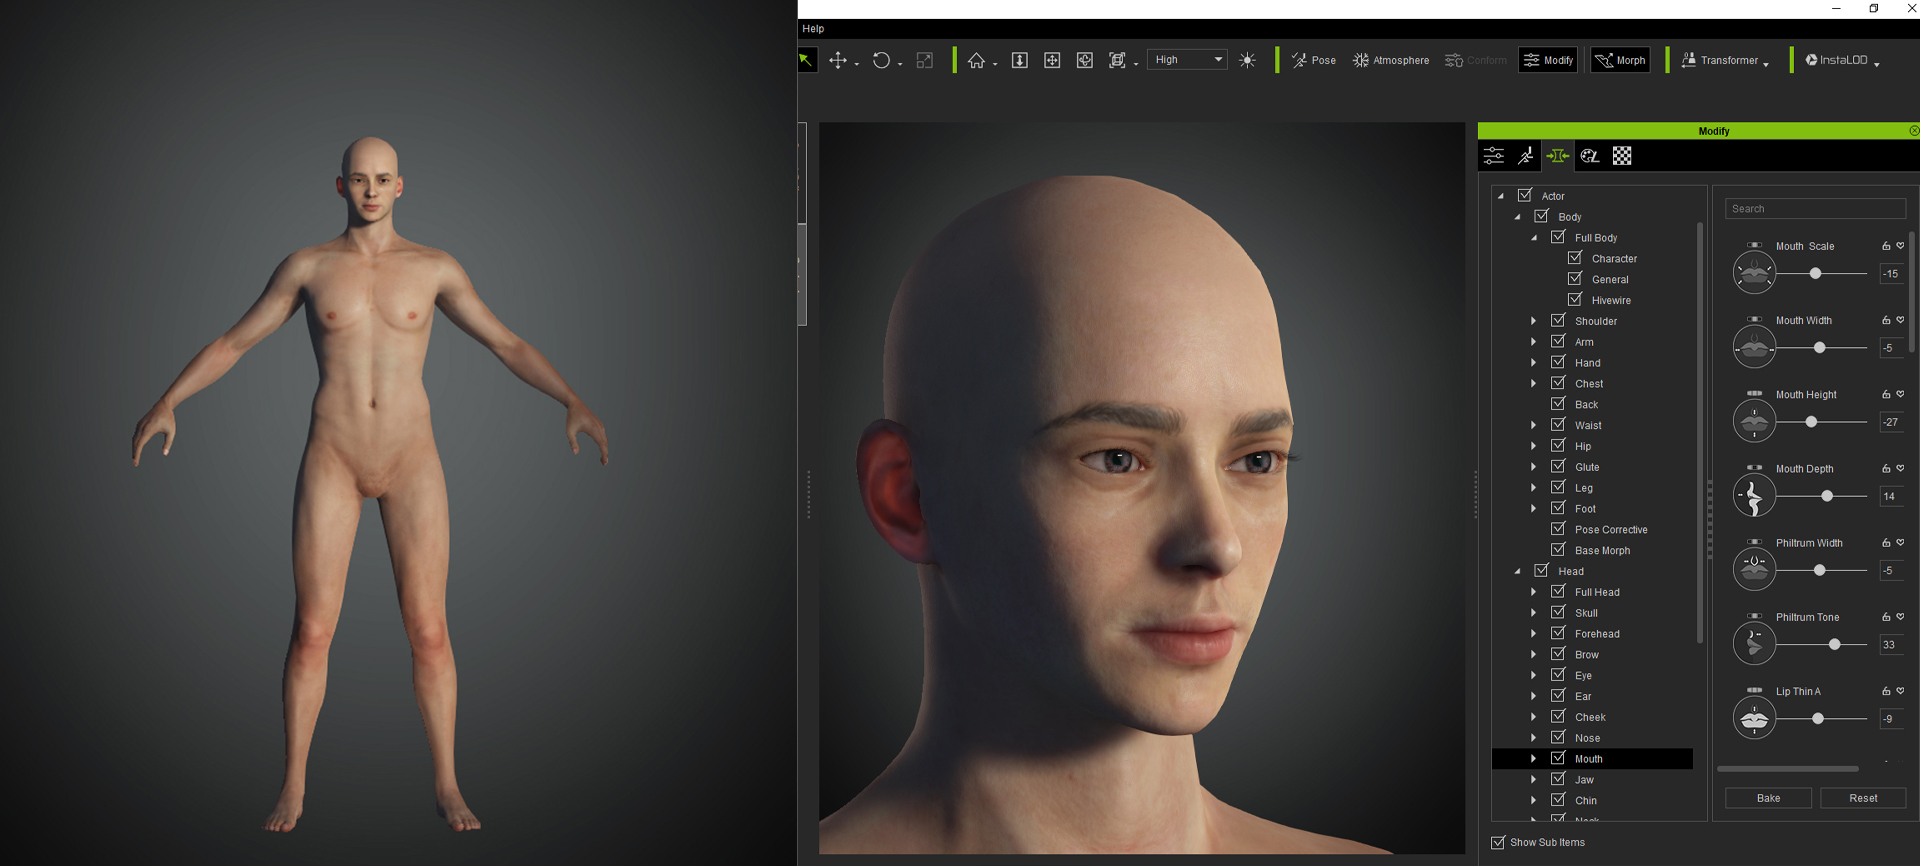
Character Creator 3provides various types of modeling, and the sliders can be used to modify the body shape and appearance so that the desired character’s appearance can be made high-quality and easy. It also provides texture maps such as base colors, normals, etc., which helped to shorten the working time very much.
Step 2: Additional Software
Take the model from the Character Creator to the Z-Brush and make a simple clothing shape to see if it matches the character. Then, make low poly and high poly using 3ds Max and Z-Brush (or Marvelous Designer if necessary) and bake the normal map.
Take the baked normal map to Substance Painter, apply it to the model, and create a texture map to complete the clothes.
Additionally, the face texture map provided by Character Creator 3 changes the appearance by modifying the digital human skin details and makeup in Photoshop and Substance Painter.
For the hair, use the hair cards in 3ds Max to create a hairstyle that fits the character. And make a hair texture using Z-Brush‘s Fiber mesh and apply it to the hair cards.
Step 3: Pose and Lighting
Move the character’s bones and pose according to the character’s concept in 3ds Max. Adjust the skin value using the weight tool to make it look smooth and not awkward.
Then export it and take it to Unreal Engine 4 (UE4). Apply all the texture maps created in step 2 to the material node in UE4.
In the case of the background, it has a solid color or gradation plane to give a lighting effect, or it adds various brightness and colors to the set downloaded free of charge from Unreal Engine to make the character look the prettiest and “coolest”. If you apply lighting effects to the character, you can create various moods.
Export the action of applying facial expression change to the animation provided byiClone and take it to UE4. As in step 3, add a lighting effect to the animation and add camera movement to make it look more dynamic. Then take a screenshot and record a video to complete all the work.
In Conclusion
After going through the steps above, all the work is done and the character is completed. Character Creator 3makes the process of modeling the basic appearance easy and fast, helping to reduce working time and making the work fun. Thank you for viewing my workflow.
Part II. Feature story
Q : Hi Go Eun, thank you very much for sharing the workflow with us. First of all, congratulations on winning the contest!
There are two scenes of your entry Adventurer: one in the spaceship and the other in the canyon. Can you elaborate more about the stories behind this Adventurer?
What’s the fun part and the biggest challenge of creating this character?
Hello, thank you for congratulating me on winning the award! I was worried about choosing a background that would make the character of “Adventurer” stand out. To maintain the concept, I thought I shouldn’t bring the character to any background. So I chose two backgrounds because I wanted to give the character a feeling of exploring a place. It’s like an NPC waiting for a user on a hunting ground or a dungeon in an RPG game.
The biggest challenge in creating characters was the clothes modeling process. Because it was my first time making clothes using Marvelous Designer, but I think it is a good experience. The greatest fun in creating characters is in the process of using Substance Painter. I think adding color to low poly mesh and detail using textures is the most fun work because it feels like instilling vitality in the character.
Q : How did you learn Character Creator (CC)? In your experience, what are the merits and drawbacks of using CC to design characters? Have you ever tried the GoZ function to sculpt your characters in ZBrush and CC at the same time?
What are your favorite features of CC 4 / iClone 8?
I got to know CC through a 3D character production contest hosted in Korea, and I used the GOZ function by making the appearance of the character using CC, modifying it in ZBrush, and bringing it back to CC to check. I think the advantage of CC is that it not only provides realistic and high-quality character models but also provides various textures and facial animations, so it saves working time.
However, I think it was regrettable that I had to install and use various software to use the animation function. And among the newly added features of CC 4 / iClone 8, I am looking forward to using the physics and animation player functions for my new project.
Q : Because of your great passion for creating games, you have even decided to pause one year from college and learned 3D modeling by yourself. Do you have any role models whose works keep motivating you to pursue this goal?
As you’ve returned to the campus this year to continue your studies in Computer Engineering, I wonder if you see any potential to combine your passions with your major studies? Or say, has the knowledge of Computer Engineering ever helped you to create something different from the past year?
I don’t have a role model, but I always try to do my best in a given task because I believe that if I do my best, I can be the best. And the project I did my best is the motivation for the next project. Currently, my major is different from studying 3D modeling, but I continue to study them together because I think that knowledge of computer science can help me communicate with other departments when I produce games later.
Q : The Mechanic Girl has a similar style to that of the Adventurer, but with more interesting accessories from her hairstyle and weapons to her bag. Do you usually design unique props for your characters? Could you share more of your artistic ideas on this Mechanic Girl?
How did you achieve your character design and character animation by using Character Creator, ZBrush, 3ds Max, iClone, and Unreal Engine? In your opinion, what are the merits and shortcomings of using iClone Unreal Live Link?
Mechanic Girl was my first project to create after seeing the concept art of characters drawn by others. The design looked unique, so I thought it would be fun, and I chose this character because there were many things that I could try, such as skirts, weapons, and accessories. And the body and appearance of this character I modeled using 3ds Max and Zbrush, so it takes a relatively long time and there are some awkward parts, but I was able to learn how to make a body mesh and how to make a digital human face; I think it helped me understand character modeling.
And I planted the bones in 3ds Max and rotated them directly to make the character take the attack pose. I then modified the face model and created a facial animations that matches the attack posture to complete the character animation. I think the advantage of iClone Unreal Live Linkis that it works with iClone and Unreal Engine in real time without having to export and import FBX.
Q : Please share with us three things (e.g., website, books, podcast, music, games, sports, etc.) that inspire you most when you start a new project.
When starting a new project, the most inspiring things are games, ArtStation, and animated movies. Because I think these inspirations come from the desire to challenge, starting from the curiosity of “how did you make this?” when I see things that I have never made.
For more of Kim’s work, check out her ArtStation page.
After two months, the2022 ‘Animation At Work’ Contest for Cartoon Animator (CTA) has come to a close. Reallusion would like to thank all of its wonderful sponsors including XPPen, Affinity, Magix, and ASIFA. Overall, the event received 169 global entries, each with their work-in-progress videos among five categories: Business & Commercial, Comics & Art, Education, Vertical Shorts, and VLOG & VTuber.
A total of 26 winners, from different backgrounds, were selected with different levels of skills and experience. Additionally, a wide array of styles and topics were created, proving that Cartoon Animator is streamlined for creative diversity. Several newcomers who were first-time CTA users, were even able to use their newly acquired techniques to combine other software pipelines for amazing submissions. Click here to see the full list of winners with their respective judges’ comments.
Business & Commercial Animation — 1st Prize
Songrea Travels TVC by Onome Egba (Nigeria)
Onome Egba and his thoughts:
“Cartoon Animator excels at simplifying a lot of complex processes naturally associated with character animation. The rigging tools and animation presets are especially good at helping you get your characters moving in no time. Real-time playback is also something you’ll quickly take for granted when using the software. No ramp previews, pre-render, or 1/4 resolutions are needed to actually see what you’re working on which really helps with iterations.”
Judges comments:
Congratulations to Onome Egba! This is a delicate 2D production that all judges immediately pictured seeing as a TV or YouTube ad. The voice acting, characters, and body motions were all well balanced, and we also loved the scene and camera changes. Well done!
Comics & Art Animation — 1st Prize
Godly Princess by Eon De Bruin (South Africa)
Eon De Bruin and his thoughts:
“I have been working with Cartoon Animator 4 since 2017 and it has opened up a whole new world of possibilities for me. Today I have my own streaming platform where I create numerous animation shows for kids, and CTA4 is my software of choice because it is so easy to work with, fast to create animations, and integrates well with Clip Studio Paint. I don’t think I will be able to create as many animated shows for my platform if I were to use another software. I love Cartoon Animator!”
Judges comments:
Our seasoned CTA user Eon De Bruin impressed us again with his entry and WIP Video. He took a chance to have the 2D princess interact with 3D people – and it all paid off! Congratulations Eon!
Education Animation — 1st Prize
The Secret of Figs by LuckyPlanet (Thailand)
LuckyPlanet and his thoughts:
“Cartoon Animator allows me to produce my animated series more quickly and easily. These animation tools make me feel like an actor myself.”
Judges comments:
A 10 out of 10 winning entry for the Education category! We were very impressed with the final quality, and we cannot wait for more educational Cartoon Animator videos created by LuckyPlanet!
As the contest ended, Reallusion was also pleased to announce the coming of Cartoon Animator 5. In this forthcoming release, we are fulfilling the groundwork of animation productions and also elevating Cartoon Animators’s unique techniques. In the new version, secondary animations will be automatically created with simple keys, squash-and-stretch motions can be deformed freely, and vector graphics are supported for infinite resolution. Take a sneak peek at what’s inside Cartoon Animator 5!
Raqi Syed is an artist, visual effects designer, researcher, and lecturer at Victoria University of Wellington. She is the co-director of MINIMUM MASS.
Her practice and teaching focus on the materiality of light, hybrid forms of documentary and fiction storytelling, and using media archeology and software studies methodologies to better understand contemporary practices in visual effects.
Raqi has worked as a visual effects artist on a bunch of feature films. In 2020, her VR work was exhibited at the Tribeca, Cannes, Annecy, and Venice International Film Festivals. She is a 2018 Sundance and Turner Fellow, and a 2020 Ucross Fellow. In 2017, The Los Angeles Times pegged Raqi for a list of 100 people who can help solve Hollywood’s diversity problem. She holds an MFA from the USC School of Cinematic Arts and an MA from the VUW Institute of Modern Letters.
Raqi Sayed created an animated docu-memoir (Raise Ravens) where she digitally resurrected her deceased father in virtual reality with the help of Character Creator in order to lay his ghost, and generations of family hauntings to rest.
” I’ve been using Reallusion software for 5 years. I find the tools flexible and responsive to the different needs of storytelling in both my own work and teaching students the principles of character-centric visual effects.”
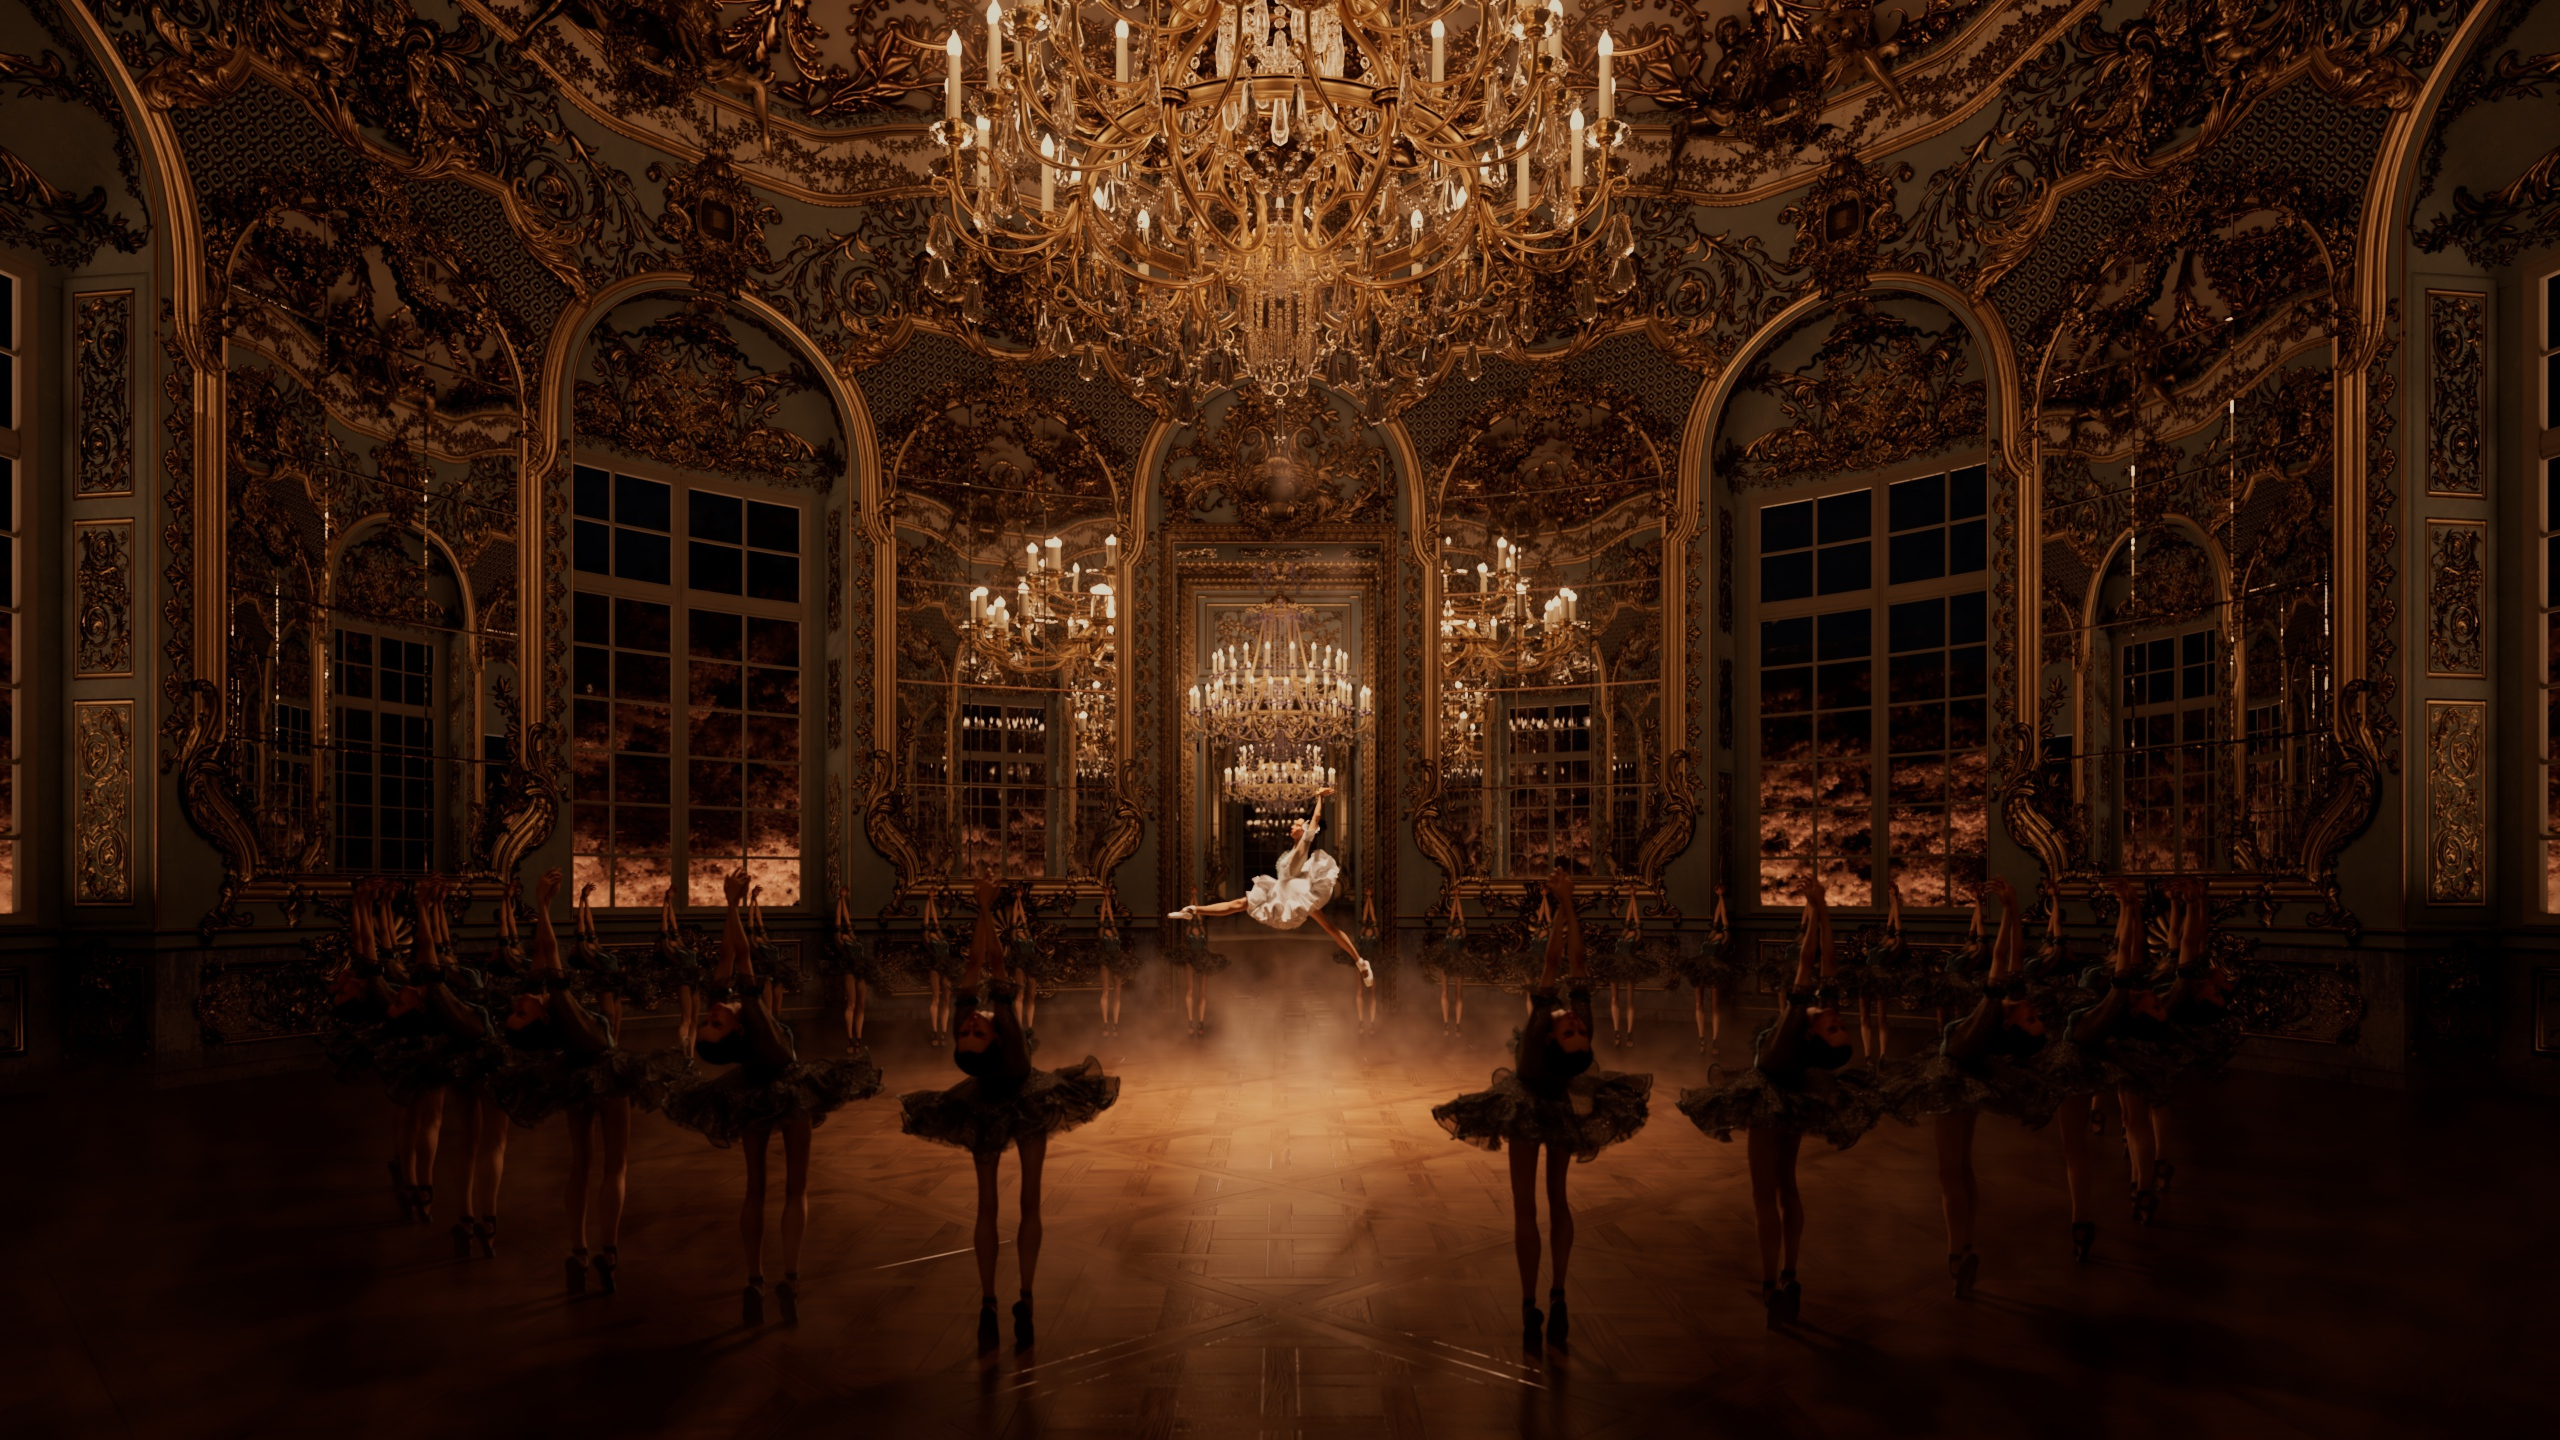
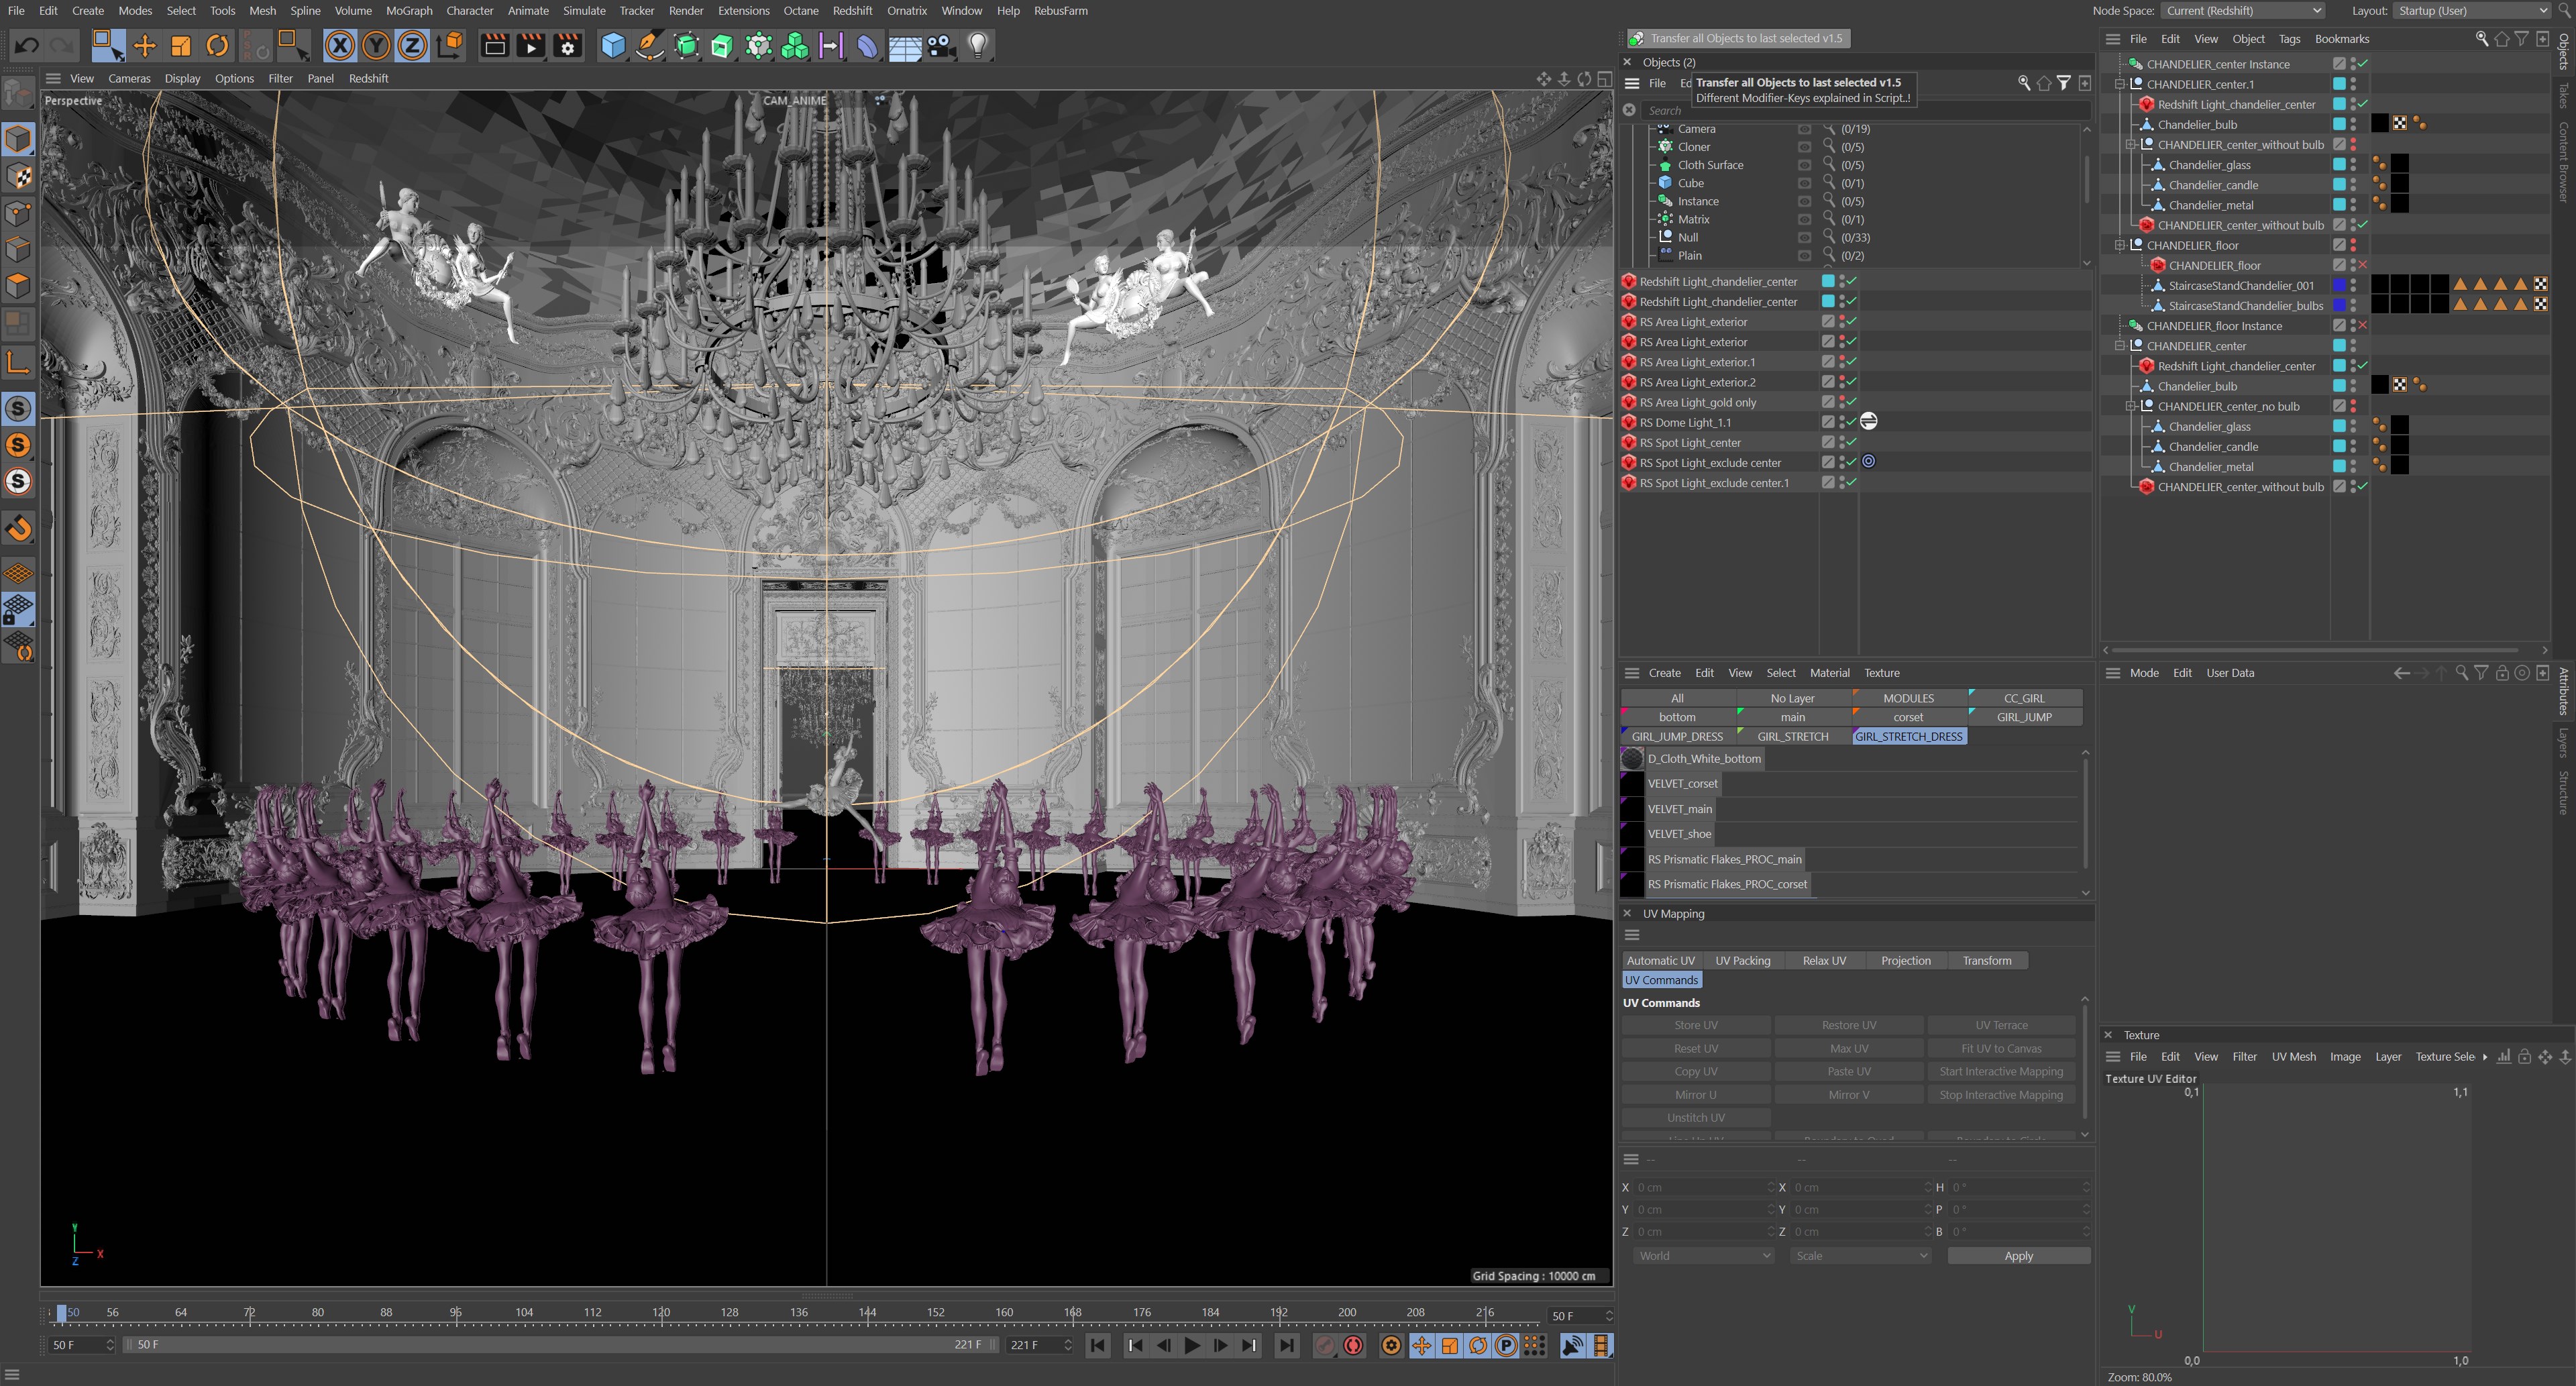
Project “Ballerina” is a 30-second full CG animation, Kay John Yim’s first personal project to feature an animated photorealistic CG character staged within a grand Baroque rotunda lounge. The lead ballerina is mainly made with Character Creator, animated in iClone, and rendered with Redshift and Cinema4D.
Kay John Yimis a Chartered Architect at Spink Partners based in London. He has worked on a wide range of projects across the UK, Hong Kong, Saudi Arabia and Qatar, including property development and landscape design. His work has been featured on Maxon, Artstation, CG Record and 80.LV.
Yim’s growing passion for crafting unbuilt architecture with technology has gradually driven himself to taking on the role of a CGI artist, delivering visuals that not only serve as client presentations but also as means of communication among the design and construction team. Since the 2021 COVID lockdown, he challenged himself to take courses in CG disciplines beyond architecture, and has since won more than a dozen CG competitions.
This making-of tutorial article is a short version of “Ballerina: A CGI Fantasy”, written by Kay John Yim. For the full version, please visit Fox Renderfarm News Center.
The Making of Ballerina
The animation is a representation of my inner struggles in all artistic pursuits, both metaphorically and literally.
Ballet, an art form widely known to have stringent standards of beauty and highly susceptible to public and self-criticism, is the metaphor of my daily professional and artistic practice. As an architect by day, I work on architectural visualizations, where every detail is being scrutinized by my colleagues, senior architects and clients. As an artist by night, I work on personal CG projects, of which I would do hundreds and up to thousands of iterations to get the perfect compositions and color schemes. No matter how proficient I become in my professional and artistic skills, the inner struggle never fades away.
Through months of trial and error, I have since learned a lot about efficient character animation and rendering. This article is an intermediate guide for any indie artists like myself who want to take their CG art to the next level.
My primary software for architectural modeling is Rhino.
There are many different ways to approach architectural modeling. Rhino’s main advantage over some other more popular DCCs like Cinema4D (C4D) or Houdini is its capability in handling very detailed curves in large quantities.
As an Architect, every model I built always started with a curve, usually in the shape of a wall section, cornice or skirting section, swept along another curve of a plan. Rhino’s command list might seem overwhelming at first, but I almost exclusively used a dozen of them to turn curves into 3D geometry:
Rebuild
Trim
Blend
Sweep
Extrude
Sweep 2 Rails
Flow Along Surface
Surface from Network of Curves
The key to architectural modeling is to always use reference wherever possible. I always have PureRef open at the right bottom corner of my screen to make sure I model in correct proportions and scale. This usually includes actual photos and architectural drawings.
For this particular project I used the Amalienburg Hunting Lounge in Munich as my primary reference for the architecture.
PureRef board for the project
While the architecture consisted of 3 parts – the rotunda, the hallway and the end wall – they were essentially the same module. Hence I initially modeled one wall module consisting of a mirror and a window, duplicated and bent along a circle to get the walls of the rotunda.
Rhino modeling always begins with curves
Wall module duplicated and bent along a curve
The module was reused for both the hallway and the end wall to save time and (rendering) memory. Having built up a library of architectural profiles and ornaments over the past year, I was able to reuse and recycle profiles and ornaments for the modeling of the architecture.
Ornament modeling could be a daunting task, but with a couple of ornaments modeled I simply duplicated and rearranged them geometrically to get unique shapes.
Rhino ornament placement
All the objects within Rhino were then assigned to different layers by material; this made material assignment a lot easier later on in C4D.
Assigning objects to layers by material
Note :
The best way to get familiar with Rhino navigation is to model small-scale objects. Simply Rhino has a great beginner’s series in modeling a teapot in Rhino: For anyone in a pinch, there are pre-built ornaments for purchase on 3D model stores like Textures.com ; some ornament manufactures have free models available for download on Sketchfab and 3dsky.
Exporting from Rhino to C4D
Rhino is primarily a NURBS (Non-Uniform Rational B-Splines) software; and although NURBS models are very accurate in representing curve and surface data, most render engines or DCCs do not support NURBS.
For this reason I exported the NURBS and MESHES to .3dm and .FBX respectively, and used Moment of Inspiration (MOI) to convert the NURBS model to a mesh.
MOI has the best NURBS to quad mesh conversion(over Rhino or any other DCCs) – it always gives a clean mesh that could then be easily edited or UV-mapped for rendering.
Exporting from MOI
Importing into C4D
Importing the FBX file into C4D was relatively straightforward, but there were a couple of things I paid attention to, notably the import settings, the model orientation and file unit, listed below in order of operation:
open up a new project in C4D (project unit in cm);
merge FBX;
check “Geometry” and “Material” in the merge panel;
change imported geometry orientation (P) by -90 degree in the Y-axis;
use script “AT Group All Materials” to automatically organize Rhino materials into different groups.
Importing FBX exported from MOI
Importing FBX exported directly from Rhino
I modeled half of the architecture in Rhino and then mirrored it as an instance in C4D, since everything is symmetrical.
C4D instance & mirroring
The floor (Versailles Parquet tiles) was modeled using photo-texturing method, most widely touted by CG artist Ian Hubert. I applied a Versailles Parquet tile photo as texture on a plane, then sliced up the plane with a “knife” tool to get the reflection roughness variations along the tile grouts. This allowed me to add subtle color and dirt variations with Curvature in Redshift.
The floor tile was then placed under a Cloner to be duplicated and spanned over the entire floor.
Cloning floor tiles
Note :
C4D and Rhino use different Y and Z orientations, hence FBX directly exported from Rhino has to be rotated in C4D.
Architectural Shading (Cinema4D + Redshift)
Since I grouped all the meshes by materials in advance, assigning materials was just as simple as dragging and dropping to the material groups as cubic maps or Tri-planar maps. I used Textures.com, Greyscalegorilla’s EMC material pack and Quixel Megascans as base materials for all my shaders.
For ACES to work correctly within Redshift, every texture has to be manually assigned to the correct color space in the RS Texture Node; generally diffuse/albedo maps belong to “sRGB”, and the rest (roughness, displacement, normal maps) belong to “Raw”. My architectural shaders were mostly a 50/50 mix of photo texture and “dirt” texture to give an extra hint of realism.
2. THE CHARACTER
The base character was created in Character Creator 3 (CC3) with Ultimate Morphs and SkinGenplugins – both of which were very artist friendly with self-explanatory parameters.
Ultimate Morphs provided precise slider controls to every bone and muscle size of the character, while SkinGen gave a wide range of presets for skin color, skin texture detail and makeup. I also used CC3’s Hair Builder to apply a game-ready hair mesh to my character.
CC3 morphing & Hair Builder
Face Texturing
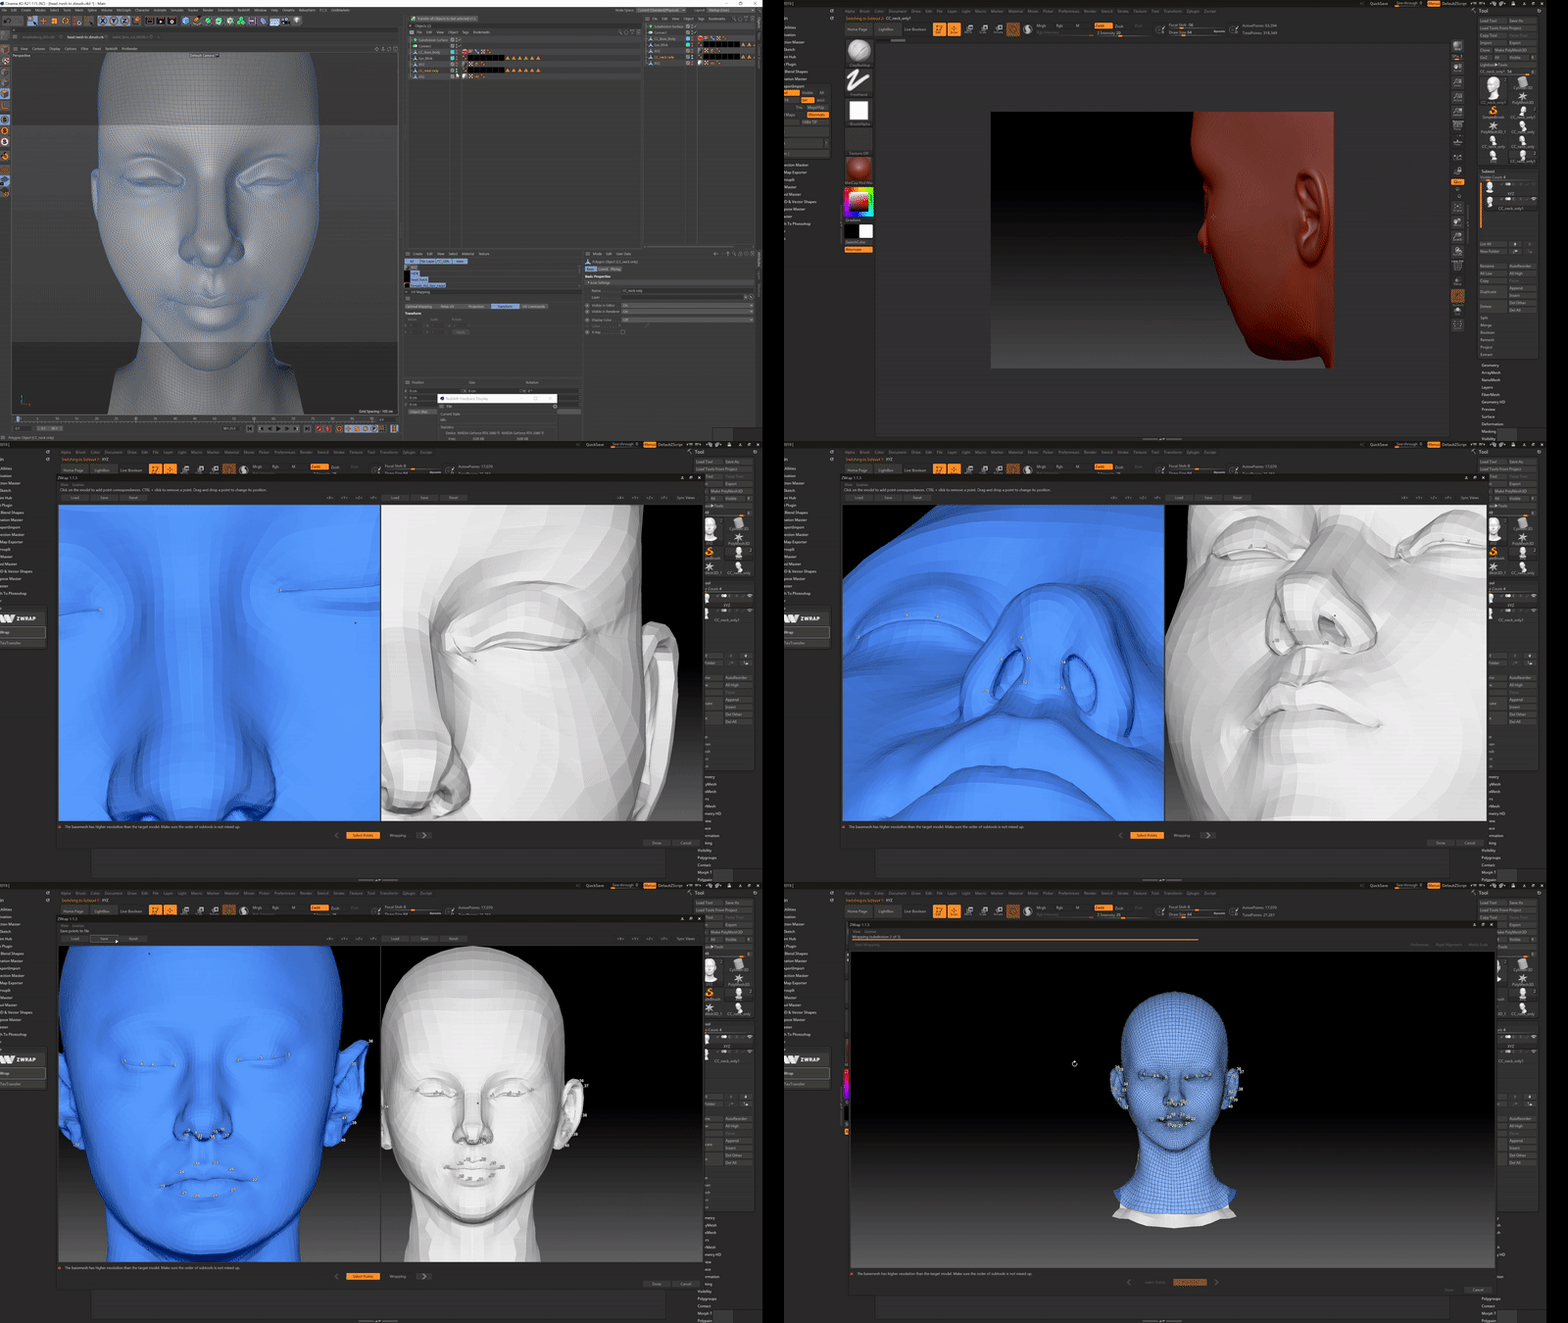
Face was the one of the most important parts of the CG character that required extra attention. The best workflow I found to add photorealistic detail was the “Killer workflow” using Texturing XYZ’s VFace model and Zwrap.
VFACE is a collection of state-of-the-art photogrammetry human head models produced by Texturing XYZ; every VFACE comes with 16K of photoscanned skin textures, displacement and utility maps; Zwrap is a ZBrush plugin that allows one to automatically fit a pre-existing topology to a custom model.
The “Killer workflow” essentially matches the VFACE mesh shape to the CC3 head model; using the Killer workflow, I was able to bake all the VFACE details down to the CC3 head model once the 2 mesh shapes are matched up.
My adaptation of the “Killer workflow” can be broken down as follow:
export T-posed character from CC3 to C4D;
delete all polygons except the head of the CC3 character;
export both CC3 head model and VFACE model to ZBrush;
use MOVE/Smooth brush to maneuverer VFACE model to fit as closely as possible to the CC3 head model;
launch ZWRAP, click and match as many points as possible, notably around the nose, eyes, mouth and ears;
let ZWRAP process the matched up points;
ZWRARP should then be able to output a VFACE model that matches perfectly to the CC3 head model;
feed both models into XNormal and bake the VFACE textures to the CC3 head model.
Matching points of VFACE (left) & CC3 HEADS (right) in ZWRAP
Note :
Full “Killer Workflow” Tutorial on Textureing.XYZ’s official Youtube channel: VFace – Getting started with Amy Ash. I recommend saving the matching points in ZWRAP before processing. I also recommend baking all the VFACE maps individually in XNormal as they are very high-res and could crash XNormal when baked in batch.
Skin Shading (Cinema4D + Redshift)
Once I had the XYZ texture maps ready, I then exported the rest of the character texture maps from CC3. After that, I imported the character into C4D, and converted all the materials to Redshift materials.
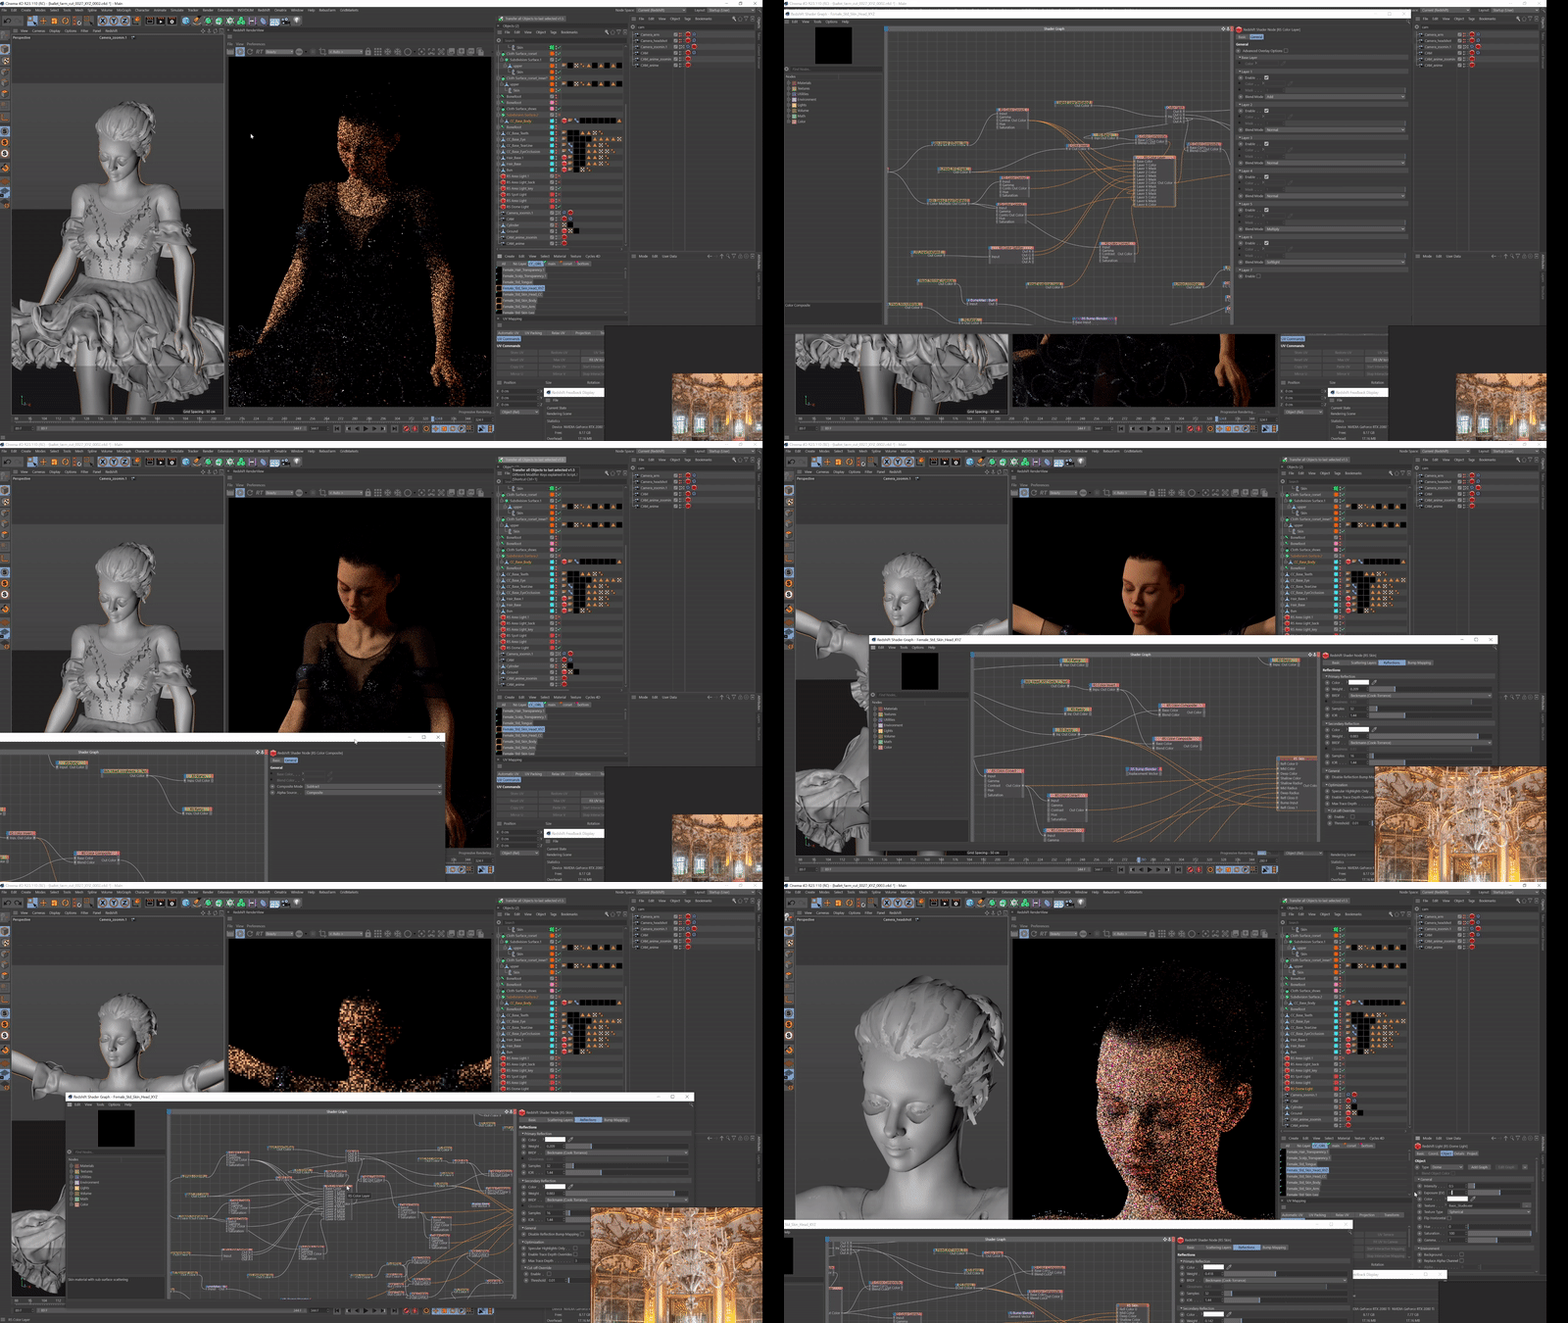
At the time of writing, Redshift unfortunately did not yet support Randomwalk SSS (a very realistic and physically accurate subsurface scattering model found in other renderers like Arnold), hence required a lot more tweaking when it came to rendering skin.
The 3 levels of subsurface scattering were driven by a single diffuse material with different “Color Correct” settings. The head shader was a mix of both the CC3 textures and VFACE textures; the VFACE multichannel displacement was blended with the “microskin” CC3 displacements map.
Character look-dev
A “Redshift Object” was applied to the character to enable displacement – only then would the VFACE displacements show up in render.
Close-up render of the character
Hair Shading
Having experimented with grooming using C4D Ornatrix, Maya Xgen and Houdini, I decided that using the baked hair mesh from CC3 for project “Ballerina” was leaps and bounds more efficient down the line. I use a Redshift “glass” material withCC3 hair textures maps fed into the “reflection” and “refraction” color slots, as hair (in real life) reacts to light like tiny glass tubes.
Note :
For anyone interested in taking the CC3 hair to the next level of realism, CGcircuit has a great vellum tutorial dedicated to hair generation and simulation.
Early test of CC3 mesh hair to hair geometry conversion in Houdini
3. THE ANIMATION
Character Animation : iClone
I then exported the CC3 Character to iClone for animation. I considered a couple of ways to approach realistic character animation, these included:
using off-the-shelf mocap data (Mixamo, Reallusion ActorCore);
comissioning a mocap studio to do bespoke mocap animation;
using a mocap suit (e.g. Rokoko or Xsens) for custom mocap animation;
old-school keyframing.
Having experimented with various off-the-shelf mocap data, I found Mixamo mocaps to be way too generic, most of which look very robotic; Reallusion Actorcore had some very realistic motions, but I could not find exactly what I needed for the project. With no budget and (my) very specific character motion requirements, option 2 and 3 were out of the picture. This led me to old-school keyframing.
First I screen-captured videos of ballet performances and laid them out frame by frame in PureRef. I then overlaid the PureRef reference (in half opacity) over iClone, and adjusted every character joint to match my reference using “Edit Motion Layer”.
Pose 1
Pose 2
The animated characters were then exported to Alembic files.
Final character animation
Note :
While my final project concept depicted ballerinas in slow motion, my original idea was actually to keyframe a 20-second ballet dance, which I very quickly realized to be bad idea for a number of reasons:
in slow motion a lot of frames could be interpolated, but real time motion involved a lot of unique frames and hence required a lot more tweaking;
subsequently more unique frames meant more rendering problems (flickering, tessellation issues etc.).
Early test render of my original idea.
Considering this as my first character animation project, I came to the conclusion of doing a slow-motion style sequence instead – 2 unique poses with 160 frames of motion each.
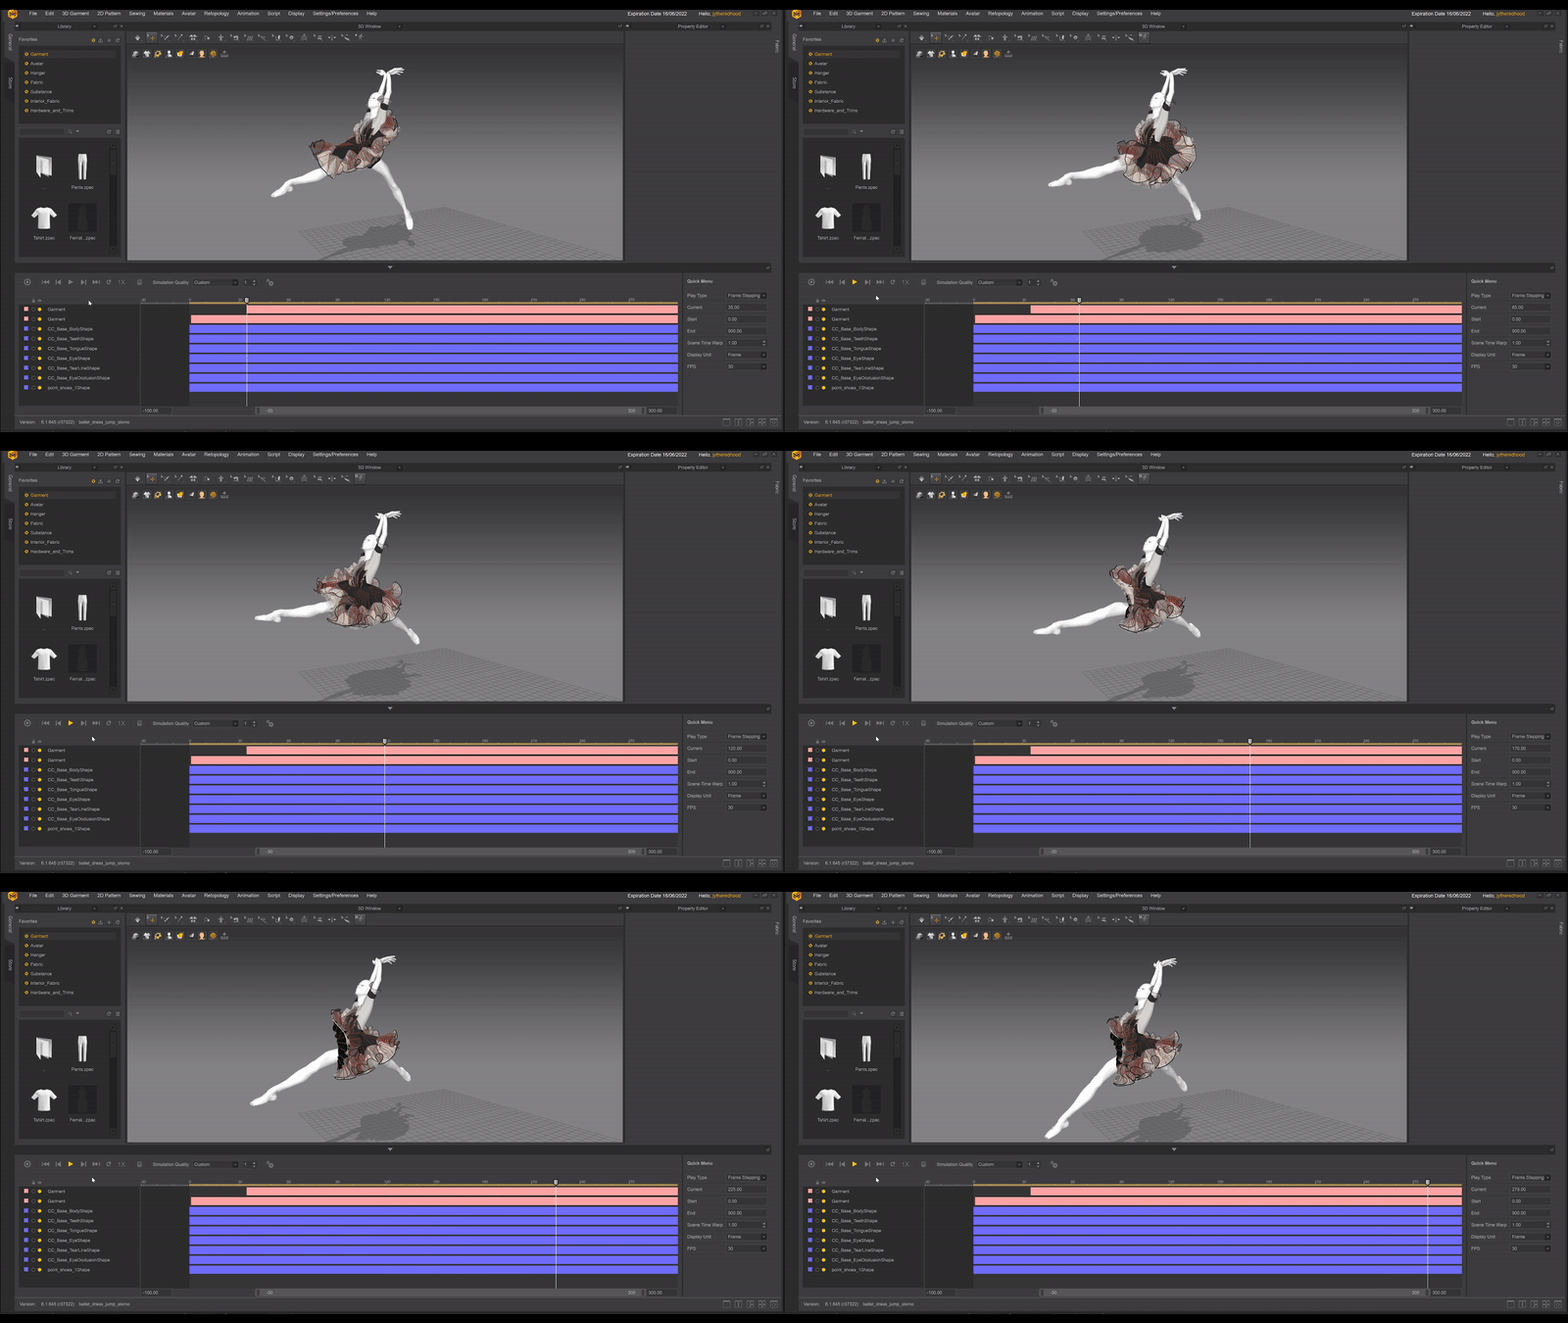
Garment Simulation
Cloth simulation was by far the most challenging part of the project. The two major cloth simulation/solvers that I considered were Marvelous Designer (MD) and HoudiniVellum.
While Houdini Vellum was much more versatile and more reliable than Marvelous Designer, I personally found it to be way too slow and therefore impractical without a farm (one frame of cloth simulation could take up to 3 minutes in Houdini Vellum vs. 30 seconds in Marvelous Designer on a Threadripper PRO 3955WX with 128GBs ram).
Cloth simulation in MD, while generally a lot quicker to setup than Houdini vellum, was not as straightforward as I imagined. Simulated garments in MD always came with some form of glitches; this included cloth jittering, piercing through character or just complete dislocations. Below are some of the settings I tweaked to minimize glitches:
using “Tack” to attach parts of the garment to the character;
increasing cloth “Density” and “Air Damping” to prevent garment from moving too fast and subsequently move out of place;
simulate parts of the garment in isolation – though not physically accurate, allowed me to iterate and debug a lot quicker.
I also reduced “Gravity” in addition to the above tweaks to achieve a slow-motion look.
MD simulation
Note :
The official Marvelous Designer Youtube channel has a lot of garment modeling livestreams which I find to be the most helpful resource for learning MD. Alternatively there are a lot of readily available 3D garment online (notably on Marvelous Designer’s official site or Artstation Marketplace) which I used as a basis for a lot of my projects.
MD is extremely prone to crashing, there is also a bug in both MD10 and MD11 that prevents saving of simulated garments 90% of the time, so always export simulated garment as Alembic files rather than relying on MD to save the simulation.
Simulation Clean-up
After dozens of simulations, I would then import the MD exported Alembic files into Houdini, where I did a lot of manual cleanups, this included:
manually fixing collided cloth and character with “Soft Transform”;
reducing simulation glitches with “Attribute Blur”;
blending together preferable simulations from different alembic files with “Time Blend”.
Cleaning up simulated cloth in Houdini with “Soft Transform”
The cleaned-up cloth simulation was then exported as Alembic to C4D.
Alternative to Garment Simulation
For anyone frustrated by the impractical Houdini Vellum cloth simulation times and MD glitches, an alternative would be to literally attach the garment to the character’s skin in CC3 – a technique most commonly found in game production.
Attaching garment to character in CC3
Note :
See the Reallusion’s official guide for creating game-ready garments here.
Garment Baking and Shading
Once I was done with cloth simulation in MD and clean-up in Houdini, I imported the Alembic file into C4D. MD Alembic files always show up in C4D as one alembic object without any selection sets; this makes material assigning impossible.
This was where C4D baking came to play – a process I used for converting the Alembic file into C4D object with PLA (Point Level Animation):
drag the alembic object into C4D timeline;
go to “Functions”;
“Bake Objects”;
check “PLA”;
then bake.
Going through the steps above I was able to get a baked down C4D object that I could easily select polygons and assign multiple materials using selection sets. I then exported an OBJ file from MD with materials, imported into C4D and dragged the selection sets directly onto the baked down garment object. This eliminated the need to manually reassign materials in C4D.
I used a blend of linen texture maps (from Quixel Megascans Bridge) and Redshift Car Shader to emulate sequins fabric (think “blink”) found in a lot of professional ballet tutu dresses.
Close-up render of the fabric material
WARNING :
Do not use AO or Curvature nodes for the simulated garment materials (or any animated object), as they could potentially produce glitches in final renders.
4. RENDERING
Lighting & Environment
Although I tried to keep my lighting as minimal as possible, project “Ballerina” inevitably required a lot of tinkering due to the nighttime setting.
The nighttime HDRI did not provide sufficient ambient light to the interior space, and the chandelier bulbs were way too dim as the primary light source. Ultimately I placed an invisible spot light under the center chandelier and used a fake spot light that only affected all the architectural ornaments. The fake light provided an extra level of bounce light that gave just the right amount of illumination without ruining the moody atmosphere.
I also added a “Redshift Environment” controlled in Z axis multiplied with “Maxon Noise” to give more depth to the scene. Exterior-wise, I scattered 2 variations of Dogwood Trees with C4D “Matrix” in the surrounding area. They were lit from ground up in the scene to give extra depth. In summary lighting of the scene includes:
Dome light (nighttime HDRI) x 1
chandelier (mesh lights) x 3
Spot Light (center) x 1
exterior Area Lights x 4
fake Area Light positioned under chandelier (includes architectural ornaments only)
RS lights
Note :
The trees were generated with SpeedTree. Lighting takes a lot of consistent practice to master; apart from my daily CG practice, I spent a lot of time watching b-rolls/breakdowns of movies – for instance I took a lot of inspiration from Roger Deakin‘s lighting and cinematography, as well as Wes Anderson‘s frame composition and color combinations.
Camera Movements
All my camera movements were very subtle. This included dolly, camera roll and panning shots, all driven with Greyscalegorilla’s C4D plugin Signal. I personally prefer using Signal for its non-destructive nature, but old-school key-framing would work just fine for similar camera movements.
Draft Renders
Once I had the character animations, cloth simulations and camera movements ready, I began to do low-res test renders to make sure that I would not get any surprises during the final renders, this included:
flipbook (openGL) renders to ensure the timing of the animations were optimal;
low-res low-sample full sequence renders to ensure there were no glitches;
full-res (2K) high-sample still renders with AOVs (diffuse, reflection, refraction, volume) to check what contributed to the prevalent noise if any;
submitting test render to Fox Renderfarm to ensure the final renders matched up with my local renders.
This process lasted over 2 months with iterations and iterations of renders and corrections.
Close-up shot I
Close-up shot II
Final shot
Final Renders & Denoising
I used a relatively high-sample render setting for the final renders, as interior scenes in Redshift were generally prone to noise.
RS final render settings
I also had motion blur and bokeh turned on for the final renders – in general motion blurs and bokehs look better (more physically accurate) in-render compared to motion blurs and bokehs added via compositing.
Half of the final 2K sequence was rendered on a local workstation, while the rest was rendered on Fox Renderfarm, total in about 6840 hours of render time on dual RTX 3090 machines. I used Neat Video for denoising the final shot, whereas the closeup shots were denoised using Single Altus (in Redshift).
Note :
Always turn “Random Noise Pattern” off under Redshift “Unified Sampling” when using “Altus Single” for denoising.
Redshift Rendering GI Trick
Redshift’s GI Irradiance Cache calculation could be quite costly; my final renders for instance have an average of 5 minutes of GI Irradiance Caching time for each frame.
In Vray there was an option in the IR/LC setting named “use camera path”, designed specifically for scenes where the camera would move through a still scene. Once “use camera path” was enabled Vray would then only calculate one frame of GI cache for an entire sequence. Borrowing a page from Vray, I use the following motion blur settings to calculate the first frame of Irradiance Cache:
RS rendering GI trick motion blur setting
The one Irradiance Cache is then used to render the entire sequence. Two shots of the project were rendered using one single GI cache, resulting in a 10% faster render time overall.
Note :
The GI trick only applies to shots with very little motion; when applied to the 2 closeup shots of project “Ballerina” for example, I got light patches and ghosting on the character skin.
Conclusion
Having spent months working on the project, I have gained an appreciation for traditional character animators – I never realized the amount of effort involved in crafting character animations, and the subtlety of details required to bring convincing CG characters to live.
Though I would not consider myself to be a character artist, I personally think Character Animations are really powerful in making CG environments relatable, and therefore would still be an essential part of my personal CG pursuit moving forward.
Hello, my name is Roumen Filipov and for those who don’t know me, I’m a 3D artist / Senior 3D Character artist at Chief Rebel, specializing in creating stylized characters for AAA and mobile games.
Bringing CC4 Cel-Shaded Character into iClone 8 and Unreal Engine 5
José Antonio Tijerín
In this Part 2 tutorial, Digital Artist José Tijerín expounds on the workflow of sending cartoonish characters to iClone 8 and Unreal Engine 5 (UE5) for animation. From adding cloth physics, and overlapping animation to new facial expressions designed for the animated character.
José Tijerín is a digital illustrator, 3D sculptor, and creator of video games such as “Dear Althea” available on Steam. His content pack “We’re Besties” is currently for sale in the Reallusion content store.
Hi, I’m José Tijerín and this is the second part of a tutorial in which we are creating a cartoon character with Character Creator (CC) and iClone in the style of one of the first animated movies: Disney’s Snow White. Please check out the video here if you haven’t already.
Making the character’s clothes move dynamically is a really simple and quick process. First, we need to prepare a grayscale texture that maps the physics according to the clothe’s UVs where white are areas most affected by physics and vice versa. In the Modify menu click on the Physics section, select the target model, and click the Activate Physics button. In the subsequent “Weight Map” request, provide the aforementioned grayscale texture that was prepared beforehand.
If we activate the Soft Cloth Simulation button at the top of the program and go to the timeline at the bottom, we can apply an animation to the character to check if the result is desirable. You can adjust the properties of the fabric or hair under simulation to your liking. It’s also possible to adjust the physics colliders of the character if the clothing or hair is going through the model. To do this, go to the character’s Attributes menu and click on the Collision Shape button. Within the floating pop-up window, select the collision capsule for the target part and increase its size.
Correcting facial expressions
Once modified, we can check if the result is as desired by applying it to the character again. These animations help enormously for finding errors and quality checking our character, with the facial expressions being one of the most important checks. In the latest version of Character Creator, we can correct and customize expressions to make the character feel alive.
Let me mention another character that will appear in “The Evil Furry”; his animation style is much more cartoonish and his expressions should follow suit. However, we see that the predefined morphs do not meet the requirements and fail to be applied to the character.
If we go to the Modify menu, enter the Motion Pose section, and click on the Facial Profile Editor button, a new window will appear on the left side of the screen with the same name as the button. Click on the Edit Expression button to unlock a long list of specific facial movements—these form the standard CC facial profile, but I recommend unlocking the extended version even for cartoon characters.
To unlock it, just click on the Traditional button below and the Extended option in the following pop-up window. Now we can edit facial expressions. Starting with the eye blinks, which is the most obvious mistake, and although it’s the most serious error, it’s also the easiest to fix as CC offers a specific function to solve this problem. Just find the Characterin the top menu bar and click on Correct Eyeblink; we can see the problem is solved immediately and the faulty morph has also been corrected.
However, when the morph is at 50%, the eyelids do not cover the eyeballs and leave a strange appearance. To fix this, we don’t have to go very far, such as bringing the model into Maya. At the bottom of the menu we can click the Edit Mesh button that’s among a series of buttons under the Expression Tools section. We can then fix the eyelids by flattening them a bit and clicking on the Edit Mesh button on the right to exit the editing mode. Next we click on the lightning bolt symbol next to the morph target which is activated at 100%. This will register all deformations made to the character model (the character base can’t be edited while morphs are being adjusted).
Now that the morph works well from 0% to 100%, we can mirror this deformation to the other side of the face by clicking on the little symbol with two arrows pointing at each other. Granted, you can also edit morphs in a third-party application like Maya, but I recommend using the options right in front of you inside CC.
Adding cartoon facial expressions
Clicking on GoZ Expression for the morph we want to edit (in this case, “Open Mouth”) takes the character into Zbrush. Personally speaking, editing the character’s expression is the most important step after it’s created. Artists should work beyond just correcting mistakes in facial expressions.
The best advice I can give is to look for concept art references from films and series. Theoretically, I should have drawn inspiration from the earliest Disney movies, but I wanted the character to be more expressive and contemporary.
A good example is the art of the famous Jin Kim; one of the artists who left an indelible mark on Disney’s artistic style for animated 3D super productions. Even with characters expressing the same emotions, Kim was able to have them uniquely articulated. Jin Kim was not satisfied with giving carbon copy smiles to different characters.
When we examine the smiling expressions alone, we find that they are very different depending on the character’s anatomy, demeanor, and background. To design characters and bring them to life, however cartoonish and deformed they may be, you need to have some knowledge of anatomy; I recommend looking at the work of Anatomy For Sculptors to learn the anatomy behind facial expressions. Understanding when and why facial wrinkles form will allow you to create characters that feel real.
If your character is not human, you can look to other great Disney studio artists such as Borja Montoro and Cory Loftis for inspiration. They have an absolute mastery of human anatomy, but they also have an amazing mastery of animal anatomy and demonstrate it by humanizing their faces in a very appealing way. To end the topic of expressions, I would like to remind you that Character Creator allows you to add an infinite number of new expressions and the more you add, the more versatile your character will be.
Create overlapping animation
Before returning to character creation, I’ll take the opportunity to explain the use of the “Spring effect” to automate “overlapping” animation.
This consists of complementary and overlapping motion that is part of the twelve principles of animations identified by Frank Thomas and Ollie Johnson in their book The Illusion of Life: Disney Animation, which is considered one of the best animation books of all time.
First, we’ll bring a model into a 3D program for rigging and once the bones have been placed in the model, we’ll apply and tweak the skin binding. Keep in mind that bones need to be frugally placed and organized into hierarchies with proper x, y, z axes orientation—all factors that determine the final movement.
Then we export the object in FBX format and add it to the character by clicking on the Propoption under the Create menu to load it into CC. Once loaded, we can click on Edit Spring in the Modify menu to launch a window on the left side displaying all of the bones placed in the model. When we select one of the bones, the Translate and Rotate effect will become accessible on the right side of the application.
In my case, I’m going to apply the Rotate effect to some of the bones and in the group settings below, give very little Mass and Bounciness while maximizing Strength. You can add a test animation to the model to try out the settings and get the effect you desire.
Send to iClone
Now, let’s send our character to iClone. iClone specializes in working with motion capture, which is what I have deployed, and involves the recording of sensors placed on an actor’s body. Roughly speaking, the initial steps for professional animators (not counting layout artists) consist of block-outs and “step” animation. We can deploy the same methods using the Edit Motion Layer tool, but instead of entering the “spline” phase, we will generate a complete animation using key character poses instead.
This similar example shows why this method of animation was picked and just how fast and economical it can be because the new iClone tools make it happen in just a couple of steps. If we select the keyframes and click the right mouse button, a menu will appear; inside it, we click on the Transition Curve option. A window will appear where different curve types can be assigned from one key character pose to another with single clicks. This is ideal for works with a lot of cartoony animation, like video games.
To top it off, I have also added a Digital Soul animation layer to the face and the result is quite satisfactory. However, compared to the motion capture version, the movement is a bit artificial and progressively undesirable on increasingly realistic characters.
Left: Animated by keyframing with Digital Soul animation layer. Right: Animated by Motion Capture.
Having finished the character animations in iClone and before transferring it to Unreal, I noticed that the right hand, with a Reach Target to the broom, judders from time to time; and you’ll notice it particularly in slow motion. This often happens when a model has multipleReach Targetsand Pick Parents associated with it. The problem is solved once we select the constrained model (in this case, the broom) and click on the Flatten All Motion with Constraint option under the Animation menu.
Let’s go to Unreal Engine
Now we’ll talk about preparing the project in Unreal Engine. When we have a project open in Unreal, we must make sure that the following options are activated:
Settings > Plugins > iClone Live Link
Live Link > Window > Virtual Production
Cinematics > Take Recorder
Under the Live Link menu, click on + Source, select the iClone option and add the port number that will connect Unreal to iClone. We’ll have to do the same in iClone by activating the Unreal Live Link option in the Plugins menu, click on the Transfer File button in the subsequent pop-up menu, and wait for the whole scene to be exported to Unreal. Now that everything is imported, we can click on theUnreal Live Link > Link > Link Activated button to see the animations played in Unreal without clothes physics.
To get the physics simulation in Unreal, activate Edit > Project Settings > Global Physics Settings > Bake Animation, select a dynamic object (in this case, the skirt), and play the animation to register the simulation. When finished, we deactivate the physics and the Bake Animation option. Finally, we activate Simulate in Unreal.
At this point, I recommend adjusting the colliders to avoid strange effects—you can watch a whole tutorial about this on this Youtube channel. Now that everything is ready, go to the Take Recorder menu and drag in all of the motions we want to record. Clicking on the red circle button will start a countdown, and when it’s finished, we must click on the Play button to record the animation into the Unreal timeline—it’s as simple as that!
Making perfect cel shading in Unreal Engine 5
There are two ways to achieve the 3D cartoon effect. The first is by using effects on the object’s material to make the lines appear on the interior of the model. For example, you can download the free “Stylized Materials Pack” from Unreal to see how it works. The second way would be to use a post-processing effect that encompasses everything that appears on the screen and creates lines on the edges and surfaces of the models. We are going to use the latter cel-shading effect.
The first thing we will do in our Unreal project is to go to the Quickly Add to the Project menu and add a Post Process Volume from the Visual Effects sub-menu by dragging it into the viewport. With this element, we can easily and practically achieve any imaginable visual effect in Unreal. By default, this post-process cube will only affect a section of the scene when the camera is within its boundaries. To extend the effect to the whole scene, we only have to enable Post Process Volume Settings > Infinite Extent in the details of this element.
Improving the cartoon effect of Unreal 5
The toon shading effect is composed of two materials; one that is in charge of creating contour lines, and another that is in charge of the lighting which only has two, or in this case, one tone. Starting with the latter material, we will create and edit a “PPMM BaseColor” material. Enabling Material > Post Process will allow us to work with Emissive Color, and from that, I remove the “SceneTexture SceneColor” node. To remove the error message, we have to indicate to the node that we want it to use the “Filtered Base Color”.
Next, go back to the material and select Blendable Location > Post Process Material > Before Tonemapping. When we save the material and go back to the post-process cube, we can add this new material into the Post Process Materials section and immediately notice a loss of lighting. However, we can still see the textures which are ideal. We will now create an “Outlines” material for the second material.
We can directly go to the tutorial on dev.epicgames and download the project and its materials. Open the demo project and look for “Postprocess > Content Drawer > PPMM Outlines All” material. If we click on it, we will see a group called Polylines and another called Normal Lines.
I removed “Normal Lines” to get a cleaner and more controlled result, you can also remove this group for the “Outlines” material. All of these materials will be taken into our project. Once we add the materials we have created and select them, we can paste the nodes we have copied from the example project. To apply this material we go back to the PostProcessVolume menu we created and add one more array in Post Process Materials. We have to indicate that it is an “Asset Reference” and, to make it work, we have to put the “Outline” material above the “Basecolor” material.
However, the result could be better. The first thing we noticed is that you can hardly see the lines. If we reopen the “Outline” material and click on the first node on the left called “Polygon Outline thickness” we will see that in its details menu the “Default Value” is 1.
Let’s try to give it a value of 4 , and change Polygon Outline Quality > Polygon Outline Amount from 0.2 to 3. Now the effect looks better as it resembles a drawing, however, lines on the interior of the shapes are also formed where they should not. To solve this problem, we have to go back to the “Outline” material and duplicate the “SceneTexture”, “Mask”, and “Lerp” nodes from the “Blends Poly and Normal” group. Then duplicate the first two nodes again and connect the old “Lerp” node with the new one at the letter “B”. From the same, we connect the duplicated nodes to the new “Lerp” node, to the letter “A” to finally connect this new lerp to the material.
We only have to connect the “alpha” channel, but first, we are going to go to the “SceneTexture” node that we still have to connect and change its configuration. In this way, we repurposed metallic textures into masks where the black areas display contour lines and the white or “0” color prevents the formation of lines.
Now we are going to eliminate the “Mask” node which is connected to the Color channel and replace it with “1-x” node which we connected to a “Ceil” node which, in turn, will be connected to a “Clamp” node obtained by copying it from the same “Blends Poly” group. All this is connected to the Alpha channel of the Lerp and we have the material with the mask ready.
To see the result we are going to create a metallic texture for the face material. We have chosen metallic textures because, as we have a post effect that only shows the diffuse channel of the whole scene, there is no material that needs metallic textures.
The face mask will depend very much on your design and some testing will be needed to get the desired effect. The only thing left to do is to connect the metal texture to the material and apply the material to the face. As you can see the result is now much better and much more similar to the original sketch. Finally, we can rejoice now that our cartoon character is fully animated as if it was part of an authentic old-school 3D movie.
Thank you for reading this tutorial, it took a lot of work and I hope it will be useful for your projects. Remember that you can add my funny video game to your wishlist. And if you want more tutorials like this, don’t forget to subscribe to Reallusion’s official channel.
Bringing CC4 Cel-Shaded Character into iClone 8 and Unreal Engine 5
José Antonio Tijerín
In this Part 1 tutorial, Digital Artist José Tijerín elaborates on the process of applying cel-shading in Character Creator 4 to visualize 3D cartoon characters as hand-drawn 2D animation in the classic Disney style—one of the greatest advantages being the speed of production for games and films.
José Tijerín is a digital illustrator, 3D sculptor, and creator of video games such as “Dear Althea” available on Steam. His content pack “We’re Besties” is currently for sale in the Reallusion content store.
Character Creator 4 is the best option
This is a basic guide to creating 3D cartoon characters with a cel-shaded style. The aim is to mimic old 2D cartoons that were made in the traditional hand-drawn way. Besides mentioning Reallusion Software such as the benefits of the latest Character Creator 4 (CC4) update, this article will also offer some unique tips, which are also available in the aforementioned video.
The main advantage of creating a character in Character Creator (CC) for me is the ability to directly visualize the final result by applying a cel-shaded effect that makes it look like it was made for 2D animation. As we shall see below, this makes the modeling easier and allows us to make corrections in a simple and intuitive way. The other great advantage is that CC is the ideal program to create this kind of character due to the ability to customize expressions, besides getting professional and functional models. I’ll expound on these amazing features in the latter half of this article, but first, let’s talk about the merits of adopting a cartoonish look.
Benefits of Cartoonish look
A 3D character that imitates a 2D character has many advantages that can speed up the production of a video game or any film work. Without the need to use complex materials full of textures or the implementation of complex lighting systems, we are dealing with works that do not require a lot of processing and that do not give as many technical problems compared to projects with aesthetics that want to approach realism. This is an advantage that I discovered while creating my current game in development “The Evil Furry” (available on Steam wishlist).
For this tutorial I’m going to use characters from this project because, most of it, is created from cinematics; so this tutorial will be useful for creators of any audiovisual product.
2D cartoon character in classic Disney style
The character we are going to create will be for the Unreal Engine in which it will be used in cinematic scenes, but this method can also be used in not so cinematic video games. With this in mind I recommend, as always, be clear about the description of the character and the actions they will undertake in the story.
In this case it is a young girl who appears in a specific part of the story pretending to be a banished princess. She is a carefree, sweet person who dresses in poor clothes and who ends up falling in love with the protagonist of the story. With this in mind and the cartoon style of the Disney film “Snow White“, I looked for the perfect references and explored different designs until I found this one you can see. In my case it has been very useful to look for concept art of the Disney film to be able to see what ideas were being considered and to really understand the film’s style of drawing.
It is of vital importance that your entire project is consistent in style to be considered a solidly professional and credible work. As you can see, I didn’t completely copy the style of the film, but the bases are the same; a main character animated by rotoscoping with flat colors, without light or excess most of the time, with unsaturated colors, hand-drawn backgrounds and with very contained expressions for a cartoon animation. We will see these issues later, but for now let’s start working with Character Creator.
Cel shading effect in Character Creator 4
The first thing we will do when we open Character Creator is to select the cel-shading effect in the “Atmosphere” folder in the Stage section. Inside we can find the “Toon Shader” folder with cartoon filters; I’m going to choose Line Art. The effect has not turned out the way we wanted it to, so we will have to customize it a bit. If we go to the Visual section we can deactivate Post Effect and Global Illumination. In the Toon Shader section, we can configure the effect to increase the thickness of the line and its intensity. In my case, I will also remove all the lighting from the model to make it more faithful to the reference. Finally, if we go to the main menu in the Visual section, we can activate the IBL and change the color of the ambient light from blue to white to see the real color of the textures on the model.
Obviously, these textures are not cartoonish, so we will have to change them to flat colors in a program such as Clipstudio. When placing them on the model, remember to remove the normal textures from all materials. This is because the normal textures affect the outlines in the cel-shading and can be confusing. Leaving them on would not affect the final result inUnreal but I recommend removing all textures other than the base color. In the case of the eyes, it will also be necessary to change the shader type from “Digital human eye” to “Traditional“. to make the texture appear clean and without post-processing. In the case of eyebrows, we can be extra creative by being able to decide their shape through opacity. Remember that you can also make them completely transparent if you don’t want your model to have eyelashes like Mickey Mouse.
I recommend that you use simple shapes and look at your references to check that the result is appropriate; This is a very important element in the expressiveness of the animated character. Another useful trick is, knowing that Character Creator has eight sets of tabs, leave the upper and lower assemblies invisible to avoid extraneous effects and to achieve a better visual result. It is possible that when changing the opacity texture of the tabs you may encounter an error where the texture fails to load.
First make sure the image is a JPG. If it still does not work, the solution I have found to this problem is to activate the skin editor by clicking Yes in the floating window that appears. When we deactivate the skin editor again the texture will load correctly. Another trick I recommend is to use the eyebrows as 2D models rather than as a texture to prevent the texture from distorting or pixelating when stretched and the cel shading effect will interact better with the 3D face. It is a good idea to use the cartoon eyebrows that Character Creator offers by default and then customize them.
Customize the cartoon character
Now that we have fully tooned the model, it is time to personalize it.
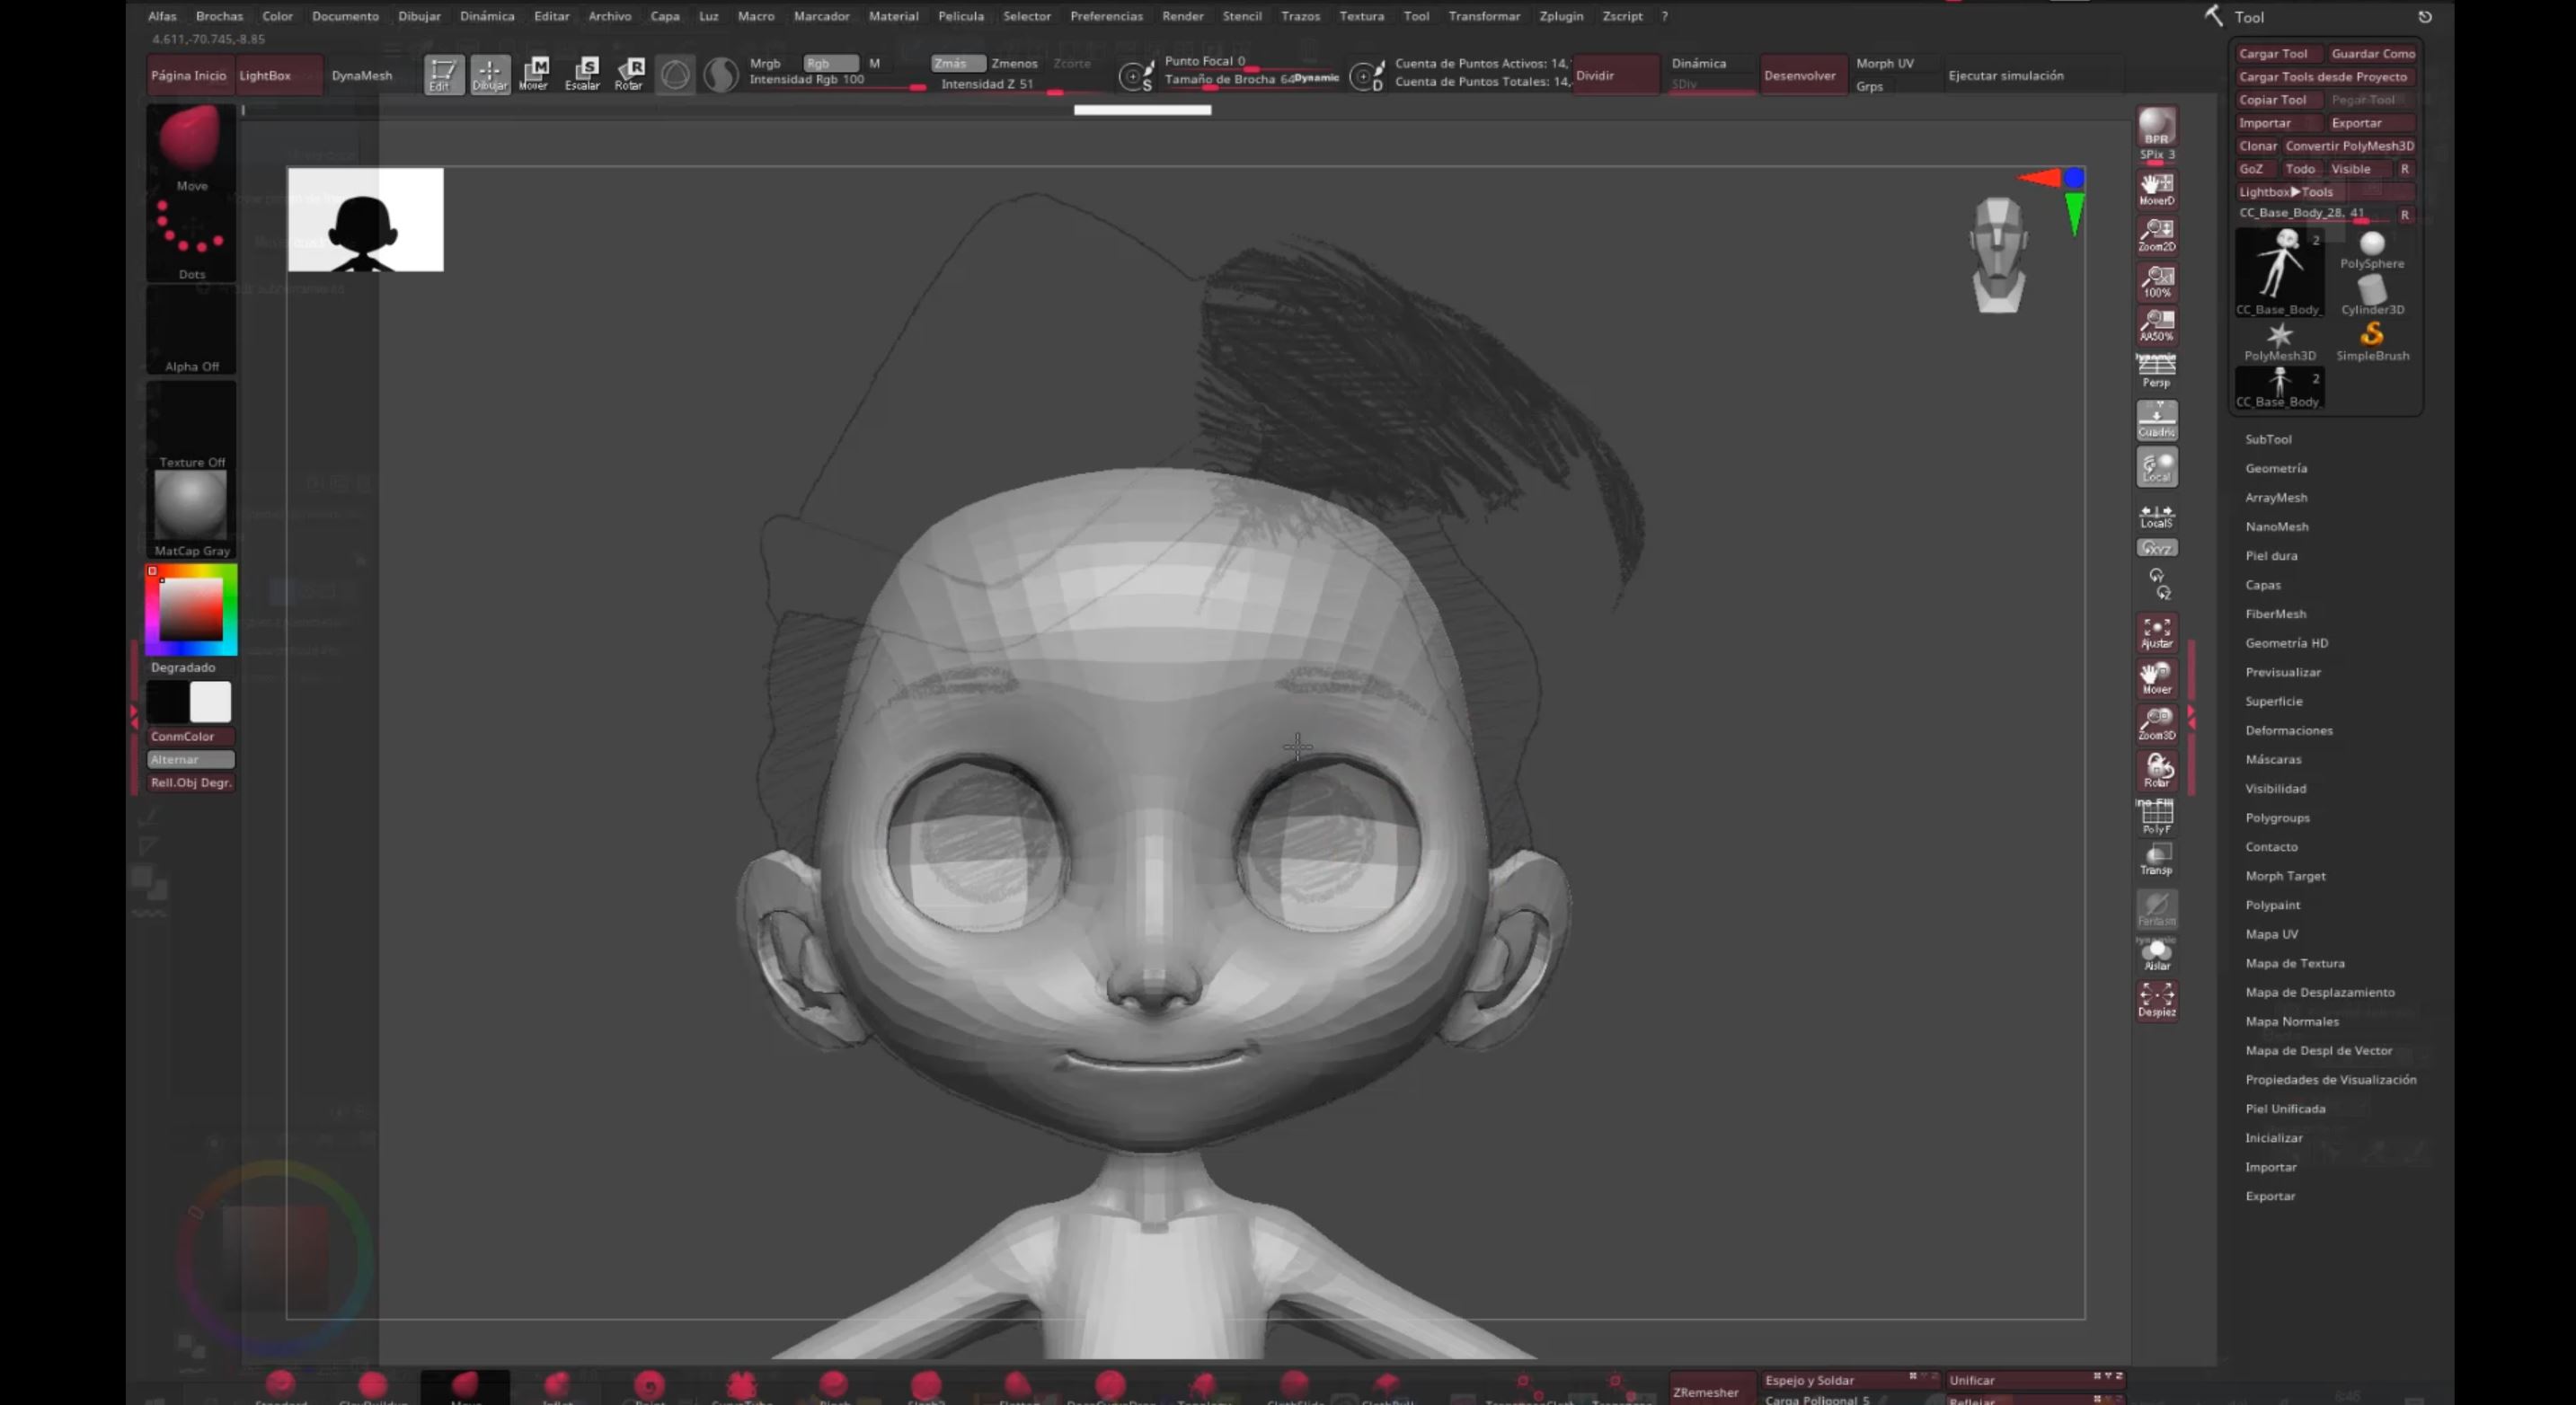
If we go to the Morph section we can find several morphs that will be especially useful in this case. “Head scale” is a great step towards cartooning our character, but “Eyeball scale” and “Eye scale” are also very useful. After a couple more tweaks, we can take it to ZBush to do the rest of the work. As I have said before, I always work in ZBrush without perspective, and I like to visualize the polygons I’m working with so I can more accurately create the models. After modifying the size of the head, the most important thing is to define the height and width of the neck. But it is common for people to forget to adjust the width of the neck in profile resulting in the strange sensation that the profile of the animated character is totally different from its frontal image.
In this case I decided to make a cartoon Nefertiti-style collar. This is the most fun part of the job for me. But remember that you have to constantly look at the sketches and references to not stray from the style and the result you were looking for.
ZBrush also has the option to lower the opacity of the program. Taking a character from my video game The Evil Furry as an example, the slider at the top of the program allows us to customize its opacity. This way, the reference we want to trace can be visible in the background. This is very useful because we tend to deviate from the source like making the eyes too small, the mouth too big, or ears too detailed in relation to the reference.
I then proceed to hide the fleshy parts of the eyes inside the skull to simplify the eyes. Even though I give plenty of mention to the 3D face, the rest of the body should not be neglected, especially the hands. You can and should deform the character as much as necessary to resemble your reference sketch. You may even experiment with form or ideas that may be more appealing to you, but it is generally better to leave the form-finding in the sketching stage since we tend to be more conservative with 3D modeling than drawing.
Character Creator is very versatile in this aspect, coupled with its ability to automatically correct all problems with the rig when the character is brought into the program: just go to the Adjust Bones menu and click on the Auto Position button. We will soon see that the character is fully operational, although in this case, the eyes should be repositioned.
Often, the cel shaded effect does not turn out as expected, so we have to make further modifications so that the outlines also appear on the inside of the character and not just on the edges. Lines are produced on very pronounced angles of the geometry, that’s why the smooth upper part of the nose does not generate lines, but the nostrils are outlined due to sharper angles. We can take advantage of this mechanism by forcing the creation of unique outlines, like placing them on the corners of the lips to heighten expressiveness.
Creating a line to achieve this effect is very simple. You just have to form a very sharp angle at the corners of your mouth as shown in the video. Just be careful not to deform the mouth too much so that there are no problems when opening the mouth properly and take care that no lumps or deformations are visible when rotating the head.
When we are happy with the model and we have checked that it works correctly with cel shading, we can move on to modeling the final part: the teeth.
Fine-tuning the details : Modeling the teeth
Character Creator has cartoon style teeth for these instances which are certainly more suitable than realistic teeth. However, if you look closely, it is rare for a cartoon to have all individual teeth clearly defined. Most of the traditional animated films unify all the teeth, making the final result more pleasant and easier to draw. We don’t want the character looking horrible every time it opens its mouth, so we are going to merge all teeth into one unified mesh.
For this we are going to use ZBrush to hide all the teeth inside the skull because we’ll be using the gums as teeth. As unpleasant as the idea sounds, this is the best method I have found to achieve the same effect as a drawing. By flattening the gums and combining them into a single block, we get a fantastic cel shade effect. Although, of course, you must change the texture to a solid color and remove the normal textures, and the same should be done for the tongue. Meanwhile the teeth should be correctly positioned in the mouth, however, the positioning will be adjusted when creating facial expressions.
Now we’ll finish off with the eyes. Although the art style I’ve chosen does not include glint in the eyes (Disney characters did not have glinting eyes until Bambi was released in 1942), I’ll explain two ways to go about adding them to bring them to life. The first method is to add highlights as part of the drawing, which is the most common way in traditional hand-drawn cartoons on acetate, and produced by hand using digital programs in modern times. Sometimes highlights are added as an after effect that can be repositioned around the surface of the eye as one wishes, but we can do it simply by embedding it within the texture.
While the effect is nice and easy to apply, it is strange that the reflections are not affected by the upper eyelid; we can solve this problem by deploying a the second technique: that is to illuminate the eyes as if there was a light pointed at them (this technique is unusual for 3D animation but can be seen in animations made by Spa Studios). To do this, we add highlights to the “Eye Occlusion” model over the eye. We simply create a JPG image as a layered shell and apply it to the texture. I’ve had issues before with these textures which can be solved by saving the image file and opening them again.
As one can tell, the result is more realistic, but since we can’t move the highlights with the iris, it won’t look good aesthetically.
Tips on Character clothing
In conjunction with all this work, I’ve been making clothes and accessories for the character in ZBrush. I won’t dwell on this process, but here are a couple of tips:
Clothes andhairstyles are the fundamental parts of designing characters, and it’s advisable to design them with clothes they will wear the most, even if we have to imagine the look of their bodies. Design with big and simple shapes so that characters don’t turn into a mishmash of meaningless lines. Same as for the rest of the model, textures should remain solid flat colors and one should check to make sure the cel-shading is working properly. However, don’t stress this part of the process because some tweaks can still be made when the character is exported to Unreal.
I hope you liked this first tutorial; I’ve really wanted to do it for a long time and I’ve put a lot of thought into it. I hope my tips will be a guide for you to create new characters and different styles. See you in the second part!