ZBrush has long been recognized as a powerhouse of 3D sculpting and painting with innovative tools, techniques, and a user interface that is very unconventional but very usable. Once you’ve spent some time with ZBrush you can begin to appreciate its value to the 3D community.
ZBrush can sculpt the finest details into a mesh whether it be an aging, realistic character with weathered old leathery skin to detailed armor, or finely engraved jewelry. It’s long been recognized as a 3D tool that punches way above its weight class in terms of pure artistic “enablement” if that is a word.
While Character Creator 4 does indeed create 3D mesh characters it does so from base or original meshes reducing the need to rely on pure artistic sculpting or technical rigging. It does not produce character meshes from scratch which is the domain of tools like ZBrush that can and often do require advanced skills. On the other hand, ZBrush is not known for its character rigging either, which is one of the strong suits of Character Creator 4.
Put them both together and you have basically supercharged Character Creator 4.
ROBUST GoZ FUNCTION
Face Tools is the kind of GoZ functionality we’ve always wanted. It packs a lot into the time it takes to make the trip back and forth from ZBrush to iClone with the click of a button. The Face Tools control panel is packed with one click morphs for testing and editing along with detail and diffuse functionality. Just the diffuse feature alone is a great improvement and that is not counting the rest of the features in the Face Tools control panel.

EASY INSTALLATION
Face Tools installation is a very simple process. Use the Reallusion Hub to install the plug-in and you should see a Face Tools button (with a character loaded) on the modify menu. Do your thing in Character Creator 4 with the sliders to define your character, add Skin Gen, and things like that if desired. Once your character is ready to go into ZBrush for heavy-duty work you press the Face Tools button.
The first time you press that button it will check to see if the GoZ functionality is installed and then do so. It will ask you which version of ZBrush to use if you have more than one version installed.
That’s it. Worked flawlessly for me and there was no need to manually copy some GoZ files like many users had to do with the original GoZ feature.
ZBRUSH LAYER’S FUNCTION
The tool relies heavily on the Layers function in GoZ to keep track of changes within the mesh. When you go to layers you will see there are several layers there already. Since Layers is being used you need to use an existing layer or create a new one to make changes. The Face Tools control panel image above shows just a few of the available layers that transfer over to ZBrush.
MY FIRST TEST
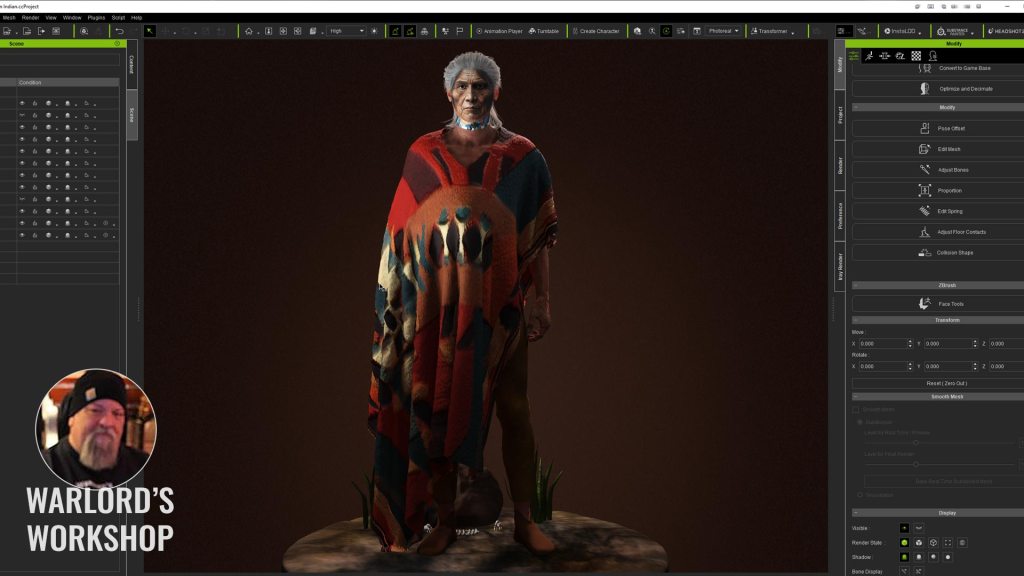
Just to see what Face Tools was about I loaded a base mesh and then jumped over to an online AI image generator to create a facial image of an older Native American Indian male. I used Leonardo AI for this particular image, and it really made the character pop without a lot of interaction from me.
I sent the mesh over to ZBrush with all the options checked that I could find or made sense as I had not read the manual yet wanting to see how far I could get just using it. There is very little learning curve with this tool if you are proficient with ZBrush and CC4. By proficient I mean able to follow instructional steps to move forward as you don’t have to be a power user.
As I said earlier, layers rule the day as you need to create a new layer or use an existing layer to make changes in ZBrush. This is nothing new to seasoned ZBrush users. Layers are powerful and record your changes.
At this stage, I can add more detail to wrinkles or add more skin texturing if desired. Enhance what is already there or cut in new wrinkles that match some of the AI-generated head image. I never ran into a snag along the way. It was one of the few times the experience was frustration-free.

I will list Kai’s quick start tutorial in the resources section at the bottom of this article. When I said I didn’t read anything, that didn’t mean I didn’t WATCH anything. So with Kai as my guide, I flew through the process like I knew what I was doing and that Is a plus when you can do that on your first run with any new plugin or tool. I made the clothing and accessories in Marvelous Designer.

CHARACTER CREATOR 4 TOON WOLF TOUCHUP
Since the early days of Character Creator, I created several toon sliders and some extreme reshaping sliders to morph characters like the Toon Wolf I’m using in this example. I loaded a generic base in CHARACTER CREATOR 4 and applied the slider to the full extent. The slider was based on reshaping the existing base mesh at the original low poly count for GoZ. It might have been created as far back as CC1 since it seems I’ve always had these morphs around to test with.
PHOTOSHOP RETOUCHING
I sent all the different maps like diffuse and normal over to Photoshop to remove things like the mouth, nose, and ear sections so they wouldn’t interfere in the anthropomorphic wolf skin. If you don’t remove these details, they can show up on the character in the wrong places or show a badly distorted human ear where the original ear was located on the base mesh.
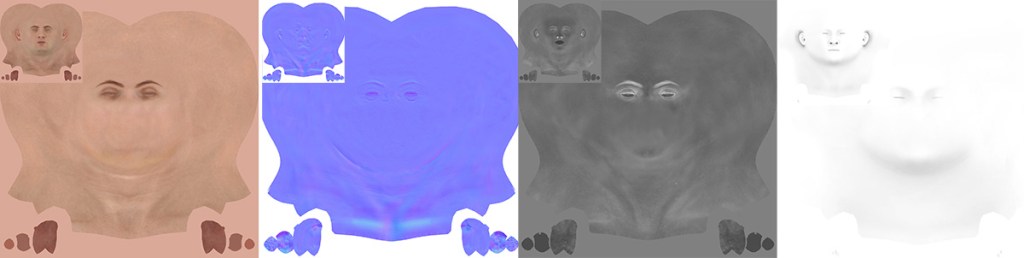
You can use the image editor of your choice for the same task. In this example, I didn’t change the texture until the end of the process.
TIP: If you still see two black nostrils after editing the maps in the various channels then you need to change the shader from Human Skin to PBR and the black nostrils will disappear.
TO ZBRUSH
Next up was sending the head over to ZBrush with the Head Tools plugin so I could correct some problems with the teeth sticking through the lips due to the extreme reshaping and low poly count. The Face Tools menu in ZBrush makes it easy to quickly select a morph like Mouth Smile or Mouth Frown to check on the teeth penetrating the skin.
This is Face Tools in its basic usage. We could also create more wrinkles, and/or modify existing wrinkles while adding other details like skin textures, wounds, scrapes and bruises if needed, and much more.
RESHAPING THE SKIN OVER THE TEETH
As I went through the morph buttons in the Face Tools menu, I used the Move tool with horizontal symmetry turned on to pull the skin over teeth or gums when they poked through.

This requires using the aforementioned layers in ZBrush to make edits and you can make edits to the wrinkles and other modifications or add more detail to the skin surfaces as long as you do not alter the polycount like any GoZ function. You cannot increase or decrease the polycount as it has to match the model it will be transferred to.
TIP: When I needed to do body shaping and head shaping, I did the body first with the regular GoZ function then used Face Tools to Create a new head mesh instead of Relinking to the original GoZ mesh.
DIFFUSE WORK
The next step was changing the diffuse map from a human skin tone to a tone more suitable for a toon wolf. To do this I turned on the Diffuse channel in the Face Tools ZBrush menu then went to Polypaint -> Paint from Texture (in ZBrush) to transfer the existing skin texture which we could alter or paint over.
I turned off the diffuse button in the ZBrush Face Tools palette and noticed the original coloring remaining was now painted on the head. I selected the material in ZBrush I was going to use for the and got to work. For the purpose of this review, I kept it very simple.

After transferring back to iClone I then dressed the Toon Wolf in clothing similar to what a jazz musician might wear to complete the look of a laid-back, saxophone-playing anthropomorphic wolf with his nose and mouth scrunched up playing the saxophone with no penetration from the teeth or gums. I dragged and dropped in a 2D ai-generated background of a stage to dress things up a bit.
What used to be a tedious character to work with because of the extreme shapes forced on the low poly base mesh had become a pleasure to work with no penetration problems even when using the wrinkle system heavily.

I’ve been using ZBrush for several years and consider myself to be a typical user, not a power user by any means, and I found Face Tools to be simple to use, easy to grasp, and somewhat intuitive which is not a word generally associated with ZBrush. This GoZ function is much more powerful and including the ability to paint in ZBrush and transfer to iClone without mapping will be a time saver and eliminate some of the buzzkill that type of housekeeping work can bring with it.
SUMMARY
If you use ZBrush with iClone then Face Tools is worth a look. Take the trial for a test drive and decide for yourself.

MD McCallum – WarLord
Digital Artist MD “Mike” McCallum, aka WarLord, is a longtime iClone user. Having authored free tutorials for iClone in its early years and selected to write the iClone Beginners Guide from Packt Publishing in 2011, he was fortunate enough to meet and exchange tricks and tips with users from all over the world and loves to share this information with other users. He has authored hundreds of articles on iClone and digital art in general while reviewing some of the most popular software and hardware in the world. He has been published in many of the leading 3D online and print magazines while staying true to his biggest passion, 3D animation. For more information click here.