Welcome to this 4-Part mini series on how to develop content for Reallusion Stores, ActorCore, and Marketplace.
In this FIRST, step-by-step tutorial we will show you how to design a character with all the head and body morphs in Character Creator (CC4)! In this first article, I will provide you with an overview of the complete process, allowing you to create custom characters in no time
- The first step is to export the character. We’ll use Blender for this example. Go to the “File” menu, select “Export,” and enable the “Nude Character in Bind Pose” option. Then, choose the export location and click OK.

- Next, go to the Modify panel and select the model. Press the “Reset” button at the bottom right to reset the model to its initial state.
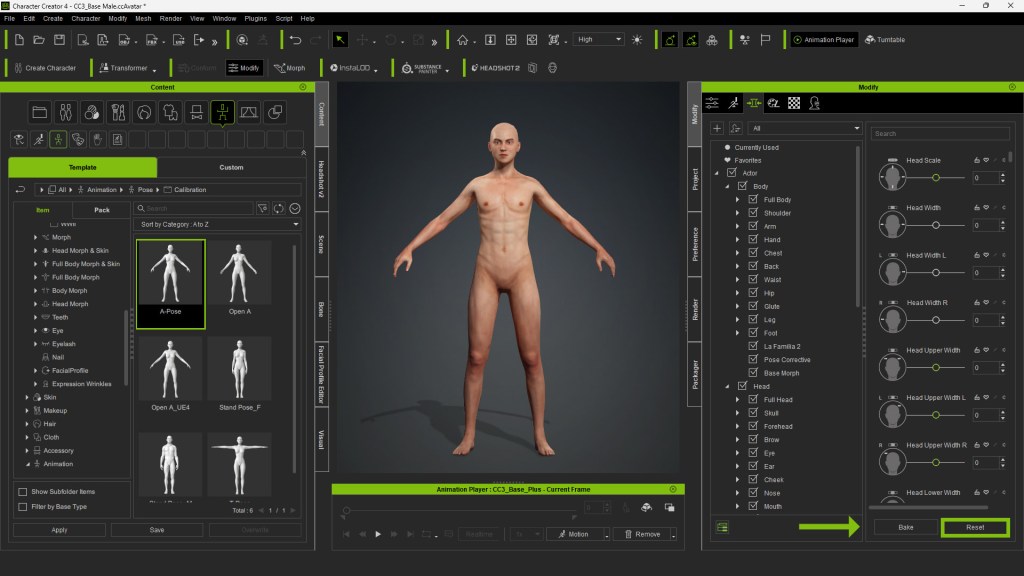
- Now, you’re ready to start modifying the character. Begin by adjusting the overall scale and making specific modifications to different body parts using the sliders. Make use of the library of morphs categorized by body parts, such as the head, shoulders, arms, hands, eyes, and more. All modifications are applied in real-time

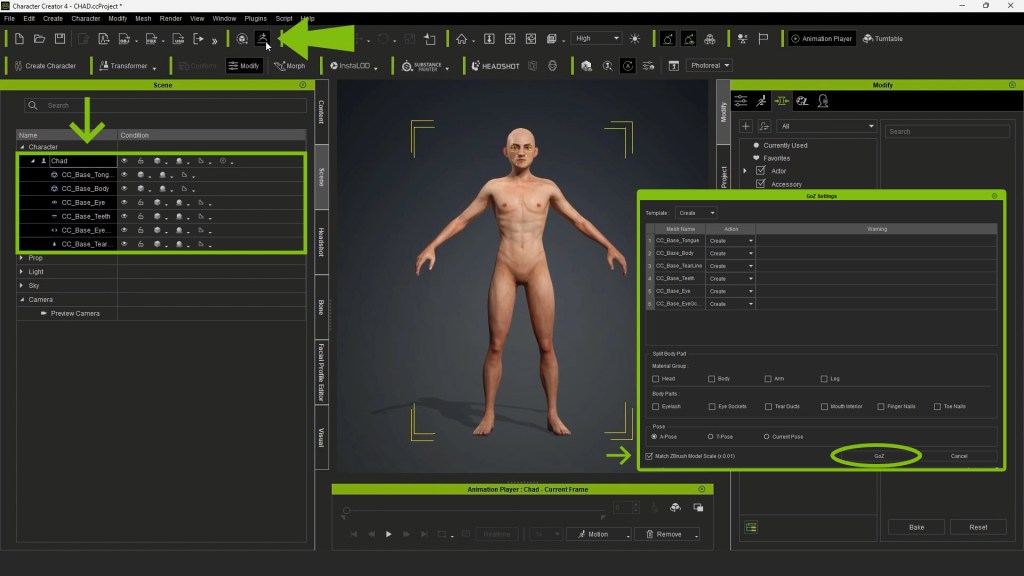
- When you’re satisfied with the modifications, go to the Scene Panel, give your character a name, and select all objects. Activate the “GoZ” option to transfer the model to ZBrush and continue customizing it.
- Inside ZBrush, make specific modifications to the body Subtool using the Move brush and sculpting tools until you achieve the desired result.
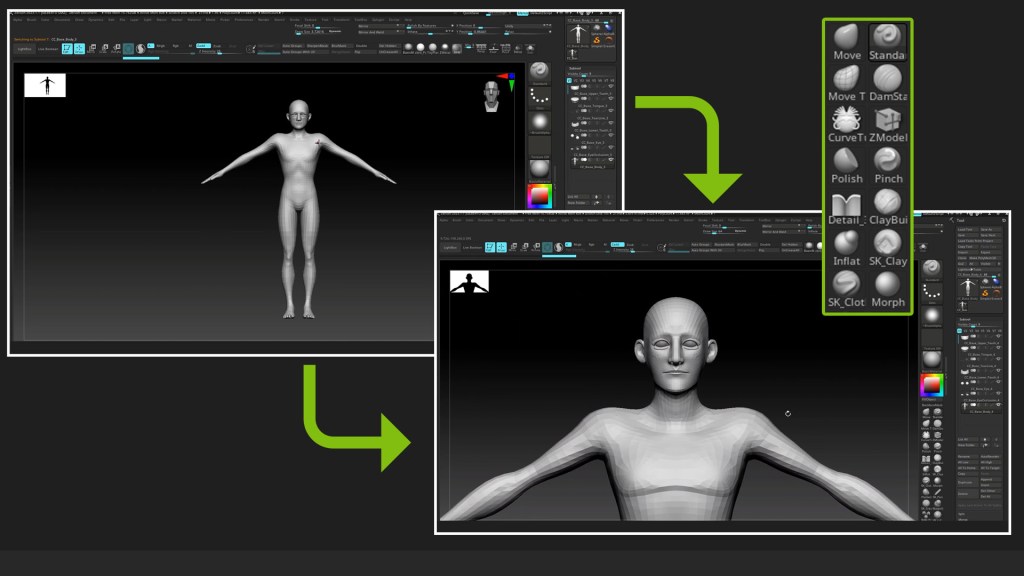
- After making modifications in ZBrush, go to the Tool panel at the top and press the “All” button to synchronize and return the model to CC4 with the applied changes.

- In the Modify panel, you’ll notice that the model is divided into various materials. Add color textures and normal maps to each of these materials.

- Enhance the inside of the mouth by adding stylized teeth from the library. For greater precision of objects within the mesh, use the Edit Mesh tool from the Modify panel.
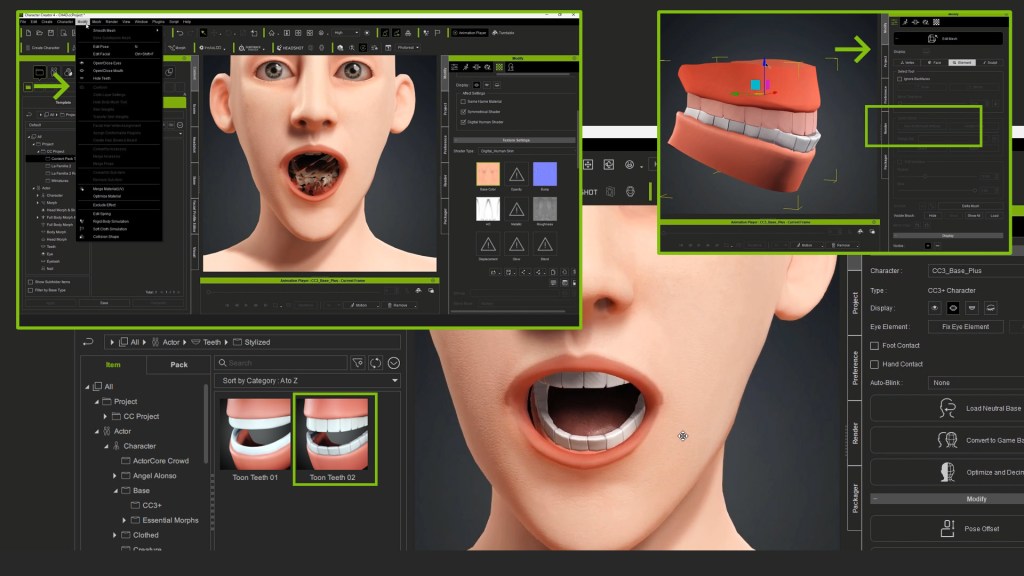
- Include a basic eye texture in the corresponding fields to emphasize the character’s cartoon style. Replicate the same texture on the 4 present UVs (Eyes and Corneas).

- You can further customize your character by adding elements like eyebrows. Model the eyebrows in Zbrush and adjust them in Character Creator.

- Finally, refine facial expressions using the expression editor. Increase the values of the sliders to extend the range of geometry. Ensure that the eyelids behave correctly both individually and collectively. Adjust the expressions to your preferences.

Ready for Action!
With these simple steps, you can create unique and customized characters in Character Creator. I hope this tutorial has been helpful to you!
See you in the next article below.

Next in this tutorial series, we go to PART 2 – Creating Clothing & Accessories with Character Creator and ZBrush