Welcome to this 4-Part mini series on how to develop content for Reallusion Stores, ActorCore, and Marketplace.
In this 2 tutorial, we will explore how to create 3D clothing and accessories as assets in Character Creator (CC). We will summarize the process of creating
clothing for our character, Chad, who is a character designed for a Character Creator content package that you can find in the Reallusion Content Store, under La Family Members Vol. 2 category.
- Let’s start by opening Character Creator and selecting our Chad model. Make sure to have the eyebrows selected as well. Then, activate the “Goz” button. In the pop-up window, keep the “Current Pose” and “Maintain Scales Relative to Model in ZBrush” options selected. The idea of having the model in this pose is to facilitate clothing material creation.

- Now, we can begin modeling the different pieces, using the body as a reference. You can duplicate the body and hide unnecessary parts. I also recommend using good references to achieve a realistic look without exaggeration. Chad has four pieces of clothing: a sweater, a coat, pants, and shoes.
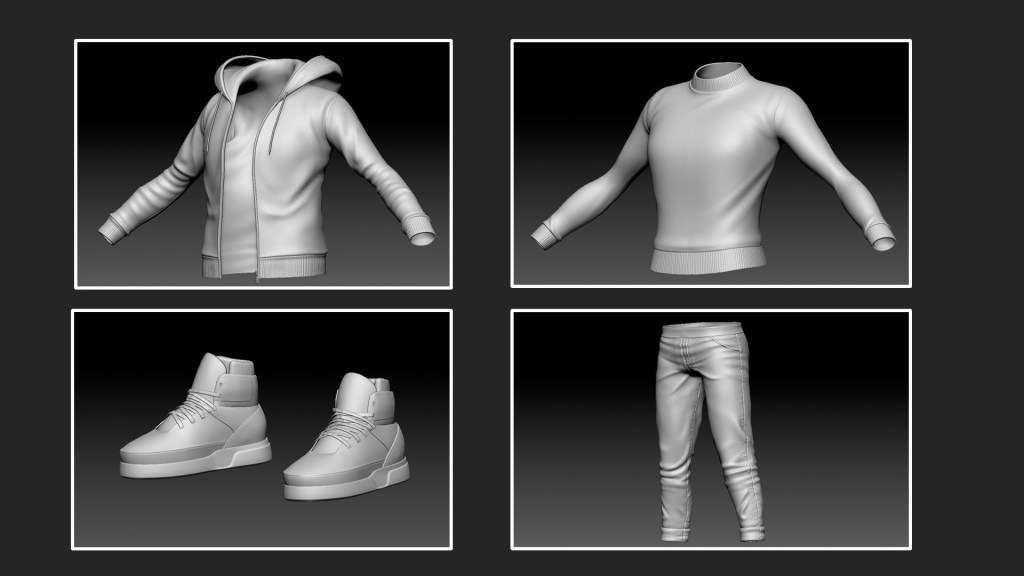
- Once all the pieces are ready, export each piece separately and perform retopology using modeling software. This will generate new geometry with fewer polygons for animation.
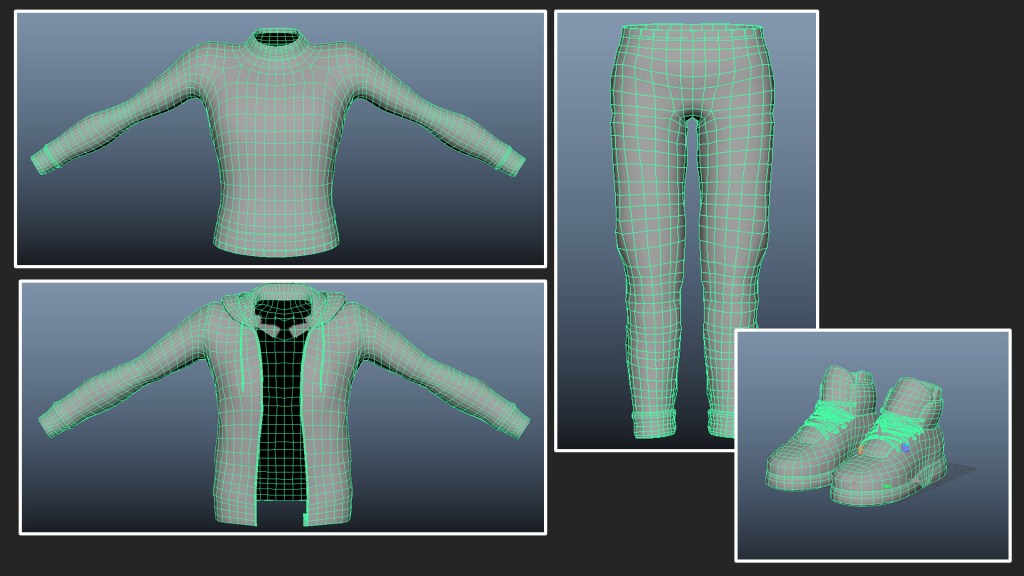
- You will also create UVs for each object independently, meaning each piece of clothing will have its own set of UVs. This optimizes textures. Before applying textures, use Substance Painter to transfer details from the high-resolution mesh to the low-resolution one through the Bake process.

- Now, let’s return to Character Creator. Import our pieces one by one from the “Create” menu and activate the “Accessory” option. Make sure to center the pivot for each piece for proper placement.
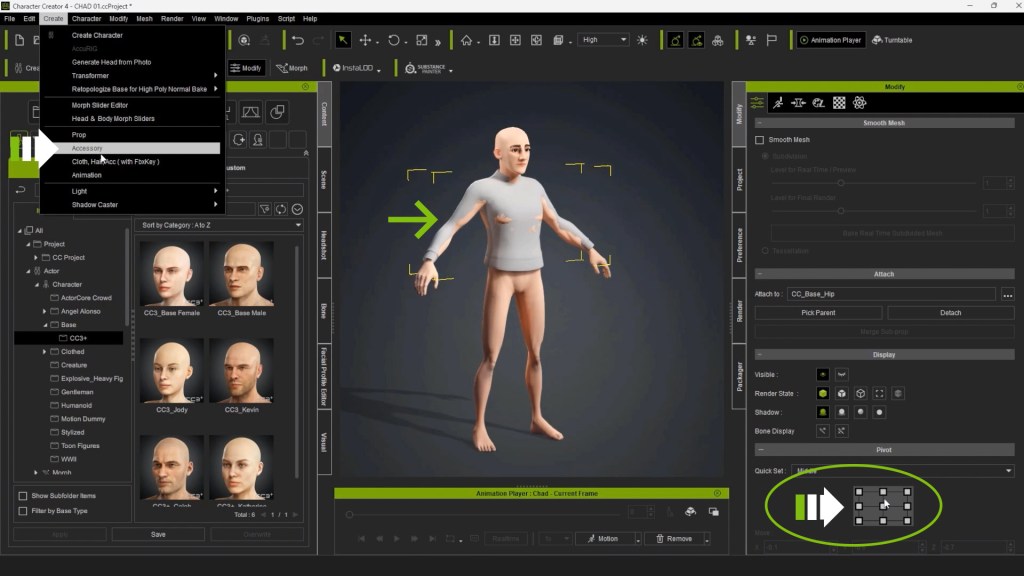
- Then, select each geometry and use the “Transfer Skin Weights” option in the “Modify” panel. This will allow the pieces to follow the character’s movements. Before proceeding, let’s organize the different clothing layers. Select the sweater geometry and go to theTop Menu “Modify.” It’s essential to assign each garment to a different layer. This helps the program identify geometries based on their location on the avatar. For example, the sweater will be in layer 14, pants in layer 9, and shoes always in layer 1.
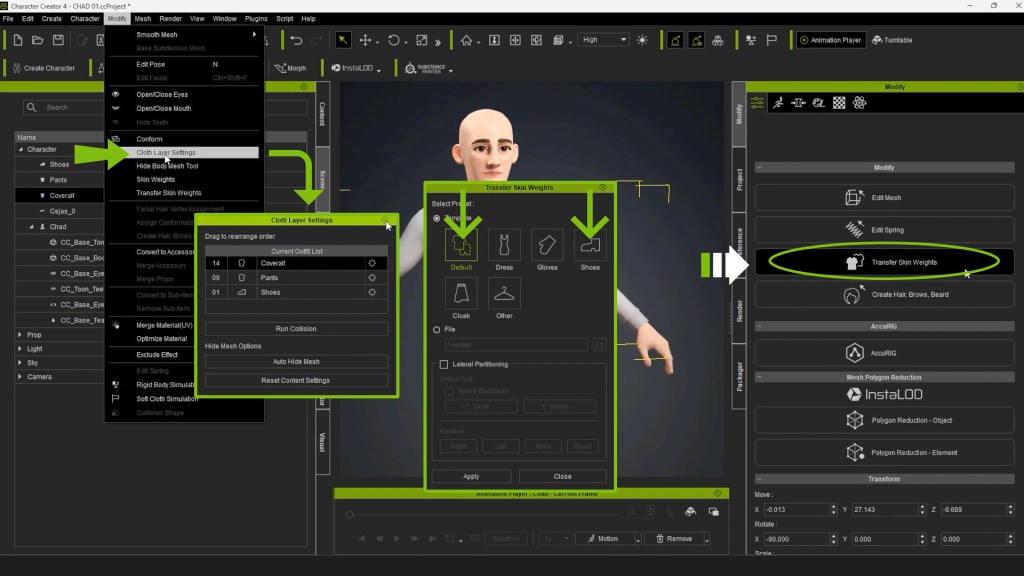
- Next, insert texture maps into each material. To do this, select each piece of clothing and go to the “Modify” panel, then to the materials section. In the texture settings, you can insert up to nine different textures, each serving a specific purpose.

- To correct skin weights on the clothing items, let’s start with the inner sweater. Select the piece and go to the “Modify” panel, then select the “Skin Weights” option. Vertices will be highlighted, and you can see irregularities in the geometry, especially near the joints. To correct this, right-click on the corresponding bone and adjust the vertex influence using the quick selection tool. The quick selection panel allows you to adjust vertex influence on a scale from 0 to 1, with 0 being the least influence and 1 being the greatest influence

- Now, let’s eliminate overlapping geometries. Select the shoes from the Scene Panel. Then, activate the “High Body Tool” from the “Modify” panel. This tool allows you to remove internal geometries. Activate symmetry and select the parts you want to hide, such as those on the foot. Do the same with the pants, making sure to keep symmetry active while selecting overlapping areas.

- Now that we have all clothing assets ready, the next step is to include them in our library. Ensure that the asset is centered in the scene and go to the content panel in the clothing section. Select the appropriate category, customize the asset, and then press the “Save” button. Assign a name and apply the changes

- Create a new project and select an avatar, like Eddie, removing all accessories and leaving only the body. Add the clothing assets one by one in real-time and check how they behave on the new body structure.

- To include accessories, the preliminary steps involve modeling and texturing the object, which applies to all types of accessories. Let’s take a cap as an example. Go to the top menu “Create” and choose the “Accessories” option. Reposition the cap by centering the pivot and adjusting its size as needed. Use the “Attach” option and search for the head bone in the search bar to link the cap to that bone. Apply the changes and check how the cap behaves by moving the head with the pose editor.

And that concludes our tutorial on creating 3D clothing and accessories with ZBrush and Character Creator. I hope you’ve learned a lot, and I hope this information is useful for your 3D animation and design projects.
Continuing with this tutorial series, we go to PART 3 – Hair Creation for CC Characters with Blender or ZBrush