Welcome to this 4-Part mini series on how to develop content for Reallusion Stores, ActorCore, and Marketplace.
In this 3rd PART, we will show you how to create hair in Character Creator! In this tutorial, you will learn how to breathe life into characters with different hair styles using tools like Blender or ZBrush.
- The first step is to export the character. We’ll use Blender for this example. Go to the “File” menu, select “Export,” and enable the “Nude Character in Bind Pose” option. Then, choose the export location and click OK.

- Once in Blender, import Chad’s body model. Next, insert a curve next to the character and shape it using handles. With Ctrl, you can add new nodes to create more complex shapes. Using the “Bevel” tool, turn the curve into a tube, allowing you to project hair strands.
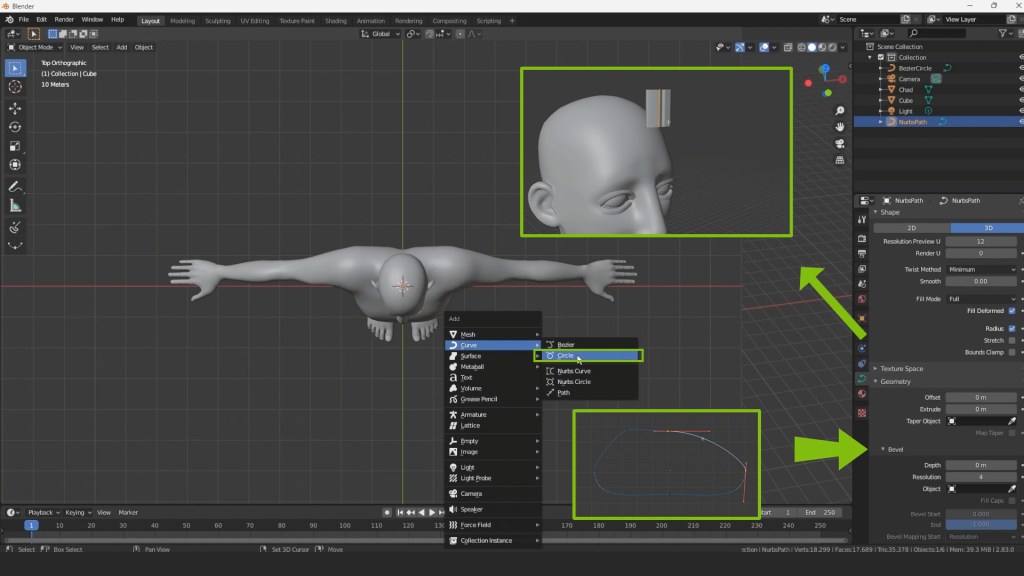
- Duplicate the first strand with Shift+D and adjust as desired. Continue creating new shapes from the node lines until you achieve the desired look.

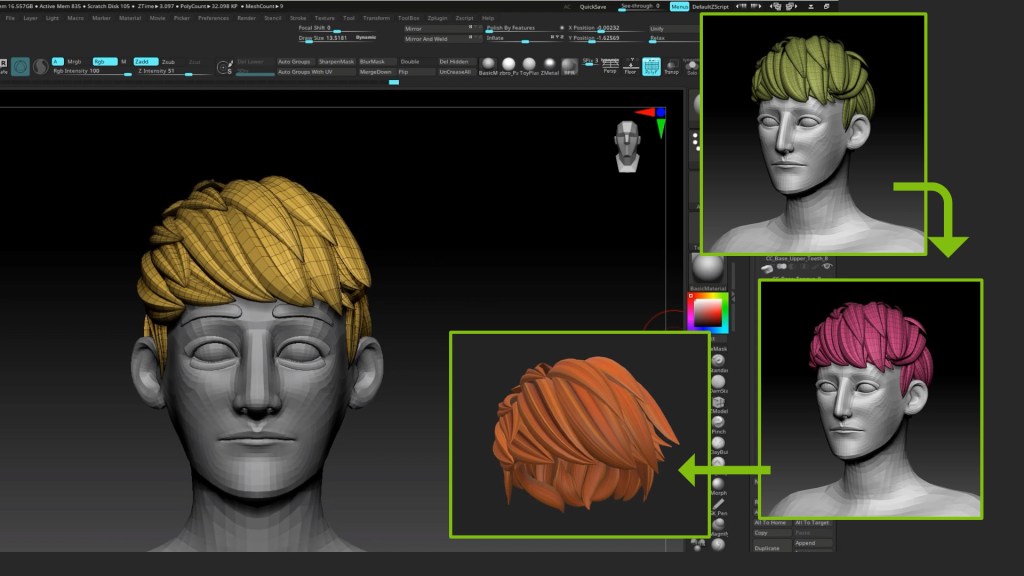
- If you prefer to use ZBrush, select Chad’s body in the content menu and activate the “Goz” button in the popup window. Then, regardless of whether you used Blender or ZBrush, clean up the geometry to optimize and adjust the polygon count. Afterwards, transfer the high-resolution details to the low-resolution mesh and take everything to a texturing program, such as Substance Painter.
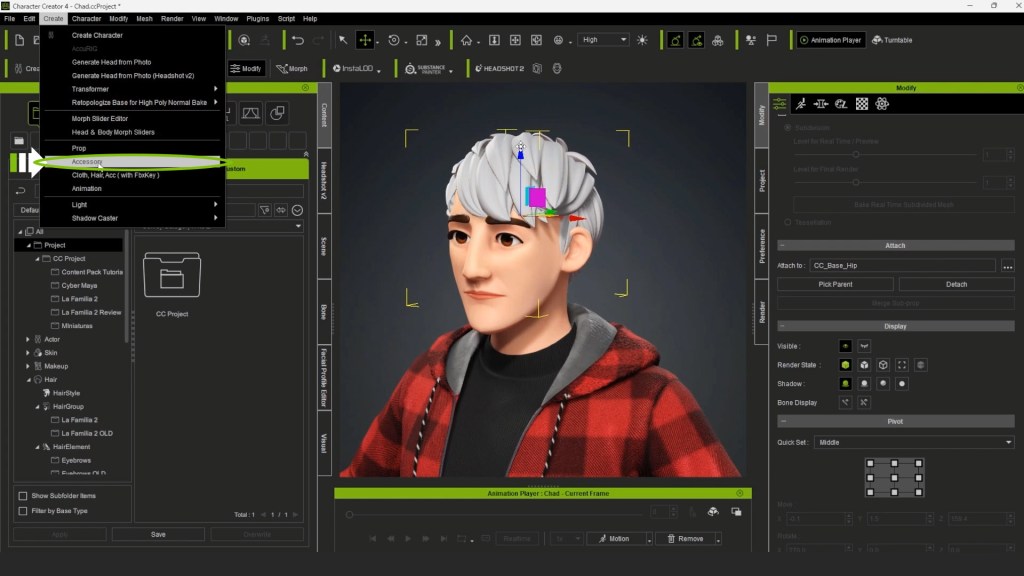
- Back in Character Creator, import the object from the “Create” menu, enabling the “Accessories” option. Make sure the hair loads correctly in the scene and adjust it if necessary.
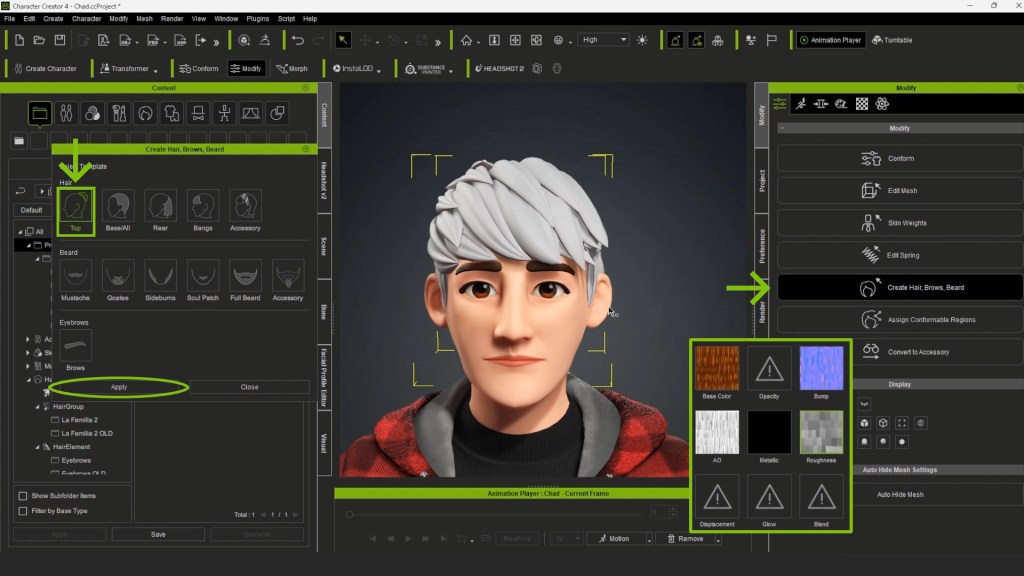
- Then, go to the “Modify” panel and activate the hair creator assistant. Select the appropriate profile and apply the changes. Build the hair material by adding pre-colored textures.
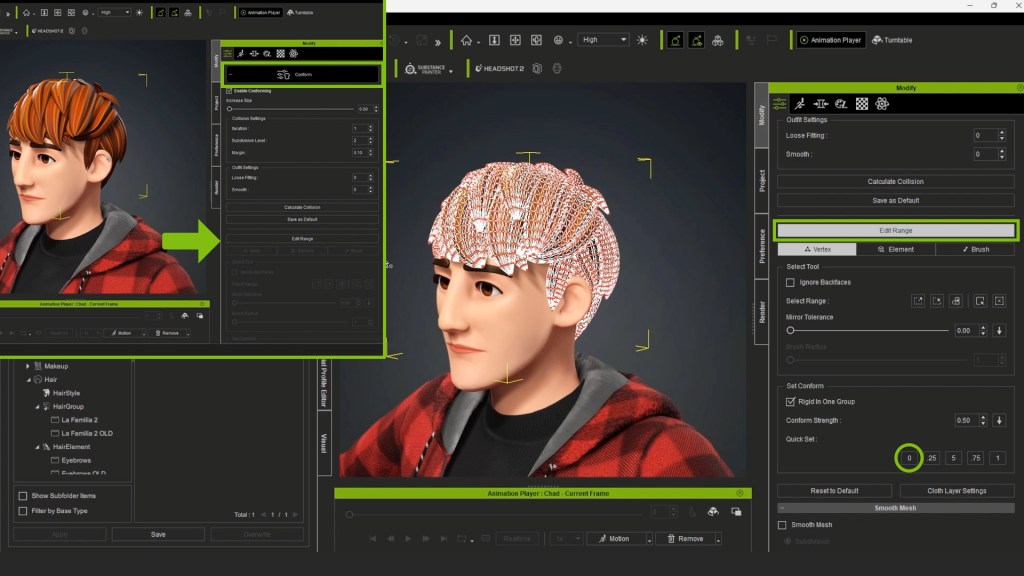
- Select the mesh and go to the “Modify” panel, enable the “Edit Range” option, and select all vertices. Press “Zero” to adjust the geometry.
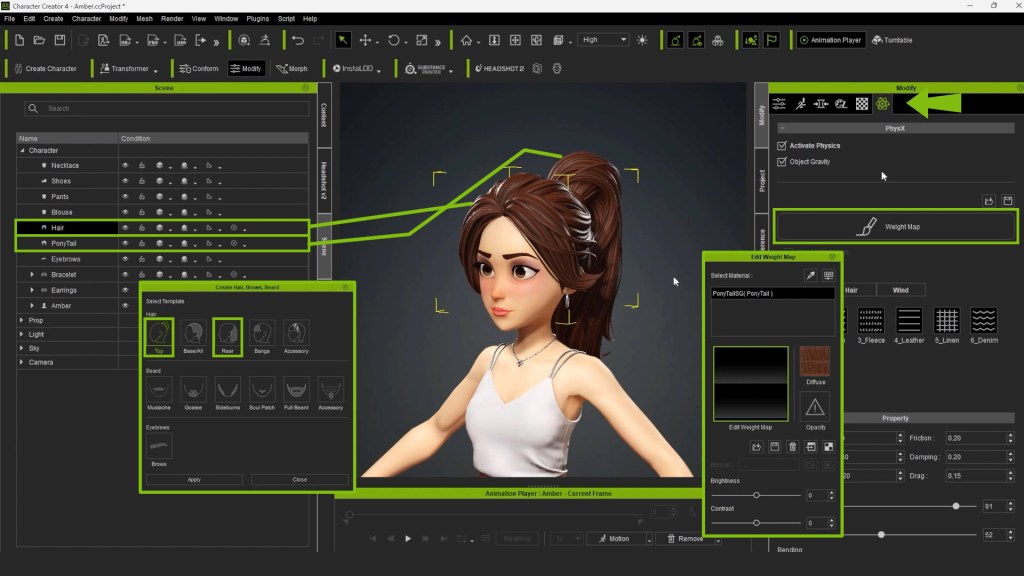
- To include hair like Amber’s, which consists of two geometries, you can apply them to the model following the appropriate steps. To enhance the hair, activate the material physics editor and apply a weight map to simulate natural movement.
- Customize the colors to your liking. Right-click and enable the color editor option. You can modify different parameters related to brightness, contrast, hue, and saturation.

- To check the created hair, create a new project in Character Creator, select an avatar, and apply the hair assets. You can also adjust other aspects of the character and add clothing for a complete result. And there you have it! Creating hair in Character Creator is simpler than it may seem.

Finally, let’s go to the last part of this tutorial series – PART 4 -3D Asset Packaging for CC Characters