When I got into 3D freelancing decades ago, rigging a character was a sought-after skill. Many of us could create props, even animated props, but that didn’t always translate into being a successful character developer who could handle the setup and rigging of the character’s internal skeleton. It wasn’t the creation of the mesh or the texturing, it was the skinning as we called it back then which today translates into rigging.
What is Rigging?
As I just stated, rigging was different in the early days. It meant, at least in my experience, attaching a control box to built-in animation controls or “rigs” as they were known. Control knobs and levers were made from non-rendering splines to create a control panel. These control rigs were set up on hands, digits, extremities, and anything that might need to be animated within the character. As computational power increased so did the complexities of rigging.

After this came the process of skinning. This is where things could get interesting and more than a bit tedious. My software of choice back then was 3DS Max which worked with envelopes that encompassed every bone including finger and toe bones, which could get tedious. We had to set the control envelope tolerances to minimal to avoid collapse, folding over, or poke through on multi-layers like clothing. Those were just a few considerations.
You had to think ahead if you wanted a clean topology with tight control envelopes that wouldn’t distort the mesh in any fashion. Mesh collapse, usually on arms and legs at extreme poses, was a major headache in the low poly days. By extreme poses I mean folding the arms or crossing the legs when there were barely enough polys to pull it off.
Conventional Rigging/Skinning
Conventional rigging took many hours and was usually the bottleneck in any production pipeline whether it be a large studio or small indie project. Like texturing, rigging/skinning was a vital step and perhaps the most important step in the development of the character mesh. As I said earlier, in 3DS Max we had to size the control envelopes to each bone including knuckles in some cases. This meant a lot of control envelopes in a very small area. When they overlapped you resorted to the dreaded weighting, which was necessary in any decent character.

Today we paint weights which were available back in the early days but mainly it was manual weight tables with a lot of back-and-forth fine-tuning via numbers. This gave exact control but was one of the leading factors in the production bottleneck. An experienced skinner could push out the work, but it could take newbies, trainees, and interns a while to get on board. With experience, you knew a better range of weights to start with, which saved some time.
Creating the character mesh was fun, but took some time and texturing it took some time too, None were the time hog that rigging/skinning was. It was also a buzzkill. Nothing could kill the creative urge and slow down or almost stop your pace like being assigned to rig/skin a character. There were times I’d rather create an entire city than skin a character, especially a novel character with many arms and tentacles. Not all character meshes were bipedal. Creatures like aliens and monsters could be a real pain to wire up. It wasn’t unusual to have to add some meat to the character mesh in places so it would not collapse or bind. This wasn’t simple either as that change had to be re-topologized and re-textured.

Character development was a big part of the budget back then too. It was nothing to pay thousands of dollars over the development life of a character. Each revision had to go back down the line and then back up again, sometimes with multiple approvals along the way. It was nothing to wait several days to two weeks to get a small revision completed on a character.
It is no wonder it was incredibly expensive to produce a minute of animation back then as the character development cost was just a part of a much larger production budget.
AccuRIG and Characterization
Flash forward to today where the term skinning is not used anymore as rigging has replaced it as the terminology for skinning. If you use any of the old-school tools like Max, Maya, and the like then you can still create control rigs but why do so when Character Creator skips that step completely?
The same with skinning. It’s all handled, the clean topology, proper skinning tolerances, and all that goes with making a character ready for animation, by Character Creator with either the Characterization tool or AccuRIG.
Simply put, if you want to preserve an existing skeleton then you use Characterization by matching bone to bone until you have enough bones to activate a working, animatable character. If you want to add a skeleton to a character mesh that does not have one or you want to replace the existing skeleton, then you use AccuRIG.
Check out my article for more detailed information on AccuRIG versus Characterization to learn more about the process of each one.
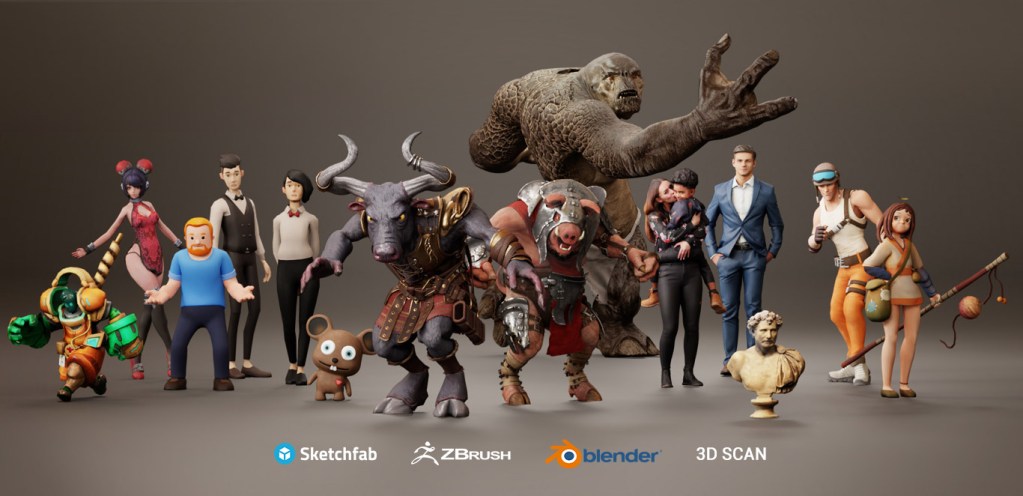
Using AccuRIG to Rig a Character Mesh
“Garfield” (https://skfb.ly/oHRtU) by gaddiellartey2010 is licensed under Creative Commons Attribution (http://creativecommons.org/licenses/by/4.0/).
“Odie (1)” (https://skfb.ly/oGERJ) by mustafatylan68 is licensed under Creative Commons Attribution (http://creativecommons.org/licenses/by/4.0/).
Anyone can Rig/Skin with Character Creator
Not only was rigging and skinning a sought-after skill, but it was also one that you had to use often or you could grow rusty. Freelancers tend to jump from task to task as called for by their contracts, so it wasn’t unusual to have to spend some unpaid time refreshing your skills when you got a character dev contract.
Character Creator and tools like AccuRIG have eliminated all of that. We get to focus on creating a great mesh with AAA texturing or use the sliders on a base mesh to shape a unique character. We can also send that base mesh over to ZBrush via a very robust GoZ function that makes transfers between the applications seamless. This feature alone gives us a method of sculpting that is used by studios and indies for top-shelf production.
With AccuRIG and Characterization, anyone with competent computer skills can create a “ready for animation” 3D character.
Using Characterization to Retarget an Existing Rig in a Character Mesh
Masking Bones
A great feature, often overlooked, is the bone masking tool that allows us to mask out unnecessary bones from an unusual character mesh. We can rig meshes like partial characters or sculptured busts with the body, arms or legs masked out, so they don’t interfere or induce unwanted movement when applying motions.
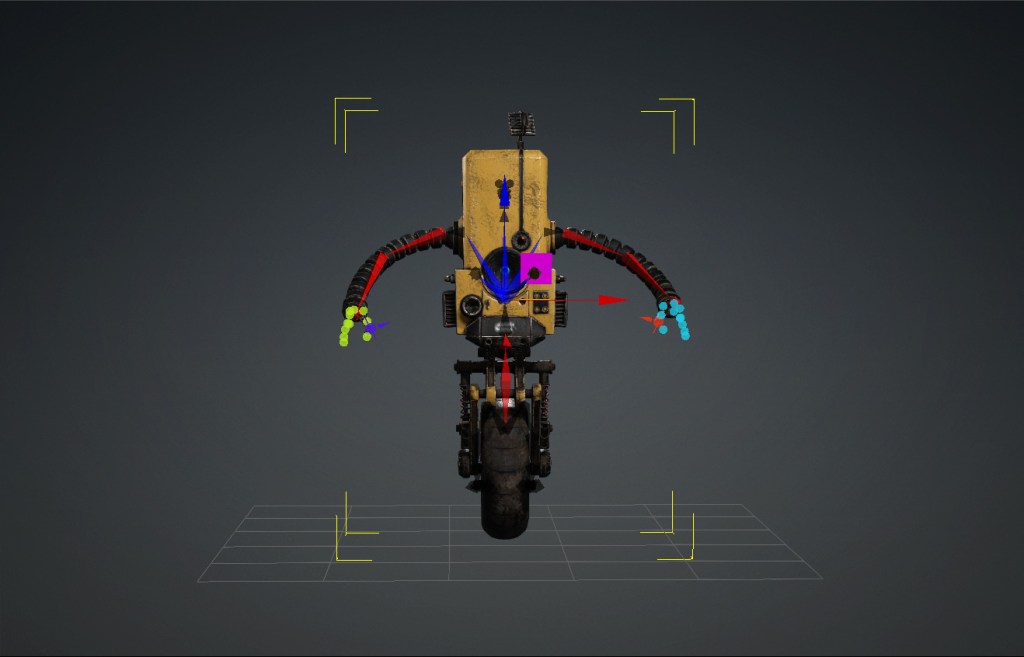
In the image above I have masked out everything except the arms. When you select a bone and turn masking on it will mask all bones in that hierarchy. Masking a torso or pelvis bone will mask out the legs and feet or possibly all of the upper body depending on the bone chain direction. If you select a torso bone to mask and the arms are masked but you want to use them then select the arms again and turn off the mask for them.
I also used the Extract Mesh tool to extract the wheel/tire, radar, and a few other items and finally extracted the claws so I could spin them even though I didn’t use that in the demo.
Production Budgets Drop Dramatically
It’s still not cheap for a large, triple-A studio to create a minute of animation but budget considerations have changed dramatically for the small, indie producer or studio. It was not uncommon in the early days of 3D production to have $5K to $10K or more annual expenses just for licensing some needed applications. That was in dollars that had a lot more purchasing power than today, so the tools weren’t cheap by any means. Piracy was a problem because of the expense. It was a barrier to a lot of smaller indie producers and animators.
Today we have pricing and competition that have reduced the annual cost of 3D software. It may still take a good budget to get started with a lot of tools, but maintaining those tools is no longer a $5K to $10K annual burden. There were times we were forced to spend the first few months of the year just paying for our software or maybe I should say waiting for that annual license to pay for itself, then we could make money.
Character Creator and iClone have empowered a lot of new animators by being able to learn and produce animation at a small fraction of the cost per minute. I’m not saying our time is not worth anything, but I am saying our time is key in lowering the budget for out-of-pocket expenses. Some iClone productions have little to no budget while producing quality work for any number of reasons from previsualization to trying to get noticed or a project financed.
Summary
It’s hard not to like the power and ease of use that Character Creator and tools like AccuRIG provide. I have become so spoiled at using Character Creator and its auto rigging tools that I can’t remember the last time I rigged a character in 3DS Max.
I hope I never have to again either.

MD McCallum – WarLord
Digital Artist MD “Mike” McCallum, aka WarLord, is a longtime iClone user. Having authored free tutorials for iClone in its early years and selected to write the iClone Beginners Guide from Packt Publishing in 2011, he was fortunate enough to meet and exchange tricks and tips with users from all over the world and loves to share this information with other users. He has authored hundreds of articles on iClone and digital art in general while reviewing some of the most popular software and hardware in the world. He has been published in many of the leading 3D online and print magazines while staying true to his biggest passion, 3D animation. For more information click here.