
Lessons from Minute Guides
Cartoon Animator 5 is a powerful 2D animation software for creating engaging and dynamic animations. Whether you’re a seasoned animator or a beginner just starting out, mastering the essential tools offered by this software can significantly enhance your workflow and creativity.
- Eight key functions that every animator should become proficient in to fully leverage the capabilities of Cartoon Animator 5.
- Motion Pilot – Animating without the timeline
- Face Puppet – Smooth facial expression
- 2D Motion Key Editor – Flexible animation
- Sprite Editor – Fine-tuning character designs
- Face Key Editor – Precise facial expressions
- Path properties – Leveraging animation paths
- Spring Editor – Organic animation
- In-application vector color adjustments
- How to make your animations five times faster, smoother, and more lifelike, while easily animating complex facial expressions.
- How to streamline character movements, switch sprites seamlessly, and control animation paths with precision. You’ll also learn how to create realistic follow-through effects effortlessly and adjust colors quickly and effectively.
Be well-equipped to create captivating animations that stand out. Let’s dive into each tool and uncover the specific benefits they bring to your animation projects, transforming your creative process and final results.
1. Motion Pilot – Animating without the timeline
Motion Pilot lets you animate by pressing record and moving your mouse.
In this episode, you will learn how to generate unique and complex animations using a couple of clicks and swipes with Motion Pilot. This video covers how to initiate Motion Pilot, preview animation with different parameters, how Lazy Mouse can smooth your animation, add depth with Z controls, and change the moving directions.
2. Face Puppet – Smooth facial expression
The face puppet tool lets you animate facial expressions easily by moving your mouse, bringing life to your character.
In this episode, you will learn one of the quickest and most powerful ways to animate your character’s facial expressions in real-time using only mouse movements. Additionally, the video will show you how to choose from various animation profiles and templates, such as sad, angry, or happy, and how to disable specific facial elements, like the eyes, for more natural head movement. This tutorial will equip you with essential Face Puppet skills, enhancing your animation capabilities and enabling you to create detailed and vivid character expressions effortlessly.
3. 2D Motion Key Editor – Flexible animation
The Motion Key Editor lets you freely pose 2D characters using bones in Cartoon Animator.
In this episode, you will learn how to structure intricate bone rigs, use pins to constrain certain bones, and optimize subdivision topology for smoother deformations. Additionally, you will learn how to change the direction of a character, lock leg positions to maintain a natural stance, and adjust overall character movements flexibly. Ultimately, the video will cover how to correct knee bending issues to ensure smooth and natural motions.
4. Sprite Editor – Fine-tuning character designs
Sprites allow you to change from one drawing to another.
(Character made by Garry Pye for Space Coppers, directed by Ward Anderson)
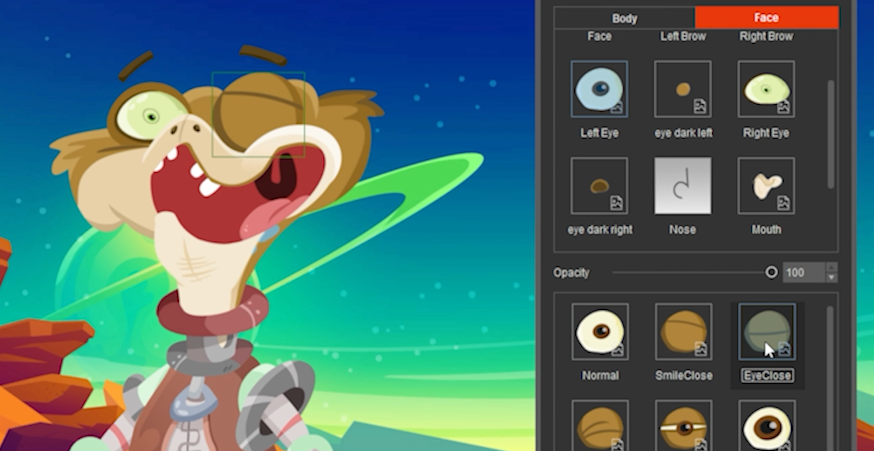
In this episode, you’ll learn how to efficiently set up character components using PSD transfer in CTA Pipeline Edition. We’ll guide you through the process of selecting and replacing various body parts, including changing expressions, switching hand gestures, and animating by altering these elements. You’ll also learn how to use the face tab to modify facial features, such as choosing different eye expressions. Additionally, the video will demonstrate how to select body parts in the editor by simply clicking on them in the workspace.
5. Face Key Editor – Precise facial expressions
The Face Key Editor allows precise facial animation. For automatic positioning, use the face puppet tool, but for precision, the Face Key Editor is best.
In this episode, you’ll learn ways to masterfully control the frame-by-frame expression animations of your characters. We’ll show you how to select and move individual eye components or coordinate multiple facial parts for synchronized movements. Using the Transform options, you’ll easily reposition facial elements or use the deform function to alter the shape of any element, allowing you to make your character smile or frown effortlessly.
6. Path Properties – Leveraging animation paths
Paths allow you to move characters on precise trajectories.
In this episode, you’ll learn how to infuse your animations with enhanced dynamism by defining object movement paths. Discover how to attach objects to a path, edit the path shape using bezier curves, give smooth or linear transitions, set start and end points, adjust movement speed, and ensure objects follow the path trajectory. Watch your character animated along the path, achieving smooth and precise movements.
7. Spring Editor – Organic animation
Use spring effects to automate follow-through — one of the core animation principles — to make physics easy to animate in Cartoon Animator.
In this episode, you will learn how to adjust spring bones in characters and props, and enhance secondary animation with organic physics behaviors. Discover how to apply spring effects to selected bones and assign them to groups, or using presets for quick assignments. You’ll also see how to preview the effects in real-time, make necessary adjustments, and fine-tune settings like speed or gravity to perfect your animation.
8. In-application vector color adjustments
With vector characters, you can easily change colors in Cartoon Animator without leaving the software.
In this episode, you will learn how to efficiently group vector elements and adjust colors in specific parts or across the entire character. Composer mode allows you to set up color groups, grouping by individual parts or entire color schemes. For instance, you can transform a blue skirt to red by utilizing the “Group by Color” feature, and change all the segment colors at once.
In Short:
Mastering these essential tools in Cartoon Animator 5 will significantly enhance your animation skills. With smoother, more lifelike animations and increased efficiency, you’ll be able to create captivating projects that stand out.
Additional interface tips
After learning the key features above, you can continue with the step-by-step UI interface guide below to gain a clearer understanding of the operation steps.
1. Motion Pilot
1. Select your character and click the Motion Pilot icon to open it.
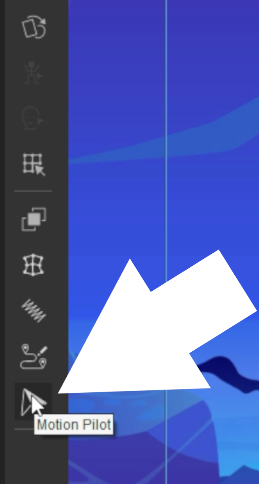
2. Practice your moves by pressing preview (space) to see it in action.

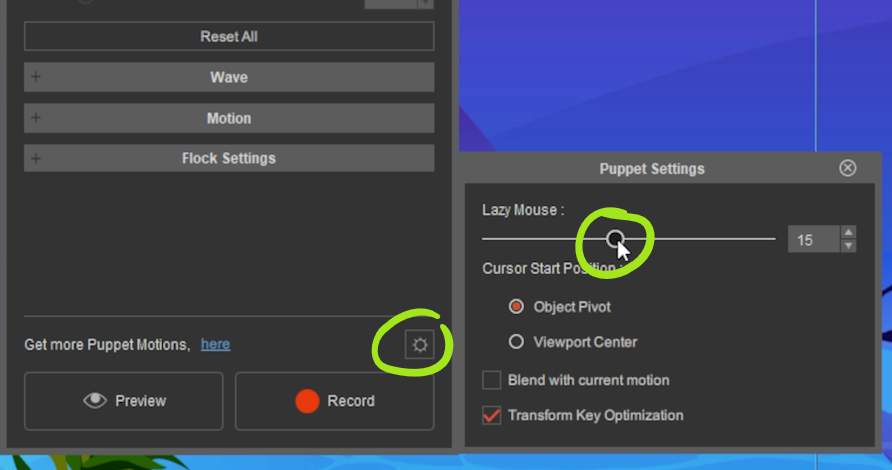
3. For smoother movement, click on “Settings” and increase “Lazy Mouse” to 15.
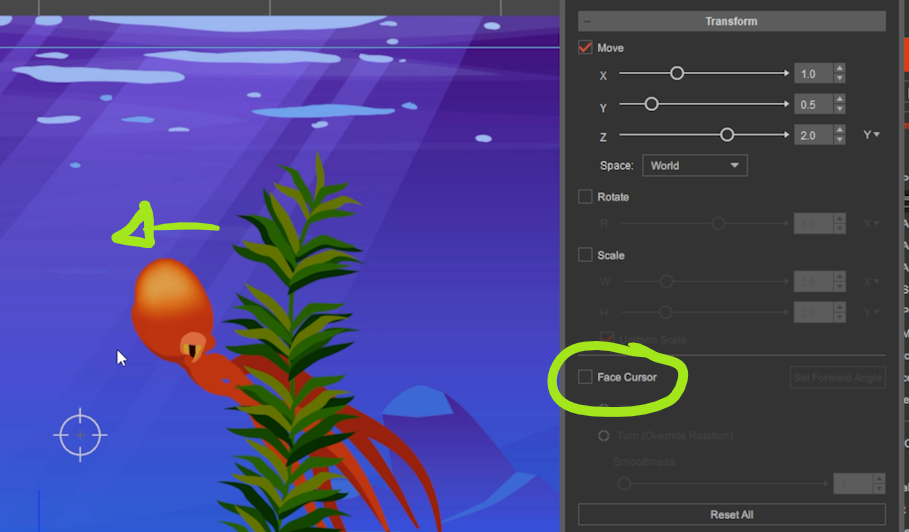
4. Adjust settings with the Z control to move in front of and behind objects like this seaweed.

5. You can also disable “Face Cursor” to make it move in one direction.
2. Face Puppet
1. Press Ctrl+U or find it in the toolbar.
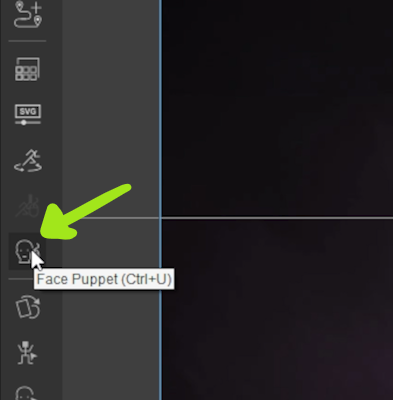
2. Press “Record” and move your mouse to animate, using clicks to make your character blink.
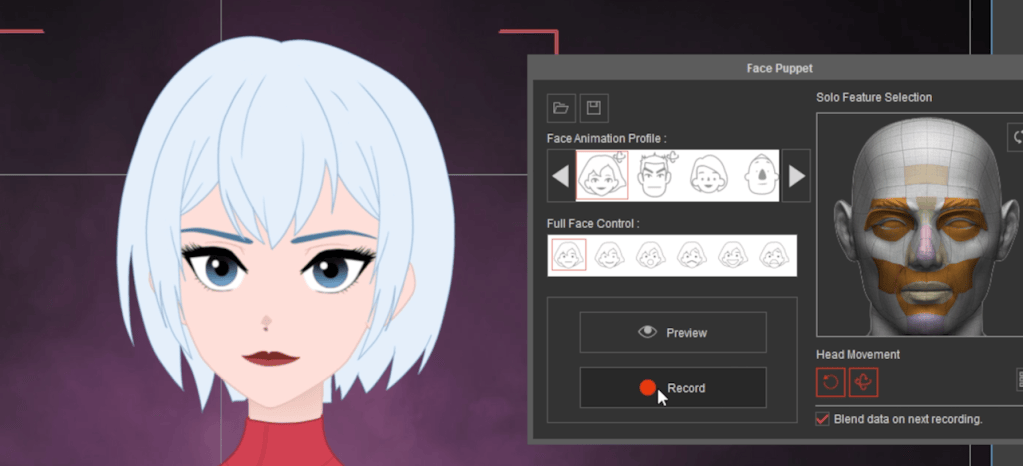
3. Choose from different animation profiles and templates like sad, angry, or happy.

4. Click on face elements to disable them; for example, disabling eyes makes the head move without eye movement.

3. 2D Motion Key Editor
1. Press K or find its icon in the toolbar.
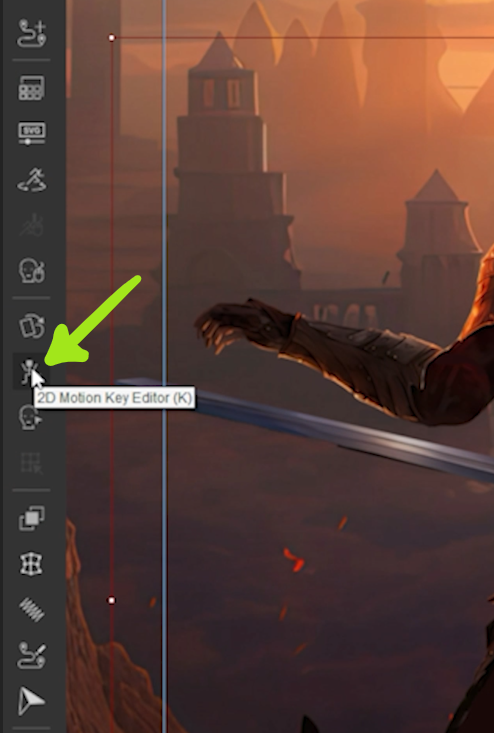
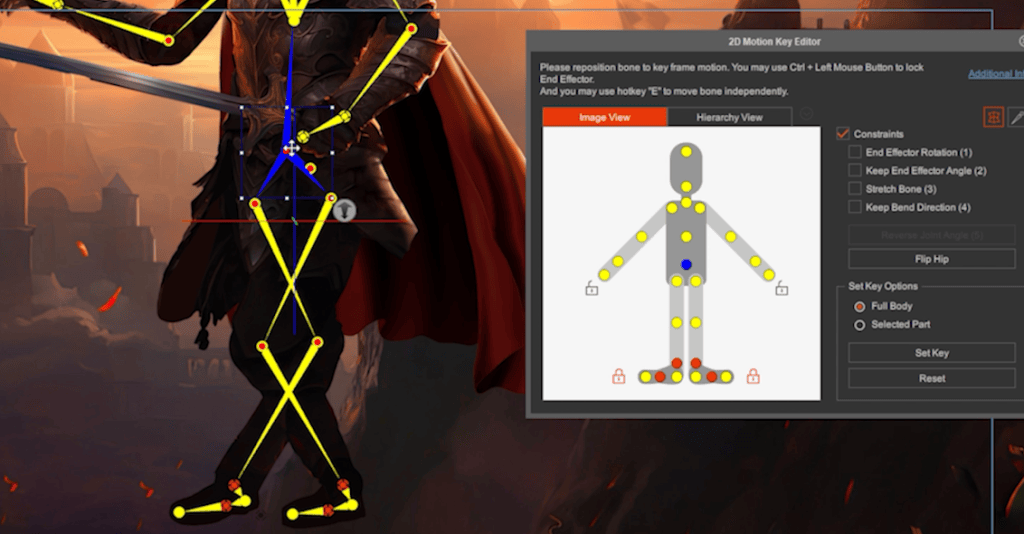
2. Click on “Flip Hip” to change the character’s direction.
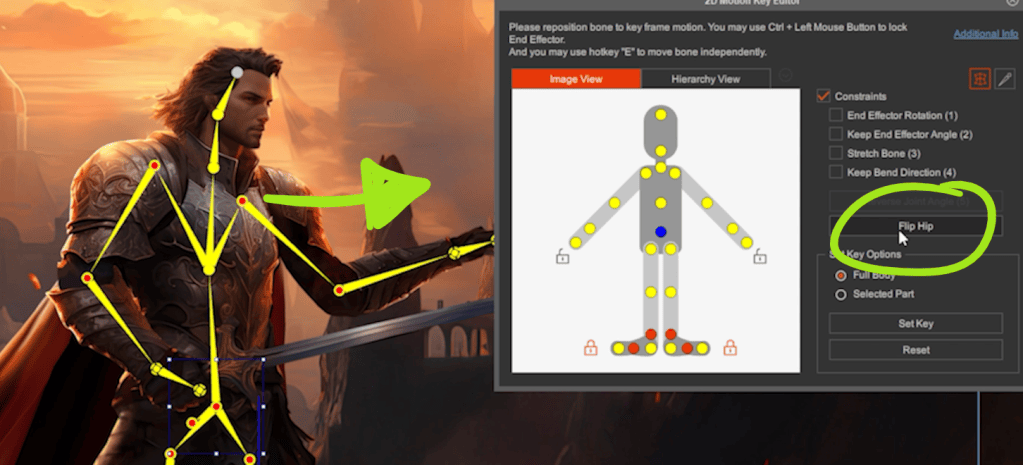
3. The lock feature can keep the feet planted on the ground while the hips are moved about.
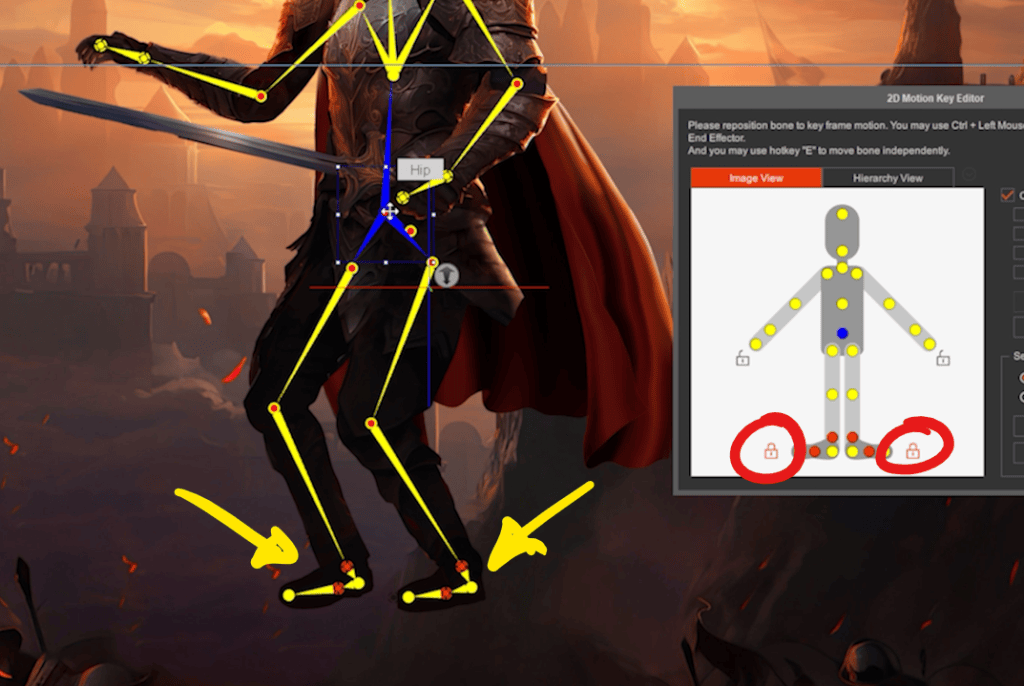
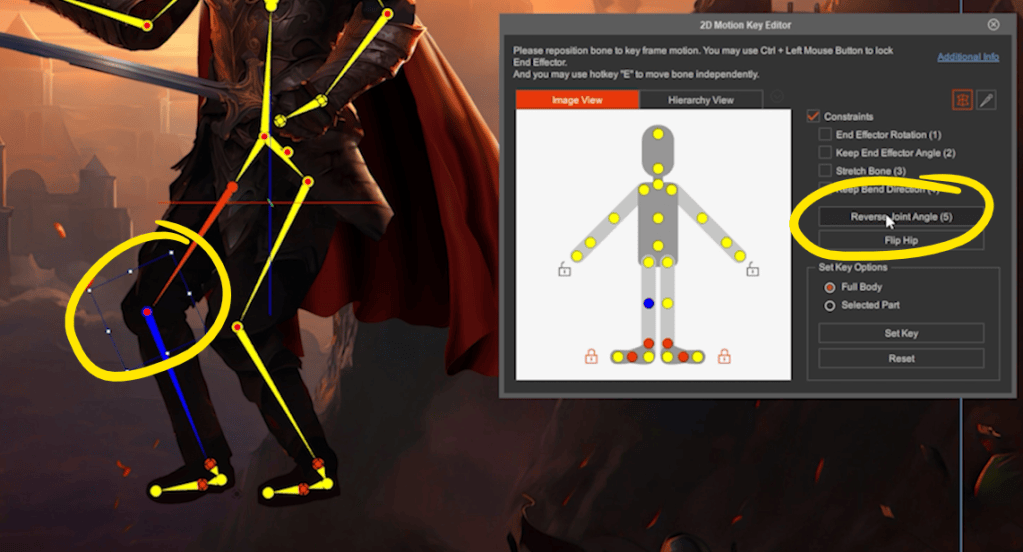
4. Disable it to move the entire character. And, if the knees bend incorrectly…
5. Select the shank and click “Reverse Joint” or press 5.
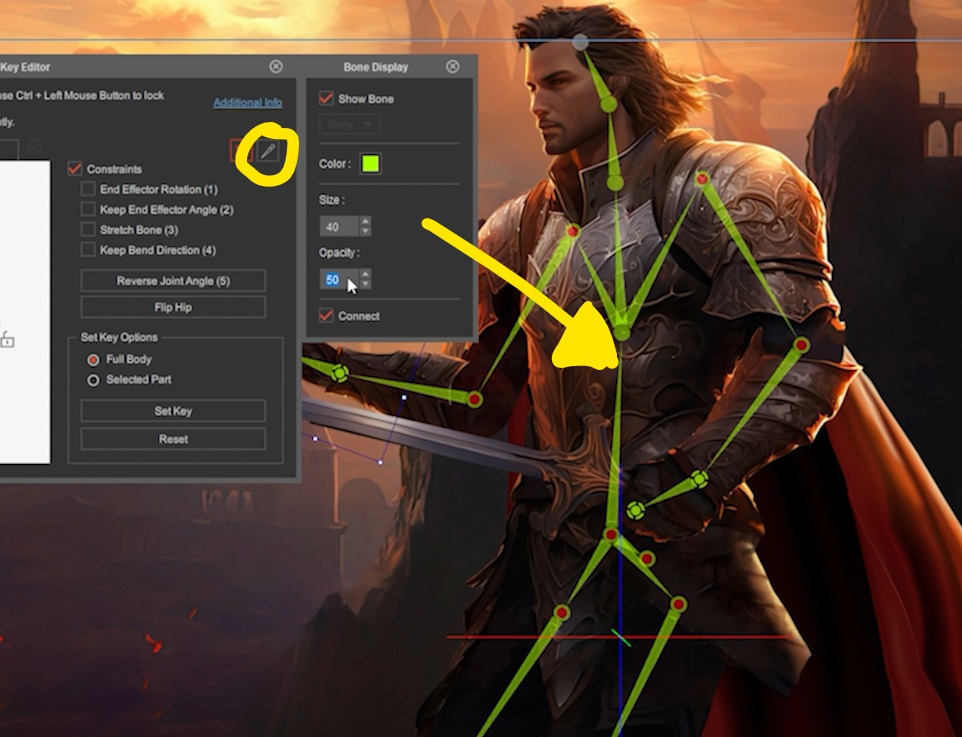
6. This applies to arms as well. Disable constraints to move bones freely and adjust bone settings by clicking “Bone Display” to hide bones, change their color, size, or opacity.
4. Sprite Editor
1. With your character selected, press S or find its icon in the toolbar to open the editor.

2. Select a body part, like the right hand, to switch between different sprites.
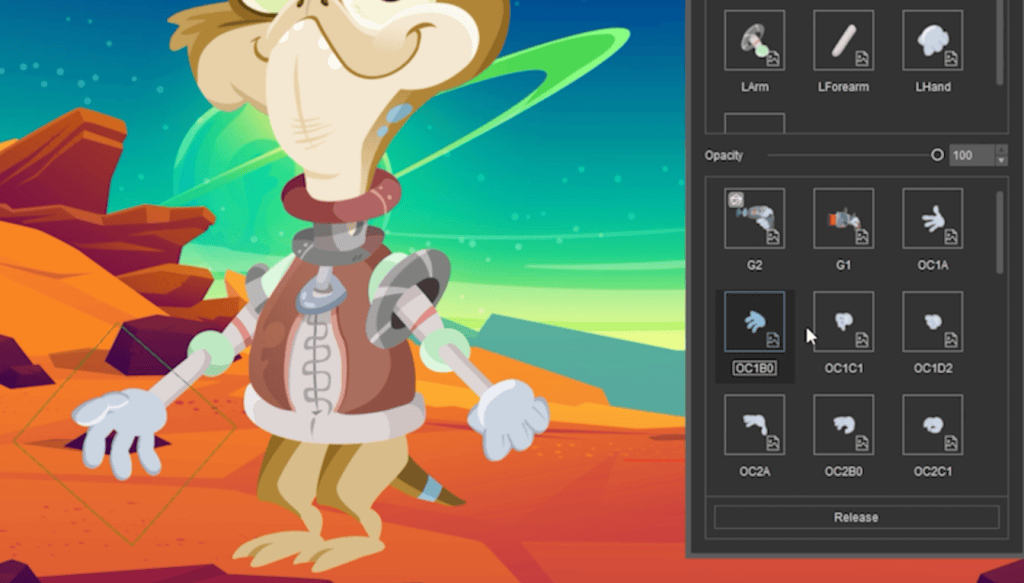
3. You can swap sprites for the body or click the face tab to change facial features.

4. For example, selecting the left eye, lets you choose different eye expressions.
5. Face Key Editor
1. Press Ctrl+K or find its icon in the toolbar.
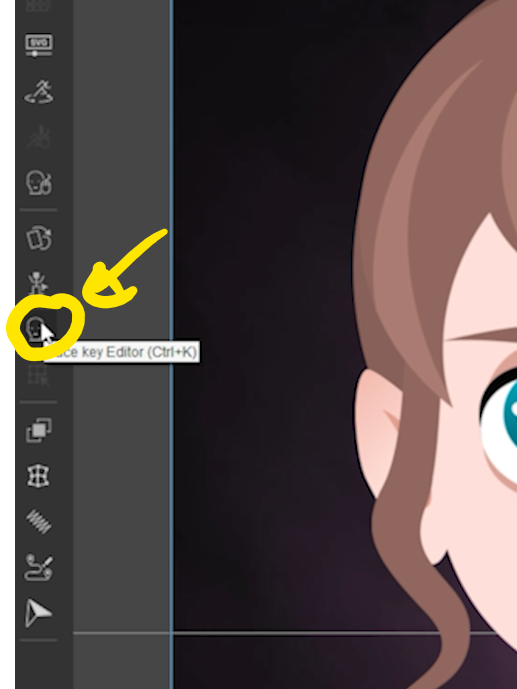
2. Use the head rotation gizmo to turn the head, or drag the circle indicator to rotate it.
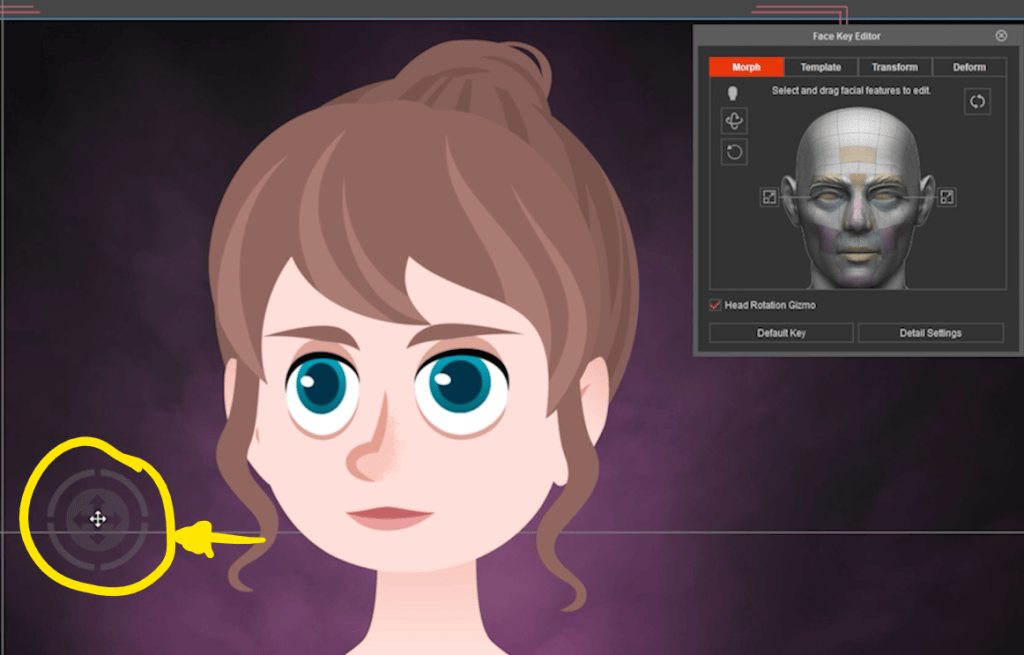
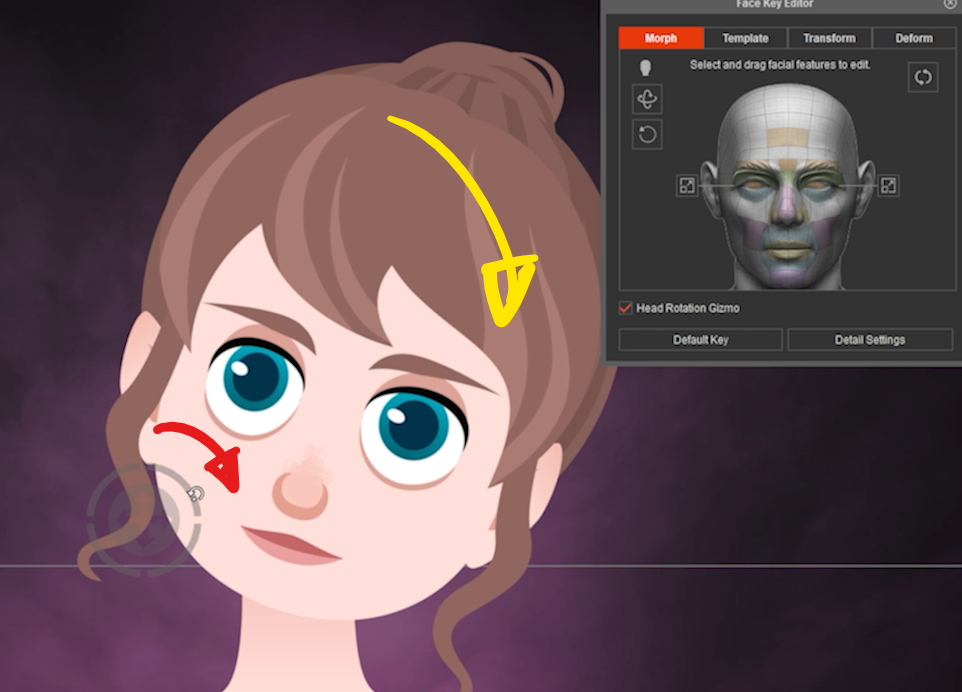
3. Select both eyes and click and drag to move them.
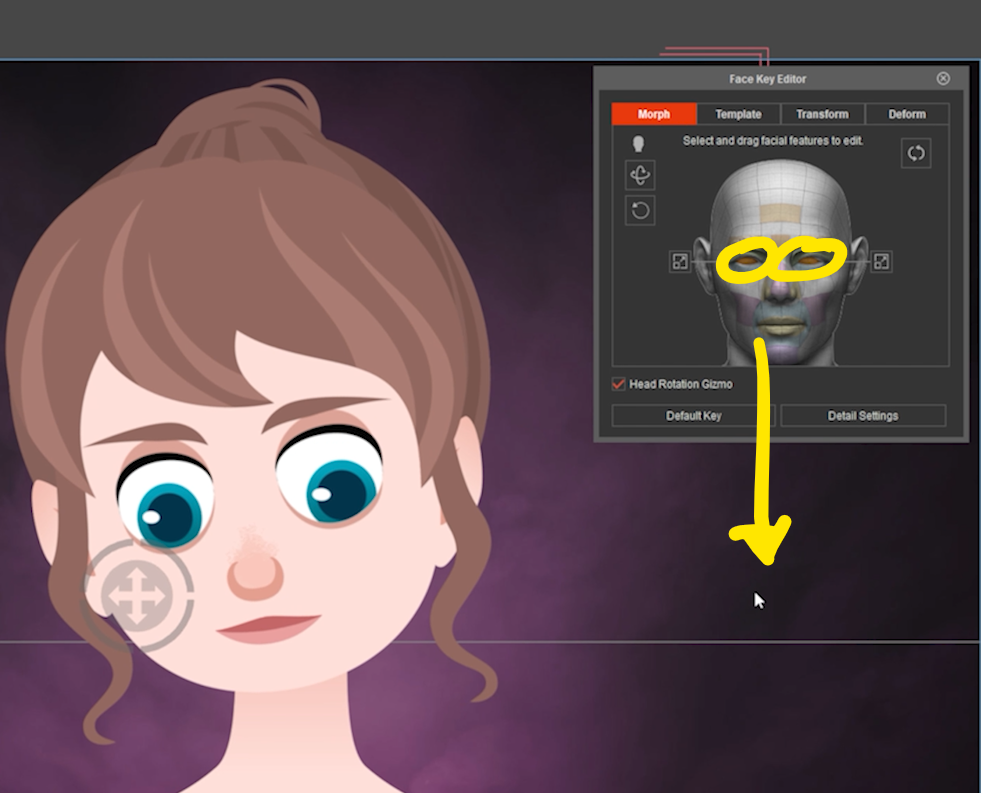
4. Select multiple face parts to move them together.

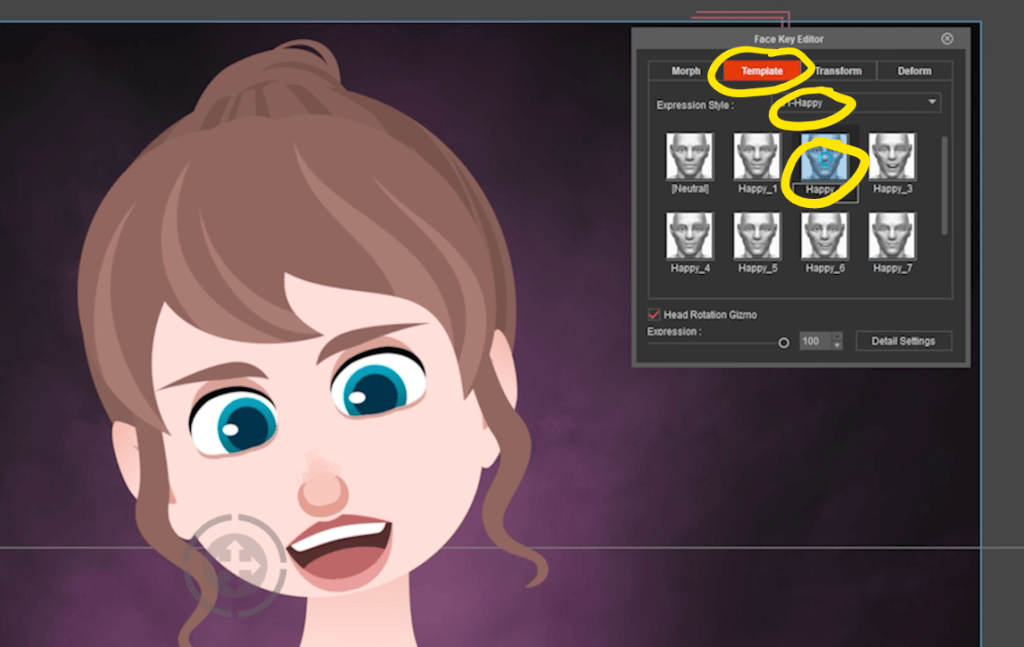
5. Click on templates to quickly change emotions like angry or sad. Select the expression style and face template.
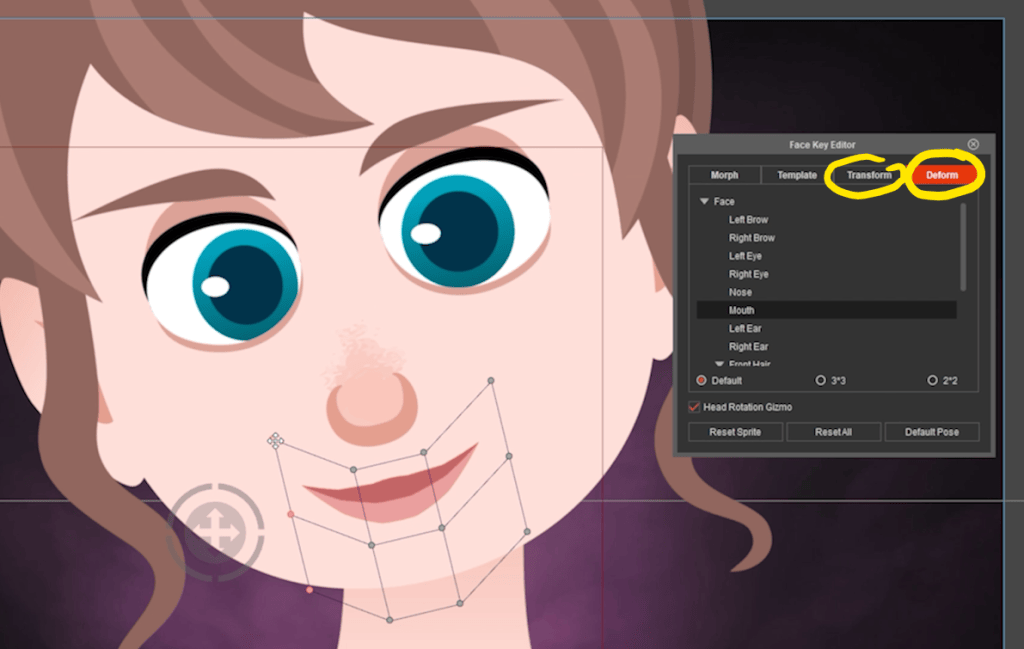
6. Under the “Transform” tab, move face elements easily or use deform to change the shape of any element, making the character smile or frown quickly.
6. Path Properties
1. Click the “Create Path” icon in the toolbar, then click in the scene to add points.
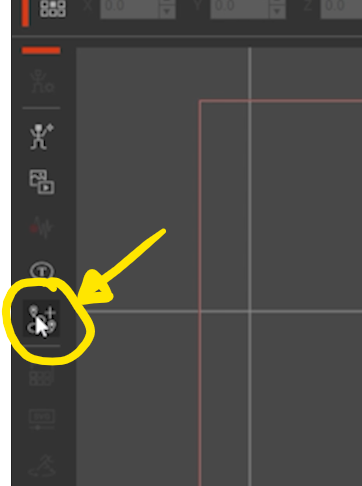
2. Click and drag to add Bezier handles for a smooth curve.

3. Press ESC when done. Reposition points and adjust the path as needed.
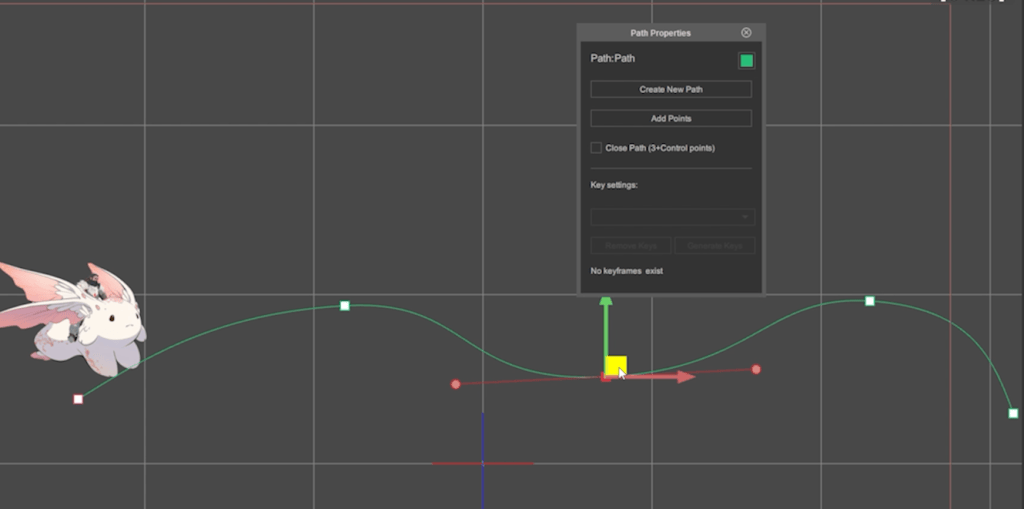
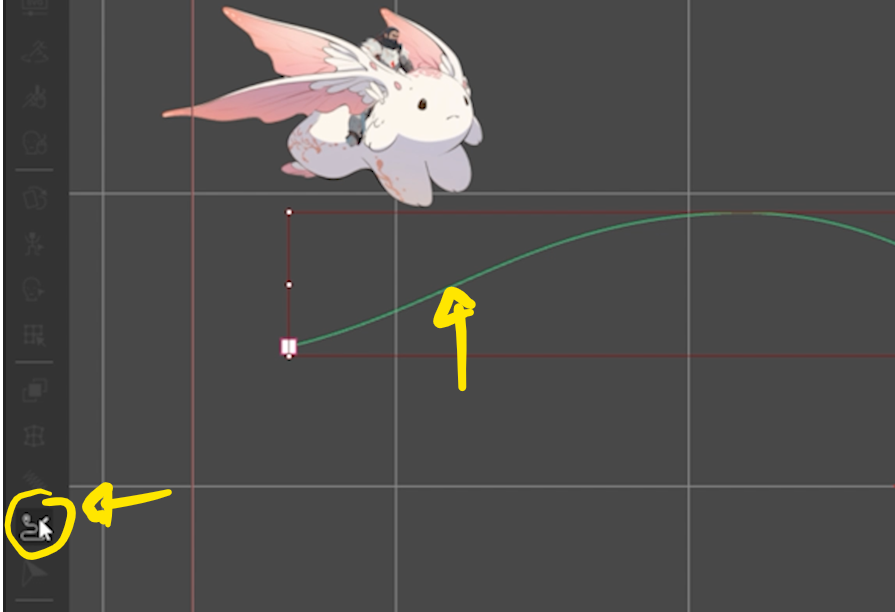
4. After selecting another object, reselect the path and click “Path Properties” to start editing.
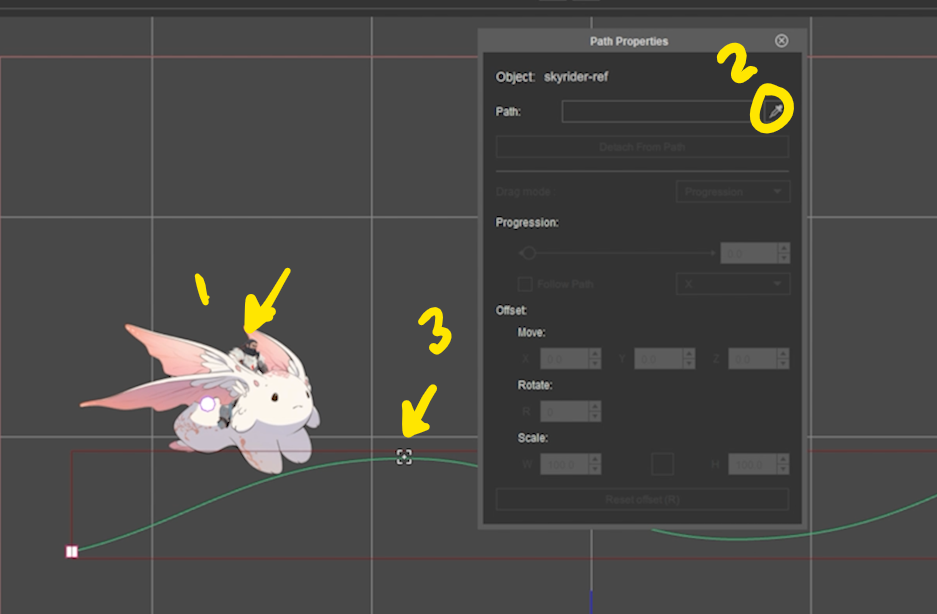
5. To animate a character along the path, select the character (1), click the Path Properties eyedropper tool (2), and then click the path (3).
6. To adjust the progression to move the character: Set progression to zero, advance the timeline, and set it to 100 to animate — now your character is moving along the path.

7. Spring Editor
1. To add springs, select the character, enter Composer mode.
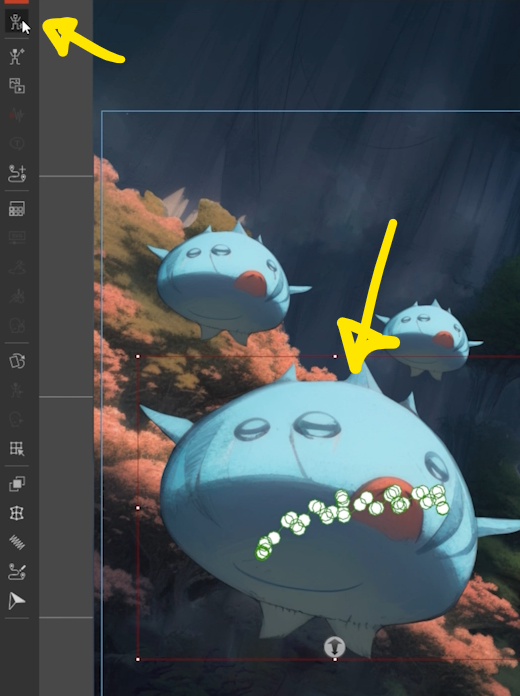
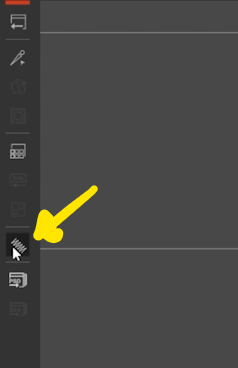
2. Click on “Springs” in the toolbar, and choose the target bone for adding spring effects.
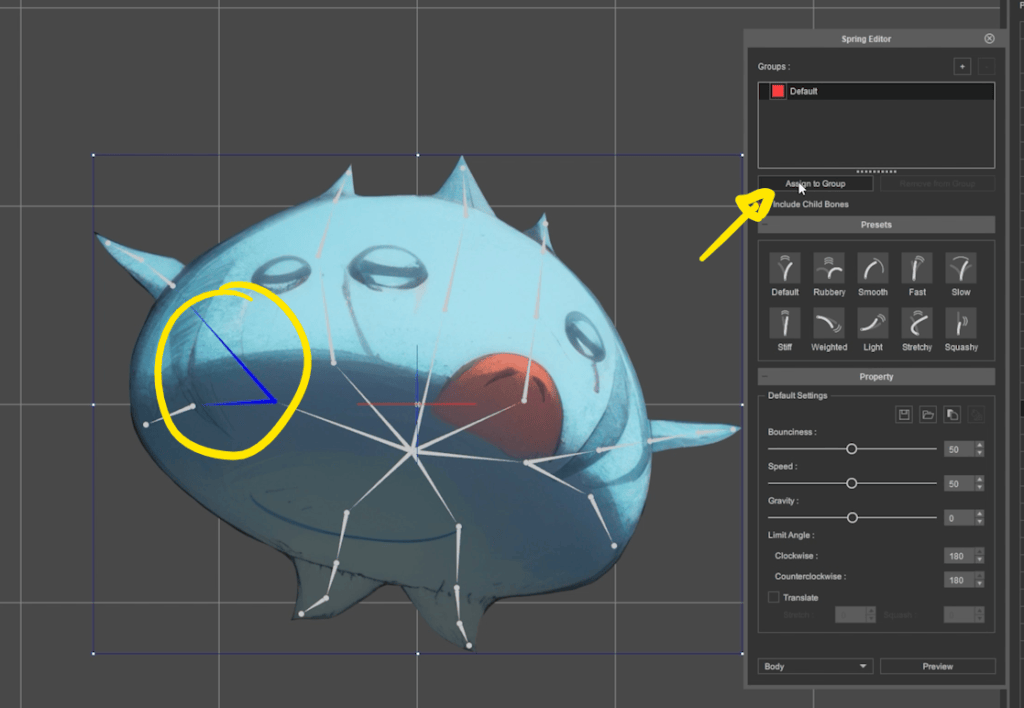
3. Select a bone and click “Assign to Group”.
4. Click “Preview” and move the character to see the springs in action. Continue adding springs to the group, previewing as you go.

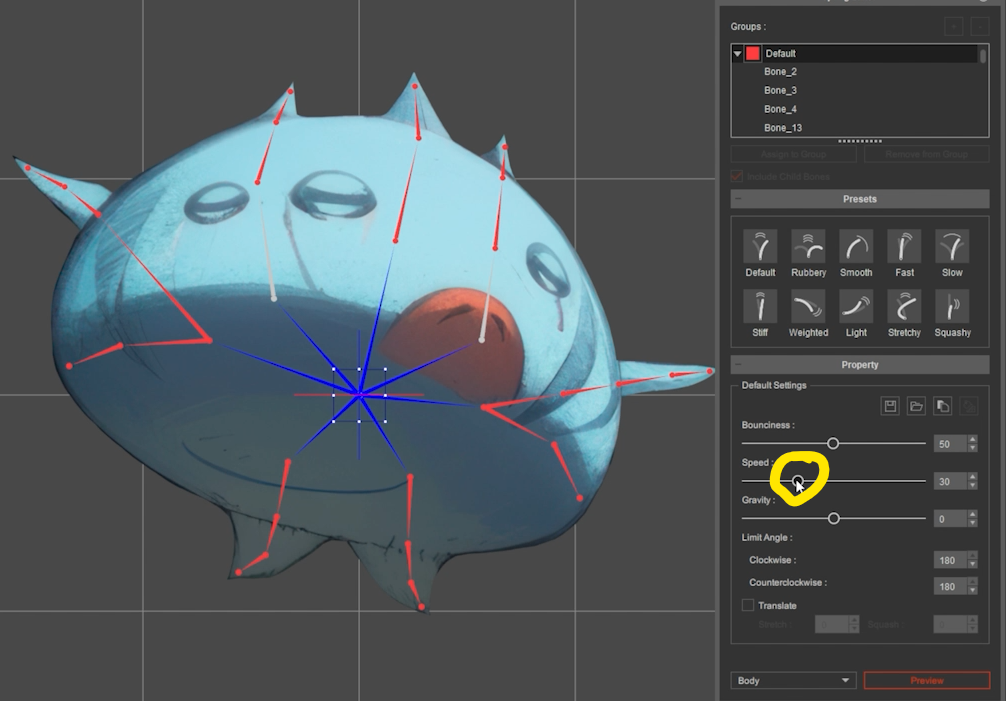
5. Adjust settings or presets as needed; for example, reduce speed to 30.
6. When done, stop the preview, close the editor, and return to the stage.
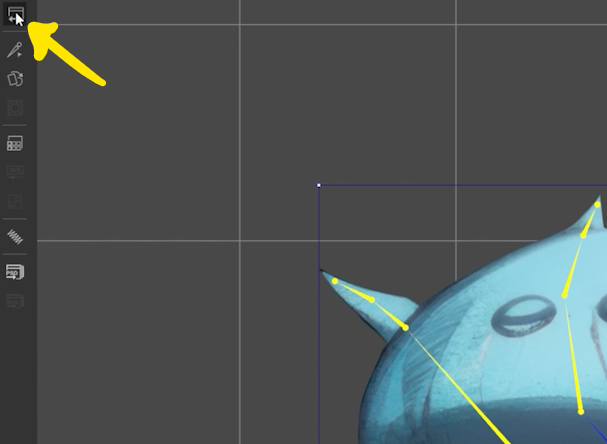
8. In-application vector color adjustments
1. First, select the character (1) and enter Composer mode (2).
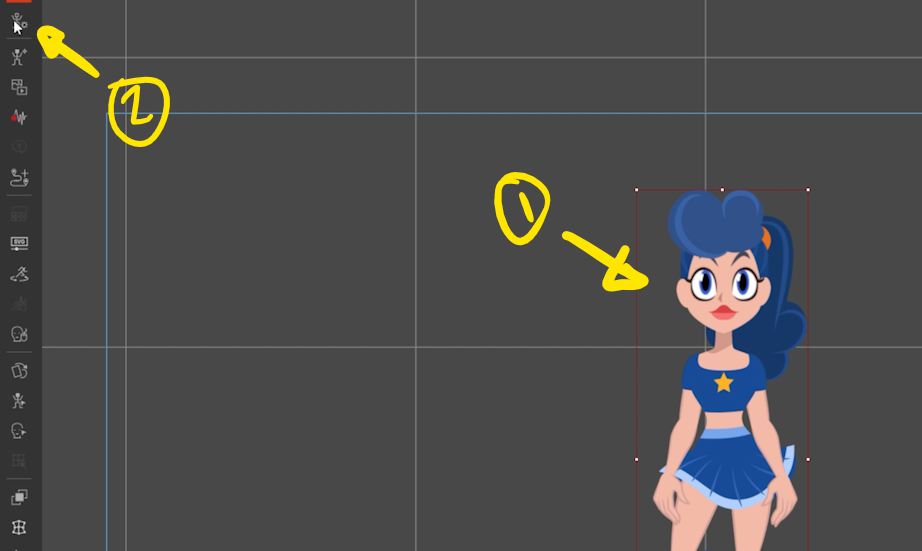
2. Set up group colors by clicking the icon and choose to group by part or color sets.
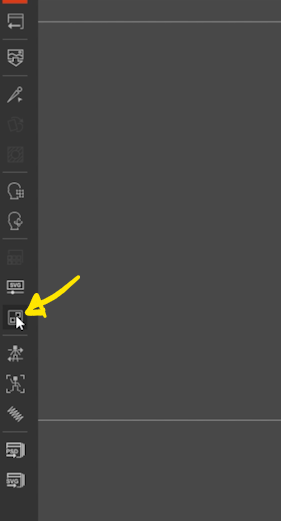
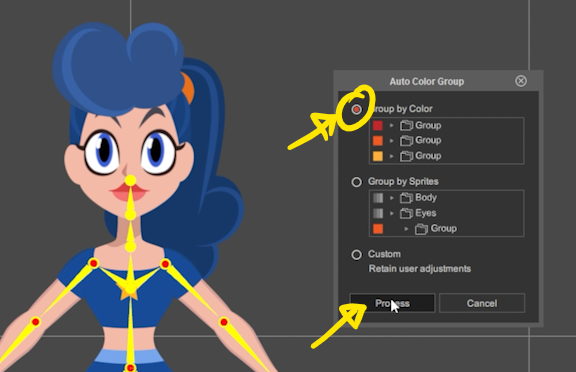
3. For example, to change a dress from blue to red, click “Auto Color Group”.

4. Select “Group by Color”, click “Process”, and “Okay”.
5. Close the window; and in the toolbar, click on “Adjustments”.
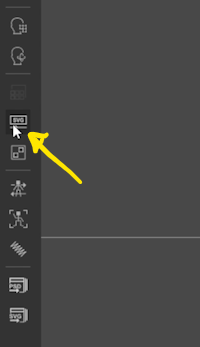
6. Click on the blue skirt to make it blink. This indicates that the blue colors are selected.
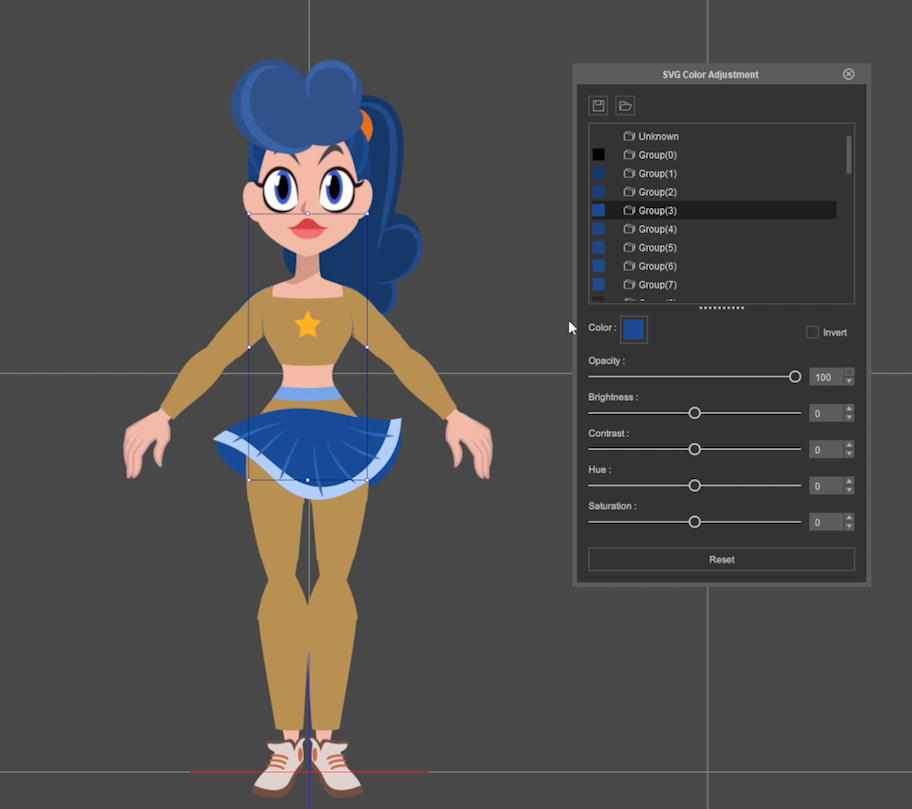
7. Proceed to change the color.
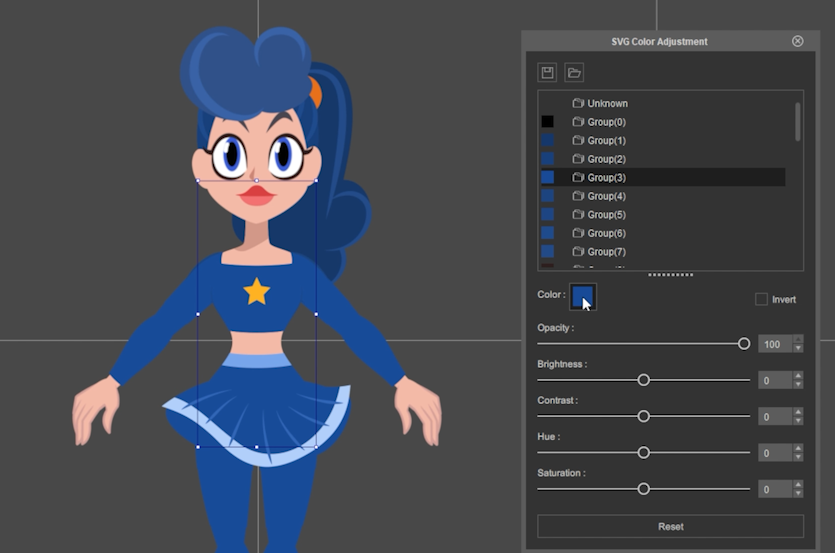
8. Select red, and click “OK”.

9. Repeat the steps for all the blue elements, in order to turn them red. Recolor the entire dress to complete this lesson.

Learn More
2D Animation Software for Cartoon Maker | Cartoon Animator
FREE for 30 days & get 1,700+ ready-made assets:
2D Animation Software Download | Cartoon Animator





1 comment
Hey Mark! What a magnificent set of “shorts”. Thanks, Cheryl Brown