

Jaaziah
Hi everyone! I’m Jaaziah, a 3D Character Artist. In this mini-tutorial, I’ll be showcasing the workflow for posing a ZBrush character I used for creating my Space Pirate creature from “The Extra Mile” tutorial course.
When I started the course, my goal was to create a character that could exist in the same universe as Kudu, The Clever Repairer, created by Pablo Munoz Gomez for the course. This meant achieving a realistic style by sculpting in ZBrush, texturing in Substance Painter, posing in Character Creator 4, and using ZBrush Pose Tools all of which I will showcase in this article.

Sculpting
Heavily referencing the 2D concept for my pirate, I started with a blockout in ZBrush, prioritizing the character’s silhouette. I used ZBrush sculpting tools to extract many of the clothes and accessories, and utilized ZRemesher and ZModeler to create clean details. Additionally, I enhanced my character’s costume with a variety of sci-fi kitbash assets.

Re-topology & ZRemesh
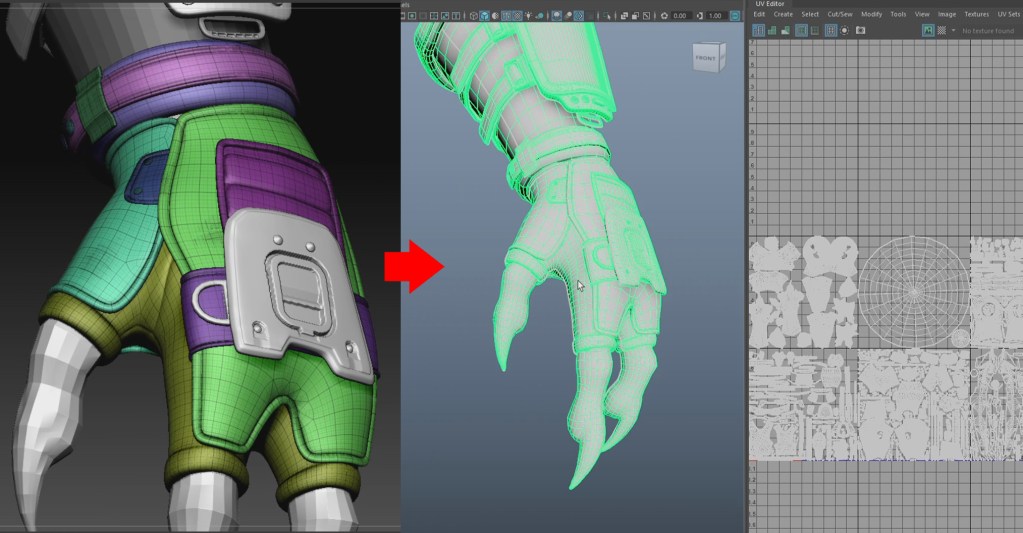
Before importing our character into CC4, we need to ensure the 3D model has proper topology for smooth animations. The model should have enough quads for smooth deformations but not so many that it becomes too intensive for CC4 to handle. I used ZRemesher to create low-poly subtools for my character, which I then imported into Maya. In Maya, I further reduced the quad count by deleting unnecessary edge loops and UV unwrapping the meshes.
Baking & Texturing
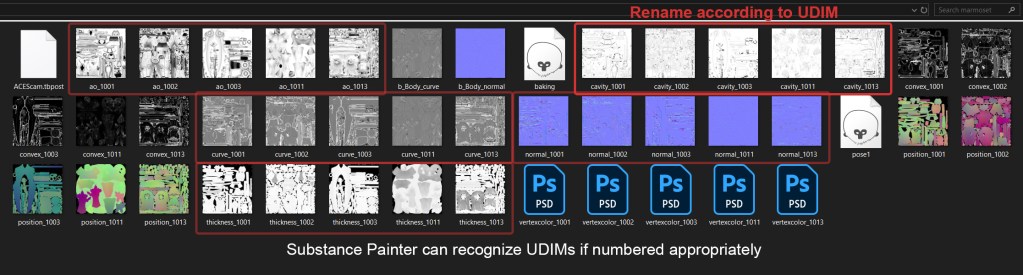
I used Marmoset Toolbag 4 for baking, as it allows me to manually paint the offset and skew the baking cage to eliminate baking errors. The more tedious step is manually renaming all of the baked maps to their corresponding UDIMs so that Substance Painter can recognize them properly.
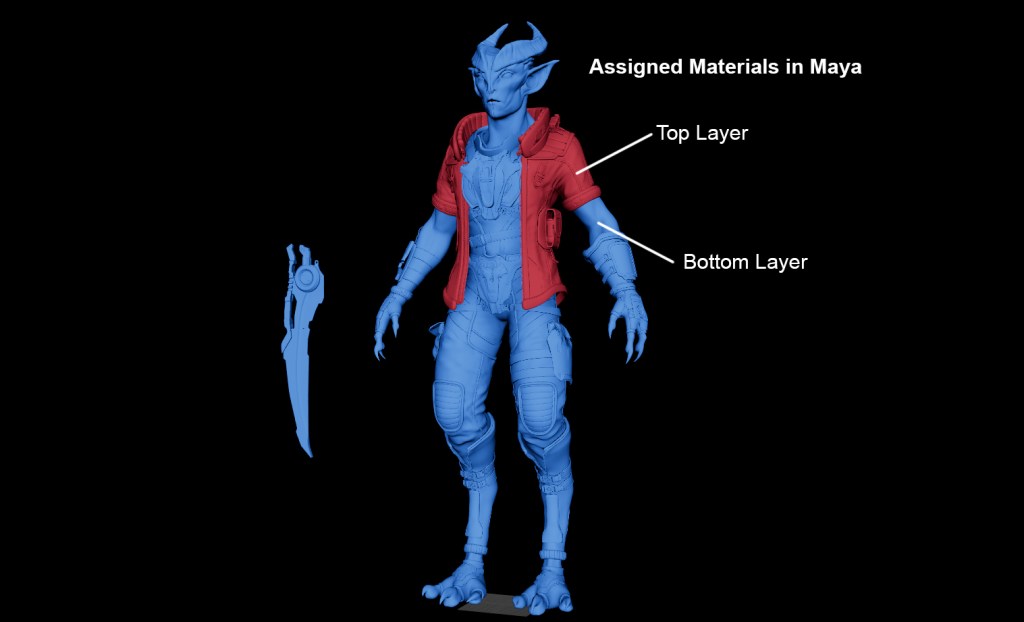
To simplify the texturing phase, I assigned two materials to the character: one for the jacket and one for the rest of the character. This allowed me to hide the jacket layer and properly texture the materials underneath.
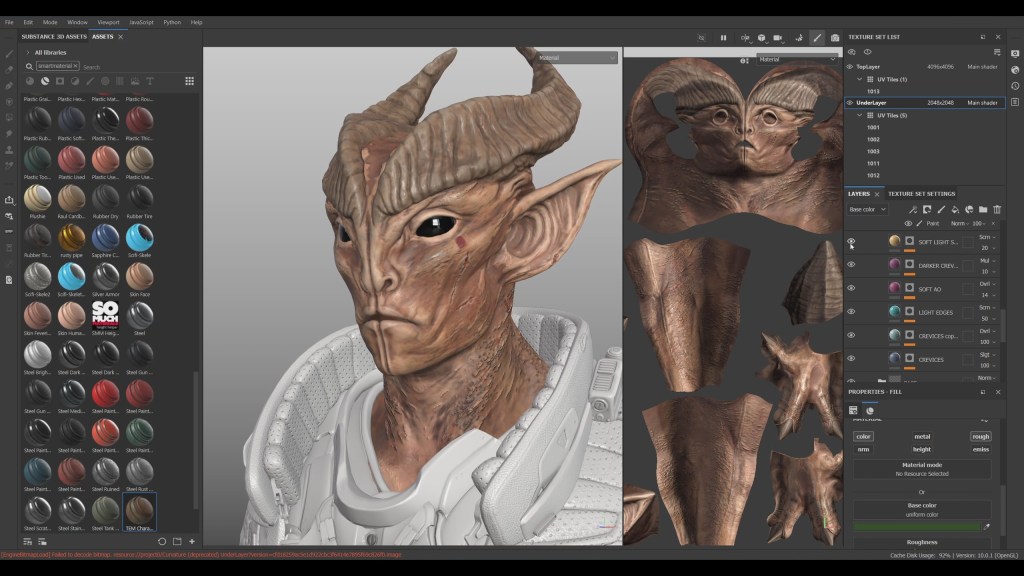
After this, I exported the model and baked maps into Substance Painter and began a PBR texturing workflow. To achieve a realistic look, I referenced real-life clothing and creature skin to replicate intricate details like dirt on clothing and wrinkles and scars on the skin.
To make the texturing phase a lot easier, I used many smart materials I’ve collected over the years from high-quality packs by various artists. For the skin, I used a “Creature Skin” smart material provided by Pablo in “The Extra Mile” course, which includes settings for veins, skin color variation, and bumps.
Posing in Character Creator 4 (CC4)
To efficiently transfer our retopologized model from ZBrush to CC4, we need two plugins: ZBrush Pose Link for CC4 and ZBrush Pose Tools in ZBrush.

Rigging in CC4 is a straightforward, step-by-step process. To simplify joint placement, I hid the jacket and set the leg joints to tip-toe. I then generated a three-fingered skeleton and placed the joints accordingly. Next, I selected the meshes that needed to deform during animation, leaving others as non-bending accessories. I pressed “Bind Skin,” which might take some time depending on mesh density. After just 10 minutes of work, I ended up with a fully rigged character, ready for posing.
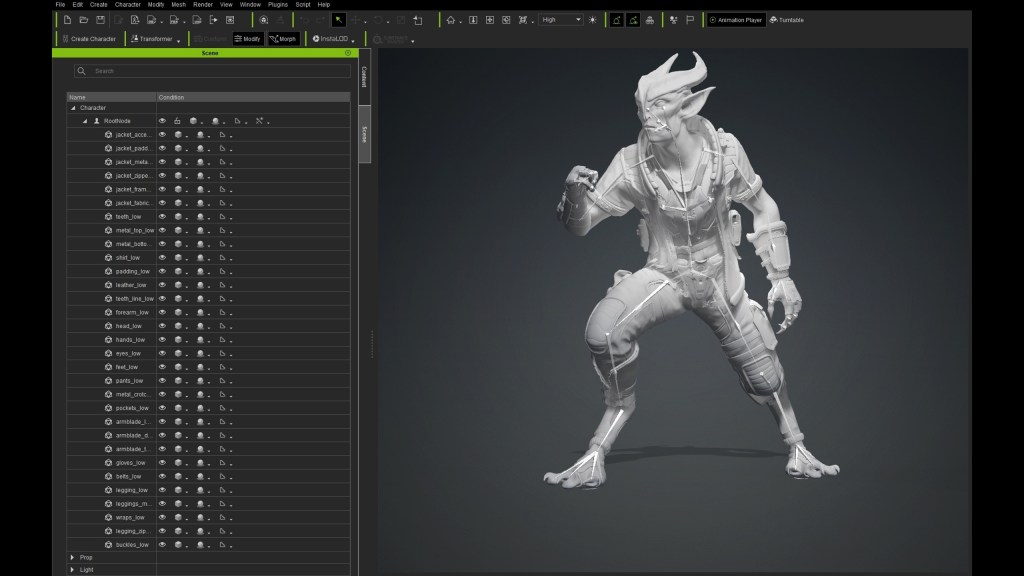
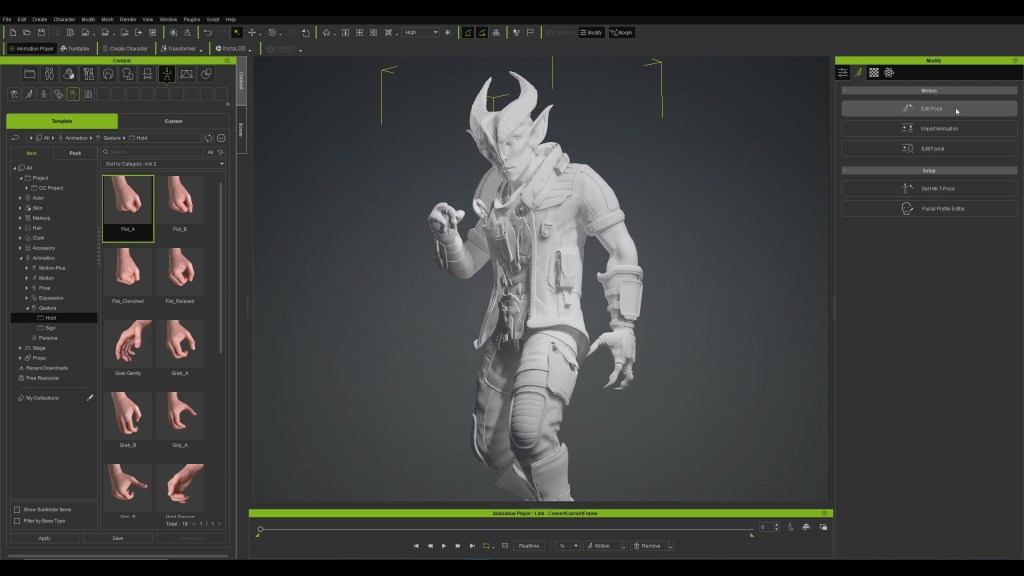
For this character, I’ll be using the “Raging Orc” animation pack, as its barbaric style complements the Space Pirate’s personality.

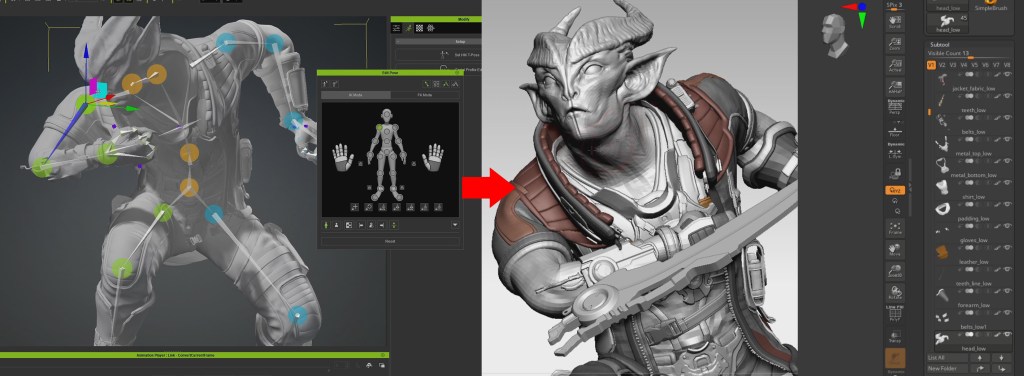
I explored the animations and selected a frame, then further edited the pose to my liking. I pressed “Record New Pose” in the Pose Tools plugin before sending the mesh back to ZBrush. Since I didn’t import the armblade into CC4, I can adjust it in ZBrush.
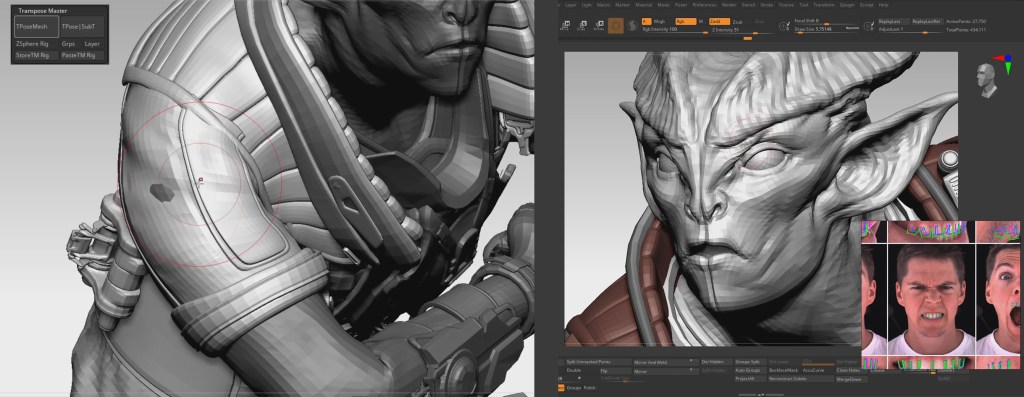
Once back in ZBrush, I can easily correct any errors by pressing the “Edit Current Pose” button and using the move brush. This feature is very useful for correcting issues when weight painting becomes too tedious in CC4 or for exaggerating certain shapes of your character.
Thanks to CC4’s efficiency in creating new poses, I crafted five different poses to showcase the character’s sneaky yet aggressive personality. In ZBrush, I utilized the T-Pose mesh feature to edit multiple subtools simultaneously, which was especially useful for the jacket due to its multiple subtools. I also used facial references to add expressions to the character, such as anger, characterized by furrowed eyebrows, flared nostrils, and a clenched jaw.
What I appreciate about CC4 is its extensive library of hand signs and gestures, which is a massive time saver for me. Looking back, these five poses took about half a day to complete, even though I had to manually touch up some meshes that were deforming or overlapping incorrectly. Overall, CC4 is the best software for posing characters efficiently.
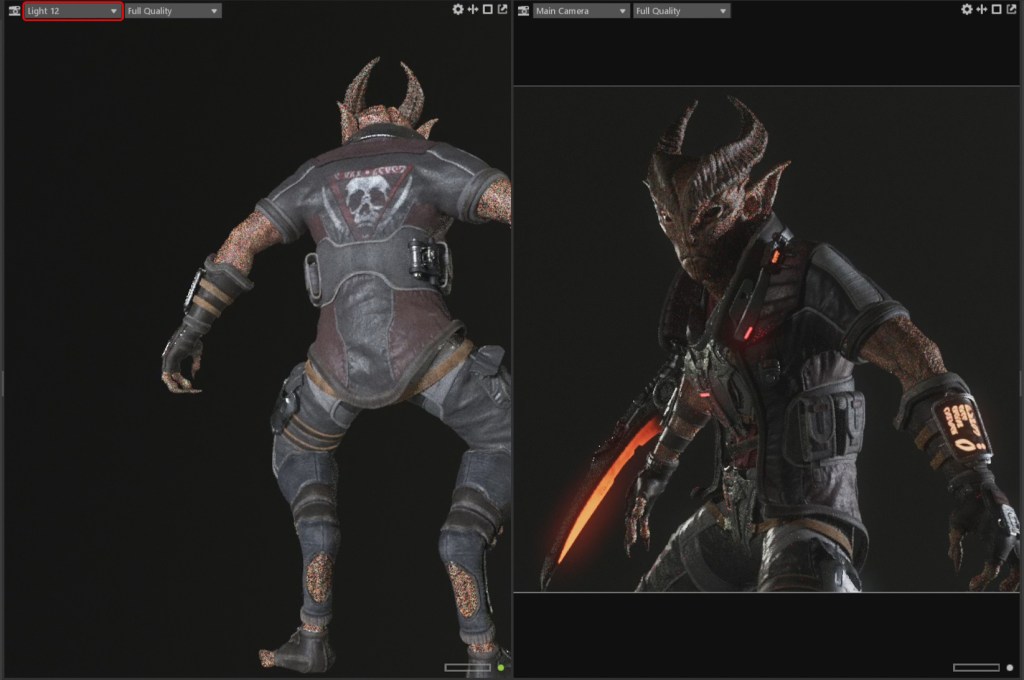
Once I was satisfied with the poses, I exported the entire model from ZBrush and imported it into Maya to assign unique materials to each UDIM, as Marmoset Toolbag 4 currently does not support UDIMs. After assigning the materials, I exported the model to Marmoset Toolbag 4 for lighting and rendering.
Lighting
The quickest yet most crucial part of the character creation workflow is lighting and rendering, as beauty shots significantly enhance the quality of your portfolio. The best method is 3-point lighting, achieved by combining HDRI with point lights. To easily adjust the point lights, I select them directly in the viewport, allowing me to move them as if they were a camera. I recommend using no more than 2 or 3 point lights in addition to your HDRI, as adding too many lights can quickly make the lighting appear artificial.
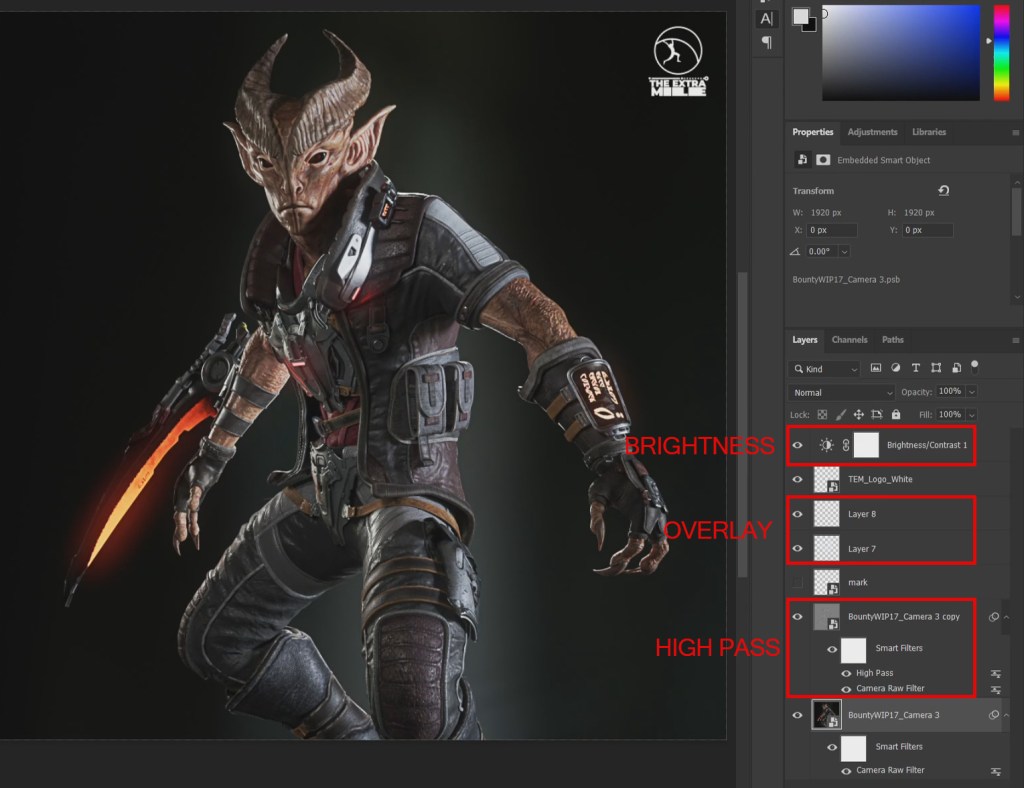
After that, I imported the raw renders into Photoshop, applied a High Pass filter, and used overlays to brighten key areas such as the character’s face. These adjustments help make your portfolio stand out among other character artist portfolios.
Conclusion
This concludes my showcase of the Space Pirate creature character. I’d like to thank Reallusion for recognizing this character and providing me the opportunity to share my workflow. I hope you found my process helpful for your own character creation journey.
Related Posts
- 3D Sculpt of Street Fighter Cammy: Power posed with ZBrush Pose Tools and Character Creator
- Masterful Poses in ZBrush with Character Creator Advanced AccuRIG and Pose Tools
- The Making of Miles Morales | Transforming 2D concept into 3D model with Character Creator ZBrush Pose Tools
————————————————————————————————————————————————————————————
The original article was written by Jaaziah and is also featured on 80 Level.



1 comment
Very cool! Nice work.