Rafael Benedicto
Hi everyone, I’m Rafael Benedicto, a freelance 3D character artist. I’ve worked on indie game projects and small film productions, while also honing my skills through personal projects for my ArtStation portfolio. My passion for 3D art started in childhood and I began my career as a generalist, creating everything from props and vehicles to buildings and hard-surface models. Eventually, I found my niche in character creation, focusing on hyper-realistic portraits that often get mistaken for photographs. This led me to discover Character Creator and its potential in enhancing my workflow.
In 2020, I won first place in Reallusion’s Digital Human contest with my piece, “Scout Annie”, a pivotal moment that elevated my standing as a 3D character artist.

Currently, I’m working with a startup game studio, Knightly Works, designing Dark Souls-inspired characters for their upcoming indie game, Skars: Rise of the Last Keeper.


In this article, I’ll demonstrate how I used Reallusion’s Auto-Setup plugin for 3ds Max to quickly import and set up a CC4 character for rendering with V-Ray. I’ll be showcasing the Last Keeper, the main character from the Skars project for the entire process.
Before diving into Auto-Setup, I’ll start with a quick overview of how I brought this character to life — transforming a concept illustration into a fully-realized real-time character in CC4, and ultimately preparing it for stunning V-Ray renders in 3ds Max.
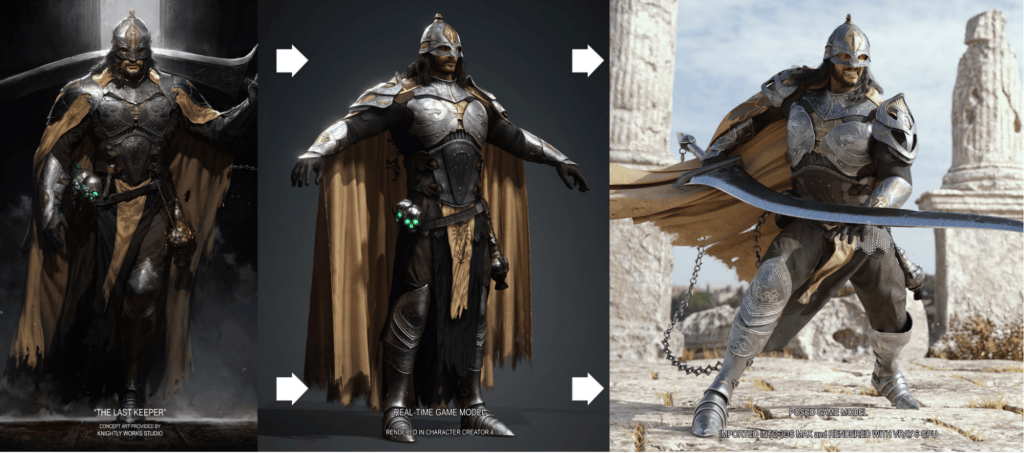
Character Creation
I began by creating the base model in Character Creator 4, designing his face and body to match the concept art.

Next, I used GoZ Plus in Character Creator 4 to easily transfer the character to ZBrush, where the armor and clothing was subsequently modeled.


After modeling each armor group, I used Topogun along with ZBrush’s ZRemesher feature to create low-poly versions of the parts. Then, I utilized RizomUV for unwrapping before importing them back to Topogun to bake the normal and ambient occlusion maps. These maps became integral to the texturing process in Substance 3D.
Once the texturing was complete, the armor was imported into Character Creator and fitted onto the base character as an accessory or clothing piece. Below is a simplified flow chart, using the helmet as an example, illustrating the process from ZBrush to the final piece in Character Creator 4.
The garment pieces like the pants, cape, and loincloth were made in Marvelous Designer, and were also textured in Substances Painter and imported into Character Creator to dress the character.

The hair I used was the “Long Curls” hair from a hair pack, but I altered it a bit so that the hair would fit into the helmet.

Finally, I transferred the skin weights from the body to the armor and clothing parts, ensuring they were skinned to the bones and could move in sync with the body.

After everything was prepared, I exported the entire character as an FBX file, and made sure that “3ds Max” was selected for “Target Tool Preset”.

Auto Setup for 3ds Max
With the Auto-Setup plugin already installed in 3ds Max, the first thing I did was open the “CC Auto Setup” window and placed it alongside the “Command Panel” to the right. I then loaded the FBX file that was exported from Character Creator, selected “Vray GPU” as my renderer, and clicked on the import button.
After 2-3 minutes, the character was imported along with its skeleton rigging and skin weights from Character Creator 4. All the materials from Character Creator 4 were also converted into Vray materials. With the original rigging and materials transferred and intact, I was ready to set up for final rendering.

Effortless Lighting and Look Development
The first task is testing the Look Dev presets on the Auto-Setup panel’s first tab. This tab features 10 preset buttons that automatically generate comprehensive sets of lights, along with a camera and background for the scene. To enhance usability, a dummy helper object is included, enabling easy rotation of all the lights in the scene simultaneously.

I experimented with various light presets but ultimately chose the first one, as I prefer a more subtle approach for this particular character.

As shown in these initial test renders, the materials for the armor parts look excellent. The colors, reflectivity, roughness, metallicity, and normal bumps all appear just right.
I conducted another render, and the skin finally appears bumpy. While I resolved the issue with the normal maps, I had to disable the Auto-Setup wrinkle system that activates when I change his facial expressions, which is unfortunate. After that, I put his helmet back on and continued testing.


Simplified Material Adjustments
Then, I moved on to the next tab in the “CC Auto Setup” window. This interface allows me to conveniently adjust the properties of the materials without needing to access the Material Editor. For instance, there are handy sliders for modifying subsurface scattering (SSS) intensity, normal intensity, roughness, and more. When I click on the character’s hair, the sliders in the material tab change to display settings relevant to hair. Conversely, clicking on the head mesh switches the settings in the tab to skin properties, and the same applies to the eyes, teeth, and tongue.

Unfortunately, not everything can be adjusted using the Auto Setup material sliders. For instance, there are no options for glowing pupils. As a simple workaround, I had to open the Material Editor and add a texture map to the self-illumination node for both eye materials to achieve the glowing effect.
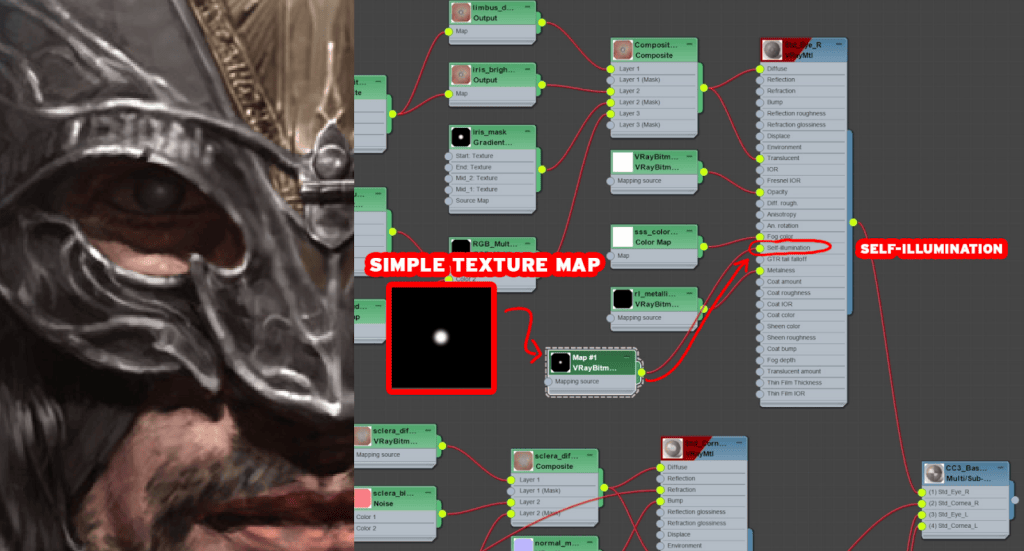
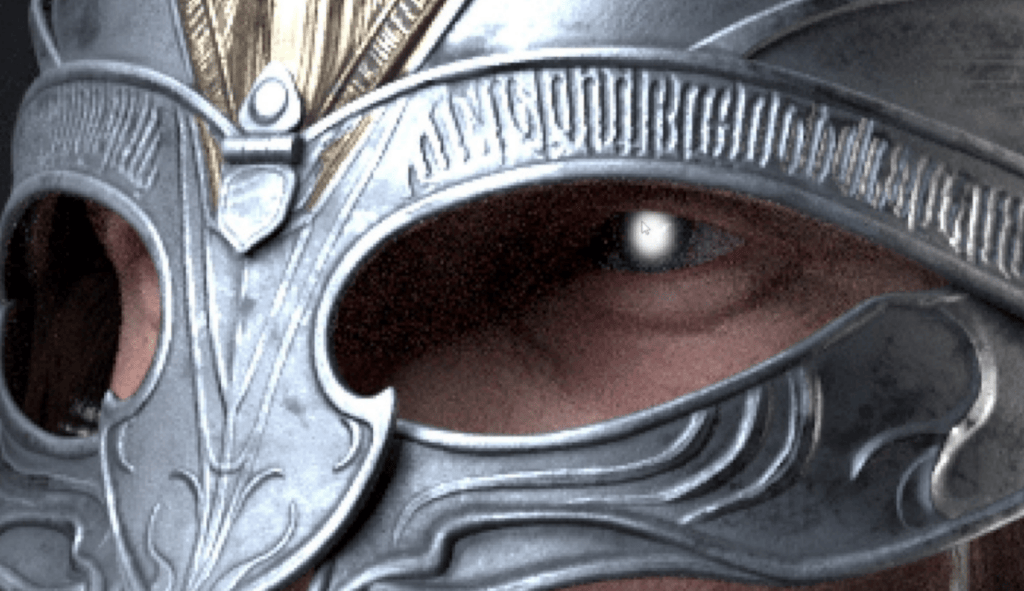
Now, the hair materials needed adjustment to eliminate those overly bright streaks. Fortunately, it was an easy fix with a simple setting of the roughness value to around 1.00 in the materials tab. The same adjustment was made to the facial hair.


Flexible Rigging with CAT System
Next, I wanted to focus on his pose; and to do this, I first needed to examine the character’s rigging and skinning. Because the character was pre-rigged in Character Creator, all I had to do was unhide all the objects to view the bones.
However, I prefer to use 3ds Max’s CAT rigging system for my workflow. In the Auto Setup window, I navigate to the “Body Rig” tab to create a CAT rig that overlays the existing bones.
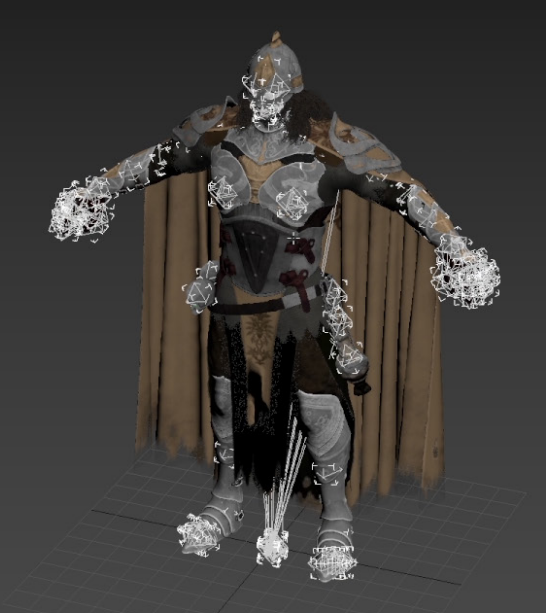
The CAT bones do not replace the regular bones; instead, the regular bones are linked to the CAT bones created on top of them. This means that when I manipulate the CAT bones, the regular bones follow, and consequently, the skinned parts follow as well. I just need to remember that if I want to adjust the skinning, the model is still skinned to the regular bones, not the CAT bones.

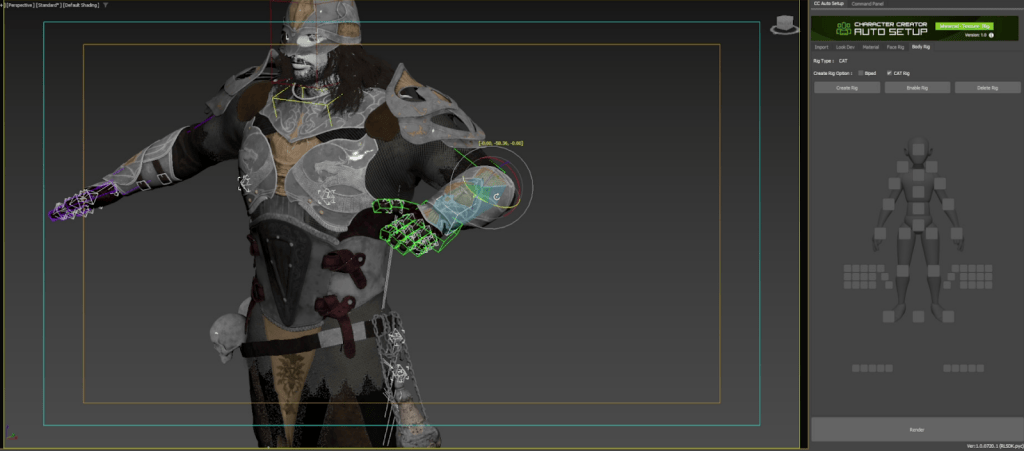
Here’s how I posed the character based on the game director’s input.

Facial Expressions Made Easy
Now that we have settled on a pose, the game director requested a facial expression. With the Auto Setup face rig controls, this process is straightforward. The import process for Auto Setup also includes all the facial morphs available in Character Creator. By navigating to the “Face Rig” tab, I can easily use the control panel to manipulate the individual regions of the character’s face and create the desired expression.
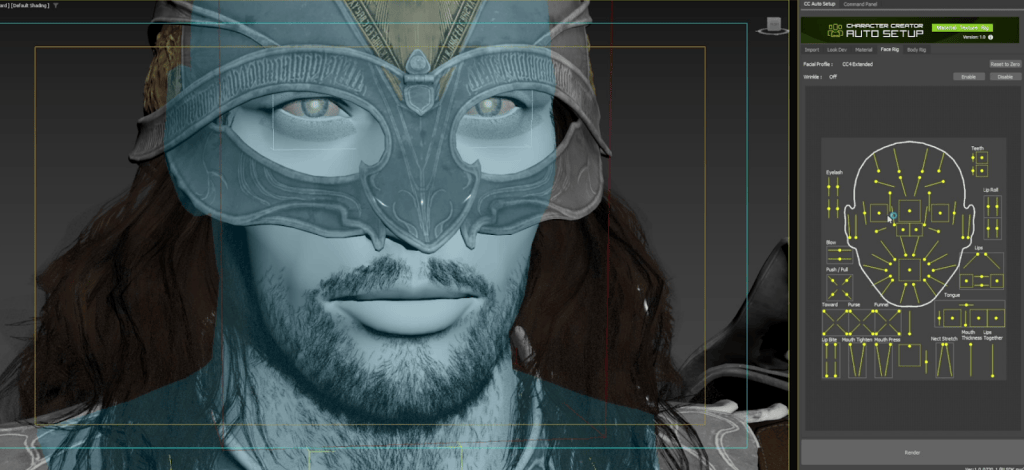

After conducting more test renders, I realized the hair quality was holding the entire piece back. Its awkward appearance was due to poor skinning, with excessive bending and various unappealing distortions. Afterall, there’s a limit to how realistic polygon-based hair can look in rendering.


When the skin looks this realistic, but the polygon-based hair cards don’t, it detracts from the overall realism of the rendered character. As much as I wanted to stick with the polygon-based hair cards to avoid extra work, I decided to replace them with Ornatrix hair for better results.
Finally, the cap and loincloth were remade with Marvelous Designer.


With the materials, pose, and expression finalized, I set up a dome light using HDRI lighting from PolyHaven.com. I also created the environment in 3ds Max and ZBrush, followed by additional test renders.
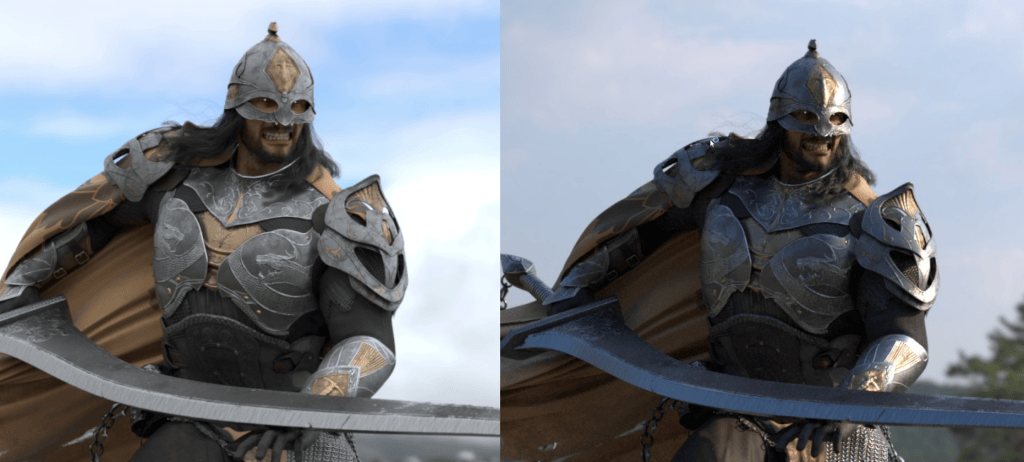
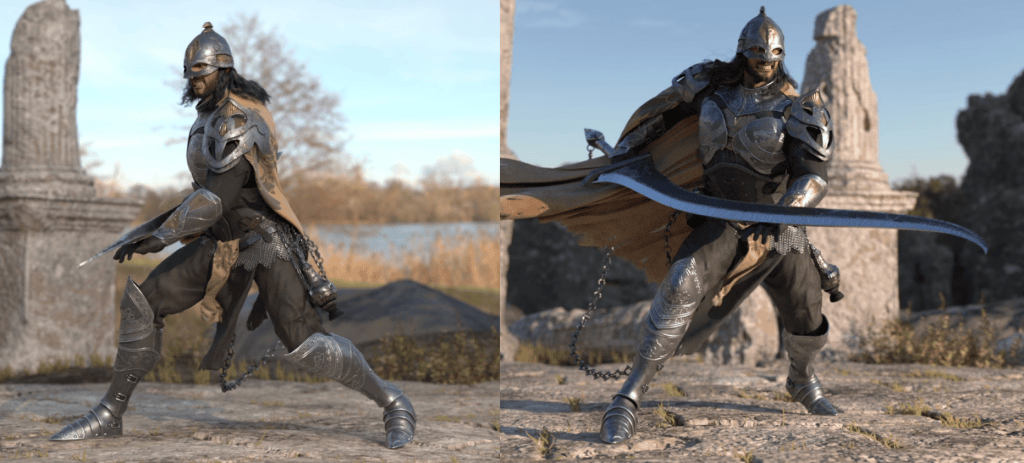
Once the game director approved the setup, I proceeded to render the final turntable and close-up shots.


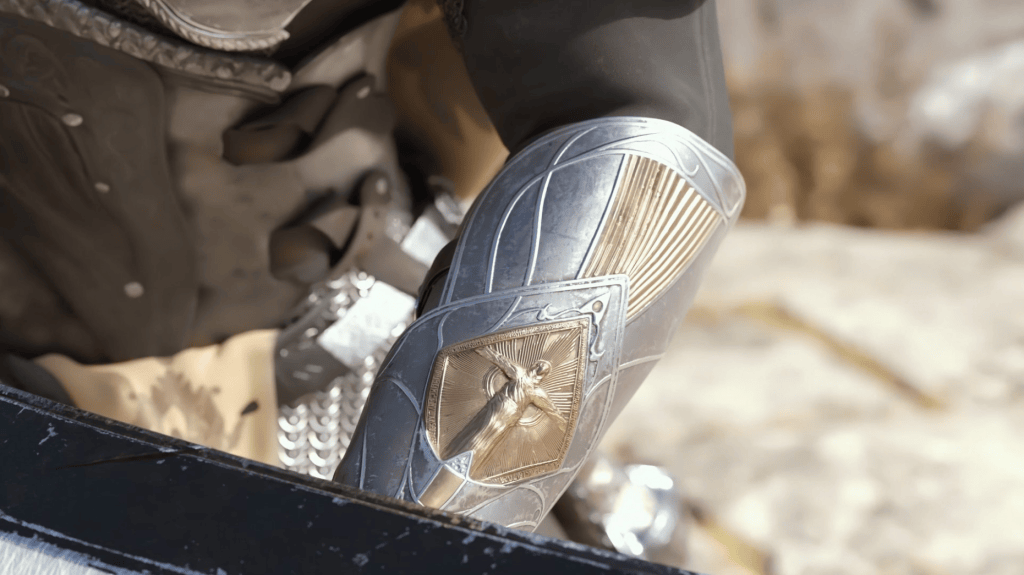
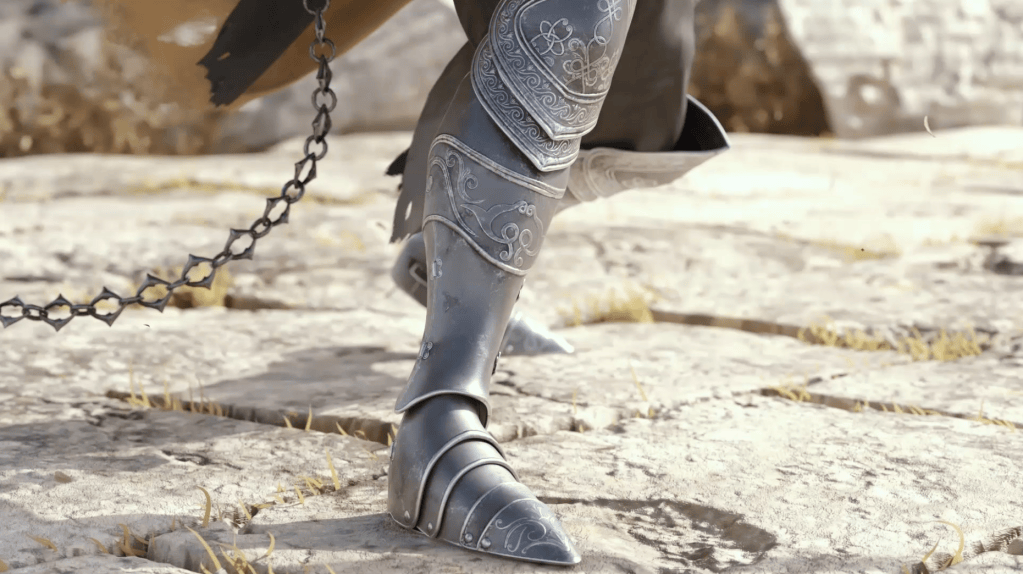
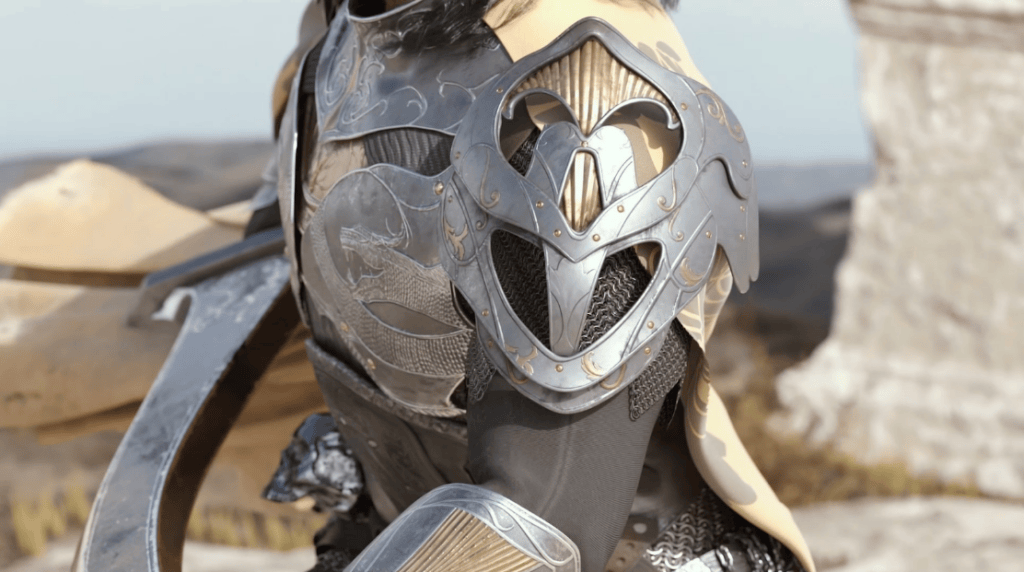
Here are the final shots.

Final Thoughts
The Auto-Setup plugin was a huge time-saver for this project. While it doesn’t make everything perfect automatically or act as a complete solution for importing from CC4, it significantly streamlined the process. I still had to adjust parts of the CAT rig, like adding twist functions to the arm and leg bones, and I spent time tweaking materials in the editor to improve their look. In short, there was still plenty of work to be done.
What Auto-Setup excels at is handling the initial setup — materials, rigging, and other technical details — in just a few clicks. It saved me days of work, allowing me to jump quickly into the creative phase, like posing the character, adjusting expressions, and fine-tuning skin and hair materials.
In terms of reliability, Auto-Setup was stable throughout the project. I didn’t encounter any crashes caused by the plugin, which made the process even smoother. If you haven’t tried Auto-Setup yet and you are in the situation of spending days setting up everything manually in 3ds Max before getting to the creative part — like me in the past — I highly recommend it. It’s a free plugin available for download on Reallusion’s website or through the Reallusion Hub.
Thanks for reading! I hope you found this article helpful. A big thanks to Reallusion for sponsoring my showcase, and special thanks to my client at Knightly Works for allowing me to use their character for demonstration.


Related Posts
- Multiple Poses for League of Legends Character: The Making of Dragon Sorceress Zyra
- Free Auto Setup for 3DS Max | iClone 8 & Character Creator 4