ÓSCAR FERNÁNDEZ / DIGITAL SCULPTOR
Óscar Fernández is a freelance digital sculptor from Spain, specializing in creating figures for 3D printing. With deep expertise in ZBrush, he is known for crafting highly expressive characters that capture both personality and motion. His work stands out through the meticulous attention to facial expression, muscle definition, and dynamic posing, giving each sculpt a strong sense of tension and storytelling power.


Overview
Character Creator 5 (CC5) continues to expand its creative ecosystem with the addition of new free plugins that streamline workflows with leading industry tools. One of the latest integrations, Auto Setup for Marmoset, makes it easier than ever to render and showcase your characters with professional quality.
In this article, we’ll take a closer look at how Marmoset Toolbag—and specifically Marmoset Viewer—can enhance your CC5 projects. From real-time rendering to interactive presentation, we’ll explore how these tools work together to bring your creations to life with both speed and style.

Setting Up Our Scene
We’ll start by setting up the scene: importing the mesh using Auto Setup for Marmoset, applying its materials, and adjusting the lighting, camera, and post-processing effects, just as we did in the previous video.
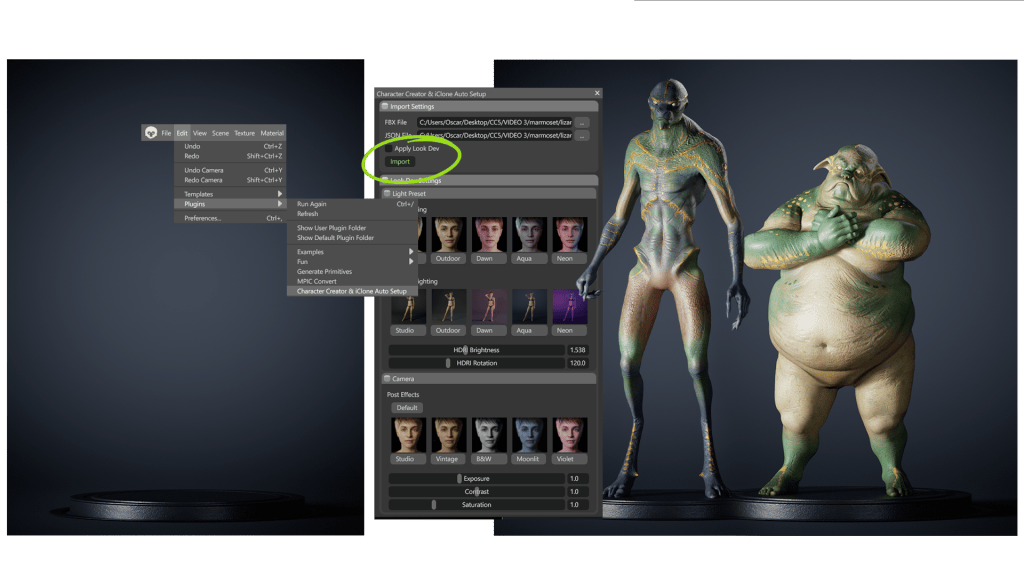
It’s important to keep in mind that Marmoset Viewer is designed to run smoothly on a wide variety of devices, so there are some limitations. For example, shadow-casting lights are limited to three (you can use more lights, but only the first three will cast shadows), omni lights don’t cast shadows, and certain shading models, post-processing effects, and rendering features are not yet supported.
We’ll make sure the camera is centered to make navigation and scene rotation easier. Usually, to do this, we select the main mesh and go to View → Frame Selected (Ctrl+F).
Export the .mview File
To export the .mview file, go to File → Export → Viewer, or simply press Shift + Ctrl + V.
You can also add artist credits and a link to your portfolio by filling out the Title, Author, and Link fields.
As you’d expect, the texture quality setting has a significant impact on the file size. Here you can choose between Low, High, or Unreasonable quality — a very fitting name for this viewer’s purpose, corresponding to 4K textures.
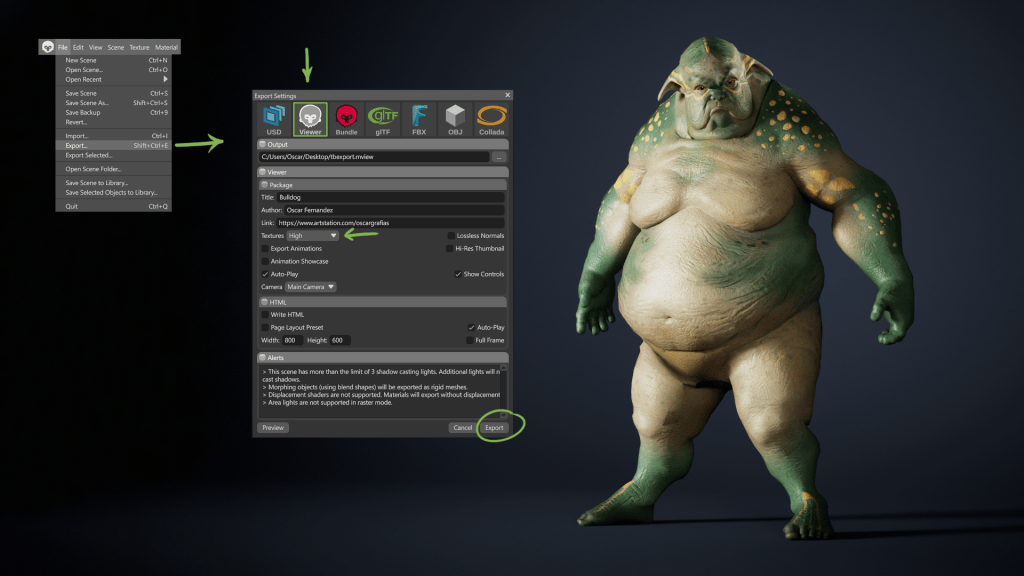
Once everything is ready, just click the Export button to generate the file.
After exporting, you can view the file locally using Marmoset Viewer, which is installed for free alongside Marmoset Toolbag, but can also be downloaded separately from the Marmoset website.
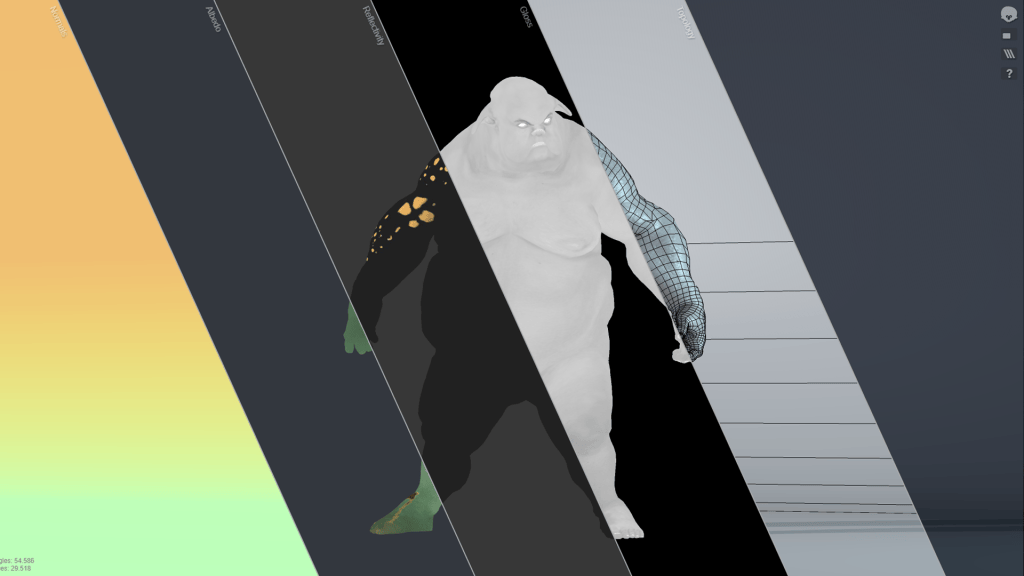
Once opened, you can switch to full-screen mode and also isolate different layers such as normal maps, color information, roughness, metalness, and mesh topology independently — all with the advantage of being able to view your model in real-time 3D.
Upload to Artstation
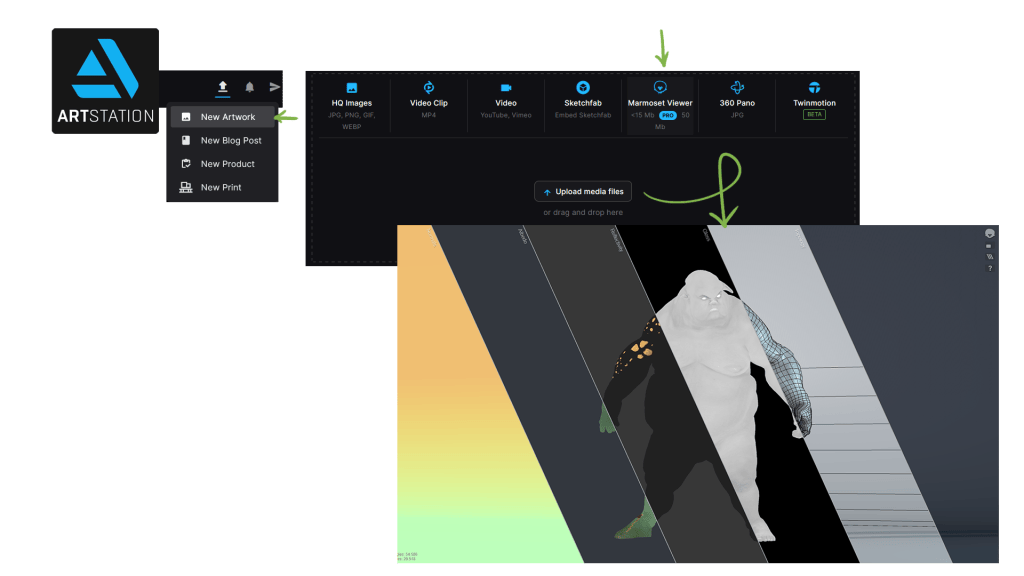
This same file can be shared directly on several 3D communities, such as ArtStation, just as easily as adding an image to a new project, and with the same viewing advantages we saw earlier.
Embedding On Our Website
When exporting, you can also choose the HTML option. Once you’ve defined the size and a few additional parameters, you can hit Export. However, if you’re going to embed the viewer inside an iframe, it’s important to select Full Frame. This way, Marmoset Viewer will ignore the height and width values and automatically fit the iframe size.
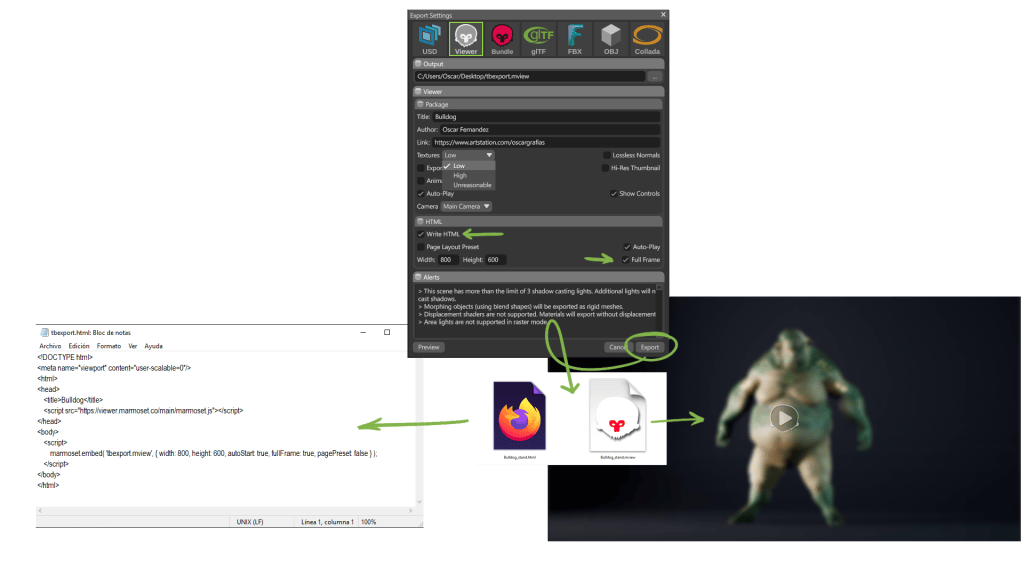
This will generate a simple HTML file that displays your scene. It’s very handy if you want to embed or showcase the scene on your personal website. You’ll just need some basic HTML knowledge, but it’s very straightforward.
I’ve created this super simple HTML file, and we’re going to embed the code by simply copying and pasting it where we want:
<iframe src="yourscene1.html" allowfullscreen="true" height="467" width="830"></iframe>
We replace the example HTML with our own file, adjust the iframe dimensions, and that’s it!
Keep in mind that for this to work, the file must be uploaded to a server, since it won’t display correctly when viewed locally. Another very interesting option is to create a gallery on your own website.
We’ll create a pose for each character in Character Creator to give them a bit more personality, export each one as FBX files (as we already know how to do), and then load them into Marmoset using the Auto Setup plugin, on a previously configured but empty scene — just like we did in the previous video. Finally, we’ll export a Marmoset Viewer (.mview) for each character using the HTML export option we just saw. We’ll also render some images of each character to use as thumbnails for our gallery.
Using the same template as before, we’ll copy the following base code:
<iframe src="yourscene1.html" name="viewerframe" allowfullscreen="true" height="467" width="830"></iframe>
Here, we can assign any name we like — in this case, “viewerframe”.
We replace the example HTML with the scene we want to display by default, make sure allowfullscreen is set to “true”, and define the viewer size. To create clickable thumbnails, we’ll copy the following code:
<a href="yourscene1.html" target="viewerframe"><img src=" yourscene1.jpg" alt=" yourscene1"></a> <a href=" yourscene2.html" target="viewerframe"><img src=" yourscene2.jpg" alt=" yourscene2"></a> <a href=" yourscene3.html" target="viewerframe"><img src=" yourscene3.jpg" alt=" yourscene3"></a>
Replacing each HTML reference with one of our own. Make sure that the target matches the name we defined earlier (viewerframe) and replace the images with our custom thumbnails.
I’ve also added a stylesheet to the gallery to make it look a bit more modern and appealing — and this is what the final result looks like once uploaded to our website.
<style> .gallery-section { display: flex; flex-direction: column; align-items: center; /* aling iframe horizontally*/ gap: 10px; /* space between the iframe and the thumbnails */ margin-top: 20px; } .thumbnail-bar { display: flex; justify-content: center; /* center the thumbnails */ flex-wrap: wrap; /* allows them to go down the line if there are many */ gap: 10px; /* space between images */ } .thumbnail-bar a img { width: 295px; /* thumbnail size */ height: auto; border-radius: 8px; cursor: pointer; transition: transform 0.2s, box-shadow 0.2s; } .thumbnail-bar a img:hover { transform: scale(1.05); box-shadow: 0 0 10px rgba(0,0,0,0.3); } iframe { border: none; border-radius: 12px; box-shadow: 0 0 20px rgba(0,0,0,0.3); } </style>
And finally, this is the part of the code connected to the style sheet:
<div class="gallery-section"> <iframe src=" yourscene1.html" name="viewerframe" allowfullscreen height="600" width="900"></iframe> <div class="thumbnail-bar"> <a href=" yourscene1.html" target="viewerframe"><img src=" yourscene1.jpg" alt=" yourscene1"></a> <a href=" yourscene2.html" target="viewerframe"><img src=" yourscene2.jpg" alt=" yourscene2"></a> <a href=" yourscene3.html" target="viewerframe"><img src=" yourscene3.jpg" alt=" yourscene3"></a> </div> </div>
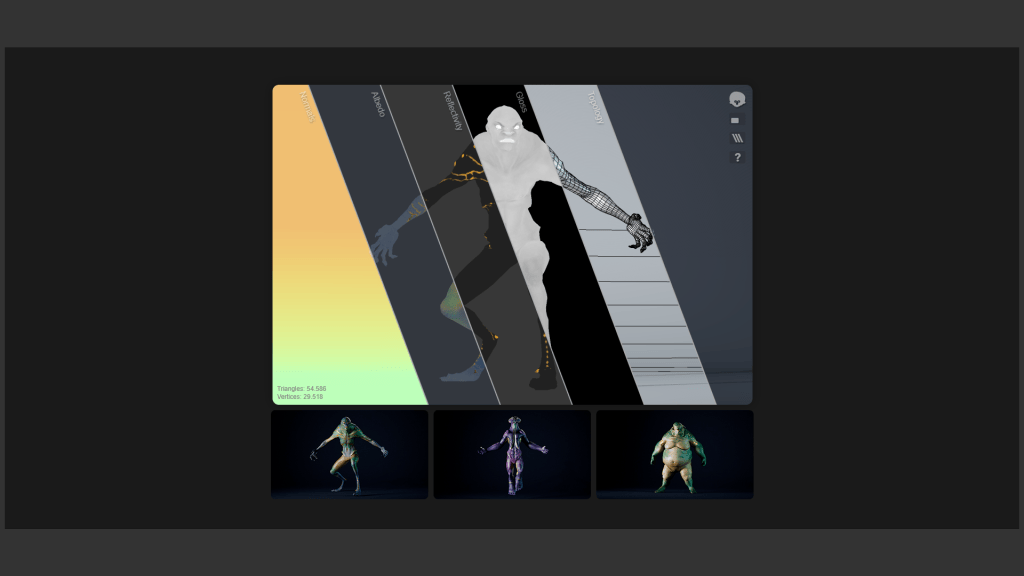
I hope this tutorial has helped you enhance your project presentations using the new tools in Character Creator 5.
Related Posts
- Breathe Life into Your CC5 Characters with Marmoset Toolbag Auto Setup
- From Concept to Motion-Ready Alien Character: ZBrush and CC5 HD Step-by-step Workflow
- Mix Custom Aliens Into Infinite Characters with CC5 ActorMIXER Pro
- Auto setup for Marmotset Toolbag online manual