
Character Creator 5 dramatically improves the workflow for fast character iteration, stylization, and asset customization. It’s now paired with an even smoother HD GoZ pipeline all the way to Marmoset Toolbag rendering.
This article is the first in a seven-part series, where we break down a complete CC5 → ZBrush → Substance Painter → Marmoset Toolbag 5 workflow for creating high-quality sci-fi characters. Each chapter focuses on a different stage of the pipeline, and together they form a full production-ready guide for artists.
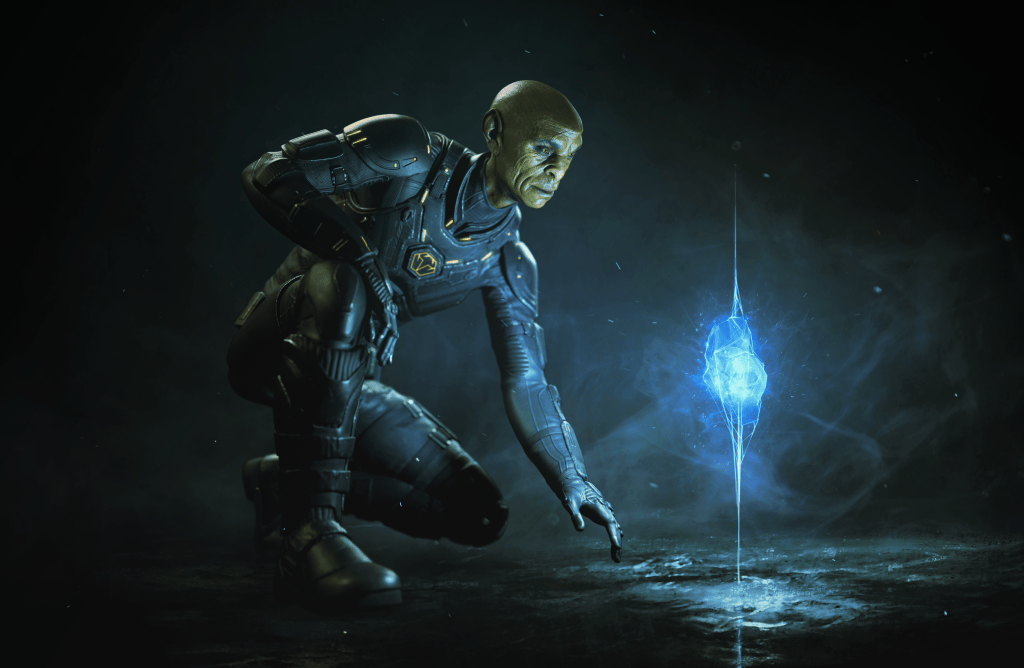
In this first part, we’ll walk through choosing your base mesh, prototyping with the ActorMIXER, refining morphs, previewing facial rigging, and preparing clean skin edits to set the foundation before sculpting begins.
Pablo Munoz Gomez
Hello, my name is Pablo Munoz Gomez, and I’m an enthusiastic 3D concept and character artist who is deeply committed to the spread of knowledge. My expertise lies in 3D sculpting, visual development, and engaging in mixed-media projects. I take immense pride in being the creator of Pablander Academy, serving as an outlet for showcasing my work, sharing my workflows, and assisting fellow artists in honing their skills across a wide range of subjects.

Pick a Mixer-Ready Base
Start inside Actors → Content → Character → Mixer Ready. These assets are specifically optimized for CC5’s new ActorMIXER workflow, making them ideal starting points for rapid character prototyping.
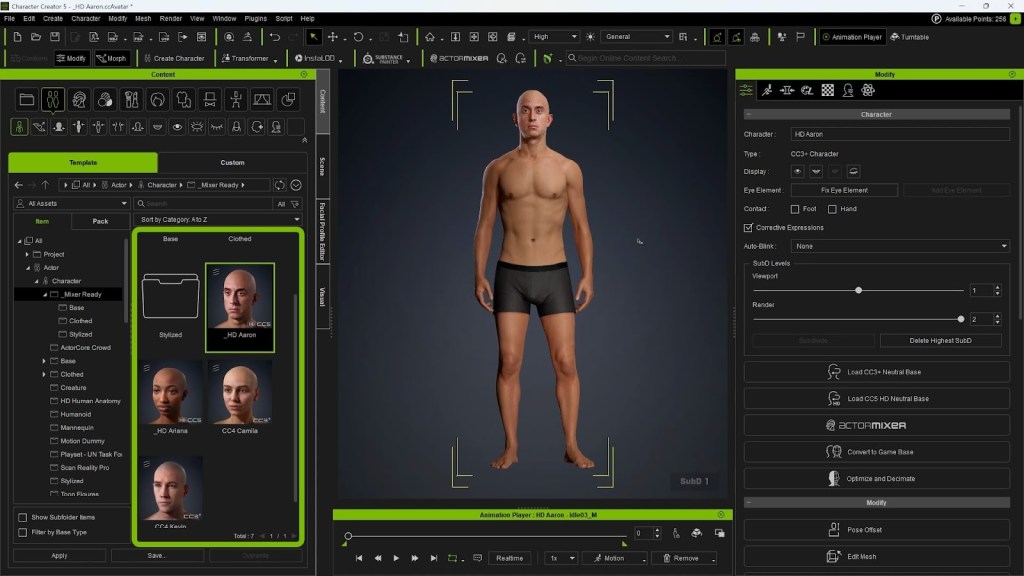
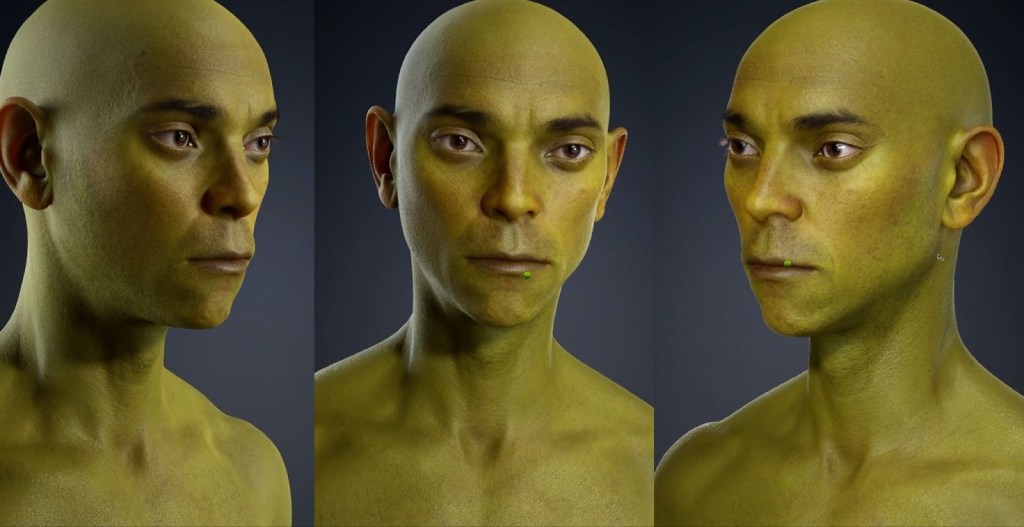
For a male creature, select an HD base such as the HD Aaron asset. Drag and drop it into the viewport. Once loaded, remove any geometry you won’t use so you are working with a clean base mesh.
Fast Morphing with Viewport Click-and-Drag
While CC5 still provides a huge library of sliders, a faster and more intuitive approach is to morph directly in the viewport. Enable the viewport morph switch, hover over the model, and simply click-drag to push or pull shapes. You can quickly adjust neck thickness, jaw length, eye spacing, and so on.
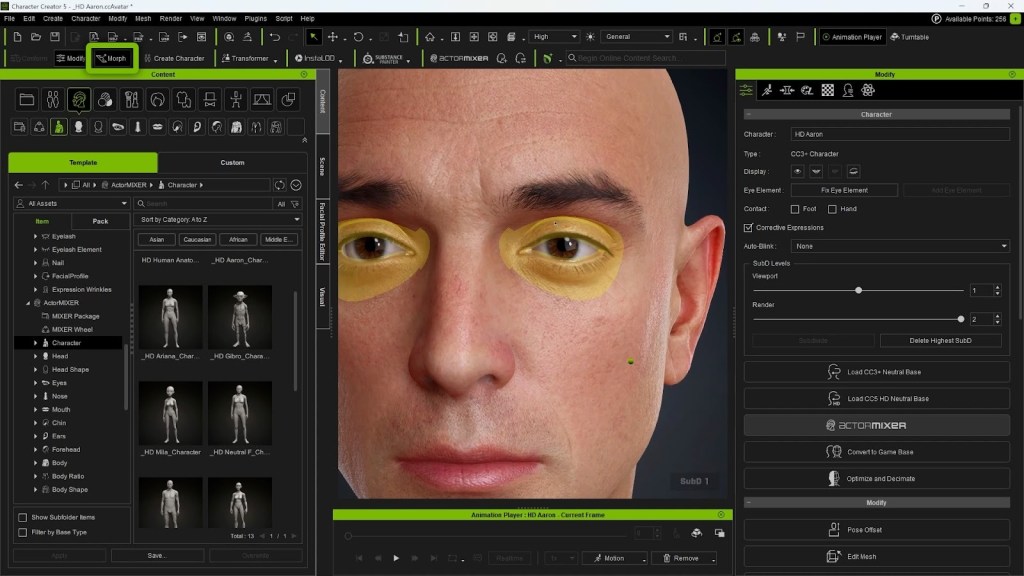
This direct manipulation is ideal for exploring exaggerated or stylized proportions quickly. Small adjustments give immediate personality without fiddling through long slider lists.
ActorMIXER: The Big New Feature
ActorMIXER is the new standout feature in CC5. It provides a radial visual controller that lets you mix multiple body or head presets and refine the results quickly. Available under Modify → Settings → Mixer (Current), it works with the full character, head only, or body only.
Open it via Modify → Settings → Mixer (Current).
You can work with:
- Full character
- Head only
- Body only
Drag the central control point toward different zones to blend presets, stylized, muscular, aged, or softer forms.
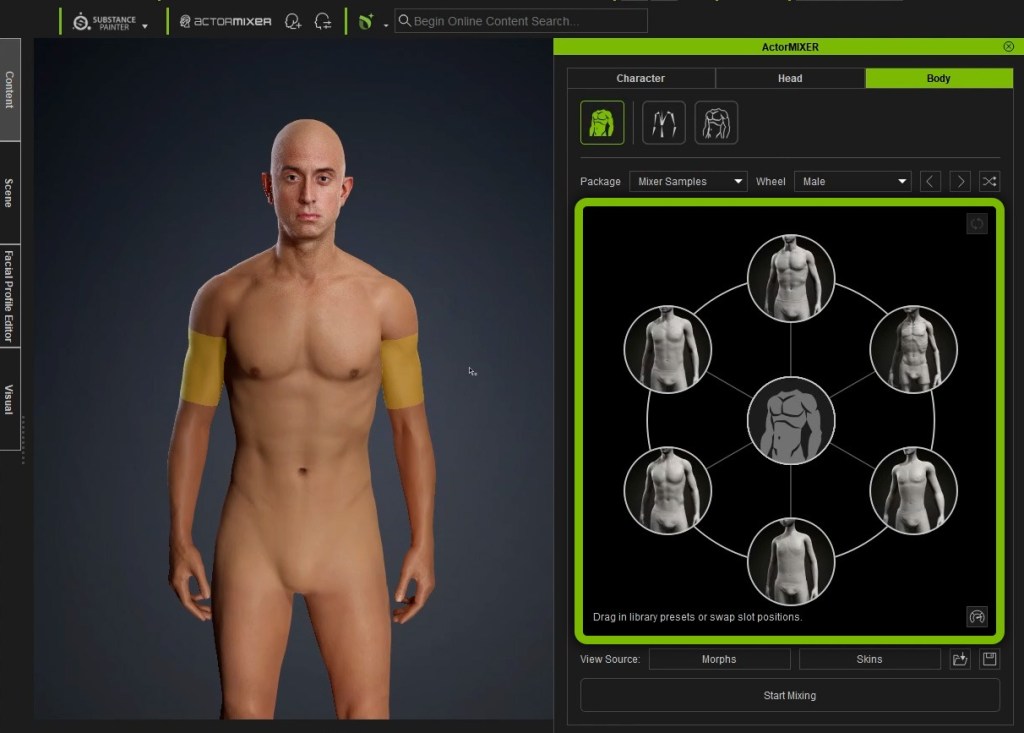
Why ActorMIXER is a Game Changer
- Visual blending helps you pick the perfect in-between looks without guessing slider values.
- Independent head/body mixing allows character hybridization, like realistic bodies with stylized alien heads.
- Rig-aware ratios ensure bones automatically follow mesh changes, keeping animation deformation natural.
- Optional proportion editing gives full artistic freedom when stylizing creatures or non-human silhouettes.
This tool allows you to generate a unique character identity extremely early in the process — before sculpting or outfit modeling even begins.

Refining Expression and Facial Rigging
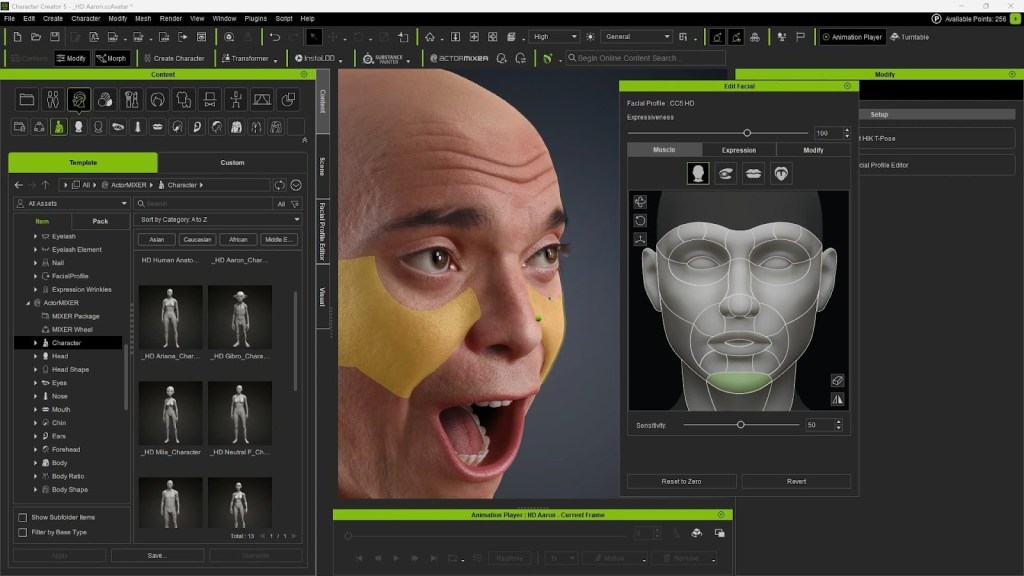
Before committing to sculpting or clothing, test the character’s facial movement. Go to Modify → Motion → Edit Facial and use the controllers to preview the range of motion for the jaw, brows, eyes, and more. Use the middle mouse button to drag controllers and watch how parts move.
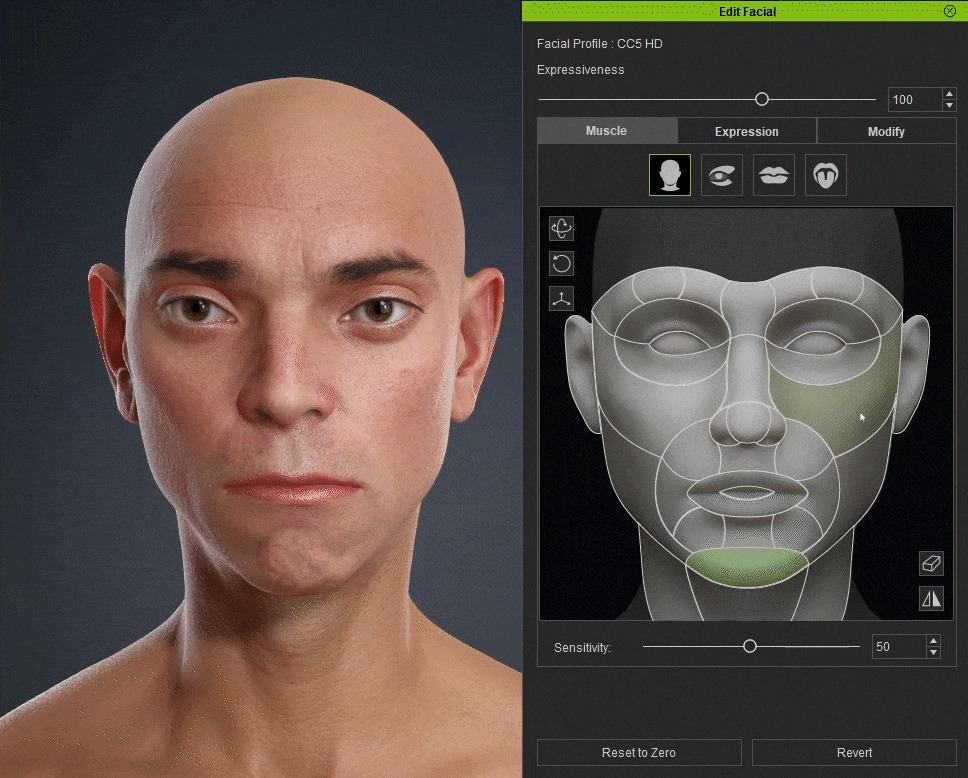
CC5 retains the powerful dynamic wrinkle system first introduced in CC4. These wrinkles auto-activate based on expression intensity, giving instant feedback on how the face behaves in animation.
Why This is Important before Sculpting
- You can identify where folds should be emphasized or softened in ZBrush.
- Lets you avoid sculpting wrinkles that will later conflict with the dynamic system.
- You get a roadmap of natural compression zones — directing the sculpt rather than guessing.
If you want to go deeper, CC5 also supports custom dynamic wrinkle profiles, letting you design completely unique expression maps. I have another in-depth series on the YouTube channel covering this process specifically, in case you are interested.
Skin Editing with the Activate Editor
The skin editor is also very powerful and flexible. Open the paint palette section and click Activate Editor to access base textures, IDs, and material resources.
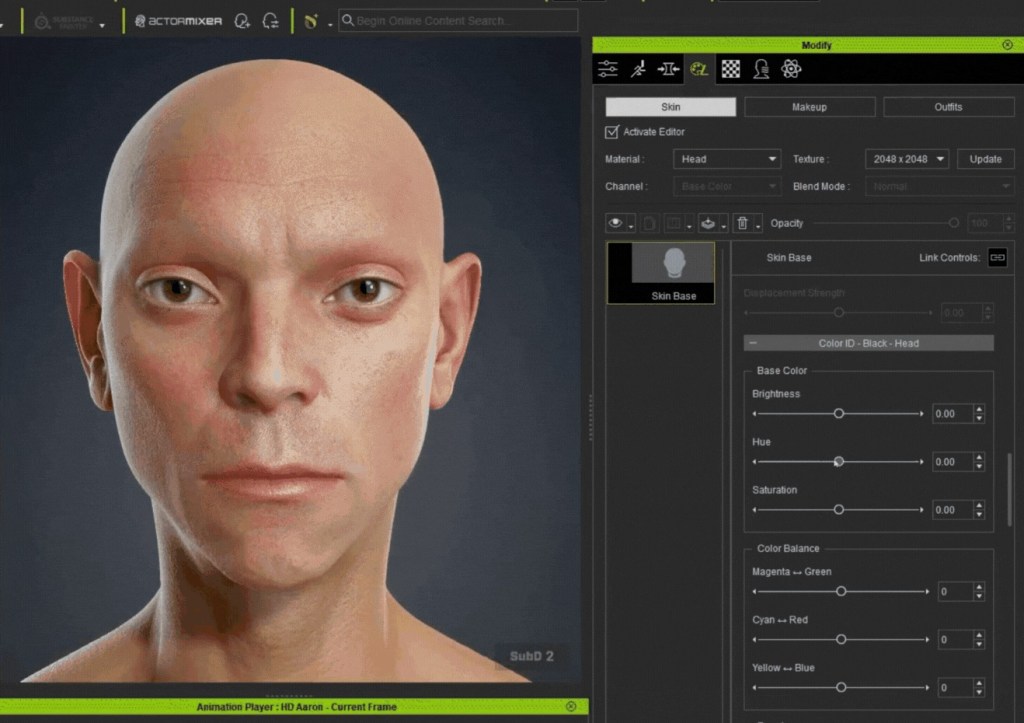
I like to work on the face first, especially since in this project the body will be covered by a suit or armour. Use brightness, hue, and saturation to push toward a stylized tone. Remember that different regions, like lips or specialized body parts, might use separate material IDs and therefore require individual editing. After adjusting the face, click Update to propagate changes across the body. Deactivate the editor to bake the textures.
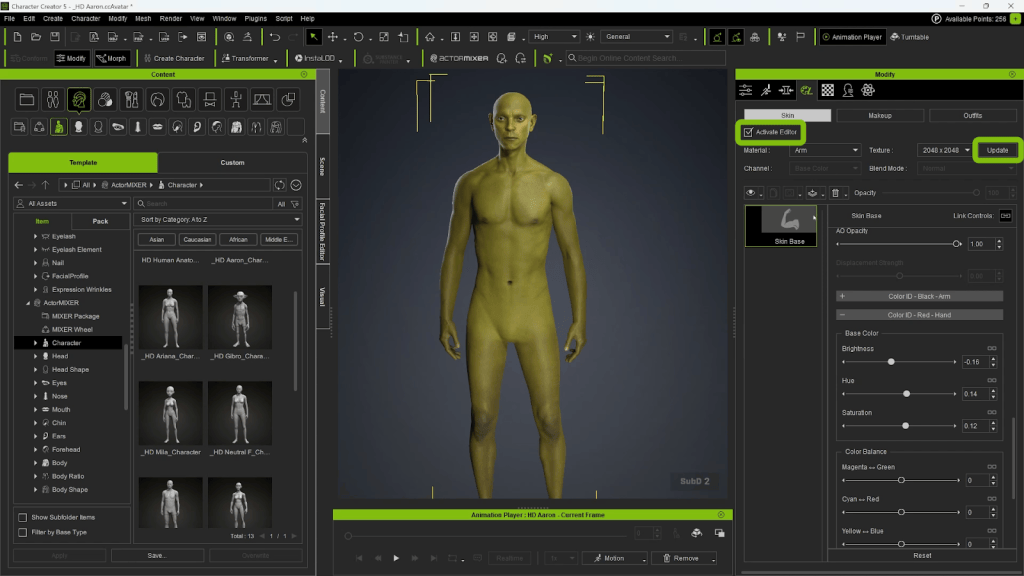
It’s best to check specific areas like the lips, eyes, teeth, and accessories immediately upon import, as these often come with separate IDs that require manual adjustment to function correctly. Of course, none of this is necessary for the project but I wanted to share with you because the options are in there and are quite useful to know.
Exporting the Base Mesh to ZBrush with GoZ
Once the CC5 base is established, send the mesh into ZBrush using the GoZ button in the Scene tab. Choose Create Template > A-Pose (recommended for sculpting).
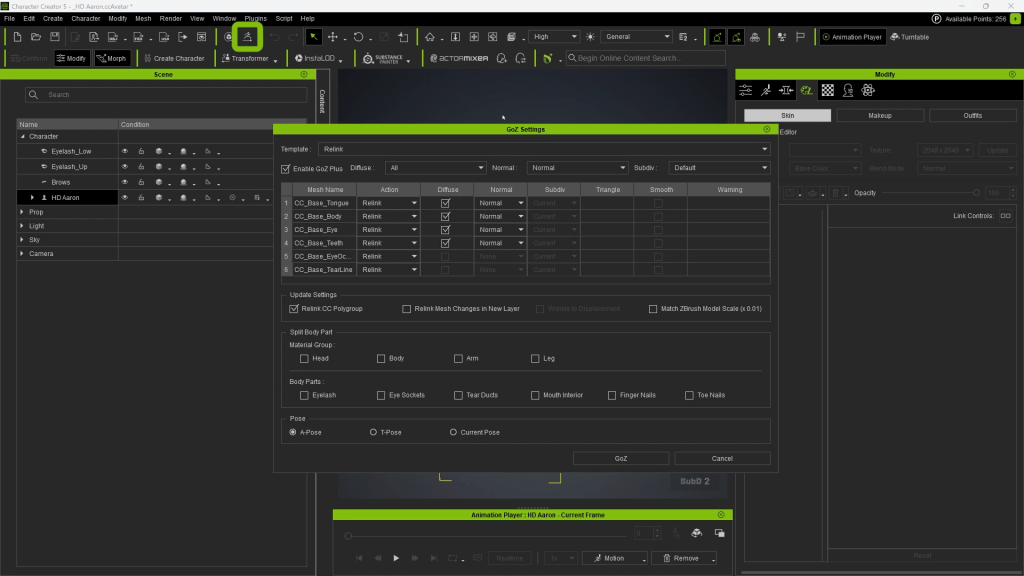
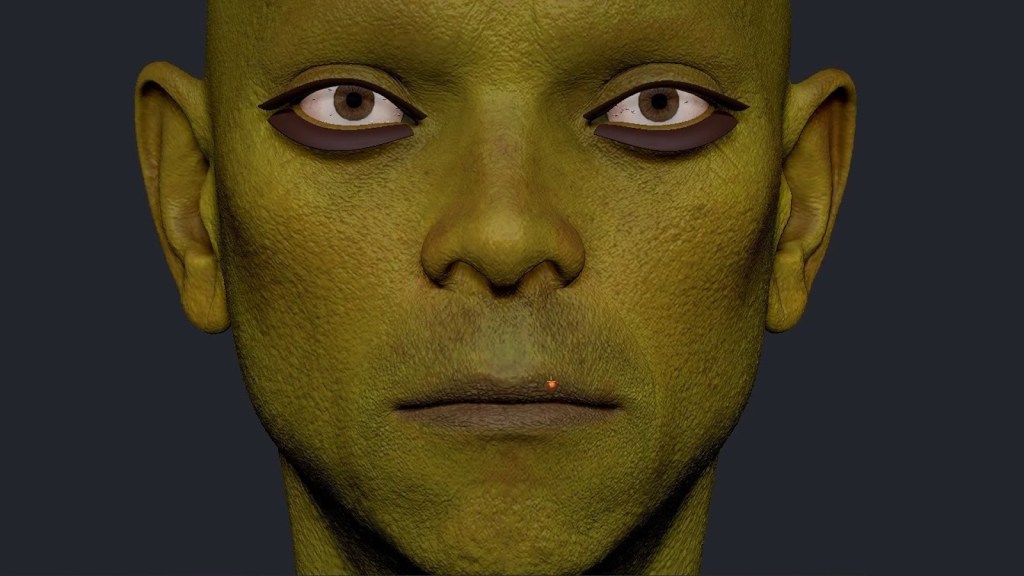
Character Creator transfers normal map details into a ZBrush sculpting layer as high-fidelity detail. That means pores and micro-skin texture are preserved and editable as a layer, very useful for toggling intensity or removing detail during broad-form sculpting.
Fixing Brush Scale in ZBrush for CC5 Meshes
Due to CC5’s real-world scale, ZBrush brushes may feel too small, even at maximum diameter. Go to Preferences > Draw and choose 5000 for Max Brush Size and 50 for Dynamic Brush Scale.
This dramatically improves the usability of brushes when working on full-body meshes with millions of polygons.

Coming Up in Part 2
In the next chapter of the series, we’ll take the CC5 base mesh into ZBrush using GoZ, begin sculpting primary and secondary forms, and block out the sci-fi suit. We’ll also explore how to manage CC5’s transferred microdetail layers, fix brush scale issues, and prepare a clean sculpt for subdivision workflows before sending everything back into Character Creator 5.
Related Posts
- CC5 x ZBrush: Create a HD Sci-Fi Vanguard (2/7)- Sculpting the Body and Simulate the Nano Suit
- From Concept to Motion-Ready Alien Character: ZBrush and CC5 HD Step-by-step Workflow
- Mix Custom Aliens Into Infinite Characters with CC5 ActorMIXER Pro
- Building a Custom Vampire Character from Scratch with CC5 and Unreal Engine 5.7






1 comment
Awesome!