

Building Lulu’s Head: AI, HeadShot, and Hope
In the first Lulu entry, Garry Pye set out with a clear goal: to apply everything learned from building Carl and approach 3D character creation with more confidence and intention. Now, in this second chapter of Lulu’s journey, that mindset is put to the test where it matters most—the face. This post dives into the creative and technical process of turning a 2D illustration into a living 3D head, blending AI tools with Character Creator and its Headshot plugin to shape Lulu’s identity from the ground up.
When it comes to creating 3D characters, the part that still makes my brain hurt a little is the face. As I start thinking about facial rigging, lip synching, and all those tiny muscle movements in sculpting software, my brain goes on holiday. So for now, I’m sticking with what I know works, using Headshot 2.0 for my character’s head and Character Creator for everything else.
The process starts with a bit of AI magic. I take one of my 2D illustrations, in this case, my design for Lulu, and feed it into an AI program (for Lulu, I used Krea) to create a 3D stylised version of her.

The goal here isn’t to copy the AI result exactly. It’s just a visual guide or inspiration. To get a better sense of her form, I use AI again to generate images of her from different angles, making sure I can clearly see her head shape and hair from every side. Once I’ve got those angles, I take them into another AI tool, Rodin, which converts the reference into an actual 3D model of Lulu’s head. It’s like jumping ten steps ahead in the creative process. I then export that head as an FBX file and import it into Character Creator as a prop, ready to bring it into Headshot, where the real fun begins.
Inside Headshot, I start plotting face markers, little dots that tell the program where all the important facial landmarks are. Because Lulu’s head is more stylised than a realistic human face, I place extra markers wherever I need them, making sure to define everything from the top of her head right down to the base of her neck. The more time you spend here, the better the results later on, and the best part is that Character Creator lets you make changes in real time. You can shift a marker, hit generate, and see the update instantly. It’s a process that feels creative rather than technical, which is the way I work best.

A handy little trick I’ve picked up is to temporarily replace the skin texture with a grid pattern. It might sound odd, but it gives you perfect symmetry guides while you’re placing points, a lifesaver when you’re still learning to eyeball things accurately.
Once all the markers are where they should be, I generate the new skin. If something looks off, I can simply go back, nudge a few points, and regenerate. There’s no pressure. The freedom to keep redoing this process makes this whole step surprisingly enjoyable.
Then comes Refine Mesh, the digital equivalent of smoothing out a clay sculpture. Using the Project tool, I can make sure the new face sits snugly against the base mesh, pressing all those surfaces together. It’s like watching a mask slowly become a face.

And just like that, Lulu’s head is born.
For me, this was one of those quiet “wow” moments. The point where you suddenly realise how far you’ve come. I couldn’t help but notice how much faster I’d reached this stage compared to my first character build. Credit for that has to go to Character Creator, which makes it incredibly easy to make adjustments on the fly. Everything happens right there in front of you, updating in real time, so instead of guessing and waiting, you’re sculpting and seeing instant results.
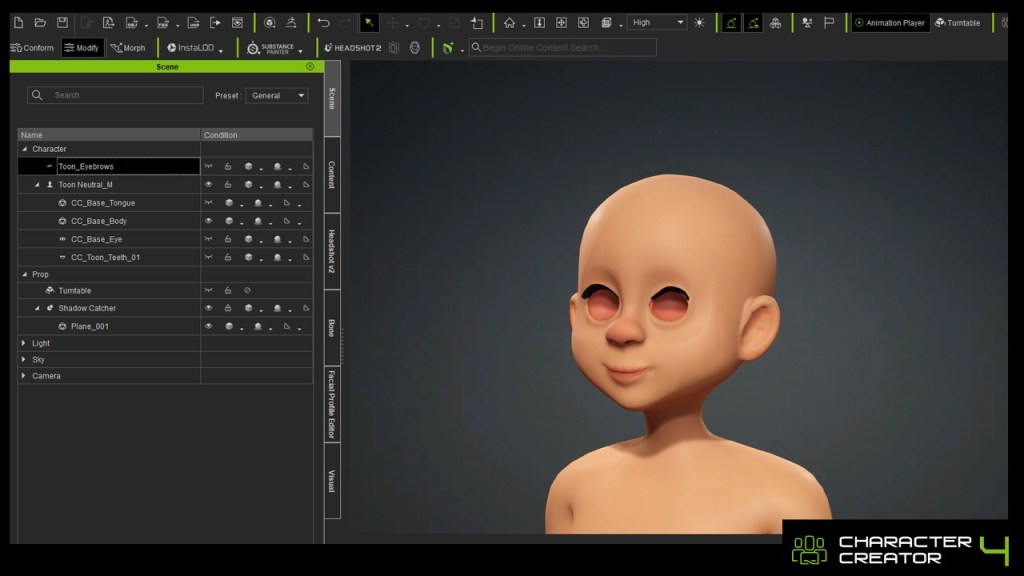
Already, I could see the beginnings of Lulu’s personality emerging. The face wasn’t perfect, not yet at least, but it had that unmistakable spark of life. And for anyone who’s ever built a 3D character from scratch, that’s the moment that hooks you. That’s the moment you fall in love with the process.


Garry Pye – 2D/3D Animator | Content Developer
Garry Pye is an Australian illustrator, animator, and Cartoon Animator instructor with over a decade of experience in the animation industry. Known for his unique blend of creativity and humor, Garry’s work spans from teaching animation techniques to creating innovative content that helps both novice and experienced animators improve their skills.
Garry’s enthusiasm for storytelling and animation shines through in all his projects, whether it’s creating animated shorts, preparing educational tutorials, or sharing his expertise by teaching. With a passion for making animation accessible and fun, Garry has built a community of learners who not only appreciate his knowledge but also his infectious sense of humor and dedication to his craft.
Follow Garry Pye’s iClone Page|2D Animation Page|2D Marketplace
Related Posts
- From 2D to 3D: Overcoming Eye Obstacles for my Custom CC Character
- From 2D to 3D: Why After 10 Years I Moved to 3D Animation
- From 2D to 3D: My First Steps with iClone and Character Creator





1 comment
Making LuLu Blog 2 is so so good and spot on! How did you put the grid on face as a texture. Using AI to make a 3d file or to convert 2d image to 3d file is really the new paradym for novice animators; this is how democratizing animation is occurring throughout the world. Reallusion has the animation tools to make learning to read culturally engaging and fun. That is my goal, and why I appreciate your training articles!