Mythcons
Greetings, my name is Peter Alexander. In this demonstration, I’m going to walk you through how you can leverage Character Creator 5‘s new ActorMIXER as a powerful stepping stone to create unique, stylized characters. We’ll use the CC Base Mesh as our foundation, and ActorMixer will provide the next layer from which to build, making professional character creation that much easier. For this demo, I’ll be creating a stylized version of Arnold, using the Blender Autosetup pipeline, which is both cost-effective and efficient for creating characters and assets.

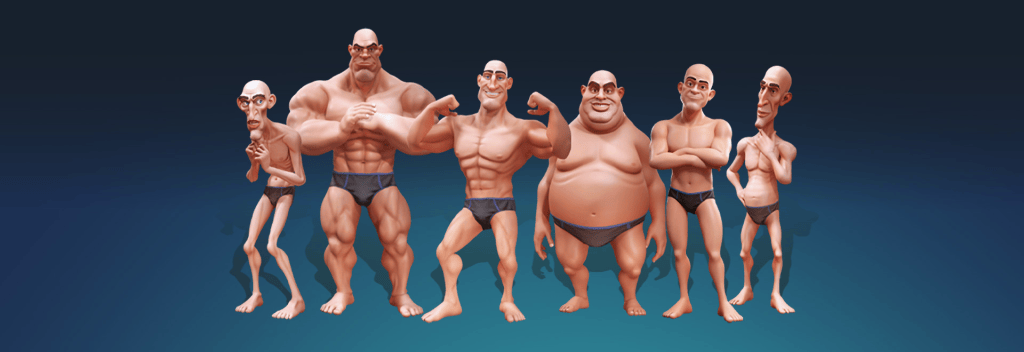
In this tutorial, I will walk you through the steps to create a celebrity-style 3D caricature—specifically a stylized Terminator—using Character Creator 5, ActorMIXER, and the Caricature MIXER pack. We will move between AI generation, Reallusion tools, and Blender to refine the look.
Tools Used:
- Character Creator 5 (CC5)
- Headshot 2.0
- ActorMIXER & Caricature MIXER Pack
- Hyper3D (AI)
- Blender (with CC Auto Setup Addon)
- Krita (or any raster editor)
Step 1: Generating 3D Reference with AI
While you can sculpt manually from photos, creating a 3D reference mesh gives us a faster starting foundation.
- Generate Image References: Ask an AI image generator for front and side views of your subject (Arnold), ensuring you request to remove hair for a cleaner mesh.
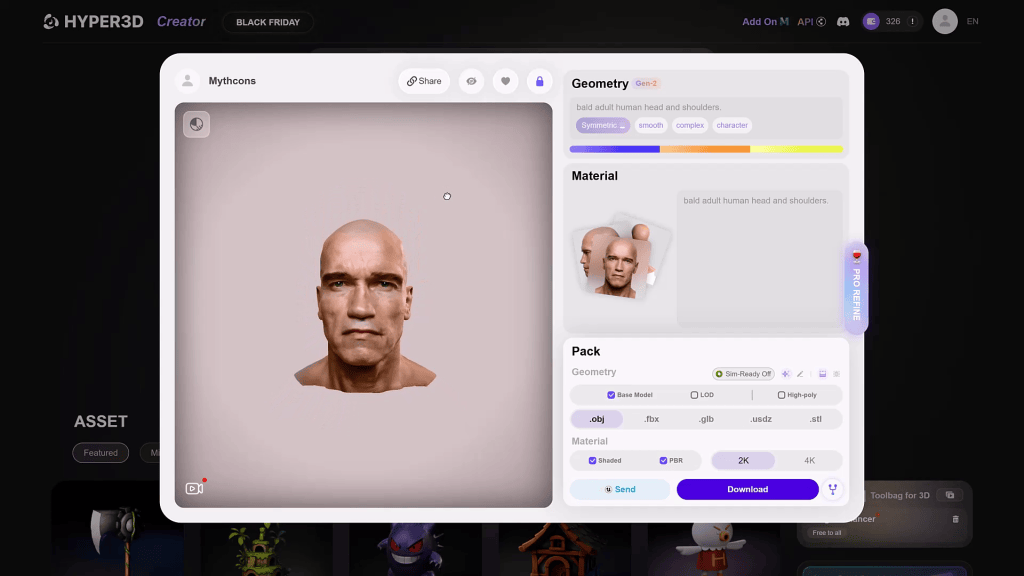
- Generate the 3D Reference: I used Hyper3D for this workflow.
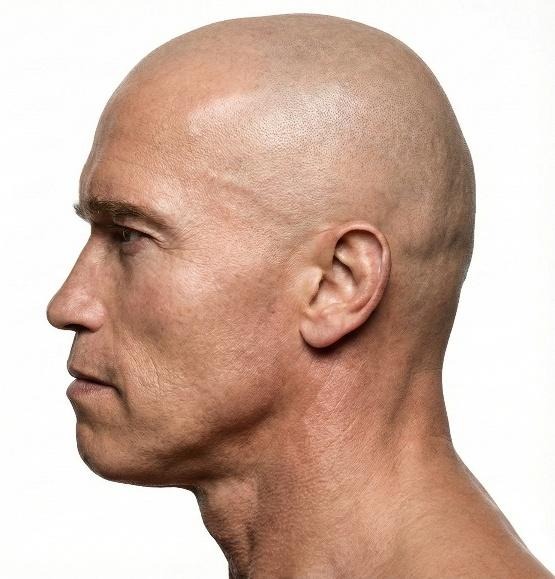
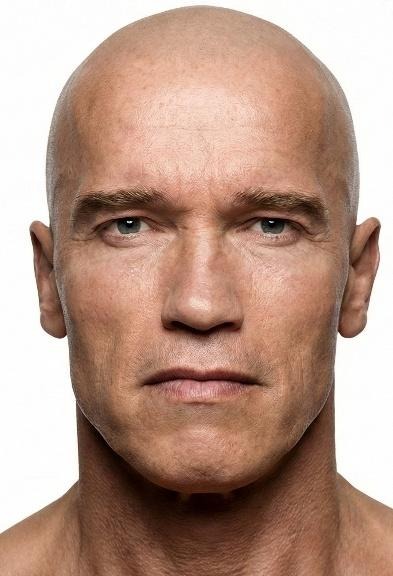
Note: I chose Hyper3D because other platforms (like Hunyuan) produced results that were already too stylized. I wanted a more neutral base to apply my own stylization to.
Step 2: The Foundation (Headshot 2.0)
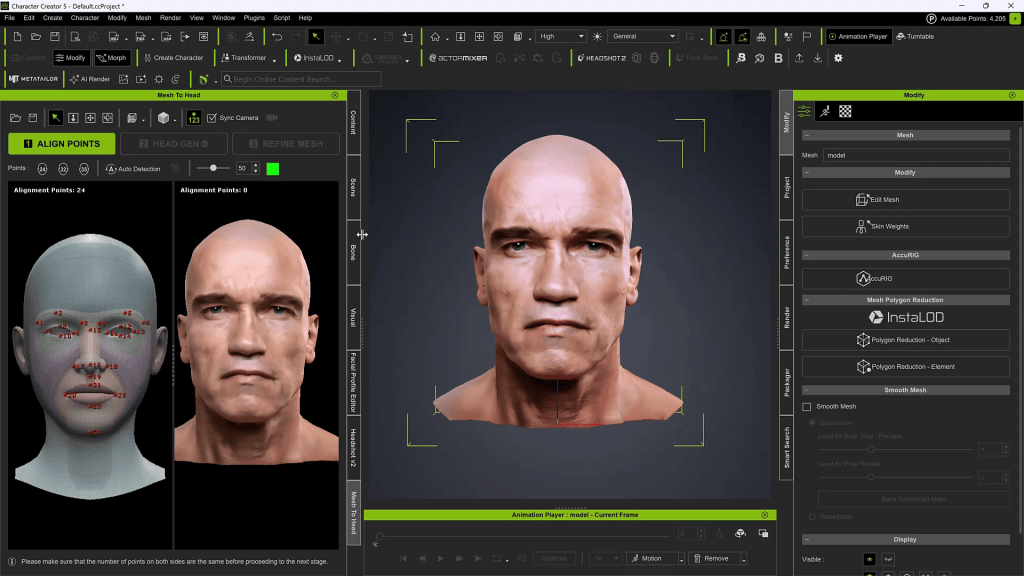
Once you have the .OBJ or mesh from Hyper3D, load it into Headshot 2.0 inside Character Creator.
- Select the Mesh option.
- Alignment: Align the corresponding points on the reference mesh to the CC base mesh.
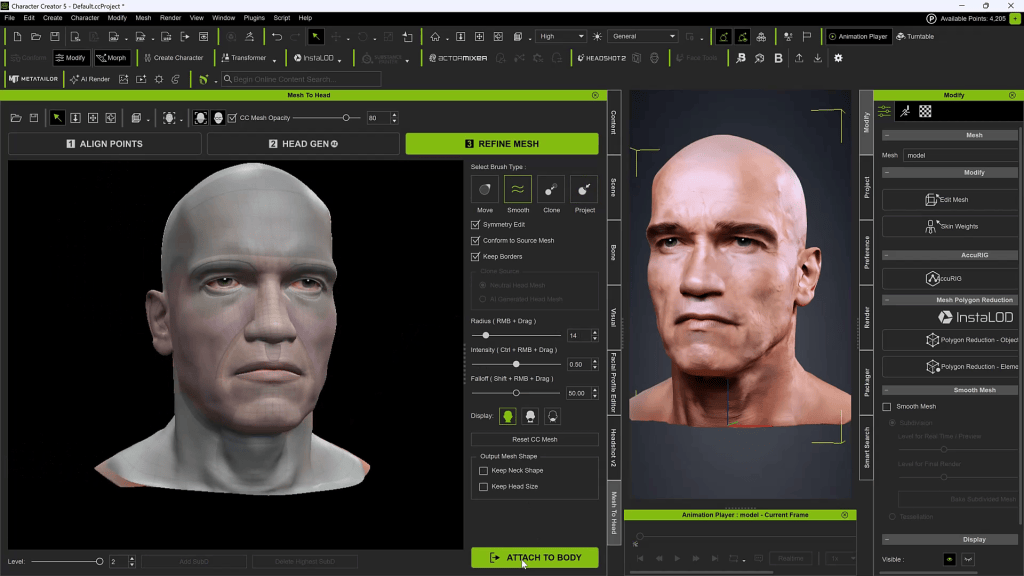
- Refine: Use the included brushes to add, delete, or switch between subdivisions to ensure details align correctly.
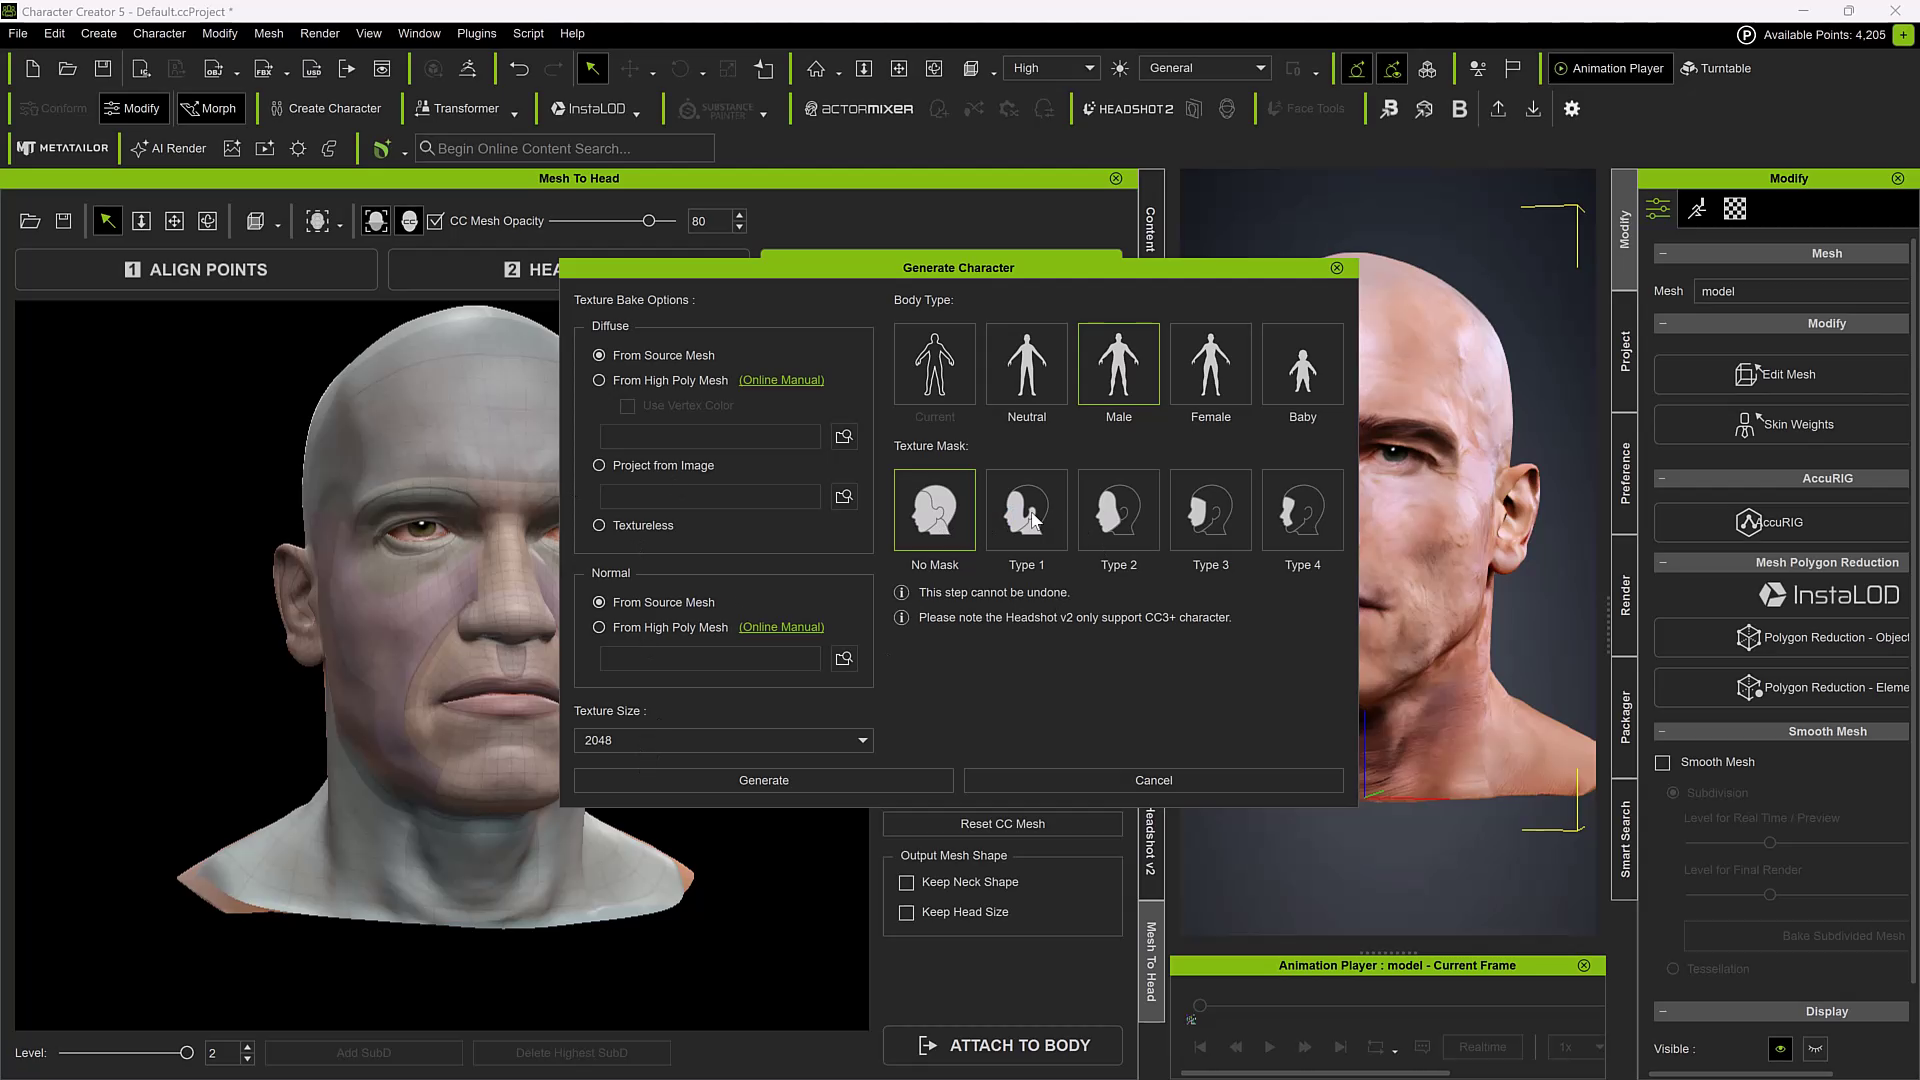
- Generation Settings: Set the generation type to Male and select a Masking Style (this helps blend the reference details into the CC base smoothly).
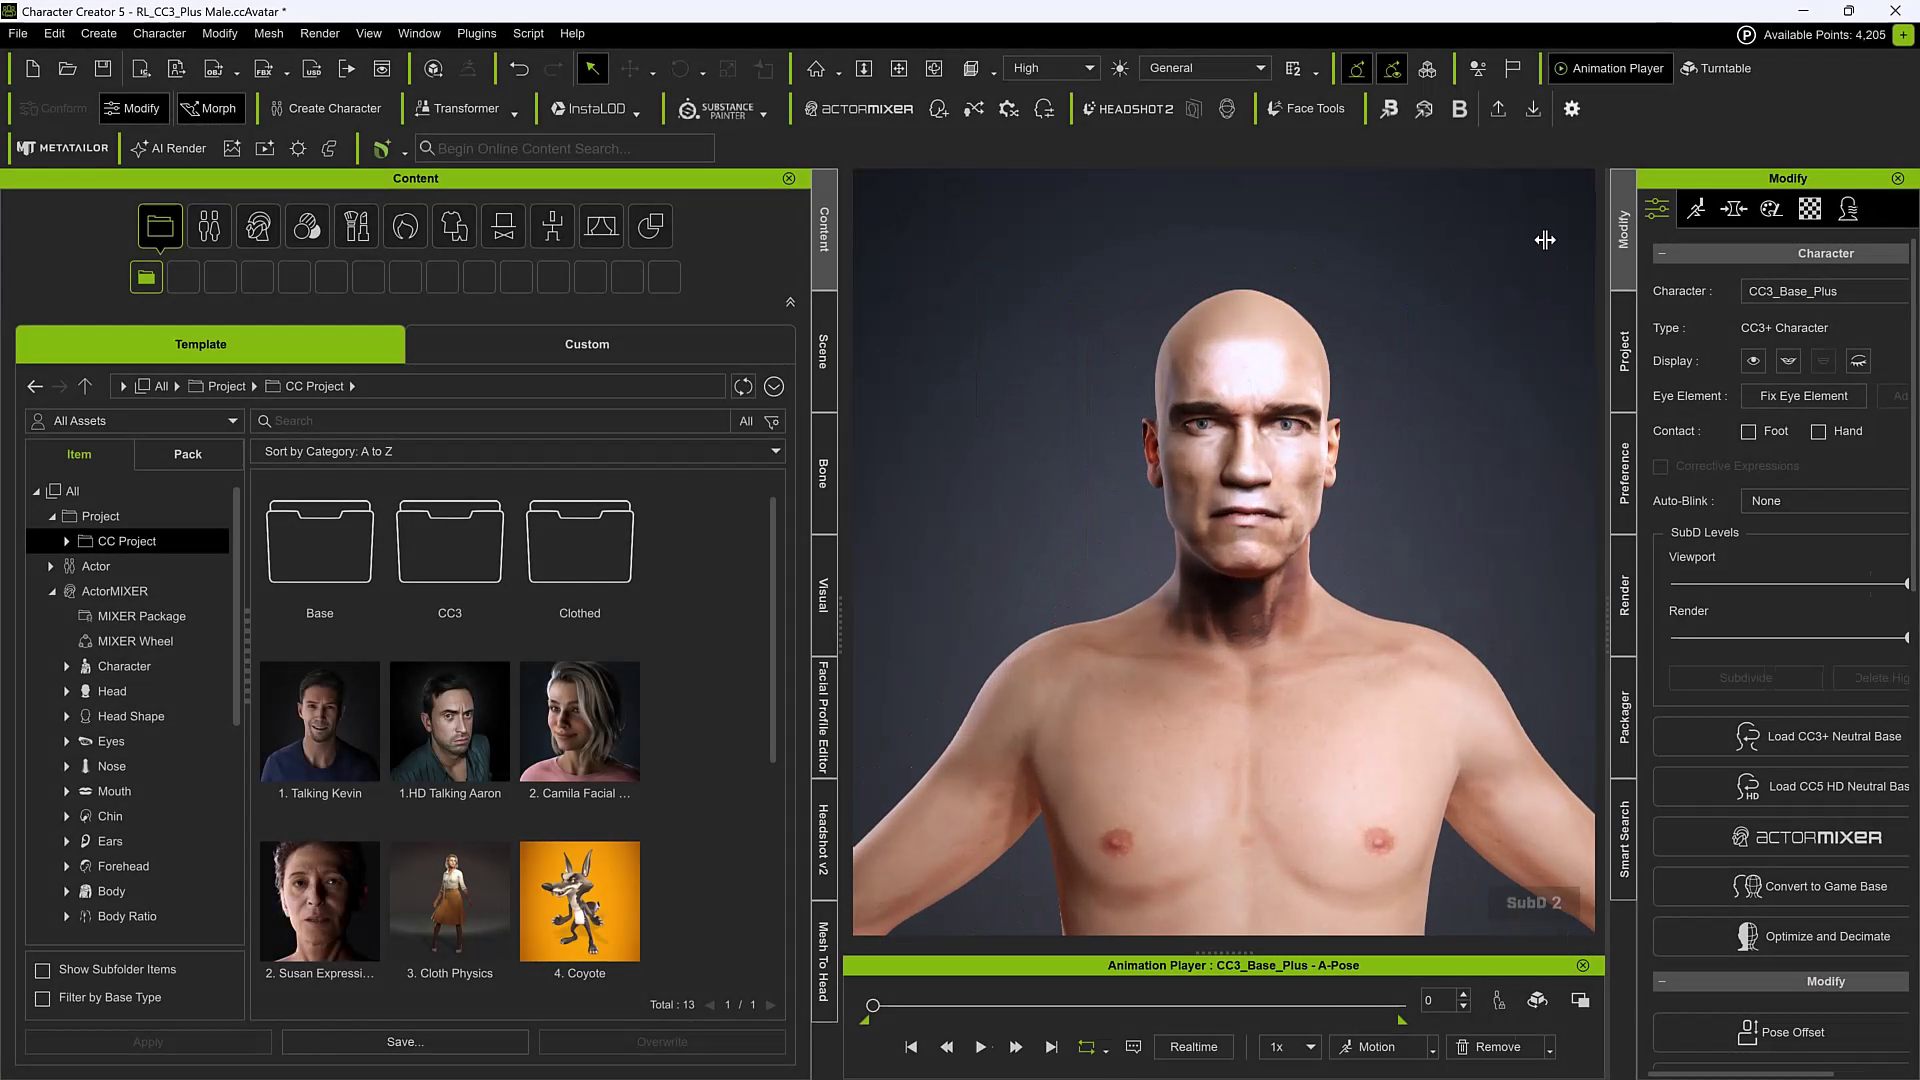
Step 3: Body Shaping & Exaggeration
He isn’t a Terminator without an imposing physique. This is where we start pushing the style.
- Open ActorMIXER.
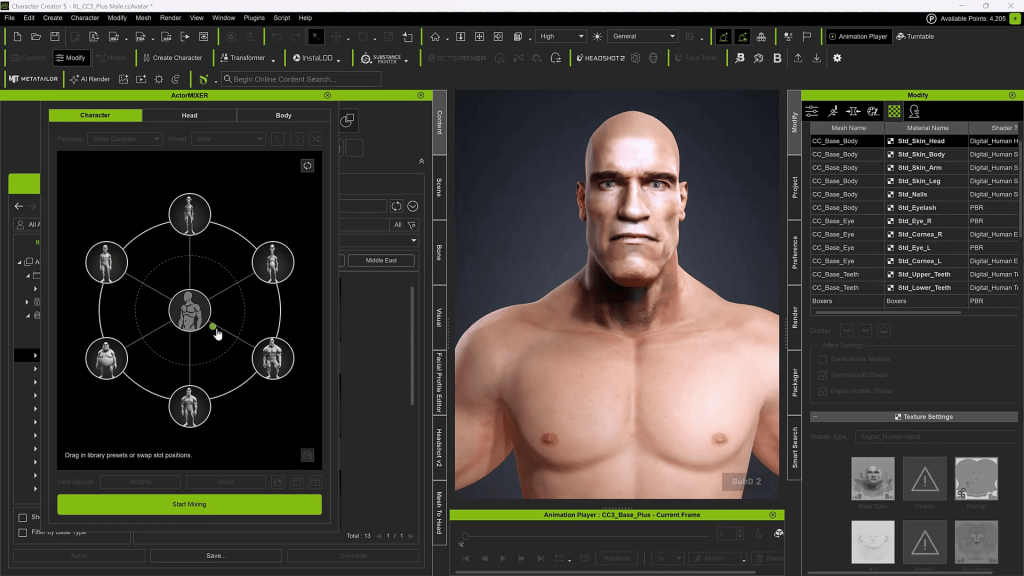
2. Blend elements from the Caricature MIXER pack with standard muscle morphs.
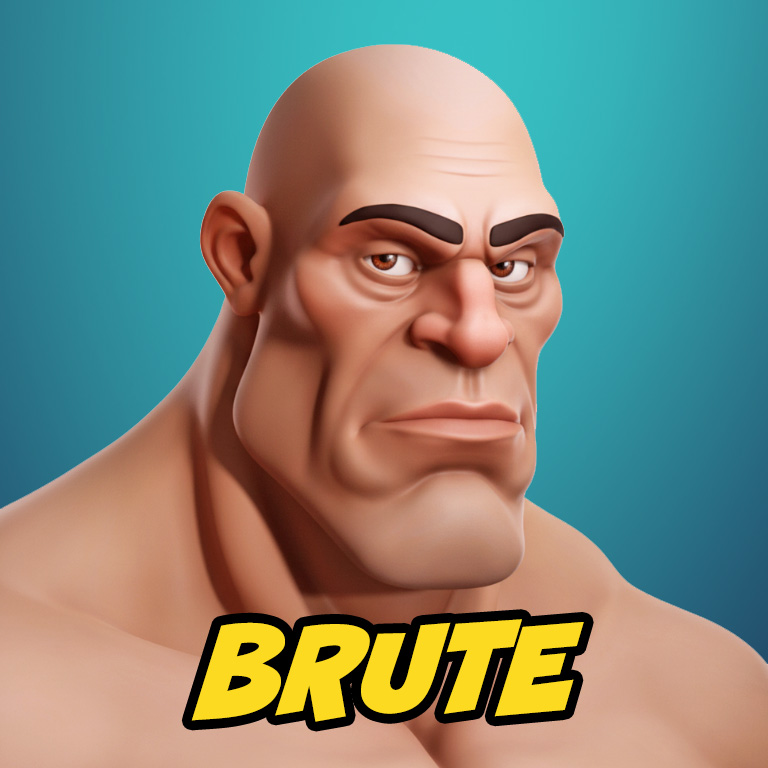
3. Cycle through combinations to find the right balance of “Brute” and “Caricature.”
4. Mesh Correction: If areas don’t blend well, use the Edit Mesh brushes.
Technique: Reduce the mesh to low resolution, smooth out the artifacts, and then mirror the changes to the other side.
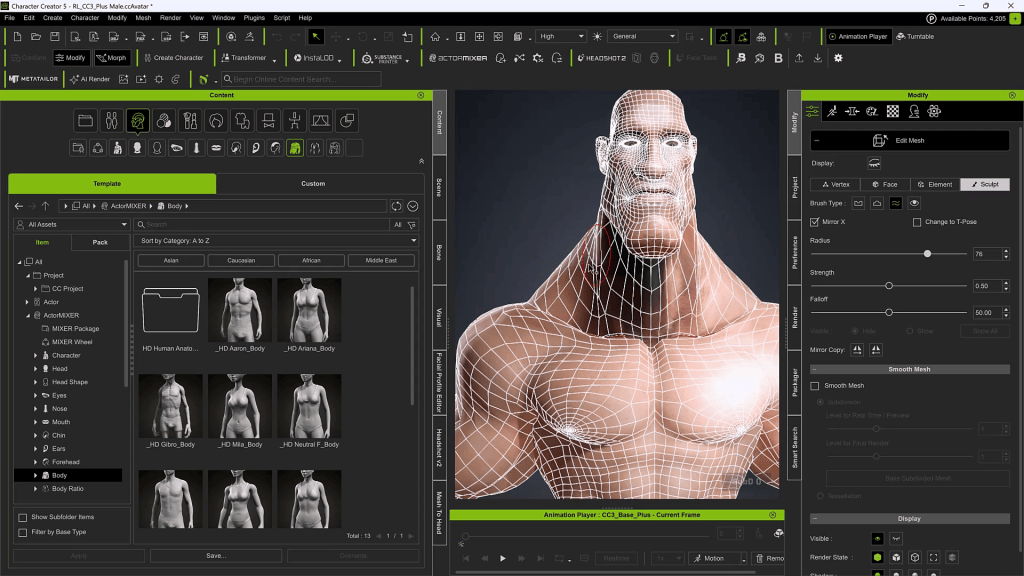
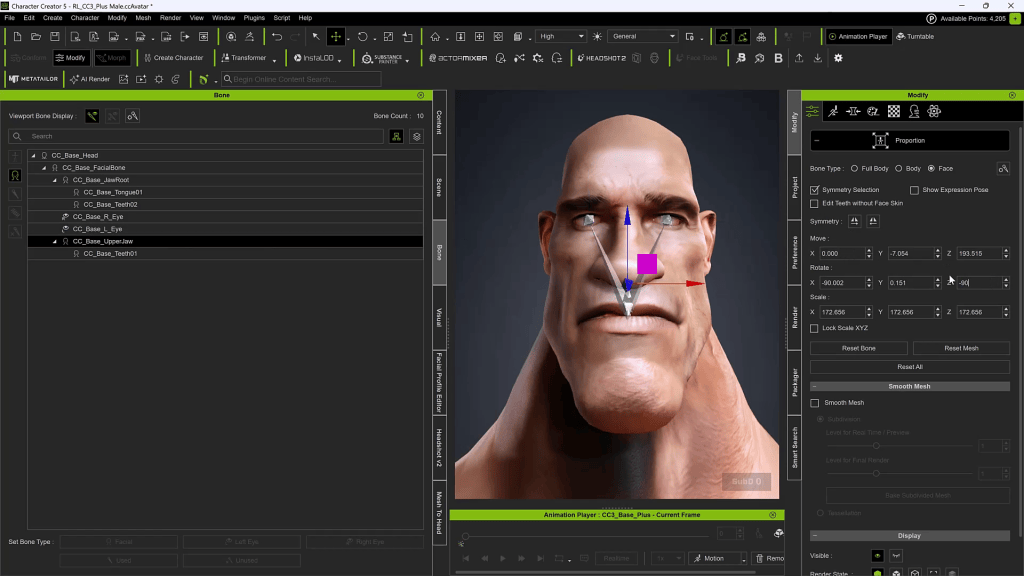
Troubleshooting Tip: Fixing Symmetry & Bone Alignment If you find that your mesh edits aren’t mirroring correctly, the bone coordinates might be off.
- Select the bone (e.g., Head, Jaw Root, or Upper Jaw).
- Check the Move and Rotation values.
- Move X should generally be 0.
- Rotation is often not zero. If you see a value like -89 degrees, change it to -90 or 90 degrees. Correcting these values usually solves mirror symmetry issues.
Step 4: Texture Cleanup
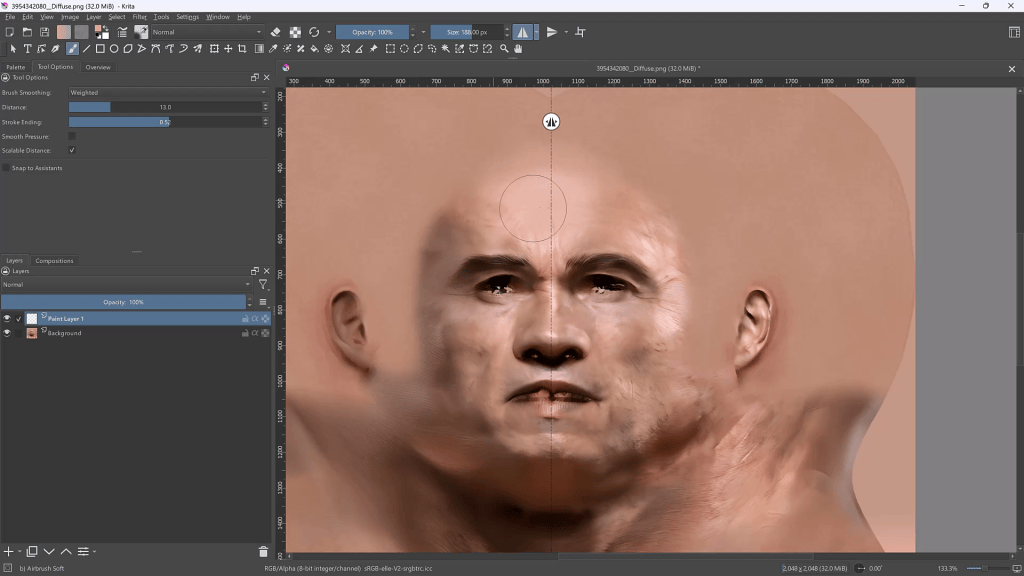
The AI projection will likely leave unwanted shadows on the face texture.
- Export the texture to a raster editor (I use Krita).
- Paint out the heavy baked-in shadows.
- Note: You will lose some likeness, but for a caricature, clean textures are often better than noisy photo-real ones.
Step 5: Sculpting in Blender (Round 1)
Now we need to push the shapes beyond what sliders can do.
- Use the Blender Auto Setup Addon.
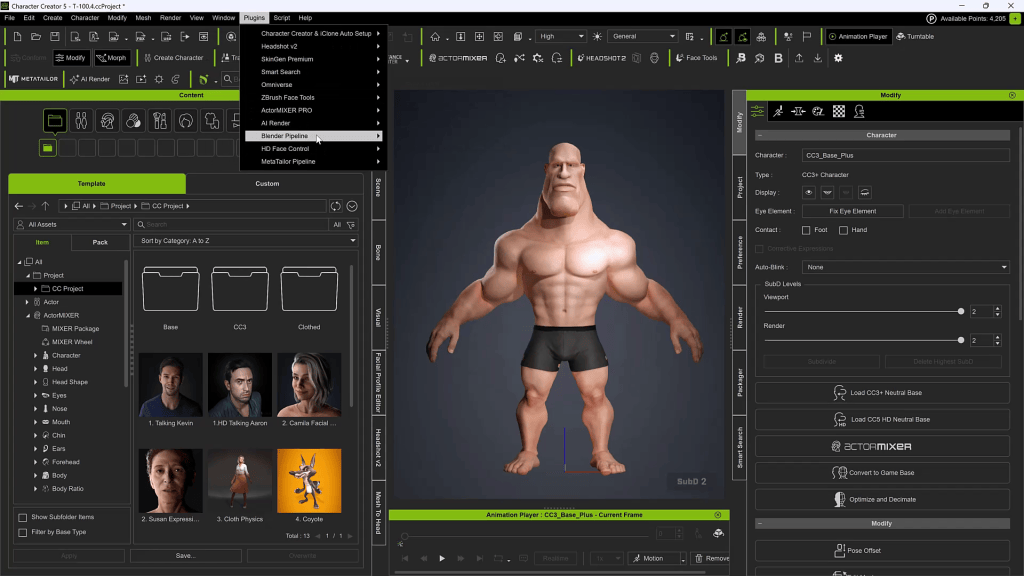
- Send the character using Morph Edit at SubD 2 (we don’t need a low-res pass for this).
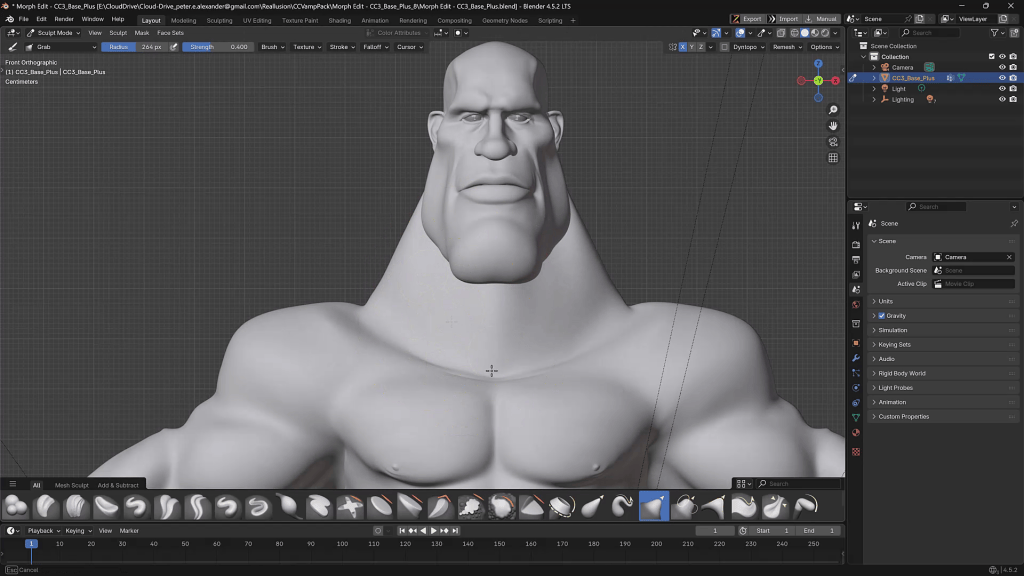
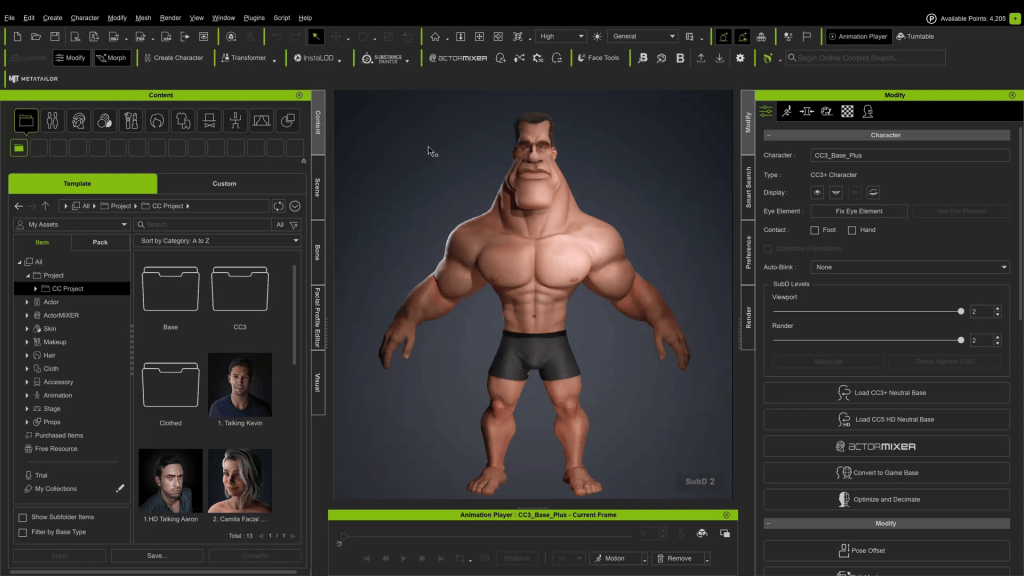
- Sculpting: Use the Grab/Move brush to push the stylization. Since CaricatureMIXER gave us a good foundation, we are just refining shapes here.
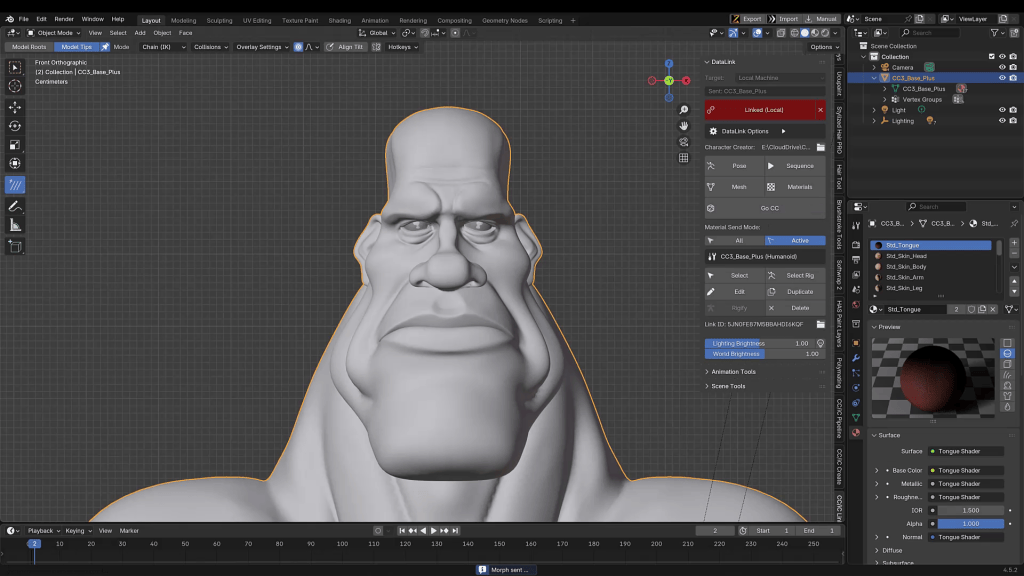
- Send back to CC5: Once updated, check the silhouette.
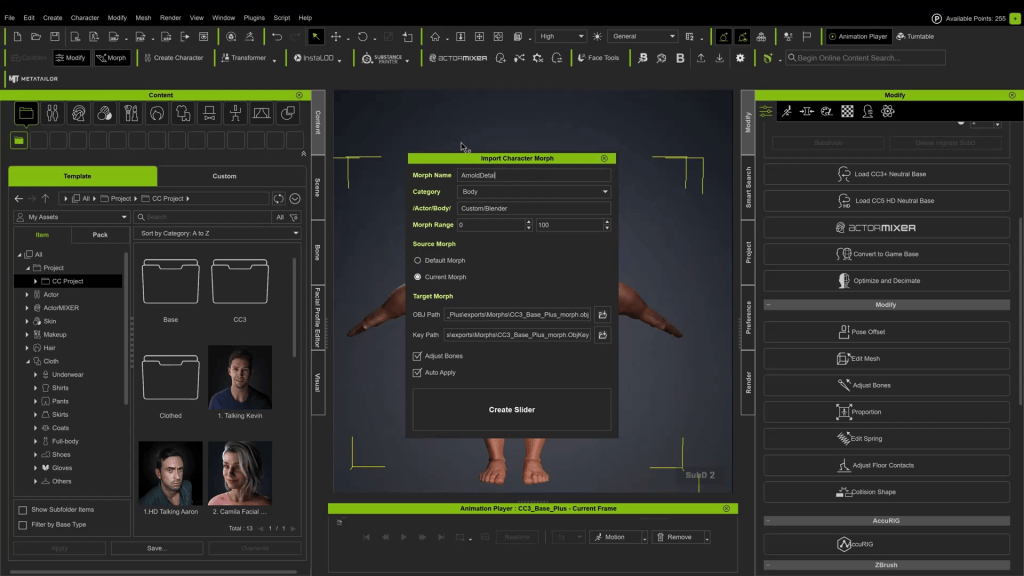
Iteration Note: After applying hair in CC5, I realized the forehead was too low. I simply sent the character back to Blender, adjusted the forehead height, and updated the mesh again.

Step 6: Clothing & Smart Search
To dress the character, we can use the Smart Search feature in the Content Panel.
- Trial Function: You can download a watermarked version of clothing to test the fit.
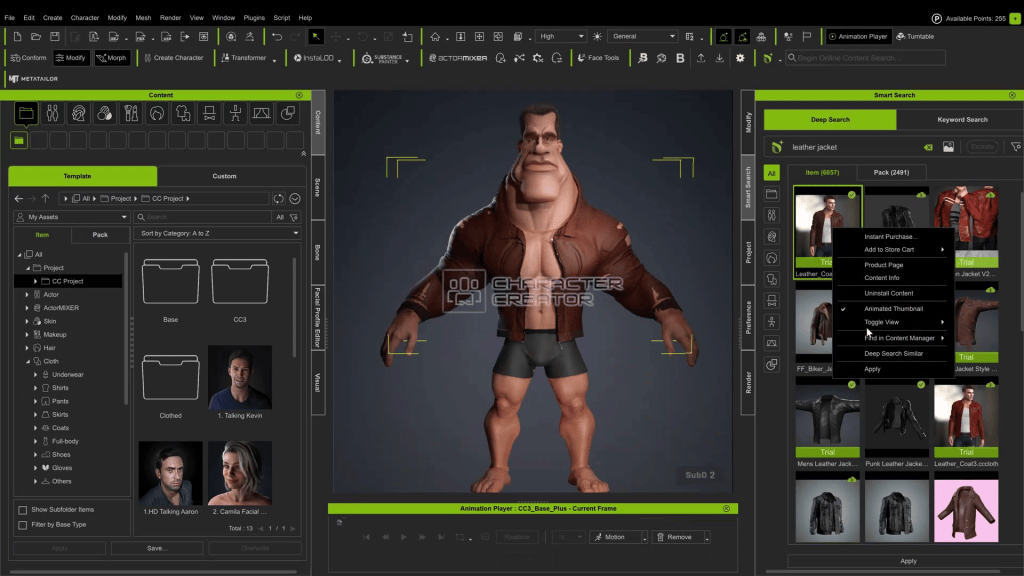
- Deep Search: Use “Deep Search Similar” to find assets that match the vibe of the items you are looking at.
- Licensing Explained:
- i-Content: For use strictly within iClone/CC.
- Standard: Required if you plan to export the mesh to Blender or ZBrush (which we are doing).
Layering Tip: Check your Clothing Layer Settings. Ensure the Leather Jacket is layered above the shirt and jeans to prevent mesh collision.
Step 7: Fitting Clothes to Extreme Shapes
Because this caricature has exaggerated proportions, standard clothing won’t fit perfectly out of the box. We need to fix the stretching.
- Establish DataLink: Make sure your CC5 character and Blender are connected via the Pipeline addon.
- Bind Pose: Ensure the character is in the default Bind Pose in CC5.
- Send to Blender: Send the character (mesh) to Blender.
- Sculpt the Fit:
- Use the Grab brush to pull clothing over the muscles.
- Caution: The Smooth brush in Blender is very strong. Lower the strength significantly before using it on clothing.
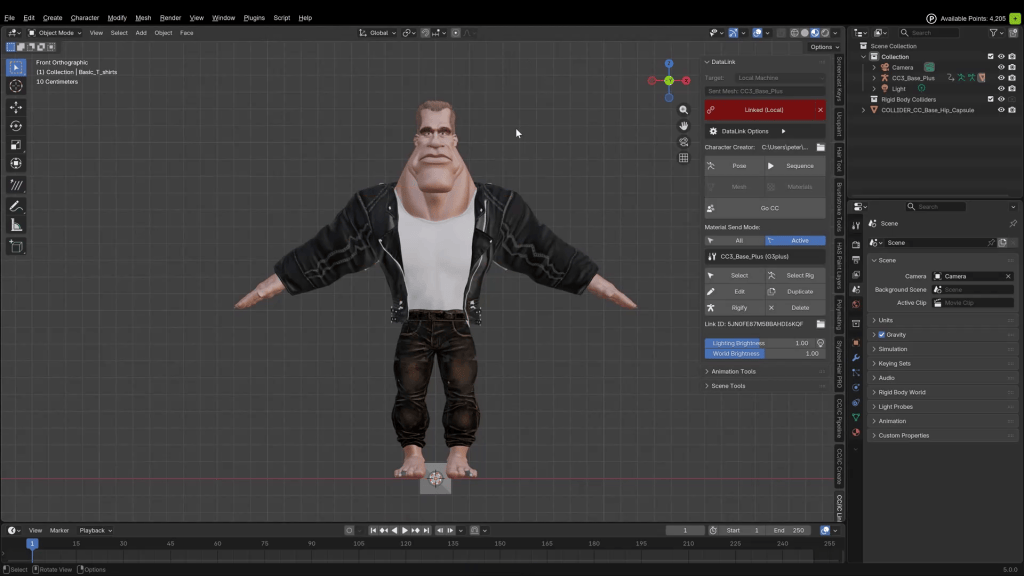
- Update CC5: In the Blender Pipeline addon, under DataLink, select Mesh. This updates the vertex positions inside Character Creator.
Step 8: Final Polish
Once the clothing fits:
- Adjust facial expressions to verify that the rig handles the new shapes correctly.
- A lot of the likeness comes through in the expression (the squint, the stoic mouth).
- Set up your lights and render!
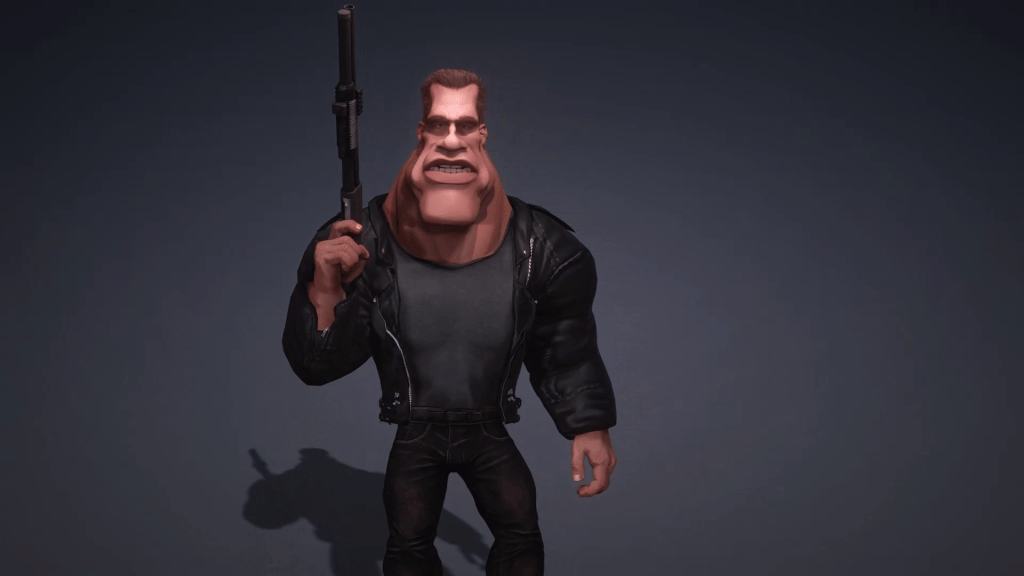
Summary
This workflow is designed specifically for caricaturizing characters efficiently, without sacrificing control or pipeline flexibility.
At the core of this process is ActorMIXER, combined with the CaricatureMIXER Pack, which dramatically lowers the barrier to stylized character design.
Reallusion’s rich content ecosystem further accelerates the workflow. With a wide range of ready-to-use clothing and assets, plus the Smart Search and Deep Search Similar features, finding outfits that match a specific character archetype or visual vibe becomes frictionless
When custom refinement is needed, the full Blender pipeline ties everything together. Thanks to CC Auto Setup and DataLink, both character shapes and clothing adjustments can be sculpted directly in Blender and seamlessly synced back to Character Creator.
Related Posts
- A Stylized Wolverine Workflow with Character Creator 5, ActorMixer & Blender HD Workflow
- Mix Custom Aliens Into Infinite Characters with CC5 ActorMIXER Pro