Overview
In this tutorial, we will quickly create a John Wick-inspired 3D caricature based on a sketch.
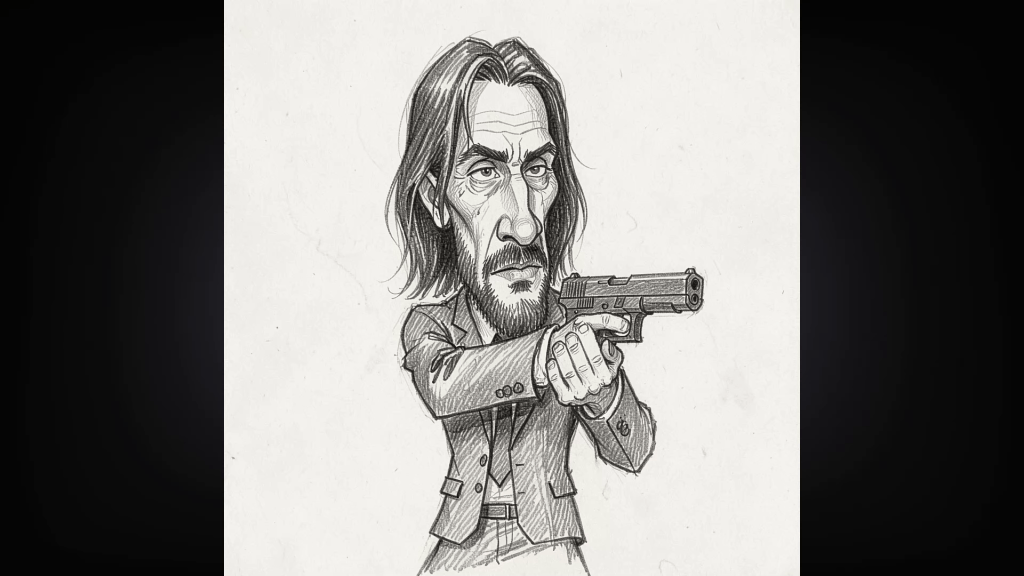
We will leverage the power of Character Creator’s ActorMIXER to create a strong base for an exaggerated character, use Blender for custom grooming and refining, and finally, bring the character to life in iClone. During this process, we’ll be using AI-generated animation and the Video Mocap plugin.
Software Used:
- Character Creator (with ActorMIXER and CaricatureMIXER pack)
- Blender (with Hair Tool add-on recommended)
- iClone (with Video Mocap plugin)
- AI Video Generator (e.g., Google Flow/Veo) used for motion source.
Mythcons
Greetings, my name is Peter Alexander. In this demonstration, I’m going to walk you through how you can leverage Character Creator 5‘s new ActorMIXER as a powerful stepping stone to create unique, stylized characters. We’ll use the CC Base Mesh as our foundation, and ActorMixer will provide the next layer from which to build, making professional character creation that much easier. For this demo, I’ll be creating a stylized version of Arnold, using the Blender Autosetup pipeline, which is both cost-effective and efficient for creating characters and assets.

Step 1: Establishing the Foundation in Character Creator
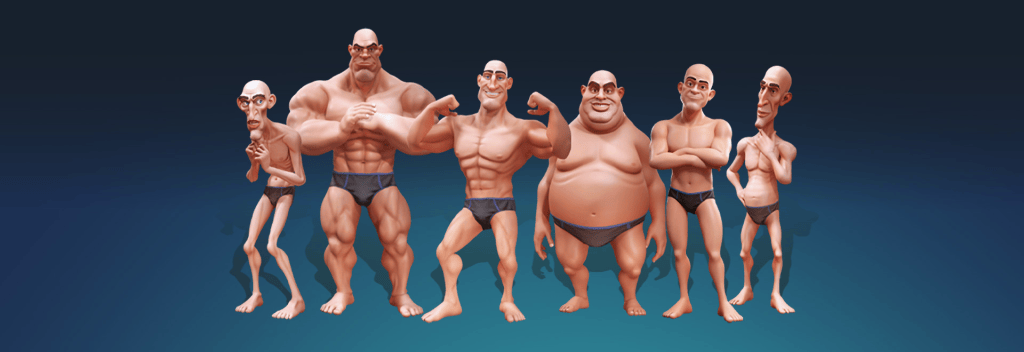
The hardest part of character design is often just getting started in a specific direction. ActorMIXER, combined with the CaricatureMIXER pack, makes this easy by providing useful directions for body types and character exaggeration.
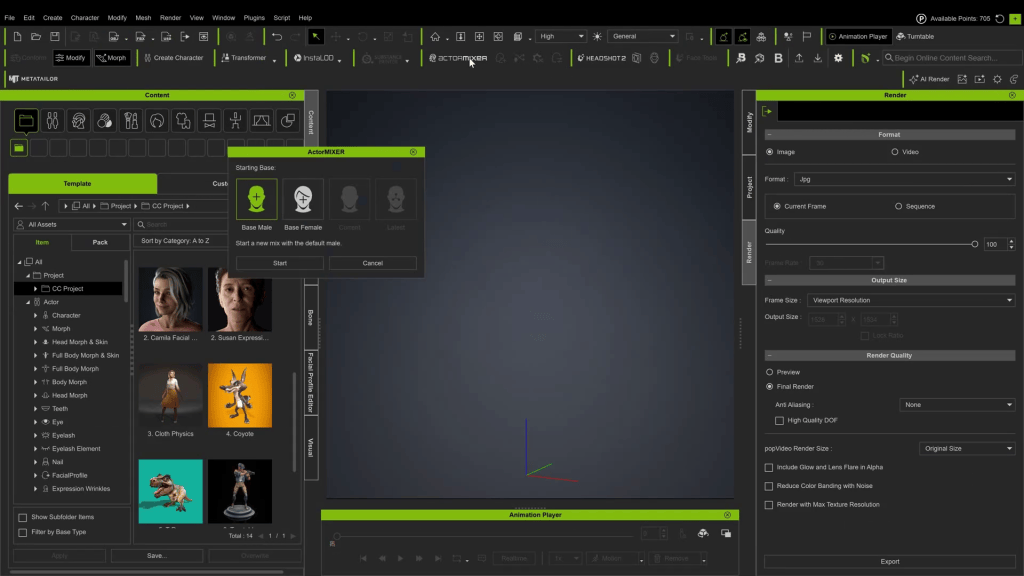
- Initiate ActorMIXER: Start by loading up ActorMIXER within Character Creator. Select the standard “Male” option.
- Define the Shape: Ensure the CaricatureMIXER pack is loaded. Begin defining the character’s shape by mixing the presets.

- Target the Look: For a John Wick caricature, aim for a fairly slender body, a thin face, and a long, narrow nose. Leaning towards the “Thin” shape preset in the CaricatureMIXER pack is a good starting point to dial in the exaggeration.
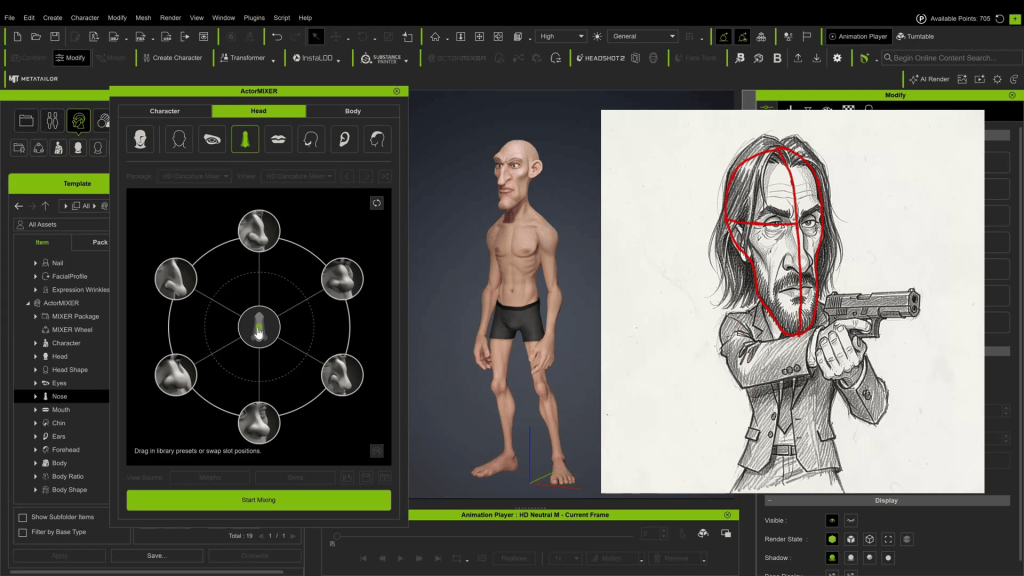
Pro-Tip: While these packs provide a solid foundation, to really develop a strong caricature style, it is highly recommended that you study master artists like Tom Richmond.
Step 2: Refining Proportions and Initial Assets
Once the general direction is set in ActorMIXER, exit back to the main Character Creator interface for refinement.
- Adjust Proportions: Use Character Creator’s tools, such as Morph Sliders, the Proportion Editor, and the Edit Mesh tool, to adjust the character further.

- Exaggerate the Head: Caricatures are often defined by larger-than-normal heads. Scale the head up to achieve that distinct caricature look.
- Add Base Assets: Give the character a basic prefab suit from your existing content library and add some initial facial hair.

- Assess Needs: If you cannot find the exact hairstyle needed in your library, prepare to send the character to Blender for custom creation.
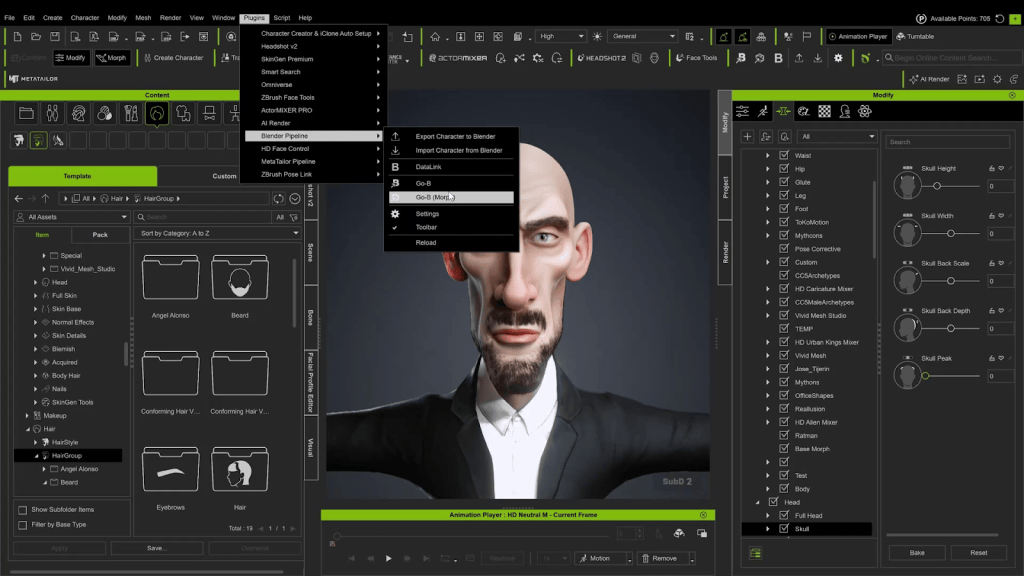
Step 3: Custom Grooming and Rigging in Blender
Send the character FBX to Blender to refine the sculpt, fit clothing better, and create custom hair.
- Refine Sculpt and Clothes: In Blender, use sculpting tools to further refine facial features and adjust the fit of the clothing over the exaggerated body shape.
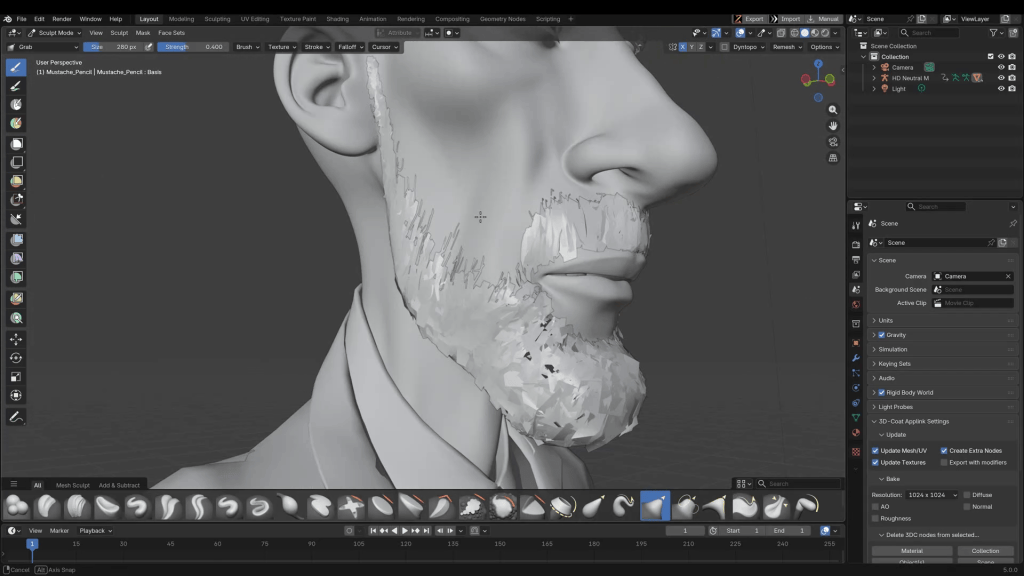
- Create Hair: Create a custom hairstyle. The Blender “Hair Tool” add-on is highly recommended for assisting with basic hairstyles. (Optional: Add extra assets, such as a suitable tie, if available in your Blender assets).
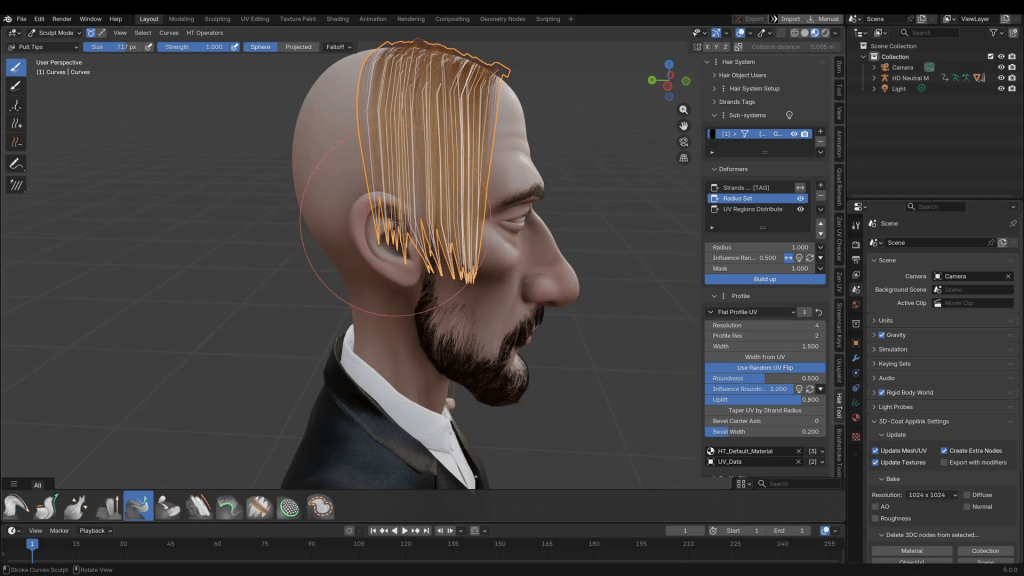
- Rigging Assets: Once the hair and accessories are created, they must be rigged to the main character’s armature.
- Select the item (e.g., the hair object).
- Hold Shift and select the character armature.
- Press Ctrl + P to parent them.
- Choose “With Automatic Weights” (this is the most common selection for clothing).
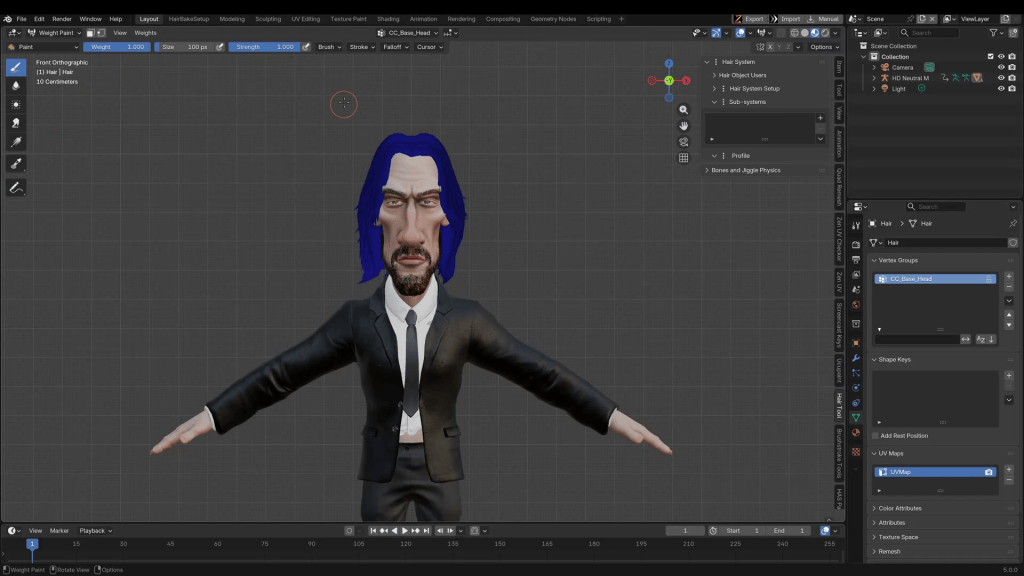
- Adjust Weight Skinning: Refine the rigging by adjusting weight painting. For short-to-medium hair like this, generally assign 100% of the weights to the “Head” vertex group. (For longer hair, you might also need to include neck groups).
Step 4: Preparing AI Motion Capture in iClone
With the character model finalized, send it back through Character Creator for any final checks, and then export it to iClone. Before applying motion to the character, you need a source video for the motion capture.
- Generate AI Video: Use an AI video platform (such as Google’s Flow using Veo) to generate the desired motions. For this tutorial, three martial-arts style clips were generated and stitched together to create an 18-second fight sequence.
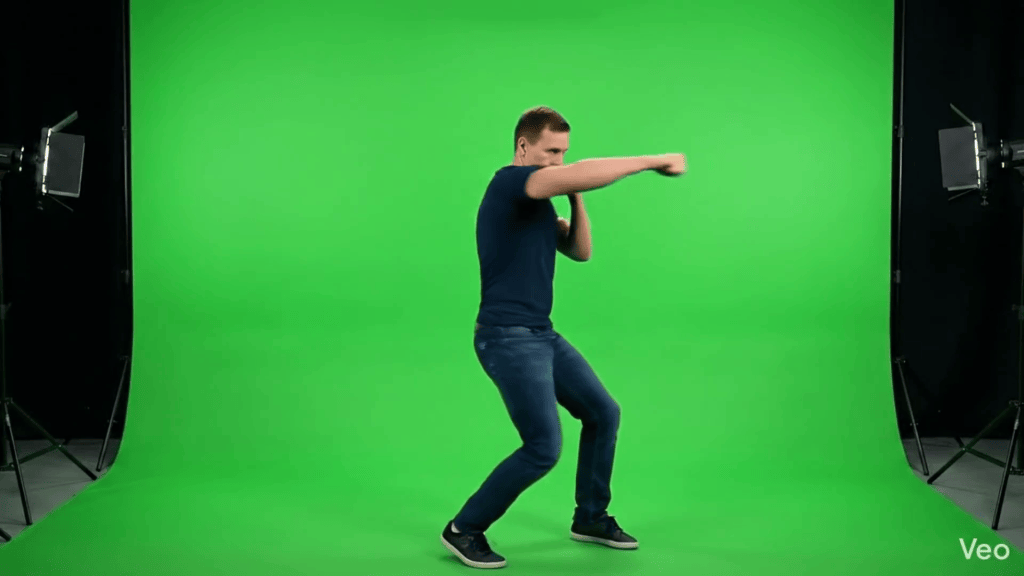
- Motion Selection Advice: The Video Mocap plugin is a credit-based service. To maximize it, use input videos with very deliberate motions that are not too fast. Things like dance moves are perfect; super-fast combat motions or flips might yield mixed results.
Step 5: Applying Motion Capture
- Load the Video Mocap Plugin: In iClone, open the new Video Mocap addon.
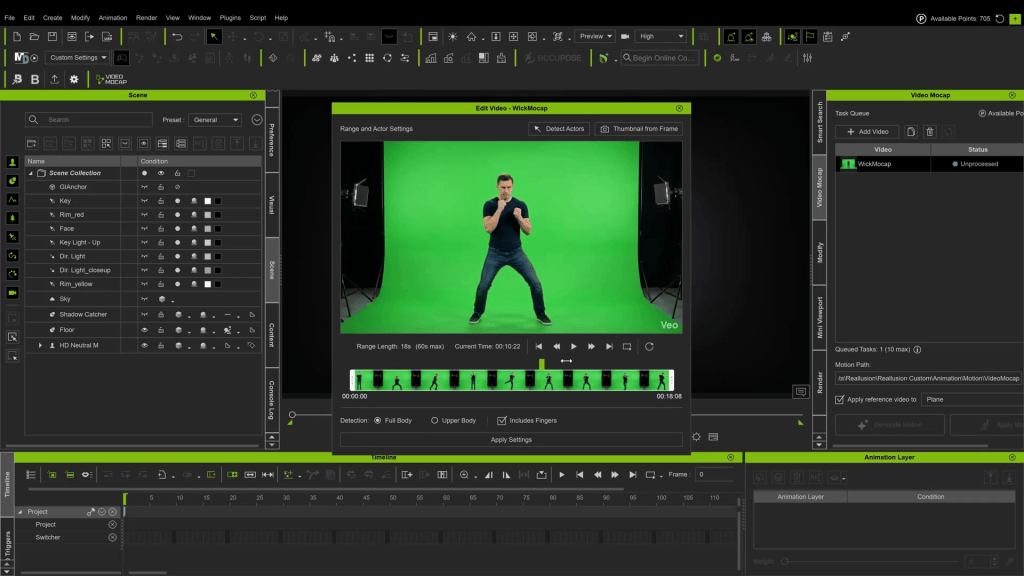
- Import Source Video: Load your AI-generated martial arts video.
- Settings: If it is a solo animation, you do not need to select “Detect Actors”.
- Sample the Motion: Analyze and sample the video movements. (Note: This 18-second video took approximately 10 minutes to sample. While this seems long, manually animating these moves would take significantly longer).
Conclusion
Once the motion is generated, apply it to your character. iClone will generate a plane showing the input video behind your character for comparison purposes.
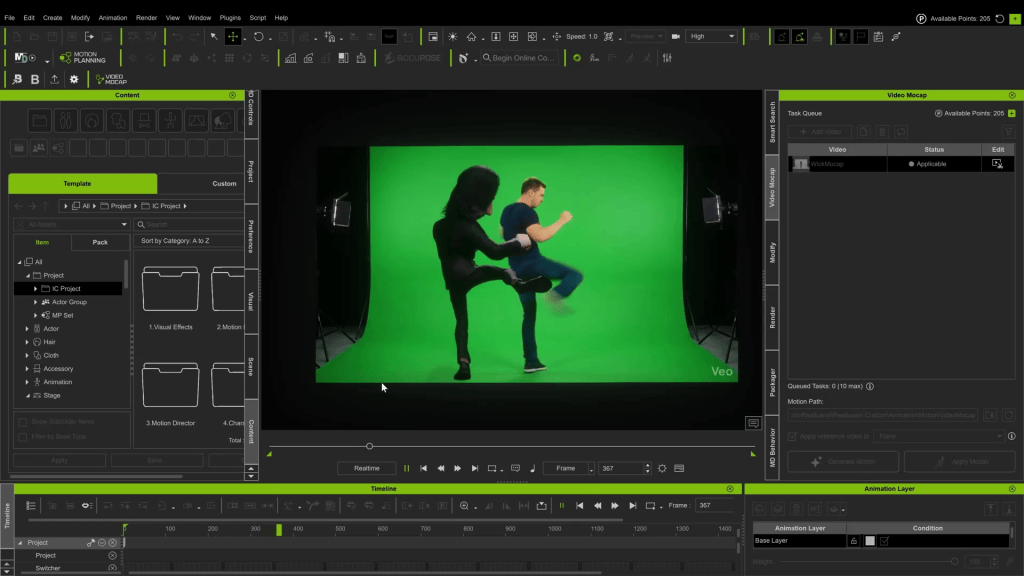
By experimenting with clear video inputs, you can maximize your animation results. And there we have it: John Wick is animated and ready for revenge.
Related Posts
- A Stylized Wolverine Workflow with Character Creator 5, ActorMixer & Blender HD Workflow
- Mix Custom Aliens Into Infinite Characters with CC5 ActorMIXER Pro
- Creating a Stylized Arnold Schwarzenegger 3D Caricature with CC5, ActorMIXER & Blender