Project “Henshin!” (変身!) is a one-minute full CG animation, showing a uniform-dressed crowd celebrating during a festive time. Made with Character Creator, animated in iClone and environment decorated with the latest BuildingGen Plugin. This is also John’s artistic and metaphorical transformation, representing his exciting leap from Cinema 4D to the captivating world of Houdini.

John Yim
Kay John Yim is a Chartered Architect at Spink Partners based in London. He has worked on a wide range of projects across the UK, Hong Kong, Saudi Arabia, and Qatar, including property development and landscape design. His work has been featured on Maxon, Artstation, CG Record and 80.LV.
Yim’s growing passion for crafting unbuilt architecture with technology has gradually driven himself to taking on the role of a CGI artist, delivering visuals that not only serve as client presentations but also as means of communication among the design and construction team. Since the 2021 COVID lockdown, he challenged himself to take courses in CG disciplines beyond architecture, and has since won more than a dozen CG competitions.
“Henshin,” a beloved term in Japanese Anime for initiating electrifying transformation scenes, fittingly translates to “transformation.” In this project, I blend the pulse of modern dance with the grandeur of Gothic fashion and architecture. Inspired by the vibrant and whimsical dance scenes in Anime, I sought to capture that same energy and playfulness in “Henshin!.” As a former Cinema 4D enthusiast, this project marks my first deep dive into Houdini’s procedural magic—a transformative experience for me as both an Architect and a CG Artist. Houdini’s unique node-based interface was intimidating at first, diverging significantly from what I was used to. To navigate this new terrain, I balanced experimentation with thorough research on relevant use cases. In this article, I will outline my workflow, highlighting the key takeaways and challenges I faced during this project. I will also share valuable resources, including articles and tutorial links, that helped me troubleshoot and ultimately achieve my desired outcome.
Intro – why I switched to Houdini
Rhino has always been my go-to tool for 3D modeling as an Architect. Its accuracy and intuitive user interface, reminiscent of hand drawing, made it my favorite for over a decade. My muscle memory in Rhino modeling was so ingrained that I became very accustomed to a ‘manual’ or ‘destructive’ workflow. In the early days of exploring CG rendering, I turned to Cinema 4D as my gateway to third-party renderers like V-Ray, Redshift, and Octane. My process involved exporting models from Rhino into MOI3D and then into Cinema 4D. This repetitive workflow, especially with frequent design iterations and client brief changes, was grueling. Yet, I brute-forced my way through, never considering an alternative.
A turning point came a few years ago while working on an Unreal Engine project, ‘An Unreal Diorama‘, which required baking hundreds of texture maps in Substance Painter. The sheer volume of repetitive tasks quickly overwhelmed my excitement and physical stamina. Desperate for a more automated solution, I discovered Houdini. Houdini’s fully procedural nature was a revelation, easily handling repetitive tasks. At first, I used Houdini as a Cinema 4D ‘plug-in,’ exporting models into Houdini for poly-reduction, quad-meshing, or UV-mapping before re-importing them into Cinema 4D for rendering. Over a year and a half of intermittent use, I gradually transitioned most of my modeling, texturing, and rendering tasks into Houdini. This shift unlocked new possibilities for my professional and personal projects, particularly in iterative FX like pyro and flip simulations, cloth simulations using Vellum, and procedural modeling.
Character (iClone + Marvelous Designer + Houdini)
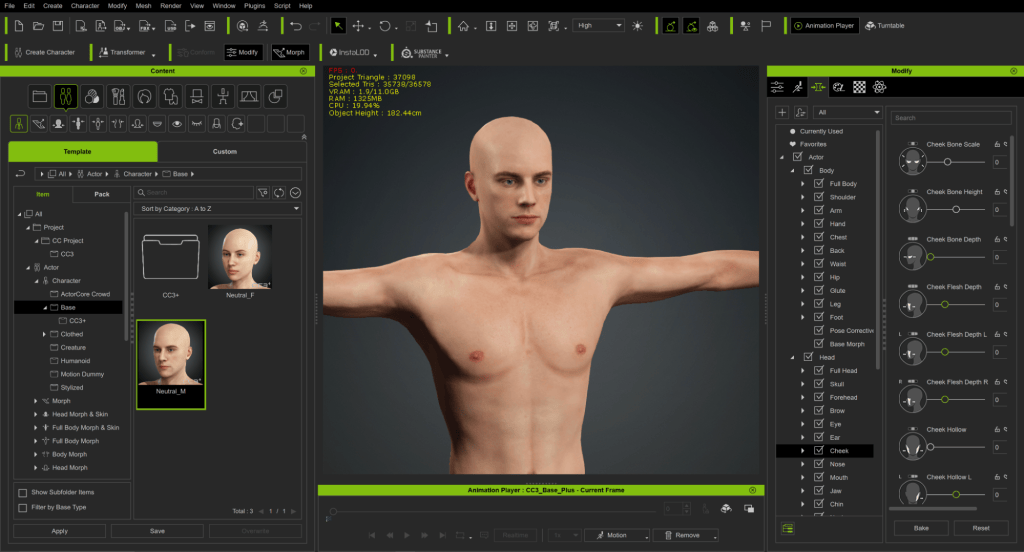
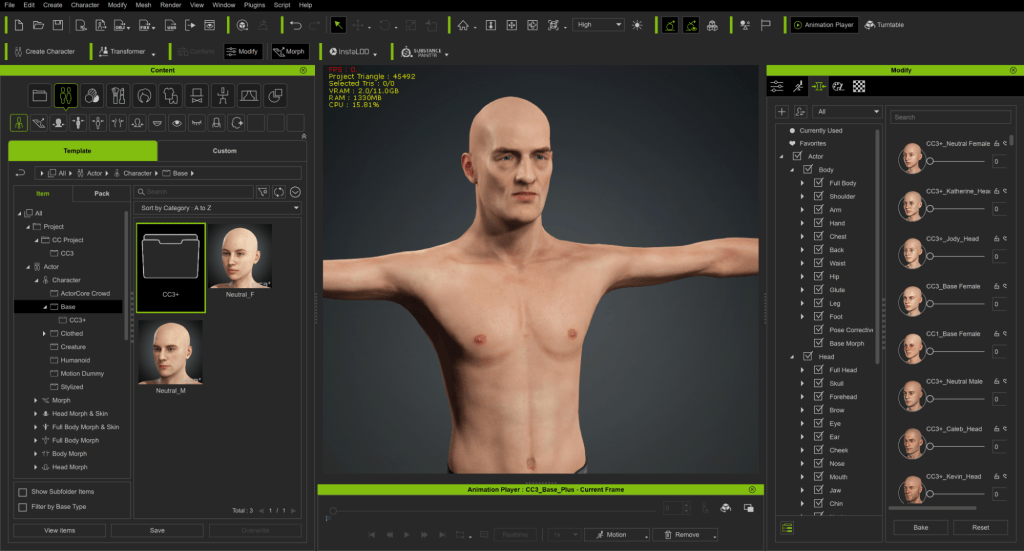
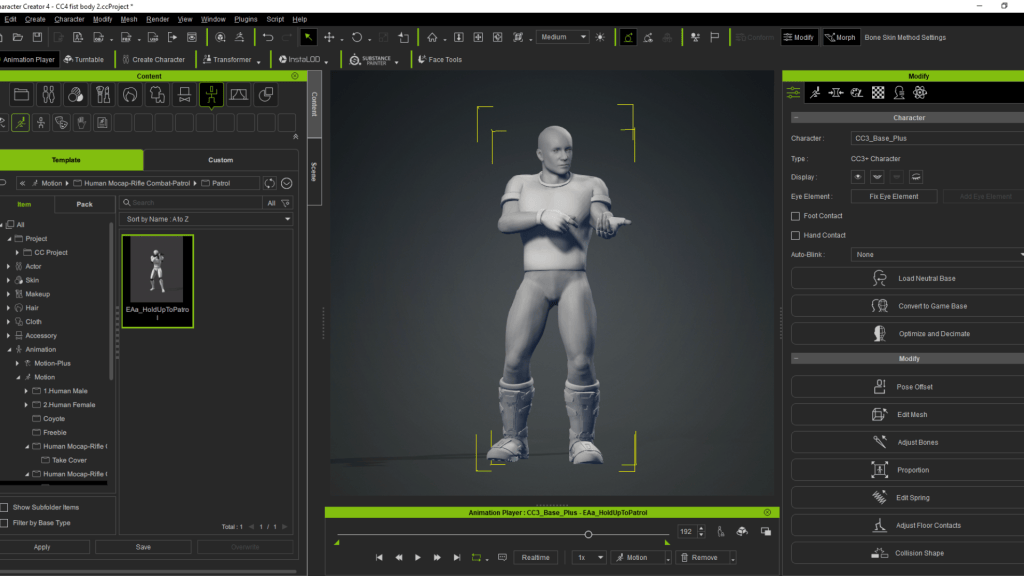
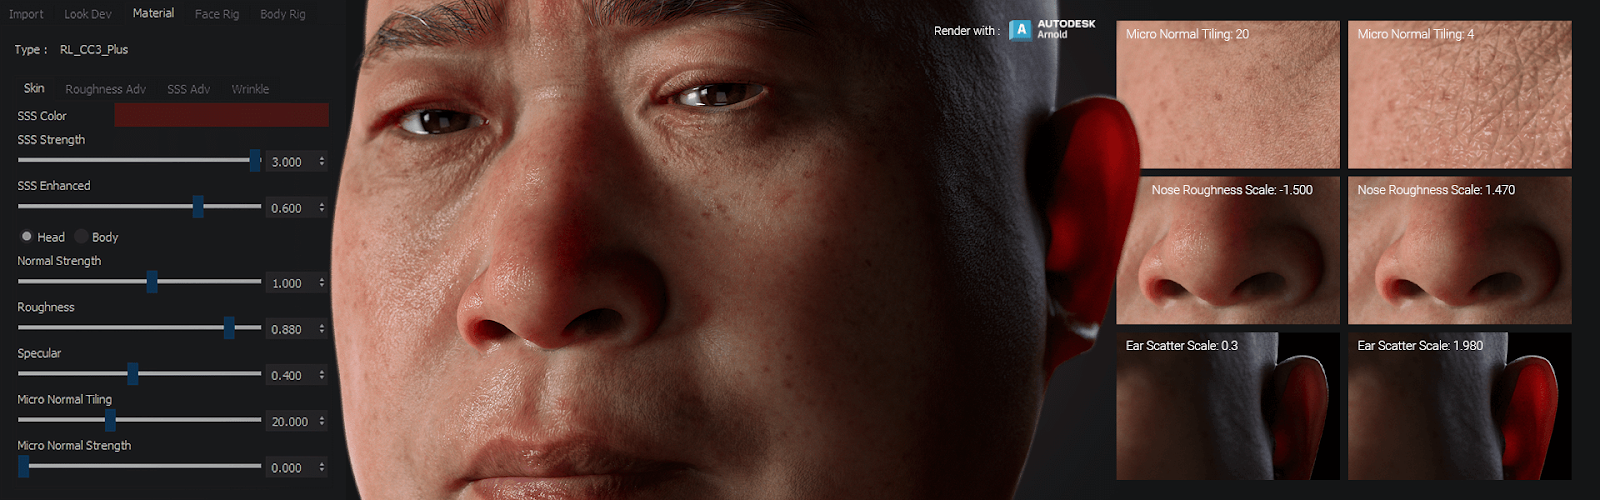
My character workflow began in Character Creator, where I primarily used the body morph sliders and Skingen to create my two characters. I then brought the characters into iClone and explored the Actorcore library for mocap animations. I chose 5 sets of Actorcore Motions and blended them into 3 sets of character animations:
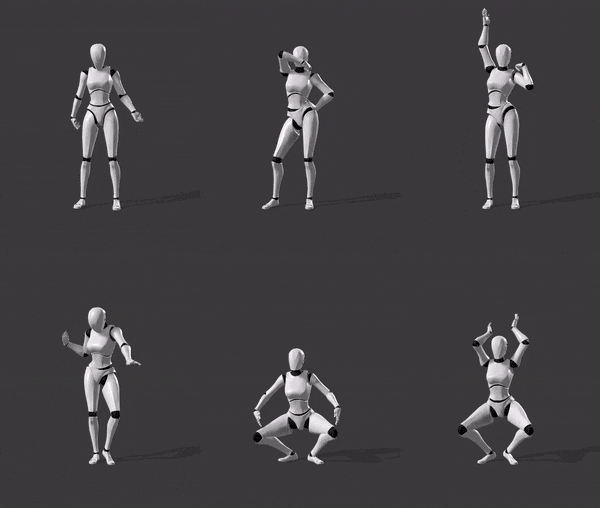 |  | 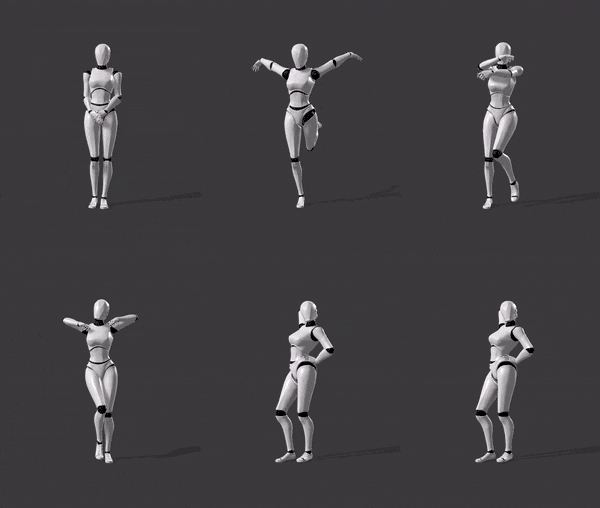 | 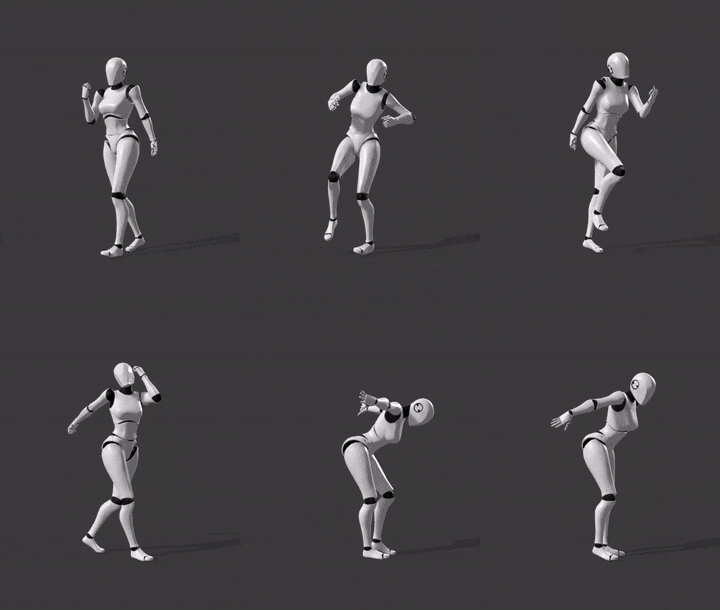 | 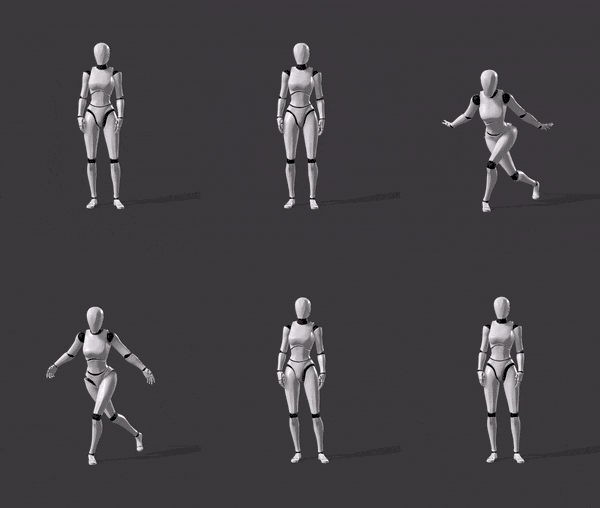 |
The ‘Edit Motion Layer‘ and ‘Motion Correction‘ functions were the ones I used most frequently.
I always set the first frame as a T-pose or A-pose, with at least 15 frames of buffer before the character animation starts. A-pose is recommended for cloth creation in Marvelous Designer and cloth simulation in Houdini Vellum.
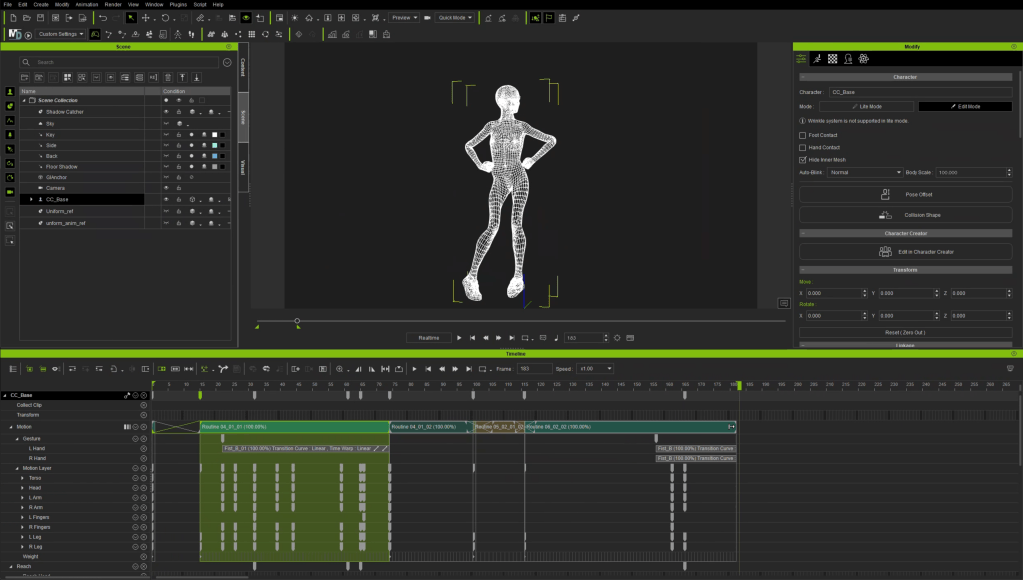
Once I was happy with the character animation, I exported it from iClone as both Alembic and FBX files for use in Houdini and Marvelous Designer. The Alembic file was my primary working file throughout the project. Note that at the time of writing Houdini has a known bug that does not import iClone FBX characters’ accessories properly (hair, clothes, shoes etc.), so I recommend using Alembic to avoid issues down the line.
Cloth Preparation
The character clothes are prepared separately in Marvelous Designer using the first frame of the exported Alembic file from iClone. Cloth creation is a complex topic beyond the scope of this article, but I generally look for sewing patterns on Etsy or start with the clothing templates that come with Marvelous Designer by default.
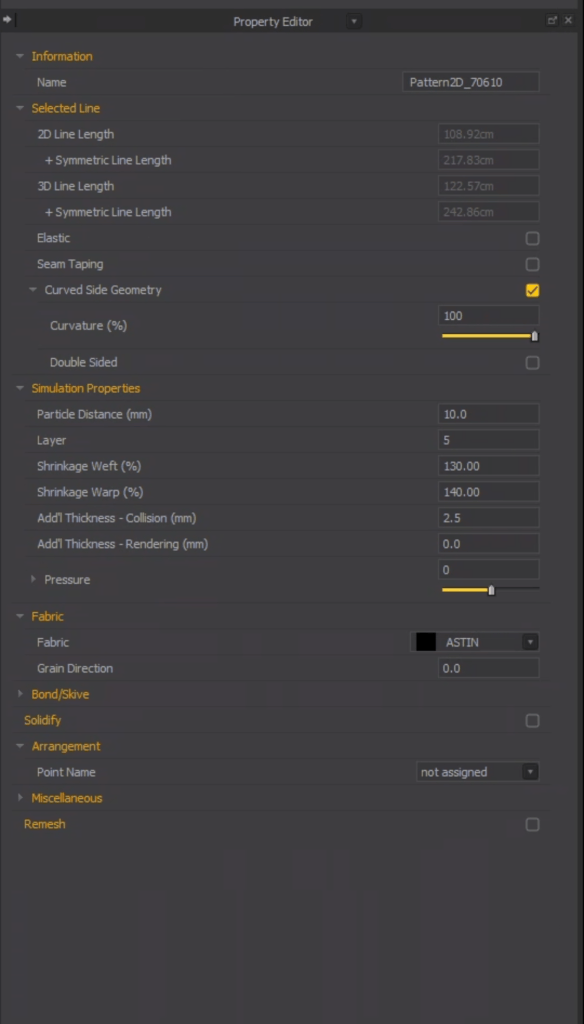
There are two essential points I always keep in mind during this process:
1_Avoid adding garment details with overlapping cloth (e.g., the hem of a dress), as this can cause issues during cloth simulations with Houdini Vellum.
2_Maintain a particle distance above 10mm for the garment. Lower particle distance increases the simulation time in Vellum.
Marvelous Designer’s cloth simulation is extremely user-friendly, but its lack of control over partial simulation and collision masking makes it unreliable for art direction or design iteration.
Once I have the garments fitted to the character’s A-pose, I re-topologized them as quad mesh (right click on garment ‘Quadrangulate’) and then export them as OBJ files into Houdini (as welded). Note that Alembic files exported from Marvelous Designer do not include any material data, so unless I am exporting animations from Marvelous Designer I always default to exporting in OBJ.


Vellum Simulation in Houdini
With both the character animation and garment A-pose imported into Houdini, I first use the ‘Transform’ node to scale them down to the correct units. Houdini’s native unit is meters while Marvelous Designer and iClone works in centimeters, so I always have to scale imported files down by 0.01.
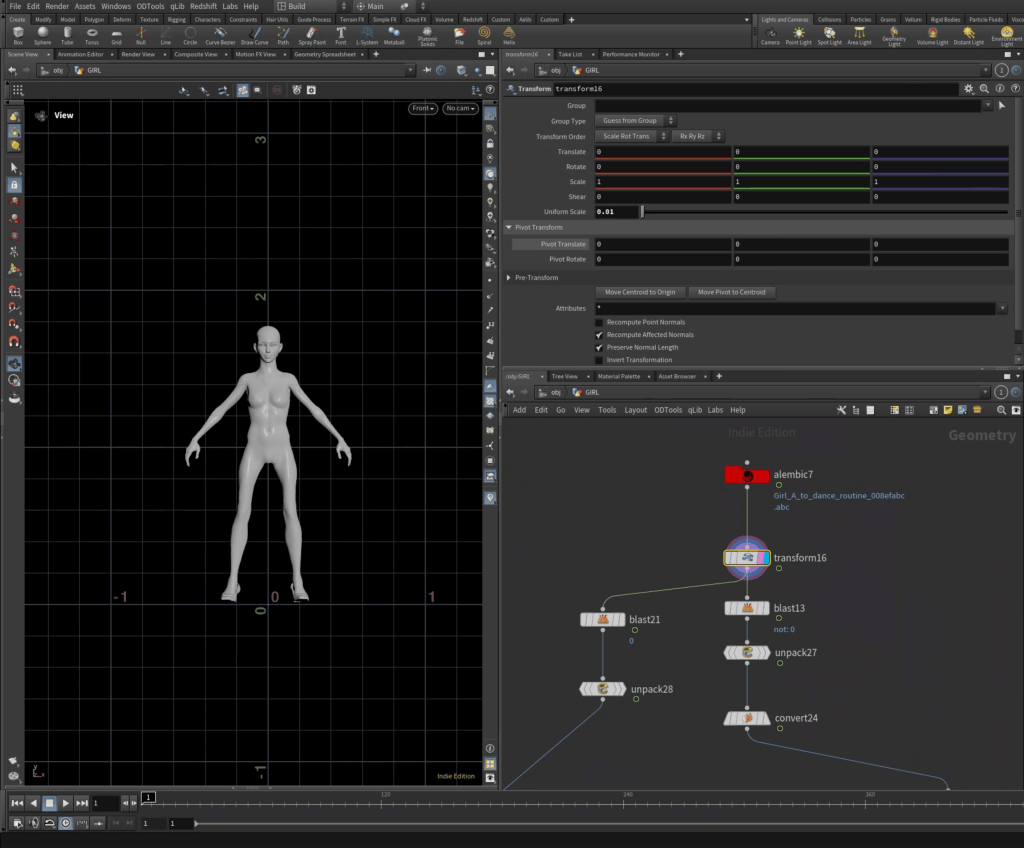
My overall cloth simulation workflow in Houdini can be categorized into four main stages:
i: Character pre-Vellum setup
I separated the main body from the rest of the body parts, including the eyes, shoes, and nails. From the hundreds of Vellum tests I did, I found that armpits are the most problematic areas during cloth simulation due to the minimal space for the cloth mesh to fit into. To address this without delving into muscle simulation, I perform a Vellum simulation solely on the main character body, with the armpits masked out to solve intersecting frames. This simulation resolves skin intersections and prevents future issues down the line.
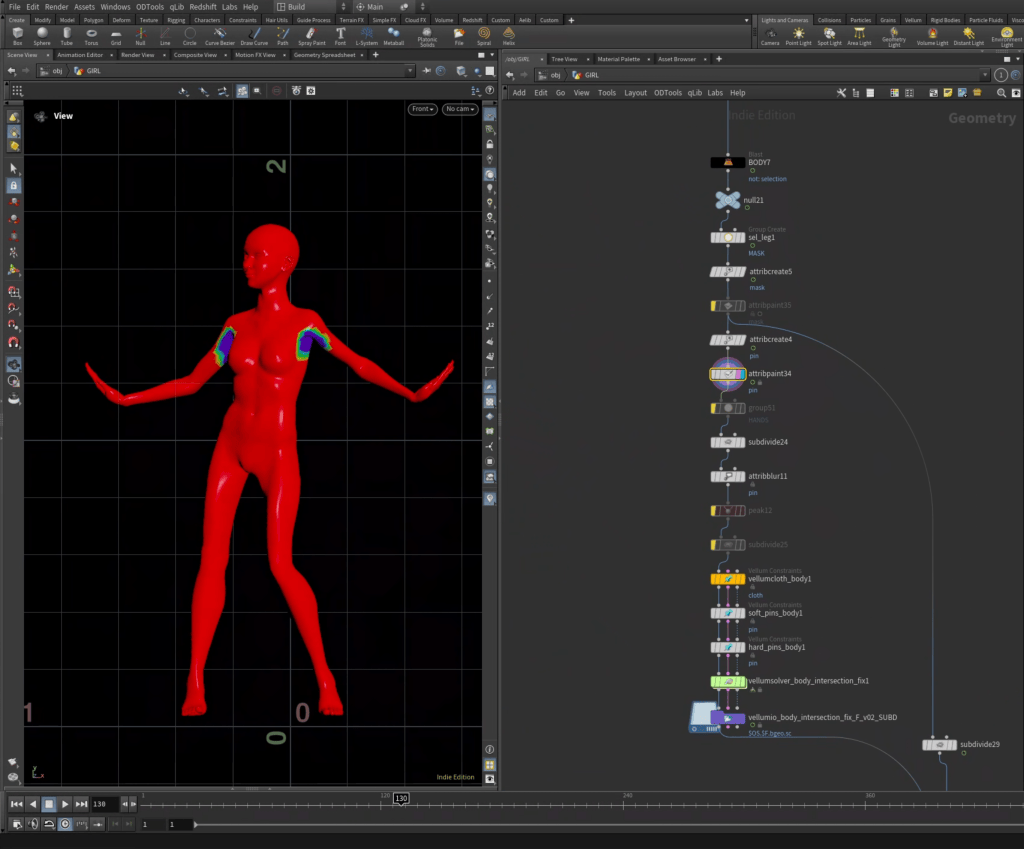
This workflow is also outlined in detail on SideFX’s site: ‘Vellum Cloth: Tips & Tricks.’
ii: Garment pre-Vellum setup
I first separated the imported OBJ file by materials. I used a handy free plugin ‘MASSEParmUtilities‘ to do this, but one can just use ‘Blast’ nodes to do the same. My principle is to always perform Vellum simulations on each separate clothing item before combining multiple items in one simulation, making iteration and fine-tuning more efficient.
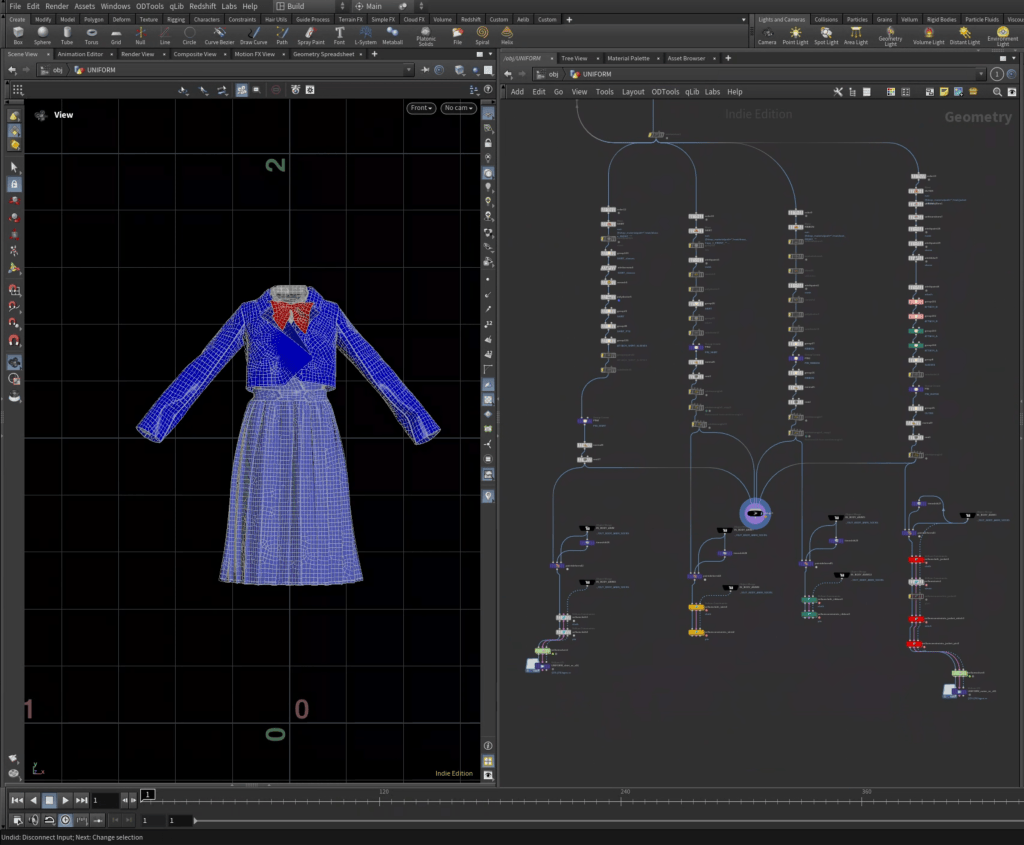
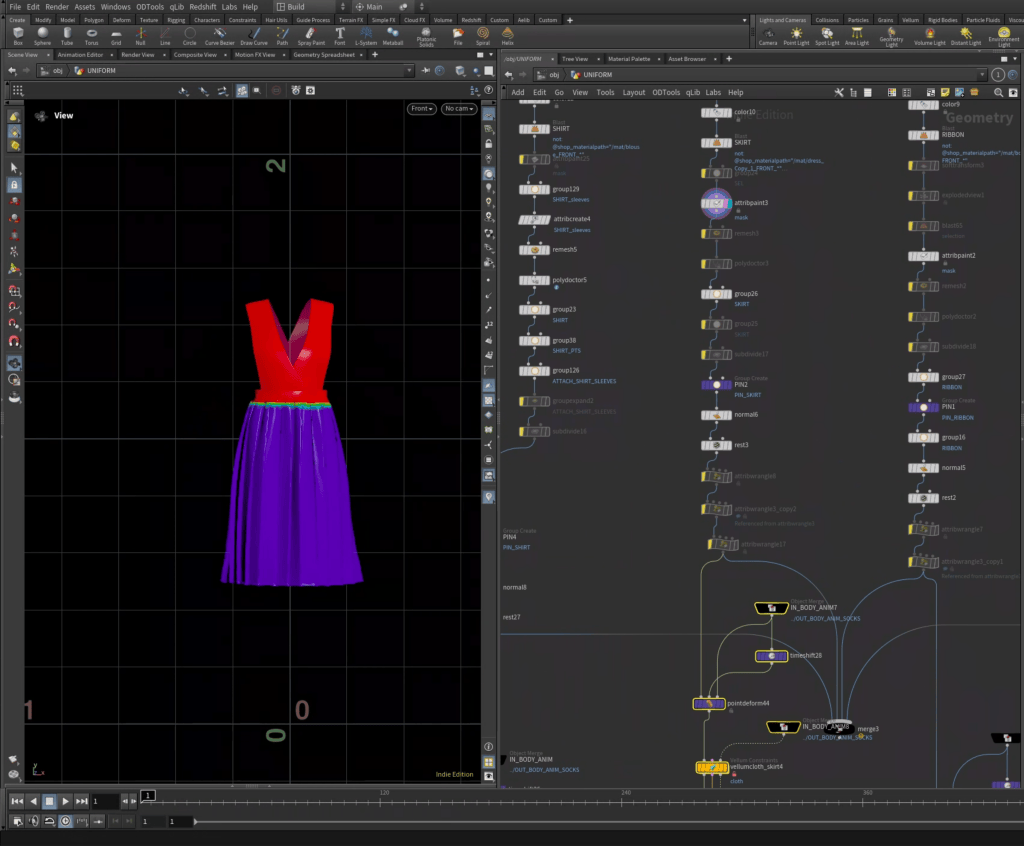
I manually painted masks on the cloth to define which parts of the clothing should ‘stick’ to the animated character at all times. Buttonings of jackets were also defined with paint masks. The paint mask attribute is then promoted to point groups with a simple expression: @mask_name > 0.5. I then used a ‘Point Deform’ to deform the static clothing to the animated character.
This process involves a lot of trial and error, as Vellum properties vary by mesh density and do not adhere to real-life metrics. I usually begin with the Fabric Samples found in the SideFX Content Library. SideFX documentation recommends using a ‘Remesh’ node to triangulate clothing into uniformly distributed triangular meshes before Vellum simulation, as triangular meshes use fewer points than quad meshes (renderable mesh) to capture more details (e.g., wrinkles). However, I find that quad meshes can produce more realistic simulations for thicker fabrics like leather. I always run test simulations with different mesh densities on both quad and triangular meshes whenever time allows. One of the best tutorials I found online on Vellum setup is ‘Houdini Vellum Creature Setup’ on CGCircuit, which explains how to set up multi-layered clothing for Vellum simulation in great detail.
iii: Vellum simulation
Once I had all the separate simulations dialed in, I brought all the clothing together using either a ‘Vellum pack-unpack’ workflow or by combining them into a single stream.

I personally prefer setting up multilayered cloth simulations within a single stream, as I find it much clearer to read and easier to attach different cloth parts together when necessary. For instance, I attached the jacket sleeves to the shirt sleeves to ensure that the jacket does not slide down the character’s arm when her arm is lifted.
iv: Post-Vellum clean-up
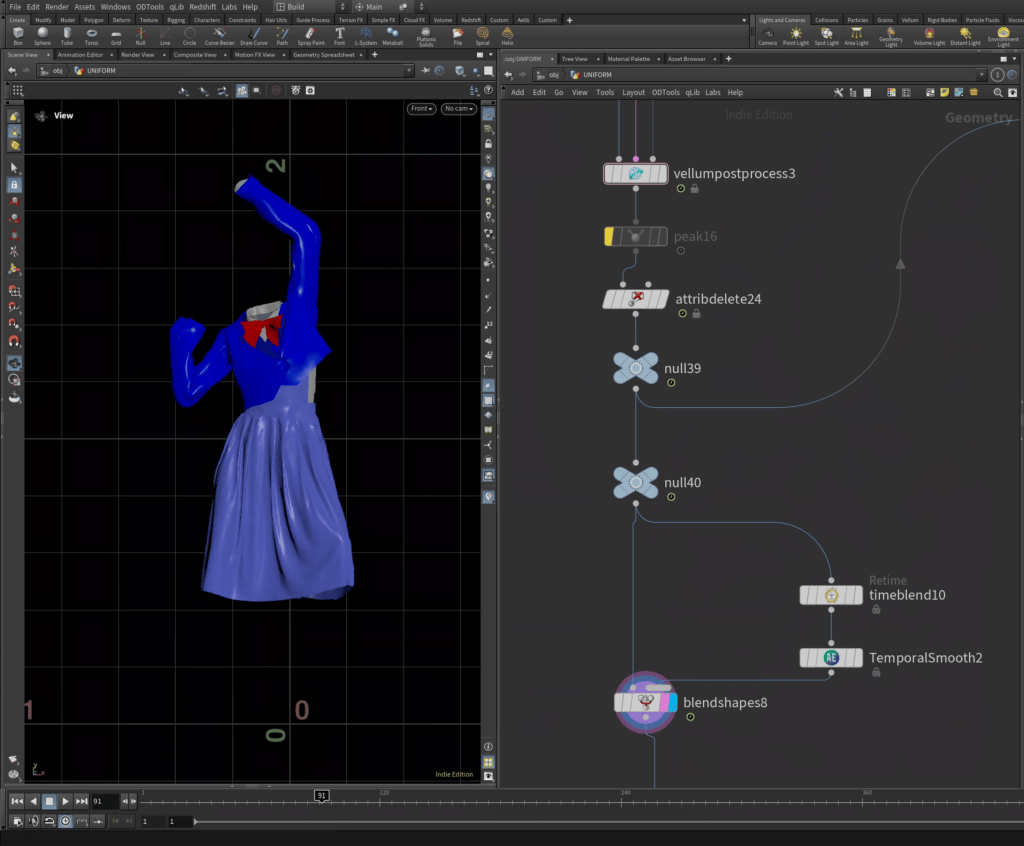
On average, it took me about 40 iterations to achieve the final Vellum simulations that I am happy with. I usually add a ‘Post vellum’ node after the simulation to smooth out some of the spiky or rough surfaces. Vellum sometimes produces jittery results during minimal animation (e.g., idle character animation with very little movement), for which I use the ‘AE temporal smooth’ node from Aelib to eliminate unnecessary movements.
With all the simulations cached, I use a ‘Point Deform’ node to transfer the simulation from a low-res/triangular mesh to a renderable/quad mesh.
Cloth Transformation
The cloth transformation is composed of three parts:
i: Disintegration with Sop Solver
Disintegration is essentially achieved with a Sop Solver that spreads and accumulates grouped points, using a Blast node to delete points with values above a certain threshold. I first learned about the Sop Solver from Applied Houdini’s tutorials—Particle IV covers the theory of the Sop Solver and how to spawn particles (such as petals) along the disintegration effect.
Applied Houdini – Particle IV / Another great intro to SOP Solver from Far Out Studio:
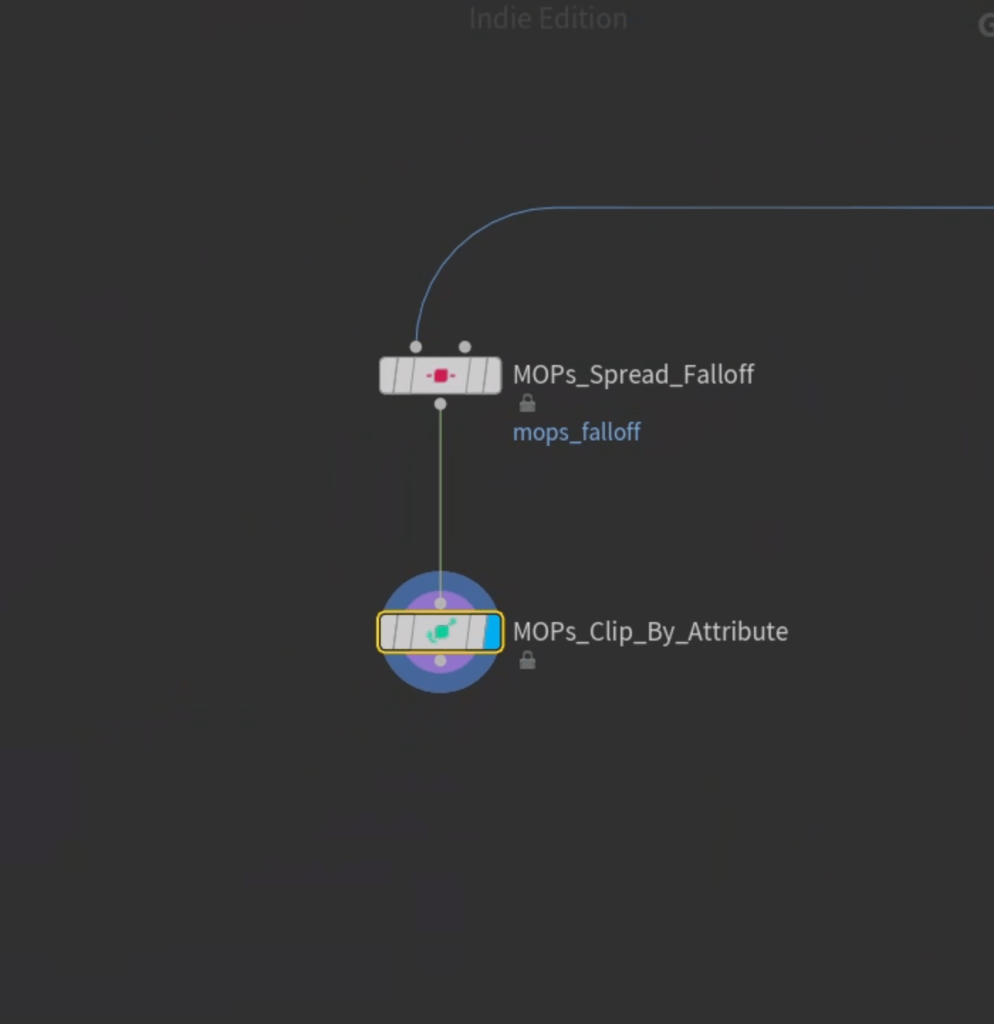
In retrospect I could have used a combination of ‘MOPs Spread Falloff’ & ‘MOPs Clip by Attribute’ to completely replace my aforementioned setup, both nodes could be found within the free MOPS houdini toolkit and simplifies a lot of what I did for this project.
ii: Pyro simulation with Axiom Solver
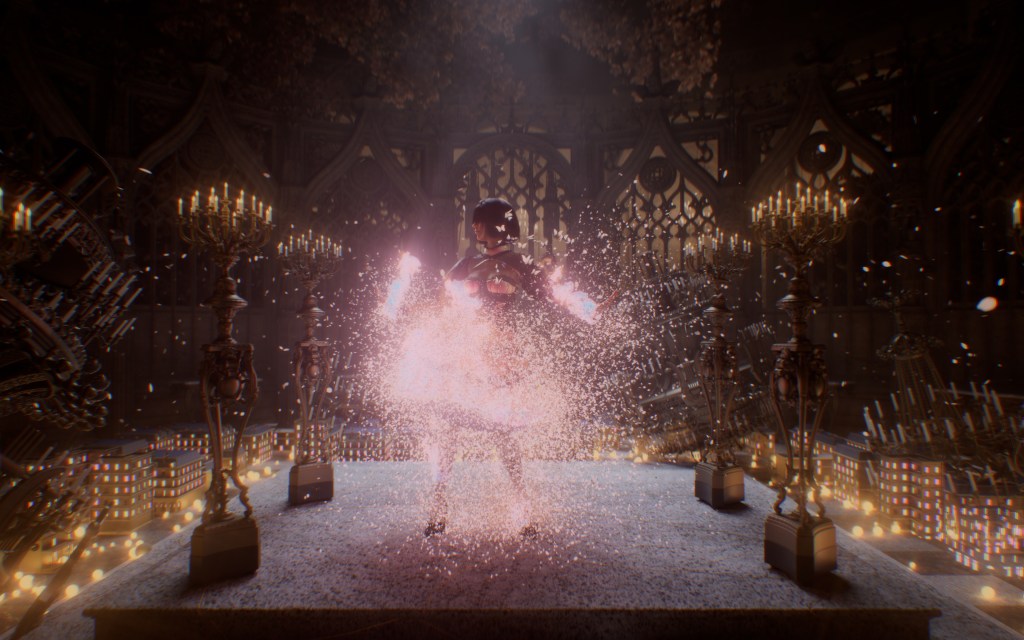
With the SOP ‘Solver’ cached, I blasted out the disintegration edge and fed it into the Axiom Solver for the pyro simulation (the same result could also be achieved by Houdini’s Pyro Solver, Axiom Solver is speedier on GPUs) . The resulting pyro simulation is then fed into a Pop simulation to generate swarming particles onto which I instanced butterflies. The butterfly swarm consists of nine time-shifted variations of the same butterfly animation.
https://www.youtube.com/watch?v=nJa5RbQK9zU&t=2s
iii: Butterfly spawning with Pop simulation
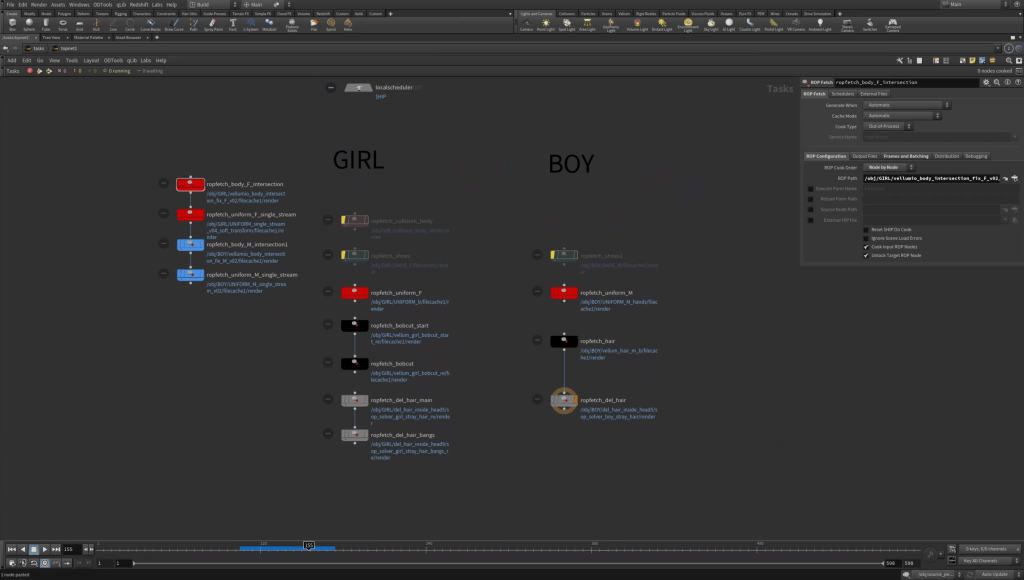
I setup a TOPnet for all my simulations, such that in case when I have to tweak my character animation and re-import into Houdini from iClone, I could just press a button and let Houdini re-run the Vellum simulation and cloth transformation automatically overnight, rather than checking manually.
Environment
What’s the point of Procedural Modeling
Coming from Rhino NURBs modeling, procedural modeling has been one of the most challenging aspects of learning Houdini for me. As the only DCC tool that enables a fully procedural workflow, many online Houdini tutorials advocate for a completely non-destructive approach to modeling. However, this can be technically overwhelming and time-consuming. To determine the complexity of the procedural setup needed, I ask myself two questions:
Is there a possibility that I will need to model something very similar later on, or is this a one-off project?
For most architectural or geometric objects loosely modeled from photos, I prefer to keep my setup as procedural as possible. However, for one-off projects where I’m recreating an existing product, such as a chair or sofa, I may model it in Rhino and then bring it into Houdini, knowing that it’s less likely to be modified later on.
How strictly do I need to adhere to the reference, and how much freedom do I have to tweak the design of the environment?
For architectural modeling, if I’m tasked with modeling a house based on a loose sketch, I’ll set up everything to be procedural, anticipating that every dimension and proportion may change. However, if I’m provided with a CAD drawing, I might model everything in Rhino and then export it into Houdini with material attributes.
My procedural modeling workflow
Throughout the project, I typically adopt a hybrid procedural setup (10% destructive, 90% procedural) for efficiency. For instance, the altar arch-shaped screen begins with curves drawn in Rhino by tracing a reference image. Since Houdini’s curve drawing utilities are relatively primitive compared to Rhino, I prefer to do any line or curve drawings in Rhino first. This included the backbone curves of the altar screens as well as the profile/section curves.

Later, I bring them into Houdini either as FBX (planar mesh) or IGES (NURBs curves).
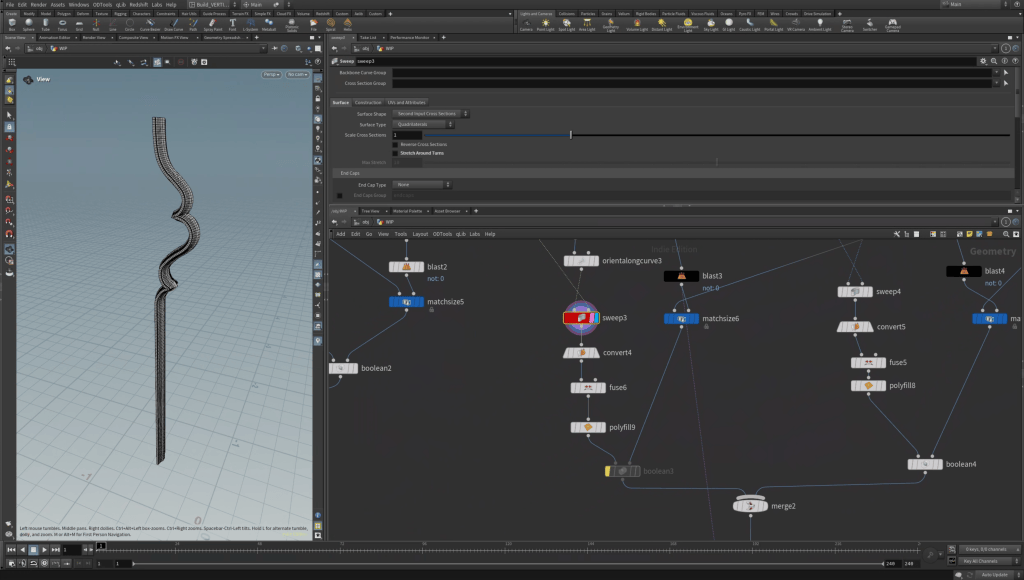
In Houdini, I utilized a ‘Sweep’ node with imported backbone curves and profile curves to create the main arch. Subsequently, I added more intricacies by manipulating the same backbone curves with ‘Soft Transform’ and ‘Transform’ nodes. Then, I used ‘Copy to Points’ to duplicate them geometrically, using the arch shape as the foundation.
Frequently used nodes
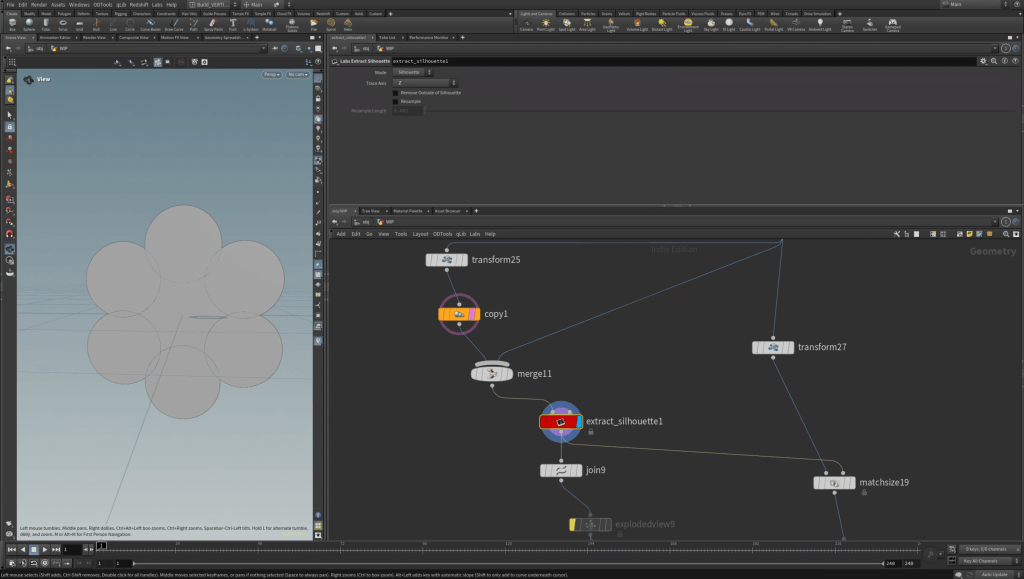
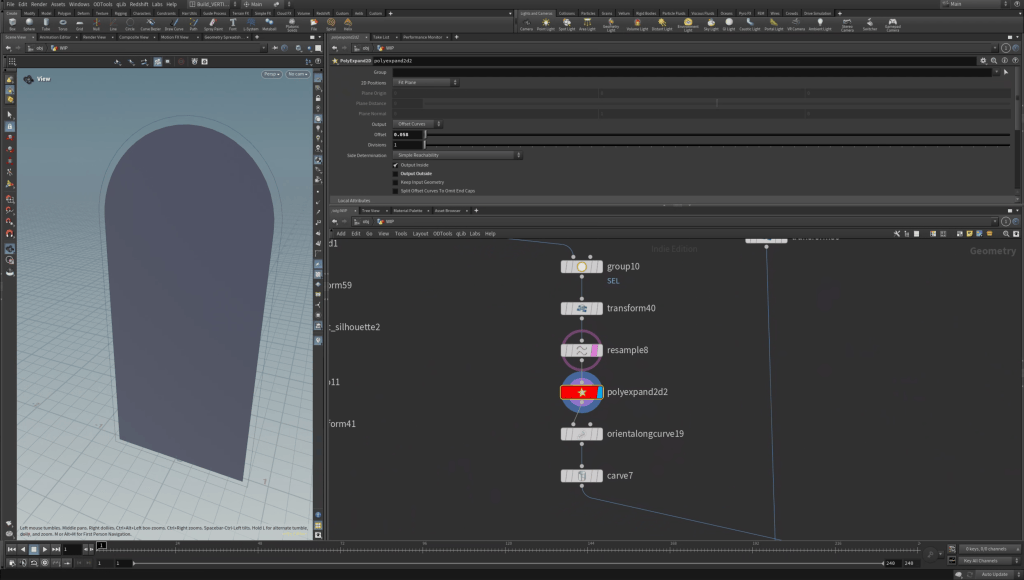
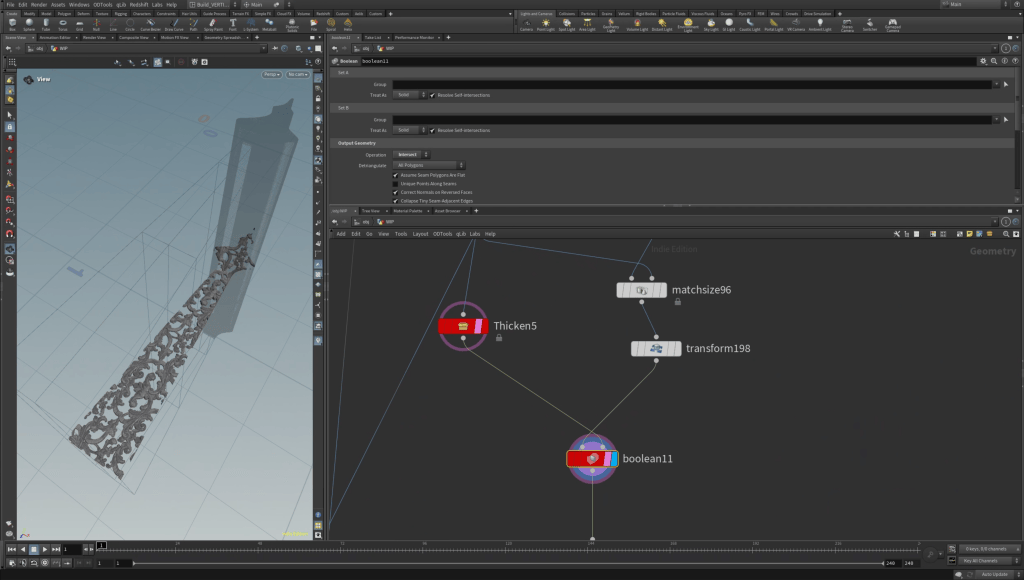
Here are a couple of nodes that I constantly utilized for a procedural modeling setup. The name of the nodes are “Match Size”, “Labs Extract Silhouette”, “Labs ExtPolyExpand2D”, “Sweep” and “Boolean & Thicken (AELib)”. Pleas see the illustration below for detailed info.

Assembly, Look-dev & Shot-framing
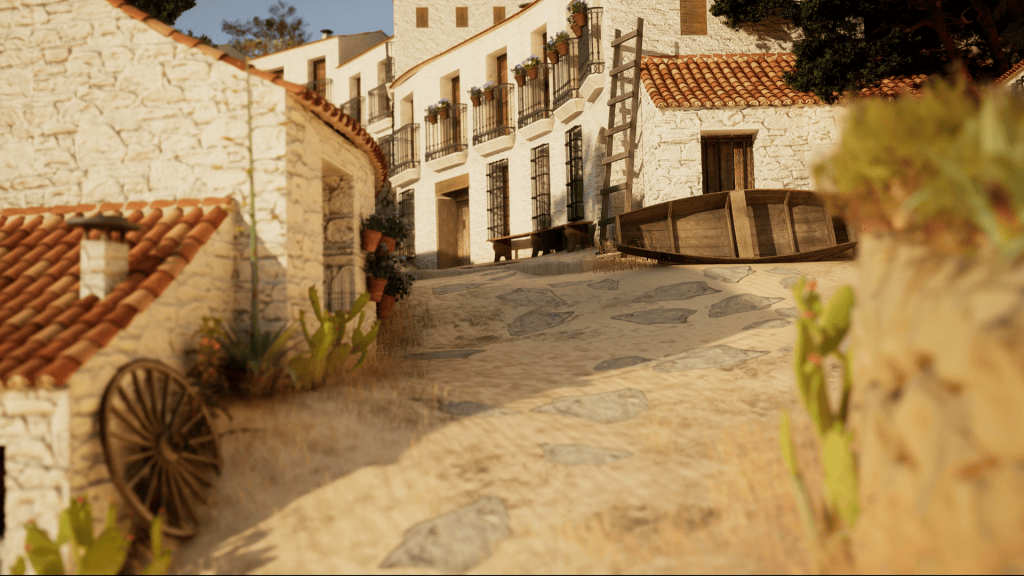
Assembly, look-dev, and shot framing were not linear processes; they required extensive back-and-forth testing to achieve the final result. I parent objects to ‘Null’s when moving them around in the scene. This way I can easily replace the object in the same position by re-parenting the ‘Null’. I used ‘Instance’ objects as much as possible to populate my scene in order to reduce RAM usage, this included the altar screens, the characters, chandeliers and the floating petals. When working on materials or shaders, I always prefer to work in context—viewing through the final animation’s camera, with appropriate lighting and environment settings—rather than isolating different objects. This approach ensures that I focus my efforts on objects and materials most visible on camera. To maintain a relatively mysterious atmosphere throughout the animation, I emphasize bottom-up artificial lighting. A major part of the look-dev process involved testing the placement of bottom-up light sources to enrich the scene. Here, Reallusion’s French Style BuildingGen Content Pack proved invaluable. This pack includes nine variations of detailed houses, optimized with minimal point counts and baked textures.
BuildingGen & French Style House Content Pack
Assembly, look-dev, and shot framing were not linear processes; they required extensive back-and-forth testing to achieve the final result. I parent objects to ‘Null’s when moving them around in the scene. This way I can easily replace the object in the same position by re-parenting the ‘Null’.

I used ‘Instance’ objects as much as possible to populate my scene in order to reduce RAM usage, this included the altar screens, the characters, chandeliers and the floating petals.
When working on materials or shaders, I always prefer to work in context—viewing through the final animation’s camera, with appropriate lighting and environment settings—rather than isolating different objects. This approach ensures that I focus my efforts on objects and materials most visible on camera.
To maintain a relatively mysterious atmosphere throughout the animation, I emphasize bottom-up artificial lighting. A major part of the look-dev process involved testing the placement of bottom-up light sources to enrich the scene. Here, Reallusion’s French Style BuildingGen Content Pack proved invaluable. This pack includes nine variations of detailed houses, optimized with minimal point counts and baked textures.
BuildingGen & French Style House Content Pack
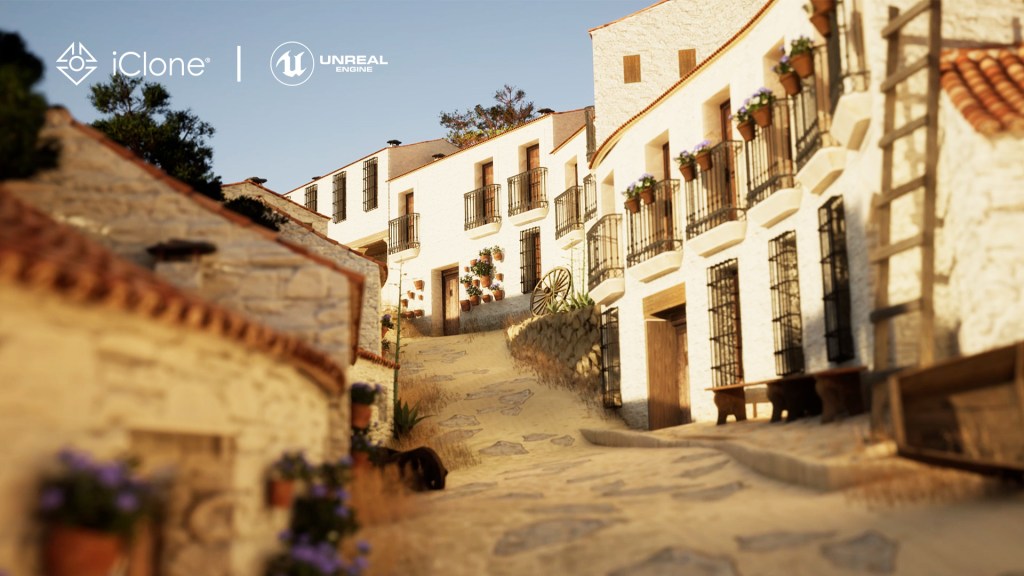
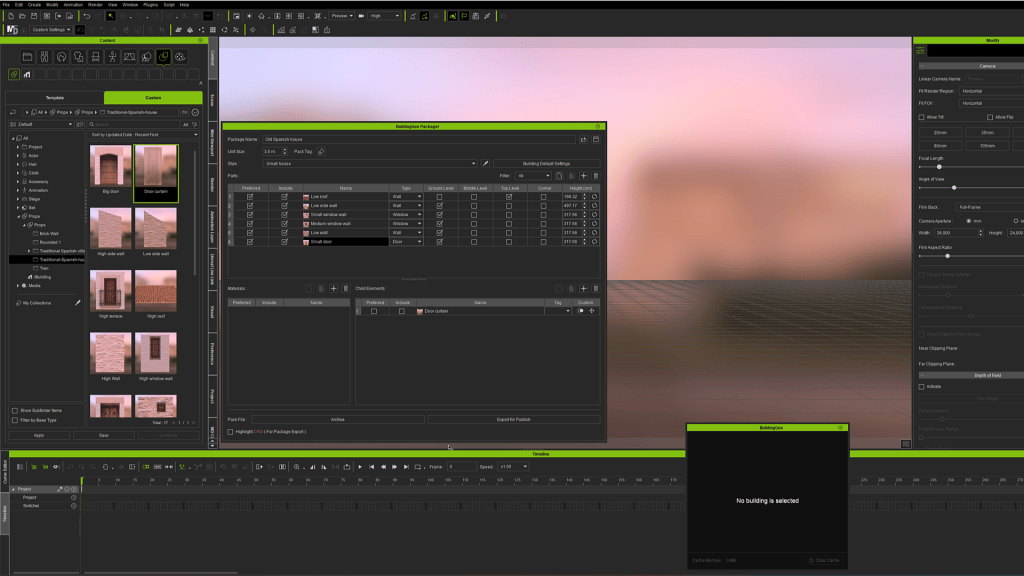
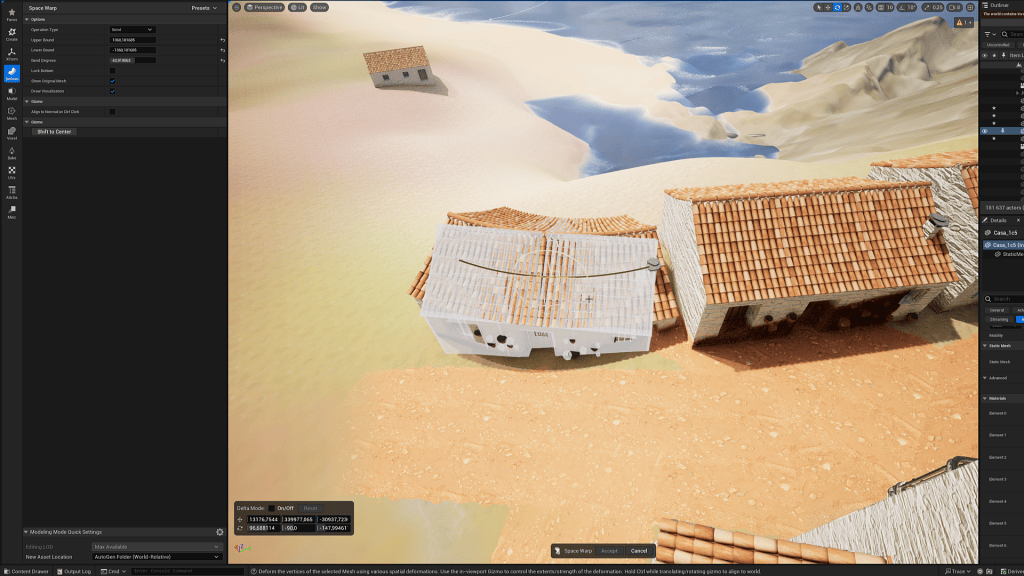
Using iClone’s BuildingGen plugin, I exported all the French Style BuildingGen presets into FBX format. I then imported them into Houdini using a simple drag-and-drop method, facilitated by the Houdini plugin ODTools. ODTools automatically created a Material network with all the materials exported from BuildingGen, allowing me to easily drag and drop the building textures into the network.
I separated randomly selected windows as Redshift Mesh Lights and scaled the buildings down to knee-size models, effectively turning them into miniature floor lanterns. I scattered points on the ground and placed the nine variations of the French Style buildings onto these points using an ‘Instance’ object. This method added significant visual detail and provided fantastical direct light to the scene without overwhelming global illumination.
Additionally, I scattered two variations of chandeliers and spheres across the scene as light sources to diversify the “floor lantern landscape”.
Adding Camera Shake
I introduced a subtle random camera shake to the camera’s parent ‘Null’ and added an extra layer of noise, keyframed to sync with the dragon’s fire breathing. I personally find intense shakes disorienting and indicative of a haphazard, handheld filming style, so I keep camera shakes minimal to mimic the steadiness of heavy cinema cameras.
Rendering
As SideFX’s native GPU render engine Karma exits beta in Houdini 20, there is a lot of push from official tutorial and Film industry veterans promoting the migration of rendering into Solaris (LOPs) from OBJ context. Having done extensive experiments with Redshift in both OBJ and LOPs, LOPs is too time-consuming to set up for a one-man team and slower to render with Redshift in general, so I kept the entire project in OBJ context.
As John’s long-term partner and also his favorite render farm, Fox Renderfarm stands out in the CG industry since 2011, offering fast & secure cloud rendering services to 3D artists, VFX companies, and animation studios.

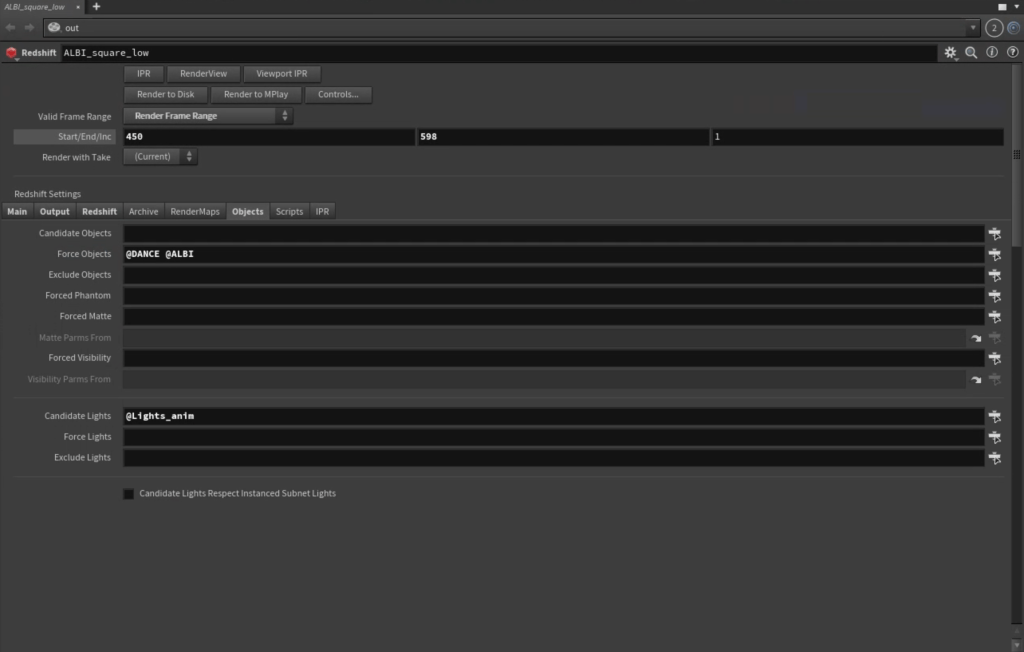
Managing objects in the OBJ context can quickly get messy – unlike LOPs where everything is node based and has to be interconnected, everything in OBJ is loosely positioned. I used ‘Bundles’ to manage my OBJ render sets in Houdini OBJ Redshift; this allows me to render and debug objects separately whenever necessary.
Motion Blur
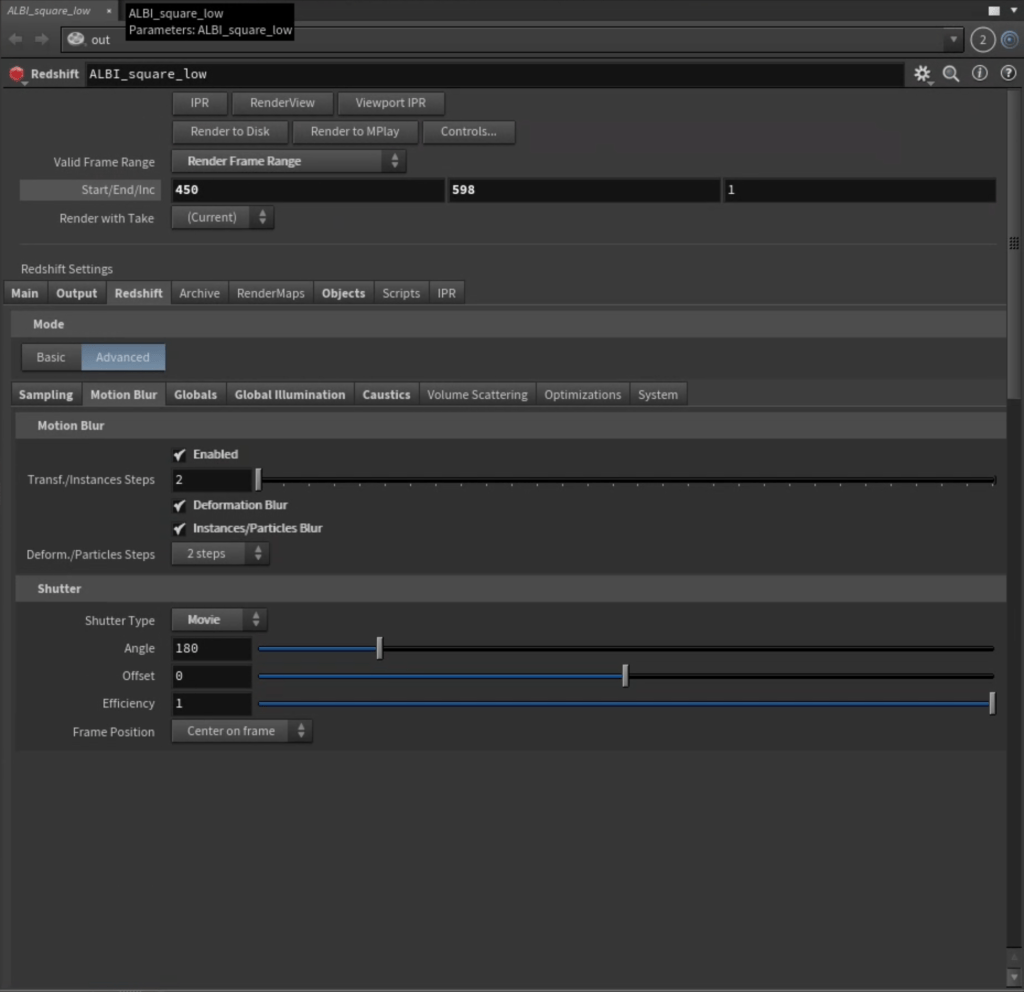
To render characters with correct motion blur, I enabled the ‘Deformation Blur’ option under Redshift ROP. Using a ‘Trail’ SOP, I calculated the characters’ velocity and transferred this velocity to all the clothing using “Attribute Transfer’. Without this step, I noticed that at higher ‘Deformation Blur’ settings, the characters’ skin would pierce through the clothing.

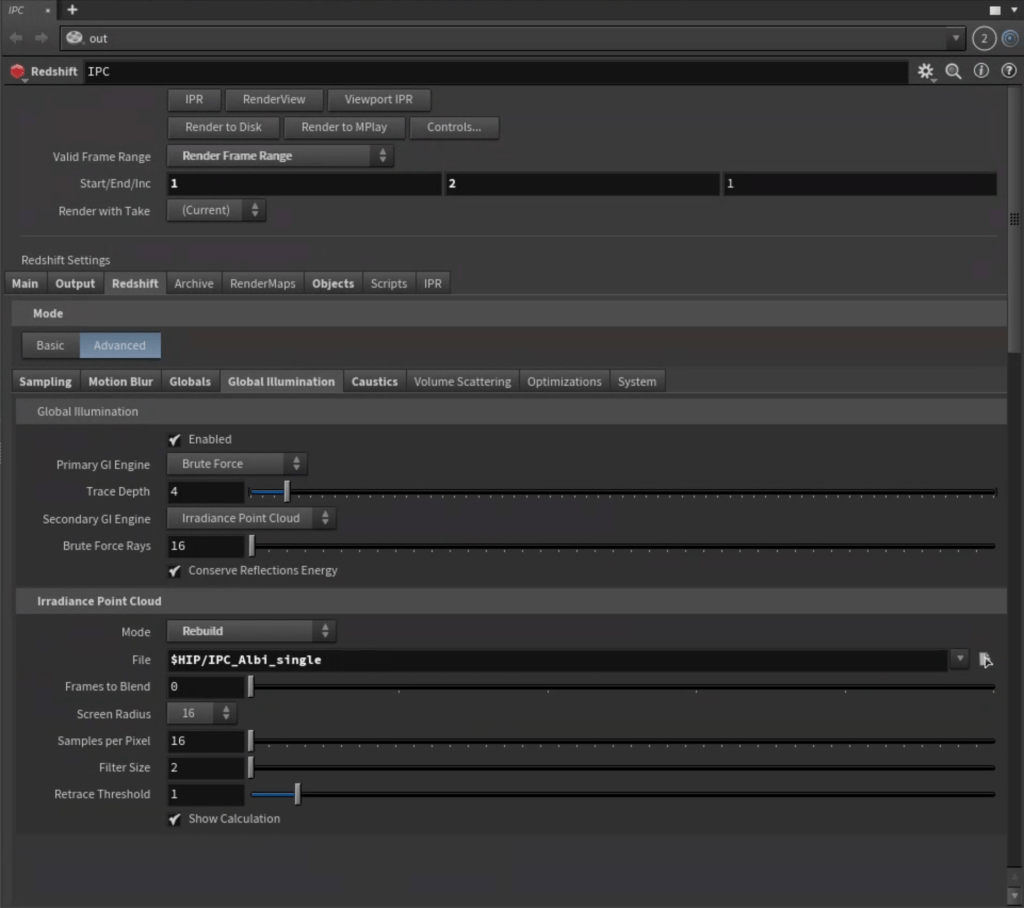
Irradiance Caching Trick
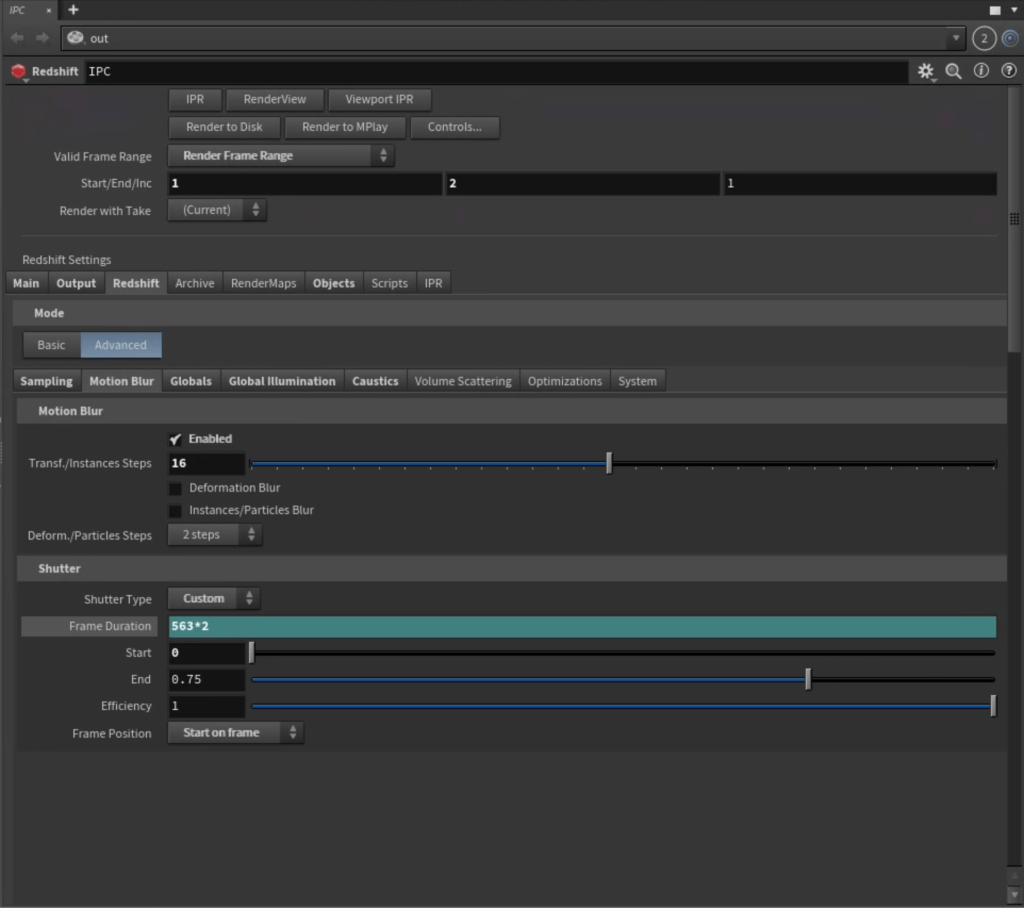
To reduce rendering time, I rendered a single irradiance cache from the first frame, setting the motion blur frame count to twice the total number of frames in the final animation. Although this is not the officially recommended method for rendering sequences with significant motion, I found that it mitigates the ‘light patches’ issue often caused by small light sources and can save up to 10-20% of total rendering time.
Post
With the whole sequence rendered, I used Red Giant looks for slight color correction, adding lens artifacts like halation and chromatic aberration to soften the final render to a more “filmic” look. As John’s long-term partner and also his favorite render farm, Fox Renderfarm stands out in the CG industry since 2011, offering fast & secure cloud rendering services to 3D artists, VFX companies, and animation studios. To celebrate its success in cloud rendering service, Fox Renderfarm offers a special welcome offer with exclusive $50 USD render points. (Link: https://bit.ly/4f9VQQN)
Afterthoughts
Transitioning to Houdini has opened up numerous possibilities for both my personal and professional work. The number of iterations this project required to reach the final result would have been impossible without a procedural setup. Houdini fully procedural nature enables me to very quickly update files exported from iClone, Marvelous Designer or Rhino; its capability to handle heavy scenes is also superb compared to other DCCs; for instance, Cinema 4D would have struggled with more than two high-res characters and constantly crashed the viewport. However, as much as I love Houdini, I cannot wholeheartedly recommend it to everyone. It has notable shortcomings in areas such as sculpting, curve drawing, modeling from CAD data, and freehand drawing or painting.


Additionally, I do not recommend Houdini for projects that need to be completed within a very short time frame, such as an artistic brainstorming session within a couple of hours or a day. In my early days of using Houdini, its procedural nature could quickly turn a fun artistic project into a technical nightmare, diverting my focus from achieving the render to getting lost in optimization rabbit holes.
Despite all the technical hurdles, “Henshin!” represents a significant personal milestone, a thematic and technical “transformation” that has profoundly shaped my approach to future projects.
Related Posts
- Architect-Artist Innovates CG Film Production with CC AccuRIG, Redshift SSS and iClone
- Architect by day, Digital Artist by night – CGI fantasy leaps off with Character Creator, iClone, and Cinema 4D
- Ballerina: One Architect’s CGI Fantasy made with Cinema 4D, Character Creator and iClone