Michael T Morrow – Director / Documentary Filmmaker
Michael T Morrow
Michael T Morrow is an award-winning television director, camera man and editor with over 22 years of experience in Documentaries and Series Television, Music Videos and Commercials.
After graduating from OCAD’s Integrated Media Program, MTMorrow spent his first few years directing television commercials, music videos and corporate films before self-financing his first documentary feature film, “Hot Rod, The Movie” about small-town demolition derby drivers. The film played in festivals worldwide, before airing on OLN and IFC. Morrow worked with Summerhill Entertainment to extend the concept into a half-hour series redubbed “Crash Addicts” for OLN. Morrow directed and story produced each of the 26 episodes.
Morrow has become a sought-after director, cameraman and editor of factual television with larger-than-life people living on the social fringe. Notable directing work includes the Gemini award-winning “Fire Jammers” Discovery Channels “License to Drill:, “Cold Water Cowboys”, “Nerve Center”, and “Mighty Planes”, History Channel’s “Ice Road Truckers” and second unit directing and editing four seasons of “Political Blind Date” for TVO.
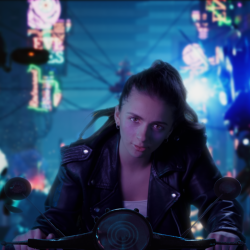
Morrow’s first attempt at 3D/virtual production, came with the music video – “Every Single Night” for Canadian artist Vicky Rai who enjoyed international recognition, winning Best Pop Music Video – Munich Music Video Awards, Best Music Video – Madras Independent Film Festival, Best VFX – International Music Video Awards, Best Music Video Finalist – Kosice International Film Festival, Best Music Video Finalist 4th Dimension Independent Film Festival, and Official Selection – High Tatras Film and Video Festival. In this music video project he extensible utilized Reallusion’s Character Animation suite with Character Creator 3,iClone 7, and ActorCore, with final render in Unreal Engine.
Morrow aspires to make a meaningful contribution to Canadian culture by continuing to work with top production houses and networks on programs that educate, inspire and entertain a broad audience.
“Reallusion’s one-two punch of Character Creator 3 and iClone 7 are a powerful suite of digital human creation, rigging, and animation tools. I found them intuitive to use, massively scalable, and I was able to generate very high-quality digital assets with little time and effort.”
Michael T Morrow – Director / Documentary Filmmaker
A NEW AVENUE FOR LIP-SYNC ANIMATION: INTRODUCTION TO FAST TRACKING
AI VOICE LIBRARY INTO FACIAL ANIMATION
I’m a Character Artist and Content Developer for Reallusion’s Character Creator for over 5 years now and I was always looking for an easy way to breathe life into my creations. As I had worked in the CGI and animation movie industry for a couple of years before, I know how time-consuming and cost-intensive character voice casting can be. You would need to hire a voice actor, do the sound recording, edit the voice, import into your software, then (frame by frame) edit your character’s talking and facial performance. Voice acting and editing is one job, animation is another job. That could mean weeks of work, and thousands of dollars for the project—which is not something that every creator can afford.
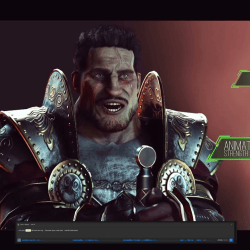
I was lucky enough to test out the new collaborative solution provided by Reallusion and Replica. Replica is a company that specializes in providing AI voice libraries. Thanks to Replica, I now have a huge library of natural-sounding voices—always at my fingertips. Then I found out that the AI Voice Actors Plugin for iClone is opening a whole new avenue for animators: You simply just type the text for your avatar, one-click send to iClone, then your avatar will be animated with automated lip-syncing.
Having given it a deeper review, I decided to write this article to show other creators how this solution is a real game-changer. I hope all of you will find this useful and perhaps change your viewpoints of how to create lip-sync animation forever.
Tobias Kolodziey (TokoMotion)
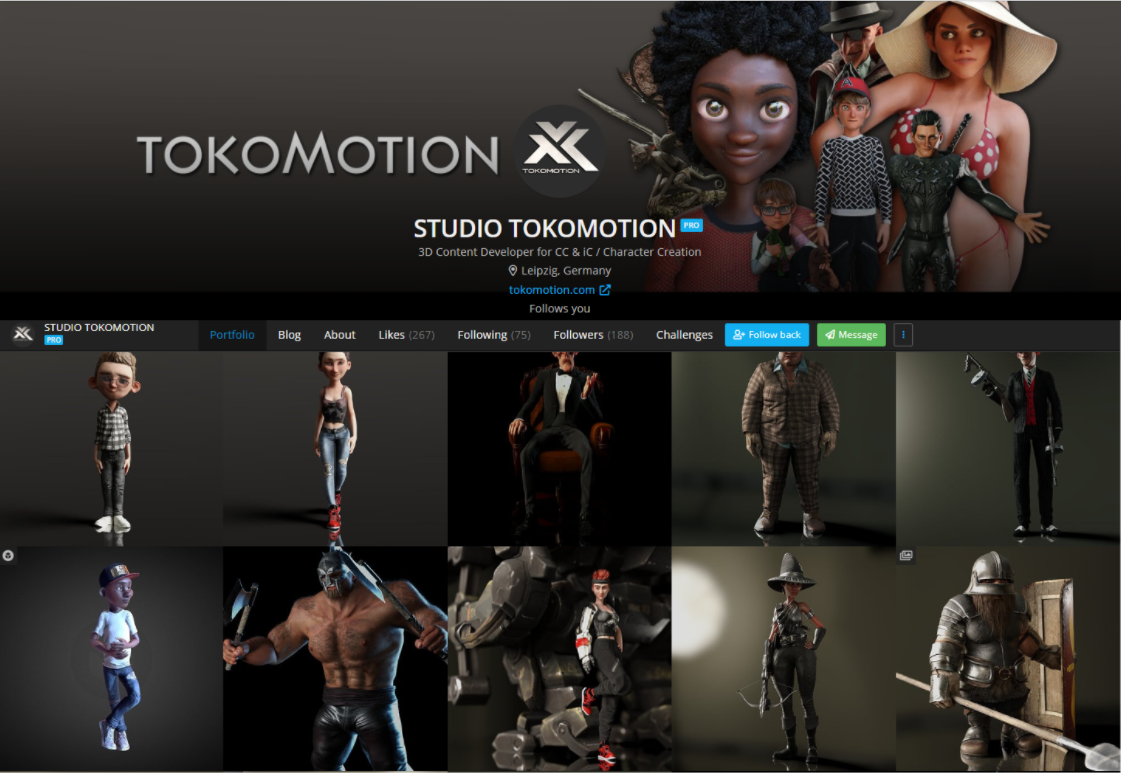
My name is Tobias Kolodziey and I’ve been working in the animation & CGI industry for several years now. As a character artist, I started Studio ToKoMotion in 2011 to develop and produce my own ideas. Since then I also had the opportunity to work with clients on some small but interesting projects, especially in the field of edutainment. You can see more of my works in Artstation https://www.artstation.com/tokomotion
In this behind-the-scenes article, I will give you a quick overview of how the new Replica plug-in for iClone will help you to bring your characters to life in just a few clicks. Please make sure you have the (free) Replica plug-In installed onto your iClone software. For more information about the plug-In installation, and other helpful hints and tricks, please visit the official Reallusion product page at: https://www.reallusion.com/iclone/ai-voice-replica
You will also need to have the Replica Studio software installed on your computer in order to connect iClone via Replica Link. Please visit https://replicastudios.com to create a (free) account and download the software.
Check out the following tutorial video, and learn the workflow:
LET’S START ICLONE
But now let’s start and see what Replica for iClone has to offer. To open the plug-in in iClone, go to MainMenu > Plugins > Replica Studios > Replica Link. Now you can select the character in your scene via the Replica Link and it is ready to receive the voice from Replica Studio.
IN REPLICA STUDIO
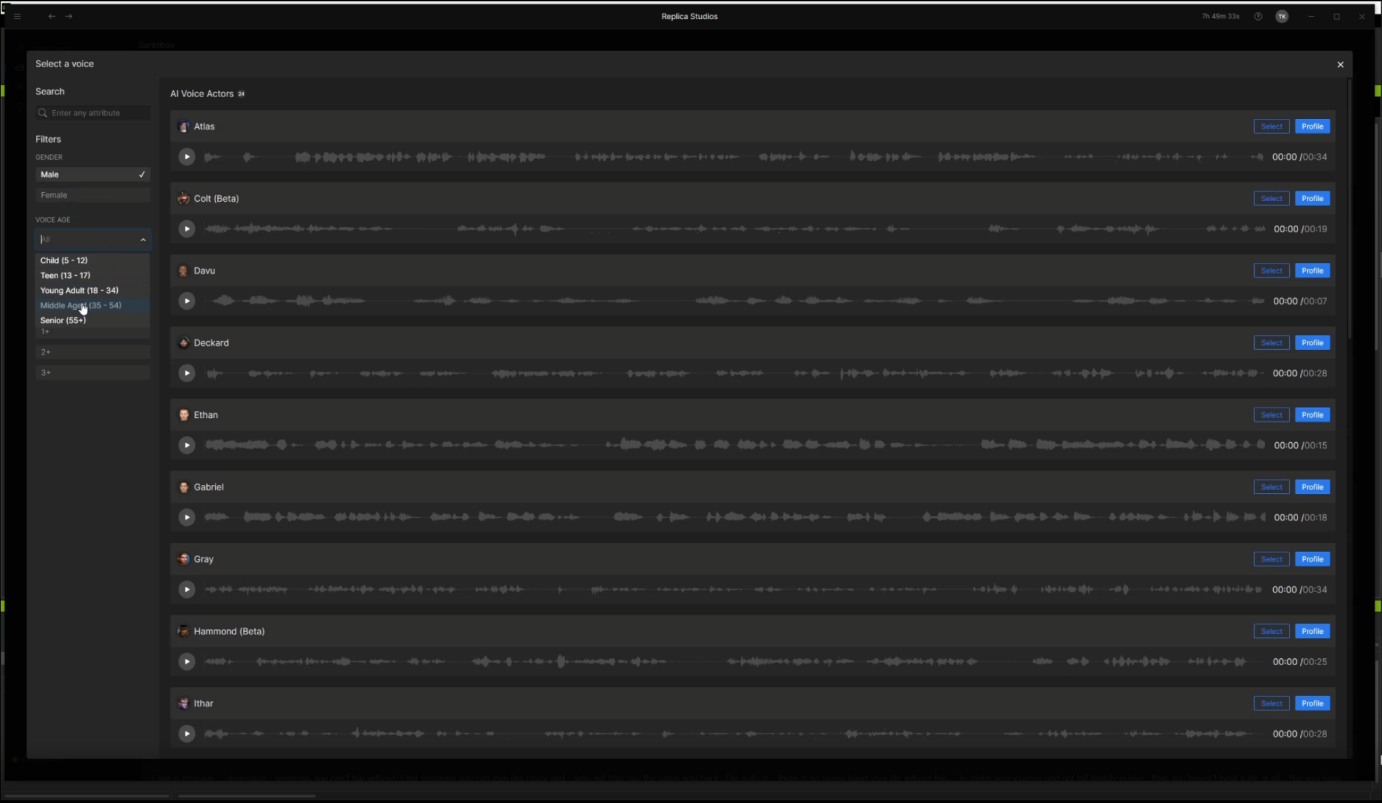
So just switch over to Replica Studio Sandbox and type in some lines of dialogue, then click Select a voice… to choose a voice from the Replica voice library.
You can scroll through the library and preview the voices or use the provided filters to search for specific features of the voice. A total of more than 45 voices can be found here.
After you’ve selected the proper voice you just need to press Play to let Replica Studio generate the voice for your character’s dialogue. This provides a quick way for you to review different voices.
Try to play with the “Style“, “Speech Rate“ or “Pitch“ to further adjust the voice to your liking and save the take to export it to iClone.
AUTO-GENERATE FACIAL ANIMATION STYLES
After you’ve clicked Export to iClone in Replica Studio, iClone will ask you to select an Animation Style and Strength Level that will be applied with the generated voice to your character. There are a bunch of animation styles for different moods from ”Anger“ to ”Surprise“ available for your character’s facial animation. Click Apply and let iClone do the rest.
When finished, your character will have a cool-sounding voice, great lip-sync, and a base facial animation. Here you can already see your character talk with a basic facial animation matching your selected talking style.
If you are not satisfied with the animation style or strength level you can always change it using the Expression Loop presets that can be found under Content > Animation Template > Face > Expression_Loop. Needless to say, you can create your own facial expression clips, but this library gives you another level of automated preset motions.
FINE-TUNING WITH ICLONE’S BUILT-IN ANIMATION TOOLS
Please also make sure to check out iClone’s built-in animation tools, Face Puppet, and Face Key to finetune your character’s facial animation afterward. It’s easy to add some more facial expressions for the whole face or just certain areas like eyes, brows, or mouth/lips with these tools.
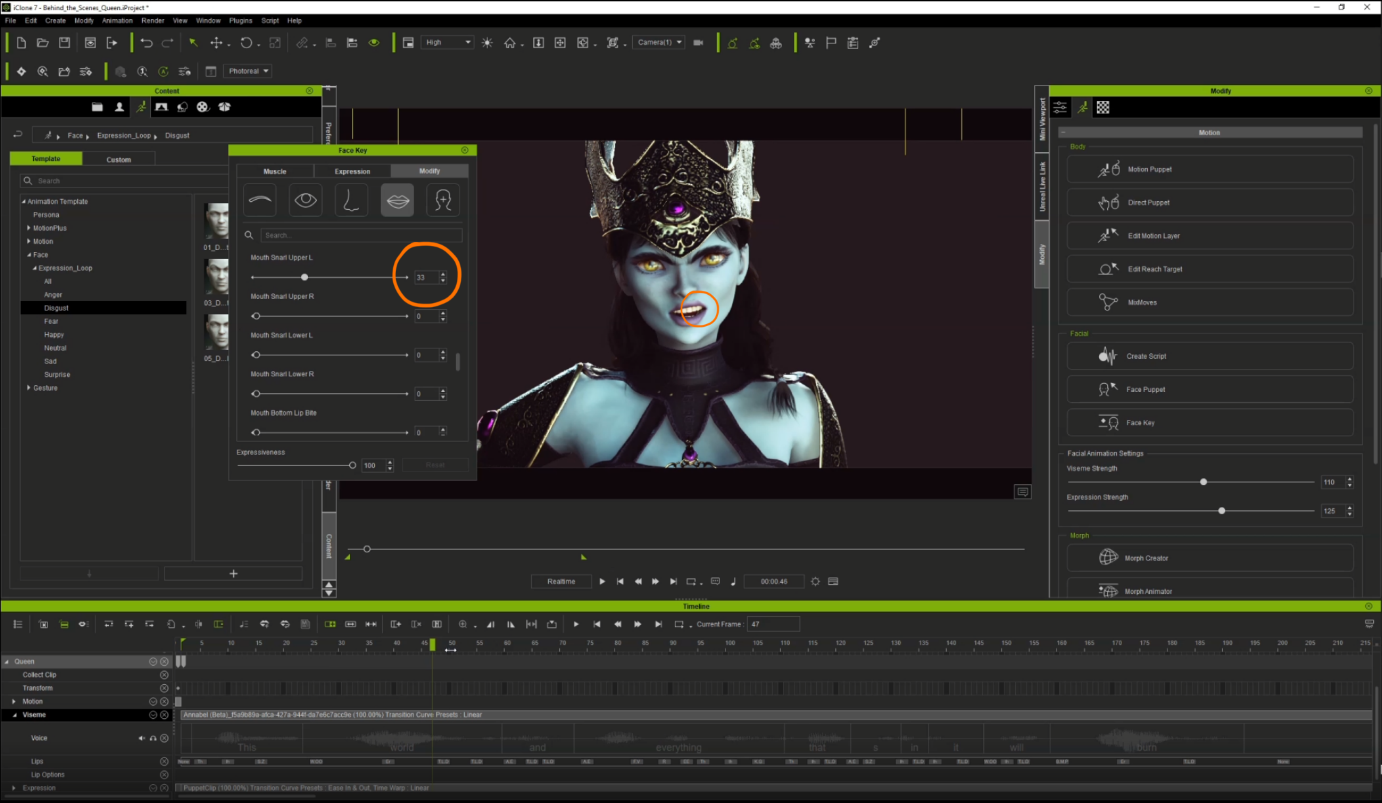
Face Key is the perfect tool to create individual mouth/lip shapes for certain letters/words of your character’s dialogue to make it look unique.
Use the Muscle, Expression, and Modify sliders to create special morphs and to emphasize certain letters or words. Additionally, you can manually adjust the auto-generated visemes of the voice track to acquire the perfect lip sync.
Finally, create somebody animations for your character, add props and effects to your scene to bring your character to life—it has never been quicker and easier!
This workflow turned out to be way easier than expected. I highly encourage you to give it a try. Have fun and happy creating!
Free Blender AutoSetup Plugin Instantly Sets Up Characters from Character Creator to Blender
Martin Klekner has always dreamed of creating animations for believable CG characters from captured actor performances. He got a taste of such technologies while working on cinematics for Kingdom Come Deliverance by Warhorse Studios. However, he was still left wondering whether talking animations could be done by one person at home using affordable software.
Martin Klekner is a freelance director and CG artist from Prague, Czech Republic. He specializes in Blender and is an instructor on CGBoost.com
Complementary workflow between Blender, iClone, and Character Creator
Next-Gen Character Creation and Animation
Martin was very interested in iClone’s capabilities, including animating faces with LIVE FACE tool, generating lip-sync with the new AccuLips, and sending everything to Blender with just a few clicks.
The first step was creating the human base meshes in Character Creator. The new CC3+ character base capabilities allow for more realistic eyes and have a new realtime hair collection. Also, using the options provided by the SkinGen texturing tool was a must; layering great-looking skin details onto the base texture. The simplicity and automation of the process were the key for Martin to make everything in a matter of mere hours.
“Reallusion tools are allowing me to not only create great-looking human meshes, but also to immensely speed up the entire workflow. With the new Skingen and Hair capabilities, CC3+ models now meet (and exceed) all my quality requirements!”
– Martin Klekner
Easily generating believable, fully-rigged charactersOne-click transfer from Character Creator to iClone animation
Once the character’s look was final, the next step was the seamless export to iClone. The fully-rigged character was now ready to be animated using both mocap data and facial animation from the LIVE FACE app. The new step Martin tried was using the AccuLips option, generating automated lip movement based on a single voice clip. It provided a base for the rest of the facial animation.
“Lipsync, something I’ve always dreaded, has become a simple and enjoyable task for me with AccuLips and LIVE FACE.”
– Martin Klekner
Martin recorded his own facial performance using the iPhone LIVE FACE app. He layered animation tracks for eyes, brows, mouth, and head movements, blending everything together and letting iClone automatically smooth the tracks with the new Smooth option. This removed the jerky facial movements one usually gets. Finally, the extensive ActorCore library was a great source for choosing a body animation for the final animated result.
Precise auto lip-sync animation directly from voice input.Best of breed multi-pass iPhone facial motion capture
AutoSetup to Blender
With the animation done, it was time to export everything to Blender. The format he used was the FBX with Blender preset set. Importing to the 3D tool was as easy as using the freely available CC3 add-on. With a single click, the FBX was automatically set up in Blender, ready to use both in Cycles and the realtime renderer Eevee, with fully editable materials.
Adjustable digital human shader for Blender Eevee render
Eevee was used to render out the final shot, which meant realtime preview and thus, speeding up the workflow. Thanks to the automated tools by Reallusion, Martin was able to make this shot in a single day.
Create true-to-life facial animations with a game-changing workflow that includes accurate lip-syncing, emotive expressions, muscle-based key editing, and a best-of-breed iPhone facial capture. Furthermore, a new set of scan-based ExPlus blend-shapes for iClone 7.9, gives unmatched, comprehensive facial performances.
Powerful Tools Come to the Aid
Whether humanizing realistic digital doubles or dramatizing stylized characters, iClone provides time-saving tools that can help anyone direct their 3D actors’ facial performances to maximize productivity. These tools and features come in the form of AccuLips, Face Puppet, ExpressionPlus (in combination with expression preset), Face Key Editor, and ARKit.
Automatic lip-syncing, which is provided by AccuLips, gives the most intuitive and effective way to generate procedural, editable talking animations, by allowing all types of users to easily create accurate, natural, and smooth-talking performances. Face Puppet lets you easily start with 23 predefined facial animation profiles that cover diverse personalities and emotions, with the addition of 7 ExpressionPlus profiles for subtle performances over eyes and mouth movements. All of these profiles allow an artist to animate facial parts like never before! In addition, one can effectively tone down the animation strength for realistic humans, or increase the strength for exaggerated stylized character expressions. It’s also possible to humanize characters with advanced facial behaviors like rolling the eyeballs while the eyes are closed, sucking in the lips, biting the lips, chewing with jaw movements, opening the jaw with lips sealed, poking the tongue in the mouth, licking the lips, and even simulating silent talking.
Once facial expressions are created through lip-syncing, facial mo-capping or puppeteering, one can fine-tune facial features by using the Face Key Editor. These facial keys will be overlaid and blended with existing expressions and stored in the Timeline track for further editing. Three types of expression adjustment are provided: Muscle panel, Expression presets, and morphs sliders. Within the Muscle panel, one or several effective regions can be selected and the user can mouse drag to drive the corresponding muscle movement along eyelids, eyes, brows, cheeks, mouth, lips, and nasal area. Muscle panel includes options for symmetry, head rotations, and adjustable sensitivity to accommodate subtle to drastic movements. Muscle panel also supports both Standard Mode and ExPlus mode (new in v7.9). Expression presets allow for quick jumping between different emotional presets, or access to ExPlus for 4 additional ARKit expression sets, including tongue movements, along with adjustable strength levels to match production requirements. 60 Standard and 63 (52+11)ExPlus blend-shapes can be directly accessed via morph sliders, which not only gives complete control over expression details but also allows for input of extrapolated strength values (+/- 200 ). This makes it easy to observe what blend-shapes are being triggered with expression presets and through the Muscle panel. Furthermore, blend-shape names and values can be inspected when exporting to external 3D tools.
iClone provides the most intuitive way to generate procedural, editable lip-syncing animations, allowing all types of effortlessly created, accurate, natural, and smooth-talking performances. The highly expressive, scan-based ExPlus blend-shapes are now one-to-one mapped to iPhone ARKit signals, making the data ready for post-layer editing via the iClone Face Puppet and Face Key Editor.
Lip-syncing that Works
AccuLips is a brand new lip-sync technology that allows characters to achieve smoother and accurate lip-sync results. This technology can save a massive amount of time when animating dialogue scenes, because AccuLips detects and extracts text and viseme from audio, or can be made to import prepared scripts for precise lip-syncing. Natural speak is achieved with the co-articulation design, and with further fine-tuning of every word’s viseme and strength level. AccuLips contains an English dictionary with 200,000 default words, that are easily customized by adding new words, or making changes to the existing entries.
The new iCloneAccuLips system can automatically generate accurate text data and correct viseme timing from an imported voice. This new design gives users a highly manageable approach to professional lip-sync animation. This new method lets you generate text from audio, while automatically aligning words to their corresponding voice sections. If the system is further aided with a text script, then one can get a more accurate text-to-voice alignment.
With enhanced mouth shape for each viseme, the lip-sync result is more precise and natural for both realistic and stylized characters because AccuLips is designed to simulate real human speech behavior. For true-to-life talking animations, each mouth shape takes on the qualities of other mouth shapes that precede or follow them. i.e., articulators either anticipate the next sound or carryover qualities from the prior sound. “Schwa(/ə/)” is the weak vowel sound in some syllables that is not emphasized in words. AccuLips also include slightly opened mouth shapes when there’s a break between words and sentences and mouth movements are governed by pairing 8 lip/dental shapes, 7 tongue positions, and mouth widths; all blended with varied time curves to represent more natural transitions between a total of 240 possible phoneme combinations. When we pronounce words, the preceding phoneme will be affected by the following phoneme, therefore the viseme of the preceding phoneme may be different, like “key”, “cool” and “car”. The same treatment is applied to succeeding phonemes where they are also affected by the preceding phonemes, like “chips”, “kick” and “lick”.
Although it’s good to see all the detected visemes correctly align to each word, highly frequent lips and jaw movements can cause unwanted mechanical behavior. The smart down-sampling tool can effectively alleviate the judders by reducing less prominent lip keys, just like how humans tend to slur in a effortless manner. Phoneme pair design is the foundation of iClone’s lip-sync system, and the 7.9 update takes out abrupt transitions between certain viseme pairings, and optimizes transition curves for smoother lips blends, especially when talking fast. The strength of lips and jaw movement varies due to when and how people speak. It can be influenced by speed or situation like whispering is different from yelling, and mumbling is different from enunciating. The Talking Style presets give you the quick setup over lips, jaw, and viseme strengths optimized for different talking occasions. iClone lip-sync technology realizes the character lip-sync animation with an easy and intuitive process. The system will align the visemes of phonemes to what the character says, and allow users to further fine-tune.
There are several flexible ways to import voice for characters, and they include the following:
Record the voice directly in iClone, so that the voice clip will immediately show.
Use text-to-speech to have the voice generated according to what is typed.
Import an audio file, so that the system can generate their corresponding visemes in the timeline.
When importing voice files, the system will automatically generate a voice track with corresponding timeline visemes, and with AccuLips there will also be a text track. Users can intuitively adjust the voice and animation, and the selected viseme with the Lips Editor. Use Lip Options to adjust the Smooth Options and Clip Strength of a selected clip. One can also separately fine-tune smooth level for lips, tongue, and jaw.
iPhone Face Mo-cap
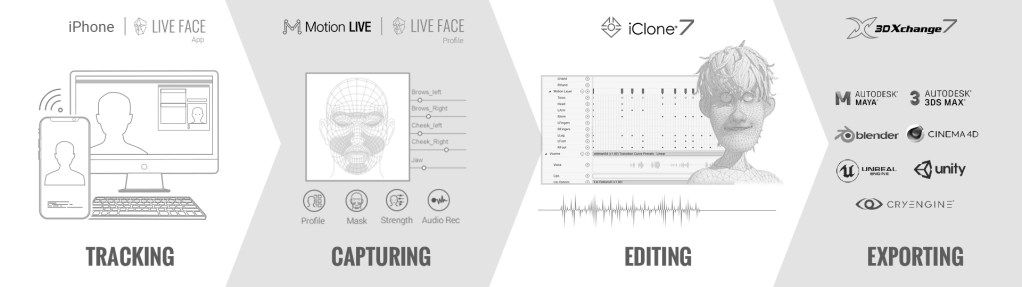
iPhone’s facial motion capture works withiClone Motion LIVE by using the exclusive TrueDepth camera system powered by sophisticated high-res sensors. The iPhone tracks face with a depth map and analyze subtle muscle movements for live character animation. The Reallusion LIVE FACE app enables the iPhone to live-stream captured facial mo-cap data directly to a PC or Mac, transforming the iPhone into a powerful 3D bio-metric mo-cap camera.
The TrueDepth Camera projects and analyzes more than 30,000 invisible dots to create a precise depth map of the face, and analyzes more than 50 different muscle movements to mirror expressions. Furthermore, it is highly sensitive to details, like rotating eyeballs and tongues; works with different skin colors and extreme light conditions. Runtime calibration offers on-the-fly calibration without pausing the face tracking process, with support for WiFi, USB, and Ethernet connection. Users are recommended to use an Ethernet connection in order to eliminate all potential lag for the optimal facial mo-cap performance.
Designed by animators, for animators – Reallusion’s latest facial mo-cap tools go further, addressing core issues in the facial mo-cap pipeline to produce better animation. Starting from all new ARKit expressions, to easily adjusting raw mo-cap data as well as re-targeting, to multi-pass facial recording and essential mo-cap cleanup – we’re covering all the bases to provide users with the most powerful, flexible, and user-friendly facial mo-cap approach yet. The biggest issue with all live mo-cap is that it’s noisy, twitchy, and difficult to work with, so smoothing the live data in real-time is a big necessity; because if the mocap data isn’t right, or the model’s expressions aren’t what you want, and the current mo-cap recording isn’t quite accurate then you need to have access to the back-end tools to make adjustments. Finally, while you can smooth the data in real-time from the start, you can also clean up existing recorded clips using proven smoothing methods which can be applied at the push of a button.
Markus Sosnowski – 2D Animator / Content Developer
Markus Sosnowski
Finding popularity for his first original nursery rhyme written for his young daughter, Markus Sosnowski made the decision to create a music video for YouTube with the help of Cartoon Animator, which he now has a loyal following for his collection of children’s music videos.
In his interview with Reallusion, Markus tells how Cartoon Animator, along with his passion for music and illustration, helped him realize his dream of becoming a successful story teller for children.
“I would never have dreamed that I would be able to produce such good quality videos without having any drawing skills myself. As a beginner with Cartoon Animator, you can start animating right away.. I can make cartoon videos in this quality without ever having studied animation or art and without a large team behind me.”
Markus Sosnowski – 2D Animator / Content Developer
Matt Hickinbottom – Owner of Musical Music Pictures
Matt Hickinbottom
Matt started in film and television at the age of 12 as a child actor on children’s television. Being a musician, he soon landed a freelance job writing regular music and jingles for children’s television and Disney across Europe. Wanting to develop his skills further, he learned how to shoot and edit and has become a sought-after producer, director & director of photography. Up until recently, he shot regular promos for SONY pictures with some of his work winning Promax awards.
In his film work he has worked all over the world from Canada and the US, across Europe and as far east as Kazakhstan. He has also created numerous cinema adverts for companies such as Merlin Entertainments, across their LEGO Discovery Centres, Sea Life Centres and Warwick Castle attractions.
‘Emily, the little match girl’ started over 25 years ago when Matt started to write a stage musical based on the Hans Christian Andersen fairy tale, ‘The little match girl’. This current production is aiming for a Christmas 2021 release and stars the voices of Bafta, Laurence Olivier and Annie Award winner ‘David Bradley’ (best known for playing Argus Filtch in all the Harry Potter films & Walder Frey in Game of thrones) as well as Olivier Award nominated ‘Lesley Joseph’ and many more.
Matt started working with Reallusion’s iClone in 2020, as the pandemic made it one of his main tools for creating animated content, where he employed everything from iClone animations to Character Creator, and Perception Neuron motion capture.
“Reallusion’s tools have been the key to unlocking my imagination, allowing me to show everyone else what’s been inside my head for so long. With the lockdowns, it’s also been the one set of tools that’s allowed me to keep working and creating without limitations.”
Matt Hickinbottom – Owner of Musical Music Pictures
Greetings, my name is Peter Alexander, a 3D Generalist, and freelancer who works heavily with iClone and Character Creator.
iClone’s Facial Animation Technology includes facial expressions, lip-sync animation, and facial mocap which provides real-time facial animation with facial capture equipment. AccuLips provides a very intuitive way to generate procedural, editable lip-syncing animations, allowing users to easily create accurate, natural, and smooth-talking performances. It detects and extracts text and viseme from audio, or imports a prepared script for precise lip-syncing which saves a massive amount of time when animating dialogue.
In this article, I’m going to run you through the process of using AccuLips to create lip-sync animation for my Laughing Buddha. I’m also going to show you how to export your animation from iClone to Blender for Eevee rendering.
To keep the focus on AccuLips, I’ve already done the character’s movements using elements from a previous project. You can see the lip-sync animation tutorial in the following video:
Prepare Recorded Voice MP3 File Compatible with iClone
For the character’s audio track, I recorded my voice using Audacity, an audio manipulation application and altered the audio’s pitch and reverberation. After editing the track according to my needs, I save it as an MP3 file, which is compatible with AccuLips and iClone.
Import and Edit the Audio in iClone
In iClone, go to Animation and Create Script, choose AccuLips, and import the saved audio. Select Generate Text. AccuLips will analyze the audio and attempt to approximate the speech into text. The words that can’t be identified will be in red, much like a spell check. You can manually correct this for a better generation of visemes.
Adjusting Text for Better Visemes and Modifying Visemes
When you apply the AccuLips data to the animation, it will produce the various visemes to accompany the audio. I then go through the timeline, and if I want a sound to be emphasized or replaced with the lip-sync, I click on the viseme indicator and adjust it. The key point is that you want to emphasize visemes at certain points during the animation. If the dialog emphasizes a sound, the animation should as well. You can keep the lip editor open as you go through the timeline, to make things easier to adjust.
Export the Audio and Character from iClone
If you choose to render in Blender, you’ll want to do two things. First, export the audio from the range of the video, then select the character and export the FBX from the same range. This will ensure that the audio and animation are in sync.
Importing Character into Blender via Auto Setup
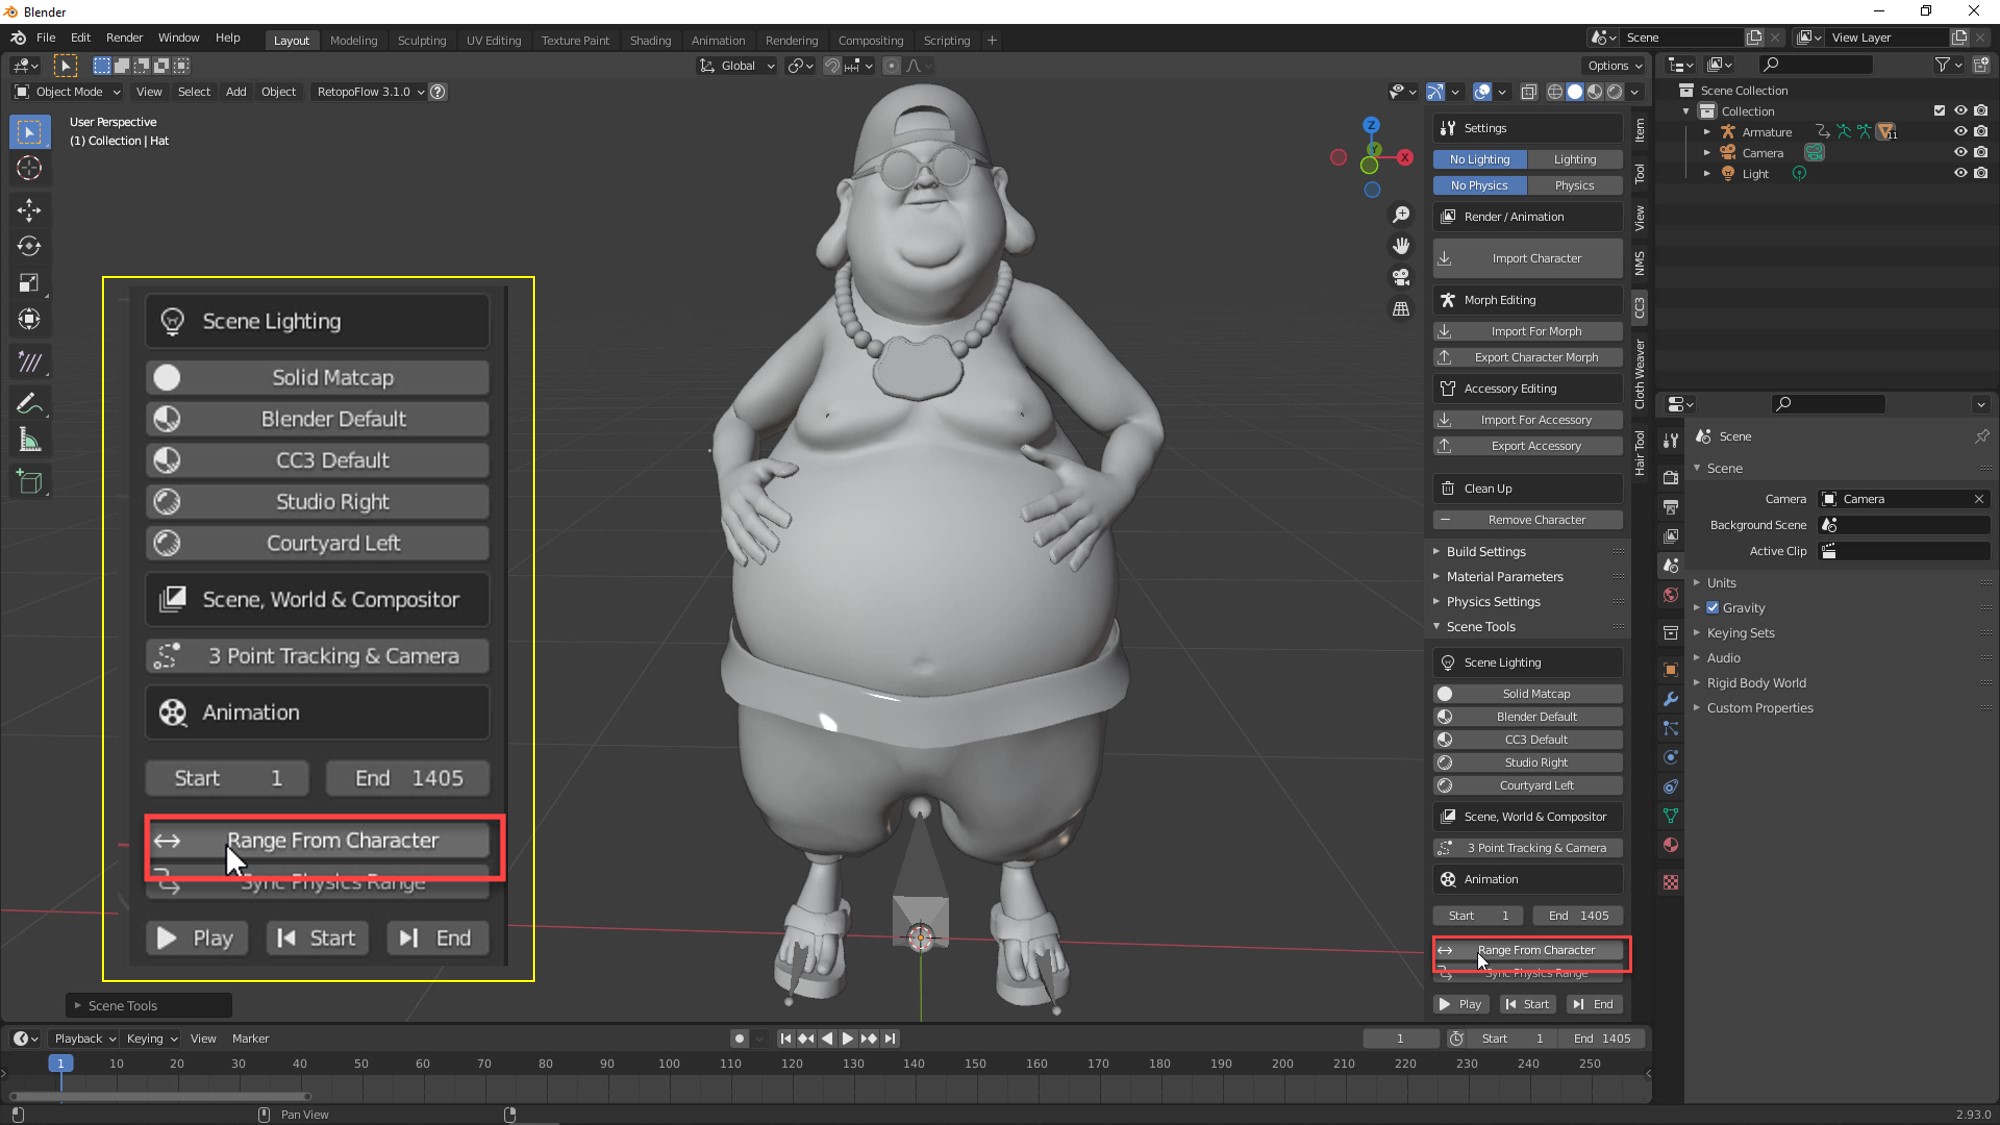
In Blender use the Blender Auto Setup, located in the CC3 tab, to import the FBX file as a character. In the CC3 tab, click the Range from Character option to set the proper animation range for the timeline.
Importing the Audio into Blender
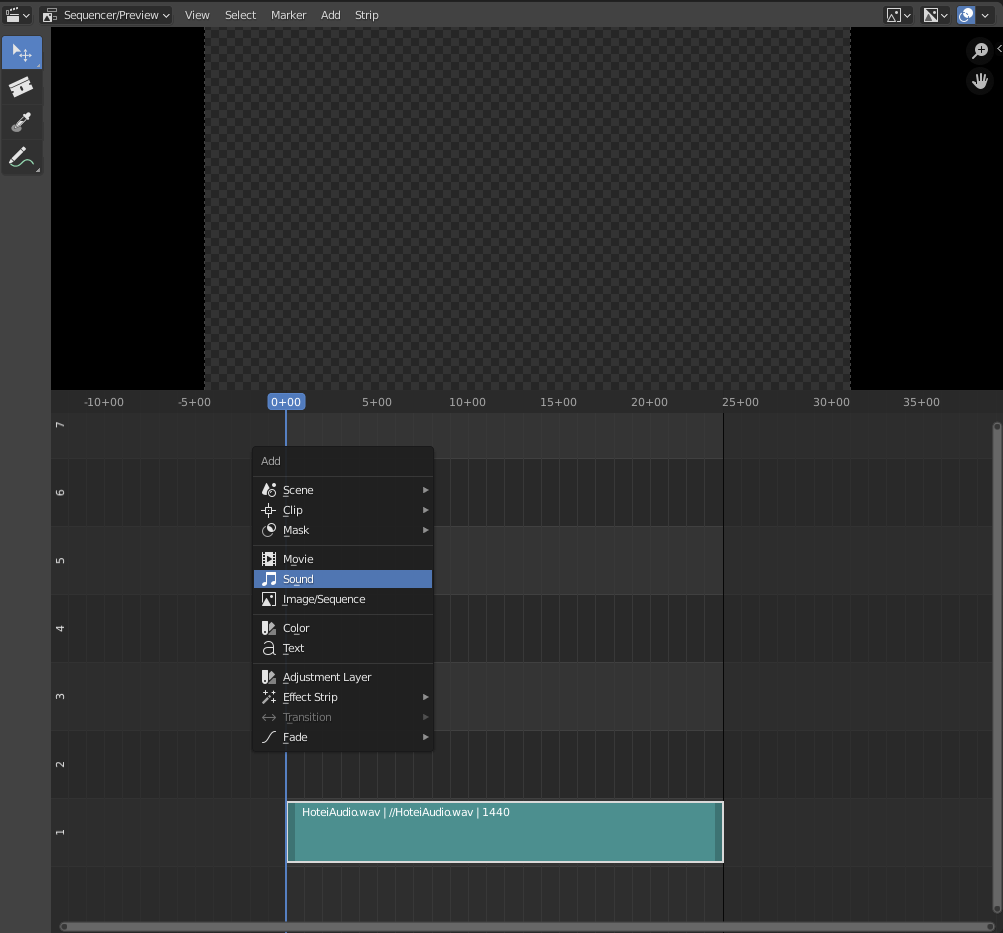
To import the audio, go to the Video Sequencer, press Shift+A, then select Sound from the menu. Or you can go to the Add menu at the top of the Video Sequencer section and add Sound from there. This will allow you to select the previously exported audio file. You can select the Playback panel on the timeline to enable scrubbing so you can hear your audio as you go through your animation timeline. If you don’t hear the audio, open preferences, go to System, then check your Sound settings.
Saving the Animation as a Video File
To save the animation as a video, go to the Scene tab, go to Output, and choose to save it in a video format rather than as an image. Also, remember to choose an audio encoding option. If you plan to do some compositing, you can set up a green screen or save this as a video with transparency (RGBA).
Rendering to Video File in Blender
Now with everything set up, choose Viewport Render Animation, rather than the full render (depending on your rendering preferences). This will render things as they appear in the Eevee Preview window.
Examples of other lip-syncs and facial animations:
Greetings, this is Peter Alexander. I’m a digital freelancer specialized in illustration, graphic design, and 3D modeling.
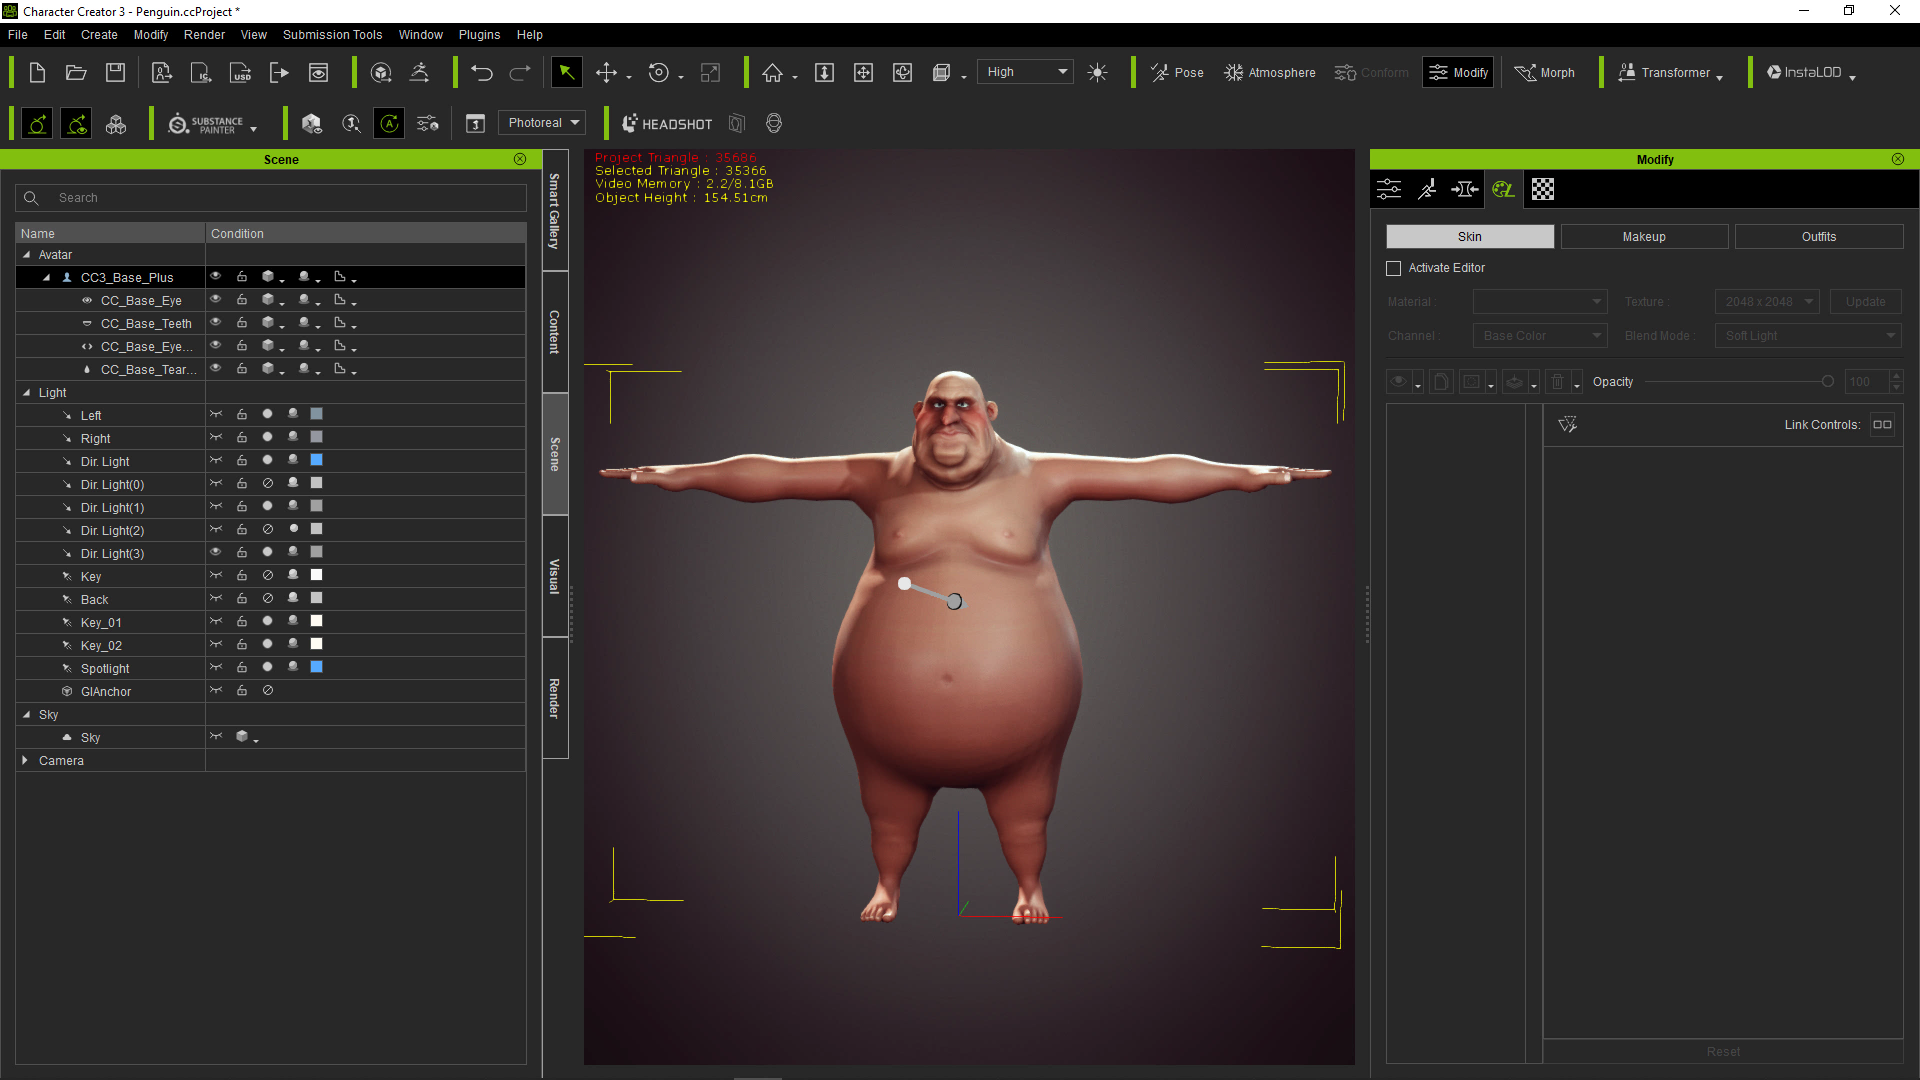
I’d like to share how I take advantage of Blender’s powerful modeling features in creating clothing and accessories, then send those assets to Character Creator to build up a reusable asset library. Character Creator supports skin weights transfer function and other optimizing tools to make the process easy.
In this article, I am putting existing assets through the pipeline for refinement, so you will have better ideas about the Character Creator-to-Blender pipeline. I will use a free ‘Blender Auto Setup’ add-on to simply the import and export process.
If you are interested in how I built up clothing and accessories from scratch in Blender, please check out this full-length video.
Depending on your needs, export either a clothed character or an unclothed character in the pose you plan to work within Blender. If you export with a bind pose, make sure your character is in the same pose when you re-import your clothing and accessories.
As I was going to be re-importing all of the items I had exported in an optimized state, I deleted his existing clothing after I exported the clothed character.
Import Character in Blender via Auto Setup
In Blender, using the CC3 tab provided by the Blender Auto Setup add-on, import your file using the ‘Import for Accessory’ option. This is similar to the other options, but is optimized for asset editing and export.
Tweak Clothing and Accessories in Blender
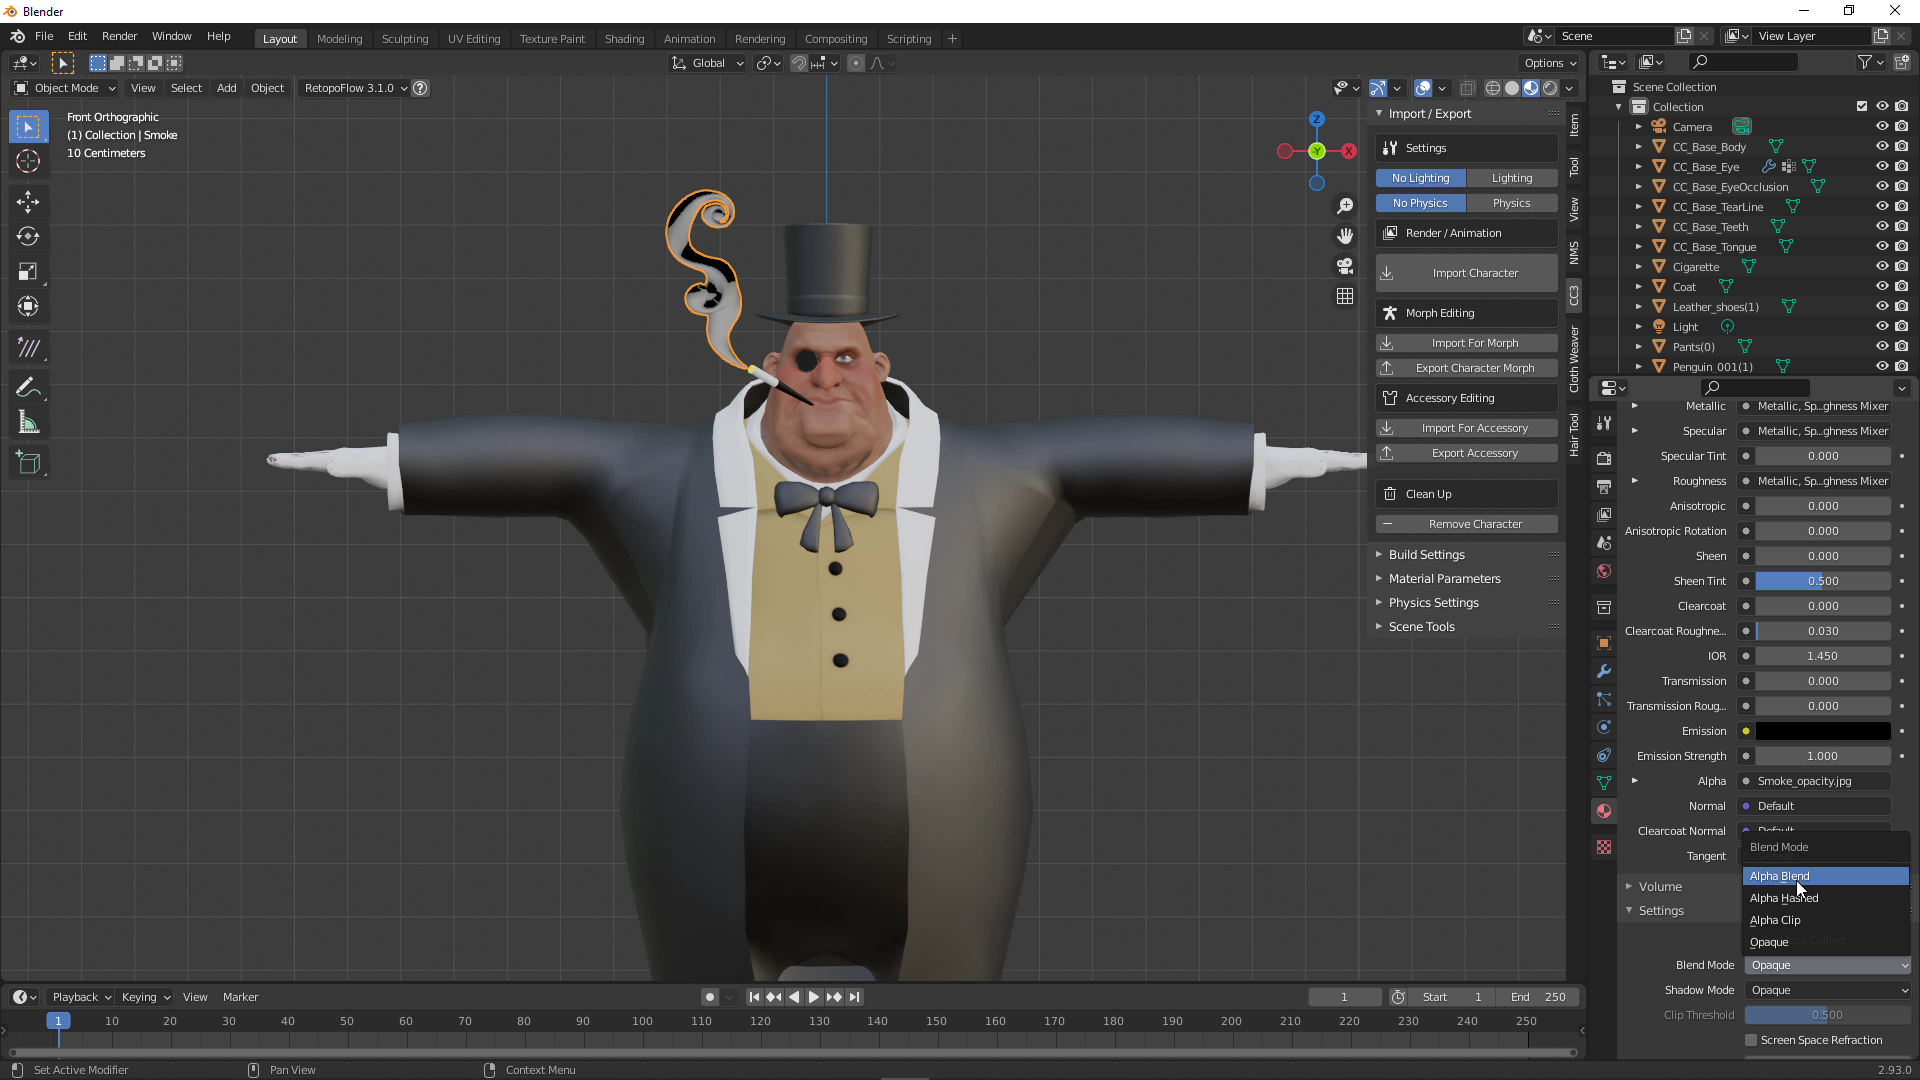
Although not necessary, I fixed a few visual settings, such as the opacity blending for the smoke I had previously created. Doing this is good practice, especially if you plan to render within Blender at some point.
Make any adjustments, edits, or even create new assets from within Blender, depending on your requirements. In my case, I mostly adjusted a few clipping issues and added some edge loops to assist with clothing deformations.
Export Clothing and Accessories via Auto Setup
After making the adjustments or creating the digital assets, export the item back through the Blender Auto Setup add-on as an accessory. If you’ve imported the character as an OBJ, you’ll be provided with an OBJ option to export back. I believe if you’ve imported an FBX, that option will be provided.
Bring in Assets with Skin Weight presets
Import the items one-by-one through the Create > Accessory option. This will import the item in approximately the same position relative to the posed character as it was created in Blender. Sometimes you will have to do some placement adjustments.
By default, the item is an accessory (unskinned geometry), and you can part the item to various bones for accessory (such as in the case of this character’s cigarette and smoke, which I parented to the Jaw bone). Clothing should be skinned through the ‘Transfer Skin Weights’ option.
Optimizing the Assets with Hide Mesh Tool and Skin Weight Editing Tool
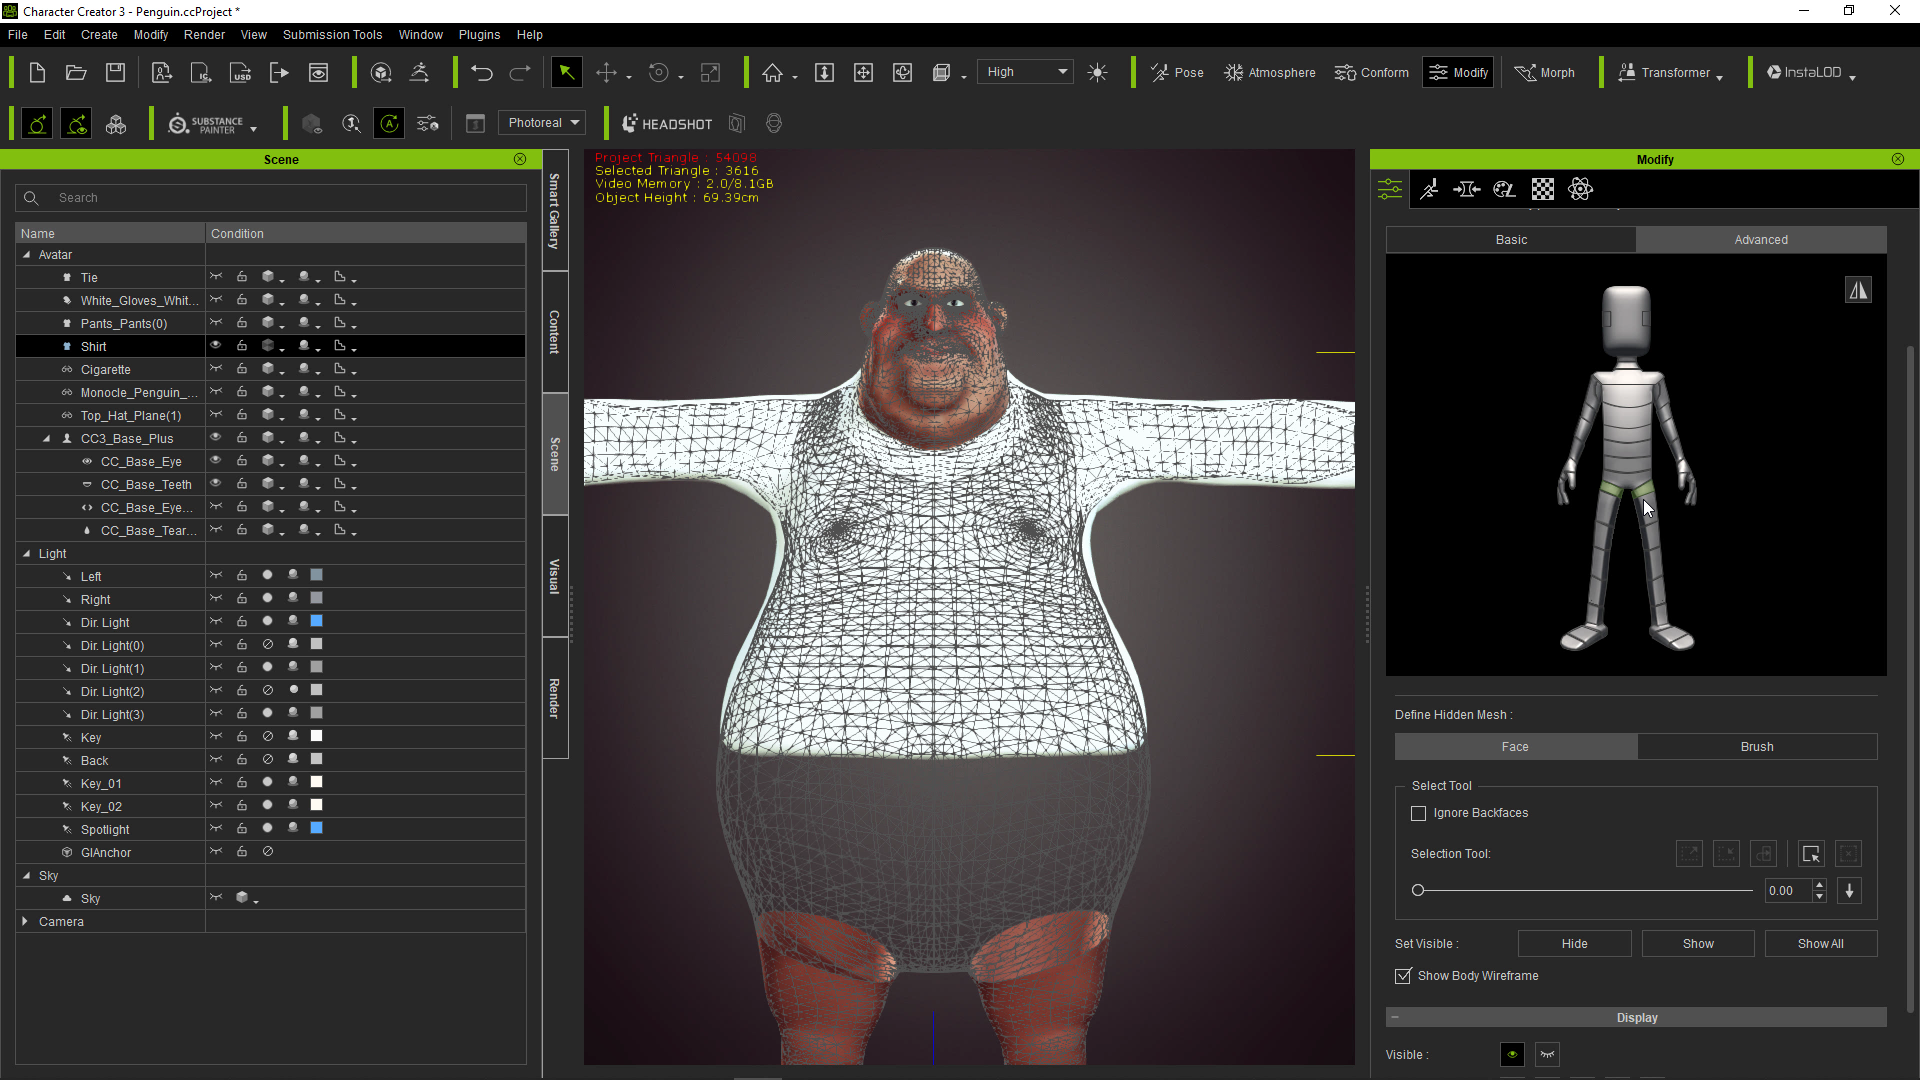
Clothing that conceals significant geometry should be optimized to auto-hide that geometry when fitted to the character. This can be done in the ‘Hide Body Mesh Tool’. This not only optimizes the visuals during clothing deformation, but it will also allow you the option of deleting hidden mesh automatically during exports into other applications.
Finally, try various poses to see where issues with skinning weights should be adjusted. In my case the clavicle was pulling the collar of the coat too harshly, so I assigned some of the vertex weights to one of the upper spine groups.
Send Character Back to Blender for Eevee Render via Auto Setup
If you plan to render out the character using Blender’s Eevee engine, you can export the character with animation or in a pose using the FBX export options. I tried the option to delete the hidden mesh during export. This eliminates the ability to re-import back into Character Creator, lessens the need to adjust the mesh after it’s been imported.
You can import the FBX file to Blender through the ‘Import Character’ option of Blender Auto Setup add-on, which will automatically translate Reallusion’s Digital Human Shader and parameters to Blender Eevee and Cycle. You can further adjust SSS skin, eyes, teeth, and hair dynamically.
Comprehensive 3D Hair and Beard Component-based Design for Any Hairstyle Imaginable.
The embeddedSmart Hair system is designed to provide the most realistic, yet performance-friendly hair, brows, and beard for digital humans in games and films. The card-based hair meshes are intricate in detail, economical in texture resolution, and efficient for real-time rendering. The highly flexible color gradients and specular variations are powered by the Smart Hair shader. Design components allow you to freely assemble different custom hair and beard elements into unique hairstyles, while the beard and brows can dynamically conform to any facial movement.
A Plethora of Choices
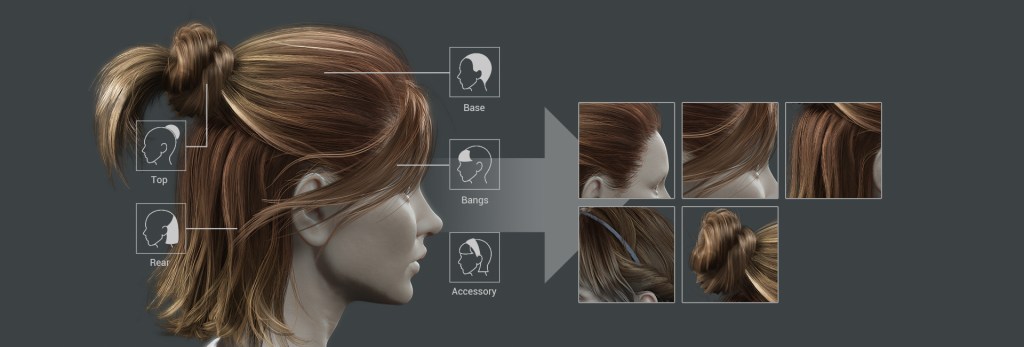
Smart Hair’s component-based design offers an easy and effective way to manage 3D hair, brow and beard assets. Users can add select hair parts and accessories, combine elements into groupings, and compose them together to form a cohesive look. Group and Style items can be replaced with a single click to quickly test out different variations. Imported assets assigned to a corresponding facial area automatically conforms to the underlying surfaces . The beard is composed of mustache, goatee, sideburns, soul patch and other accessories. On the other hand, hair is divided into base, top, rear, bangs and accessory parts for optimal mixing. Use the component design system to alter character hairstyles with different fringes, bodies, and ponytails. You can also fill in tiny hair and wispy fuzz around the hairline and back of the neck.
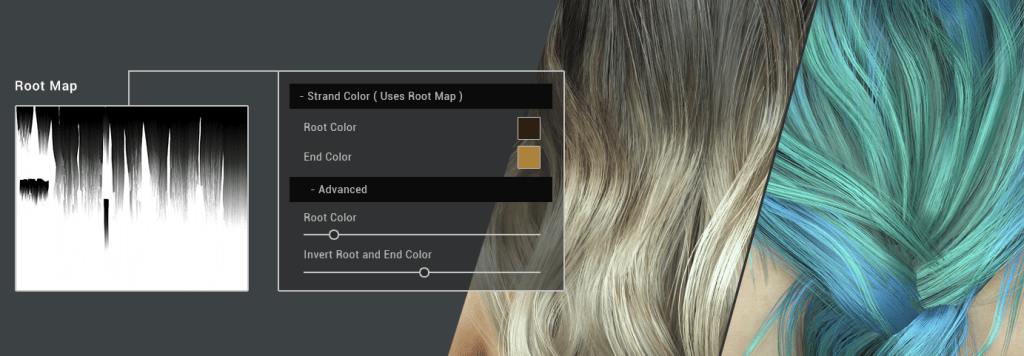
Creating a multitude of natural hair looks is possible with four powerful controls: Ombré (root and end color), Balayage (highlight color), Base Layer (vertex color), and Reflection (flow map). With these potent effects you can easily create chic or stylized hair dye, create silky smooth hair reflections, simulate silver gray, or parched look and feel. Blend with vertex color (predefined in hair meshes) for enhanced depth effect. For natural layer contrast, you can use lighter vertex color on upper layer meshes, and darker vertex color for layers underneath. Create subtle gradual hair color fades using Root and End colors, usually from darker tones at the roots to a lighter tone towards the hair tips for a classic ombré style. The strand color pattern is defined by the grey-scale Root map, and supports different blend modes and strength controls. The Highlight Color effect is the highlighting done with hair dyes that we see in reality; Two highlight colors can be blended to create more natural looks, with theID texture map controlling the effect. The natural reflections gives hair a healthy lifelike look and feel . One can adjust the Specular strength, alter the Reflection Flow, or disrupt the reflective pattern to emphasize unique hairstyles.
The Smart Hair system is designed for performance: the card based meshes are small in size, fast to load, and efficient for real-time animation. One complete hair set is merely hundreds or thousands of polygons, while using optimal texture sizes : hair at 2K and beard at 1K. By utilizing minimal resources you can achieve high visual realism with sophisticated coloring, and adjustable reflections using the real-time shader.
The Smart Hair Beard and Brows can perfectly conform to animated facial surfaces during real-time performance. It works in real-time for facial morphs, lip-sync animations, facial motion capture, and intensive expression change with the Face Puppettool. One can also fine-tune the shape and position of the facial hairs with the Mesh Editor. To top it all off, facial hairs are exportable, at any stage, as FBX blend-shapes for game engines and 3D rendering.
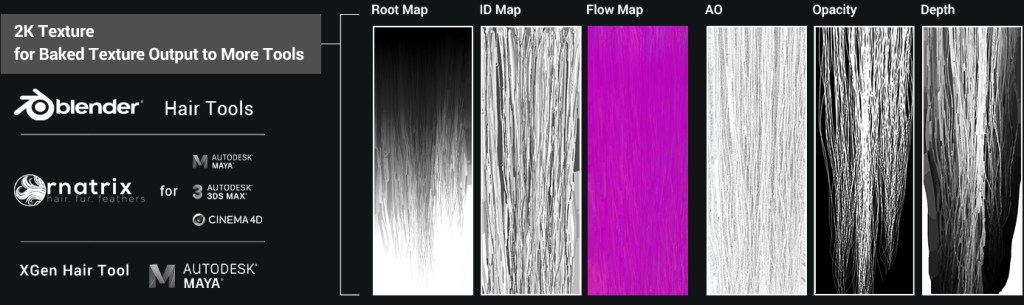
Reallusion’s Smart Hair system is compatible with major 3D hair creators like Ornatrix (for Maya, C4d, Ma, ...), XGen, and Blender hair plugins – as long as they can export card based hair meshes in OBJ or FBX format, and generate the texture maps needed for the shader effects. You can convert existing hair assets as Smart Hair components, or upgrade the rendering with the Smart Hair shader by adding required effect maps. Smart Hair supports direct shader compatibility with Unreal Engine; with one-click you can transfer hair assets through the Auto Setup plugin, while keeping the identical feature adjustments consistent between the two programs. For Unity and other 3D tools, you can choose to bake shader effects to PBR textures for rendering.
Smart Hair’s beard and brow elements are designed to move along with their corresponding facial vertices – however when bringing in new items which have vertices detached from the facial surface, users can use the Vertex Assignment tool to define the target following area to avoid mesh stretches, or mesh penetration, when animating the face.
For more information, visit the Smart Hairlanding page.