Focus on The “Creative Process” Instead of Technical Setbacks
Nick Shaheen: From Medicine to Motion
I’m Nick Shaheen, a radiologist by profession and a CG artist by passion. My journey into animation started in an unexpected place—medical illustration. Early in my career, I spent a fair bit of time creating motion graphics and anatomical visuals to help explain complex medical concepts. That experience taught me the power of visual storytelling and deepened my appreciation for animation as a way to communicate ideas dynamically.
Over time, my work expanded beyond medical visualization into character animation and motion design. I’m always looking for ways to refine my process and bring more life to my work, and discovering Reallusion’s tools opened up new creative possibilities that I hadn’t explored before.
I’ve been working in CG for over a decade, and if there’s one thing I’ve learned, it’s that character animation can be a massive time sink. Early on, I’d spend days sculpting, rigging, and manually keyframing, only to get something that looked fine but never quite as fluid as I wanted. The thing is, I never loved the technical grind of rigging and prepping characters. I wanted to animate, tell stories, create dynamic scenes, and focus on the creative side of things while still maintaining creative control over my own work.
I’ve always been drawn to animation challenges—they’re a great way to push yourself and get inspired by other artists. It’s also an opportunity to learn new techniques from other artists. I’d see people turning out insanely polished character animations in a short time span and I kept wondering: what’s their secret? After some research, I found many of my peers were using the Reallusion suite of tools. I decided to give it a try about a year ago, and I haven’t looked back since.
The Animation Ecosystem
Suddenly, I had access to an ecosystem that let me create characters, drag and drop animations, tweak performances, and maintain a procedural workflow at nearly every step. I can create a character in Character Creator, export it toiClonefor animation, make changes to the character in Substance Painter or ZBrushand then pipe it back into iClone without having to redo the entire animation.
Crowd Simulation
I recently finished work on a commercial project that required a dozen characters interacting with their environment as well as each other. With iClone, I could layer in mocap, tweak performances quickly, and move on. This made multi-character animation far more approachable than ever before. There’s even a set of tools (Motion Director) specifically designed to handle background characters and crowds. Having a built-in system for animating crowds efficiently has opened up a lot of possibilities.
Facial Performance Capture
Lip sync is one of those aspects of character animation that can quickly become a time sink without a procedural workflow. WithAccuFACE, I can use live or pre-recorded video for facial motion capture. The built-in cleanup tools help refine the animation and remove jitter while preserving key details.
I collaborated with JP Ashkar on the music video California Christmas. Despite living nearly 2,000 miles apart, we were able to sync the character’s lip movements to JP’s performance. He recorded a video on his phone, which I used with the AccuFACE plugin to drive the facial animation. One of my favorite features of AccuFACE is AccuLips, which allows you to refine lip sync even further by typing in the dialogue for improved accuracy.
iClone Has Become Even Better
The latest version of iClone has evolved yet again. With the arrival of iClone 8.52, a couple new features were introduced that can be a real lifesaver for all the animators out there. Let’s take a deep dive into those exciting features.
AccuPOSE: AI-Assisted Posing
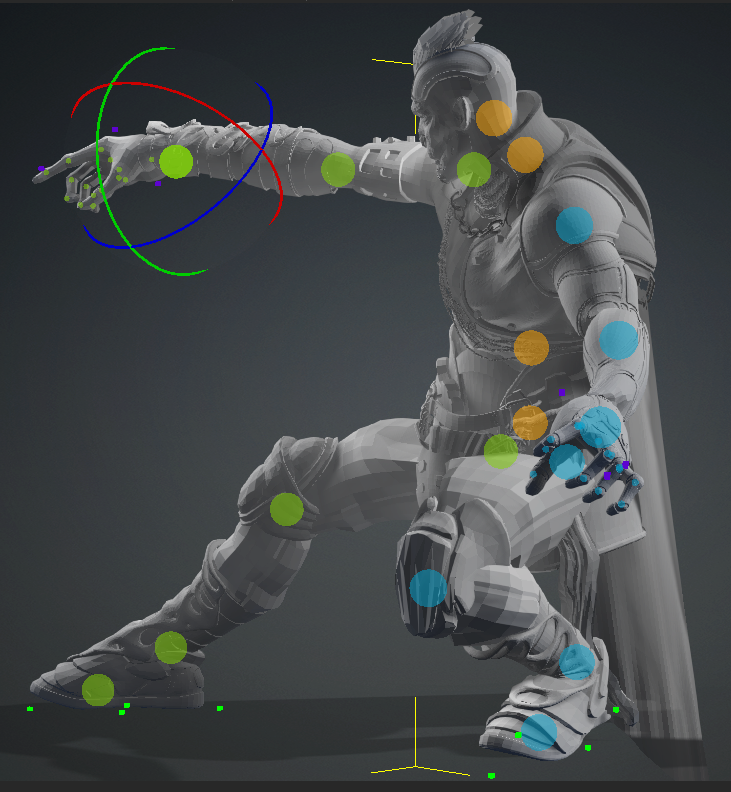
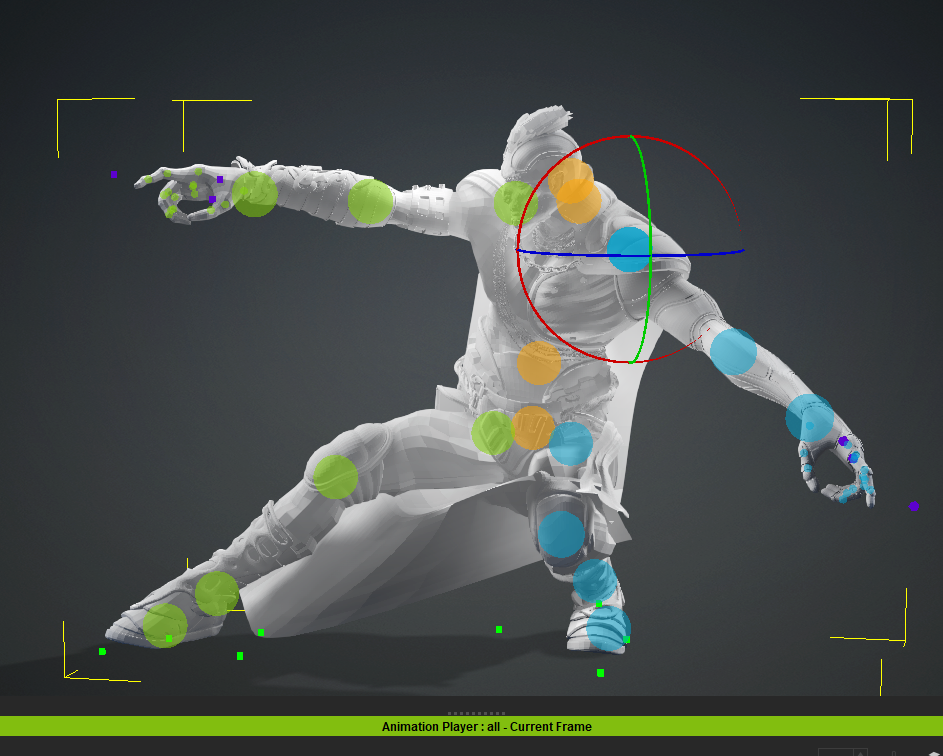
My favorite new feature is AccuPOSE. Think of it as an AI powered posing assistant that reacts automatically to your adjustments. The magic of this tool is that it lets you customize each pose as well as animate between poses without breaking the overall structure of your character. If you move an arm or a leg, the AI trained model adjusts the other joints to keep a natural balanced pose. You can even lock the position and rotation of certain joints to really dial in your animation.
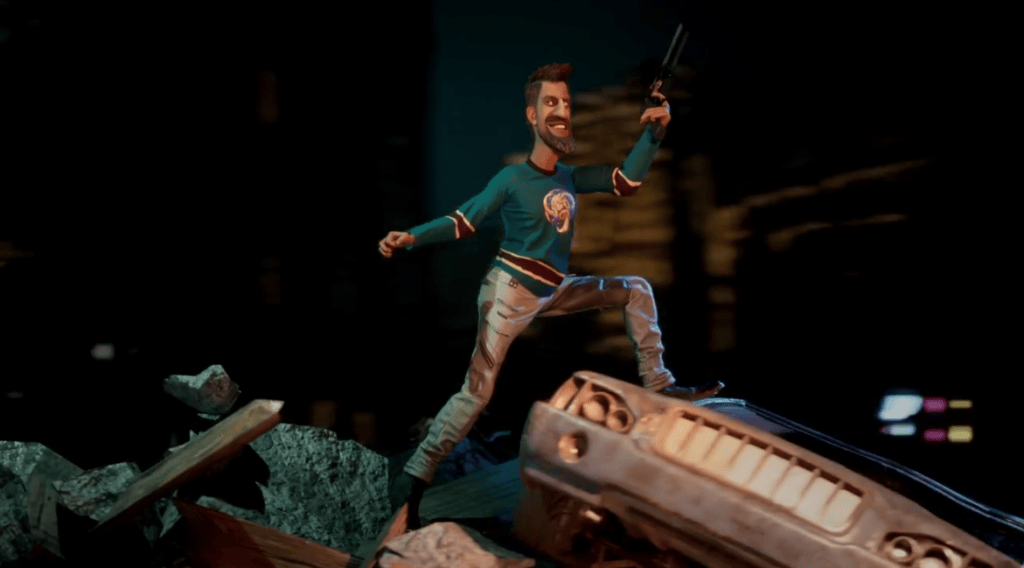
AccuPOSE INFINITYis a subscription service, which offers over a thousand additional posing presets with various themes like “daily life” and “super power”. This is a great tool if you want to create something as simple as a stylized walk cycle or something more complex like scaling a wall. This was a huge time saver for the video I recently made for Reallusion.
Advanced Curve Editing
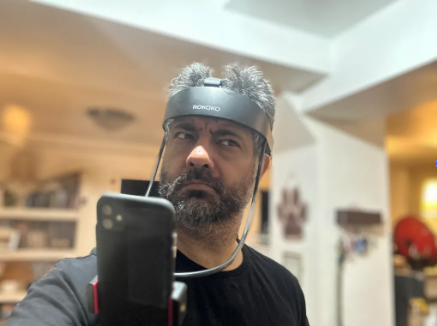
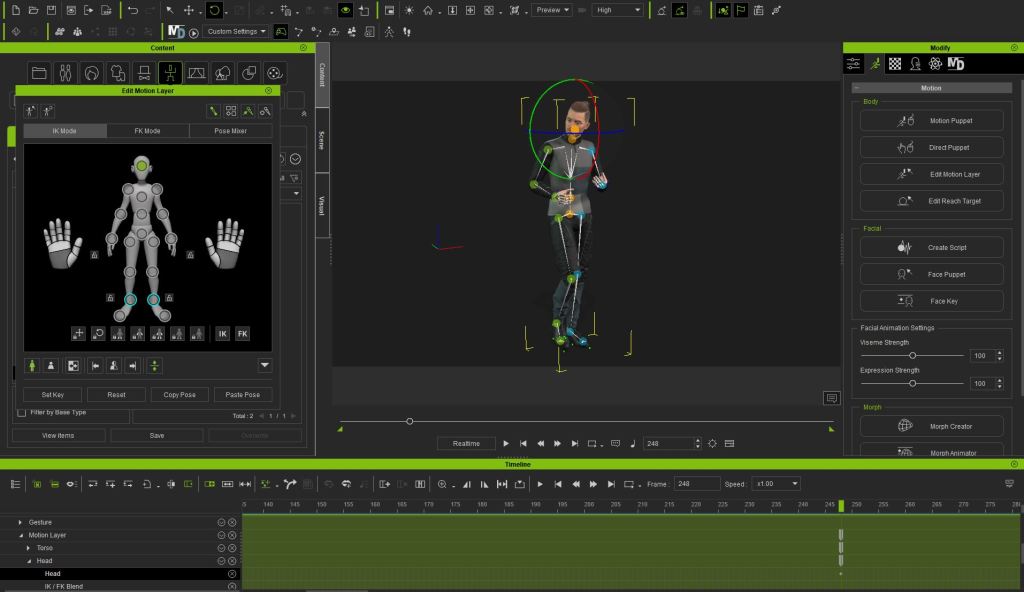
I use an inertial motion capture suit for body animation, which is great, but often requires cleanup to remove jittery artifacts. iClone streamlines this process with tools like the Curve Editor and Advanced Curve Filter, allowing you to visualize and refine mocap data with precision. You can easily navigate the character’s bone structure to locate keyframe data within the Curve Editor, where you can manually adjust keyframes or use the Advanced Curve Filter to smooth out motion. This is especially useful when working on scenes that require precise interactions between characters, like in my Pirates animation.
Non-Destructive Editing
Another new feature is the Non-Destructive Editing workflow. This gives you the ability to cut a motion clip in the timeline and maintain the keyframe data in the cut out portion. This makes the combination and transition between separate motion clips much smoother and allows a more procedural workflow. I used this extensively in the Parkour section of the Reallusion video to combine multiple separate parkour animations.
Reallusion’s Impact on My Animation Journey
Since integrating Reallusion tools into my workflow, I’ve found myself tackling projects I might have avoided before such as facial animation and performance-driven storytelling. I now have a streamlined procedural way to handle rigging, motion capture, and editing which has made me more marketable as a CG Generalist.
Over the years, I’ve learned that growth comes from embracing the process, experimenting, and patience. The right tools can unlock your creativity in ways you never imagined, allowing you to focus on the art of storytelling. With each project, each challenge, and each breakthrough, you refine your craft and bring your vision to life, frame by frame.
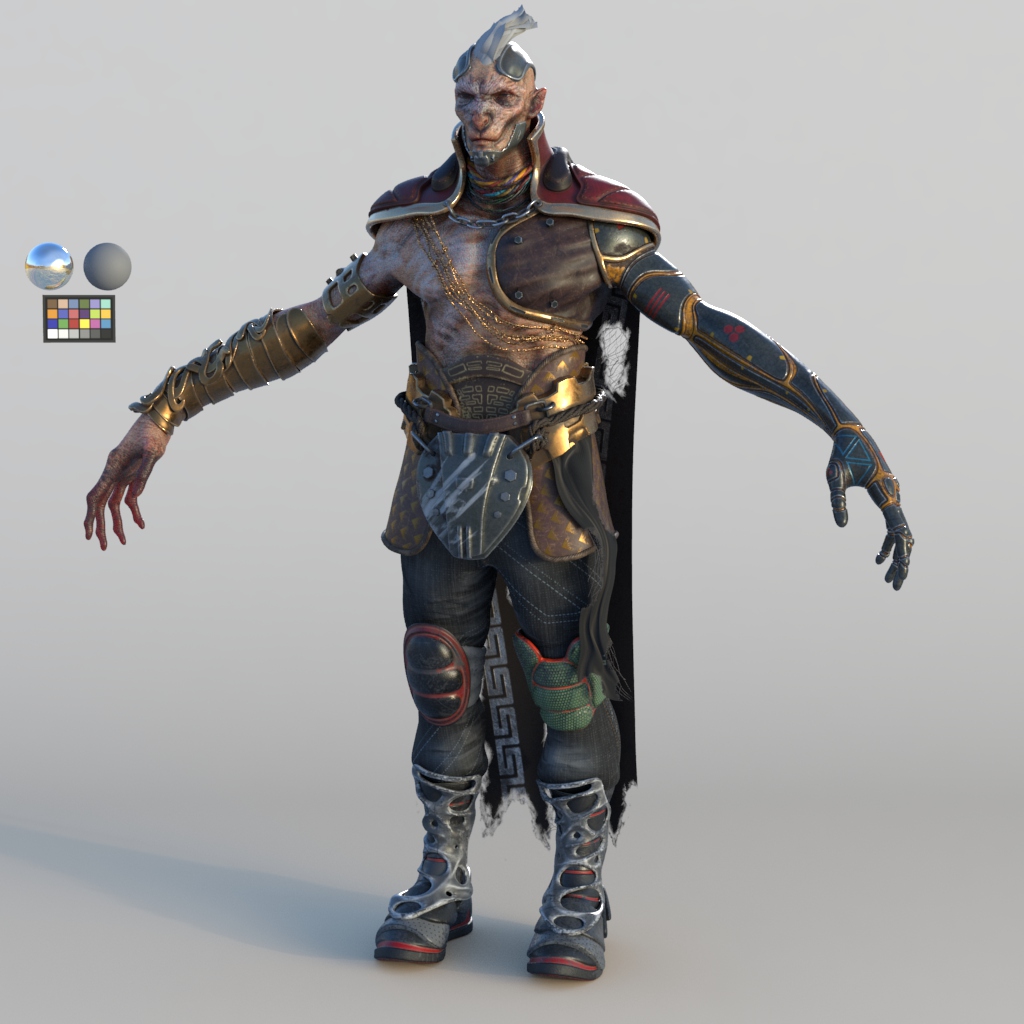
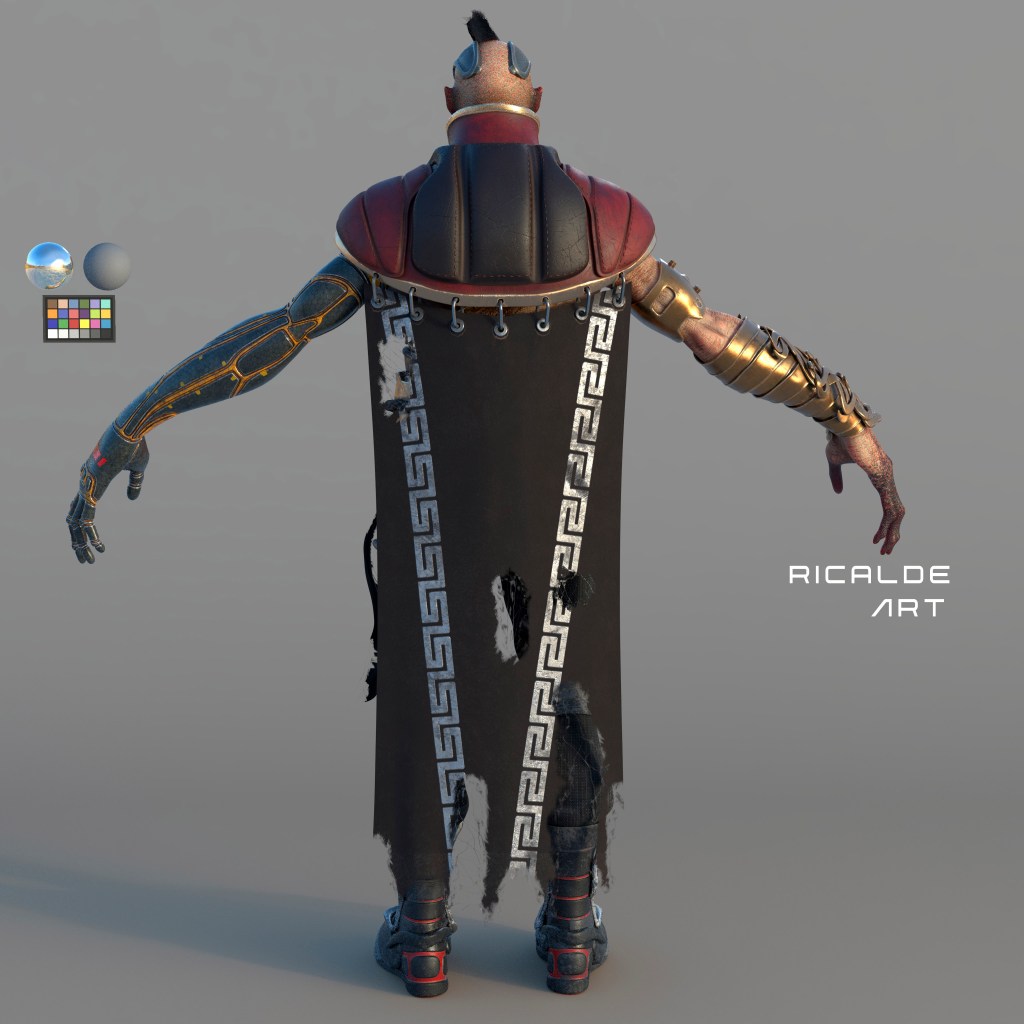
Angel Ricalde, a self-taught 3D artist, wins first place in the “AccuRIG Character” category of the 2024 Reallusion Character Contest. In this article, Angel shares the process behind creating the winning character, “Makako Kasikay,” which was completed in just two weeks. Using tools like ZBrush and CC4, Angel demonstrates how he brought the character to life with a focus on efficient workflows and innovative techniques, culminating in his success in the competition.
Angel Ricalde
With over a decade of experience in 3D art, Angel is a self-taught artist who began his journey through YouTube tutorials and books on Maya. Over the years, he mastered tools like ZBrush and Mari, specializing in texturing and shading with Arnold, Maya, and Photoshop.
Beyond personal projects, Angel has worked on films like Condorito la Película, Ainbo: Spirit of the Amazon, and Disney’s The Descendants: Royal Wedding. His passion for character creation extends into teaching, where he shares his knowledge of texturing, shading, and anatomy in various college courses.
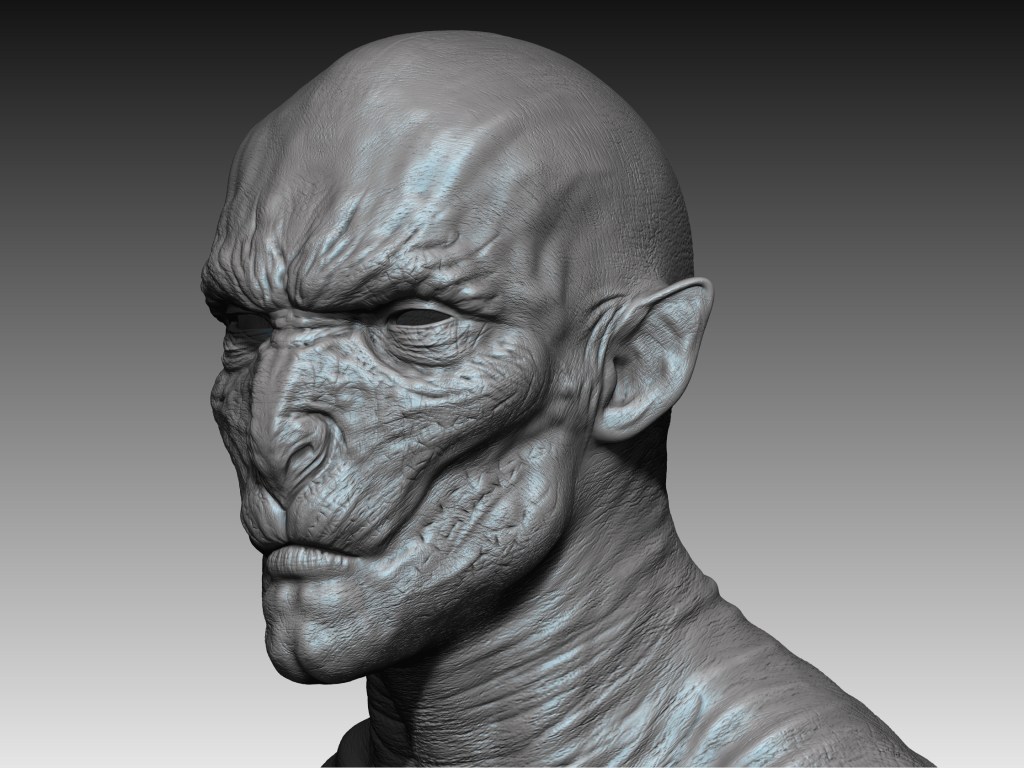
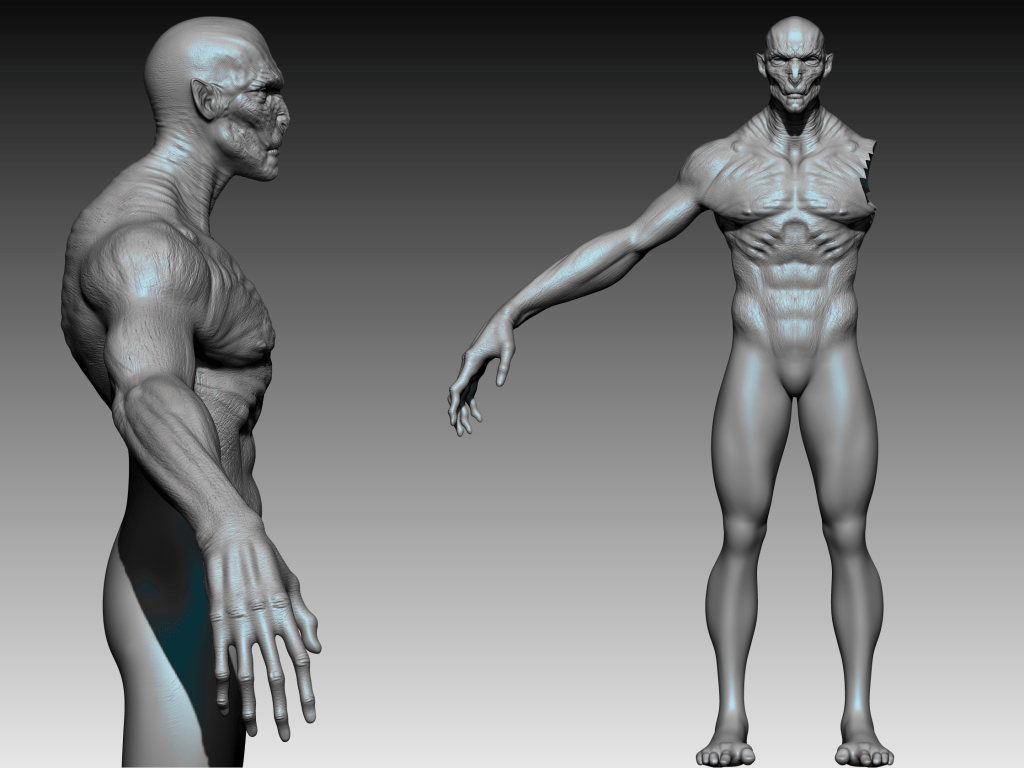
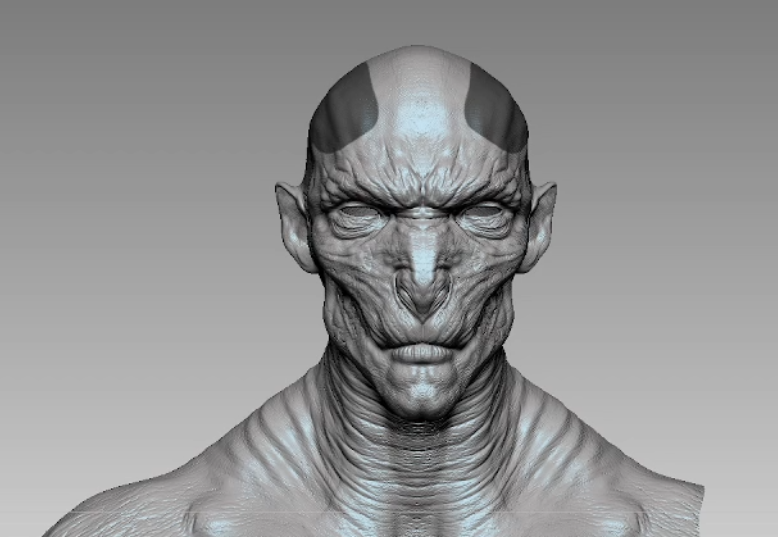
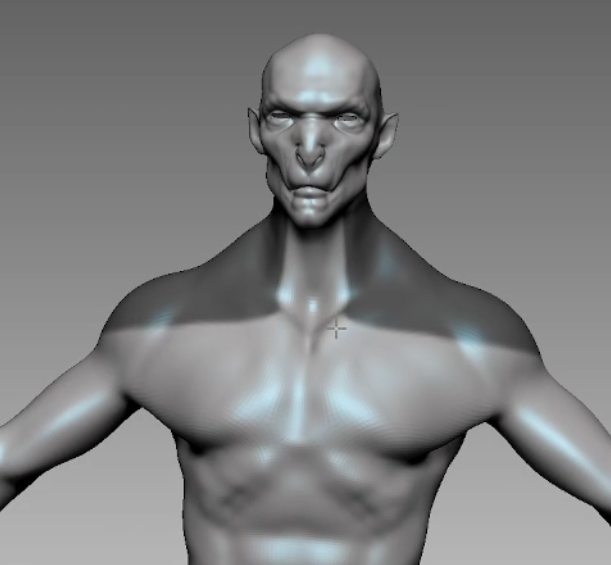
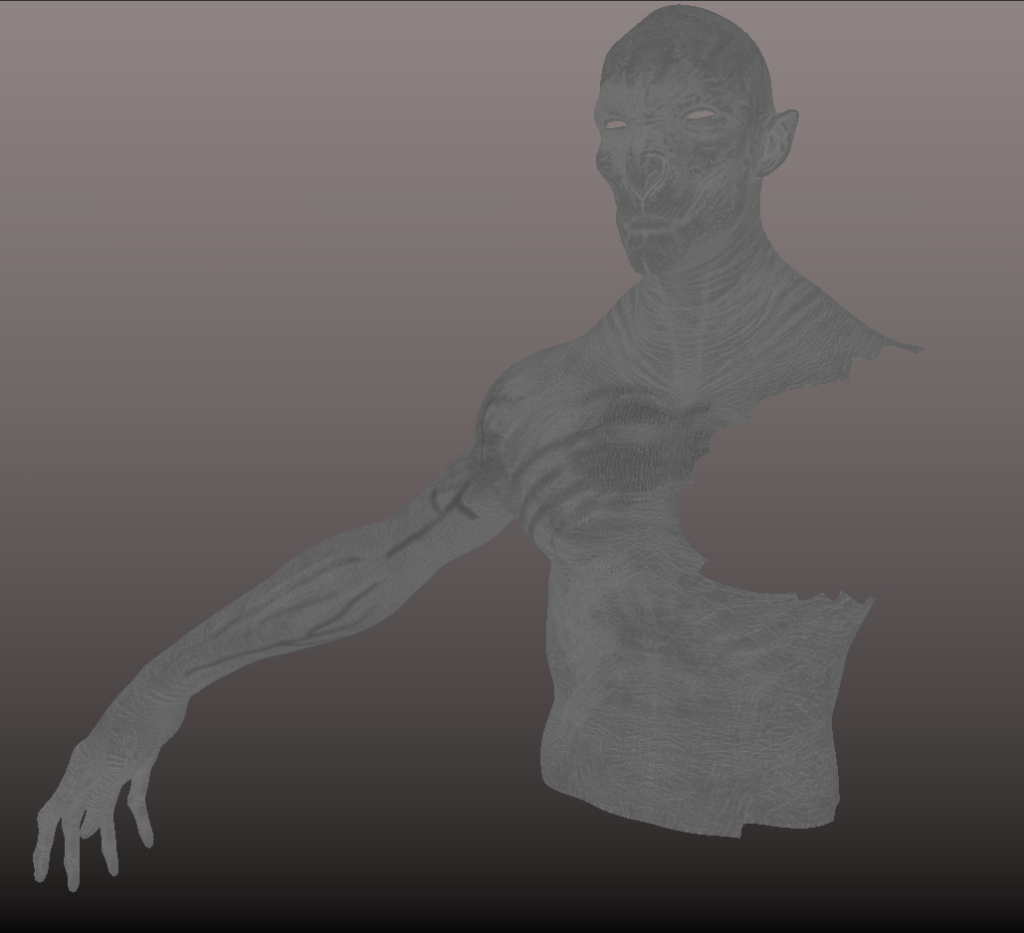
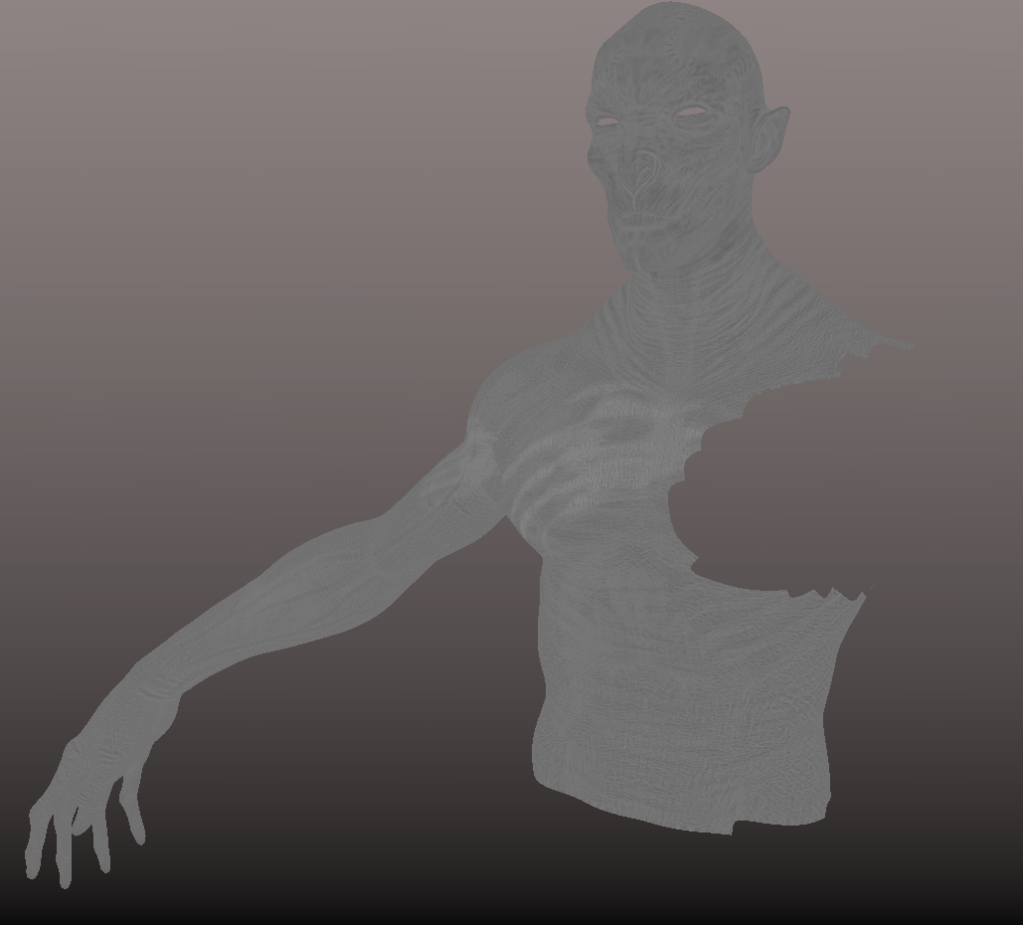
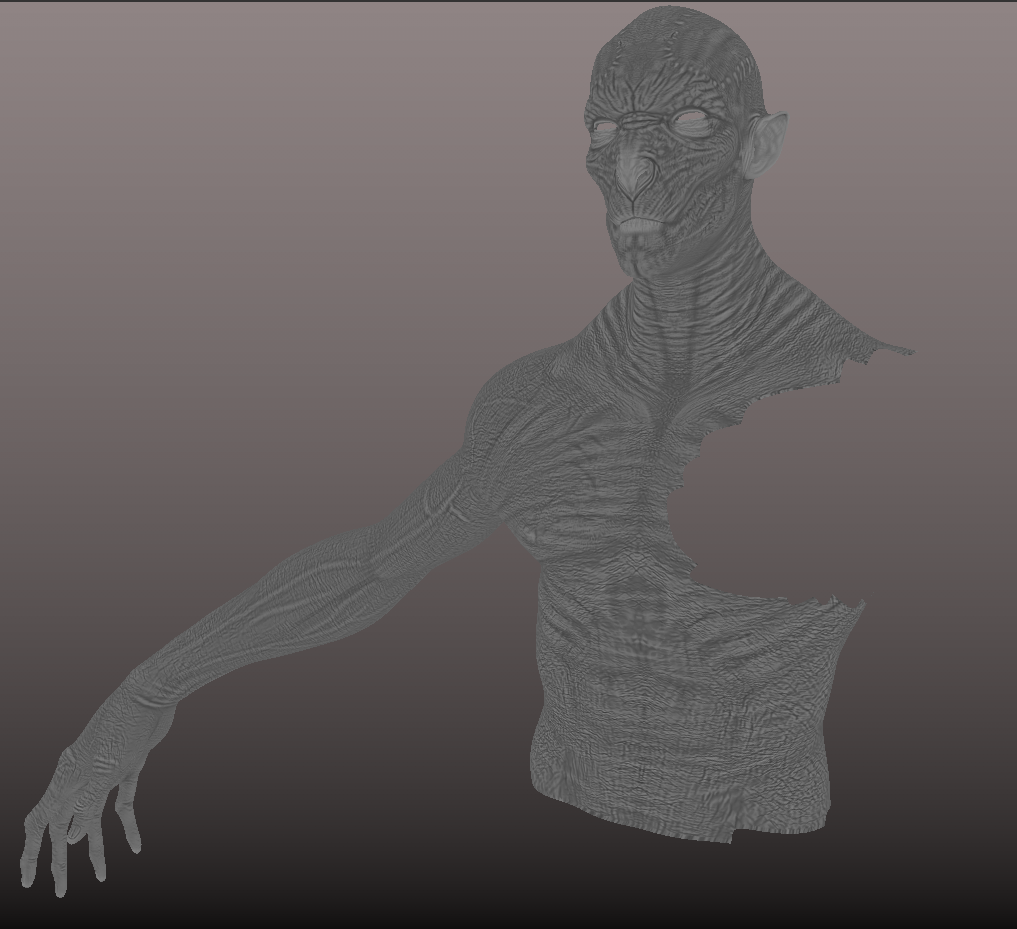
The first step was defining the concept. I dove straight into ZBrush for sculpting, as it helps me better visualize shapes and volumes. Once the base shape was complete, I added skin details using noise as a foundation. Fortunately, my extensive collection of brushes, amassed over the past decade, allowed me to save time while enhancing the quality of the work.
Hard Surfaces
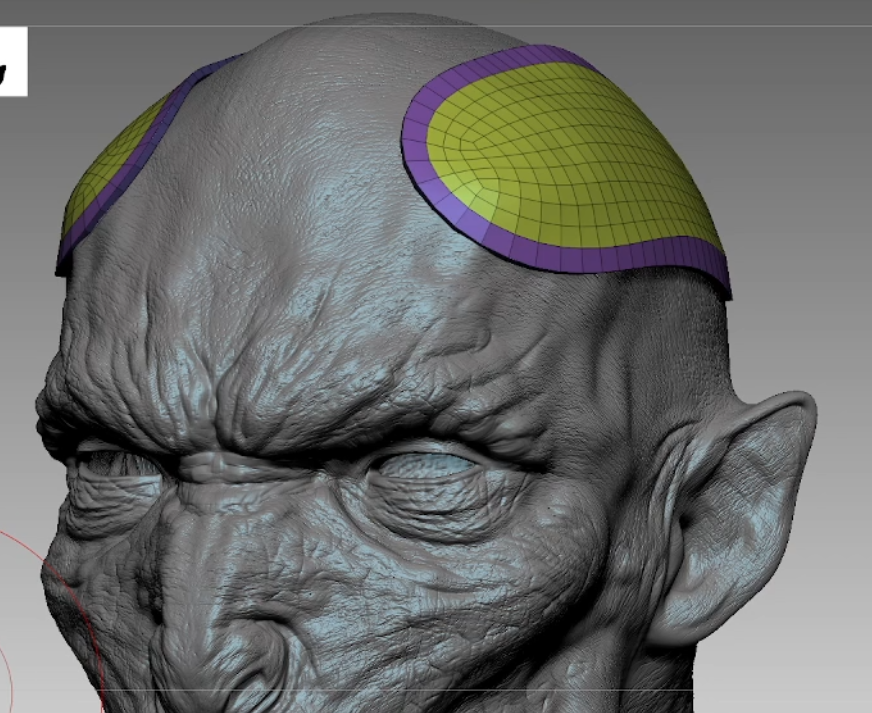
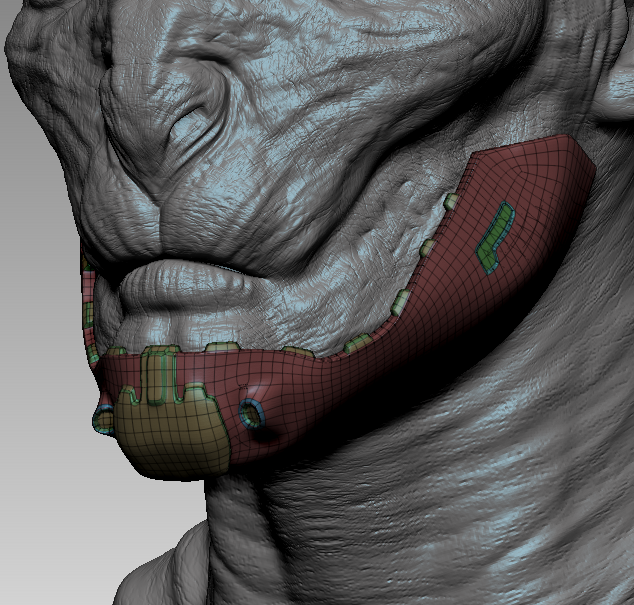
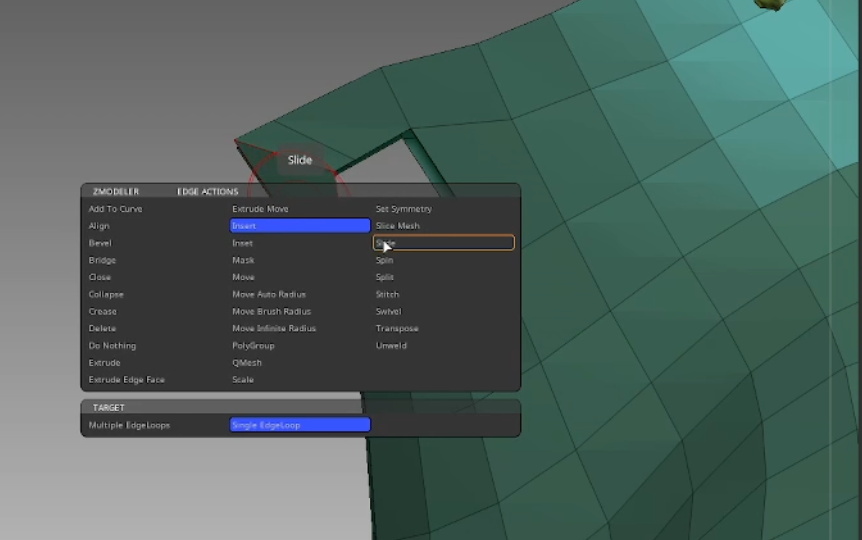
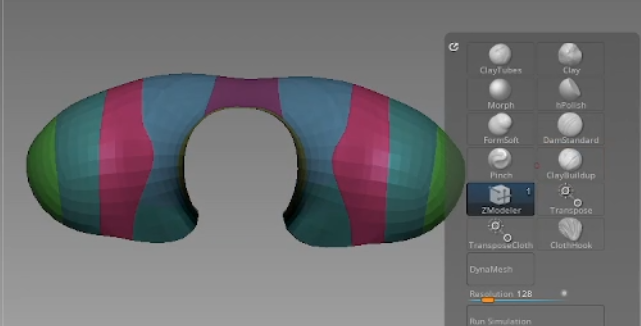
By using masks, I was able to extract new geometry and separate them into polygroups. Then, I applied Polish by Groups and ZRemesher to enhance the definition and solidify the shapes. With a low-poly version of the form in place, I switched to ZModeler, a fast and efficient tool for creating complex shapes with basic polygonal modeling skills. I applied the same process to the jaw: extraction, ZRemesher, Polish by Groups, and ZModeler with Qmesh.
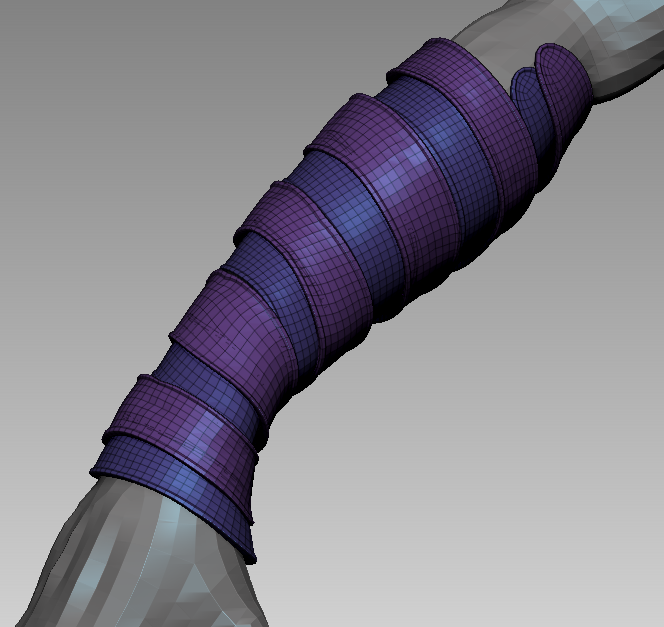
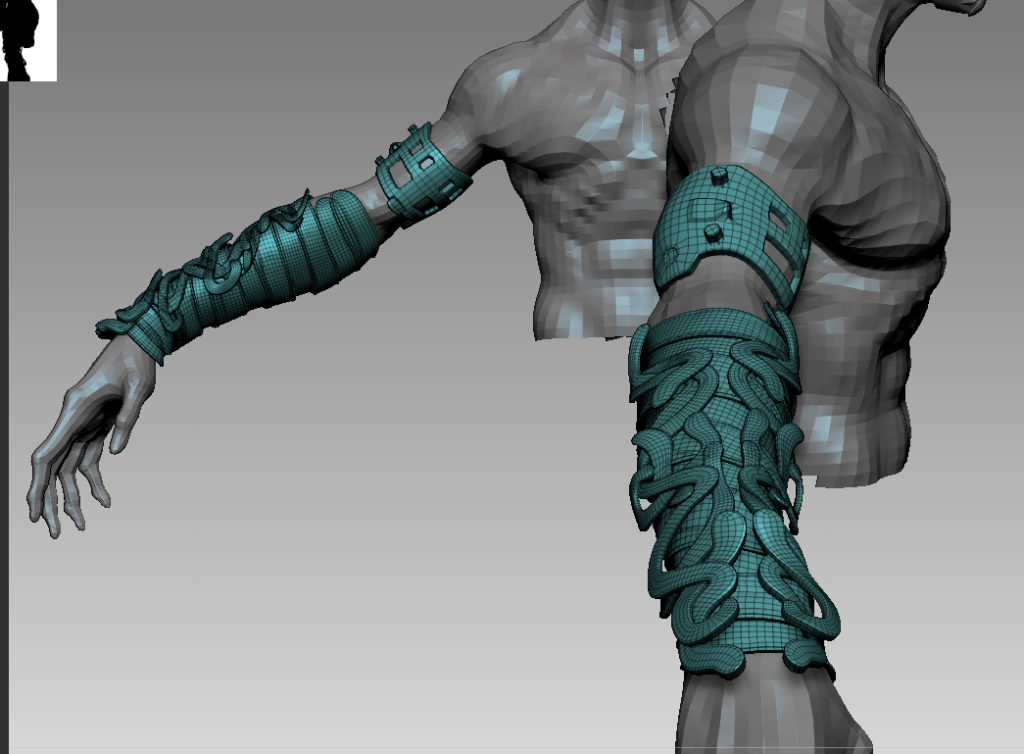
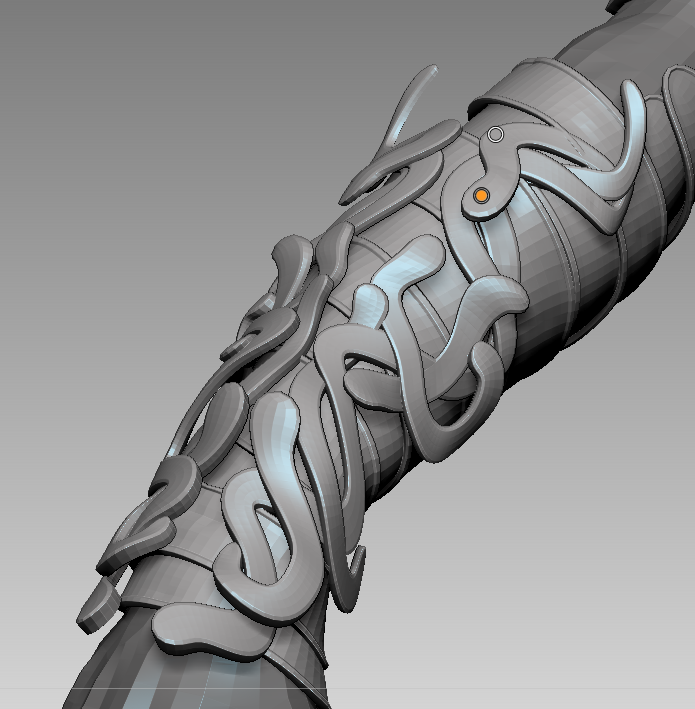
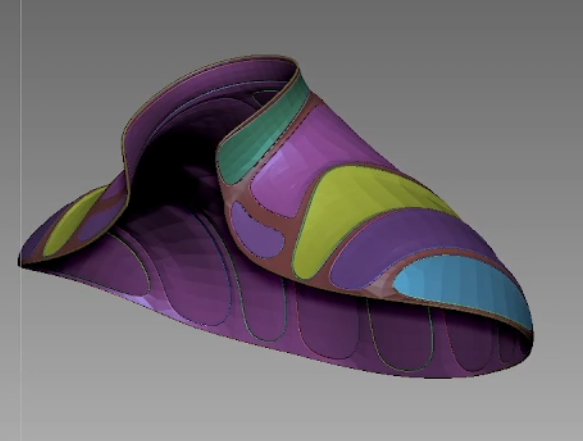
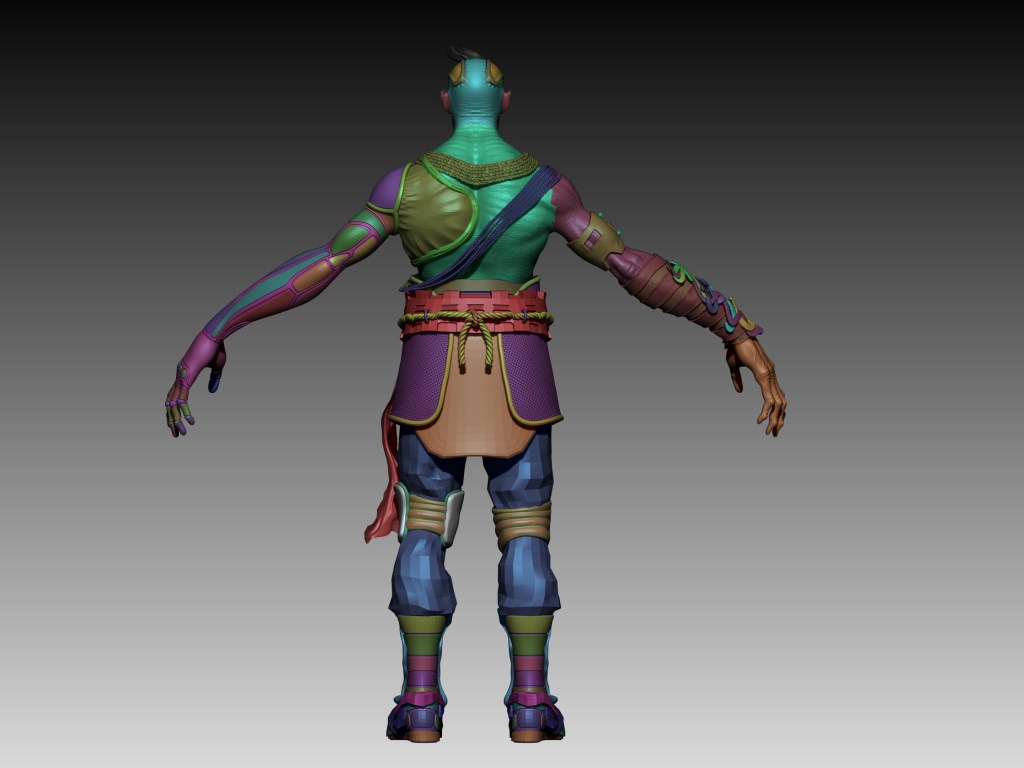
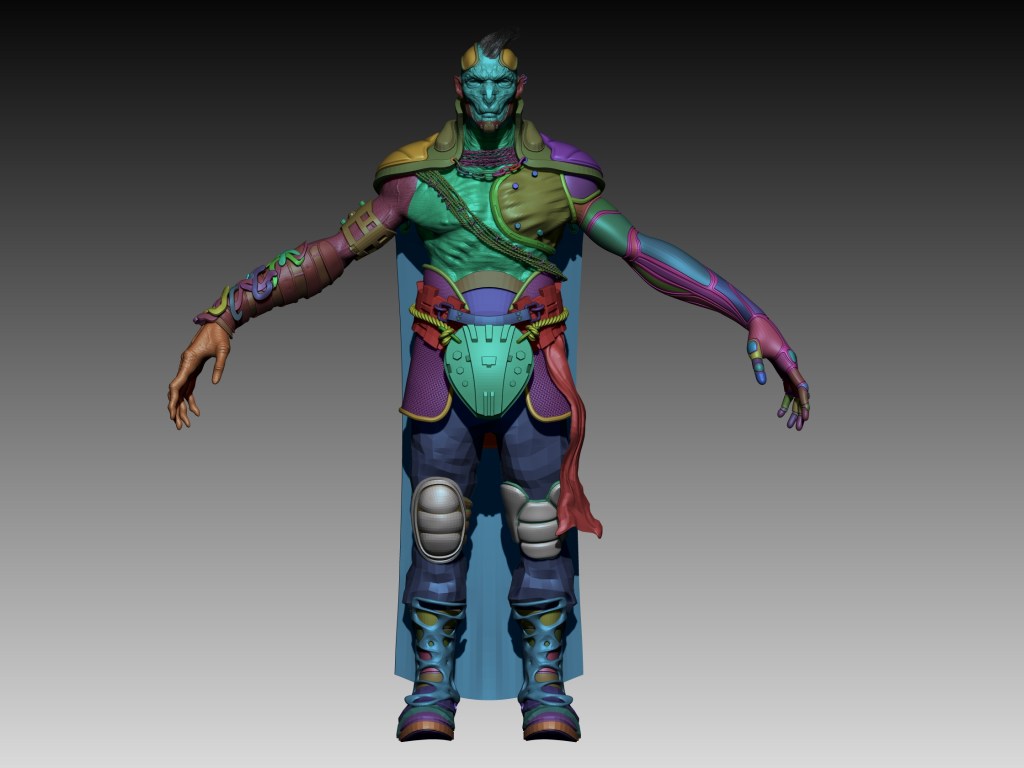
On the right arm, I wanted to incorporate a type of filigree—twisted metals that would wrap around the arm. To achieve this, I started creating masks and used the extract tool in ZBrush to generate new geometry around the arm. This would allow me to establish the foundation for a metallic armor covering the arm. Using the deformation panel tools, such as “polish by group”, I began shaping the metal. Once I had the base, I applied new masks to a dynamesh cube to extract and create new shapes to adapt to the arm. With symmetry enabled, I was able to shape it just the way I wanted.
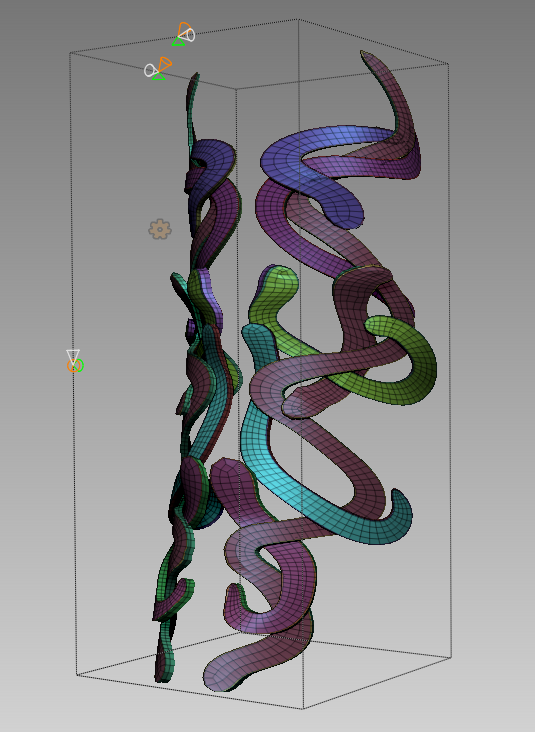
One particularly interesting part of the process was using anchor points for the first time. It’s a powerful tool for instantly creating curves. Using masks, I extracted shapes from a DynaMesh, keeping only the flat surfaces without volume. I later applied an extrude using Dynamic Subdivision, setting Smooth to zero and increasing the Thickness as needed. Here is where anchor points came into play, helping me refine the filigree designs and save a significant amount of time.
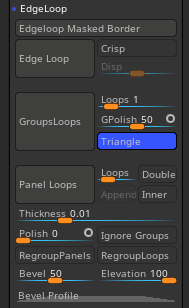
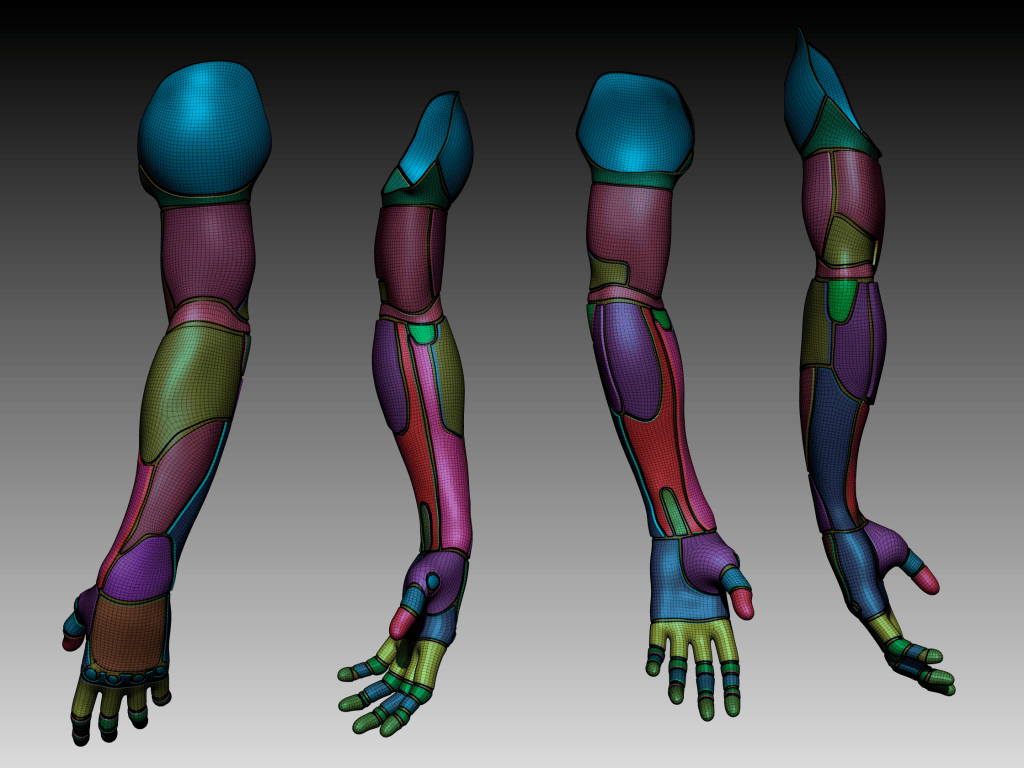
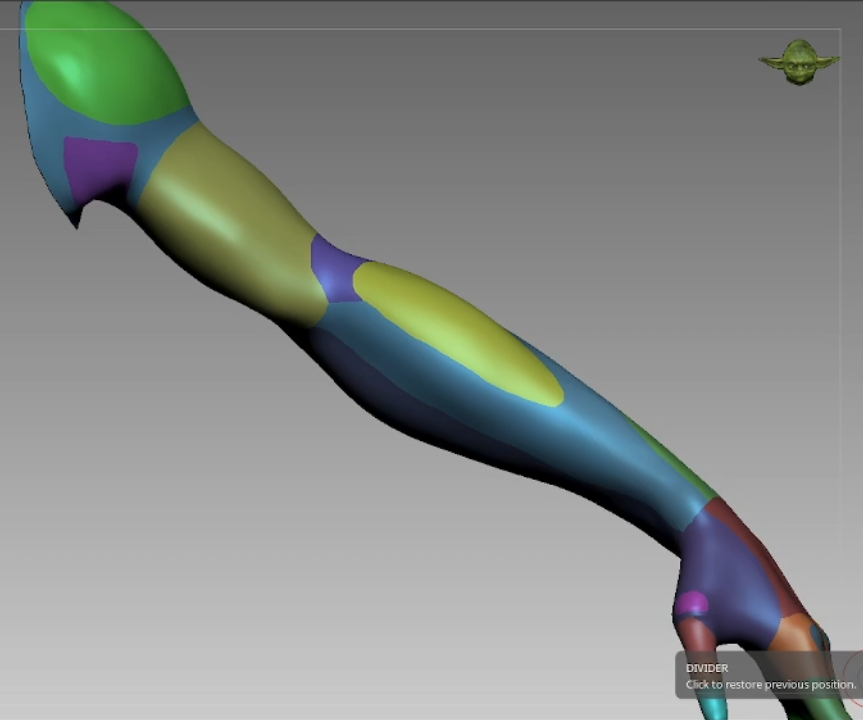
For the robotic arm, I employed a method that involved defining polygroups across the entire arm to ensure both functionality and anatomical accuracy. After creating the polygroups, I used the Group Loops tool to add additional loops between the defined sections and Panel Loops to create beveled edges that highlighted the solid shapes. Finally, using the gizmo tool, I subtly adjusted each polygroup to add volume.
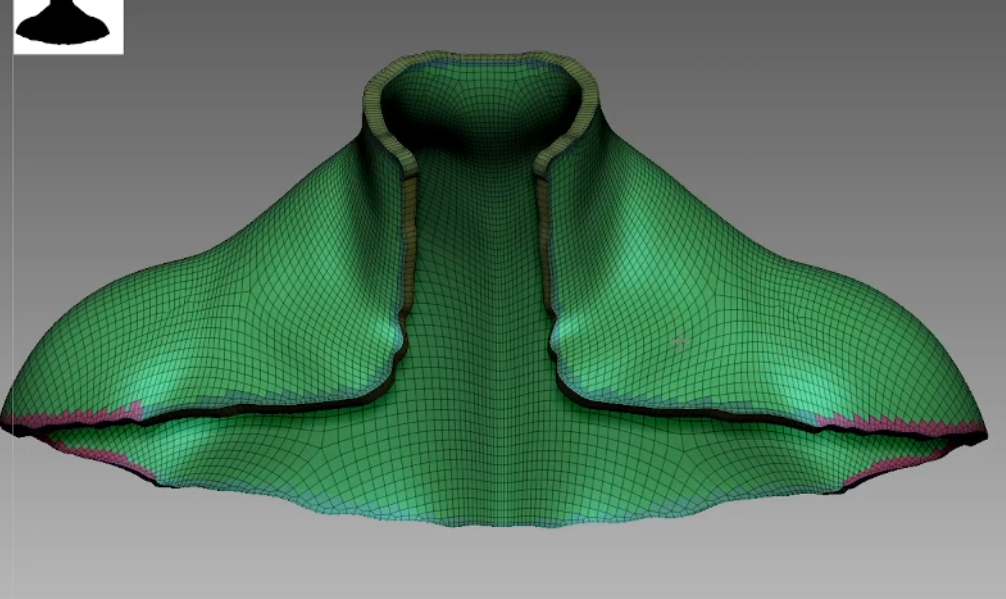
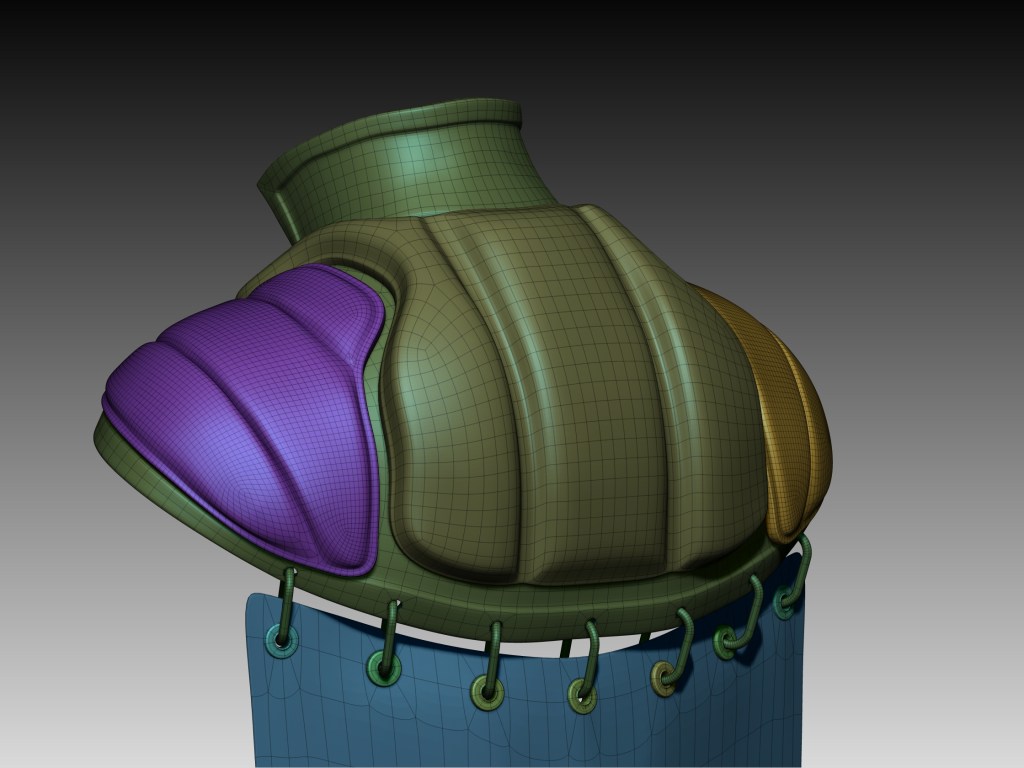
For the shoulder covering, I followed a similar approach, starting with a mask but manually improving the topology to ensure the neck area stayed angular even after smoothing the geometry. I used Group Loops and Panel Loops, along with smoothing brushes, to create the “puffy” look of the piece.
I essentially used the same approach to begin different solid surface subtools, varying the tools depending on the needs of each shape. Whether it was for creating cavities, extrusions, bridges, or volumes, I adjusted them to stay solid or smoothed them out based on what came to mind at that moment.
Pants and Exoskeleton Boots
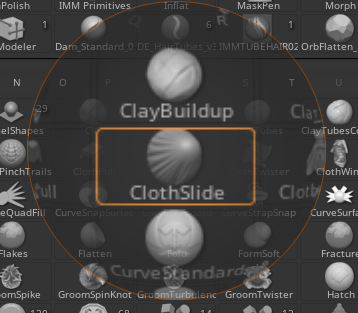
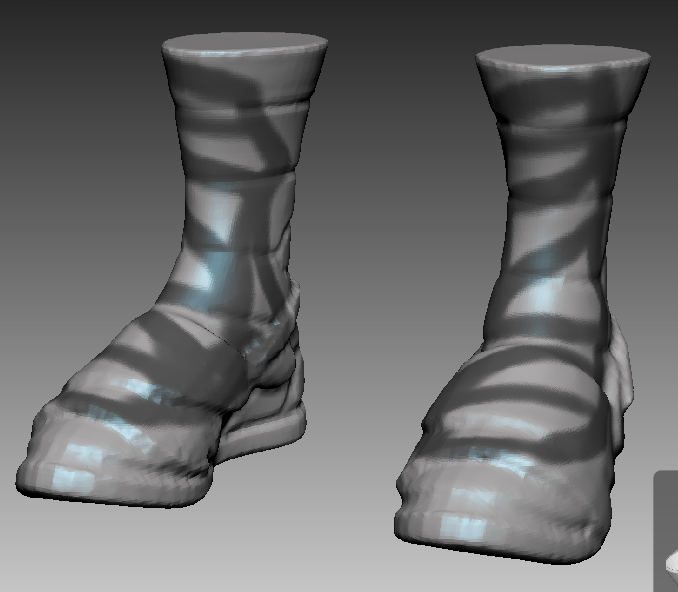
The pants were created by extracting the geometry’s surface. I applied ZRemesher to improve the topology and adjusted vertices to simulate natural stitching on the inner and outer parts of the pants, then I subdivided and use the ZBrush tool “ClotheSlide” that is meant for clothes
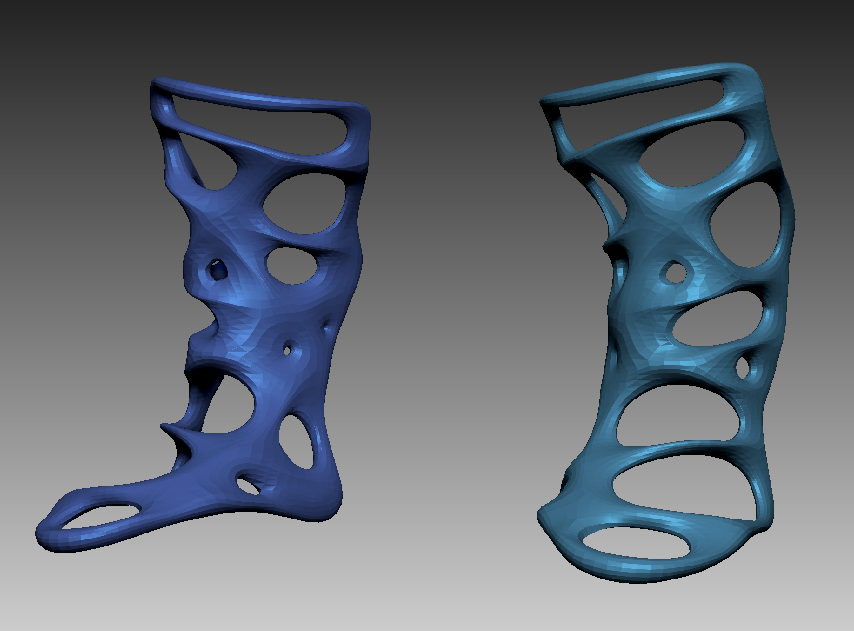
For the exoskeleton, I first created a mask with holes on the surface of the boot. I extracted the new geometry, applied Decimation, and used Inflate. Next, I used Trim Dynamic to create some flat surfaces on the subtool and applied Contrast in the Deformation panel. This allowed me to emphasize the shapes further. Finally, I refined some edges using the “Pinch” brush and Zremesh.
Hair Cardboards
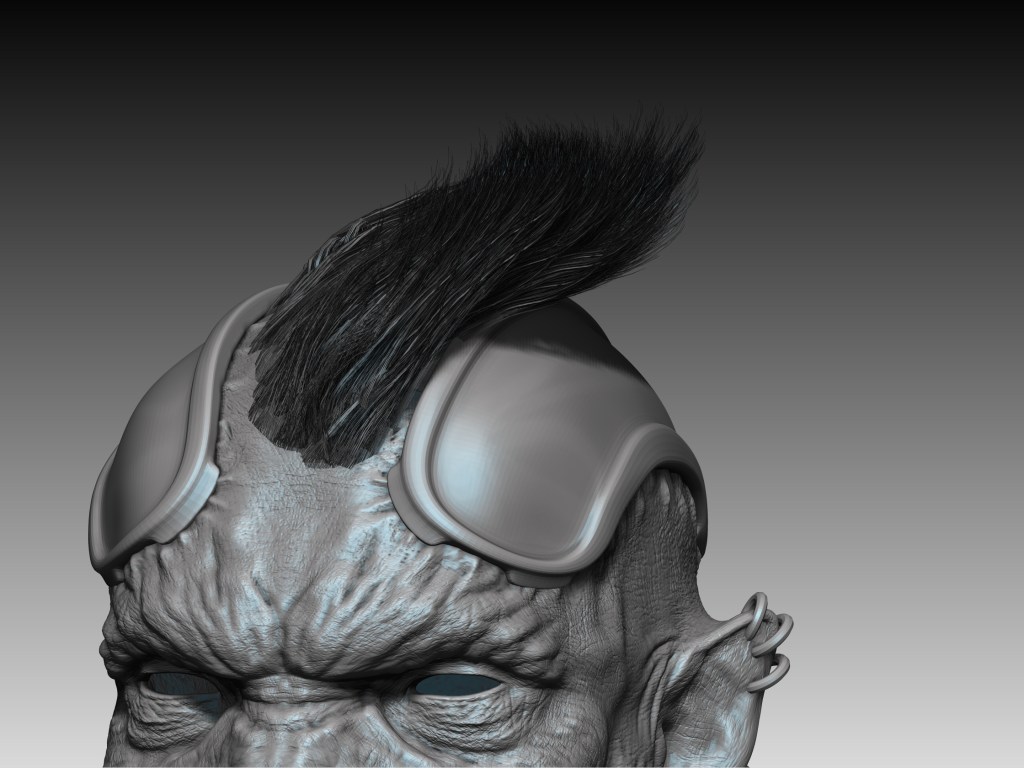
For the hair, I began by inserting a low-poly plane and dividing it into polygroups to generate the UVs. I ensured the plane had at least 3 to 4 horizontal edge loops, which allowed me to smooth and curve the strands as needed.
In Photoshop, I created a custom brush to simulate hair strands by arranging simple black dots on a white background. After fine-tuning the brush settings, I painted the strands as alphas and exported the texture to ZBrush.
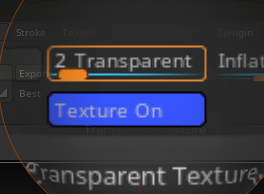
Using the Texture Map feature, I applied the alpha texture and activated transparency to preview the strands as fibers.
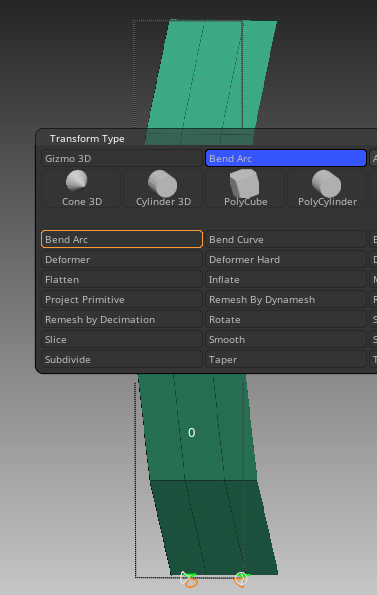
To achieve a polished result, I used the Bend Arc option in the Transform Type panel to curve the strands, adding a natural flow to the hair, then I duplicated and carefully positioned the geometry, switching between polygonal and alpha visualizations for better control.
Texturing and Shading
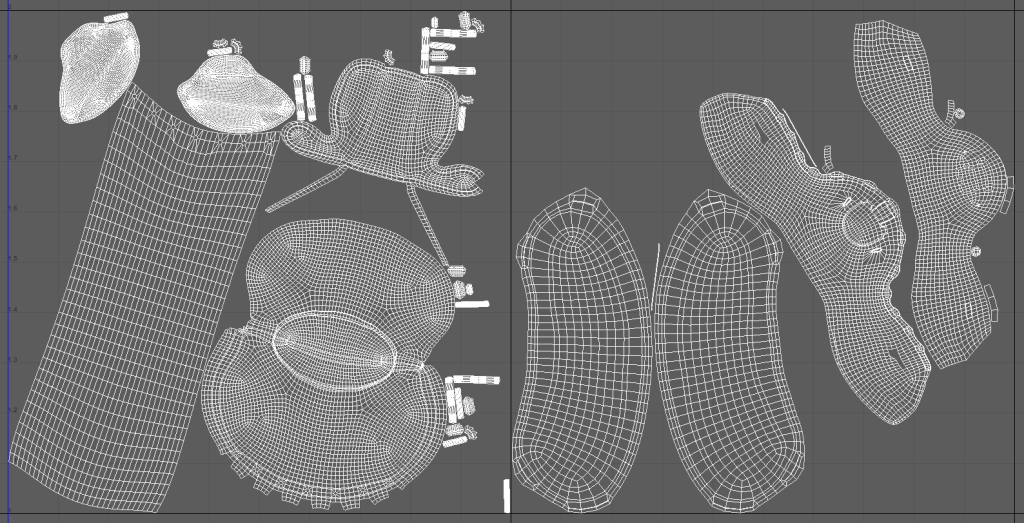
To achieve effective texturing, it’s crucial to start with clean UVs. I used UV Master in ZBrush and separated the model into polygroups for efficiency—breaking it into parts like the eyes, ears, inside of the mouth, head, arms, metals, and leathers. This allowed me to generate UVs quickly and refine them in other software, accelerating the process. Once the UVs were ready, I organized them into UDIMs for higher texture resolution.
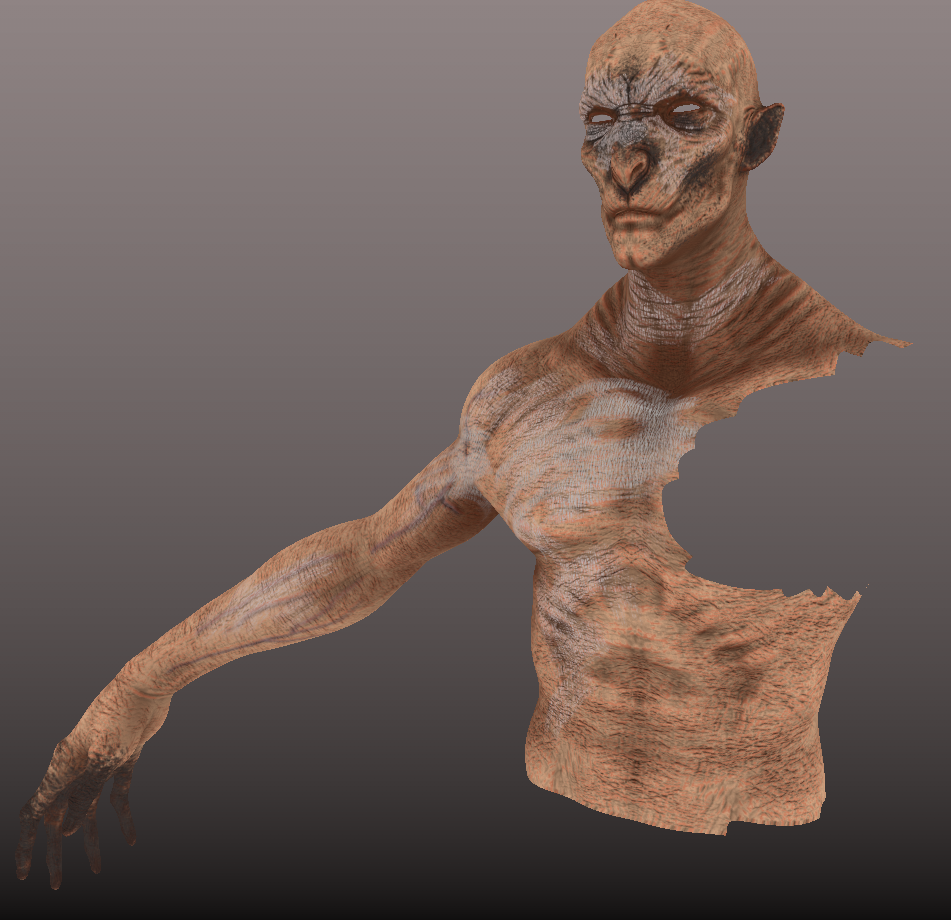
I used Substance Painter for texturing. In some cases, I modified preloaded Smart Materials, while in others, I reused custom Smart Materials I had created for previous projects. Of course, I also created new materials specifically for this character. All materials can be stored in Substance Painter for future use.
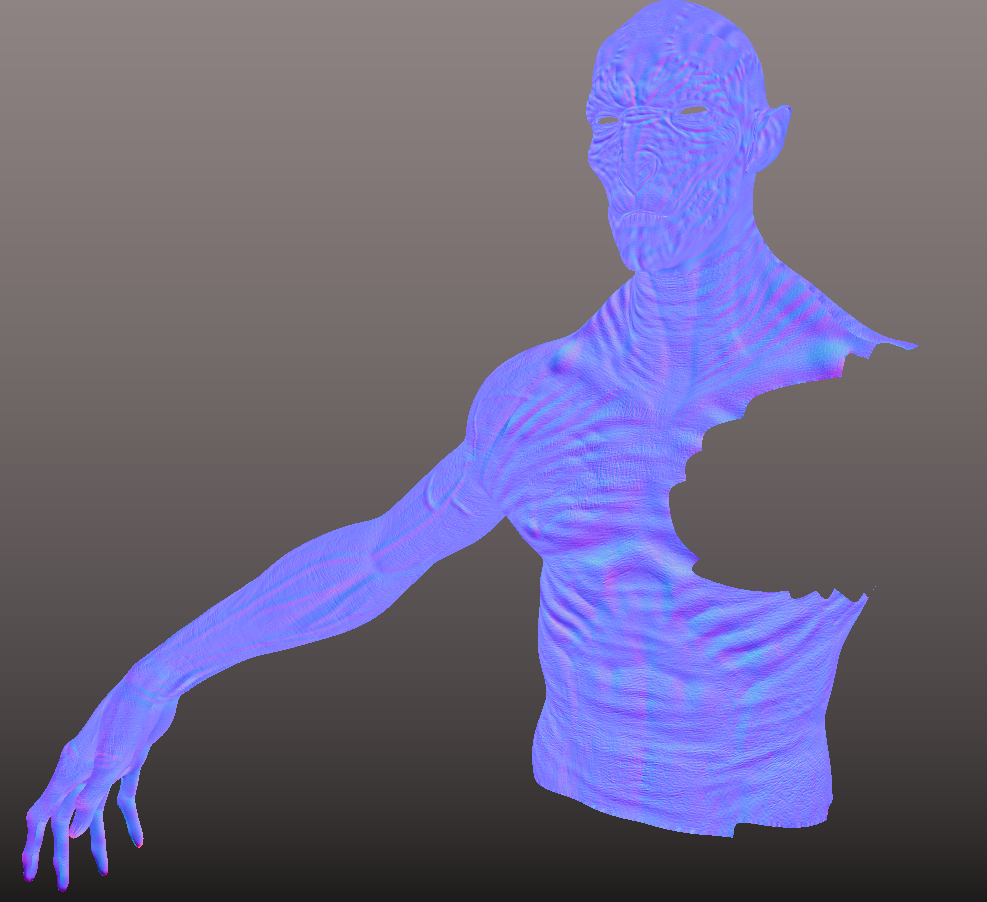
I generated a variety of texture maps, including normal, albedo, roughness, metalness, SSS Scatter, and opacity maps. The opacity map was crucial for simulating the torn fabric of the cape. For shading, I worked in Autodesk Maya with Arnold as the rendering engine, where I set up the necessary algorithms to ensure the exported textures from Substance Painter integrated seamlessly for realistic results. Each map controlled specific visual properties, such as skin transparency, color, hair transparency, specular highlights, roughness, metal reflections, and cavities. These maps were further refined using remap nodes to fine-tune the output, ultimately achieving the desired final look.
Raw render test:
Posing the Character Using AccuRig
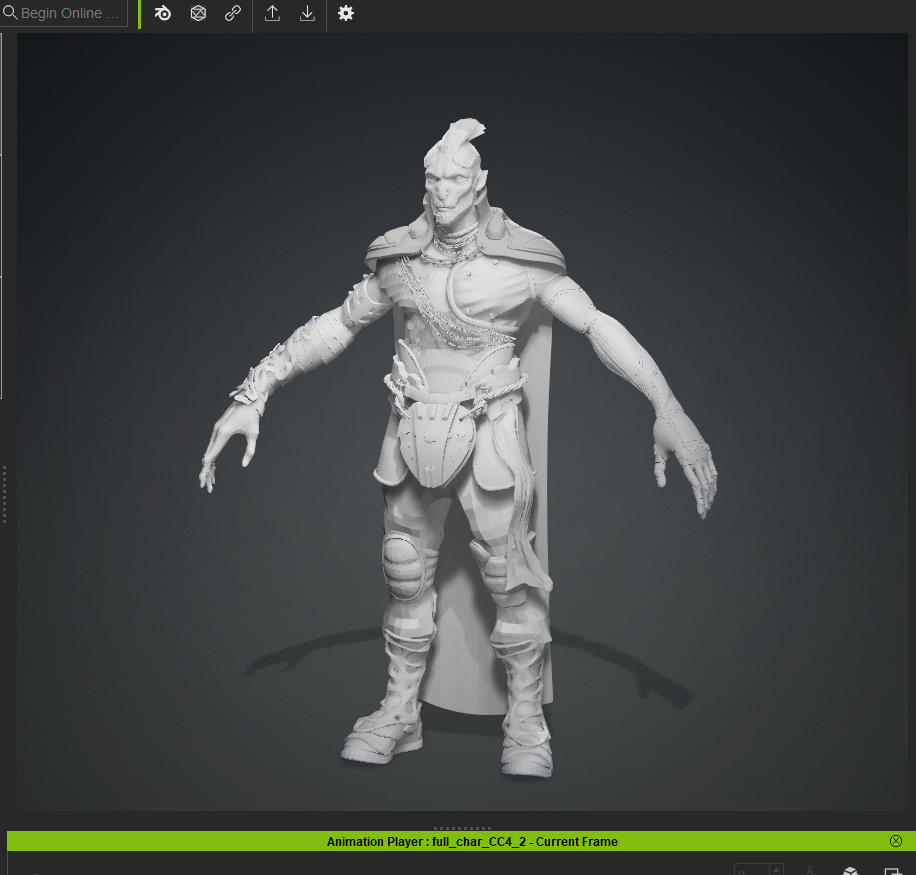
This was one of my first experiences using AccuRig, and I found it incredibly intuitive. Thanks to Character Creator 4 (CC4)‘s powerful functionality, I was able to rig and pose the character in just a few steps. What would typically take hours in ZBrush or other software was completed in under 10 minutes—an impressive time-saver for posing a character made up of multiple objects.
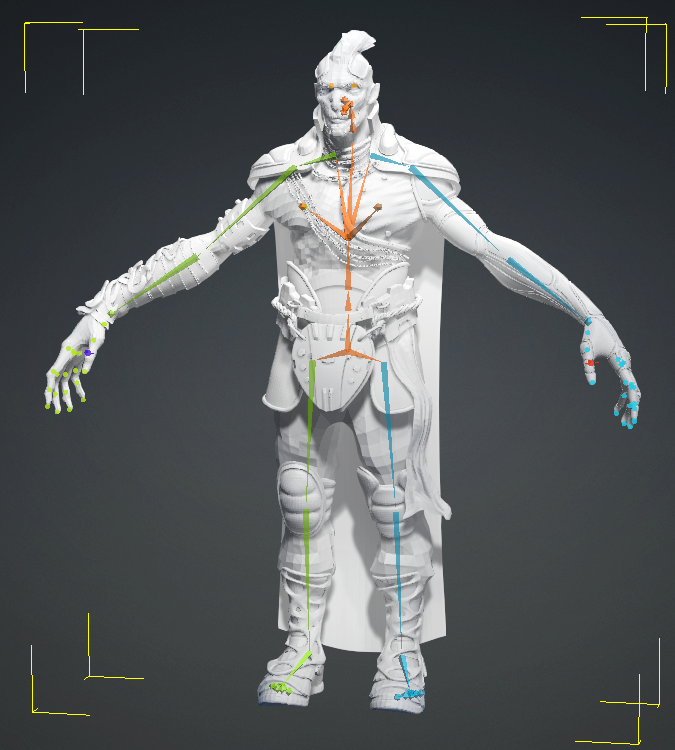
With just one click, the rigging guides are generated after importing the character. A few more minutes are spent arranging the points, with the reference image guides on the top right of the viewer making the process even easier. Once the guides are in place, the second click creates the bones, and corrections can still be made at this stage. The third step, binding the skin, may take a bit more time, but it’s still fairly quick. The final step is simply searching for an animation in the content folder, double-clicking it, and your character is already animated.
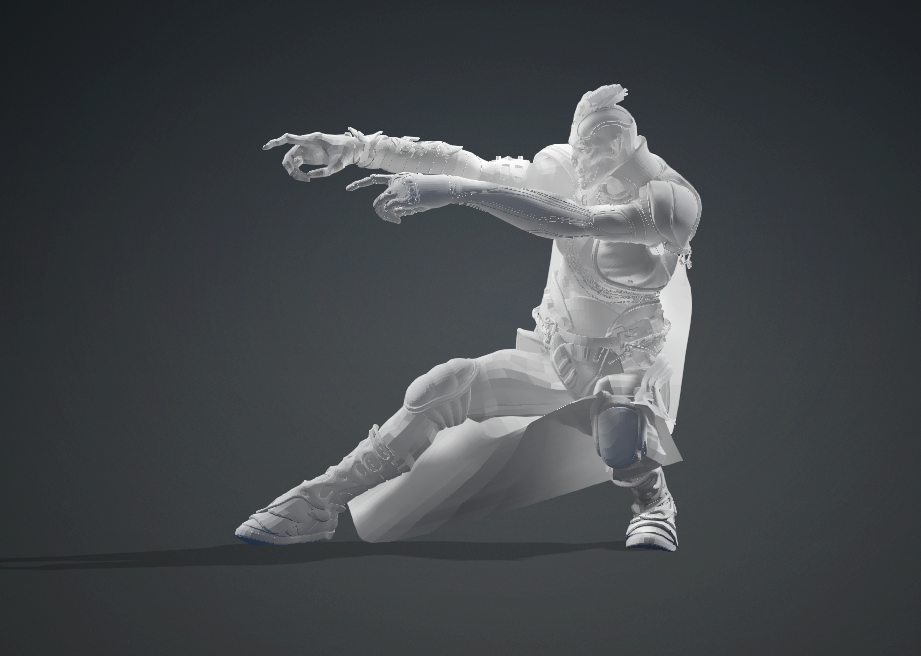
I used three preloaded animations in CC4, selecting key frames from each and editing them directly within the software. This significantly sped up my workflow, especially since I joined the contest just two weeks before the deadline. Thanks to CC4, I was able to pose my character quickly, allowing more time to focus on details like positioning the eyebrows, eyelids, texturing, shading, rendering, and post-production. This efficiency ultimately contributed to my victory in the 2024 Reallusion Character Contest in the AccuRig category.
At this stage, achieving the right lighting and camera angles is essential for a strong final render. For this project, I used several AOVs (Arbitrary Output Variables), or render passes, which I later composited in Adobe Photoshop. I utilized around 12 AOVs, including albedo direct and indirect, specular, SSS, ZDepth, Ambient Occlusion, and others to enhance the image and bring the scene to life.
To begin the composition, I started with the Beauty Pass, which combines all the passes into a single image. From there, I added each AOV individually, experimenting with blending modes, opacity, and adjustments to tone and saturation. This approach gave me full control over the lighting, especially since I rendered each light in the scene separately.
To make the character stand out, I added colorful smoke to the background, creating a striking contrast against the black backdrop. This helped me achieve a dark yet vibrant atmosphere that complemented the character. This stage was a critical part of my two-week process. Despite juggling other projects, I managed to finish on time—largely thanks to the efficiency of positioning my character using CC4’s tools.
Final Thoughts
Reflecting on the contest, Angel praised the judges and the tools provided, noting how they elevated the quality of entries. “The intuitive software and resources made it easy to learn and integrate into my workflow”, he adds. Inspired by Pablo Munoz, Angel is eager to explore a workflow where he sculpts from the CC base mesh for future projects. For Angel, the contest wasn’t just about competing but also about exploring new creative horizons with Character Creator and related tools. His journey is a testament to the power of adaptability, skill, and the right tools. His experience highlights how innovative workflows can bring ambitious visions to life, inspiring others to push their creative boundaries.
Have you ever spent hours searching for the right character, prop, or animation for your project, only to feel overwhelmed by endless libraries? Reallusion’s Smart Search changes the game by making asset discovery seamless and efficient. Whether you’re a creator working on your next character design or a developer optimizing content, Smart Search is the key to unlocking possibilities faster than ever before.
Dorothy Jean Thompson
Since high school, graphic design and photography were passions of mine. I started doing wedding photography from 2006-2018 while also getting into video editing and making short films as a hobby. When I was five years old, I got my first Nintendo console. Since then, I have been a huge video game fan, never thinking I could create a game myself; however, In 2016, I got into Virtual Reality Game Development and designed four VR experiences. While designing games, I learned 3D modeling and finally got to where I am today, where I spend most of my free time creating 3D content.
Reallusion’s ecosystem is vast, encompassing the Content Store, Marketplace, and ActorCore. Each platform offers a diverse range of 3D assets, animations, and props, catering to creators at every level. Even more, characters and motions in ActorCore can easily integrate with major 3D tools and engines, such as Unreal and Blender. The challenge? With such a rich collection, finding exactly what you need can sometimes feel like looking for a needle in a haystack. That’s where Smart Search steps in to bridge that gap, ensuring quick and relevant results without wasting valuable time or effort.
Deep Search and Keyword Search — A Dynamic Duo
Smart Search operates through two powerful tools: Deep Search and Keyword Search. Deep Search uses AI-powered visual recognition to analyze images and find visually similar assets and natural language descriptions.
Keyword Search, on the other hand, allows users to locate items based on names, tags, and descriptions.
This dual approach streamlines the search process, ensuring that assets are just a few clicks away and allowing creators to stay in the flow of their work without unnecessary interruptions or delays.
Now, imagine creating a unique character design using AI. By uploading a reference image to Deep Search, you can instantly find hairstyles, outfits, and accessories that match your vision. Alternatively, if you have a specific item in mind, a simple keyword description can lead you to the exact asset you need without endless scrolling.
Building a Character from Scratch
To showcase Smart Search in action, let’s walk through the process of building a character using this innovative tool.
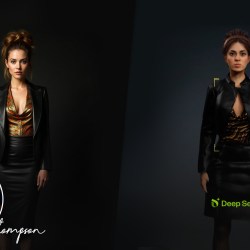
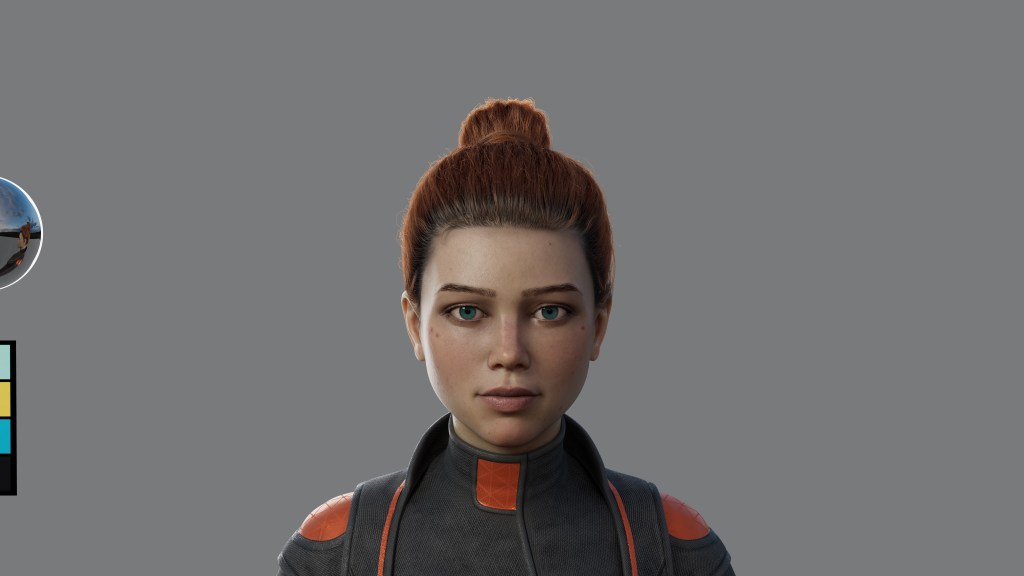
This is the reference image that will be used for image search.
1. Finding the Right Hairstyle
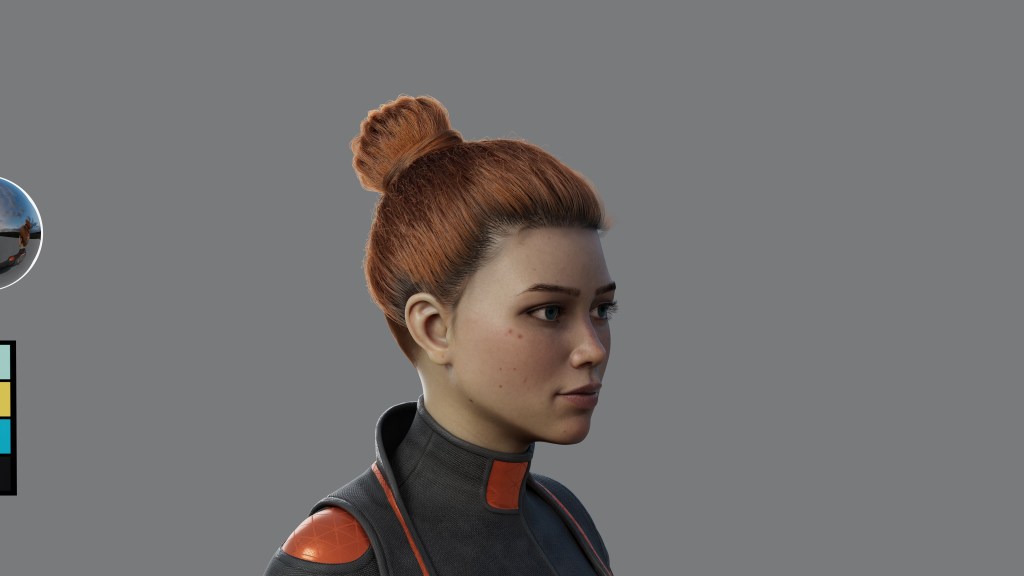
With a reference image in hand, Deep Search analyzes and displays hairstyles that closely match the design. If needed, the search can be narrowed by selecting the “Hair” category, ensuring precise results every time.
2. Selecting Clothing with Image and Text Prompts
Need a cowl neck top with a geometric pattern? Simply drag a Google image into Deep Search or describe it with keywords like “Cowl Neck Shirt.” Instantly, relevant results from the Content Store and Marketplace appear, allowing you to preview, purchase, and apply items directly to your character without second-guessing.
3. Accessories and Final Touches
From shoes to jewelry, Smart Search makes every detail count. Dragging a cropped image of boots into Deep Search generates a list of similar styles, speeding up the selection process.
By combining image and text-based searches, the entire character design comes together quickly and efficiently, cutting down on development time.
Enhancing Animation Projects with Speed and Precision
The power of Smart Search extends beyond asset discovery. By enabling faster access to diverse content, creators can focus on what truly matters, that is, bringing their ideas to life.
Imagine animating a sophisticated 3D character, with each element of her outfit, accessories, and movement sourced in seconds through Smart Search in a quick and effortless manner.
A Tool for Every Creator
Whether you’re crafting lifelike characters, designing immersive environments, or producing animated films, Smart Search accelerates the process without compromising creativity. By bridging the gap between concept and execution, Reallusion empowers creators to craft with unmatched efficiency and precision, transforming complex projects into seamless creative experiences.
Streamlining Workflow for Developers
Smart Search isn’t just for creators. Developers can optimize their assets to ensure maximum visibility. Clear, high-quality thumbnails are essential for Deep Search, while detailed descriptions and tags enhance Keyword Search results.
By refining product listings, developers can increase engagement and sales directly within Reallusion’s platforms, ensuring their content reaches the right audience effortlessly and stands out from the competition.
For developers, following Reallusion’s guidelines ensures that content is Smart-Search-ready. This not only improves discoverability but also aligns assets with user search behavior, leading to higher downloads and purchases, further amplifying potential revenue.
In Conclusion
In a world where time is as valuable as creativity, Reallusion’s Smart Search emerges as a game-changing tool for creators and developers alike. By seamlessly blending AI-powered Deep Search with intuitive Keyword Search, it transforms the once-daunting task of asset discovery into a swift, enjoyable process. Whether you’re crafting a character from scratch, animating a scene, or optimizing content for visibility, Smart Search ensures that every step of your creative journey is efficient and inspiring.
With Reallusion’s ecosystem at your fingertips, the possibilities are endless, and the only limit is your imagination. So, dive in, explore, and let Smart Search unlock your next masterpiece with ease and precision. Happy creating!
I am Tamás Zsolt Nagy, 2D animator and Reallusion Certified Content Developer. I started using Cartoon Animator six years ago, which turned out to be a perfect decision. It’s an easy-to-use application, and Reallusion’s developers continuously come up with fantastic innovations, enabling us to create higher-quality animations with less effort and in shorter time frames.
The latest release, Cartoon Animator 5.3, brought us new dimensions in terms of use of the software. It has become more professional than ever before. While we can continue to work in the application using the well-established methods, new innovations have been introduced that allow us to approach certain tasks in an entirely new way, completing them in a fraction of the time compared to the usual workflow.
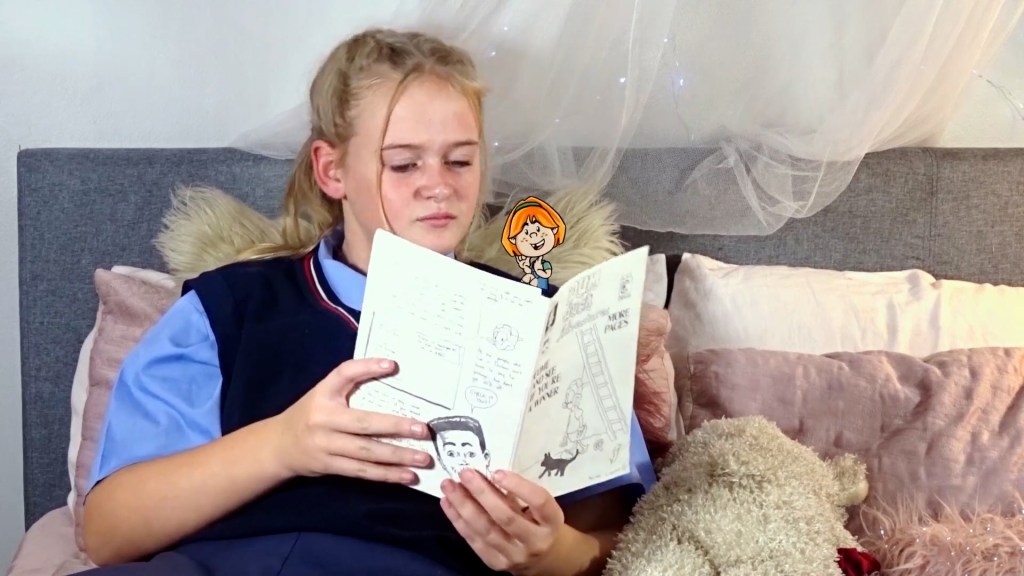
I’d like to give you a glimpse of the new solutions that I find most useful in my daily work. For the demonstration I bring you an animation recently made for children: Kenny and Teddy – The Frog. I will show you how Puppet Stage supports the animation at the scenes where Kenny is talking to the audience, and how the Camera Cinematographic tools make our work easier.
Why puppet animation
Puppet Stage is a real game-changing innovation that radically simplifies the animation process. It removes the need to set every keyframe, significantly saving time and streamlining the workflow during performance synchronization. In contrast to the traditional time-consuming work methods, I can animate the scene in real time, just by mouse and keyboard controls. This gives me the possibility to focus on the creative side of the animation process.
Most of the time in this animation, Kenny, the little guy, stands in front of the camera while explaining the life of frogs to the viewers. I am using voice recordings, and I want it to be harmonized with his body movement and with his facial expressions. It can be animated like any other rig, but the Puppet Stage makes it significantly easier and quicker. This way, I can quickly blend these effects simultaneously in real time by adding the necessary facial expressions and body motions from the Puppet Stage panel. To use this panel, I must configure it first, in the following way.
Body motion and facial expression cards
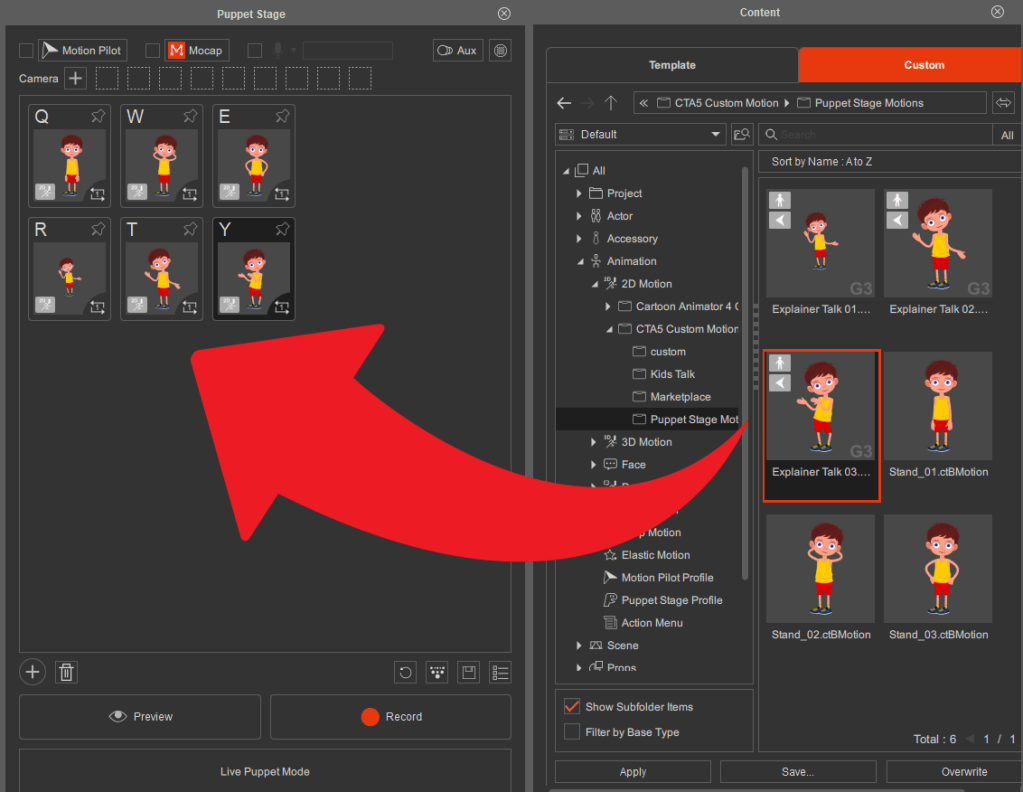
1. The first step is to set up the panel according to my goals. I select the actor I want to control, then I open the Puppet Stage panel from the toolbar.
2. I collect those ctBMotion animations in the Content Manager, I want to work with. We can do it in seconds by dragging them into the Motion Card Pool area of the Puppet Stage window.
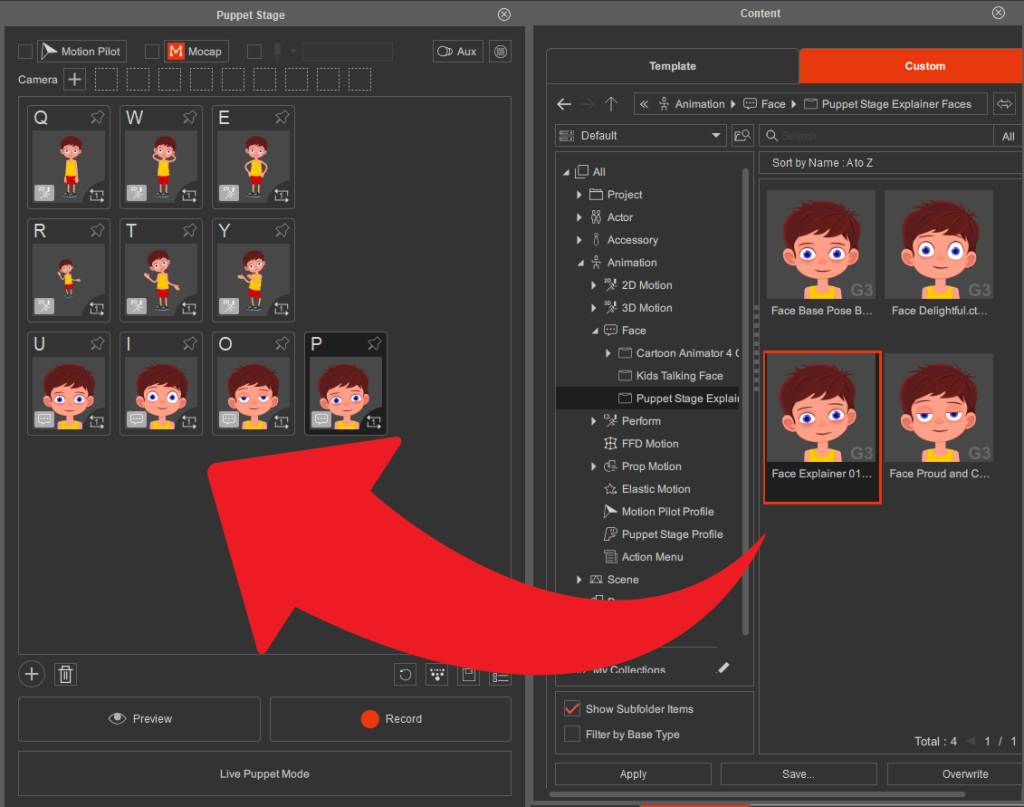
3. In addition to body motions, I gather facial expression cards from the Content Manager.
4. Setting shortcut keys for animation cards is highly useful, especially when working in Live Puppet mode. Although I don’t typically use Live Puppet, I still find this feature valuable.
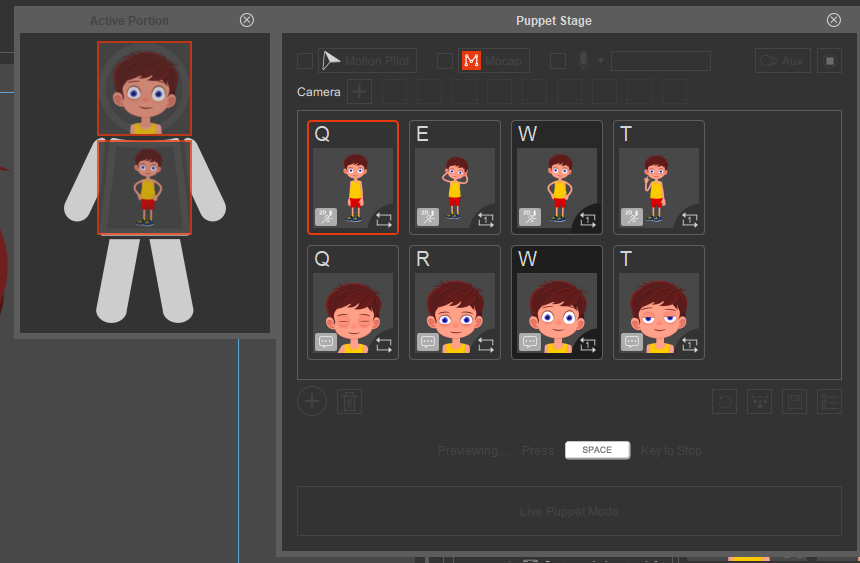
For example, as shown in the following screenshot, I assigned the same hotkey, “W,” to both a body motion card and a facial expression card. During recording, pressing “W” activates and records both cards simultaneously. If I want to apply for only one card, I can simply click on it instead.
Other templates for puppet animation
If you want to enrich the animation of your characters or props, there are other templates to add as cards into the Puppet Stage. It is a good idea to blend FFD, Prop Motion and Elastic Motion effects to characters and props while they are performing other motions or animations.
There are plenty of embedded Puppet Stage contents and we can visit the Reallusion website to purchase additional ones. We can find ready-to-use templates in the Content Store and in the Marketplace for most purposes. However, since I like creating my own set of motions, I buy from these items time after time, or when there is a need for something special, or when I am running out of my time.
Tricks for voice recording
If you added facial animation while recording your puppet stage clip and later want to include character voice from an audio file, some adjustments are needed. Due to Cartoon Animator’s priority rules, it’s recommended to delete the “Mouth_S” entries generated by the facial expression cards during the puppet animation.
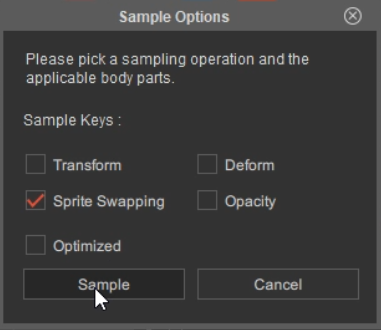
1. Sample Motion Clip on Puppet Clip: Open the Timeline, right click on the “Puppet Clip” on the “Face Motion” track and select Sample Motion Clip.
2. Sample Sprite Swapping keys: Make sure that the Sprite Swapping checkbox is enabled.
3. Delete all keyframes from the “Mouth_S” track: Right click on the track, choose Select All Keyframes, this way you can clear all the keyframes at once.
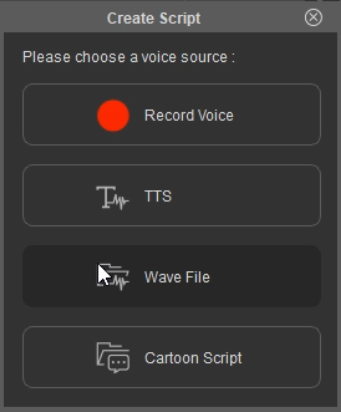
4. Import the Wave File: After completing these preparation steps, importing the wave file ensures proper lip synchronization. Open the Create Script window and select the audio file from the file explorer as usual.
How camerawork enhances storytelling
The introduction of Cinematic Camerawork has unlocked numerous opportunities to enhance animations. Strategies can vary depending on the type of animation being created. For example, the approach differs for setting up a live stream versus producing a short children’s story animation. In my video, I assigned camera shots to each actor and added extra shots for wide-angle views.
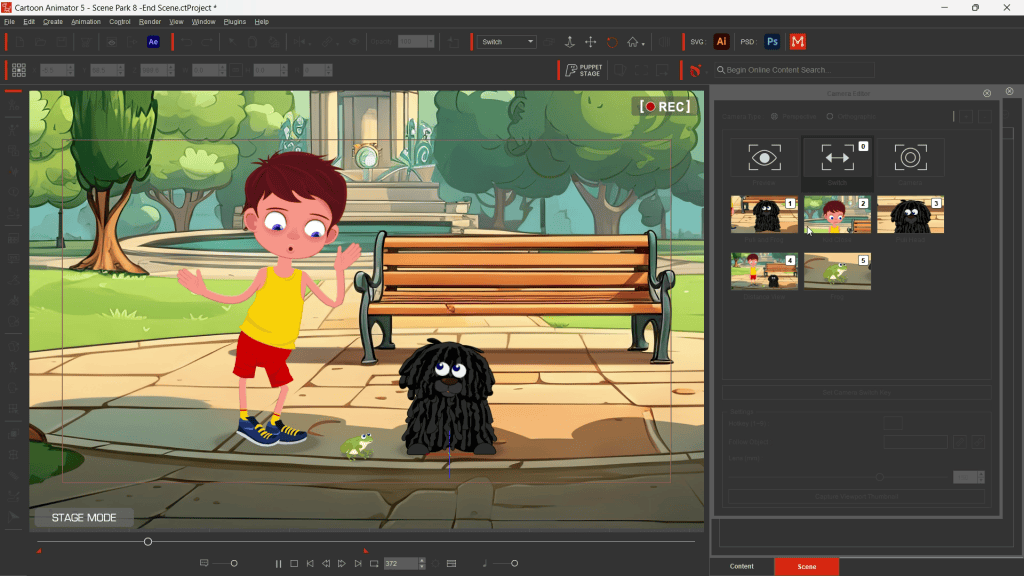
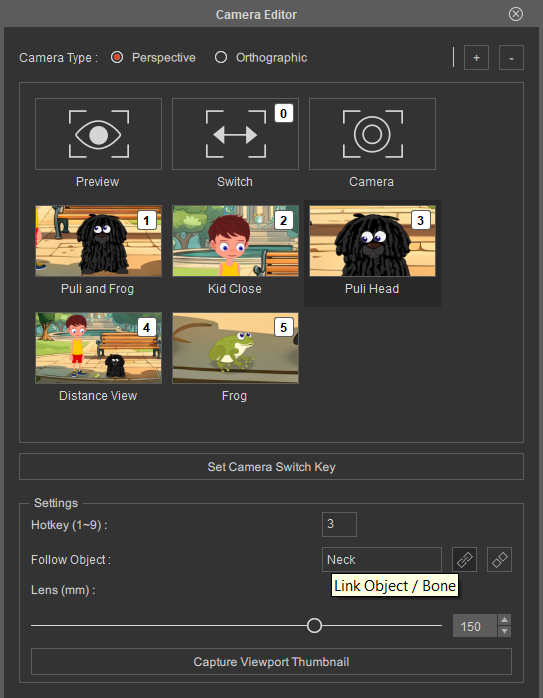
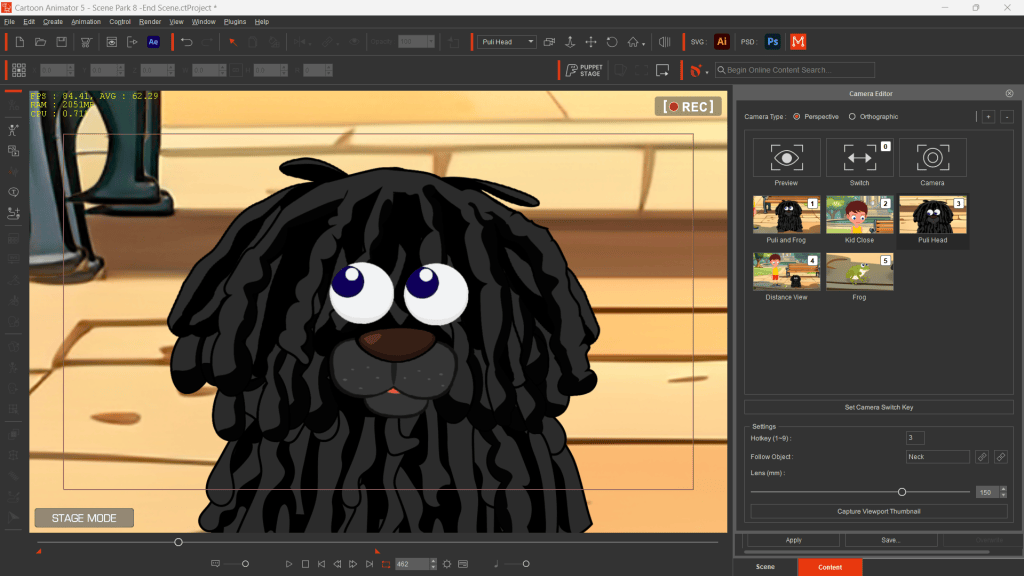
Previously, with only one stage camera available, managing camerawork was less convenient and time-consuming to configure for an entire scene. Now, with a professional toolset, the process is much simpler. Once the Camera Stage is set up, the rest is straightforward. During animation, I open the Camera Editor and use the Set Camera Switch Key to choose the desired camera. For instance, during a conversation, the camera can easily switch to the speaking character, or I can switch to a wide-angle view when needed.
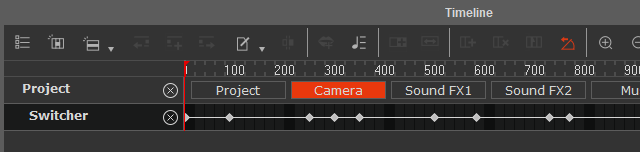
The camera switch key is always auto-added on the track, and I can work with it as I do with any other timeline track keys.
Follow object for dynamism
I would like to mention the Follow Object setting of the Camera Editor, because it is very important to me as it helps me to add more dynamism to my movies. With the link button I can pick a target object or bone that the camera will follow. In this animation I set it up for all the actors. The result is most spectacular at the beginning of the story when Teddy, the dog, is starting to jump. The camera moves together with his hip bone. Before CTA5.3, I had to manually animate the whole pathway of the camera.
Cartoon Animator 5.3 is the perfect choice
I hope you have found my article interesting and have been inspired to try the animation with Cartoon Animator 5.3. I am sure you will not be disappointed if you try it, and you will enjoy working with it, at least as much as I do every day.
Follow Tamás
You can view my animations and “how to” videos on YouTube:
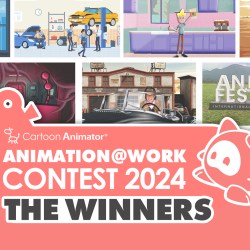
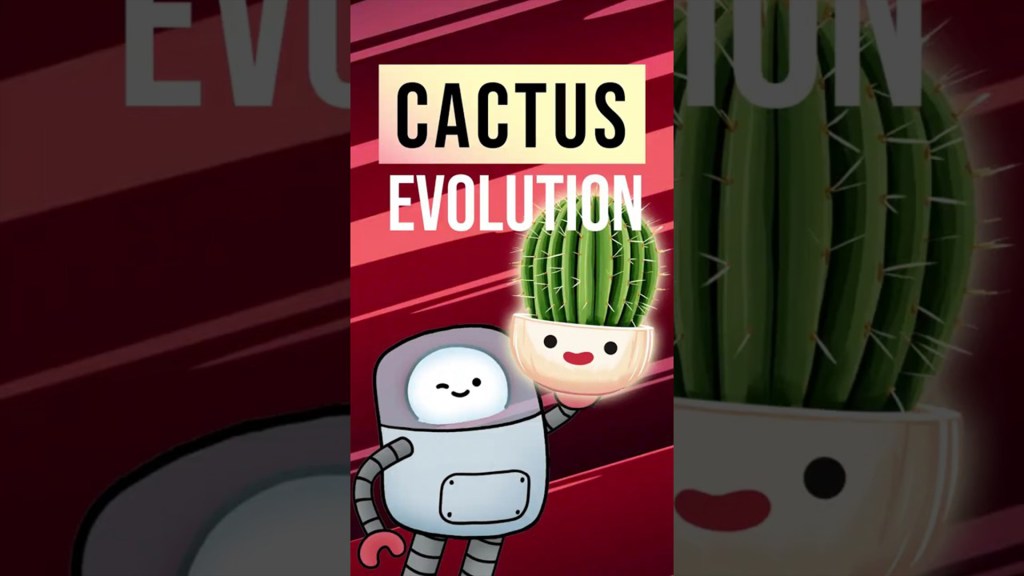
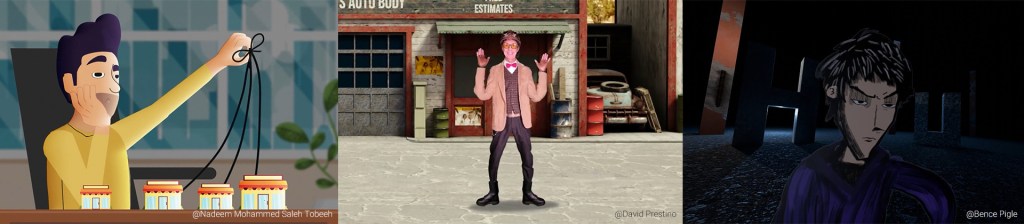
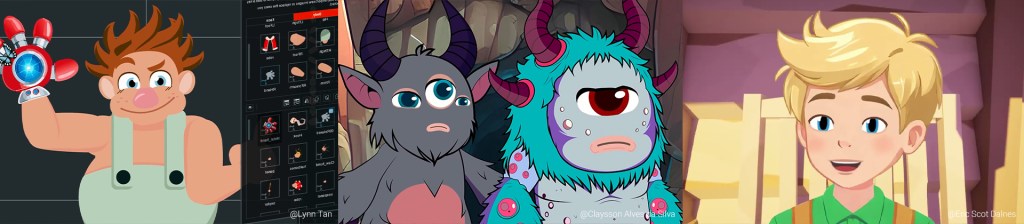
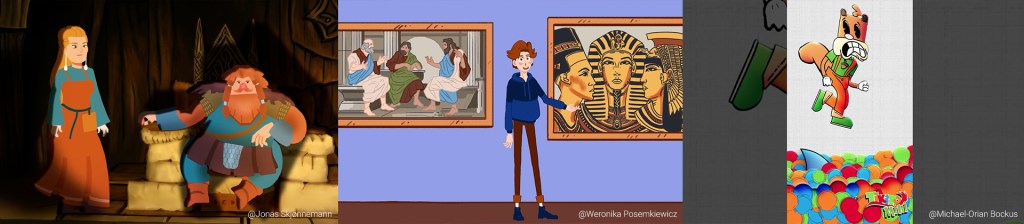
After two months of creativity, the 2024 ‘Animation At Work’ Contest for Cartoon Animators (CTA) has come to a close. Reallusion thanks all of its wonderful sponsors including XPPen, XPG, and Magix. Overall, the event received 138 global entries, each with their work-in-progress videos among seven categories: Business & Commercial, Comics & Art, Education, Best Vertical Shorts, Best Use of Cartoon Animator 5, Best Live Performance, and Best XPPen Use.
A total of 26 outstanding works have been selected from 39 countries, all with varying levels of skills and experience. Additionally, a wide array of styles and topics were created, proving that the Cartoon Animator is streamlined for creative diversity. Several newcomers who were first-time Cartoon Animator users were even able to use their newly acquired techniques, combining other pipelines for excellent submissions.
Business & Commercial Animation — 1st Prize
Ambrosi Air Drone Delivery Commercial by Stephen Townsend (United Kingdom)
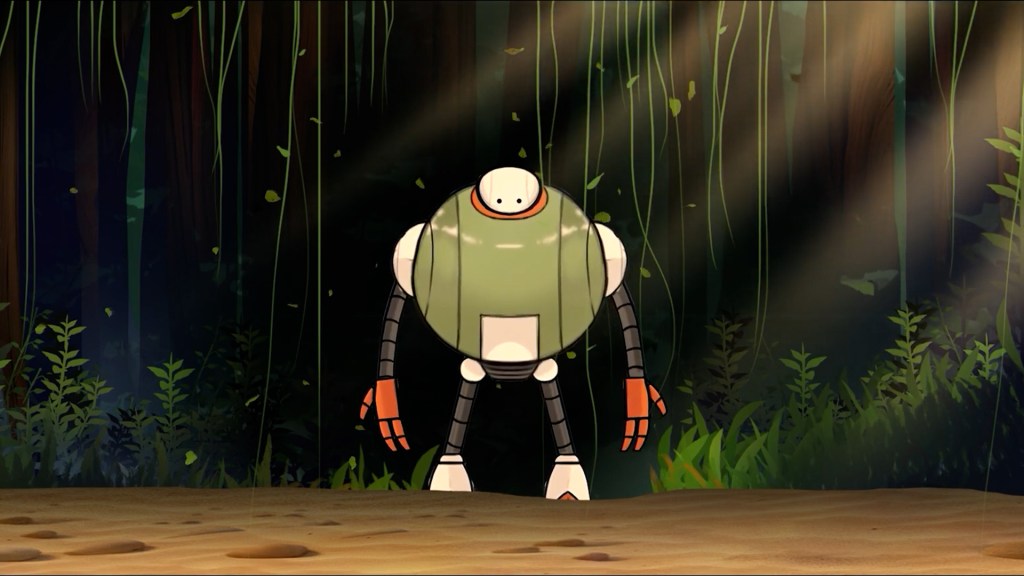
“An exceptionally well-paced advertisement for a drone delivery service that clearly conveys the business and its offerings. Townsend’s work-in-progress video was both informative and meticulously presented, providing a comprehensive look at the entire creation process—from storyboard development to the integration of Illustrator and SketchUp. The use of path animation to illustrate the transportation network was particularly impactful, leaving a lasting impression on the judges.”
“As an undisputed favorite of the judging panel, Hong put immense effort into every aspect of production—from storyboarding, storytelling, and character design to scene creation, cinematography, lighting, effects, and music—crafting a truly immersive visual narrative. The WIP video was equally impressive, showcasing his meticulous handling of volumetric lighting, scene composition, and camera shake. It was precisely these details that secured him first place.”
Judges comments
Education Animation — 1st Prize
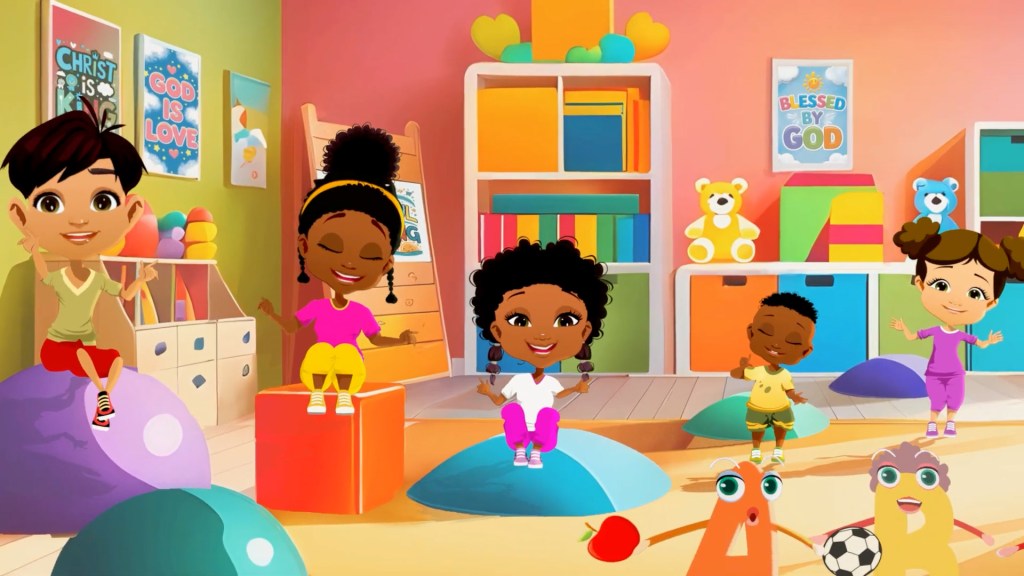
Tiana & Teo – Faith Based Nursery Rhymes by Kael Camaris (United Kingdom)
“Tiana & Teo’s Family Adventures” is a textbook example of how various AI tools can be seamlessly integrated with Cartoon Animator to rapidly produce high-quality animations with an impressive amount of tantalizing content.
The judging process for the “2024 Animation at Work Contest ” proved to be quite difficult and took many hours of deliberation. Reallusion also selected 12 winners for the Honorable Mentions. See the Winner Page for winner detailed judge comments and showcases.
In addition to the top winners in each category, the full list of winners for the 2024 Animation at Work Contest can be found on our website. Reallusion sincerely thanks all participants for dedicating their time and creativity to this competition. For those who feel inspired and ready to take the next step, we encourage you to join Reallusion member and Free Trial Cartoon Animator for 30 days. Experience our latest Motion Pilot and Puppet Stage features today!
Click the banner to learn more about the winners’ portfolios and judge comments
Recently I wrote an article on the AccuPOSE Core library and how it can be a boon to beginners and a time-saver for experienced users and pros by keeping the body in proper position while moving a limb or limbs for custom animation. The built-in AI-assisted posing maintains a proper posture while we push, pull, or rotate limbs into position.
The Core Library has a wealth of everyday motions that can be very difficult to keyframe by hand and we all know canned motions can, and usually do, require editing as they can’t fit all situations. This is where the AI-assisted accuPOSE library fits in. Motions are great and Pose to Pose is great but AI-assisted Pose to Pose allows us to manually create poses that do not contort or move body parts out of place while moving down the timeline to create our own custom motions.
The Core Library is free, and the optional INFINITY subscription allows that library to grow as more AI-assisted pose packs are added. Infinity already has many different types of AI-assisted poses with plans for many more. In fact, there is a roadmap for the continual expansion of the Infinity pose library.
INFINITY Subscription
The INFINITY subscription expands the Core Library with new AI-assisted motion packs already available or coming soon according to the INFINITY roadmap.
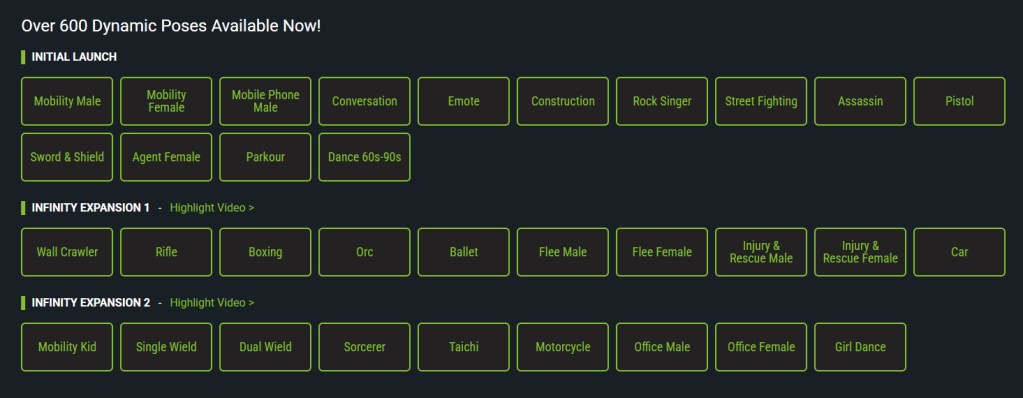
Let’s take a quick look at what is available now. The categories are Daily Life, Communication, Occupation, Combat, Action and Adventure and Dance.
Dailey Life Communication Occupation Combat Action & Adventure Dance
Mobility Male, Mobility Female, Mobile Phone F, Mobile Phone M Conversation, Emote Construction, Rock Singer Agent F, Agent M, Assassin, Wall Crawler, Street Fighting, Pistol, Rifle, Sword & Shield, Boxing, Orc Parkour, Flee Male, Flee Female, Injury & Rescue M, Injury & Rescue F, Car Dance 60s – 90s, Ballet
You can also see where some packs complement each other like Wall Crawler & Parkour or Rock Singer and Dance. This initial library has many time-saving packs like mobility and mobile phone that will provide realistic poses for our pose-to-pose work for everyday or even camera-centric scenarios.
You will notice INFINITY has already released its first expansion available to subscribers via an update in Reallusion Hub. This expansion includes: Wall Crawler, Rifle, Boxing, Orc, Ballet, Flee Male, Flee Female, Injury and Rescue Male, Injury and Rescue Female and Car.
How Can This Benefit Beginners?
As I wrote in my article about the free Core library AccuPOSE extends our current motions by giving us the ability to manually move parts of a character (keyframing) while keeping the character in the proper position and not distorting the body. The proper use of translation and rotation locks help with this by keeping certain body parts locked in to place or open for movement.
Manual keyframing can be one of the most difficult skills to master as a slight movement out of place can produce strange or off-putting results for the viewer. AccuPOSE takes care of this problem by using AI-assisted poses to keep everything in line.
It is more difficult to explain this article than it is to actually do. It also brings us one step closer to that animation easy button we are all wanting.
What is Pose-To-Pose?
If you are not sure what Pose to Pose is, you are not alone. It baffles many beginners, but it relies on picking a frame like 40 and loading a pose at that frame then moving a number of frames down the timeline, in this case 100 frames, to frame 140 and altering the pose with the built-in tools and locks or loading another pose. iClone will take care of the animation between those keyframes.
Yes, it’s that simple.
I didn’t say easy as some packs like Web Crawler will still involve some work on the posing until you get some experience but that is a more extreme type of animation. Everyday life events like picking up an object or opening a door benefit tremendously with the AI-assist and those “everyday” motions can be some of the most difficult to learn and execute manually.
Just because we can get from point A to point B in an animation sequence doesn’t mean we ‘ve done it well. If our technique is lacking, then our animations will be lacking too. Keep in mind the fact that our viewers are trained to near perfection by Pixar, DreamWorks and other triple A studios. It becomes imperative we make our animations as good as possible.
Audiences may forget bad stories or writing, but they might not forget bad animation.
CPR Tutorial
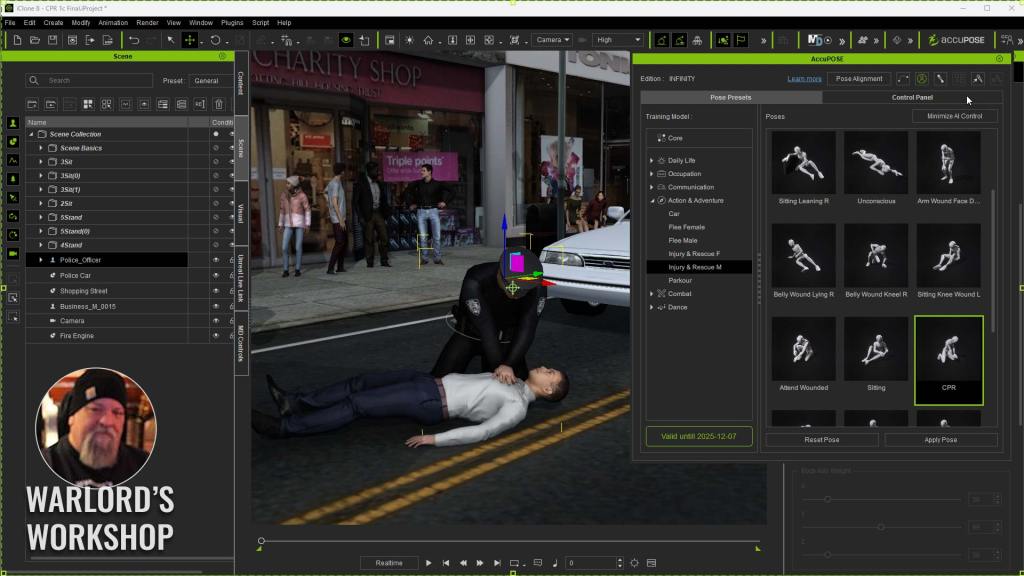
Let’s start with a real-world example of a scenario involving a police officer giving CPR to a person on the street. While this might not be a difficult animation for a pro it can be very difficult if you are just getting started. accuPOSE INFINITY provides a pack that includes this scenario making quick work out of what once would have taken hours and maybe even a day to animated properly.
We load the CPR AccuPOSE and watch the character immediately jump into an appropriate pose for the motion pack. As I show in the short tutorial below, I also use Lie from the Core library for the prone pose of the victim.
Industrial Painting Tutorial
The Construction pack under Occupation in the INFINITY pose library provides us with another easy to learn example of pose to pose with iClone taking care of the movement between poses. This example shows how quickly you can add background motions as scene filler. This also adds more life to the scene.
Think Outside the Box
Just because a motion pack says it is for a certain type of motion doesn’t mean that pack can’t be used for other motions. All we need to do is see what fits our needs like sitting, standing and so forth then drill down through those packs to see what can be used for our current need as a starting point or pose.
Almost any sitting pack will work for simple animations like a pilot in a cockpit as long as we use the locks and tools properly. A sitting conversation pack might well work for a pilot moving a joystick around while staying within the confines of the seating area or a character using a control panel.
Expanding Library of Packs
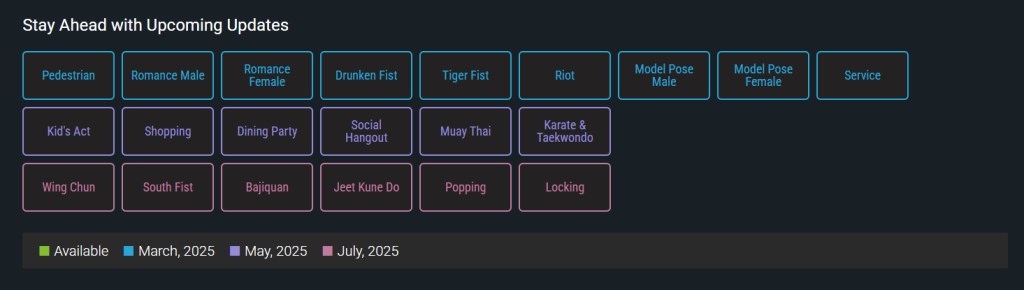
The INFINITY Library will grow regularly over time as more AI-assisted motion packs are added with new packs already available in early January.
As you can see from the above image Reallusion already has several new packs scheduled for release to expand the INFINITY library.
Existing Projects
AccuPOSE can slip right into an existing project to enhance the work with AI-assisted posing and posture. To quote from the Reallusion website:
Works with Normal Poses Transform existing poses into AccuPOSES with selected AI model and experience the precision of natural posing through customizable IK constraints.
Clip Layer Editing By incorporating AI-assisted layer keys, users can effectively enhance motion velocity in selected motion clips.
Keyframing from Library Easily add poses from the AccuPOSE library to arrange keyframes on the timeline, with the option to fill in custom in-betweens and curves for smooth transitions.
Accelerate Animation Workflow
Handkey Animation Driven by deep-learned human motions, the pose suggestions enhance the efficiency of quality keyframe posing and support the creation of compelling animation styles.
Connecting Clips The intelligent posing feature simplifies the process of filling in missing poses between motion clips, creating more natural transitions.
Mocap Correction The natural AI posing capability can effectively solve the mocap challenges such as shoulder stiffness, motion distortion, and even enhances animations with realistic hand gestures.
Curve & Trajectory iClone’s Motion Curve and Motion Trail functions empower animators to fine-tune keyframe timing and spatial trajectories, ensuring high-quality animation results.
Summary
The free core library is a great library of poses in itself, but the INFINITY Library subscription is already expanding the AccuPOSE library with more poses and will continue to do so according to its release schedule. The poses are not only AI-assisted but also professionally created to maintain superior quality that can enhance your animation project.
I have always been a pose-to-pose advocate even when it required cleanup but with AI assistance the cleanup will be little too non-existent which is a plus to beginners.
As you have seen in the examples using pose-to-pose with AccuPOSE is only a matter of timing (the number of frames between poses) and positioning of the limbs which is guided by AccuPose. As I wrote earlier the INFINITY subscription is another step closer to that coveted “easy button” for animation.
Digital Artist MD “Mike” McCallum, aka WarLord, is a longtime iClone user. Having authored free tutorials for iClone in its early years and selected to write the iClone Beginners Guide from Packt Publishing in 2011, he was fortunate enough to meet and exchange tricks and tips with users from all over the world and loves to share this information with other users. He has authored hundreds of articles on iClone and digital art in general while reviewing some of the most popular software and hardware in the world. He has been published in many of the leading 3D online and print magazines while staying true to his biggest passion, 3D animation. For more information click here.
Dream Big, When You Have All the Support to Get Over the Hump
Elvis Deane
Hi, I’m Elvis Deane, a seasoned digital event and video producer. I take pride in my ability to communicate clearly with clients and my proficiency with a wide range of production tools. My educational background in visual effects coordination, virtual production, and creative arts has provided me with a strong foundation in both traditional and cutting-edge industry techniques. After graduating in 1999 from one of Toronto’s first 3D college programs, I chose not to pursue a full-time career in animation. Instead, it became a hobby of mine alongside my work in video production, making me a long-time 3D enthusiast.
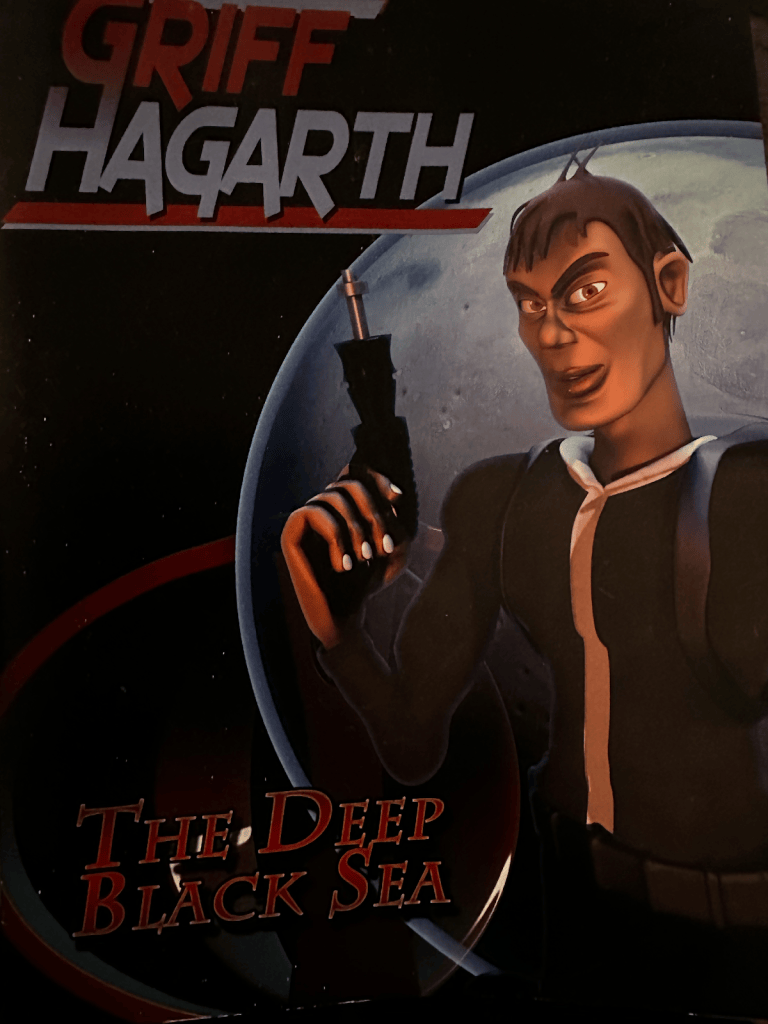
Around 2002, I started writing a show called Crash Landed with the hopes of producing a one-minute silent cartoon every week. The lead character was named Griff, a pilot in a little spaceship, who crash lands on a planet and is on the run from a giant army.
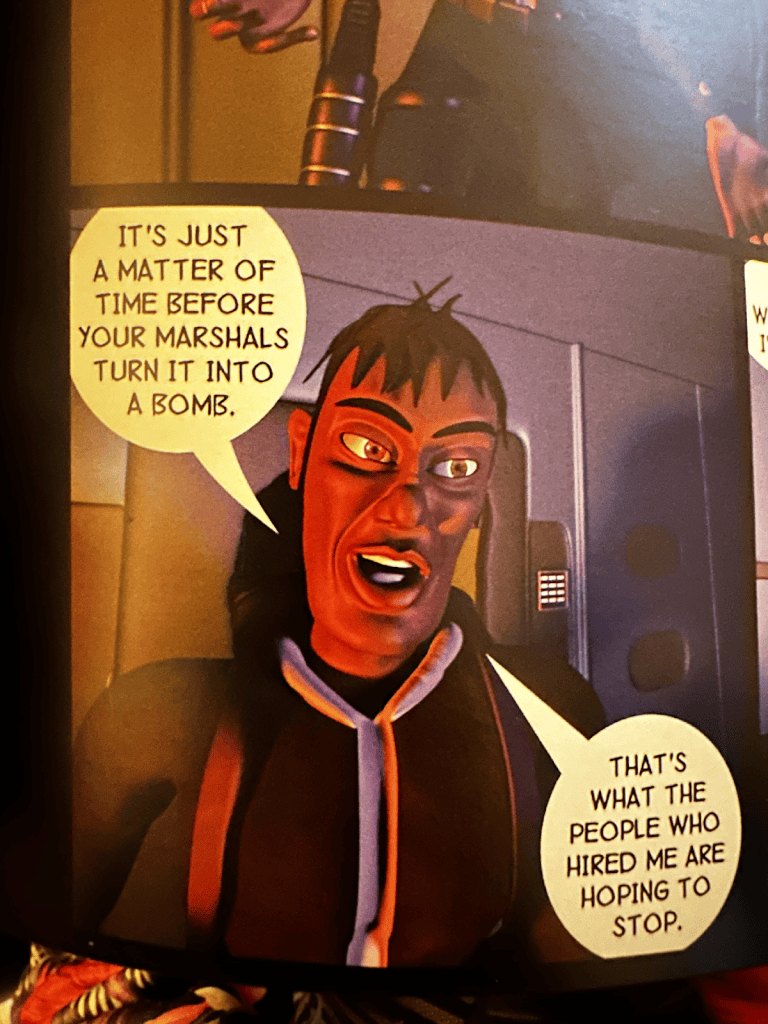
I had been watching a lot of Samurai Jack, and I was hoping to bring those sensibilities to 3D animation. But after months of modeling, rigging, and animating, I stopped working on it. It was too ambitious for what I could do alone. I made a comic book with the assets to tell a small part of the story.
I started writing a story for a feature length movie, The Sky’s The Limit, about Griff. I never really expected to make the film, it was just a fun idea I wanted to explore and maybe do as a graphic novel eventually.
In 2020, I was looking for a way to still be creative during the Covid shutdowns, and I tried Reallusion’s software for the first time. I quickly realized that the technical barriers I had faced when I first started learning 3D animation could be easily overcome. Instead of spending my time rigging and modeling characters, I could useCharacter Creator to quickly make a whole cast of characters for my projects.
With iClone, I could use motion capture to act out many of the scenes instead of animating everything by hand. I could concentrate on the story and performances rather than spending all my time troubleshooting technical issues. I dusted off some ideas I had for my character Griff, and started animating test scenes.
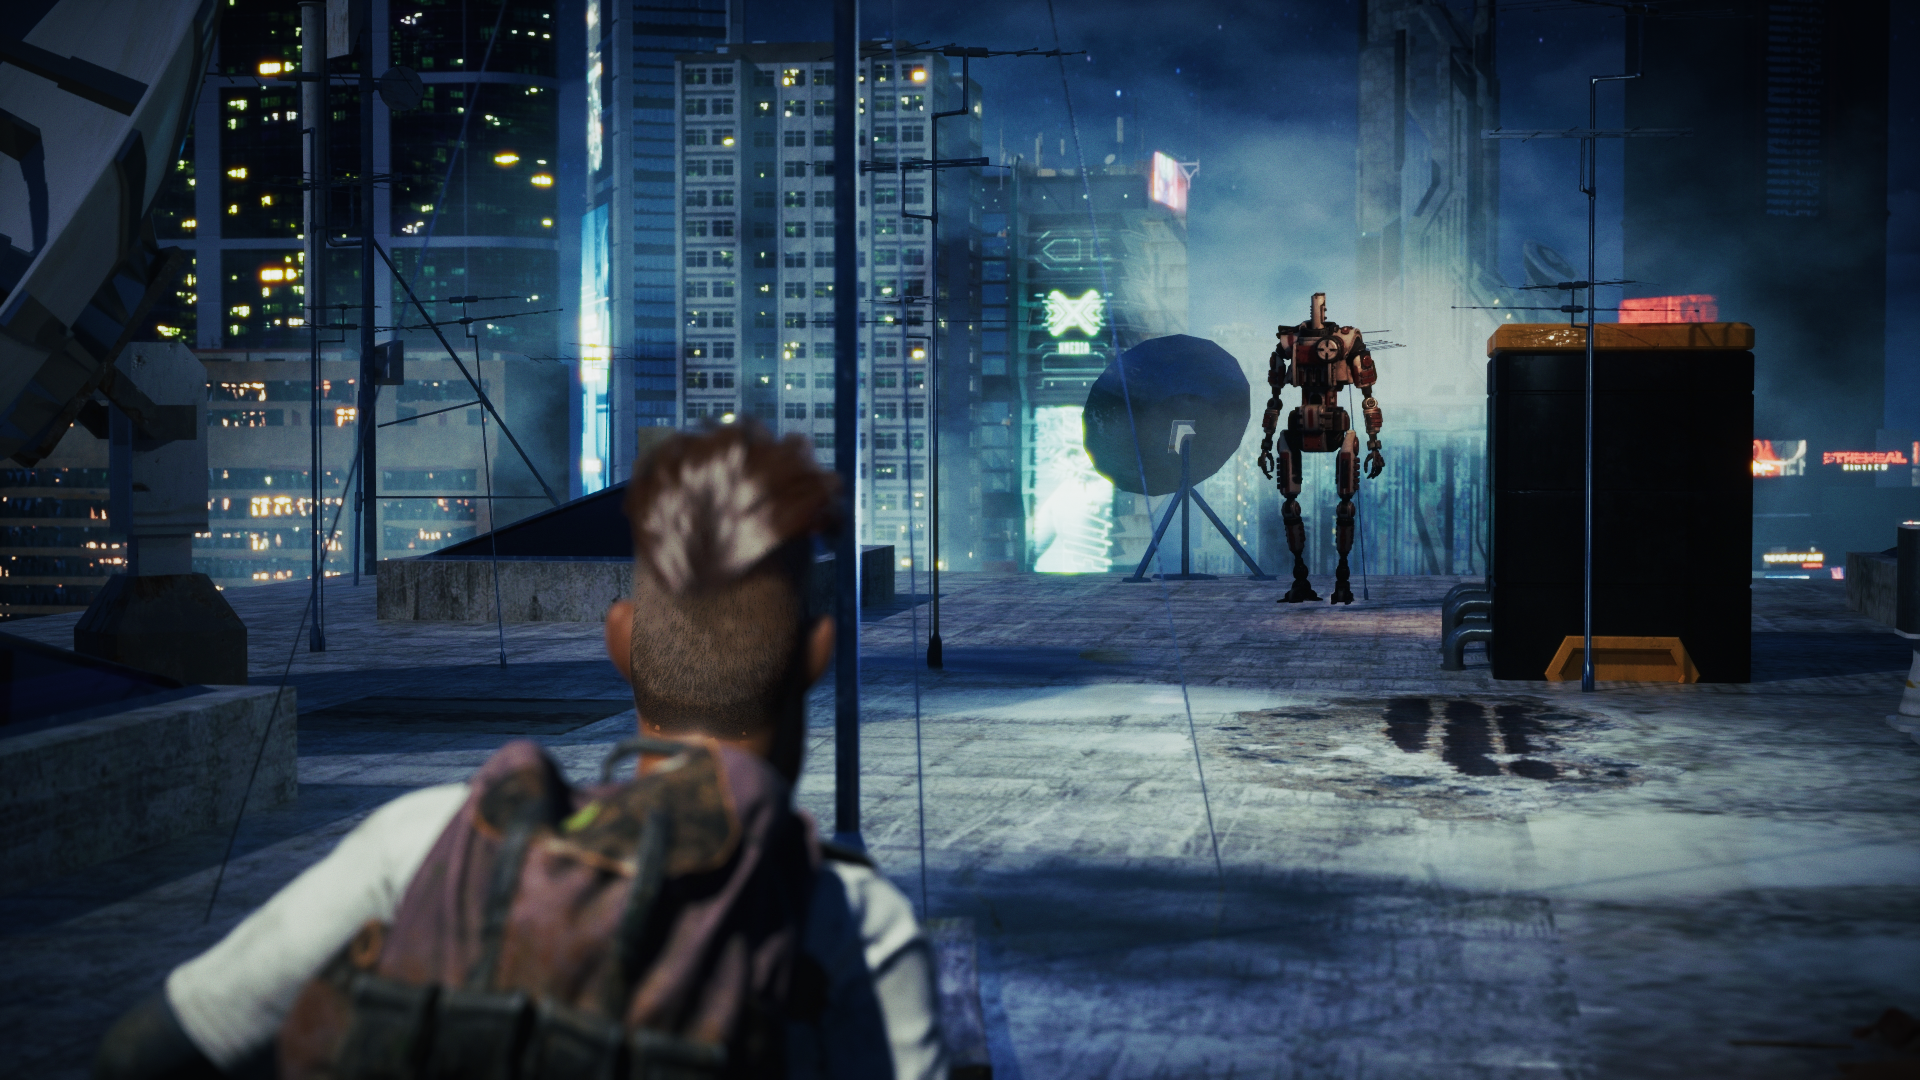
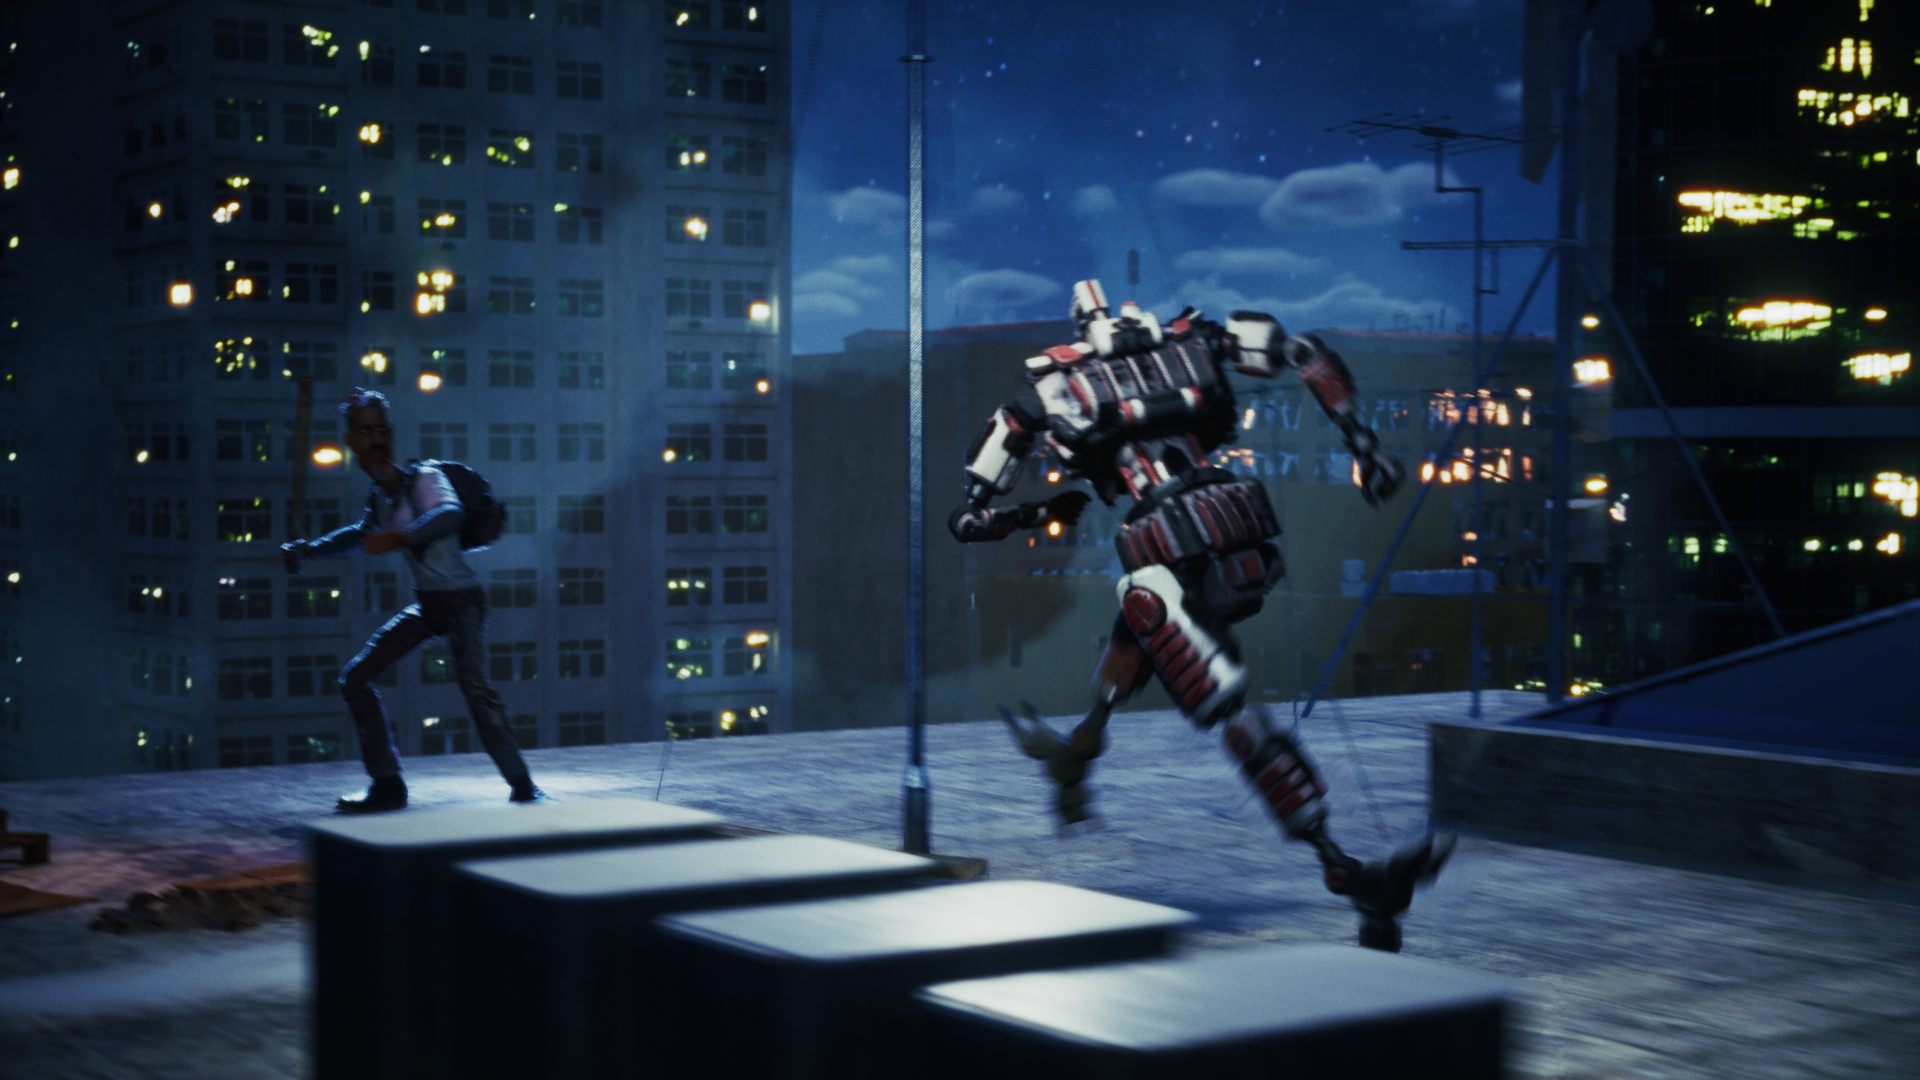
The Sky’s The Limit starts off with a robot police force arriving in the slum that Griff lives in. I wanted a big chase scene to introduce Griff.
A Game-Changer in Motion Editing: AccuPOSE
One of my major struggles when doing character animation has been animating action scenes. I often couldn’t get my characters to hit the poses I wanted. AccuPOSE has changed that in a big way. By offering tons of AI-trained poses. The real magic is it reacts to my adjustments automatically, and generates the most natural poses. I could use motion capture to do some action, like running, but AccuPOSE really helped in getting the specific poses I wanted with great freedom of customization.
AI Guidance Based on Themed Models
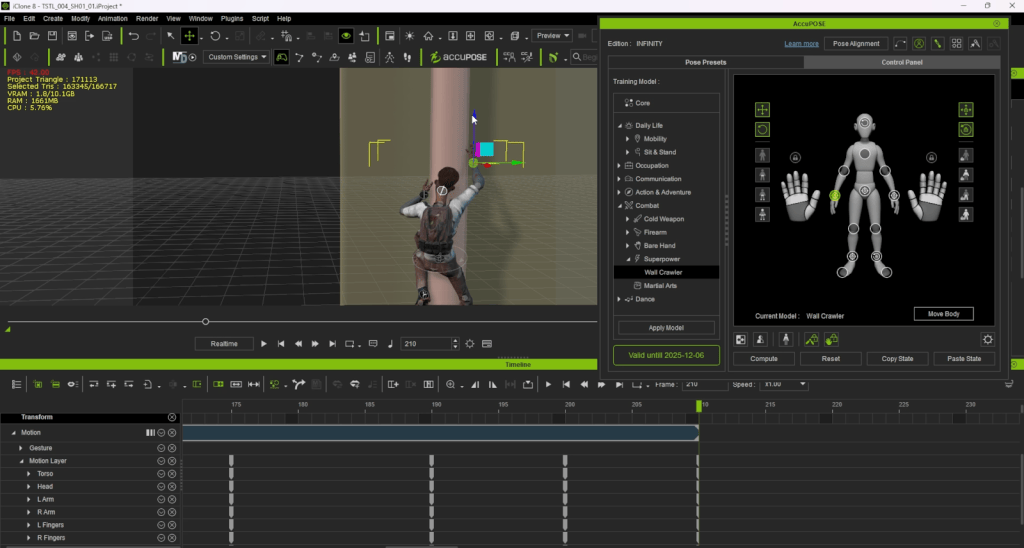
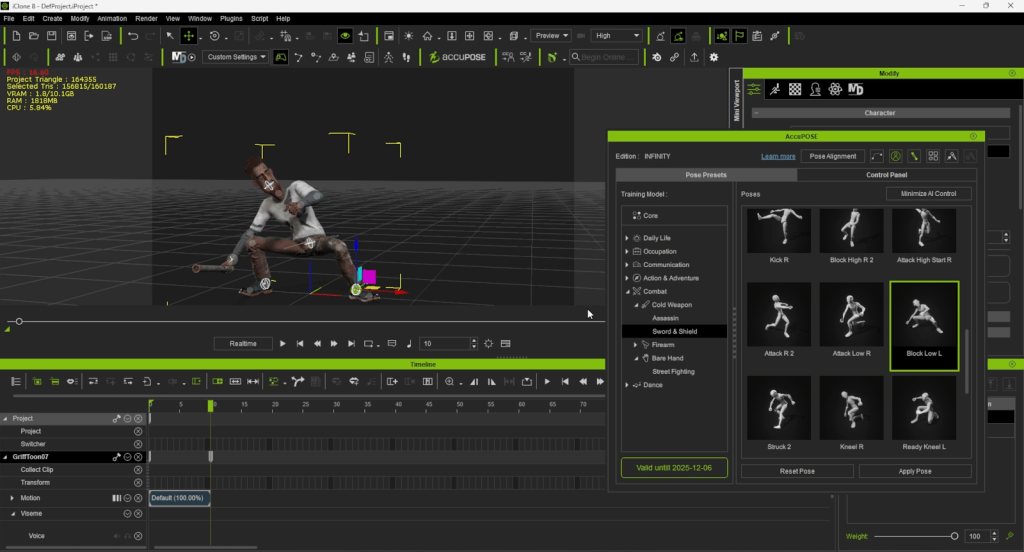
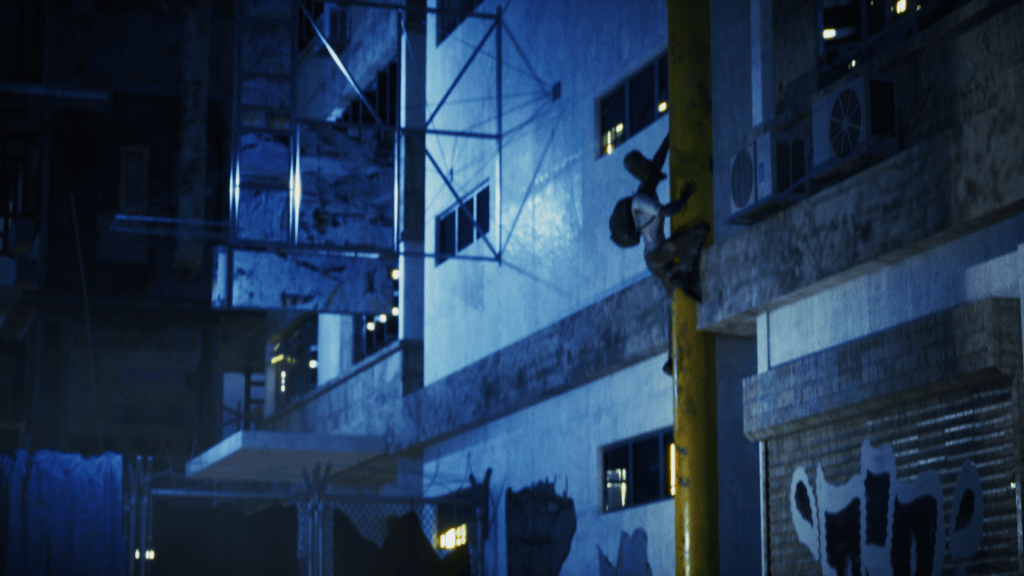
I used AccuPOSE to make Griff climb up a pipe and fight a robot, two things I would have hesitated to try before. Thanks to AccuPOSE INFINITY, which expands the plugin with poses based on different themes and categories, I was able to find the poses that I could play with for the two specific scenes.
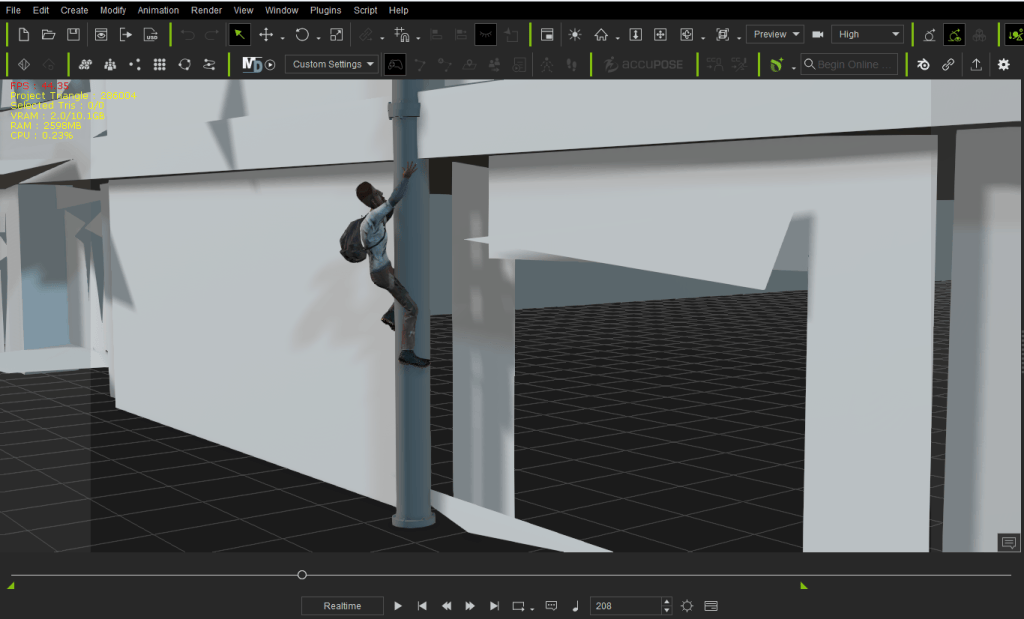
I used the Wall Crawler model for climbing the pipe, and it only took me a few minutes to create the climbing key poses. I could move the hand, foot, and hips to the place I wanted, and the rest of the body would follow.
For the fight scene, I used AccuPOSE to create my key poses of swinging a pipe and jumping in the air, and then went back and did my in-betweening to smooth out the motion. I used some poses from the AccuPOSE Sword & Shield model to get the general movement planned out, and made adjustments to make the poses fit my story.
Visualizing and Adjusting with Motion Trail
To make sure the arc of the arm looked good when he swung the pipe, I used Motion Trail to see exactly how the pipe was moving in 3D space, and adjusted my keyframes and added in-betweens to smooth out the motion.
Advanced Motion Capture Editing
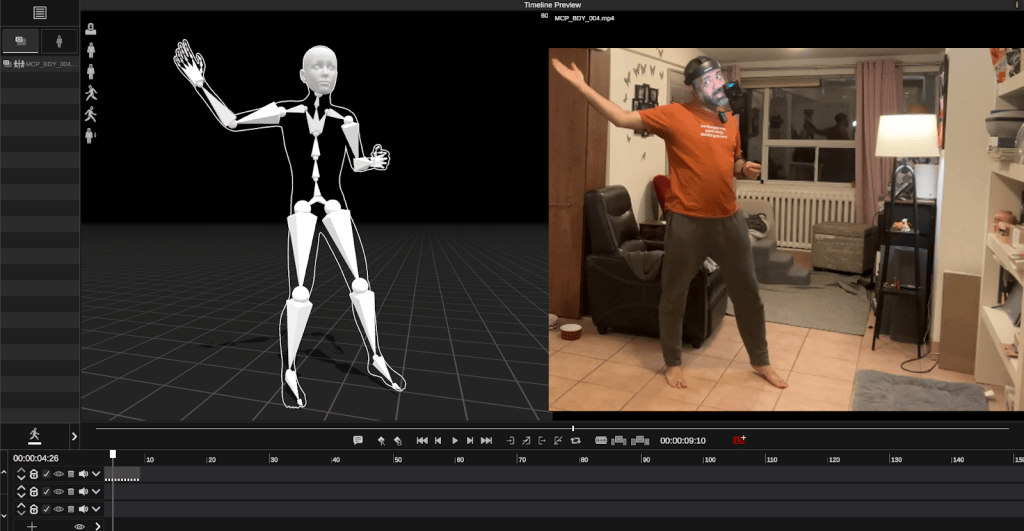
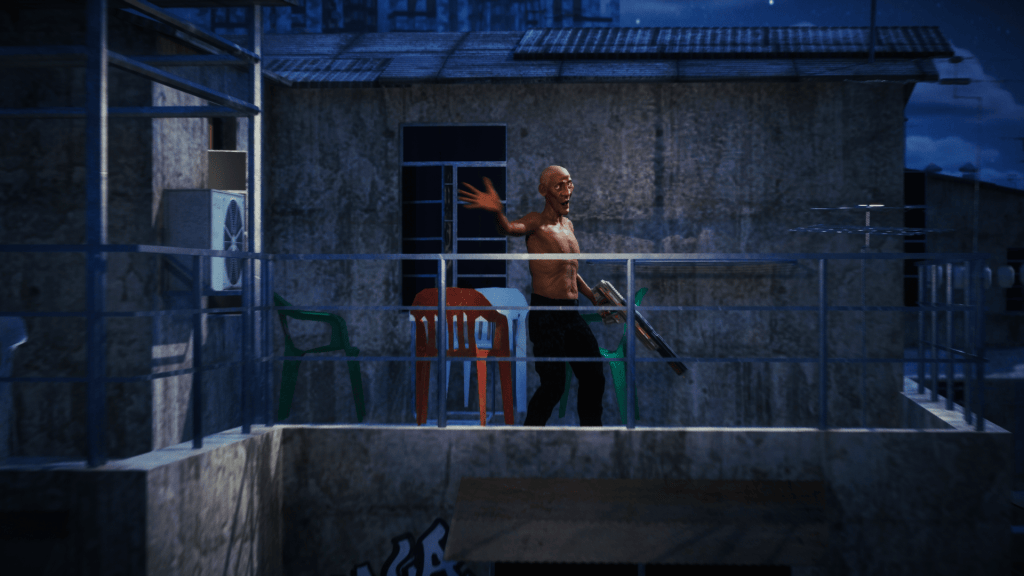
The final shot of the scene introduces the mob boss character, and it’s the only spoken dialogue in the film. I acted out the scene in my living room, recording my body animation on my phone, and used a GoPro to record my face. I used AccuFACE to capture the facial animation, and then made some small adjustments to the eye positions in iClone. I used Marionette XR to capture the body motion.
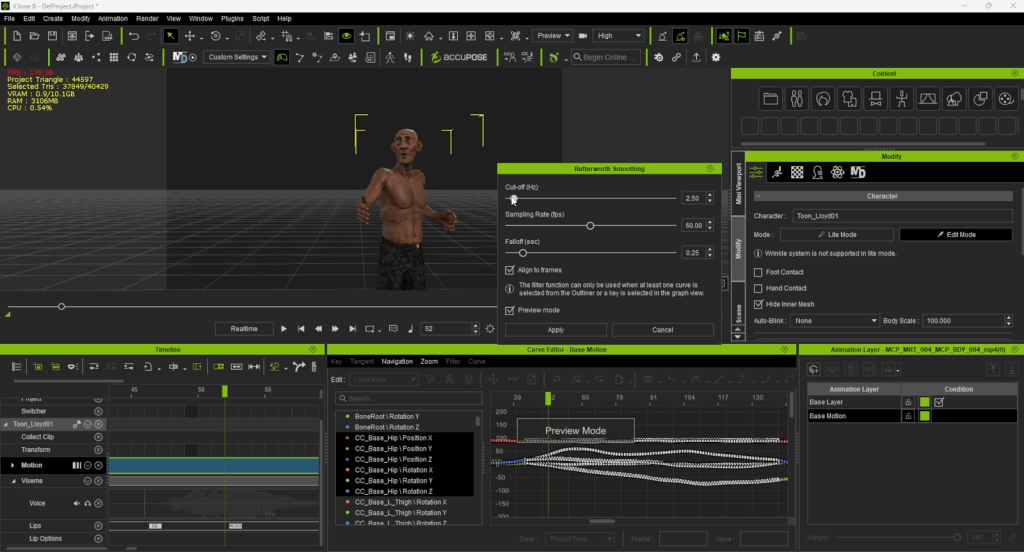
To get rid of any jitter, I used the Butterworth filter to smooth out the motion capture curves without losing fidelity on any of the big poses, and then made some quick fixes to where the mob boss’ feet were placed.
Interacting with Unreal Scene
Back in Griff’s early days, rendering a shot would take me hours and hours. I’m now using Unreal Engine to render everything in real time. I use different marketplace and Kitbash assets to build the set. iClone integrates really well with Unreal Engine, the Unreal Live Link plugin allows the assets from both sides to be transferred, so I can quickly move back and forth between the two to make adjustments to the performance or set. To make the final adjustments to my climbing shot, I brought the building’s geometry into iClone to make sure Griff’s arms and legs were in the right places.
More Options, Less Challenges with iClone
I’m really having fun mixing motion capture, keyframe animation, and AccuPOSE to animate the story. It gives me so many options on how to approach a scene. I can start a shot using downloaded mocap clips and then add custom animation with AccuPOSE, or I can act out a scene with motion capture and exaggerate the facial expressions by keyframing the eyes and eyebrows. There’s so much flexibility in how I can tackle a scene, and less technical challenges compared to when I started writing Griff’s stories.
To Conclude
Bringing Griff back to life after all these years has been an incredible experience. The roadblocks that once made animation feel impossible are gone, replaced with tools that let me focus on what really matters—the story. With iClone, AccuPOSE, and Unreal, I can mix motion capture and keyframe animation in ways that weren’t an option when I first started. Instead of getting stuck on technical issues, I’m experimenting, refining, and actually finishing scenes. Griff’s world is finally coming together, and this time, I’m seeing it through.
Hello, my name is Cho Hyeongmo, and I am a student studying game character modeling. While majoring in visual design, I discovered my passion for game art through a character design course, which steered me toward a career in character modeling. Using my background in drawing, I began exploring concept art and the game development process.
Over time, I realized I thrive when focusing deeply on a single project to enhance its quality, which led me to dedicate myself to character modeling. Over the past year, I’ve been refining my skills and streamlining my workflow. I enjoy the meticulous nature of modeling and find great fulfillment in discovering efficient methods and tools.
Cho Hyeongmo, game character modeler
My goal is to contribute to a game project and create characters that leave a lasting impact.
The characters Blue Rose Knight and Octo Head Warrior, which I previously worked on, had concepts belonging to the broad category of medieval fantasy. In order to strengthen my portfolio, I realized that I needed to show character modeling based on a new type of concept. Additionally, I wanted to find artwork that lets me focus my practice on programs like Marvelous Designer and Ornatrix, as well as hard surface modeling.
Prototype Modeling
Through the modeling process of the two characters I had worked on previously, I realized that a considerable amount of time was spent on rigging and skinning, as well as adjusting the base pose for rendering. To save time, I decided to start with character meshes or programs that offered auto-rigging features or animation samples.
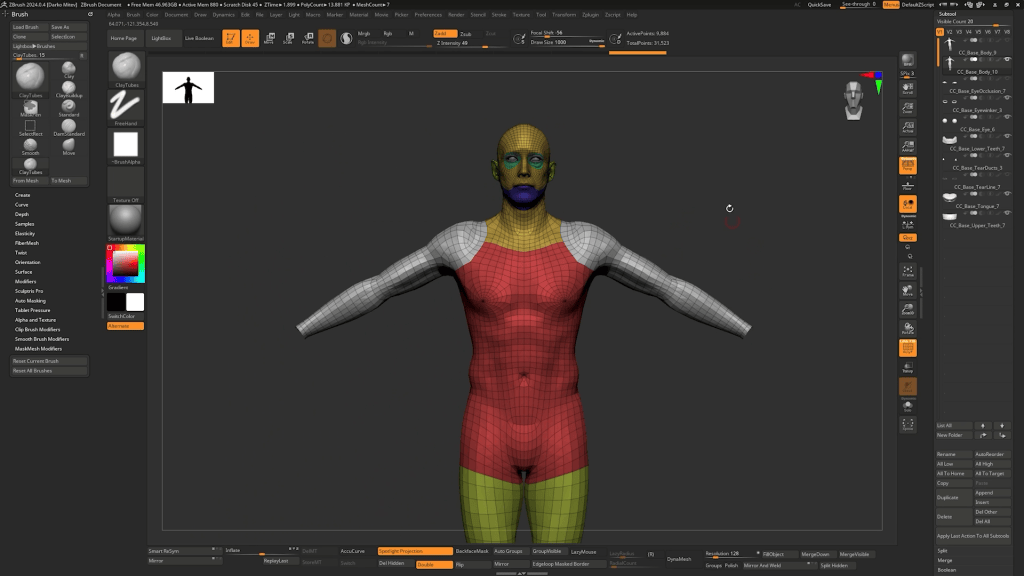
I first used MetaHuman Creator to set the skin tone, define large facial features, and create a similar hairstyle. I then brought it into Unreal Engine for testing, checked the low-poly state in 3ds Max, and finally imported it into ZBrush. However, the mesh was imported as a triangular mesh with separated vertices and edges, making it impossible to increase subdivisions for high-poly sculpting.
As a result, the MetaHuman mesh was only used as an avatar in Marvelous Designer to ensure the clothes fit properly. The MetaHuman hair, being similar in style to the concept art, was exported as hair cards and used until I transitioned to Ornatrix.
Using Character Creator
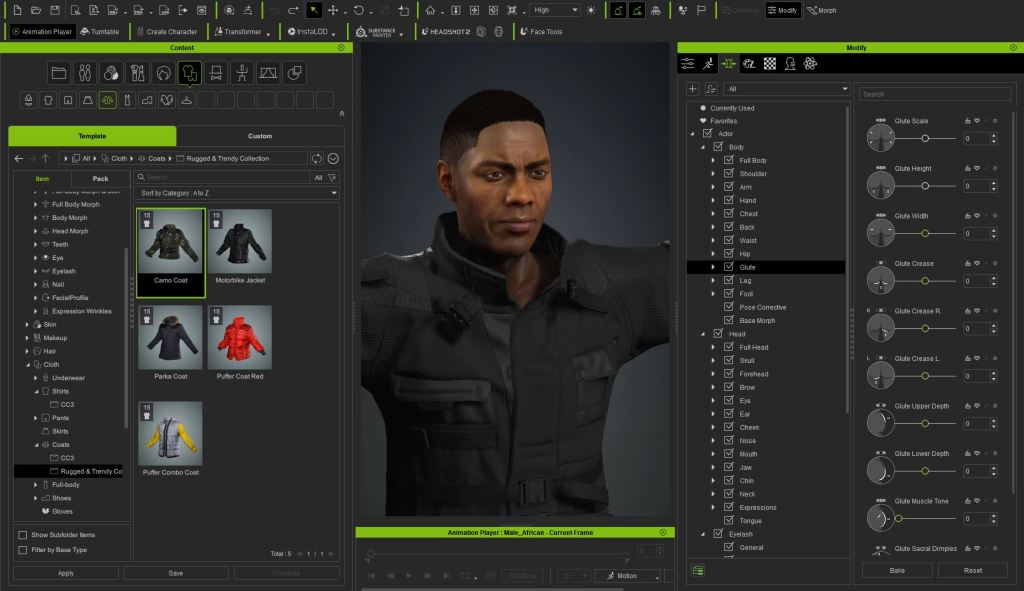
To reduce the time spent on rigging and skinning, I searched for other programs and tried the free trial of Character Creator 4 (CC4). Since CC4 offered more morph options than MetaHuman, I was able to adjust the face to better match the concept art. I was already making clothes for MetaHuman, so I adjusted the character base accordingly.
Early work 1 ▲Early work 2 ▲
Additionally, the CC GoZ Plus and Max Auto Setup plugins provided by CC4 were very well built, so I attempted several transfers. Considering the desire for future rendering work with iClone and Unreal Engine, I ultimately purchased CC4. To summarize, the workflow I followed before moving on to low poly and texturing work is as follows:
Clothes: Marvelous Designer
Body: Character Creator 4 (CC4)
Hair: MetaHuman
Accessories and Hard Surface Work: 3ds Max
Final Details: ZBrush
Posing and Rendering: UE5
Workflow
Texturing and Unreal Auto Setup
When texturing, I prefer to put the mesh into Unreal Engine and repeatedly update the texture file to check the results. While this can be done to some extent in Substance Painter or CC4, subtle differences can arise due to lighting environments or material values in the engine.
Using the Unreal Auto Setup Plugin, I quickly imported the CC4 mesh into Unreal Engine 5.4 and continued the texturing work based on this. The material graph created by the plugin had many useful elements, which I combined with the material graph I had been using to prepare for the final rendering.
Unreal Engine before and after
To proceed, I imported all the low poly meshes into CC4 and used CC GoZ Plus to fine-tune the clothes (as I had originally started working with the MetaHuman body). After that, I performed auto-rigging using the Transfer Skin Weight feature and manually adjusted some skin weights. After applying some animations provided by CC4, I quickly checked for any issues and then moved on to Substance Painter for texturing.
Animation Applied in CC4 During Skinning Converting Character to Humanoid and Adding Bones in Blender, Spring Bone Test
While utilizing a CC4 character, I tried the UDIM workflow for the first time. I referred to tutorials provided on Reallusion’s YouTube channel to import the character into Substance Painter and worked on the skin textures.
Substance painter workspace
CC UE Control Rig
Once the texture work is finalized, I use the CC UE Control Rig Plugin to generate the final rendering. Previously, the process involved a complicated workflow of adjusting poses in 3ds Max and re-importing the data. However, with this plugin, I can create poses that effectively showcase the character’s appeal by manipulating the bones in real time within the engine. By retaining the CC4 skeleton instead of switching to a biped system, I was also able to import basic animation samples and incorporate them into my portfolio.
Final Thoughts
By introducing applications to improve rigging and skinning, I discovered even more possibilities and began to fully incorporate CC4 into my workflow. By using CC4’s shaders, I was able to significantly reduce the time spent on facial sculpting work that would have been difficult to perfect in ZBrush. Additionally, using the biped system in 3ds Max, I was able to efficiently complete the time-consuming rigging work as a character modeler.
The basic animation samples provided by CC4 were particularly helpful, allowing me to quickly identify and correct any issues that arose during skinning. As a student still learning, CC4 has been the program that has solved the most problems during game character modeling work and provided clear guidance. Thanks to it, I was able to significantly improve the quality of the final output and intend to continue actively using CC4 in future projects.
Next Portfolio Project
Having completed my recent modeling projects on three different characters, I felt there were some shortcomings in their facial expressions. For my next project, I plan to focus on refining facial work to naturally implement a variety of expressions. Additionally, I aim to learn new techniques by practicing wrap tools and XYZ textures.
Out Left Productions: Pioneering Animation and Live-Action Storytelling with Character Creator, iClone and ActorCore
Richard Keane – Filmmaker, Writer, Director, Producer
Out Left Productions Ltd.
Out Left Productions Ltd., a distinguished boutique production company based in Dublin, Ireland, has been making waves in the animation and live-action industries since its establishment in 2015.
Founded by award-winning filmmaker Richard Keane, the company is driven by its core philosophy: “Creativity is Key.” Known for its commitment to crafting original, high-quality content, Out Left Productions earned acclaim for its innovative short films and is now poised to venture into feature films and television series, catering to both domestic and international audiences.
Living up to its name, Out Left Productions thrives on “out of left field” thinking, embracing disruptive innovation to forge unique creative paths. The studio’s vision is rooted in producing high-concept genre content designed for global appeal, achieved through collaborations with dynamic talent from Ireland and beyond.
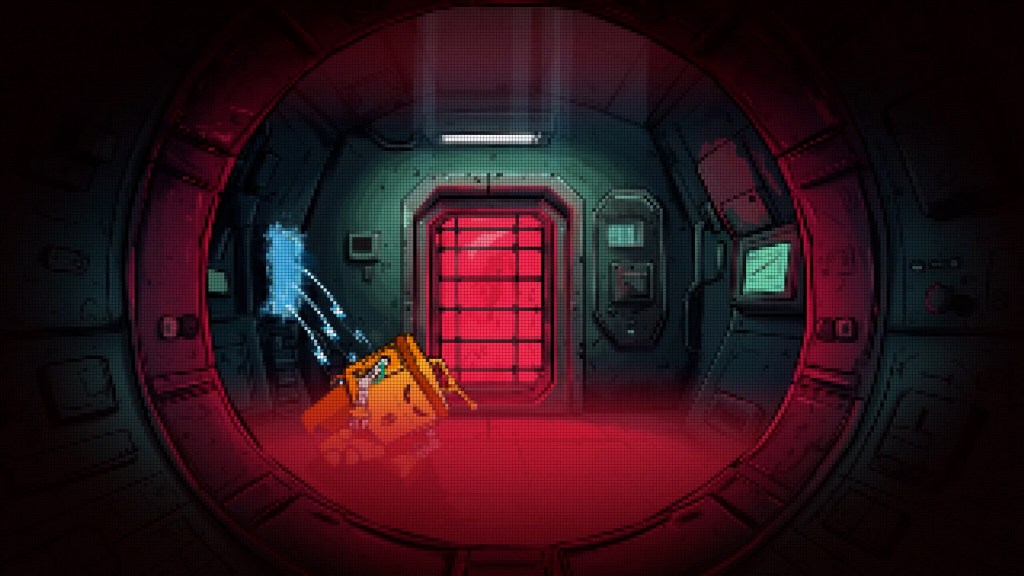
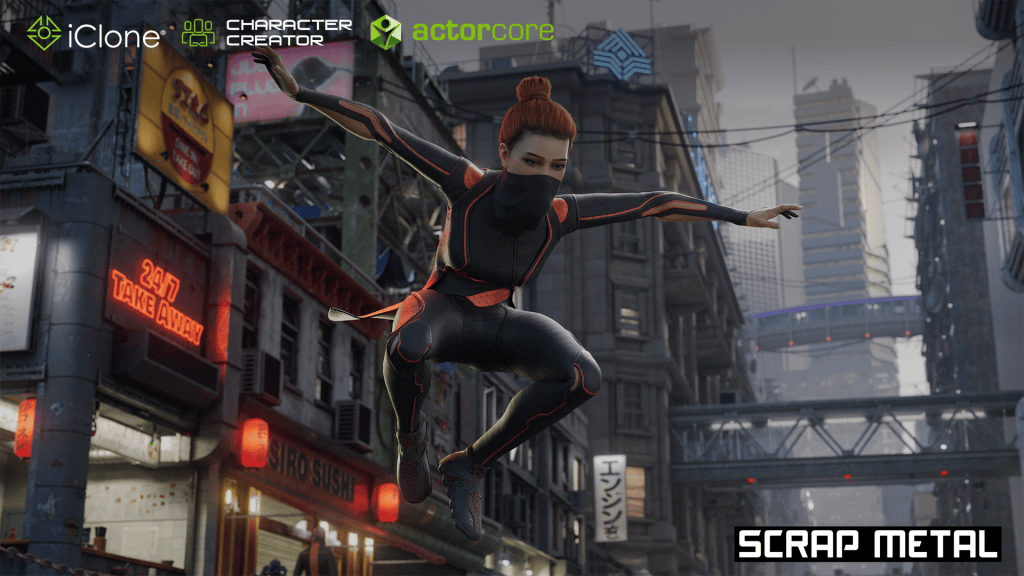
Currently, the company is working on its latest ambitious project, Scrap Metal, an animated short film set for release in 2025. Helmed by seasoned CG Generalist and Art Director Darko Mitev, who brings over 13 years of industry expertise, the film showcases a meticulously crafted world that serves as the foundation for a broader universe of stories.
Harnessing cutting-edge tools from Reallusion, including Character Creator, iClone, and ActorCore, Out Left Productions continues to push the boundaries of visual storytelling. By blending advanced technology with a bold creative vision, the team is set to deliver an exceptional cinematic experience with Scrap Metal and beyond.
Darko Mitev – CG Generalist, Art Director
“Beyond the main action, iClone and ActorCore were key in bringing our crowd characters to life and making the bustling city feel alive. Using a combination of motion-capture assets from ActorCore and iClone’s real-time animation capabilities, we could efficiently populate scenes with background characters performing natural movements—like walking, chatting, or interacting subtly with their environment. This process added depth and energy to the world without requiring extensive manual animation.”
Richard Keane – Filmmaker, Writer, Director, Producer
Q: Hello Richard and Darko, and welcome to our Reallusion Feature stories. Please introduce yourselves and share a bit about your backgrounds.
Hi, I’m Richard Keane, an award-winning filmmaker from Dublin, Ireland. I have worked as a writer, director, and producer across both animation and live-action. Since 2003, I’ve had the privilege of working at several high-profile studios in Ireland and the UK . Many of these on ANNIE, BAFTA, and Emmy award-winning productions. Clients have included Amazon Studios, BBC, Disney Junior, Nickelodeon, RTÉ, and Screen Ireland.
In animation, I’ve directed on projects such as Disney Junior’s Peabody Award-winning series Doc McStuffins (2012), Nickelodeon’s Butterbean’s Café (2018), and Screen Ireland’s award-winning short Bird Food (2012), which I also wrote.
On the live-action side, I’ve written, directed, and produced several short films that have been screened at major film festivals around the world. These include Perpetual Darkness (2007), The Grand Canal (2016), Hot Knives (2016), and Time Slips Away (2019). My most recent short, Chicken Out (2021), has won multiple awards globally and is currently streaming on Disney+.
In 2015, I founded Out Left Productions, a boutique production company based in my hometown of Dublin. The company has produced several high-end animated and award-winning live-action projects. I’m currently developing exciting new projects and am mid-production on our latest animated short film, Scrap Metal.
Hi, I’m Darko Mitev, I am a CG generalist and art director originally from Macedonia, currently based in Dublin, Ireland. Over the past 13 years, I’ve worked on a range of award-winning productions, spanning VFX, feature and TV show animation, game cinematics, and commercials.
My clients have included Disney Junior, Nickelodeon, Netflix, Apple TV, Axis Animation, Windmill Lane, Brown Bag Films, Sunrise Animation, Alt VFX, Sehsucht, and many others.
Notable projects I’ve contributed to include the games Halo 5 (2015), Destiny 2 (2017), the TV series Vampirina (2017), Butterbean’s Café (2018), Dee & Friends in Oz (2024), and the feature films Rock Dog (2016) and David (2025).
In 2022, I founded my company, Split Poligon, in Macedonia, where I am developing an original IP set in Oris City, where Scrap Metal is based.
Q: The concept of AI robots was integral to the story and the production of your short film, Scrap Metal. How did this narrative inspire your approach to motion capture and animation?
As we developed the story for Scrap Metal, we kept two key factors in mind: our tight budget and the need for a high-fidelity final output. These constraints influenced every aspect of production. Starting with the story, how we built, rigged and animated the assets, all the way down to the pipeline of the production itself.
We soon realised that we could only afford to fully model, rig, and groom one main human character, Sybyl. Because of this, we decided the best approach was to make the story’s antagonists robots—these would be the entities chasing her.
The pursuit begins with a drone robot tracking Sybyl, but after she defeats it, a larger and more sophisticated biped robot takes over, pursuing her through the city. While the biped robot is highly detailed, featuring an incredibly advanced rig created by Dhanesh Valappil, we knew that designing and animating robots would be far more feasible than creating another fully human character.
As the story progressed, we began to explore the tracking element further and asked: what if the robots tracking her could actually scan her movements, learning and predicting her actions using their own version of AI?
This idea not only served the narrative but also worked to our advantage in production. By having the biped robot mimic Sybyl’s movements, we were able to reuse her animation—both keyframe animation and the motion-capture data we obtained from ActorCore—by simply applying it to the robot character.
This also allowed for a nice evolution in the robot’s movements. Initially, its motions are more rigid and robotic, but as it learns from Sybyl, its movement becomes more natural and fluid. This shift not only enhanced the story but also created a dynamic change in the visual style of the animation, which was both efficient and effective for the production.
Q: Your decision to forego traditional storyboarding and instead use previs is intriguing. Could you discuss how this approach impacted the creative process and overall workflow?
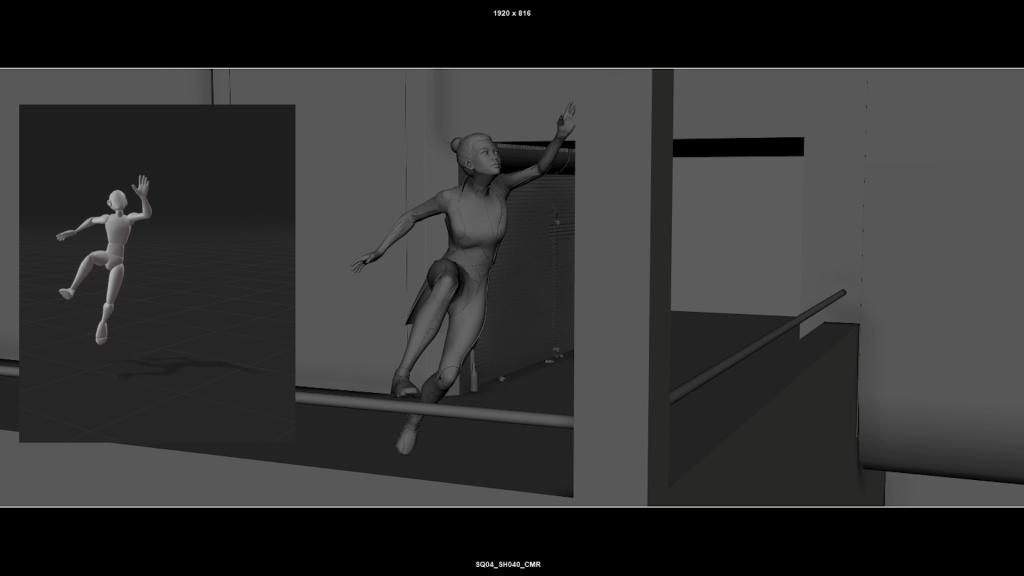
Richard’s background is in previs and cameras, and he led that department in several companies over the years. This experience made him very comfortable with blocking and staging action sequences directly from scripts. Because the core of Scrap Metal is a chase sequence, with Sybyl using parkour-style movements to traverse the city and evade her pursuers, we relied heavily on pre-captured movements from ActorCore. We identified motions that suited the character and loaded them onto our rig. Richard would then cut together multiple motion-capture actions, blending them seamlessly with camera cuts and shot transitions to ensure the sequence flowed naturally.
Rather than starting with storyboards, Richard used previs as the foundation to shape both the sets and the shots. Once the movements were in place, he roughed out the surrounding environment in previs and began experimenting with camera angles, finding the most dynamic and cinematic perspectives—similar to how a cinematographer works on a live-action set. This approach gave us the flexibility to let the sets evolve organically without being constrained by predefined storyboards.
Sometimes, we started with an idea for a cool action set piece. Richard would rough it out in previs and animation, refining both the action and camera work iteratively until we were satisfied. Once the sequence was locked down, Darko stepped in to build the sets to their final, high-quality standard.
Richard’s experience in live-action filmmaking had a significant influence on the visual style of Scrap Metal. He wanted the film to have a live-action, cinematic quality rather than a traditional animated look. To achieve this, the cameras were deliberately allowed to behave more naturally—sometimes lagging slightly behind the action or not framing the character flawlessly throughout the shot. These subtle imperfections added realism, giving the sequences a grounded, handheld quality that mimicked live-action cinematography.
In post-production, we further enhanced the sequences by adding camera shake to the shots, intensifying the effect as the action escalated. It was crucial that these movements and shakes were never jarring or distracting but served to immerse the viewer in the experience. This approach ensured the audience felt like they were right there alongside Sybyl, pulled into the energy and tension of the chase.
Q: Character Creator (CC) streamlined the process of designing characters. Kindly elaborate on the flexibility CC and ZBrush provided when creating character variations?
As mentioned earlier, our budget meant we could only afford to custom-build one character—Sybyl—who was modelled, rigged, and groomed entirely from scratch. However, because our story takes place in a bustling city, we needed to populate the environment with other human characters to make it feel alive and believable. This is where Character Creator (CC) really came into its own.
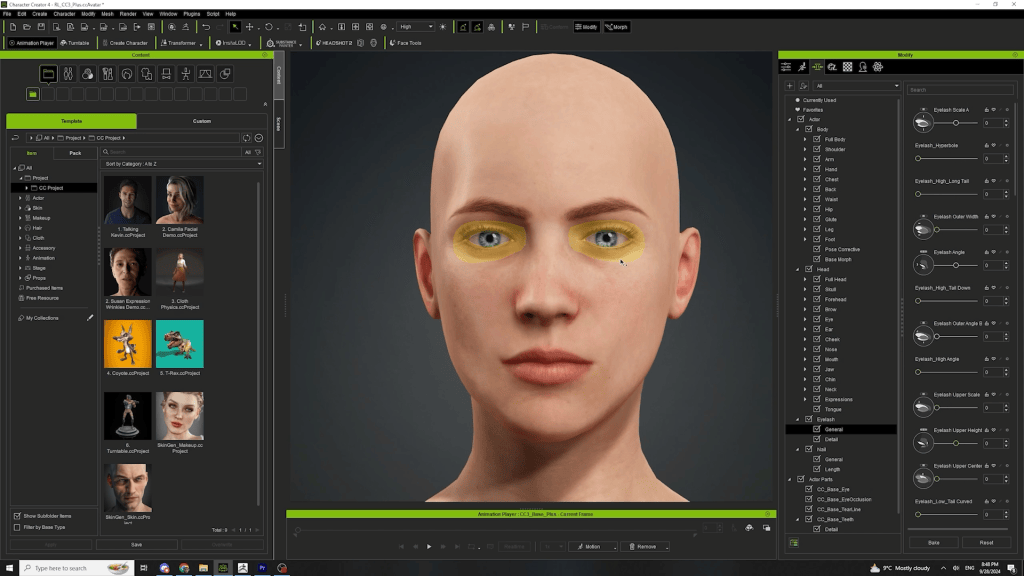
Using CC and its extensive range of high-quality, customisable assets, we were able to quickly and efficiently generate a variety of characters to populate the world of Scrap Metal. The flexibility CC provided was invaluable, especially when working under tight time and budget constraints. Without it, we simply wouldn’t have been able to achieve the sense of scale and vibrancy that the city needed.
Once we had the base characters in place, Darko brought them into ZBrush for further sculpting and refinement. ZBrush allowed us to add unique details and variations that gave each character individuality—an essential step to ensure they matched the distinct style of our lead character, Sybyl, while blending seamlessly into the stylised yet realistic world we had created. For example, we could enhance facial features, tweak body proportions, and add intricate details like clothing folds, surface textures, and subtle wear and tear to make the characters feel more lived-in and unique.
The combination of CC and ZBrush gave us the perfect balance: CC delivered speed and efficiency for creating diverse characters, while ZBrush provided the creative freedom to add high-quality, bespoke details. This streamlined pipeline enabled us to produce polished, professional characters that worked beautifully in motion and held up in close-up shots, helping to bring the world of Scrap Metal to life.
Q: iClone and ActorCore were pivotal in bringing life to Scrap Metal’s dynamic chase sequences. Describe how the Parkour motions and iClone accelerated the overall production workflow.
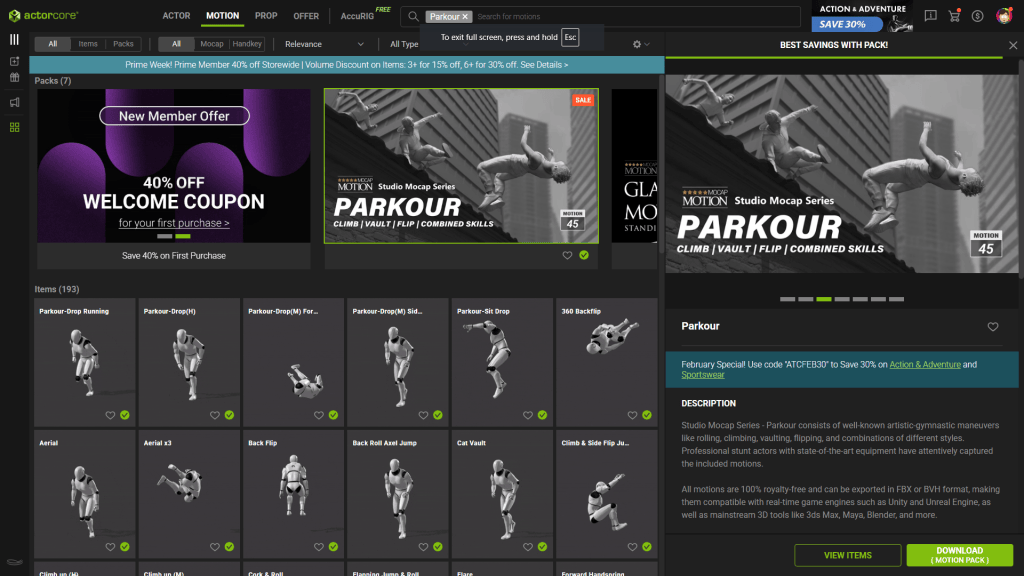
For Scrap Metal, the dynamic chase sequences were central to the story, and achieving Sybyl’s parkour-style movements in a believable way was essential. ActorCore provided a fantastic library of pre-captured parkour motions—covering actions like sprinting, vaulting, and climbing—which aligned perfectly with our needs. Instead of animating everything from scratch, Richard could quickly select and test motions directly on Sybyl’s rig, saving us valuable time while keeping the action fluid and natural.
“For Scrap Metal, the dynamic chase sequences were central to the story, and achieving Sybyl’s parkour-style movements in a believable way was essential. ActorCore provided a fantastic library of pre-captured parkour motions—covering actions like sprinting, vaulting, and climbing—which aligned perfectly with our needs. Instead of animating everything from scratch.”
Richard Keane – Filmmaker, Writer, Director, Producer
iCloneplayed a crucial role in refining these animations. Its real-time tools allowed us to blend, adjust, and seamlessly stitch together different motion clips, ensuring the parkour movements felt continuous and energetic. With iClone, we also had the freedom to experiment with camera work alongside the animation, treating each scene like we were filming on a live-action set. Richard could quickly test dynamic camera angles, tracking shots, and framing to enhance the visual impact of the chase.
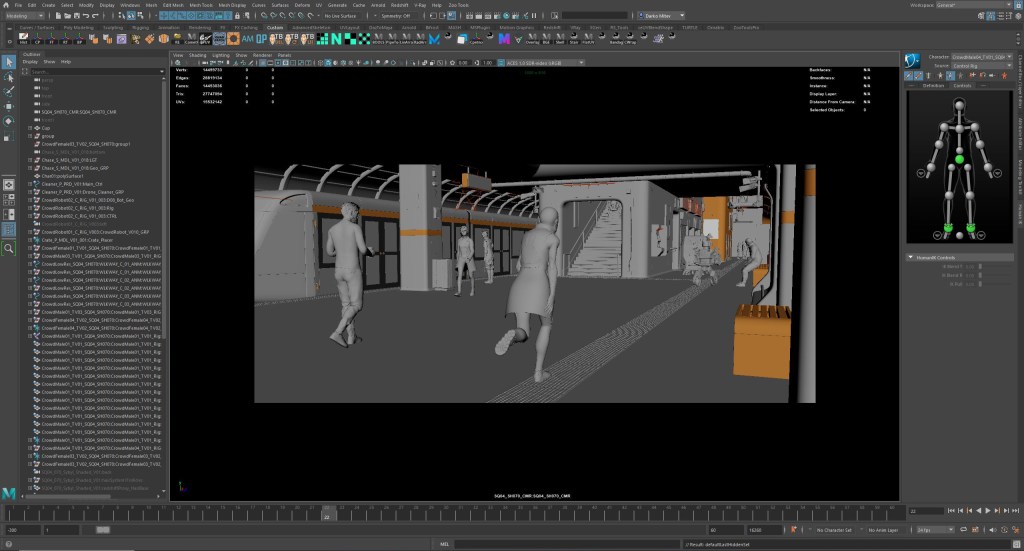
Beyond the main action, iClone and ActorCore were also key in bringing our crowd characters to life and making the bustling city feel alive. Using a combination of motion-capture assets from ActorCore and iClone’s real-time animation capabilities, we could efficiently populate scenes with background characters performing natural movements—like walking, chatting, or interacting subtly with their environment. This process added depth and energy to the world without requiring extensive manual animation.
“By leveraging ActorCore for high-quality motion assets and iClone for real-time animation and camera integration, we streamlined what could have been a time-consuming process. These tools not only accelerated the production of our chase sequences but also allowed us to populate the city with believable background characters, creating a vibrant and immersive world that brought Scrap Metal to life.”
Richard Keane – Filmmaker, Writer, Director, Producer
Going forward, we are super-excited to try the new features in iClone 8.52, like the AccuPose, the motion capture clean-up filters, and the optimise key function. We believe these will be a game-changer in our workflow since our animation is primarily based around motion capture.
Q: You integrated Maya with Character Creator and iClone. Please explain how this integration streamlined the process and contributed to the visual quality. How compatible are Reallusion tools/assets with Autodesk Maya?
While our main character, Sybyl, was custom-built entirely in ZBrush and Maya, Reallusion tools such as Character Creator (CC), iClone, and ActorCore were essential for streamlining other aspects of production, particularly for creating crowd characters and supporting animation workflows.
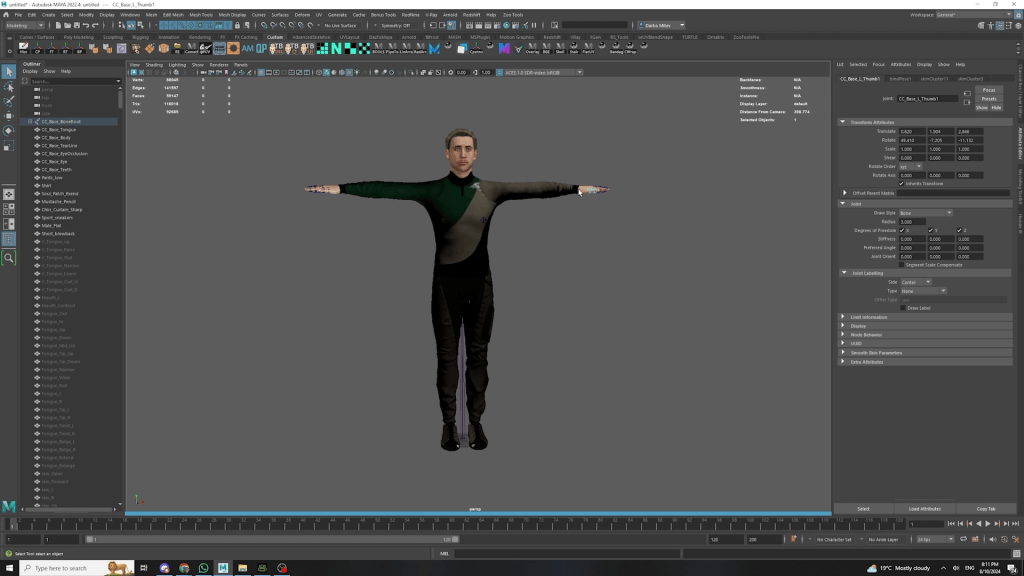
Darko used Character Creator to quickly generate a variety of high-quality background characters, complete with rigs, clothing, and textures. The excellent compatibility with Maya made it easy to export these characters via the FBX format, preserving the joints and blend shapes, UVs, and basic materials with assigned textures.
Once imported into Maya, we converted the standard materials to Redshift materials, because that is our renderer of choice. We could then use Maya’s Human IK rigging tool to add a quick layer of rig over the joints coming from iClone, which allowed us to refine their placement in scenes and add any tweaks on animation layers if necessary. This approach saved us considerable time compared to building every character from scratch, allowing us to populate the city efficiently while maintaining visual quality.
We are looking forward to the upcoming iClone-to-Maya bridge, which will save us even more time in the future for converting materials and make the integration truly seamless.
On the animation side, we leveraged iClone and ActorCore to source and preview motion-capture animations for the background and crowd characters. The pre-captured motions—such as walking, chatting, and parkour-like actions—were applied in iClone and exported seamlessly into Maya. Because the motion data transferred cleanly, we could blend, refine, and finalise these animations in Maya without any loss in quality. This allowed us to maintain consistency across the production pipeline.
“The compatibility between Reallusion’s tools and Autodesk Maya was smooth and efficient. Reallusion gave us the speed and flexibility to generate high-quality assets and previsualise animations, while Maya provided the precision and control needed for final production. This integration allowed us to focus more on storytelling and refinement without getting bogged down by technical challenges, ultimately ensuring Scrap Metal achieved the visual high-fidelity and cinematic quality we were aiming for.”
Richard Keane – Filmmaker, Writer, Director, Producer