Character Creator’s SkinGen MasterClass – with Luis Duarte

Hi guys, I’m Luis Duarte, a digital artist, 3D modeler, content developer and instructor on Libel Studios.com
Welcome to this Character Creator MasterClass for Character Creator’s SkinGen plugin, where I will explain tips and tricks on the new surprises that the latest Character Creator 3 updates bring us with tools such as the new SkinGen texture editor, compatibility of models with system UDIM, the new improved topology and many others.
This MasterClass comes in #4 parts, each carries its own tutorial video to guide you through the entire process. You can find links to the other 3 tutorials below. I hope this helps you!
Tutorial 3: ZBrush 2021 Cloth workflow System for Character Creator
Create a Roman-style outfit with rudimentary pieces
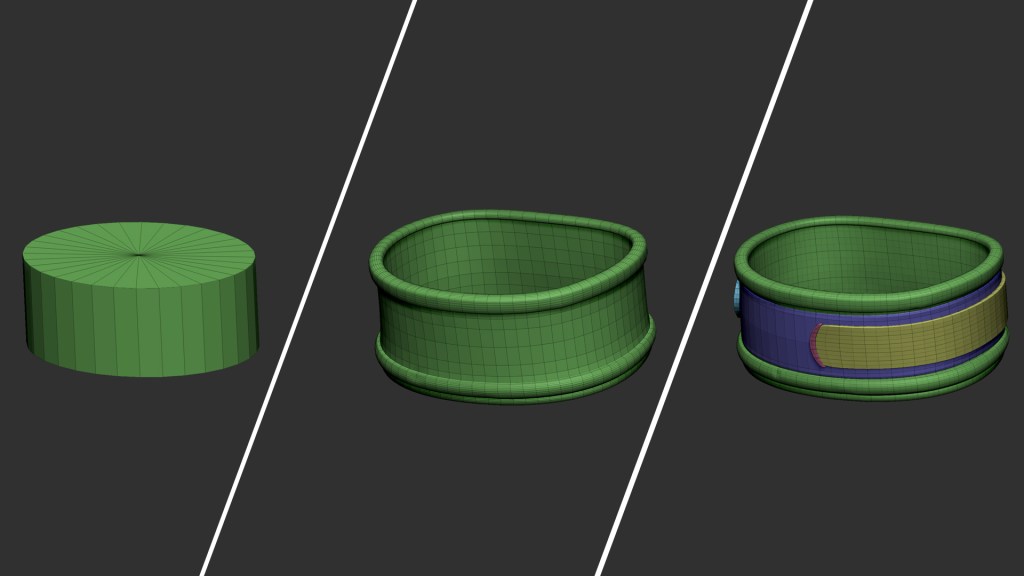
20. The process of sculpting the outfit will be done entirely with ZBrush. For this we will take basic geometric figures such as cylinders and cubes to mold them with a Move brush and adjust to the references. Another very important tool is the Extract tool, which will help us create hard objects adjusted to the body.
To easily exemplify it, the belt below is constructed with a cylinder.
And in the case of the shoulder pad, it is built with the help of the extract, the ZRemesher and the Move brush.

21. To add interesting details, I recommend adding imperfections to the geometry such as scratches, streaks, or dents. In my case I use brushes that can be obtained from internet libraries.

22. We will take advantage of the fabric simulation system in the 2021 ZBrush update, to make a few accessories that complement such as a cape and other clothes from the belt. This is done through the Dynamics menu, supported by Dynamic Subdivide.

23. Once the modeling is finished, I proceed to organize the low resolution geometries together with the UV; In this case, I recommend separating the pieces according to their location on the body, that is, the belt with the fabrics separated from the shoulder pad, which in turn has its own UV. I do the same for shoes and other accessories.

24. The next step is to manually import the accessories and clothing into our CC interface. One way to speed up work is to transfer the skins directly to the body without textures and then do the same export process to Substance Painter the same way we did with the body.
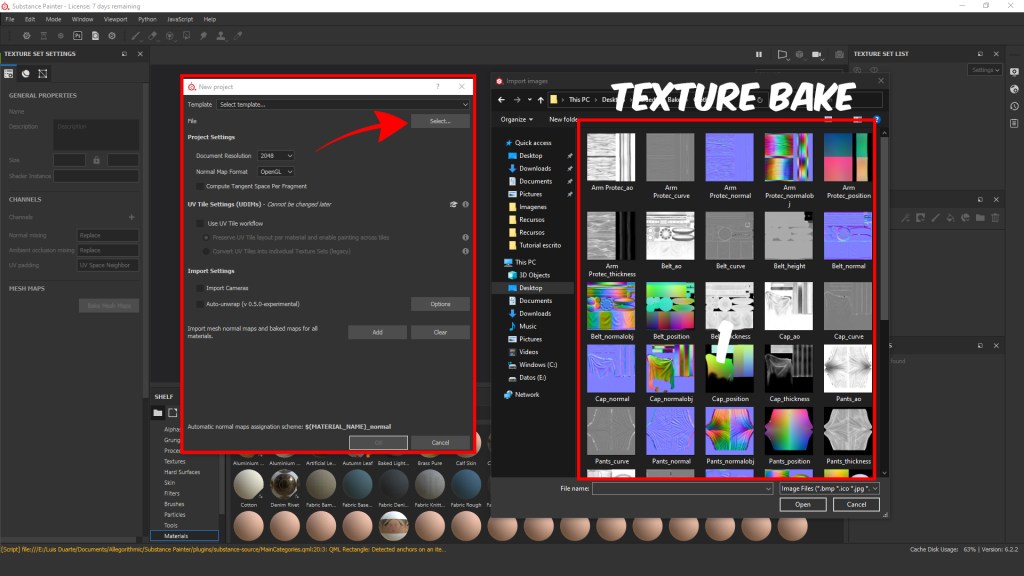
From a project creation point of view, it is not necessary to activate the UV Tile option. But always remember to add the Bake maps that are very important.
25. In Substance, we can have fun adding predefined materials or even create our own smart material by combining layers and adding filters or generators. In my case I am going to use somber colors so as not to make them stand out above the skin texture. In the end, when we are satisfied with the result, we export in the traditional way.

26. To add the textures to the model, we do it individually in their corresponding box in the CC Material editor, and finally adjust the intensity level of the color.

Thanks for reading!
Follow the other 3 tutorials in this series:
Tutorial 1: Character Creator 3 SkinGen Workflow with new CC3+ Base Advantages
Tutorial 2: Workflow with Substance Painter, UDIM, and Full body cross for body texturing.
Tutorial 4: Custom SkinGen Asset Creation with Texturing.xyz
—————————————————
SEE MORE OF LUIS:
Luis’ ArtStation: https://www.artstation.com/luduart
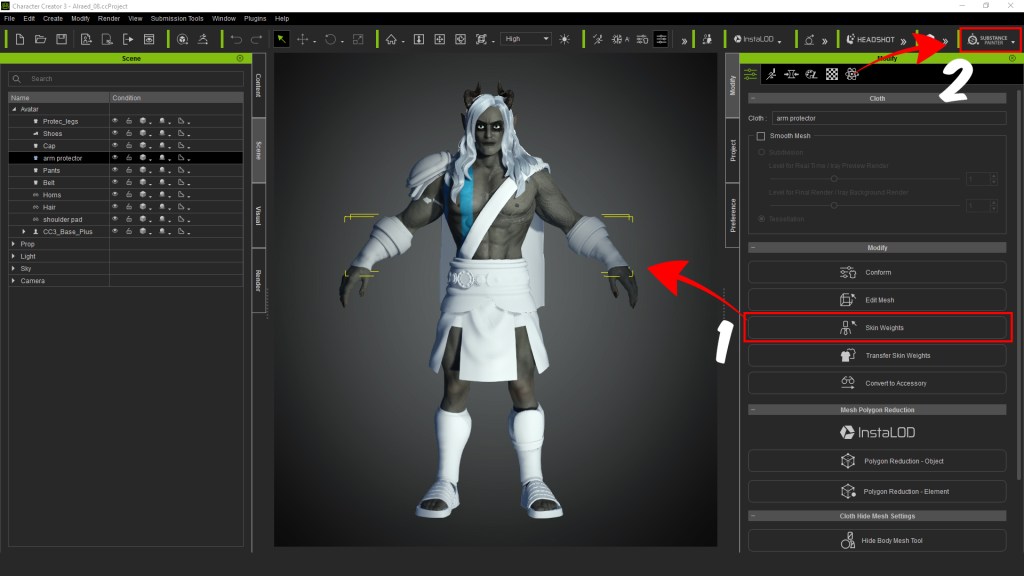
Luis’ YouTube channel for the Spanish version: https://youtu.be/hvCoX_Zrcbo
Luis’ Kids & Teens pack: https://www.reallusion.com/ContentStore/Character-Creator/Pack/3D-Toon-Kids-&-Teens-On-Campus/default.html


5 comments