Introduction- How ZBrush Artists Benefit from Character Creator
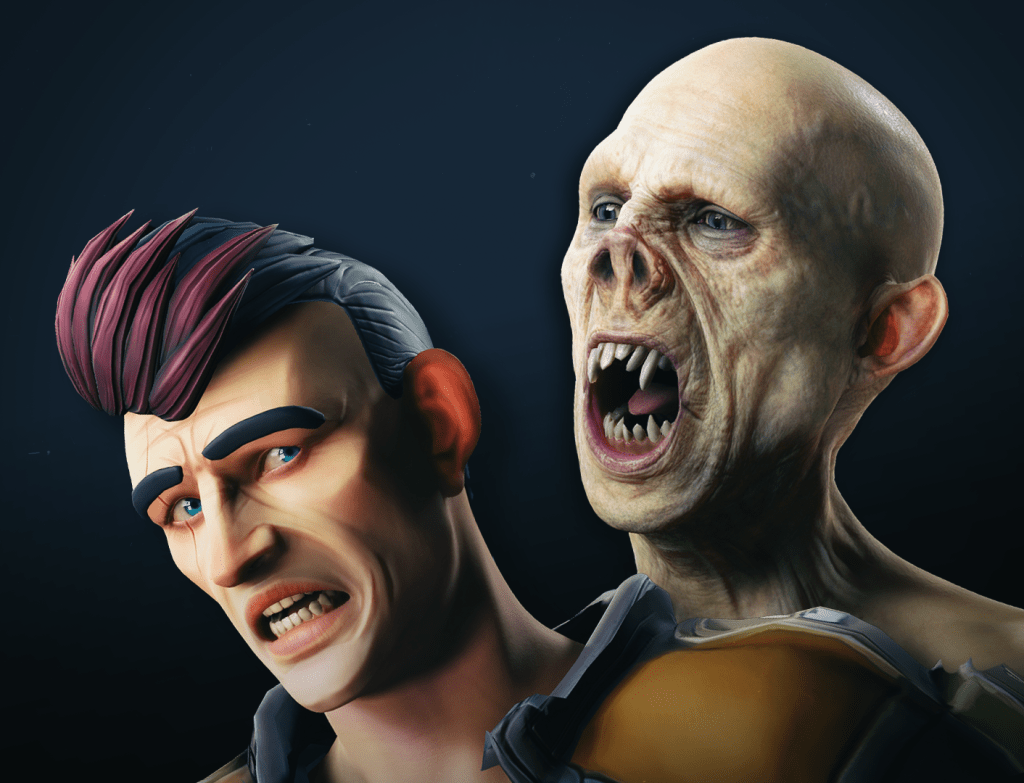
Utilizing the Character Creator (CC) base topology will allow ZBrush users to take advantage of an endless playground of flexibility and fidelity! Not only can we quickly and easily dial in the look and feel of our character using Reallusion’s robust morphs, but we’ll also gain skin weights, access to powerful rigging and facial animation systems that will give us a completely animated character from the first step. Additionally, we have the ability to quickly and easily UDIM texture our character in Substance 3D Painter!
While this will require us to work with a specific topology, there is a HUGE range of potential — from stylized to hyper-real to exaggeratedly cartoony, you’ll be amazed at what you’ll be able to create, and have it animate while you work.
- Part 1- Start with CC Base Model
- Part 2- Character Creator to ZBrush and Back Again (GoZ)
- Part 3- Character Detailing & File Saving
- Part 4- Character Creator & Substance Painter Bridge
Part 1- Start with CC Base Model Before ZBrush Sculpting
Neutral Base
We’ll need to load up a neutral CC3+ character to start with. Launch Character Creator by opening Reallusion Hub and Character Creator 4. Under Modify section > Attribute Tab, click the Load Neutral Base button.

Morphs
Now that we have a generic base human, lets dial in the look and feel of our character. Hop into the Morph tab and begin working your way down the list, from large changes, to more specific detailed morphs to dial in your base body and head shapes. You can also type terms into the search bar to narrow your selection — for example, type in “scale” to access just the scale options for any particular body part.
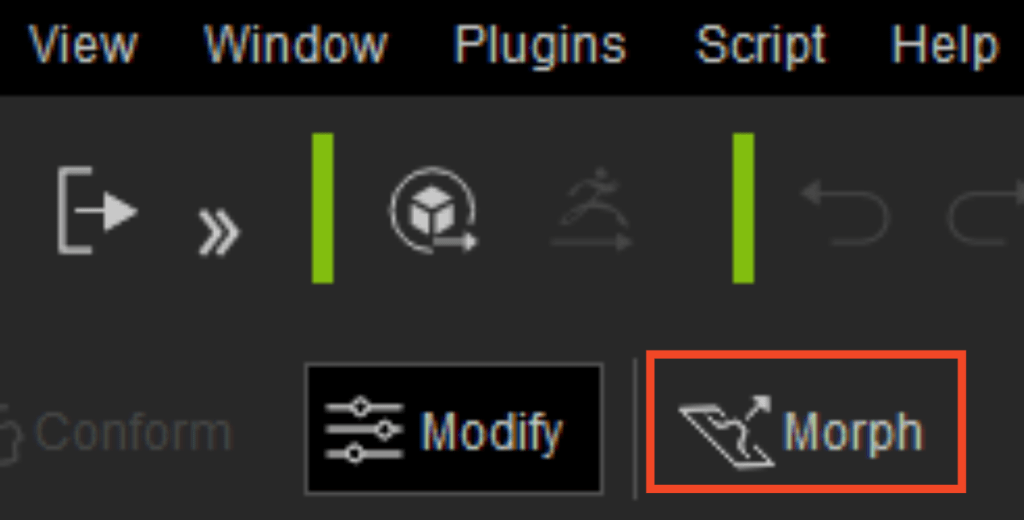
In addition to sliders, you can also turn on the Morph option in your menubar to unlock viewport morphing. With this option enabled, you can simply click and drag portions of your character to change the shapes.
Relaxed A-Pose
Before we send our character over to ZBrush for more refinement, go to the Animation Player > Motion dropdown, and choose Pose > A-Pose, so we can sculpt our character in a relaxed, symmetrical pose.


Part 2 -Character Creator to ZBrush and Back Again
GoZ from Character Creator to ZBrush
Now is the time to refine our character in ZBrush using their sculpting tools. In order to send our Character to ZBrush, go to your Scene tab, shift select all character assets, then click the GoZ button in the menu bar. In the GoZ Settings panel, make sure the Template is set to “Create”.

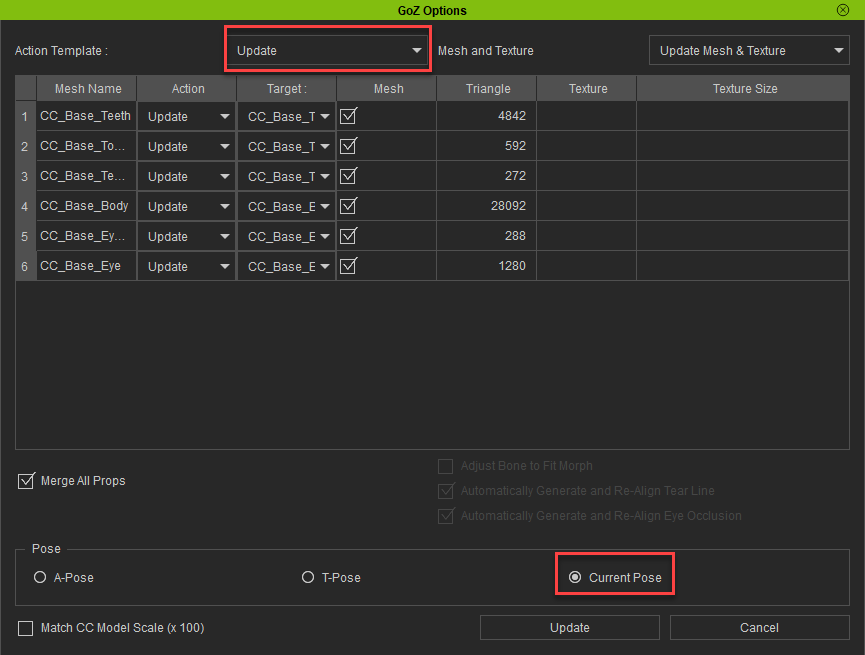
Enable eyelashes and tear ducts under the Body Parts section to split them off into their own meshes, and choose Current Pose in the Pose section. I like separating eyelashes and tear ducts, so I only have the “skin” of my character as a subtool while I work.

Refining your Characters Shapes in ZBrush
Now that we have our character in ZBrush, select the “CC_Base_Body” subtool, and begin refining your character. Use your favorite brushes in ZBrush to sculpt and refine your body and face shapes. Also, feel free to press the Divide button to subdivide your mesh and work on the details that we’ll bake to a normal map later on in the series.

Testing Animations and Utilizing Morphs
Once you’ve refined your mesh, you can send it back to Character Creator to see how your new shapes work with animation, as well as utilize CC’s morph system to make further changes. Simply press the GoZ All button in the Tool menu, and that will automatically drop your body subtool to “SDiv 1”, and send your mesh back to Character Creator. The GoZ option box in CC should default to Update, and choose Current Pose. Your CC model will now match the changes you made in ZBrush. Feel free to test animations from the Content tab or Animation Player, as well as continue using the morph system to make further changes. You can GoZ back and forth between CC and ZBrush as many times as you’d like, while you refine your character.



in ZBrush
Proportional Changes (Joint Positioning)
If you’re using the CC morph system to make proportional changes to your character, such as making the arms longer, hands bigger, etc., your character should always animate as expected. However, if you’re planning on making changes in ZBrush that will change proportions that affect joint positions, you’ll want to select the T- Pose option instead of A-Pose or Current Pose. Once your character is in a T- Pose in ZBrush, feel free to make as many proportional changes in ZBrush as you’d like.
When you’re done, GoZ all your meshes back to Character Creator, and make sure you check on the import option to allow mesh changes to update joint positions when GoZ-ing back to CC. Remember you can also GoZ back to CC and use their morph system to make proportional changes to joint positions as well, then GoZ those updates back to ZBrush, and continue detailing.
Part 3 – Character Detailing and File Saving in ZBrush
Detailed Body Sculpt in ZBrush
Now that we can bounce back and forth between Character Creator and ZBrush, utilizing morphs and ZBrush sculpting, continue subdividing, sculpting, and polypainting until you have a detailed, unique, awesome character base mesh.
While you can go to pore-level detail in ZBrush, keep in mind you can take your sculpt to “tertiary volumes” and allow SkinGen in CC to provide the pore level details, which is much less destructive and more flexible!

Saving Files
In ZBrush, go to File > Save to save a ZProject(.zpr) file. GoZ All to update your Character Creator file, and in CC, File > Save As .ccProject file. Do this whenever you want to end a session and pick up where you left off. All you’ll have to do is open them both up in their respective programs, and GoZ from CC to ZBrush, choosing the ReLink option.
Part 4 – Texturing with ZBrush & Substance Painter Bridge
In order to export our textures from Substance Painter so that Character Creator can quickly and easily import the texture files, download this preset file:
https://file.reallusion.com/cc/Character_Creator.spexp
And move the file to “C:\Users\ (UserName)\Documents\Adobe\Adobe Substance 3D Painter\assets\export- presets”.
Texture Baking and Substance 3D Painter Workflow
Right now, we have a detailed polypainted mesh in ZBrush, but our CC mesh is only the low res mesh — we need to bake those details to that low res mesh, so our character looks as detailed in Character Creator as it does in ZBrush. Before we get too far, make sure you GoZ over the final geometry changes from your ZBrush file back to Character Creator.
Opening the Mouth for Baking
In Character Creator with your character selected, go to the Motion tab, and choose Edit Facial. In the Edit Facial settings, go to the Modify tab, choose Jaw from the list, and change the value for “Jaw_Open” to 50 , then GoZ back to ZBrush to open your high-res ZBrush mouth file.


Exporting the Low- and High-Res Meshes
In Character Creator with your character selected, use the Substance Painter button dropdown in CC to export an obj file of your character.


Save this file in an easy to find folder. This is your low-res file we’re going to bake our details to. Toggle back to ZBrush, and with your “CC_Base_Body” subtool selected, make sure you’re at the highest subdivision level with all your details. With your polypaint enabled, click the Export button in the Tool menu. Choose FBX from the file type options, and in the FBX options, turn on Selected, so we just export our high-res body.
Substance 3D Painter Baking
Open Substance 3D Painter, and choose File > New. Press the Select button to import your obj file from Character Creator into Painter, with Use UV Tile checked on.


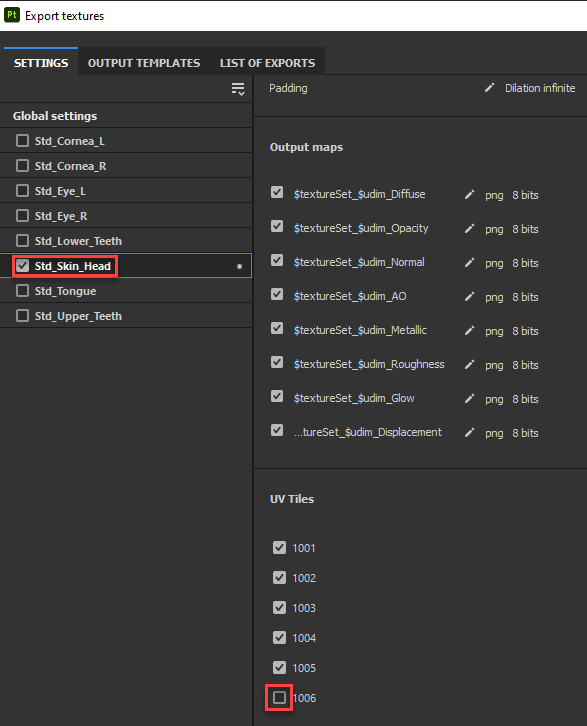
Once your low-res character is loaded into Painter, go to the Texture tab and scroll down until you can click the Bake Mesh Maps button. Uncheck all the objects except for “Std_Skin_head”, and in the UV Tiles dropdown, you can uncheck the box for “1006”, which is our eyelashes — we don’t need to bake that mesh! If you have a polypaint in ZBrush to bake, make sure to select Material ID and change Color Source from Material Color to Vertex Color. Click Bake selected textures, and when it’s done, click Return to painting mode.

Texturing
Using paint layers, fill layers, masks, generators, filters, and any number of powerful Substance Painter texturing options, texture your character however you’d like. Remember, you can load in your Color Map that was baked from your Material ID into a fill layer to use your ZBrush polypaint as a base for your textures.

Exporting Textures
Now we need to get our textures back into Character Creator. In Substance Painter, go to File > Export Textures, and select the sets that you want to export textures for. In our case, we’ll turn off everything but “Std_Skin_Head” in Global Settings; and with “Std_Skin_Head” selected, we’ll also turn off “UDIM 1006”, which is eyelashes. For the Output Template, choose the “Character_Creator” option we copied into our export-presets folder. Set Size to “2048”, and finally, Output directory should be the root folder of where you imported your .obj file — for example, “C:\Users\mpavlovich\Desktop\GoblinDemoSubstance” is the folder my .obj mesh is in.

Speaking of the root directory, I’ve found it useful to navigate to that directory in Windows Explorer, go into the “Std_Skin_Head” texture folder Character Creator made for me (in my case, “C:\Users\mpavlovich\Desktop\GoblinDemoSubstance\GoblinDemoBody\Std_Skin_Head”), and delete all the “Std_Skin_Head” textures for UDIMs 1001 to 1005, leaving just the eyelash textures behind. This way, I know when I export my textures from Painter, there won’t be any duplicate files or conflicts. When you just have “_1006” textures in that folder, hit the Export button in Substance Painter, and you’ll see this directory populated with all of your new, updated skin textures.
Importing Textures
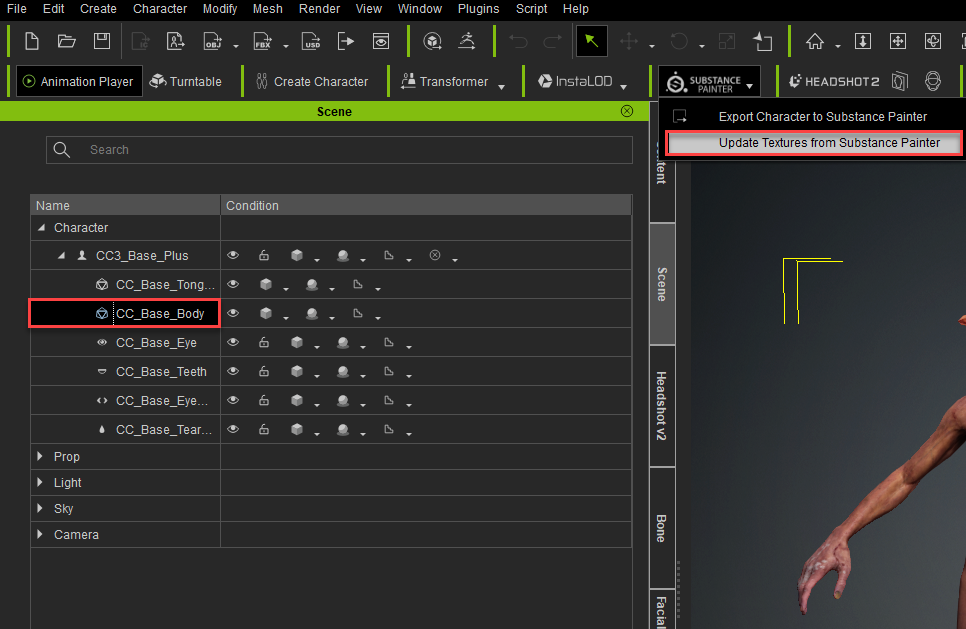
Back in Character Creator, select the character, then choose the Update Textures from Painter option from the Substance Painter dropdown menu. This will bring up a windows explorer window. This time, we’ll go into the folder containing the organized folders. Press Select Folder, and Character Creator will automatically update all your body part materials to your new textures.


Expression Wrinkles
Expression wrinkles are a great way to add life and believability to your characters. We can quickly and easily add the neutral expression wrinkle set by selecting your “CC3_Base_Plus” group in the Scene tab, then in the Expression Wrinkles tab in the Modify panel, turn on Activate Expression Wrinkles and Check with Expressions. This will apply a neutral expression wrinkle pack to your character. Click on the different regions on the face map to see wrinkles update on the character’s face, as well as adding enhancing wrinkles when playing the “Dramatic_Male” face animation. We’ll dive deeper into expression wrinkles, how they work, and make our own, in the “Face Tools” series.


About The Author

Michael Pavlovich earned a Bachelor’s degree in Computer Animation from RSAD in 2005. Initially, he contributed to the development of environment and character art for popular video games such as Madden and NCAA Football. Later, he relocated to Austin to join Daybreak Games, where he worked on the creation of art assets for DC Universe Online.
Presently, Michael holds the position of Director of Character, Weapon, and Vehicle Art at Certain Affinity. His expertise lies in implementing iterative pipelines for Certain Affinity artists helping develop renowned video game franchises, including Halo, Call of Duty, and DOOM. To stay updated on his latest tutorial projects, you can visit Michael’s YouTube or ArtStation page.
Related Posts
- PavMike’s CC to ZBrush Workflow Tutorial (2/3): Cloth & Accessory
- PavMike CC to ZBrush Workflow Tutorial (3/3): Posing & Animation
- See More Tutorial in “ZBrush Master Class”