Introduction- Final Steps for 3D Printing or Animating Your ZBrush Characters
We’ve discussed getting a fully adorned character into Character Creator, but what if you want to 3D print a pose of your ZBrush character, or control the poses and facial expressions / lip sync of your character? In this article we’ll cover both topics, giving you even more fun and easy options to fully utilize your character creations.
If you want to pose out a character that doesn’t have CC body topology, check out this ZBrush and CC Posing workflow!
Part 1. High-res Posing for 3D Print from ZBrush
GoZ ReLink Files
We’ve already set up a naked body file that we can GoZ back-and-forth between ZBrush and Character Creator. We’ll start from that point, so open your ZBrush project file (.zpr) and your corresponding Character Creator file (ccProject), then press the GoZ All button in ZBrush to relink your files. The dialog box in CC should default to Update, choose “Current Pose” and hit the Update button.


Setting Up Poseable Gear in ZBrush
Append your gear (clothing, accessories, weapons, etc…) as subtools to your body files in ZBrush. Make sure your gear subtools have a lower subdivision for each item. Remember, there’s a 300k poly / 600k tri limit in CC. Of course that doesn’t mean your ZBrush files have to be under 300k polys – for example, your helmet might be 10 million polygons, and that’s fine, as long as it’s 10 million polygons at SDiv 6 (for example), but a significantly lower polycount for SDiv 1. The reason for this is when we GoZ, it will send our Subdivision Level 1 asset to Character Creator, where we can skin and animate our meshes, and when we’re done, we can GoZ from Character Creator back to ZBrush, which will update our SDiv 1 subtool positions, but we’ll still have all the details from our SDiv 6 for those subtools still intact and available.

GoZ Gear from ZBrush to Character Creator
Once you’ve got all your gear subtools set up, GoZ All from ZBrush to CC. In CC, the GoZ Options box will default to Custom, and will do some basic selections for you. For your synced body files, it’ll be set to Update, and for the other objects, Create Cloth will be selected by default. Just like the previous article covering game-res accessories and clothing, for assets that are influenced by multiple joints (cloth type items), you can keep the Action as Create Cloth. For more rigid accessories that can be attached to one joint, choose the Create Acc option. Don’t worry about getting this selection exactly right — you can always convert a clothing item to an accessory and vice versa in CC later if you need to.

Setting up Clothing and Accessories
Again, we’ll utilize the same process we did with the game-res article. For accessories, select them, move them into place if necessary, attach it to the appropriate bone in the Attribute tab > Attach section, then set the pivot point. For clothing items, it already transferred the weights for us, so we can leave those alone. Also the same as the game-res process, if you have any clothing objects that need physics simulation, make sure they have UVs and a corresponding weight map to plug in, turn on rigid-body and soft-cloth simulation in the CC menu bar, turn on physics for that item, and finally modify any appropriate capsules for your character body that interact with the cloth asset. Remember to go to Edit > Project Settings and check on Bake Animation under the Simulation section, so you can scrub the animation timeline later and still have your cloth react naturally.


Applying Animation
Select the “CC3_Base_Plus” group in the Scene tab, and double click any animation in your Content tab to apply that to your character. In our case, you can see we’ve applied the “Saloon Door” animation. Play the animation in the Animation Player all the way through, setting it from Realtime to By Frame to allow our cloth to simulate appropriately. When it gets to the end of the animation, you can then scrub in the timeline to the pose that you want.

Modifying the Body Pose
While the pose from the animation is pretty good, we can fine-tune it to our exact needs. With your character selected, go to the Motion tab, and click on the Edit Pose button. There, you can use the dummy, in either IK or FK mode (see the tabs at the top of the Edit Pose dialog box) to move and rotate your joints as you see fit. Remember you can also navigate to the Poses and/or Gesture section of your Content tab and apply different body poses or hand positions to your character as well.


Modifying Facial Expressions
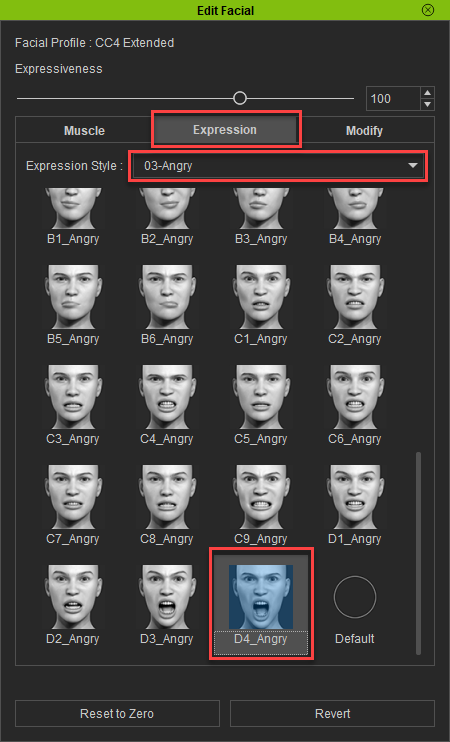
Let’s change the mood of our character! Close your Edit Pose window, and back in the Motion tab, click on the Edit Facial button. In the Muscle tab, you can click and drag on the different areas of the face to change your characters expression, in the Expressions tab, you can apply an expression from the list of dropdown options, and in the Modify tab, you can use sliders to make exact changes to your characters different face shapes. Use one or a combination of these to change your character’s face. When you’re done, simply close the Edit Facial window.




Sending the Posed Assets Back to ZBrush
If you don’t need your pose applied to your subtools in ZBrush as layers (to toggle between different poses), simply select all the character assets you want to send back in the Scene tab, and hit the GoZ button in the Character Creator menu bar. The GoZ settings should default to Relink, and because our original mesh had the “Eyelash” and “Tear Ducts” separated from the base body — we’ll check those on. Make sure you choose Current Pose, then hit the GoZ button. This will update the SDiv1 vertex positions in ZBrush to match the CC assets, and your higher subdivision details will follow. To see all the highest subdivision levels, go to Tool > Subtool and click the All High button.


If you DO want to apply your pose as a layer, open the ZBrush Pose Tools plugin in ZBrush, click the Record New Pose button, then GoZ your character assets over from CC. When the changes have been updated in ZBrush, click Save New Record and name it. Do this as many times as you’d like, storing a library of poses as you go.
- Note – if you didn’t separate out any Body meshes from our earlier step (eyelashes, tear ducts), you can use the Character Creator > Plugins > ZBrush Pose Link menu to send a pose over and have it recorded automatically on the ZBrush side!
- For an in-depth explanation and examples of Pose Tools functionality, please visit this article!

Part 2. Turn Your ZBrush Character to Life with Facial, Body Animation & Mocap
Exporting a Character from CC4 to iClone
We’ll need to go into iClone in order for us to apply and modify mocap data. Getting our character from Character Creator to iClone is easy – simply go to File > Export > Send to iClone > All!

Import Mocap Animation into iClone
I recorded some mocaps in Rokoko that contain body and hand motion capture data, including actions that needed to make contact with the body (belly, head, clapping). You could make your own mocap and import it into iClone, or download animation files from the internet as well. All you need to do to get it into iClone is to drag your mocap file onto your character (you should see a yellow bounding box show up on your character as you do this). Import settings should pop up — for Motion Profile choose Motionbuilder, and for Motion T-Pose, navigate to your mocap file and select it, choose 30 FPS, then hit Convert All. Now you can press play to playback the animation.

Editing Your Motion Capture – Global Corrections
With the character selected, in the timeline, right click on the animation (in the Motion row in the timeline), and choose Motion Modifier (or click the Motion Modifier button in the timeline menubar). Press the Preview button, then press the spacebar to play your animation. Tune the sliders to taste as you watch the effect on your character in real time. In my case, the mocap head was facing down the entire clip, so I added some “Head Back” offset to make the animation more natural. Hit OK to apply your changes.


Fixing Penetration Issues
Since my proportions aren’t the same as our virtual characters, my mocap might have issues, especially in scenarios where I need precise hand placement (since our arms are different relative lengths).


In the Modify panel, go to the Animation tab, and click on Edit Motion Layer.In the puppet window, select the IK controls you want to change to avoid interpenetration (like the hand position). Scrub a bit before the body part clips through the body and press the Set Key button. This will be the transition point from mocap data to our modified animation positions. Scrub to where the clipping occurs (where the hand is inside of the body for example). Move and rotate the hand control so there is no longer interpenetration, and hit Set Key to add a keyframe. Scrub the timeline to a bit after the clipping fix, and hit the Reset button; this will transition from our modified pose back to the original mocap data. Do this for all the problem areas of your animation.

Installing and Launching AccuFACE
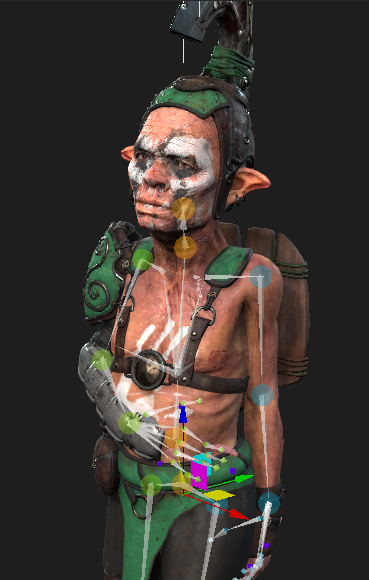
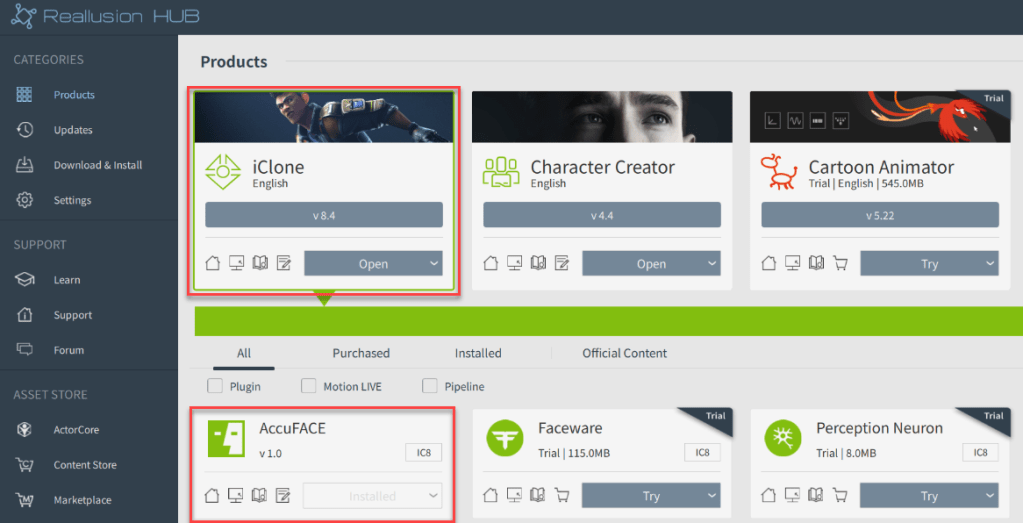
Although our Mocap file didn’t have facial animation, we can still add it. To get started, install the AccuFACE plugin for iClone 8 from the Reallusion Hub, then launch the AccuFace application. We’re going to use the camera workflow in this example, but you can also bring in video, and capture from that! In AccuFACE, select the CAMERA tab, and choose your camera in the Source dropdown menu. Since my camera is on a tripod, I’ll choose Static Cam for Tracking Mode.

Calibration
Click the Calibrate Facial Capture, and follow the directions to match your face to the expression descriptions – look at the camera with a neutral face, hit the Set Expression button, do a Brow Raise with your face, hit Set Expression, etc… until you’ve calibrated all four expressions. Close this window when you’re done.

Connecting to Motion Live
In iClone, select your character model and go to Plugins > Motion Live > Motion Live. Under Gear List, click the + button in the ‘Facial’ row, and select AccuFACE. Type the IP address shown in your AccuFACE application into Motion LIVE > Gear List > Connection, and click the hollow green circle to activate AccuFACE, making the circle solid! Next, click on the hazard sign under Character List > Face and select AccuFace.
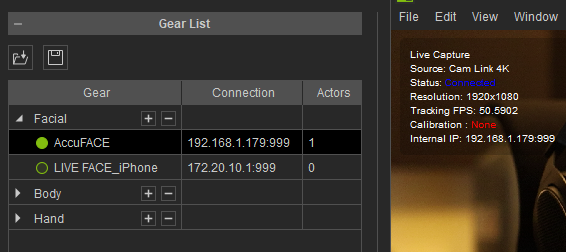

Click the Preview button and press the Spacebar to preview your own expressions on the virtual character, or click the Record button and press the Spacebar to start recording facial capture to your body motion capture!

Read More
PavMike’s CC to ZBrush Workflow Tutorial (1/3): Base to Texturing
PavMike’s CC to ZBrush Workflow Tutorial (2/3): Cloth & Accessory
See More Tutorial in “ZBrush Master Class”