Intro- Continue the “Goblin” Project with ZBrush Face Tools
This article is a continuation of our “CC Topology GoZ Goblin Body” article. We’ve already sculpted and baked the body and head textures for our goblin, but we only have default face shapes and neutral default expression wrinkles. In this article, we’ll use the powerful ZBrush Face Tools plugin to update our face shapes, eyes, teeth, and tongue, and of course create custom expression wrinkles that match our unique character perfectly.
However, all of these articles have relied on CC topology projects in order to fully utilize the Reallusion suite of character solutions — what if you have an old character project that uses another base mesh, or even just a dynamesh bust sculpt? The last section of this article will cover using Headshot v2 to quickly and easily convert legacy projects to the CC topology, and from there you can decide if you want to use the body workflow shown in this article, or the ZBrush Face Tools workflow found in the previous article.
Customize Expressions & Wrinkles with ZBrush Face Tools
Relinking Filrs with GoZ in ZBrush
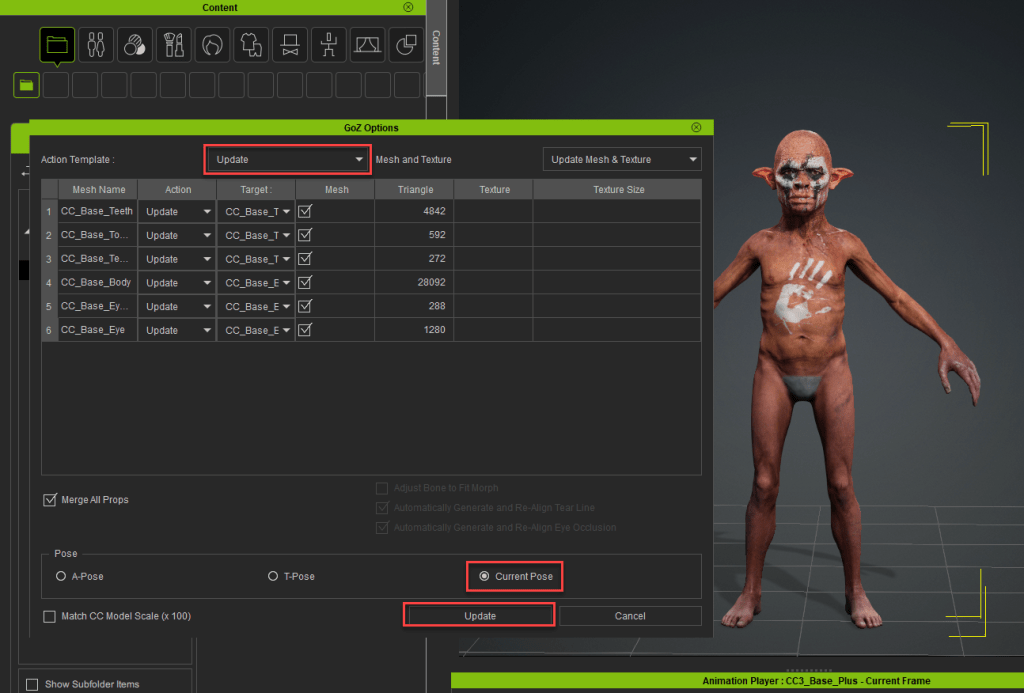
We worked on this goblin body project a while ago, so we need to relink them. Open your previous body file in Character Creator, as well as the corresponding ZBrush ZProject (.zpr) file we saved, with all our high-res details and polypaint. With both programs and files open, press the GoZ All button in ZBrush, then press the Update button in Character Creator with Current Pose selected. Your programs and files are now linked.

ZBrush Face Tools
With the character selected in Character Creator, press the Face Tools button in the menu bar, and this time choose None for the expression wrinkles. We’re going to use the character’s existing “memory” face wrinkles, which will be sent over in the Normal Details layer (also checked on in this dialog box), to indicate where our expression wrinkles will end up. In other words, no need to send over neutral expression wrinkles this time, we’ll create our own unique expression wrinkles based on the character’s actual face.

Transferring Base Color Texture to Polypaint with ZBrush Face Tools
Back in ZBrush, turn on the Diffuse button to load up your characters base color texture map, and once again use Tool > Polypaint > Polypaint from Texture to transfer your texture color to your base mesh polypaint. Once this is done, turn OFF the Diffuse button.

Sculpting and Polypainting Custom Expressions in Face Tools
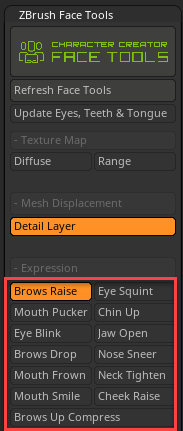
Using the Face Tools plugin, click on an expression you want to update, and tweak your shapes, expression wrinkle details, and polypaint for each expression. With our Detail layer on, we’ll see exactly where the face memory wrinkles go when the face moves, and you can use those to inform where you need to enhance the wrinkle details as the skin compresses. You’re not limited to just changing or enhancing wrinkle detail (you can also change the overall shapes for each expression, for example) changing the mouth shape when the jaw opens, or the lip shapes on the mouth pucker!


Update to Character Creator
When you’re done updating expression shapes and wrinkles, hit the Update to Character Creator button in the Face Tools plugin menu. Since we didn’t make any updates to the base head, we can leave the left side unchecked, and check on anything we changed for our Expression Wrinkles side. This will send all of our SDiv 1 shapes back to CC, and any sculptural change / polypaint in SDiv 2-6 will be baked into texture sets and sent back to CC.

Now your CC character will have your unique custom shapes and wrinkles as the character’s face moves during animation or posing.

Remeber, you can ALWAYS open files, relink, and refine at any point, in any order. Character Creator is the ultimate flexible solution for character creation — the technical heavy lifting is provided by the suite of easy to access, low barrier to entry tool sets, and allows you, the artist, to focus on compelling visual storytelling!
About The Author

Michael Pavlovich earned a Bachelor’s degree in Computer Animation from RSAD in 2005. Initially, he contributed to the development of environment and character art for popular video games such as Madden and NCAA Football. Later, he relocated to Austin to join Daybreak Games, where he worked on the creation of art assets for DC Universe Online.
Presently, Michael holds the position of Director of Character, Weapon, and Vehicle Art at Certain Affinity. His expertise lies in implementing iterative pipelines for Certain Affinity artists helping develop renowned video game franchises, including Halo, Call of Duty, and DOOM. To stay updated on his latest tutorial projects, you can visit Michael’s YouTube or ArtStation page.
Releated Posts
- ZBrush Face Tools – Complete Head & Body Creation Workflow
- PavMike CC to ZBrush Workflow Tutorial (1/3): Base to Texturing
- Easy Facial Rig in ZBrush with Face Tools (1/4): Concept & Setup